
ChemE
Well-Known Member
Perhaps one of the most popular thread topics here is "help me fix my low efficiency!!!". While there are usually many factors which contribute to low efficiency, one which is very frequently overlooked is a lack of precision in measuring volume. Most of us are able to measure grains to fractional ounces if not grams and measure the original gravity of the wort in the fermenter to the nearest gravity point, but a great many homebrewers cannot measure volume in the fermenter very accurately.
As an example take a simple SMaSH brewed with 12 pounds of marris otter and an original gravity of 1.074. Further suppose the because of an imprecisely marked (or unmarked!) carboy the best one can do is get within a quart of the true volume in the carboy. At 21 quarts we get a brewhouse efficiency of 85.20%, at 20 quarts we get a brewhouse efficiency of 81.14%, and at 19 quarts we get a brewhouse efficiency of 77.08%. 8% range in brewhouse efficiency is a lot just because of imprecise volume measurements.
In addition, there are those who choose to mark their carboys by using gallon jugs or measuring cups to add water. My own Pryex 2 cup glass measuring cup is wildly inaccurate as can be seen in the photos below. Luckily, we have all the tools at hand to accurately graduate our carboys. All that is needed is this simple but admittedly tedious technique, a carboy, a calibrated thermometer (optional but nice), a gram scale, and a means of marking the carboy. Sharpie markers work beautifully on plastic. On glass one can use vinyl stickers as masks and obtain glass etching gel used to frost glass from art supply stores. Stickers and tape don't usually provide good long term solutions and given the tedium of this method, I recommend doing it once right and being done forever.
The first step is to decide how precisely you want to graduate the carboy; I elected for pint increments. A quart is 946 mL, a pint is 473 mL, and a cup (for you super patient) is 237 mL. For reasonable water temperatures we can neglect the temperature of water. My tap water the day I did this was 60°F which corresponds to a density of 0.9991026 g/mL. To take this into account multiply your desired volume in mL by the density of your water to arrive at the needed mass of water to obtain that volume. In my case 473 mL*0.9991026 g/mL = 473.14 g. Had my tap water been 86°F, I would have needed 473 mL*0.9956502 g/mL = 471 grams of water to yield one pint. A small difference and most will probably neglect it but I offer it here for the sake of completeness.
Now the method. I placed my measuring cup on my gram scale and tared it.
Tared measuring cup

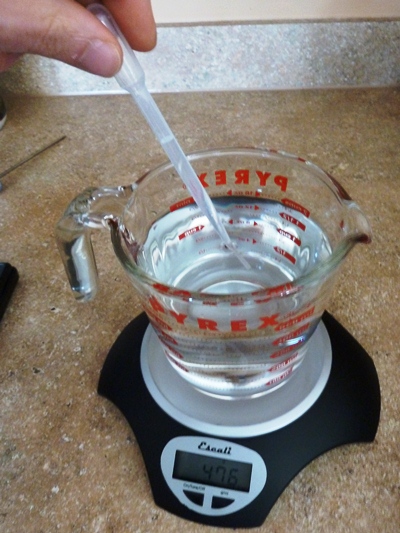
Next add tap water until you are close to your desired mass. Note how inaccurate my Pyrex measuring cup is!
Ever so slightly overfilled measuring cup being adjusted with a pipette
Here I measured the temperature of my tap water to ensure that my calculations were accurate.
Measuring the temperature of the tap water

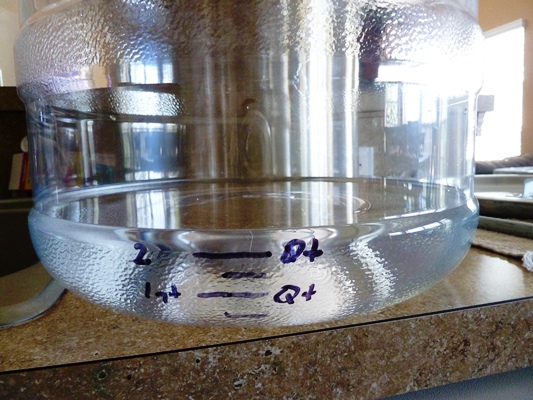
Once the net weight in the cup is as calculated above, carefully transfer it to the carboy being very careful not to spill any and draining the measuring cup completely. Place the measuring cup back on the scale to ensure that the weight has returned to zero. This helps assure us that we transferred all the grams of water to the carboy that we intended. Tap the sides of the carboy or carefully tip and roll it to encourage all the water clinging to the sides to move into the bulk fluid. Fill your next measuring cup to the correct mass and allow the fluid in the carboy to become still. Once it is still, carefully mark your carboy at the meniscus.
Carboy ready for its next pint graduation
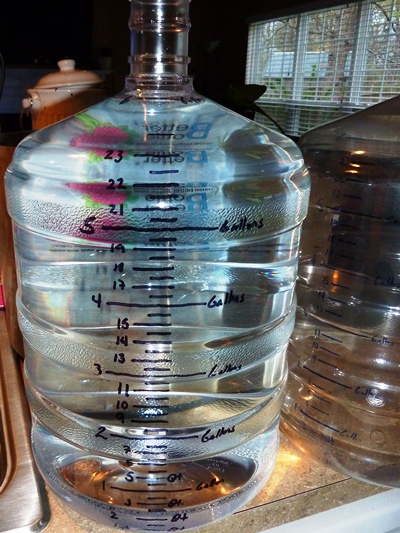
Continue with this process until your carboy is full and then enjoy using it forever after. You never need to worry again about your ability to precisely measure sweet wort in the fermenter which will help rule out a common and significant source of uncertainty when calculating and troubleshooting brewhouse efficiency.
Completely graduated carboy
It is customary to read an instrument to half of a scale unit, so in my case I can call a volume 20 quarts or 20.25 quarts or 19.75 quarts. In my original example this would tighten up the variation in brewhouse efficiency to ± 1% brewhouse efficiency for a fairly big beer. The bigger the beer the larger the variation in brewhouse efficiency. Had I been patient enough to graduate in cups, I could measure ± half a cup and in the same example and so ± 0.5% brewhouse efficiency.
As an example take a simple SMaSH brewed with 12 pounds of marris otter and an original gravity of 1.074. Further suppose the because of an imprecisely marked (or unmarked!) carboy the best one can do is get within a quart of the true volume in the carboy. At 21 quarts we get a brewhouse efficiency of 85.20%, at 20 quarts we get a brewhouse efficiency of 81.14%, and at 19 quarts we get a brewhouse efficiency of 77.08%. 8% range in brewhouse efficiency is a lot just because of imprecise volume measurements.
In addition, there are those who choose to mark their carboys by using gallon jugs or measuring cups to add water. My own Pryex 2 cup glass measuring cup is wildly inaccurate as can be seen in the photos below. Luckily, we have all the tools at hand to accurately graduate our carboys. All that is needed is this simple but admittedly tedious technique, a carboy, a calibrated thermometer (optional but nice), a gram scale, and a means of marking the carboy. Sharpie markers work beautifully on plastic. On glass one can use vinyl stickers as masks and obtain glass etching gel used to frost glass from art supply stores. Stickers and tape don't usually provide good long term solutions and given the tedium of this method, I recommend doing it once right and being done forever.
The first step is to decide how precisely you want to graduate the carboy; I elected for pint increments. A quart is 946 mL, a pint is 473 mL, and a cup (for you super patient) is 237 mL. For reasonable water temperatures we can neglect the temperature of water. My tap water the day I did this was 60°F which corresponds to a density of 0.9991026 g/mL. To take this into account multiply your desired volume in mL by the density of your water to arrive at the needed mass of water to obtain that volume. In my case 473 mL*0.9991026 g/mL = 473.14 g. Had my tap water been 86°F, I would have needed 473 mL*0.9956502 g/mL = 471 grams of water to yield one pint. A small difference and most will probably neglect it but I offer it here for the sake of completeness.
Now the method. I placed my measuring cup on my gram scale and tared it.
Tared measuring cup
Next add tap water until you are close to your desired mass. Note how inaccurate my Pyrex measuring cup is!
Ever so slightly overfilled measuring cup being adjusted with a pipette
Here I measured the temperature of my tap water to ensure that my calculations were accurate.
Measuring the temperature of the tap water
Once the net weight in the cup is as calculated above, carefully transfer it to the carboy being very careful not to spill any and draining the measuring cup completely. Place the measuring cup back on the scale to ensure that the weight has returned to zero. This helps assure us that we transferred all the grams of water to the carboy that we intended. Tap the sides of the carboy or carefully tip and roll it to encourage all the water clinging to the sides to move into the bulk fluid. Fill your next measuring cup to the correct mass and allow the fluid in the carboy to become still. Once it is still, carefully mark your carboy at the meniscus.
Carboy ready for its next pint graduation
Continue with this process until your carboy is full and then enjoy using it forever after. You never need to worry again about your ability to precisely measure sweet wort in the fermenter which will help rule out a common and significant source of uncertainty when calculating and troubleshooting brewhouse efficiency.
Completely graduated carboy
It is customary to read an instrument to half of a scale unit, so in my case I can call a volume 20 quarts or 20.25 quarts or 19.75 quarts. In my original example this would tighten up the variation in brewhouse efficiency to ± 1% brewhouse efficiency for a fairly big beer. The bigger the beer the larger the variation in brewhouse efficiency. Had I been patient enough to graduate in cups, I could measure ± half a cup and in the same example and so ± 0.5% brewhouse efficiency.
")

