Single Vessel, All Electric, NS, NC Brewery

Homebrew Talk - Beer, Wine, Mead, & Cider Brewing Discussion Forum

Help Support Homebrew Talk - Beer, Wine, Mead, & Cider Brewing Discussion Forum:

This site may earn a commission from merchant affiliate links, including eBay, Amazon, and others.
details on that sight glass ? looks like the real deal.

BTW - nice build. I've been subscribed for a while now.

Thanks, Man! It's a huge thread I know....wonder if I can trim it down once we get a working product?

Sight glass is from http://www.stpats.com. It's 1" I believe, got it for ~$65....it's really nice. You may read bad things about this vendor elsewhere, but I have had zero issues. The quality and selection are good, and the prices are very reasonable. I took a chance and it paid off....just sayin'. :mug:
 
Steve, out of curiosity what are you using for a 1/16 DIN timer? Thanks!

The timer is an ASL-51 from Auberins.com it was about the same price as the PID's, and I figured what the heck. I usually use my watch....but it'll be nice to use a variable function timer that can drive a flashing alarm. I'm thinking about getting an industrial beacon or revolving light like THIS ONE maybe smaller. But I really wanna focus/spend money on getting this thing working...then I can add more bells/whistles (literally :) ) :mug:
 
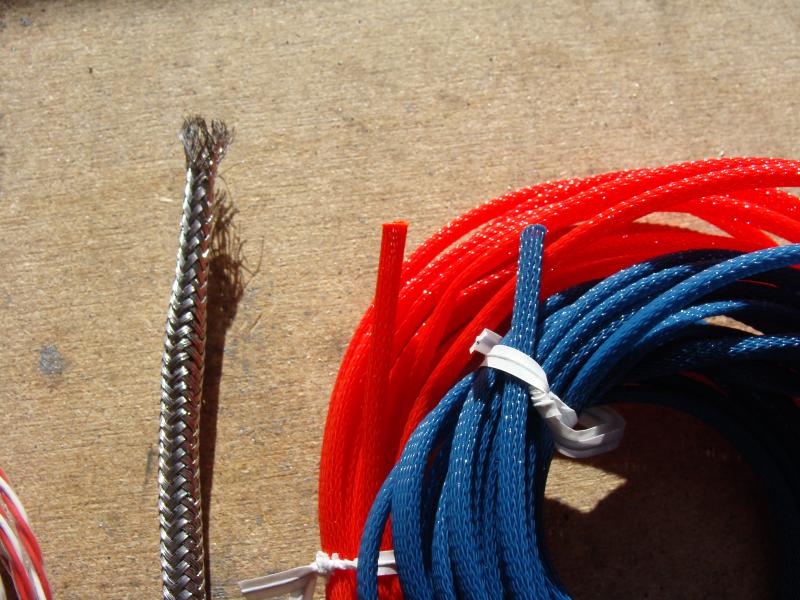
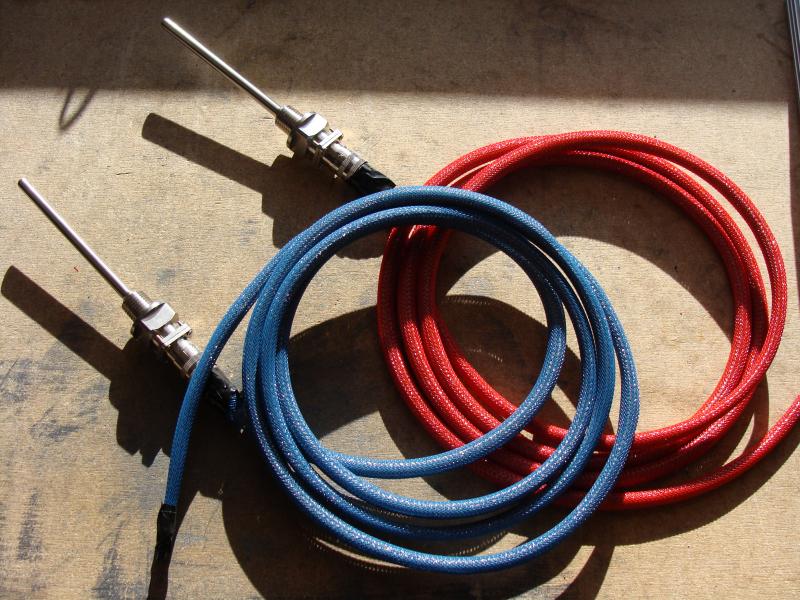
Okay, so a bit more progress...following the lead from TiberBrew, Kal, and several others, I stripped some spare coax I had lying around, salvaged the stainless braid and shielded my RTD wires with it. Then covered the cable with PET mesh. I plan on using the primary colors for the cables and their connectors....red goes to red port, etc. to make it fool/drunk proof. I still have to solder the panel mount connectors on...wasn't sure if cutting some off to use inside the box would be a no-no :confused:

DSC08488.jpg


DSC08489.jpg


DSC08490.jpg
 
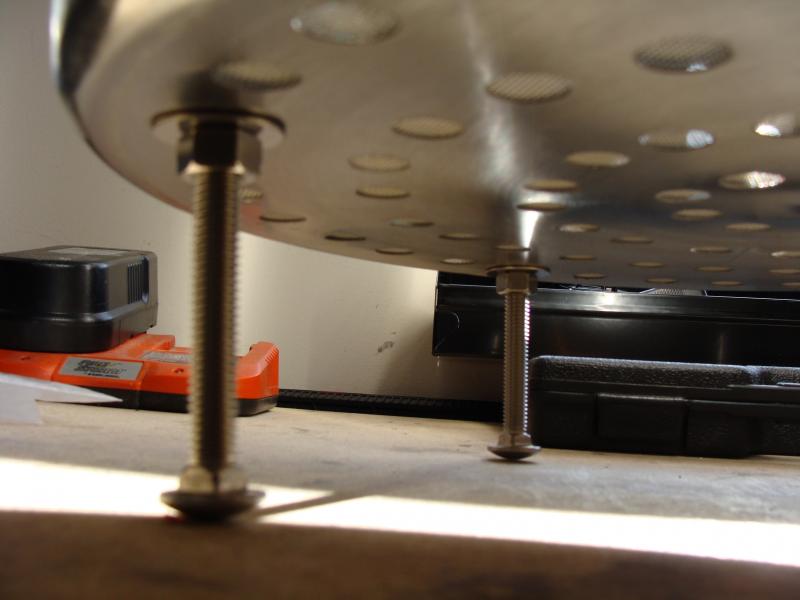
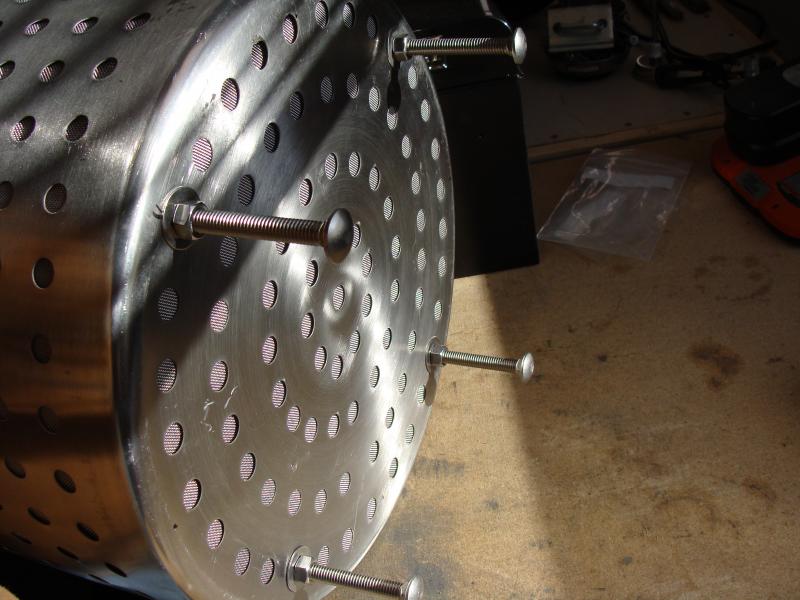
Because my time was limited today...I also did another "mini-project"....added 3/8" SS carriage bolts with matching fender washers, hex nuts, and cap nuts for the basket's legs. BOLT DEPOT rules, by the way.There's a fender washer on either side, so no stress on the screen or leakage past the bolts. Also, I made sure there was a hex nut on either side (in addition to the cap nut) so I can adjust height as necessary. As you see it, it fits perfectly, but I will fine tune it to work near (but not too near) the element.:mug:

DSC08492.jpg


DSC08494.jpg


DSC08495.jpg
 
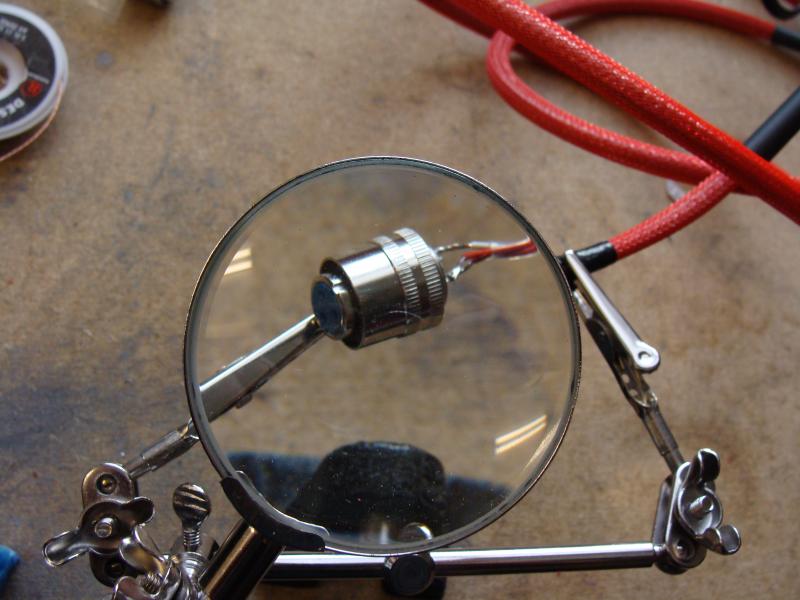
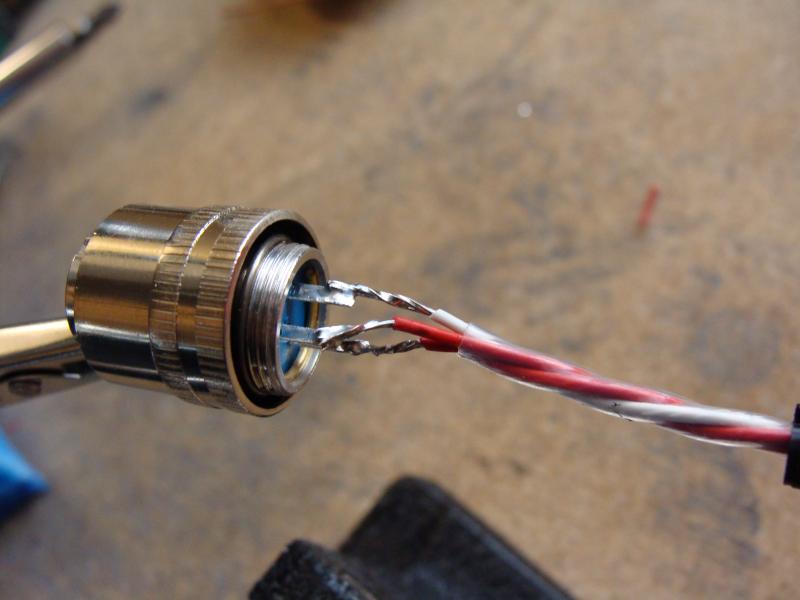
Here's a few more....I soldered the panel mount connectors up and added the heat shrink tubing. I eventually added small black zipties because I am paranoid about the sleeving shifting. Word to the wise: Get yourself a "third hand" (seen in the first pic)...soldering the connections would have been nearly impossible without it! :mug:

DSC08496.jpg


DSC08498.jpg


DSC08499.jpg
 
Steve, good suggestion about the "third hand", what stores would carry something like that? A bit off topic, do you need anything to connect the probe end of the RTD into your kettle (i'm guessing they are Auberins liquid type ones), or does it come with everything you need to screw into the kettle.
 
Well...I got mine on Amazon....it's THIS ONE Really pretty cheap and does what it says (love stuff like that!)....it has a cast iron base and wing-nuts that you can crank down....very important because it will keep a firm grip on stuff so when you touch your soldering iron to the part it won't move.

About the probes, I'm not sure...but it looks like a simple 3/8" MPT. It has a flat face, so you could add an o-ring if you want, but I plan on using either silicone sealant or teflon tape.
 
Last edited by a moderator:
I got mine at Marc's, but The Shack should carry them as well. :mug:

Didn't see any there yesterday, but I wasn't looking for one. Radioshack is okay for stuff in a pinch, but they are slowly moving towards being a cellphone/novelty electronics store. I have Amazon Prime (well worth the $80/year for 2 day shipping on everything....we went through that in just xmas gifts)....so I guess I'm biased.
 
Well...I got mine on Amazon....it's THIS ONE Really pretty cheap and does what it says (love stuff like that!)....it has a cast iron base and wing-nuts that you can crank down....very important because it will keep a firm grip on stuff so when you touch your soldering iron to the part it won't move.

I paid $3.99 for mine. :D (Yep, I'm a cheap bastard! This is why my build will not look anywhere near as nice as Steve's.)
 
Last edited by a moderator:
Great thread Steve,

Took me two weeks of lunches to get through it properly. I have limited space where I plan to brew and I will use your work(and others you linked to) as a guide. Thanks for all the effort in putting this together!

Mike
 
Great thread Steve,

Took me two weeks of lunches to get through it properly. I have limited space where I plan to brew and I will use your work(and others you linked to) as a guide. Thanks for all the effort in putting this together!

Mike
Thanks! Wish I could pare it down to the meat and potatoes, but she just keeps on goin'......:)
 
Okay....a little more progress:

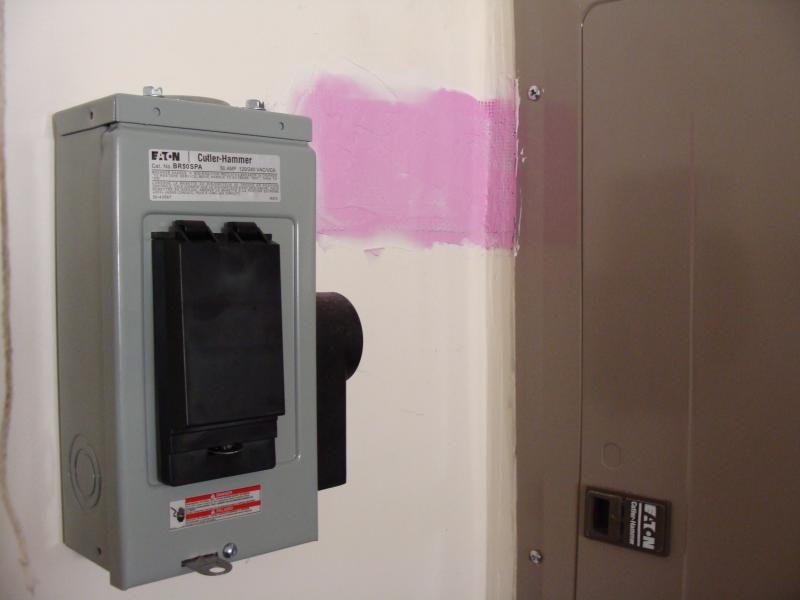
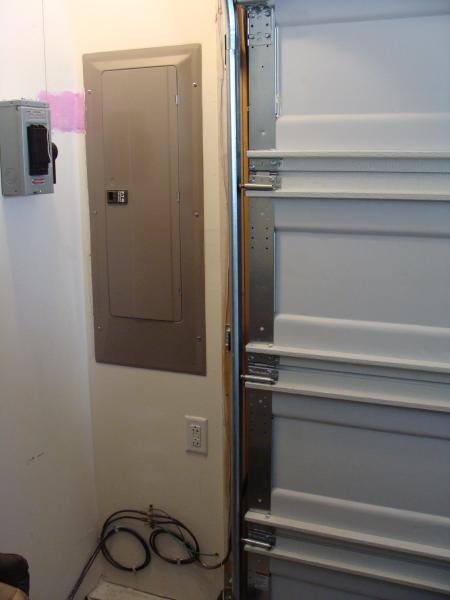
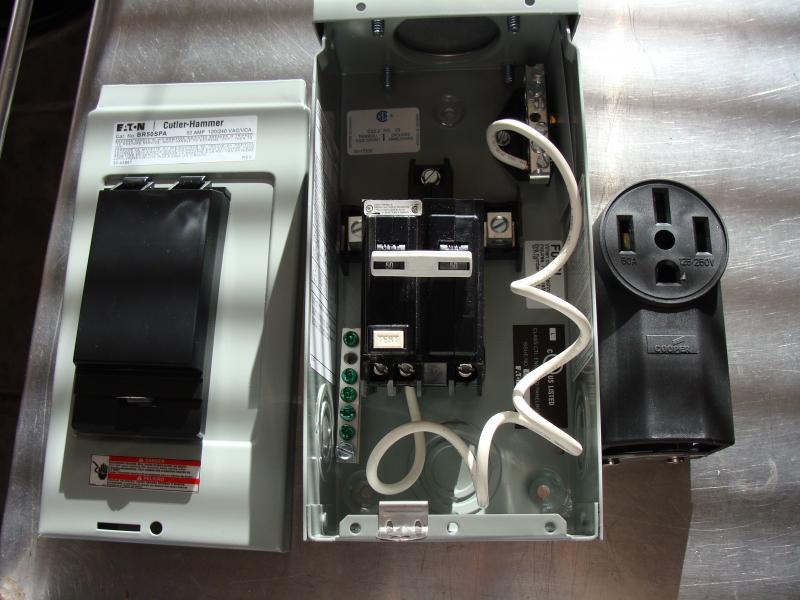
I wired up a burly 50A range outlet into my garage.....I won't tell you HOW I did it....but it was relatively easy except for a few unforseen snags. Safety was a big issue, we took this seriously, and I'm very proud that I have an outlet that is to code and can be removed easily if I move.

DSC08555.jpg


DSC08557.jpg


DSC08558.jpg
 
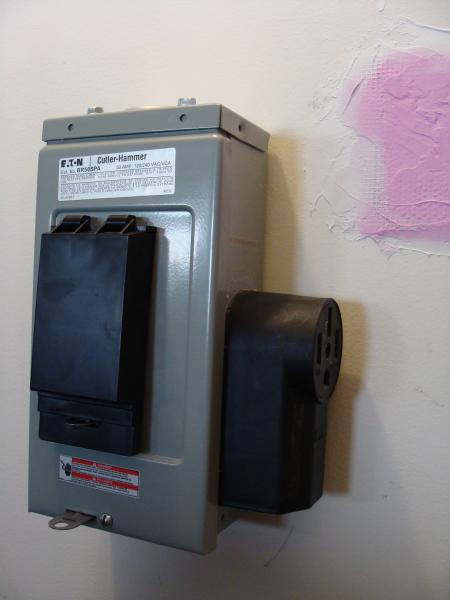
Here's a few more....we had to cut out some drywall to get an angle on the holes we were drilling for the cable. Also, I mounted the receptacle on the right, because it is actually "upside down"...range outlets are built that way so they can have zero clearance with the floor and the cord can travel upward. In this build, the cord will flop over the box then come down to tabletop height:

DSC08562.jpg


DSC08564.jpg


DSC08565.jpg
 
Nice! So how are you planning on branching this off inside the control panel?

I didn't show pics, but I got a 50A cutler hammer 2P standard breaker to fit into the main panel....then went with 6 AWG from there. I got 2 range cords for cheap; 1 for the control box, 1 for the wire run in the wall. And after wiring the subpanel I came out on top with an extra plug and about 10" of wire for a pigtail. Not sure how I'll use that yet, but I think it'll be nice to have.:mug:
 
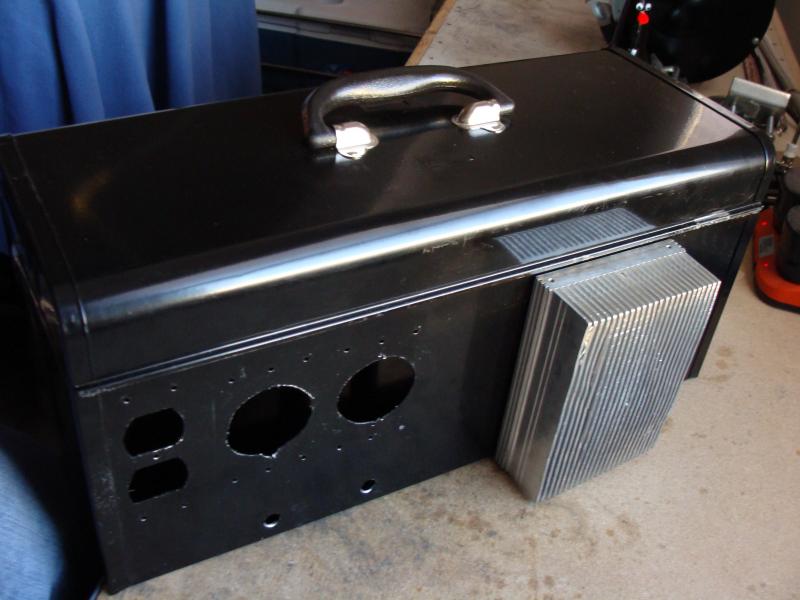
And as a bonus project, I drilled and tapped holes in the heatsink to mount to the box. After breaking a bit AND a tap, I finally got it mounted. First time I've ever used a tap&die set....a very useful piece of gear to have! But there's a learning curve, and if you're using cheap tools like me, they can break :) BTW, SO glad I chopped down the heatsink. It's still heavy, but reasonable.

DSC08567.jpg


DSC08569.jpg


DSC08570.jpg
 
You do realize you've just made one of the largest Coffee Makers I've ever seen?

For everyone else thinking about doing something like this on smaller scale, checkout Electric Turkey Fryer and restaurant coffee urn replacement parts. The fryers come with a heating element and control that fits over the side of the pot and the pot has a drain valve already installed. As for coffee urn replacement parts, they use pumps, valves, heating elements, etc...

Just my 2 pennies worth, FWIW.

Steve: aka, Pinworthy
 
Check THIS THREAD out....I scored a coffee maker several months ago and plan on making a smaller version at some point in time, once I get this beast completed. But you're right, as I was disassembling it, I could see there were elements, small pumps, silicone tubing, timers, etc.....all the things we use in brewing.
 
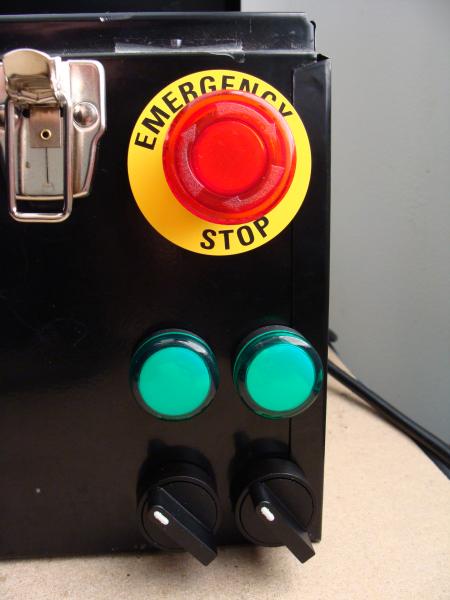
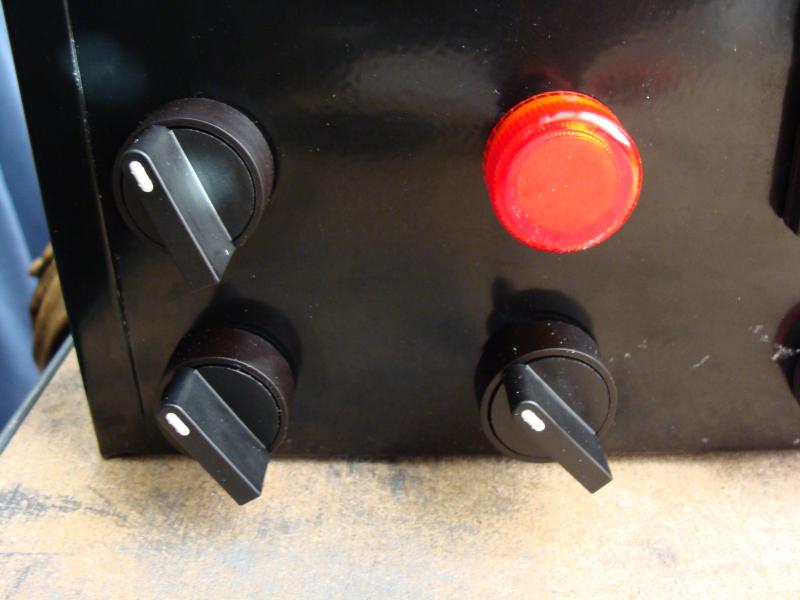
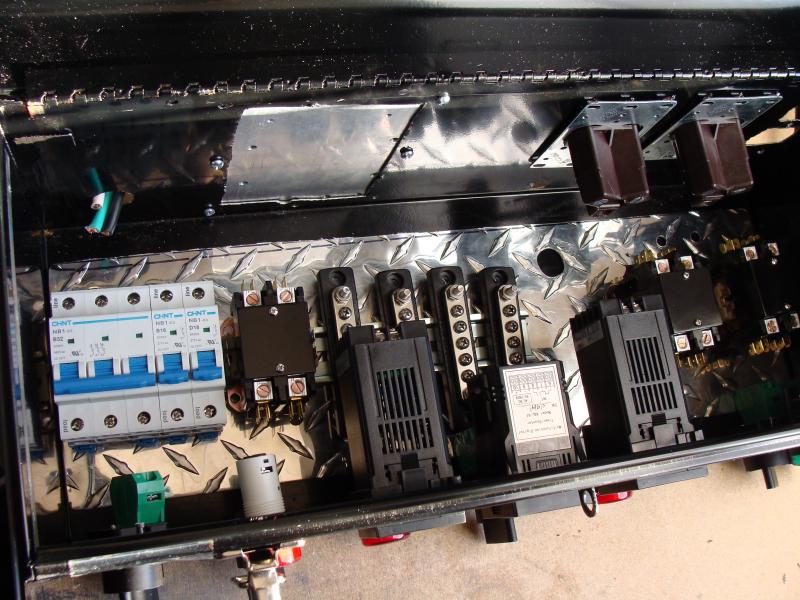
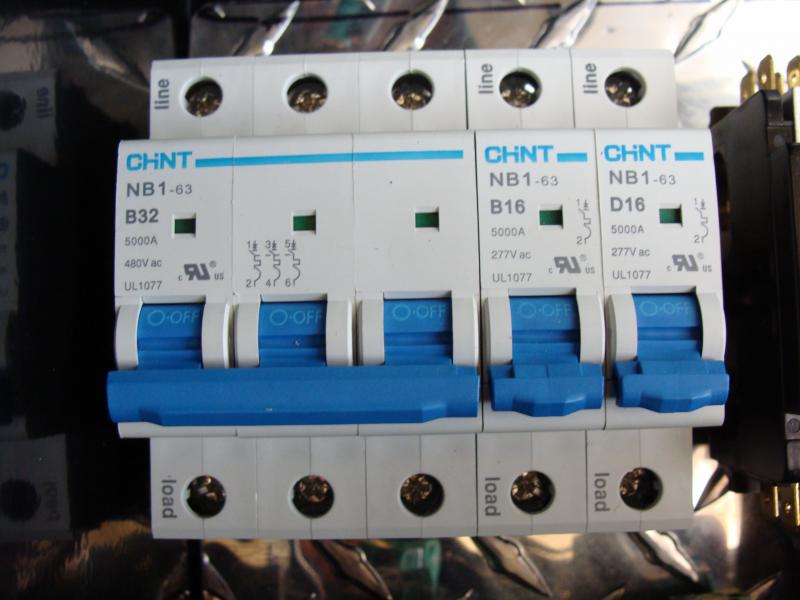
I made a bit more progress in the last few days...I had to get DIN mountable circuit breakers, some rail, and while I was at it I upgraded to LED lights. Now, I'm just mocking everything up and trying to visualize how to efficiently connect everything. Then comes the wiring! Right now, it looks like I have EVERYTHING I'll need to get this beast energized....I just have to put it all together! Third pic is going to be the alarm panel....I put a red light in place of the flashing buzzer I have coming. At present the E-Stop will be the power switch. If it's disengaged, the unit works. If not, nothing works. I'm thinking about getting a cool "missile launcher" switch for the power....but until then there's no reason I can't brew.

DSC08571.jpg


DSC08582.jpg


DSC08583.jpg
 
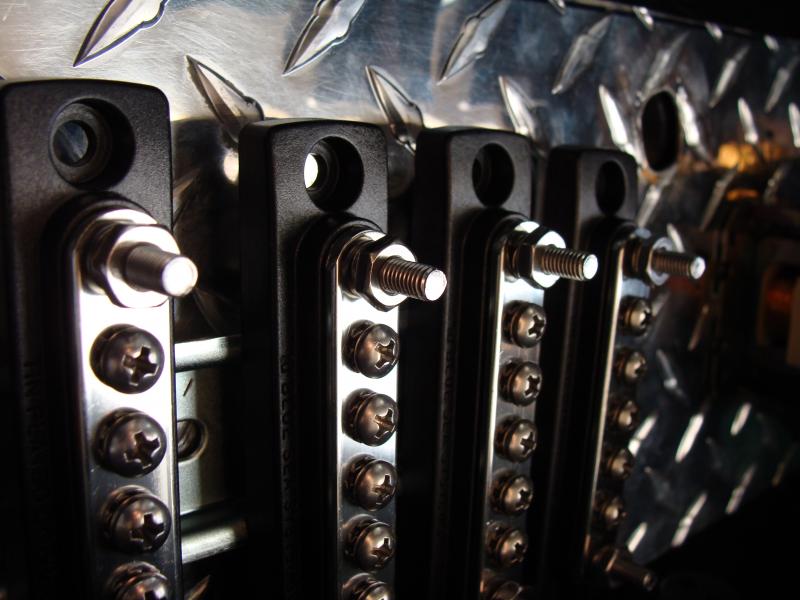
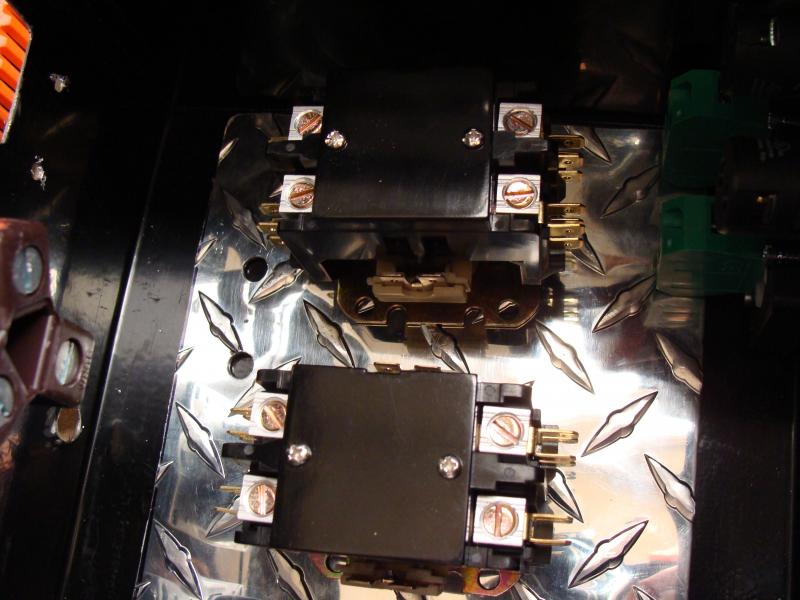
So here's the inside...I used a piece of scrap diamond plate for a base. I should be able to position everything to cover the holes. So here's my plug for FACTORYMATION.COM...I got my circuit breakers for way cheaper than anywhere else....and they have all kinds of other stuff. Very competitive (and sometimes cheaper) than AUTOMATIONDIRECT.COM (which I also bought a lot of stuff from). Quality is about the same for their economical products.

Oh yeah...and I got my contactors on ebay....they were supposed to be 40A FLA with a 120v coil. They were labeled for 24DC but it was marked out and 120v was written on the box as well as the unit. The vendor never got back to me when i asked why. I really hope they work!:eek:

DSC08573.jpg


DSC08574.jpg


DSC08576.jpg


DSC08577.jpg


DSC08578.jpg
 
That's cool...nothing like a complicated ON switch. Reminds me of Maxwell Smart!
 
Just got done going through all 47 pages of this thing. Great build and I love your ingenuity. Do you plan to remove the basket for the boil or use the basket as a hop catcher/screen? If so do you forsee any problems boiling with the basket in the kettle?

Mark
 
Just got done going through all 47 pages of this thing. Great build and I love your ingenuity. Do you plan to remove the basket for the boil or use the basket as a hop catcher/screen? If so do you forsee any problems boiling with the basket in the kettle?

Mark

Thanks for reading! I plan on keeping the screen in, but we'll see. The legs on my basket are adjustable, so I should be able to tweak distance from the element. I'm hoping all the holes in the basket will allow a good boil/circulation of wort with hops....this is something that can't be done as easily if you use a solid walled pot with mesh at the bottom.
 
Steve I just noticed you're using a 3Pole breaker, any particular reason why?

I ran the neutral through it. It wasn't really necessary, but since I was stepping down from 50A to 30A I figured I better keep it uniform. It was like $2 more, so no biggie.

P.S....Just got a TIG welder with the ol' tax refund....this hobby is a curse! :mug:
 
Now you're going to have to redo all those solder joints you made. :drunk:

Ha, don't think I haven't thought about that! Right now I just want to finish this build. I need to put the time into wiring and it should be up and running! I'll probably get my feet wet messing around with scrap, then building a welding table, then maybe a small cart (It's a Maxstar 150 STH, so it's really compact already)...or maybe I'll build a cart that'll hold my O/A stuff; the cheap porta-torch carrier was already jacked up when I bought it.

The possibilities are endless. I'm a Miller fanboy now....next thing you know I'll be wearing a welding jacket around the house for no reason. :D
 
UPDATE: Box appears to be functioning as intended, minus the alarm. Can't get the buzzer to work. But man, oh man...when I flipped the switch and she lit up, it was GLORIOUS!

Gonna do some tweaking then hopefully hook EVERYTHING up. Once I'm sure I won't embarass myself, I'll be doing a youtube video of the wet run.
 
Okay....so I did a fair amount of tweaking and troubleshooting yesterday....still haven't figured out the alarm issue (but I know the buzzer was bad). I think it has to do with setting it up in the PID's/Timer the right way.

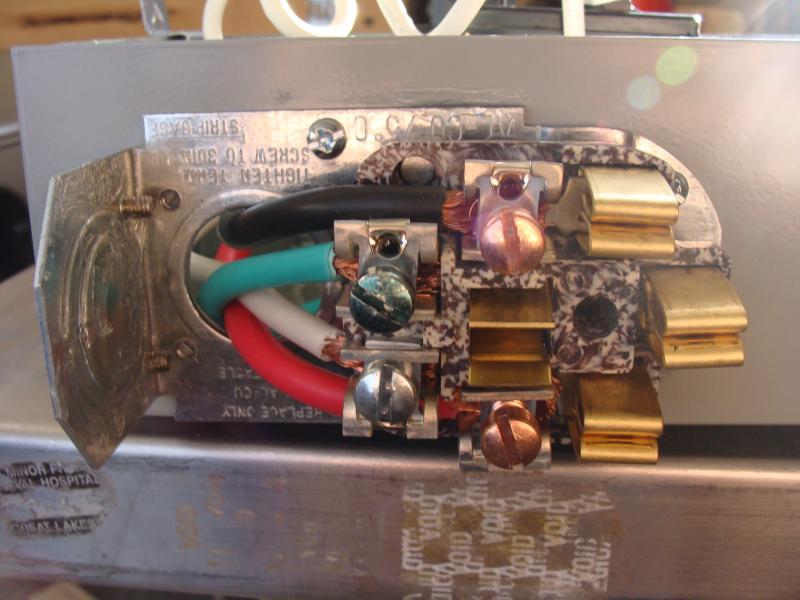
Also, I plugged the elements in and my GFCI breaker kept tripping immediately! Turns out I wired the 220v receptacles wrong...because it said "w", like an idiot I hooked up the neutral (white) and ran it to the neutral bus. But that was actually the terminal where the element's ground was supposed to travel through. So I shorted neutral to ground on accident! GFCI'S ARE TOTALLY WORTH IT!

Lastly, and probably the most important discovery: 30x30 mesh is TOO SMALL. The surface tension of the water does not allow the bubbles to pass through as the liquid boils! As a result, the bubbles run across the bottom and up the sides....causing a lot of splashing. It could be better with wort, but I highly doubt it. If I were to use fermcap, I wonder if it would help. Because it is a surfactant, it might lower the surface tension enough. If I can't get the bubbles to pass, I won't be able to use the basket for hops.

I have a 4x3 roll of some burly 6 mesh....but I'm thinking it's too big. McMaster shows it here as filtering rock salt sized particles:

particleexamples.gif


Each opening is 0.139 "....but after looking at the perforated sheet we use for FB's, their holes are 5/32" which equates to 0.156"...which is actually bigger. Maybe it's the difference between a round hole (false bottom) and a square hole (mesh)? :confused: I know for sure bubbles will pass through this, but wonder about grain chunks. Pellet hops will also probably make it through.

Wondering if I should change the mesh? I have a small piece of perforated ss I can put over the bottom drain as a prefilter.
 
Gotta love CFCI's, they let you know if you made a mistake. And high voltage is not an area with room for mistakes. So yes, they are totally worth it!

I use a cut keg top with about 500 5/32" holes drilled in it for a fb. I was getting small pieces of grain coming through, but that may have been because it doesn't have a perfect seal around the edge. I went back to my SS braid for now until I find some good edging for it. I may also try wet milling to see if it helps. Like you said though, others are using 5/32 mesh for FB's. I do know that it's not going to stop pellet hops.

I've got to ask, if you don't mind, what is the running tally on this monster? It's worth every penny whatever the amount is, but after looking back over the massive bling on this baby, I just started seeing dollar signs. A lot of them!
 
Well, I know some of the parts like the valves and pump are pretty high dollar....but I got those for relatively cheap on ebay.....as an example, the valves alone are extremely expensive...but i got them $50 for 2 pieces. Most of the fittings were bought at the cheapest places you can get them. Already had the kettle.

How much total? Only God knows ;) If it weren't for all my experimenting, It could probably be done for ~$2500 or less, like most of the other Brutus builds, etc. But I've changed my mind a million times and made even more mistakes. This build started about 1.5 years ago, so it's taken some time to design/spend/build....call it evolution of a homebrewing sculpture :D

About the 5/32" holes....good to know. I'm not concerned with small amounts of grain...even my prefabricated machined FB will pass a bit at first; that's why I plan to recirc. I'm concerned with grain that doesn't stop coming through the holes...once enough of it gets in the lines, it's destined to make it to the plate chiller or at least clog it's prefilter. Could also scorch on the elements; all bad things.
 
Back
Top