Besides the ease of racking, the racking adapter, ported closure and the other fittings allow for oxygen free transfers from primary to secondary. The primary has a ported closure with a 90˚ barb fitting installed. A length of 1/4" ID tubing from the barb fitting connects to the ID of the inlet of the high flow valve on the secondary. The secondary also has a ported closure, but this is where the dry trap air lock is installed. I put a short length of tubing on the barb of the airlock and insert it into a sandwich bag with sanitizer in it so that I can see the bubble rate.
The CO2 produced during the primary phase is used to purge the air out of the secondary. When it is time to rack, the 1/4" ID tubing simply gets removed from the valve on the secondary to the outlet barb of the air lock. This will allow for equalization during the transfer. Next, I connect a length of 1/2 ID tubing to the OD of both high flow valves. Now the secondary is placed on the floor while the primary is elevated, both valves are opened, and gravity does the rest. No introduction of O2 whatsoever. I even purge the air out of the tubing with CO2 from my tank before connecting it up. Sanitizing the valves and fittings is easy with a spray bottle of Star-San.
I know it seems like a lot of fuss after reading my description, but it really couldn't be simpler once you have done it once. As for the cost, yes it is expensive to purchase all of the Better-Bottle accessories. The racking adapter and high flow valve assembly costs more than the Better-Bottle itself, but I'm OK with that. The convenience far outweighs the cost for me. I didn't get into this hobby because I wanted to save money. As most of you know, the exact opposite is true of this hobby. You can spend a butt load of money in a hurry!
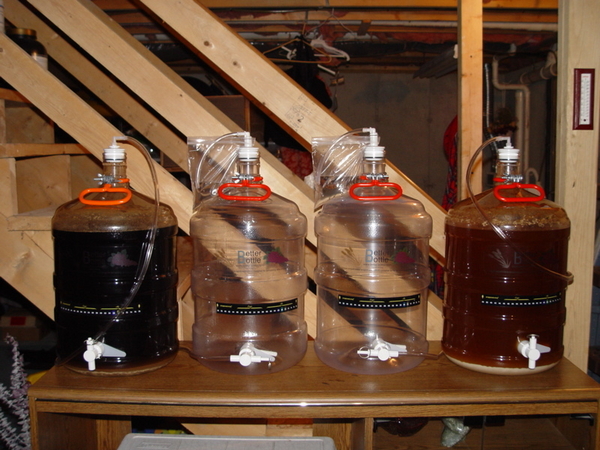
The first photo is a diagram from Better-Bottles website showing the oxygen free transfer procedure. The second photo are mine in action, and the third is the blow off tube setup for Better-Bottles that I found at Hearts Homebrew.