Single Tier Brutus Clone.....Another One!

Homebrew Talk - Beer, Wine, Mead, & Cider Brewing Discussion Forum

Help Support Homebrew Talk - Beer, Wine, Mead, & Cider Brewing Discussion Forum:

This site may earn a commission from merchant affiliate links, including eBay, Amazon, and others.

SchmidtyBeer

Well-Known Member
Joined
Oct 19, 2008
Messages
75
Reaction score
1
Location
Denver, CO
I have spent a lot of time following this forum and have been very inspired by many of your builds. I thought it was only fair that I document my build and answer any questions along the way. I will also be asking many questions myself!

So lets get started:rockin: Oh and sorry for the photos, they were all taken on my cell phone. I will try and get some better photos posted.


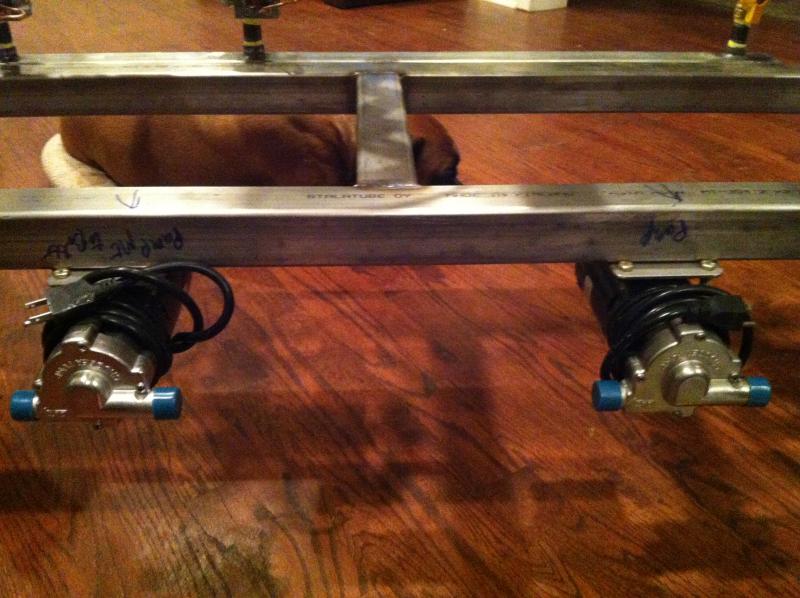
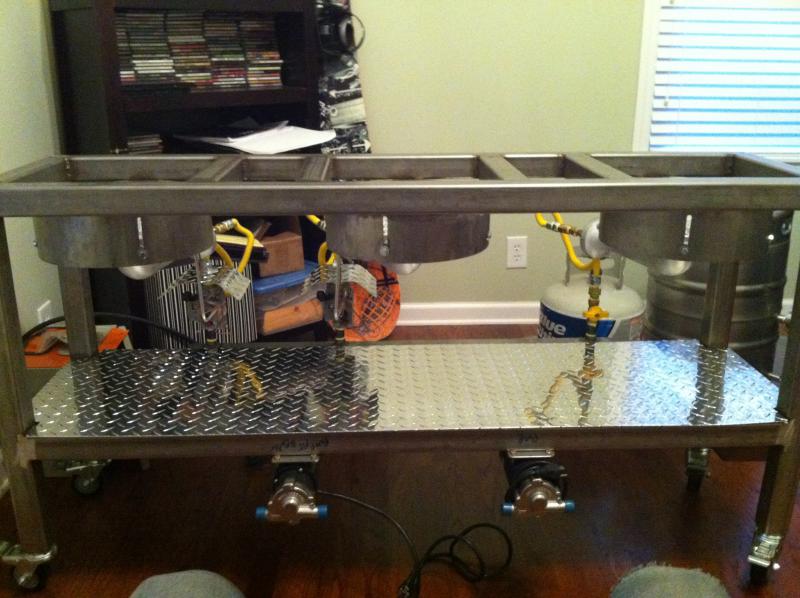
The stand welded with the pumps, chill plate, casters, and valves attached.

IMG_1312.jpg


IMG_1308.jpg


IMG_1305.jpg


IMG_1310.jpg


IMG_1314.jpg
 
The stand has been at the house for a few months now, It has costed much more then I anticipated! But we are counting on the stand to supply the beer for our wedding in a few months, so its crunch time. Yesterday I added the aluminum diamond plate shelf and valve covers.

IMG_1315.jpg


IMG_1316.jpg


IMG_1309.jpg
 
The control panel build and wiring is underway. I have to order a few more parts, but hopefully by later this week/weekend I will have some finished work to show. I will also try and gather a full build parts list, blueprints, sources, etc.


Oh, and a huge thanks to all of these guys for their inspiration, pics, knowledge, etc. There are many more I am sure and I will do my best to give credit where credit is due.

kal
JonW
Jlandin
schweaty
coderage
kladue
sawdustguy

Please let me know if anyone has any questions or picture requests along the way.:mug:
 
Hi

When you do the supports for the pots, make sure to leave enough vertical space to allow exhaust gas flow.

Bob
 
Looks very nice! Did you do all the welding yourself? Is it stainless?

You may already know this, but you should rotate your pump heads so the output is higher than the input. Helps priming a good bit.
I just ordered all the gas stuff and PID's for my eventual brutus build. One thing I didn't get into yet is the tubing to connect the pilot burners to the valves. What is that stuff and where did you get it?
 
I gotta ask: why the myriad of transition fittings between the burner orifices and the gas valves, especially considering the flex hoses? Got family in the brass business? ;)

Cheers!
 
rekoob said:
Looking very nice.

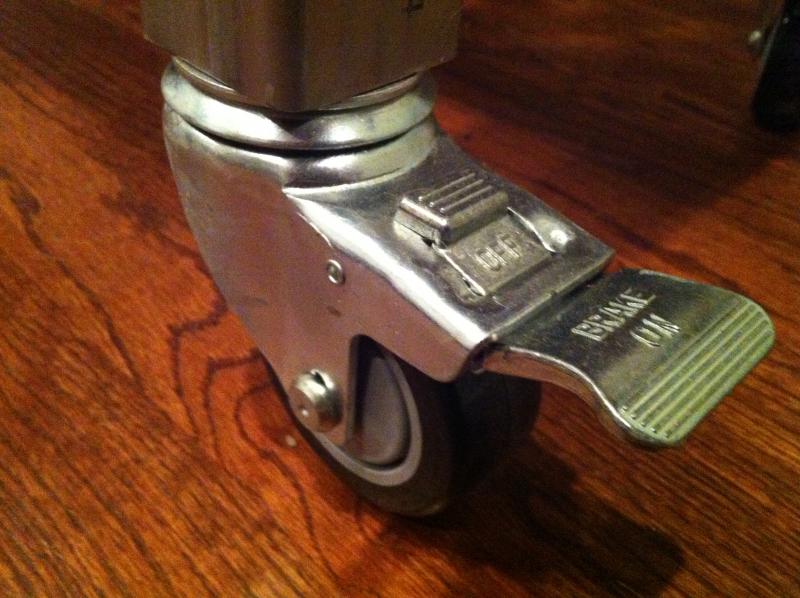
where did you get your casters? what are they rated for? you have a part number?

Thanks in advance.

The casters are from caster city, they are rated for 300lbs each, 3" wheels, and they have expanding rubber stems. The stems fit into the 2x2 stainless tubing and "expand" as they are tightened down. I don't have the exact parts number, but you can get on there and build yours to your exact needs.
 
HIM_Tattoos said:
Is that a puggle behind the pumps???

Nice build BTW.

That's actually my older boxer Hendrix. He looks a little small in that pick, but he's about 70lbs or so. He is the build supervisor!

carlisle_bob said:
Hi

When you do the supports for the pots, make sure to leave enough vertical space to allow exhaust gas flow.

Bob

I have been looking at different options for this. I was hoping the current setup would allow enough airflow through the burner mounts. Once everything is up and going we will test it out.

krazydave said:
Looks very nice! Did you do all the welding yourself? Is it stainless?

You may already know this, but you should rotate your pump heads so the output is higher than the input. Helps priming a good bit.
I just ordered all the gas stuff and PID's for my eventual brutus build. One thing I didn't get into yet is the tubing to connect the pilot burners to the valves. What is that stuff and where did you get it?

My stepfather and I did all the welding and it s 2x2 stainless. There are a couple things already I wish we would have done different, but it's all a learning experience. Can I just rotate the heads our does the whole thing need to be rotated?

What kind of burners do you have? The burners here are lp hurricanes, and the burner orifice I bought from Williams brewing, the rest of the parts were from lowes. I plan on swapping out a few of the connections soon. As far as the pilot tubes, all of that was purchased from pex supply.
2 - 1/4"x5' pilot burner tubing w/ fittings. sku11-293
2 - 24" thermocouple sku q390a1046

day_trippr said:
I gotta ask: why the myriad of transition fittings between the burner orifices and the gas valves, especially considering the flex hoses? Got family in the brass business? ;)

Cheers!

Yeah, that's a bit embarrassing! My local lowes did not have the best selection and I literally had to piece together all of those fittings to connect the brass orifice to the gas line. That will be getting swapped out in the near future, I just need to find the right parts online.
 
My stepfather and I did all the welding and it s 2x2 stainless. There are a couple things already I wish we would have done different, but it's all a learning experience. Can I just rotate the heads our does the whole thing need to be rotated?

What kind of burners do you have? The burners here are lp hurricanes, and the burner orifice I bought from Williams brewing, the rest of the parts were from lowes. I plan on swapping out a few of the connections soon. As far as the pilot tubes, all of that was purchased from pex supply.
2 - 1/4"x5' pilot burner tubing w/ fittings. sku11-293
2 - 24" thermocouple sku q390a1046

You can just rotate the heads and not have to worry about remounting the motor.

My burners currently are the Blichmann floor standing burners, but the burners inside of them are pretty much identical to what you have there. I have NG orifices on everything currently.
I'm not sure yet if I'm going to keep those burners for my build, or pick something else up. I do like them, but I'd hate to see all that pretty stainless not be used!

I don't know how I missed the pilot burner tubing at pexsupply. Looks like I get to pay extra shipping on that. Thanks for the part number though I appreciate that!
 
I ran into the same problem with fittings at lowes when I was plumbing my stand. I swear I think they don't stock certain fittings intentionally so that you have to use two or three where one would have worked. It's maddening. Your stand looks great. Very clean looking burner mount. Looking forward to watching your progress
 
I ran into the same problem with fittings at lowes when I was plumbing my stand. I swear I think they don't stock certain fittings intentionally so that you have to use two or three where one would have worked. It's maddening. Your stand looks great. Very clean looking burner mount. Looking forward to watching your progress

Hi

No matter how many things they stocked, there would still be some gaps. That said, there are still "real" plumbing supply stores around. There are also a number of places on the internet that do indeed stock just about everything.

Bob
 
carlisle_bob said:
Hi

No matter how many things they stocked, there would still be some gaps. That said, there are still "real" plumbing supply stores around. There are also a number of places on the internet that do indeed stock just about everything.

Bob

Point taken bob,

But...there are no plumbing supply stores in my town because lowe's put them out of business, and buying from them is more convenient than ordering online and waiting a week.
 
I love the fact this is in your living room for the pics. Good job!
 
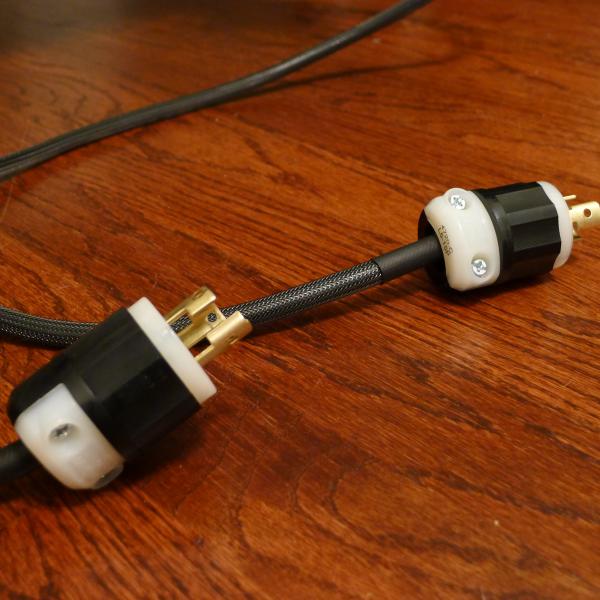
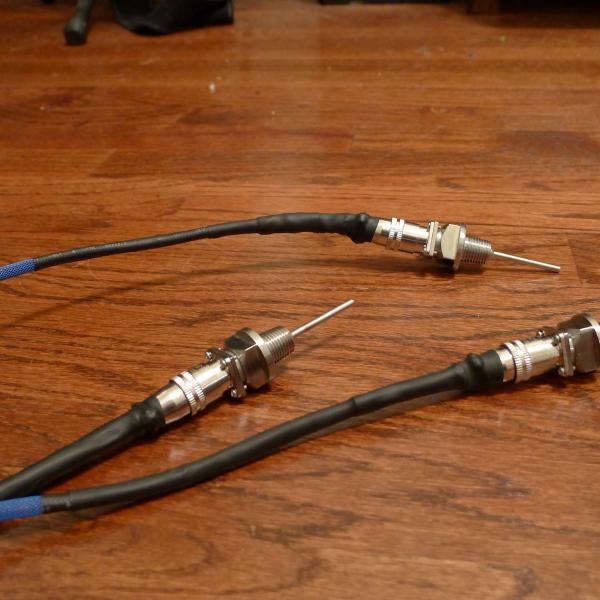
I have started to tackle the electrical side of the build. I made the temp probes a few days back (PITA...for me at least. Those connections are tiny!). Today I added another couple feet to the pump cords and replaced the plugs with NEMA L5-15 twist lock electrical plug, and wrapped the cords in techflex ( http://theelectricbrewery.com/pumps?page=3). I also rotated the heads of the pumps. I was hoping to get started on the control panel today, but my packages never showed up. Once the switches and what not start to show up I will start the control panel.

L1000158.jpg


L1000159.jpg


L1000160.jpg


L1000157.jpg
 
Does anyone have any recommendations for the burner connections? I looked online for a solution but came up empty handed. If I found a 3/8 Flared female to 1/2" flared male I could get rid of all of those ridiculous fittings...I am not apposed to getting rid of the yellow flex line either.
 
To the OP: Great build and I don't mean to thread jack but I'm a bit concerned about carlisle bobs comment and my own stand.

Hi

When you do the supports for the pots, make sure to leave enough vertical space to allow exhaust gas flow.

Bob

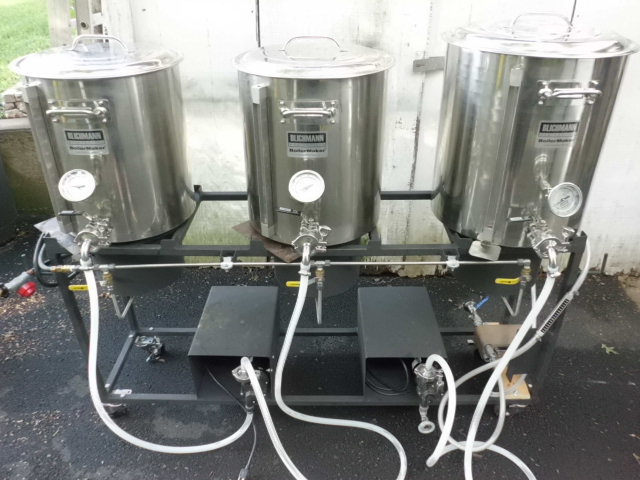
Any idea what could happen if there isn't enough vertical space? My stand was built to support my current kettle sizes and larger kettle sizes in case I upgrade in the future. The corner posts are designed to accomodate larger kettles that I don't have at this time. If I did have larger kettles, those corner posts would give me vertical space. Currently my kettles sit flat on my stand and while the HLT and MLT are not quite big enough to cover the entire area, the BK is pretty close. Should I worry? I'll post some pics.......

P.S. I know I need to add 3 piece ball valves to the flow out side of my pumps and am in the process of doing so :)

Single Tier Brewing Stand 015.JPG


Single Tier Brewing Stand 003.JPG
 
As long as your burners are not being smothered, then you should be fine ( somebody correct me if I am wrong). The stand looks great!
 
Does anyone have any recommendations for the burner connections? I looked online for a solution but came up empty handed. If I found a 3/8 Flared female to 1/2" flared male I could get rid of all of those ridiculous fittings...I am not apposed to getting rid of the yellow flex line either.

Once you have your burner height locked down where you want to keep it, just use some 1/2"OD soft copper and the appropriate flare nuts. You'll need a flare tool also, but those are relatively cheap. looks much cleaner than the flex line. The only downside though is that once you do it, it makes adjusting your burner height more work.
 
To the OP: Great build and I don't mean to thread jack but I'm a bit concerned about carlisle bobs comment and my own stand.


Any idea what could happen if there isn't enough vertical space? My stand was built to support my current kettle sizes and larger kettle sizes in case I upgrade in the future. The corner posts are designed to accomodate larger kettles that I don't have at this time. If I did have larger kettles, those corner posts would give me vertical space. Currently my kettles sit flat on my stand and while the HLT and MLT are not quite big enough to cover the entire area, the BK is pretty close. Should I worry? I'll post some pics.......

P.S. I know I need to add 3 piece ball valves to the flow out side of my pumps and am in the process of doing so :)

Hi

You don't want to have a "buffer" of dead air between the bottom of the pot and the burner. The burners run quite a bit of air, so you need some room for it to exhaust. Watch the air currents when the burner is on high. It should be pretty apparent where stuff is going.

Bob

Bob
 
Hi

You don't want to have a "buffer" of dead air between the bottom of the pot and the burner. The burners run quite a bit of air, so you need some room for it to exhaust. Watch the air currents when the burner is on high. It should be pretty apparent where stuff is going.

Bob

Bob

Thanks Bob. The problem is that (with my 20 gallon kettle) I can't even see the flame with the kettle on the stand. What I was already thinking of doing (to make lighting the burner easier) is drilling one or two 1/2" holes in the wind shield. Hopefully these holes would allow me to light the burner from the side instead of the bottom, see the flame, and allow for some exhaust. Do you think that would help?
 
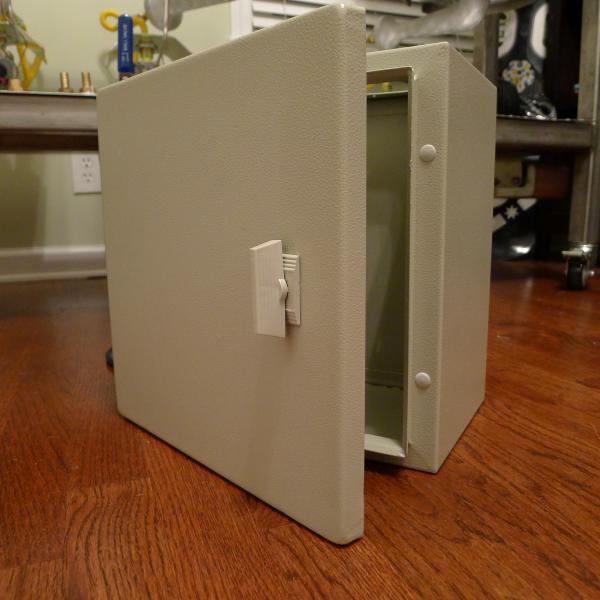
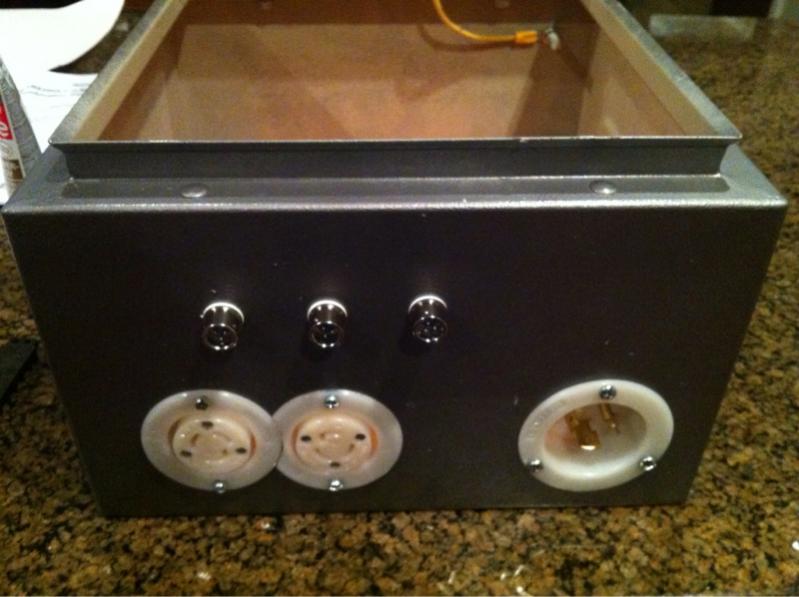
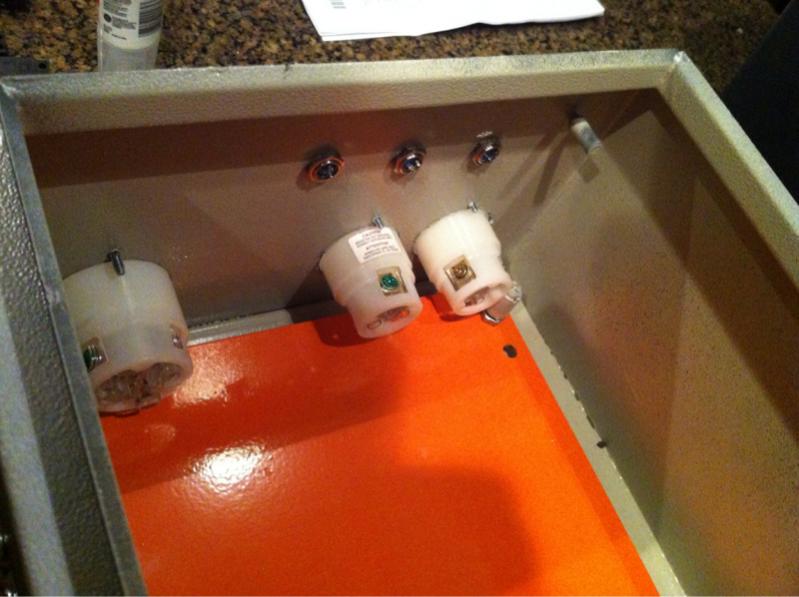
Finally got the control panel started! The wiring is little intimidating, but hopefully I can get started in the next couple days. Does anyone by chance have a wiring diagram for a similar setup? I can't seem to find one..

image-4154935568.jpg


image-126558122.jpg


image-1411275555.jpg


image-561465185.jpg
 
as far as the burner to pot height goes, you need some room for the exhaust to go but you will be able to tell pretty quick if your burner is starving for air. with the pot in place and ready to fire, your burner should be pretty much the same as when your pot is removed (the look of the flame) I had to add some space under my kegs to let it breath a little more, lowering my burner didn't seem to work, I am guessing it was exhausting the gasses that was the issue. It's not all that hard to dial in, if it's a problem you will know, it will be one of those "somethings not right" thoughts when you fire it up.
 
as far as the burner to pot height goes, you need some room for the exhaust to go but you will be able to tell pretty quick if your burner is starving for air. with the pot in place and ready to fire, your burner should be pretty much the same as when your pot is removed (the look of the flame) I had to add some space under my kegs to let it breath a little more, lowering my burner didn't seem to work, I am guessing it was exhausting the gasses that was the issue. It's not all that hard to dial in, if it's a problem you will know, it will be one of those "somethings not right" thoughts when you fire it up.

Thanks. My first batch on the system didn't seem to have any problems. Boil kettle got everything up to a boil very quickly and with the ball valve for the gas opened ever so slightly. I'll have to wait until I taste the final product to make sure the burners aren't too high / risk scorching the wort and creating maillard reactions. If I don't need to drill holes in the windscreens, I'd rather not as they will do a better job blocking the wind without them. The flame looks fine without the kettle on. Burns a nice blue color as its getting the right amount of oxygen from the air intake. I would assume that if the gas really can't exhaust upward, it would exhaust downward, no?
 
Thanks. My first batch on the system didn't seem to have any problems. Boil kettle got everything up to a boil very quickly and with the ball valve for the gas opened ever so slightly. I'll have to wait until I taste the final product to make sure the burners aren't too high / risk scorching the wort and creating maillard reactions. If I don't need to drill holes in the windscreens, I'd rather not as they will do a better job blocking the wind without them. The flame looks fine without the kettle on. Burns a nice blue color as its getting the right amount of oxygen from the air intake. I would assume that if the gas really can't exhaust upward, it would exhaust downward, no?
If there isn't sufficient exhaust space, then the burners just won't run efficiently. On your stand there is a gap between the top of the heatshield and the frame, that is where the exhaust is venting. There may be plenty of space already, but it is more likely to affect how much propane you use, not the taste of the final product.
 
If there isn't sufficient exhaust space, then the burners just won't run efficiently. On your stand there is a gap between the top of the heatshield and the frame, that is where the exhaust is venting. There may be plenty of space already, but it is more likely to affect how much propane you use, not the taste of the final product.

Makes sense. I brewed my second batch on the system this weekend and also ran a test which made me realize I'm definitely having exhaust problems. When I started my batch, I split my strike water between my HLT and my BK then heated up both. The HLT got to 180F in the same time the BK got to only 150F. I also went through almost an entire propane tank in 2 batches which is twice as much propane as I used to use on my old setup. Looks like I'll either have to drill some 1/2" holes in the windscreen for exhaust / visibility / ease of lighting, or I'll have to find some way to modify the stand and boost the kettles up.
 
This is my solution to the exhaust gas problem, I just welded on some 1/2" barstock to provide some space and lift the kettle up some. But....my stand is still in progress and I have yet to do a test fire with kettles, so take my advice with a grain of salt. This seems to have worked for others though

ForumRunner_20120806_203803.jpg


ForumRunner_20120806_203851.jpg
 
Where did you buy your switches? Also could you run through the functionality of all the items on your control panel? Just curious. Great build!!!
 
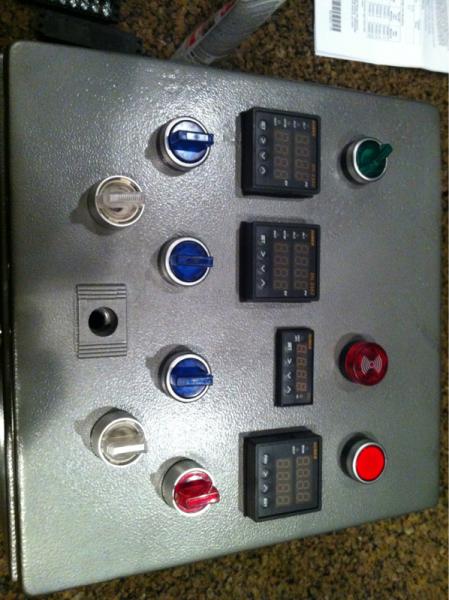
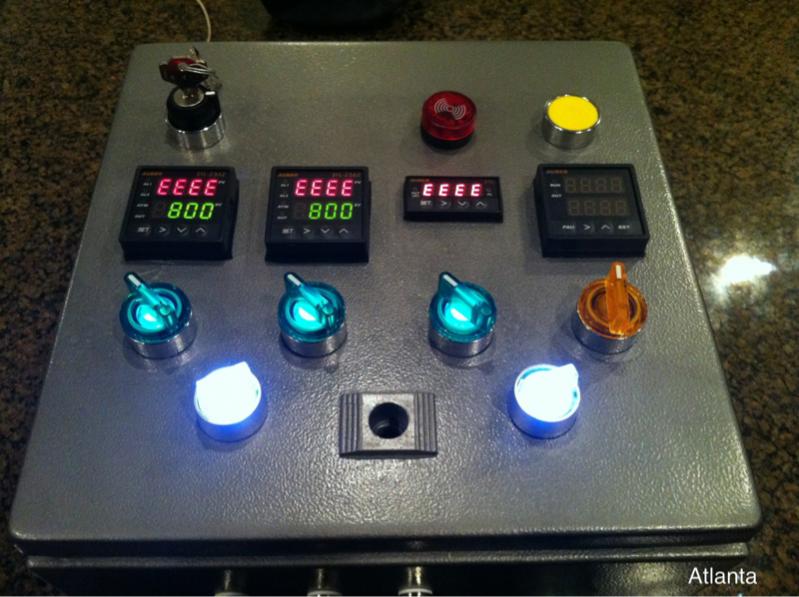
The control panel is coming along nicely. I had to make a few last minute switch changes, but everything should be good now.

image-240814544.jpg
 
Where did you buy your switches? Also could you run through the functionality of all the items on your control panel? Just curious. Great build!!!

Originally all of the switches were purchased from pioneer breaker. I made a few mistakes on switch power ratings and selector choices, so I had to change a few out. I purchased the new switches from Automation Direct. It just happens that Automation Direct's headquarters is about 45min from me. I do have to say that I like the Automation Direct switches better. They are much more user friendly.

The key switch is a 2 way maintained selector controlling the main power
There is a PID for the Hot Liquor Tank, Mash Tun, and Boil Kettle
At the far right is a timer which is hooked up to an alarm, reset, and on/off switch
The green switches are 3 way maintained selector switches connected to the PIDs/Gas Valves (hand.off.auto)
The bottom white switches are 2 way maintained selector switches (on/off) controlling the two chugger pumps

At the bottom of the control panel is all of the power and rtd connections.
 
Back
Top