My simple two receptacle all grain build

Homebrew Talk - Beer, Wine, Mead, & Cider Brewing Discussion Forum

Help Support Homebrew Talk - Beer, Wine, Mead, & Cider Brewing Discussion Forum:

This site may earn a commission from merchant affiliate links, including eBay, Amazon, and others.
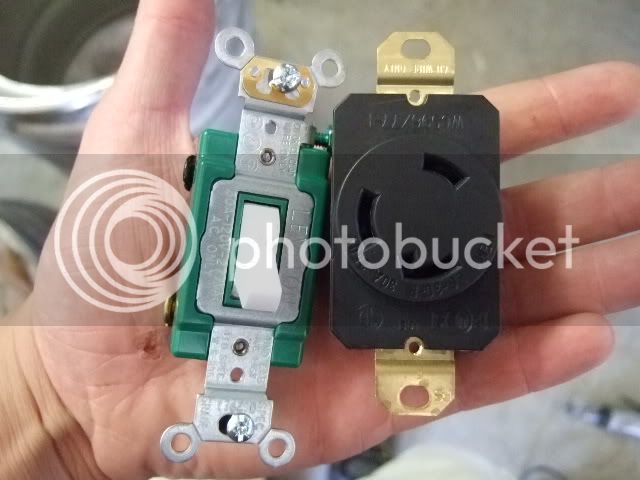
Its standard probably similar if not the same to yours. Im not too concerned at the moment because I only plan on doing 5 gal batches for the foreseeable future. If I were doing 10 gallon batches I would have to give beer away all the time to justify brewing as often as I like. Im not too concerned about boiling over. Also my element is on the far side from were I work with the system going and the keg has a separate ground and is gfci protected. I see how that could be an issue and didn't really think about the water tight factor so I might try to find some way to seal it up. Im glad I did it this way as I originally didn't have a plug on the end so it was hard wired to the box and I just changed the entire cord since I had like 4 of those laying around.

Pol do you think you could walk me through setting up the PID?

FWIW, I only do 5 gallon batches in my keggle, and I have boiled it over several times. Be careful with an element that is not water tight on the connections.

As for the PID, you said that you are using it in auto tune? For the mash? See, I only use my PID for boiling and therefore run it in manual mode for the boil. I have no experience using it in auto tune.

As for hops plugging the drain.... I have some pics in my gallery, I use those little SS scrubby pads that you can get at the store. They are like $1 for three in a package. I take one, tear it in half, and place it over my dip tube in my kettle. This way I can drain EVERYTHING from my kettle and still leave most of the gunk behind.

Do you have the SYL 2352 PID from Auber?
 
Ill look sealing it up, maybe some rtv on all the seams of the housing.

The only reason I used it in auto was because I couldnt figure out how to change the am setting from 2 to 1 or 0 so both auto and manual mode can be used. I also couldnt figure out the autotune function to let the pid figure out your set up. I do have the Auber 2352
 
Doing an ESB this weekend and bottling the Wet Russian Pale and Ruination IPA, wish me luck. I still cant get the right settings to run the PID in manual so if anyone can help me out that would be very helpfull for saturday.

Hopefully I can get some pics this time.
 
Doing an ESB this weekend and bottling the Wet Russian Pale and Ruination IPA, wish me luck. I still cant get the right settings to run the PID in manual so if anyone can help me out that would be very helpfull for saturday.

Hopefully I can get some pics this time.

What problem are you having... I can help you there.
 
Currently its still set as it came and will only do auto mode. The instructions say the factory setting is AM=2 and needs to be AM=1 or 0 in order to be able to switch between Manual and auto. How do you change this? Iv pushed every button in every order and have never seen AM settings?


Second how important is it to autotune the PID to the system? I couldnt figure out how to get it to do that either

Do you have a manual with it? That is what I am going to look at in order to help you, since that is how I set mine up.

If you are only using manual mode, there is no reason to autotune. Let me get right back to ya.
 
I would like to be able to switch between the 2 so I can use it in auto tune to heat strike and sparge water but then switch it to manual for the boil. I looked through the manual but it tells you what needs to be changed to achieve this, not how to do it.

Thanks Pol
 
I would like to be able to switch between the 2 so I can use it in auto tune to heat strike and sparge water but then switch it to manual for the boil. I looked through the manual but it tells you what needs to be changed to achieve this, not how to do it.

Thanks Pol

I am going to give you all of my parameters.... one minute

Push and HOLD the set button until ALM 1 shows up on the upper window...

After all of that is set... use the A/M button to switch between AUTO and MANUAL mode

Personally when I want the PID to heat to a certian temp. I place it in AUTO mode, and use the arrow keys to set my temp in t SV window and I let it do its thing. I have had no issues with it and I have done nothing for auto tuning etc... I do this while I sparge, to keep my kettle at 180F so that I can reach a boil quicker.

ALM1 = who cares this only closes the relay
ALM2 = who cares this only closes the relay
HY-1 = 9999
HY-2 = 9999
HY = 0.0
At = 3 (this needs to be 1 or 2 to start auto tuning, automatically reverts to 3 after tuning is complete. SET THIS TO 2 and it will start to Auto tune after 10 seconds, after 2-3 times on and off action the microprocessor will analyze the period, amplitude, waveform and the oscilation generated by the ON-OFF control and calculate the optimal control parameter value. It will perform accurate artificial intelligence control after AUTOTUNING)
I = 0
P = 0
d = 0
t = 1
Sn = 0
dP = 0
P-SL = -100
P-SH = 2500
Pb = 0.0
oP-A = 0
ouTL = 0
ouTH = 100
AL-P = 17
Cool = 10
Addr = 1
Baud = 9600
A-M = 1
File = 0
Lock = 808
EP 1-8 = NONE
 
Awesome, It will be tomorrow before I can test that out so I will let you know how it goes.

Huge help Pol Thanks
 
Awesome, It will be tomorrow before I can test that out so I will let you know how it goes.

Huge help Pol Thanks

Be sure to read my last minute edits... to the At value. This is your AUTOTUNE... it is easy. When you are ready to go, set this to "2" and it will autotune as I explained.
 
Im about to take off for my parents place for the weekend so It will be later this evening before I get a chance to mess with it. Ill keep you posted
 
Looks like it worked, I think my biggest problem was the Ms and Ts dont look like Ms and Ts lol. I went through all those settings before but didnt recognize AM or AT. The only question I have now is which is Auto and which is manual? When the A-M light is on or off? I figured the pv would change to a value between 0-100 when in manual but It displays whatever it was on all the time, ie 196
 
Looks like it worked, I think my biggest problem was the Ms and Ts dont look like Ms and Ts lol. I went through all those settings before but didnt recognize AM or AT. The only question I have now is which is Auto and which is manual? When the A-M light is on or off? I figured the pv would change to a value between 0-100 when in manual but It displays whatever it was on all the time, ie 196

Well, the A and M dont look like A's and M's. IF you look at the manual where it shows different examples of screens, you will see. The M actually looks like an "n" or the St Louis Arch if I recall, I dont even think about it since I am accustomed to seeing it.

The A-M light tells you when it is commanding the SSR close the circuit... regardless of the AUTO or MANUAL mode. So if you set it to MANUAL (or try to) and set the SV (SET VALUE) at 50 (50%) then the light will cycle on and off (50% on and 50% off).

This being said, the PV (PRESENT VALUE) will ALWAYS be a temp. If you have it in manual mode though the SV (SET VALUE) will max out at 100 (100%)
 
Finally got some pics of everything completed well together I dont think anyone's set up is ever really complete.

Heres the stand and HLT/BK, the mlt goes on the bottom level
DSCF5644.jpg

DSCF5645.jpg


The stand is a lot nicer looking and at least feels more sanitary with the new paint and top I just got done sealing

DSCF5646.jpg


Heres the first runnings about to be taken. I need to get a few more buckets, as I have concluded you can never have too many dedicated buckets for brewing around.

DSCF5650.jpg


My makeshift brewing table, with my hop additions all measured out

DSCF5649.jpg


And the boil

DSCF5647.jpg


I would like to comment on the empty Sam Adams box, a very tasty beer.

Im personally a bit over SA, Iv never really been wowed by anything they have put out. Solid beer but I would rather have Deschutes, Redhook, New Belgium, or Widmer for the price.
 
I noticed you're only switching one leg of the 220v heater with the SSR. I didnt see any one else talk about it, but that is a code violation.
1) The heater is always energized, and so is the SSR. Now since you have a GFCI breaker you most likely wont get shocked, but that protection goes away if you ever plug it in somewhere else.
2) The SSR now has to switch the full load of 5.5kw @ 220v every time it cycles. which means it would have to have a minimum rating of 31.5 amps @220v. ( some devices rate their max amp at a lower then max voltage, like 40 amps@120v)

also, and this is totally just a pet peeve, on your schematic you list the AC as 110v "positives and negative" it should be L1, L2 and N.
 
I noticed you're only switching one leg of the 220v heater with the SSR. I didnt see any one else talk about it, but that is a code violation.

The whole thing is a code violation, probably... 240V in a big kettle of water open to the world...

Most people use a DPST switch on the 240V to kill both legs. The SSR just handles the cycling to reach/keep temperature - not for safety.

Edit: see that GC89 is using a DPST switch:

DSCF5624.jpg
 
The whole thing is a code violation, probably... 240V in a big kettle of water open to the world...

Most people use a DPST switch on the 240V to kill both legs. The SSR just handles the cycling to reach/keep temperature - not for safety.

Edit: see that GC89 is using a DPST switch:

Yes, there are some other code violations, but the SSR on only one leg is the biggest one safety wise. While the DPST and cord and plug can handle the load, they should be sized to a minimum of 125% of the load. since Motors and Heaters always have a higher current when starting.
 
I know about the code stuff, Im by no means an electrician but I have done my fair share of construction and wiring. I dont see breaking both legs with SSRs as any benefit because they would still be hot 50-100% of every second no matter what. My wire is #8 and the plug is good for 30A and my system is calculated to pull 23 amps total according to the true voltage at my box so I feel pretty good about it. Plus everything is pretty well grounded. I appreciate the criticism especially when it is in regards to safety and am always open to ways to improve it, so maybe you can elaborate so I better understand what the changes you suggest would improve. I know my schematic is far from well done lol, Im an auto guy first so its hot and ground in the drawing but I usually refer to everthing as leg1 and 2, neutral and ground. when 240 is in the mix
 
While the DPST and cord and plug can handle the load, they should be sized to a minimum of 125% of the load. since Motors and Heaters always have a higher current when starting.

Half of your statement is blatently not true. These heaters are resistive therefore there is no surge on turn-on.
 
I know about the code stuff, Im by no means an electrician but I have done my fair share of construction and wiring. I dont see breaking both legs with SSRs as any benefit because they would still be hot 50-100% of every second no matter what.

The SSR will always have one side that is connected to the incoming power, called the Line side. The problem is not that your SSR always is energized on one side, but that your heater is. When dealing with Multi-phase wiring you must ALWAYS switch all energized conductors supplying the load.

My other point was that the SSR is having to switch the entire load on one set of "contacts". Just make sure it is rated to handle the full Amperage and Voltage.

Edit: The NEC does not make any variance for "true Voltage" as measured at you house. You have to make your size calculation based Name plate, or NEC tables. So a 5.5kw heater with a name plate rating of say 25amps @ 220volts, has to be sized based on 25 amps. (your voltage has to be within 10% of name plate to be within code)
 
Half of your statement is blatently not true. These heaters are resistive therefore there is no surge on turn-on.

Yes i over generalized my statement. Resistive loads are almost always Static inrush( i have worked on Hot-wire applications that had large inrush). How ever, Resistive Heaters always run at Full Load, so NEC code still requires every thing rated for 125% of the load. I dont have the UL specs with me, but i do remember Heaters required the same %125 as motors, when sizing contacts and disconects.
 
FWIW, I have a switch to turn off all current to my SSR and to my element. Though, I am pretty sure basically everything else I have built is a code violation. My Barley Crusher doenst have adequate shielding from the rotating shaft etc... It is a wonder I have not lost an arm.
 
The SSR will always have one side that is connected to the incoming power, called the Line side. The problem is not that your SSR always is energized on one side, but that your heater is. When dealing with Multi-phase wiring you must ALWAYS switch all energized conductors supplying the load.

My other point was that the SSR is having to switch the entire load on one set of "contacts". Just make sure it is rated to handle the full Amperage and Voltage.

Edit: The NEC does not make any variance for "true Voltage" as measured at you house. You have to make your size calculation based Name plate, or NEC tables. So a 5.5kw heater with a name plate rating of say 25amps @ 220volts, has to be sized based on 25 amps. (your voltage has to be within 10% of name plate to be within code)

The way I looked at it there will be constant hot to the in side of the SSR (or SSRs if both legs had one) no matter what unless the dpst is off. Also each leg will pull the full amperage of 25 but only half the voltage so the SSR is switching 25A but at 110~("119")V or so was my understanding??? and the SSR is rated for 40A so it is actually the strong point in my system.
 
FWIW, I have a switch to turn off all current to my SSR and to my element. Though, I am pretty sure basically everything else I have built is a code violation. My Barley Crusher doenst have adequate shielding from the rotating shaft etc... It is a wonder I have not lost an arm.

My bottling setup is surely an OSHA violation. I've never once worn a hair net when brewing. Not to mention all the child labor I employ.

All kidding aside - brewing with electric elements can kill you. Be smart about it. Lots of us just use DPST switches.
 
Holy chit! You mean I was doing something wrong when I was standing in a bucket of water while wiring up the 220 volt portion of my rig with the power on? Nahhhhh........
 
Holy chit! You mean I was doing something wrong when I was standing in a bucket of water while wiring up the 220 volt portion of my rig with the power on? Nahhhhh........
:eek: I think I can clean out my keyboard and use it again but the iced tea through the nose was really bad. Thanks for the laugh.
 
All I wanted to add to this is;
Now that I have all (I think) the parts in my posession. This all makes a whole lot more sense.
Damn near easy even. So for anyone out there still a little fuzzy on this - just go buy the parts.

-OCD
 
All I wanted to add to this is;
Now that I have all (I think) the parts in my posession. This all makes a whole lot more sense.
Damn near easy even. So for anyone out there still a little fuzzy on this - just go buy the parts.

-OCD

You are right OCD, once you have the parts in front of you, wiring this stuff isnt hard at all. Even a caveman could do it.
 
I noticed you're only switching one leg of the 220v heater with the SSR. I didnt see any one else talk about it, but that is a code violation.
1) The heater is always energized, and so is the SSR. Now since you have a GFCI breaker you most likely wont get shocked, but that protection goes away if you ever plug it in somewhere else.
2) The SSR now has to switch the full load of 5.5kw @ 220v every time it cycles. which means it would have to have a minimum rating of 31.5 amps @220v. ( some devices rate their max amp at a lower then max voltage, like 40 amps@120v)

also, and this is totally just a pet peeve, on your schematic you list the AC as 110v "positives and negative" it should be L1, L2 and N.

I've mentioned this bad wiring method many times and it has been designed and built that way by many members. With this speaking up I have the Pol all pissed off at me which I don't give a rats azz about on another thread from yesterday. Yeah your safe should you be hung up being shocked and can even think about reaching for the DPST switch under these conditions?
Has anyone seen a person hung up and able to write a letter or think under thes conditions? Like being nailed by a Stun Gun your not able to think properly to do anything not alone reach over and flip the DPST switch. At the least for safety is run twin SSR's to the element or better yet a SSRD and have two Panic buttons on the brewing system that will drop out the relay contactors coil interlock to fully shut doen the 240 volts feeding your brewery. To rely on the GFI to save your butt is also not a wise idea as they can and do fail at tripping.
lazybean; your speaking in a wiremans terms L1, L2 & N, this is not what homebrewers are trained or understand as they are not journeymen wiremen or had the proper training or gone thru an apprentiship program not alone 20 or 30 years in the electrical trade. This is proven many times over in the wiring methods posted on this forum. Take a WP NEMA 3 box and chop it to add receptacles sticking thru, if smart add silicone and all's well again, yeah right.
 
We only use wood and fiberglass ladders in the electrical trade, this thru my apprenticeship and union standards of my local and many others. Now scabby and DIY people use aluminum ladders and those 200# maximum not 350# rated ladders.
 
What is wrong with wiring a light socket from an aluminum ladder in a pool? As long as you lick your fingers before testing the circuit, it is totally safe. Saliva is an insulator.
 
I'm sure he's put the proper safety considerations into place. I bet he's wearing a rubber, so his little friend doesn't become the path of least resistance. :D

-OCD
 
:ban: Nice

Hey pol how far do you usually dial your PID back to maintain a very slow rolling boil? Seems Like I always have to go farther than I think
 
:ban: Nice

Hey pol how far do you usually dial your PID back to maintain a very slow rolling boil? Seems Like I always have to go farther than I think

15.5 gallon sankey, 50-80F ambient temp., 7-8 gallons volume, 60% for a slow rolling boil. My regular vigorous boil is done at 70%.
 
Back
Top