bbentley's Keezer Build...

Homebrew Talk - Beer, Wine, Mead, & Cider Brewing Discussion Forum

Help Support Homebrew Talk - Beer, Wine, Mead, & Cider Brewing Discussion Forum:

This site may earn a commission from merchant affiliate links, including eBay, Amazon, and others.

bbentley40

Well-Known Member
Joined
Oct 14, 2008
Messages
106
Reaction score
5
Location
Madison
Ok guys.. I have lurked for a long time and only had a hand full of posts on the boards... but I figured this is a thread that I need to get going. I had thought about waiting to the end of my build and doing one big thread, but I just couldnt wait to share.

First, to give credit where it is due... Thanks to everyone who posts their ideas and pictures on this forum. I researched a lot, stole ideas from many (well.. I didnt really steal them since I am here to give them all back to the community with my own twist.. lol) and in the end came up with my design. I do have to give many thanks to Jester and Hoppopotomus because I probably used their threads the most to get ideas. And with that on to the pictures..

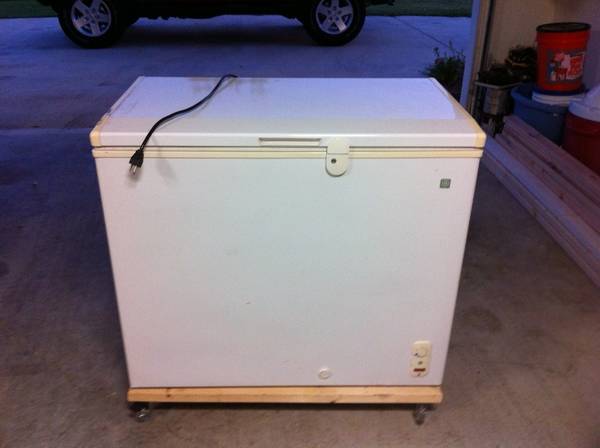
This is what I had to start with, its a 7.0cu ft GE that I got from Sams years ago. It is one of the few things I asked for in my divorce. My ex thought I was crazy, but I have been planning this for a LONG time.. lol. I had built a base for it already, thinking I would add to that for my Keezer build, but I scrapped it when I came up with my current idea. Oh and just another thing.. I am NOT a master craftsman by any stretch of the imagination (as you will be able to tell I am sure). I took 1 year of ag in high school because they made me.. the most woodworking experience I have is basically building a bird house.. lol.
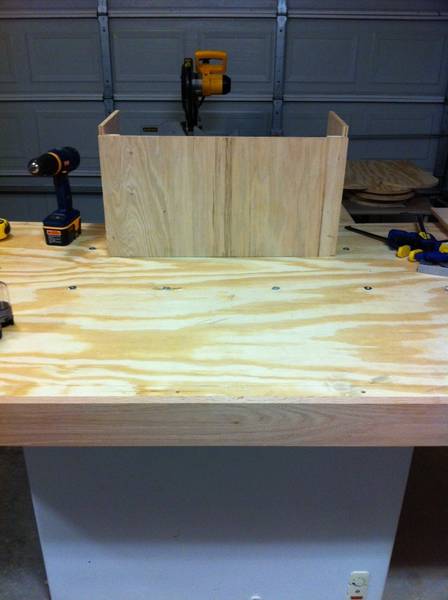
Beginning.jpg


The new base:
Base.jpg


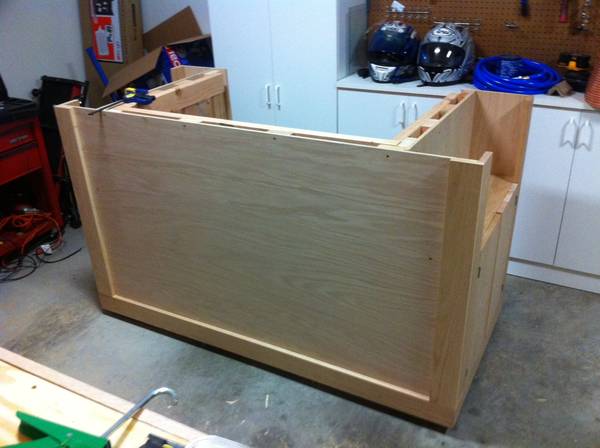
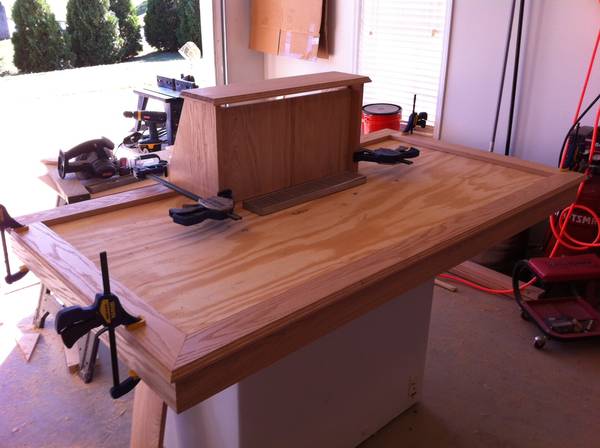
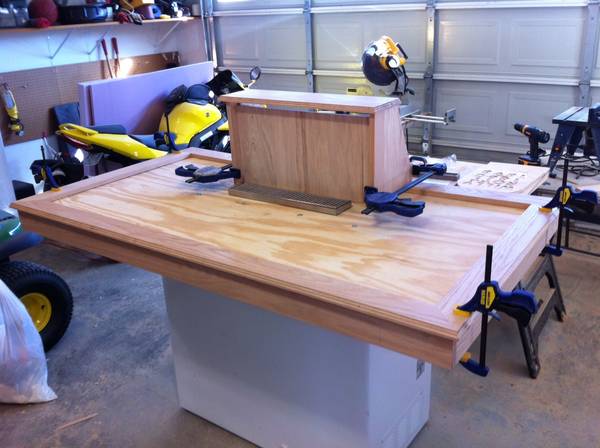
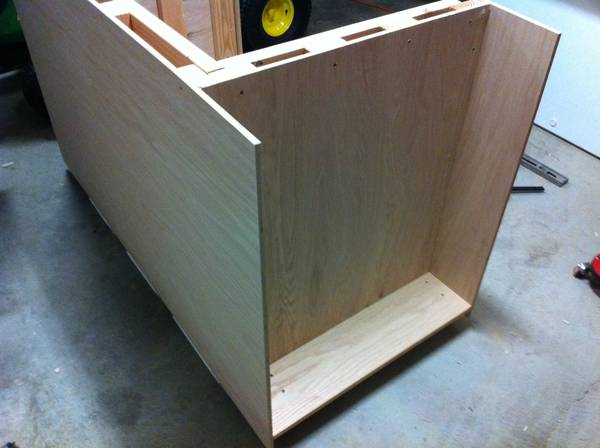
Building up the walls:
Base2Sides.jpg


BaseFront.jpg


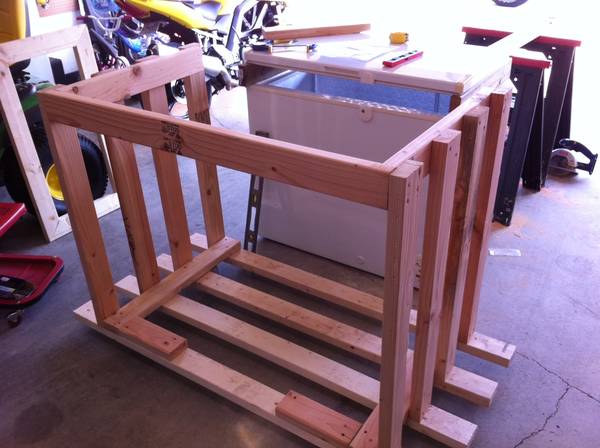
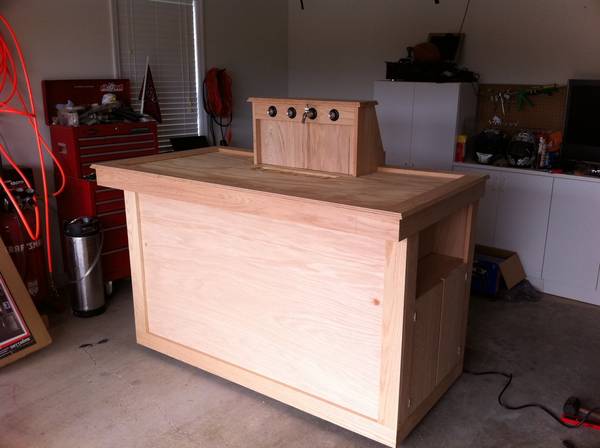
And now test fitting the freezer (you cant see it in this picture, but I have a couple of 2x4s in place of what will eventually be the collar):
BaseFront2.jpg


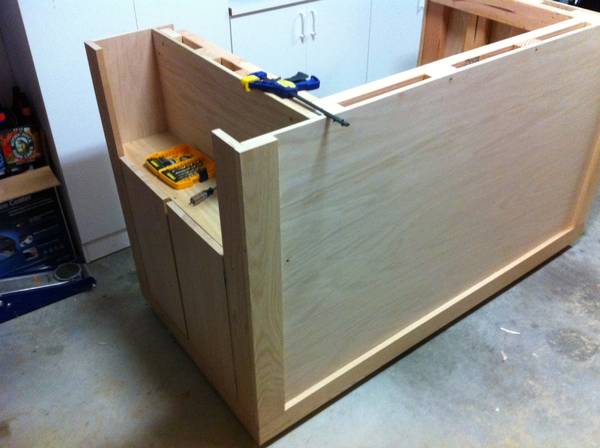
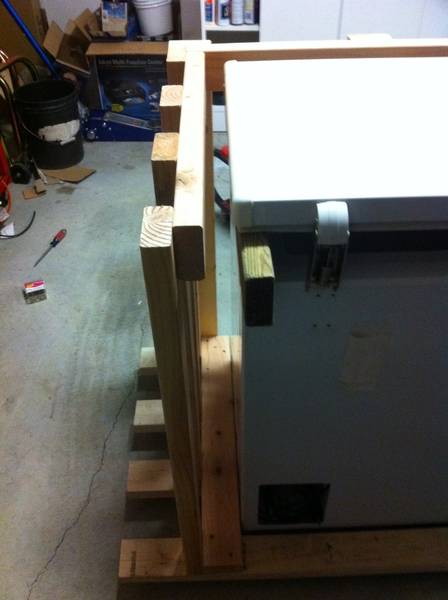
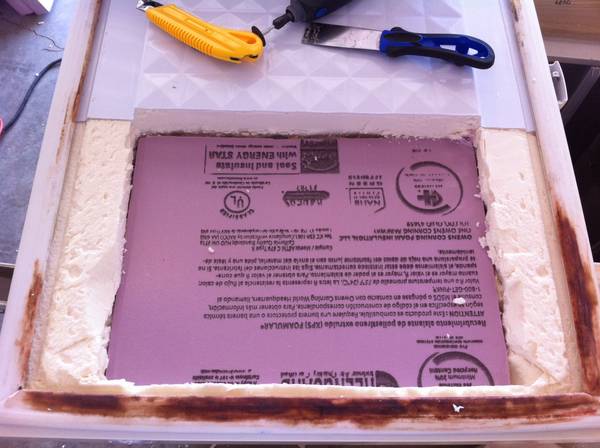
Now I know I said I am not master craftsman, but dont worry.. I didnt completely mismeasure the width of the base. You will see.

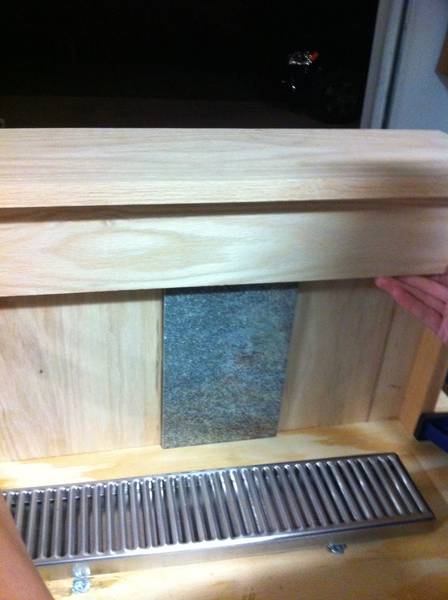
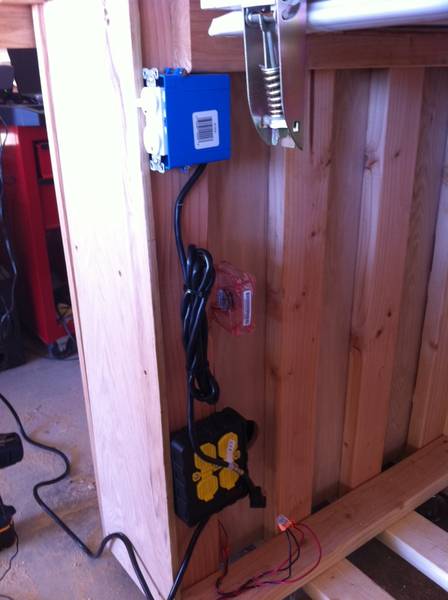
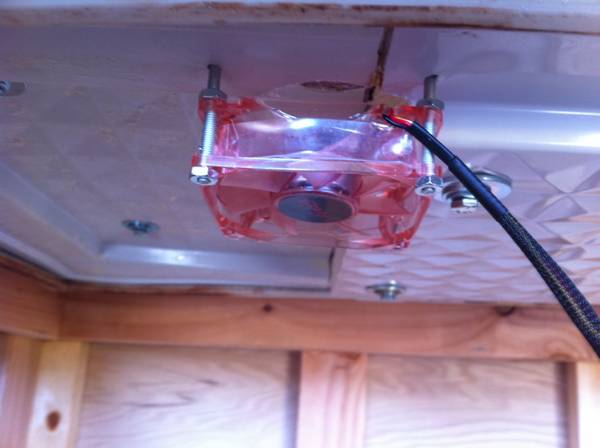
Here is a shot of the gap between the frame and the freezer. I plan to add a computer fan to help blow heat from the compressor out the back of the keezer.
SideGap.jpg


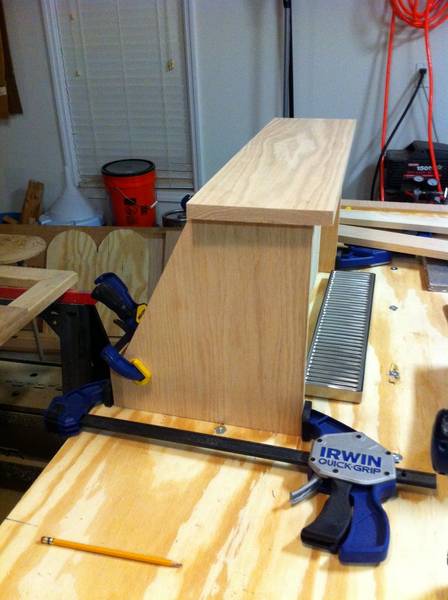
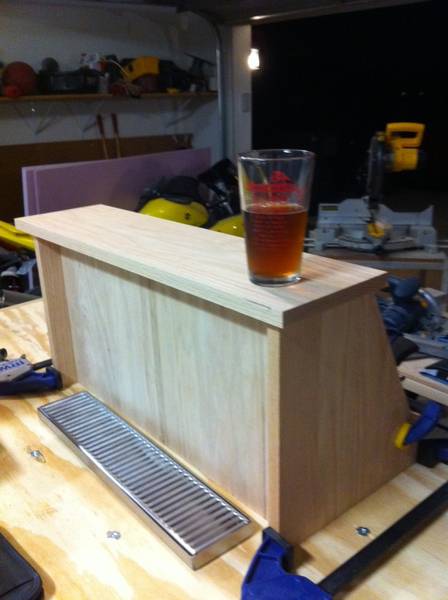
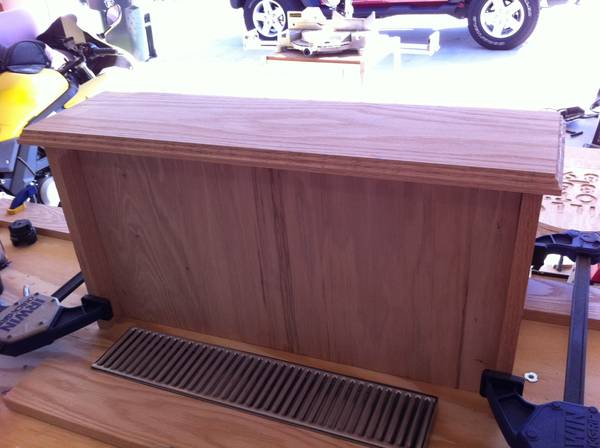
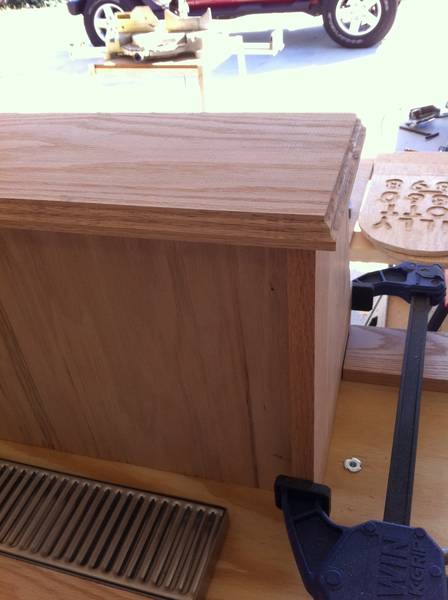
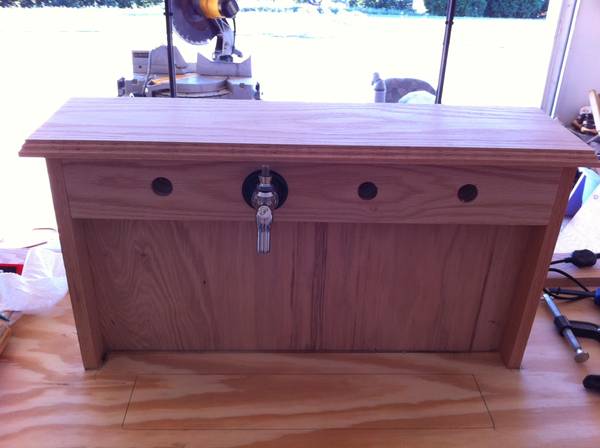
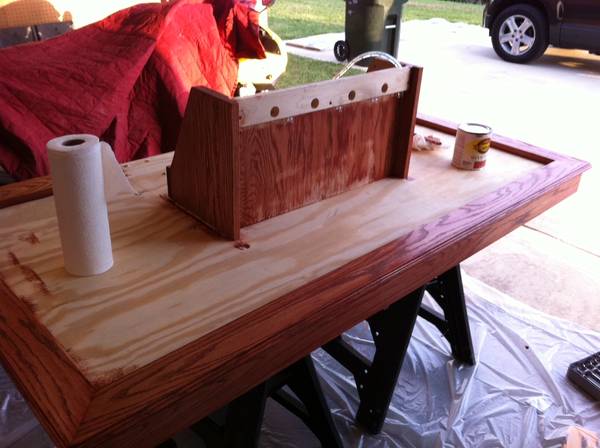
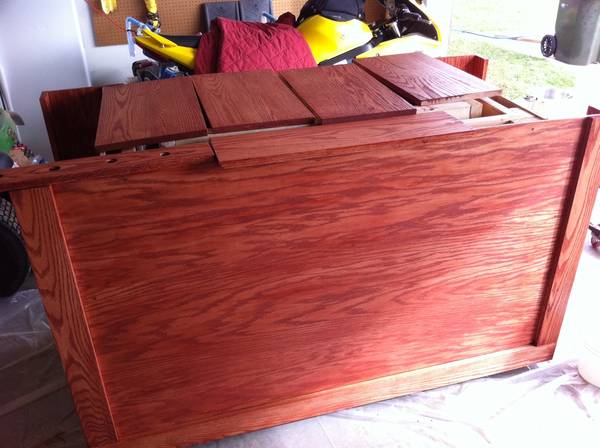
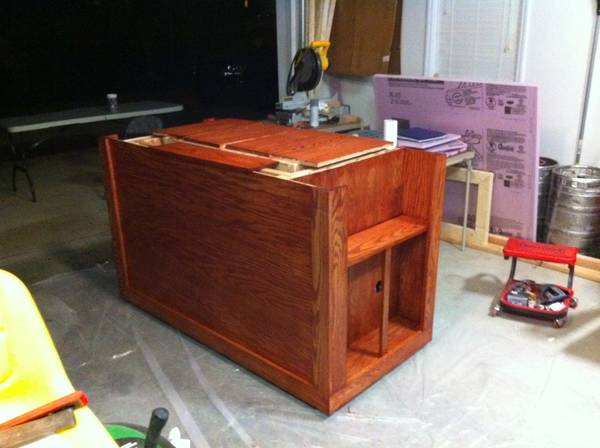
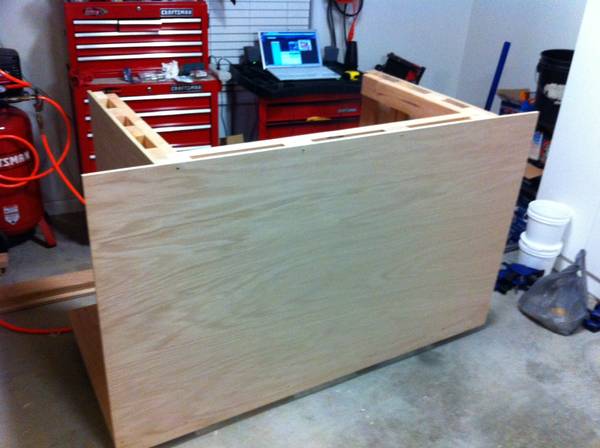
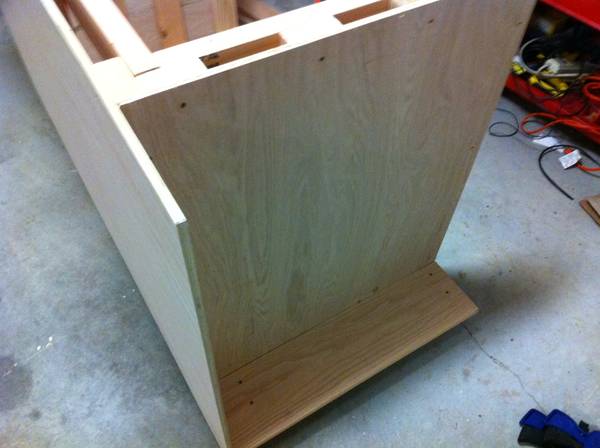
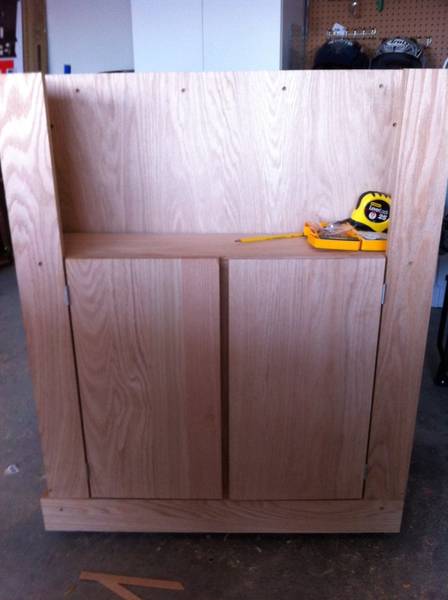
I decided to go with Red Oak for the skin of my project. I just think it looks really good when it is stained. Here are the first boards going on:
Side2.jpg


Front11.jpg


FrontSide.jpg


FrontSide2.jpg
 
So as you can see by now, I am going to be adding a nice little place to put my CO2 tank outside of the freezer. Along with the electronics and such.

Started putting some of the trim work on and you can see the cabinet taking shape:
Side4.jpg


Side42.jpg


SideDoors.jpg


SideDoors2.jpg


Both sides will have a cabinet like this. Right now I have only finished up this side. I still have to add the doors to the other side.

Now on to the freezer.

I had originally thought about just doing a 2x4 collar so I would have a place to send my CO2 line in and mount my CO2 distro block (at least until Christmas rolls around and I can ask for secondary regulators). After doing thinking I decided to go with a 2x6 collar and make this a 4 keg keezer instead of just 3. Whats that you say? You cannot get 4 kegs into a Sams Club version of the GE 7.0cu ft freezer with a 6in collar? Well, that is not completely correct. You just have to be crazy enough to try it.

Armed with a dremel, a cutting blade and a scraper I did just that.

First the collar..
Collar.jpg


Then while that glue was drying I went to cutting (maybe it was the fumes from the liquid nails.. lol)

Lid.jpg


A little test fit (this is with a Pepsi style ball lock keg.. yes the taller ones):
Lid2.jpg


Now to start cleaning up that mess a little I scraped all the foam out of the top and cut a piece of 3/4" foam to go back in.
Lid3.jpg


That is all the pictures I have right now.. but there are plenty more to come as there is still plenty of work to do. I have not even started to tackle the top of the keezer yet. Hopefully this will all continue to go smoothly and I will meet my goal of having it finished up and running by the time I host my Halloween party in just over a month.
 
looks great so far, where is this creation going to live? garage or kitchen?

Thanks! It will live in my dining room. Though I am going to have to do some rearranging because the top will be ~36"x66" give or take some trim. But hey its my house and if I want my dining room table to be halfway into the foyer so be it right? lol
 
hey its my house and if I want my dining room table to be halfway into the foyer so be it

The luxuries of a divorce I suppose.

Nice build so far none the less! I'm planning to pick up a 15 cu ft freezer tomorrow night ($50!) so as resources become available (time and money) I'll have to build my keezer. I'll be looking forward to seeing your finished product.
 
Nice job so far!!! I love the idea of the CO2 outside of the keezer and the little side cabinets are great! My GE 7 cu.ft. holds 4 corneys and a 5lb CO2 tank on the floor without a collar. It's a bit of a tight squeeze, but nothing has to be forced in. A collar would have certainly helped the cause, but it's working out fine how it is. Can't wait to see your build progress and am glad that my thread has helped you out along the way. Please do not hesitate to ask any questions that you may have....I'm happy to help in any way that I can. Keep up the great work! :mug:
 
Thanks everyone for the kind words. I was able to get in the garage for a few minutes last night, but I do not really have any pictures to show yet. I am hoping to get the trim around the top section done tonight and I will snap more pictures. After that it is basically the coffin, wiring and plumbing! :)
 
Few new pictures.. have not had a chance to make much progress because.. well life happens. I should have some more pictures up Friday though.

The base is basically done (except filling screw holes and staining).
Base3.jpg


Finished the cabinet on the left side..
Base4.jpg


Started on the top.. got some trim added and started to frame up the coffin.
TopCoffin1.jpg


Forgive my mess with the tools and stuff in the way.. I just got to that point and snapped a picture before I had to go in the house.
TopCoffin2.jpg
 
Ok, I know I said it would be tomorrow before I put up anymore pictures, but Santa made an early stop at my house this year and I just couldnt resist sharing.

There is only 1 shank in the picture because I already had the other 3, was a Chirstmas present from my SWMBO last year. I had only planned on doing 3 taps, but as you have already seen I am making it a 4 tap system now. In the bigger plastic bag are SS tailpiece and a bunch of swivel joints to attach everything. The keg is a coke keg converted to ball lock. Even though I have room for the pepsi keg with my modifications I only had 3 kegs. I figured if I have to buy one anyway I might as well go ahead and get the converted coke keg so there were no issues at all to worry with. I should make it out to the garage tonight to work on the coffin some more. We will see if that works out.

Santa.jpg
 
Ok guys.. as promised here are a few my picutres. I didnt get to do as much as I wanted, but I made great progress just because SWMBO and I went and picked out the tile for the top. The coffin is just held together by clamps right now, but hopefully I will find time to change that over the weekend. I am still waiting on my rope light to come in so that I can finish it out. Plus I have to create an access panel for the back.

Heres a shot of my lovely assistant holding things together to show the color of the tile we went with.
Coffin1.jpg


Wide shot without the tile and top board
Coffin2.jpg


Side
Coffin3.jpg


Enjoying a nice Pumpkin Ale homebrew as I finished up for the night
Coffin4.jpg
 
Thanks.. got it here:

http://www.barsupplies.com/stainless-steel-drip-tray-p-349.html

I am thinking about drilling a hole through it and down through the lid and running a hose down to a bucket so that I will be functional. But I have to come up with something that I can attach to it so that liquid doesnt seep through and rot the wood.

I plugged mine with a SS Lag bolt. Just cut the threads off put on the opening and siliconed it up. Everyone thinks its just a domed plug and that's if I point it out. Most don't even see it through the grate.
 
I plugged mine with a SS Lag bolt. Just cut the threads off put on the opening and siliconed it up. Everyone thinks its just a domed plug and that's if I point it out. Most don't even see it through the grate.

Yeah, that's more or less what I had in mind. I took off work early today and made more good progress.. Will try to post pics later tonight or tomorrow. :)
 
That is some nice work for someone who only has experience with birdhouses :p

Looking forward to more pics.
 
Ok.. here are the pictures from my work yesterday. This is my first time ever using a router.. so you will see some burning on a couple of pieces, but all and all I was pleased with the results. None of the boards have been glued down in these pics, I am going to work on that today.

CoffinTrim2.jpg


CoffinTrim.jpg


Trim.jpg


Trim3.jpg


Top4.jpg


Top3.jpg


Next up (hopefully today) I have to glue down those trim pieces, router the spot for the drip tray and cut holes for the plumbing. After that it will basically be tile, plumbing and stain for the most part. I am really hoping that this is a done deal in another week.
 
That is some nice work for someone who only has experience with birdhouses :p

Looking forward to more pics.

+1 Nice Job man. Looking forward to seeing the progress. We never got to see the lovely assistant btw (jk) :mug:

War Eagle!
 
Morning everyone.. hope you all had as good a weekend as I did! I had my little girl this weekend so I didnt get as much done in the garage as I wanted.. but I did make good progress.

My rope light came in.. so got to work on installing it.
RopeLight2.jpg


Used the router to make an escape hole for it
RopeLight.jpg


Here it is in action..
RopeLight3.jpg


After that I could drill the tap holes
Taps7.jpg


And a nice little teaser picture of it coming together some
Coffin5.jpg


I also went and picked up a sheet of backer board and started cutting it to fit. Used a skill saw to cut it.. that SUCKED! If you go this route find a way to secure it down well.. the vibrations will kill you and WEAR A MASK!

I am going to have a 1" gap on each side because my top is 2" wider than the board.. but I figure that will not be enough stress to cause any cracks.. at least I am hoping not!
Backer.jpg


Tonight I am going to try and drill the holes for the plumbing and start figuring out how I am going to space the tile out. I have no experience cutting tile so expect me to try to find pieces that mostly fit in smaller areas than trying to cut a bunch.
 
Just a small and quick word of advice for anyone trying to pick out tile and grout. If you go to Lowes or Home Depot and pick a tile you like it will tell you what grout they used with the sample. Before you buy the tile go make sure they have that grout in stock in a reasonable size! I bought my tile and now I am about to have to buy a 25lb bag of grout to do my 15sq ft.. lol. I could special order a smaller bag that will cost more after shipping than just buying a huge bag. I guess if I ever decide to tile my kitchen I can try to buy tile to match the grout I have. :)
 
Hey Bentley.....they make a carbide tipped scoring tool for the backerboard that you score it a few times with and then snap it like drywall. Cutting that stuff with a skill saw is murder on the blade and the particulate dust is not exactly healthy to breath. ;) The tool costs a few bucks and works with both standard cement board and the Hardi Backer board. I didn't run into the same troubles with the grout, because I also used the same travertine stone tile for the back splash in my bar. If you plan on doing any future tiling projects, bite the bullet and purchase a cheap wet saw at HD for around $80. Works like a dream and I was able to tile my entire home (4 baths, backsplash in kitchen, bar floor, etc., etc.) with one cheap wet saw. Just as long as it has a decent blade, your golden.

In response to your PM....I used a Love TSS2 temp. controller that has dual inputs and dual outputs. I have 2 temp. probes....one in the coffin and one in the keezer. Each channel controls a seprate outlet. One probe controls the temp. in the coffin, by powering the plugs that the fans plug into. The other probe controls the temp. in the keezer, by powering the plug that the compressor plugs into. The TSS2 was $73 and I love the fact that my coffin is controlled 100% independently of the keezer. Wasn't hard to wire at all and I can help you with programing if needed. Good luck. :mug:
 
I will remember that next time.. If there is a next time.. Lol. Started testing stain last night.. Not sure when I will get around to it though.
 
So here is a question for those of you that might know. About how may amps does a PC fan pull? I want to run 4 fans, 2 in the keezer and 2 to help pull warm air out from around the casing. I have a 12v 1.2amp power supply, but I am not sure if that can easily run 4 fans or if I need to put two on that one and two on another power supply.

EDIT: Nevermind.. I found the answer to my question. Found a screen shot that I can blow up of the fans I am getting. Says 12v 0.18A.. so 1.2A should be enough to run all of them. :)
 
Ok guys.. sorry I have not posted any updates but the progress as been a little slow lately. And what progress I have made has not been really picture worthy. So here we go...

Started doing the wiring.. this 4 plug box will be constant power, I have a power strip attached to my Ranco temp controller too. The fans in the freezer will be constant powered, fans on the outer case will only kick on with the compressor to pull warm air out of the shell.

The switch at the top will have my rope light plugged into it and allows me to flip the switch to turn it on. You can see one of the case fans in the middle.
Wiring6.jpg


I am not building in any kind of tubing to pull the air into the coffin right now. Going to see if a fan blowing in and one blowing out will push enough air through it to keep the temp where I want it. Here is the out fan.
Fan21.jpg


Here is the in fan.. you can also see where I made the part of the lid that I cut out look a little better by flipping the plastic I cut off over and putting it back in.
Fan1.jpg


Here is the case fan on the other side..
Wiring21.jpg


Here is the hole picture of the wiring..
Wiring31.jpg


Here is the fully assembled picture without stain. The spots on the front are wood filler. It had just been put in, not sanded yet. It looks much better now.
Unstained.jpg


Unstained2.jpg


And the staining begins!
Stain.jpg


Top, front and back of the coffin
Stain2.jpg


Tomorrow should be a great day off work.. going to stain the rest AND brew while things are drying. What else could you ask for.. working on my keezer while homebrewing! :mug:
 
Its a porcelain tile I pick up from HD. Think I posted a picture of one of the tiles.

You're right.....sorry, I went back to the 2nd page of your thread to take a peak. Very nice, should look great with the stain! I look at so many of these threads, that I forgot that you posted a pic. prior. Great work man, your almost there! :mug:
 
The stain is Cherry by Cabot. Had planned on using minwax Cherry (it's a little less red) but I think this color looks great. First coat is on the base and strike water is coming up to temp! :). Brewing a simple cream ale today, hoping it doesnt need any age time and can be kegged and ready to drink for my Halloween party on the 29th.
 
Ok.. been a long weekend and I am not just talking about the number of days I been off work. Here is the progress I made today.

First coat of stain on the base
StainedBase.jpg


Both coats on the top.. and added the backer board:
StainedTop.jpg


This is what I call a good day.. brewing homebrew while waiting on the stain to dry between coats:
GoodDay2.jpg


Tomorrow I am hoping to tile the top, but that is if I can get the pieces I need cut for the back splash. And finish staining the cabinet doors. After that it is basically just final assembly and clear coat.

Here is a shot of how the back splash will be laid out.. got to get some pieces cut, then we will try to actually glue them down. Have to thank my SWMBO for this.. she did all this herself.
StainedCoffin.jpg


Here is the top after the second coat.. you can see the hole in the cabinet that my gas line and stuff will go through.
StainedBase2.jpg
 
Back
Top