Brew Stand Build

Homebrew Talk - Beer, Wine, Mead, & Cider Brewing Discussion Forum

Help Support Homebrew Talk - Beer, Wine, Mead, & Cider Brewing Discussion Forum:

This site may earn a commission from merchant affiliate links, including eBay, Amazon, and others.

Ohio-Ed

Supporting Member
HBT Supporter
Joined
Nov 18, 2008
Messages
2,058
Reaction score
25
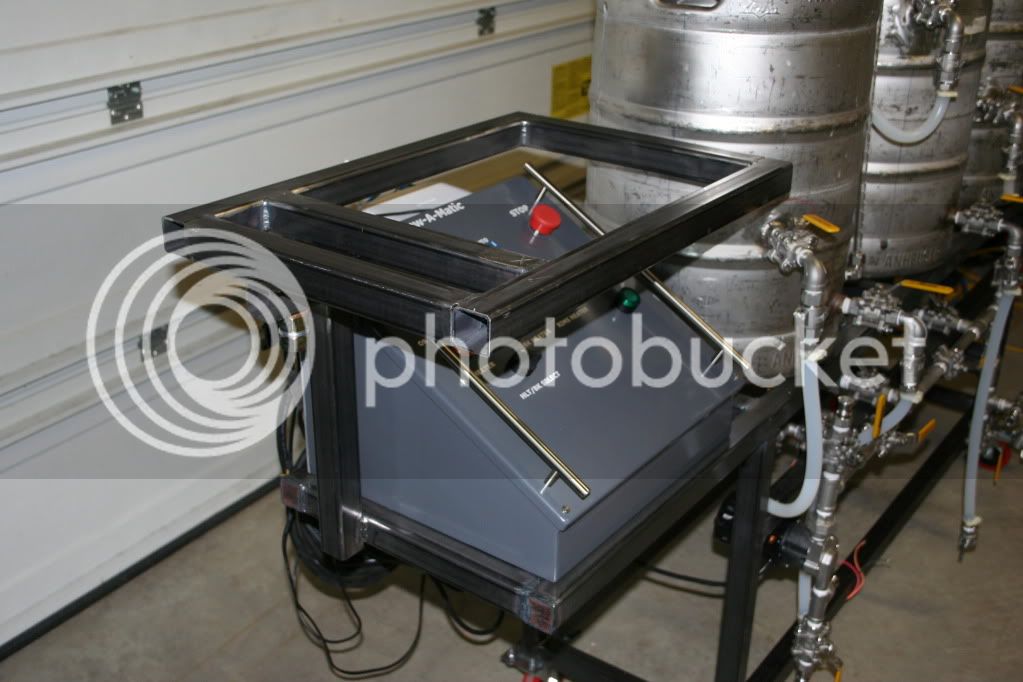
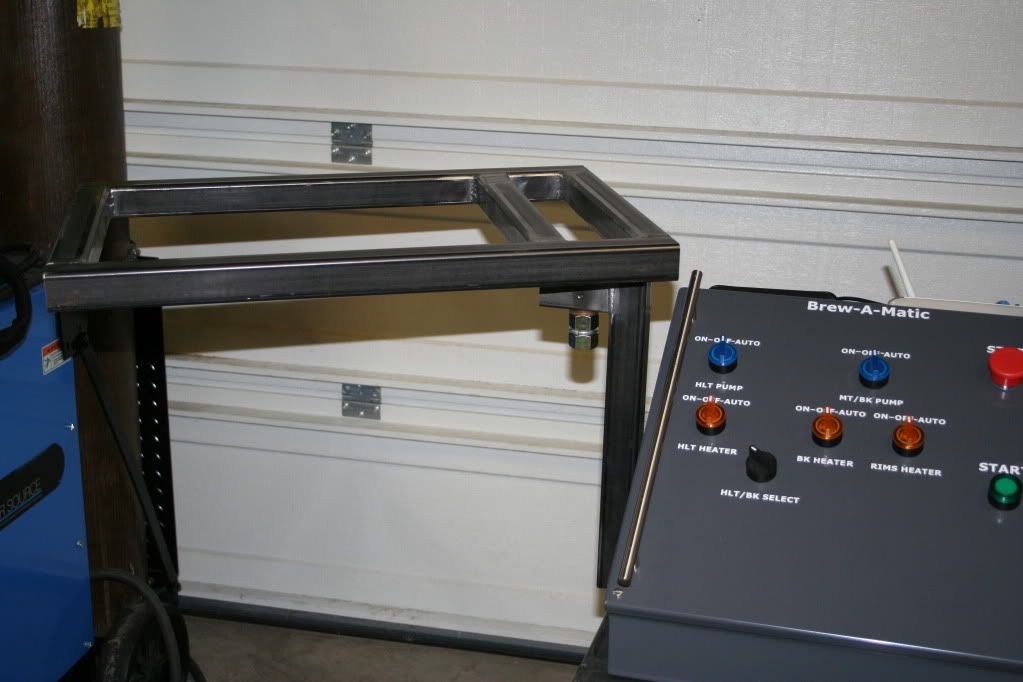
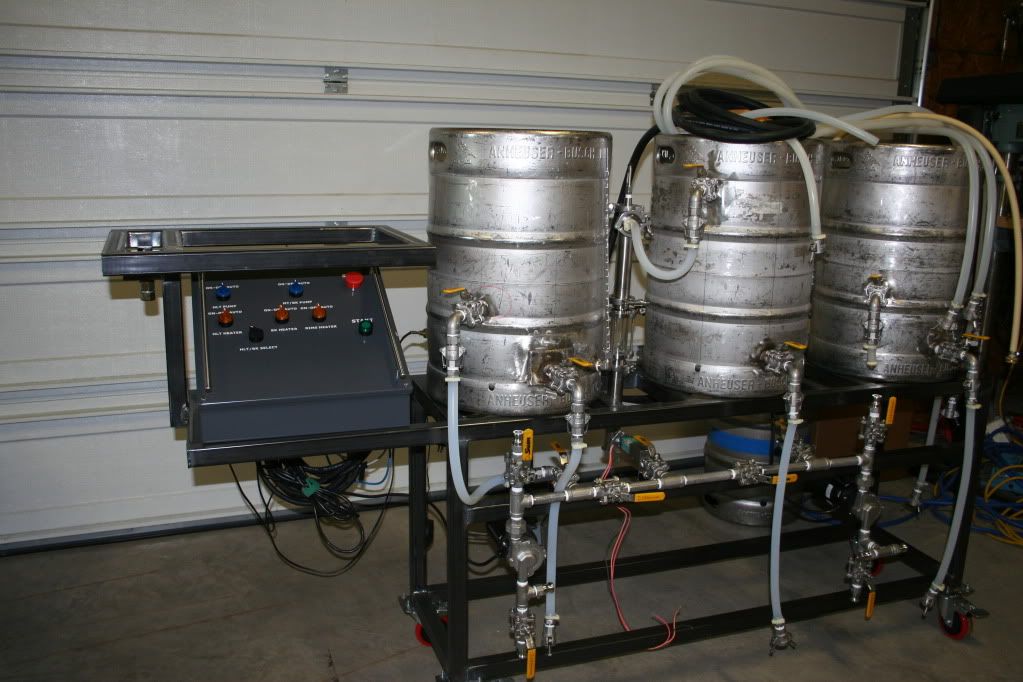
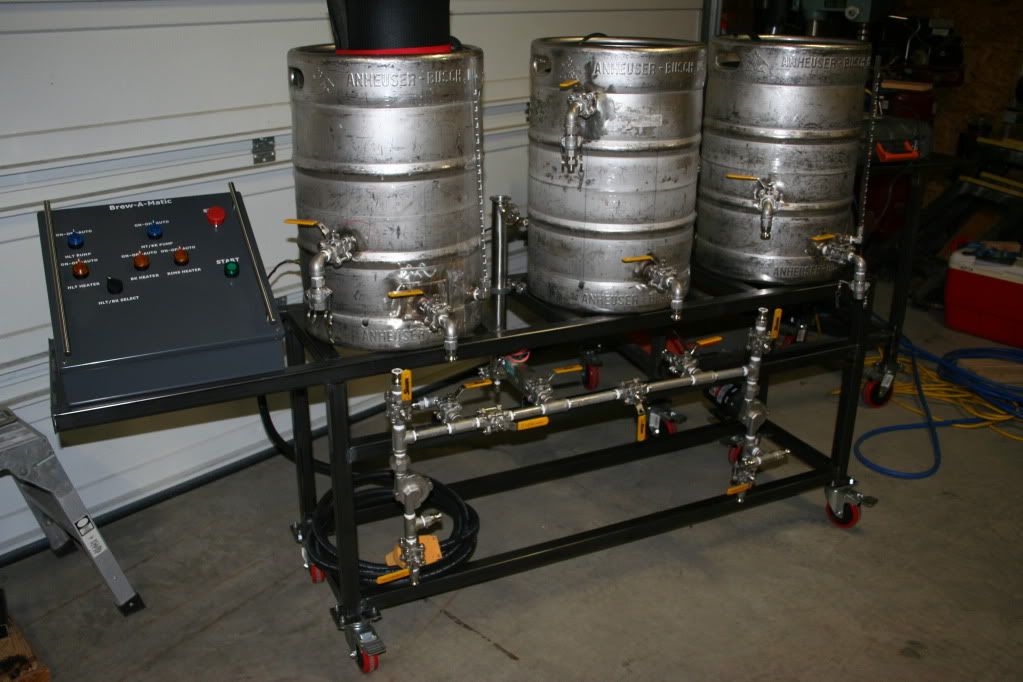
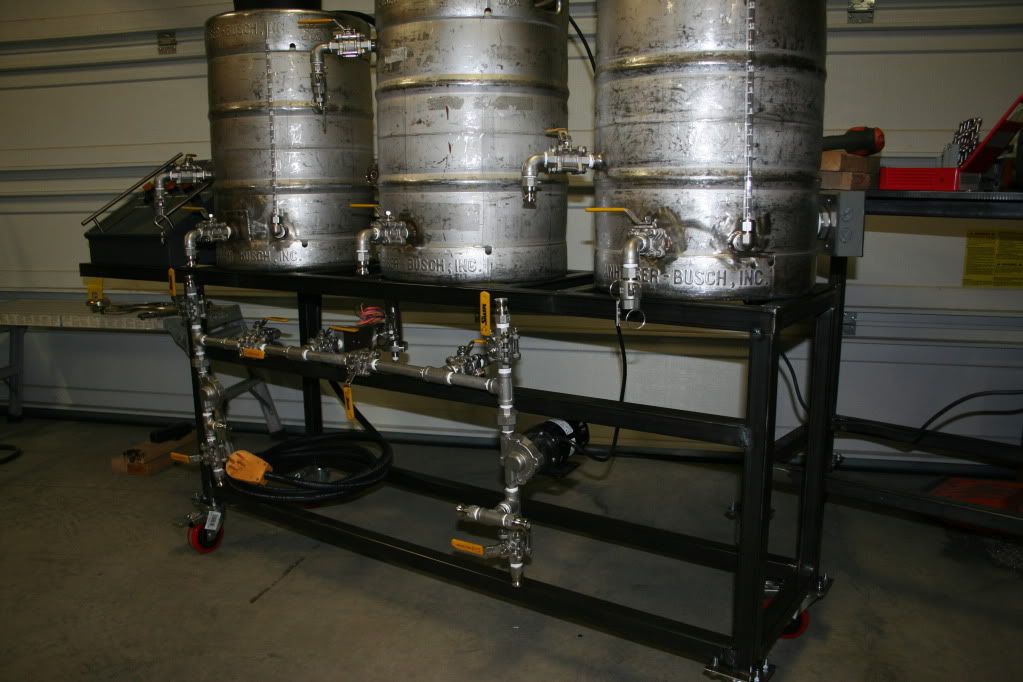
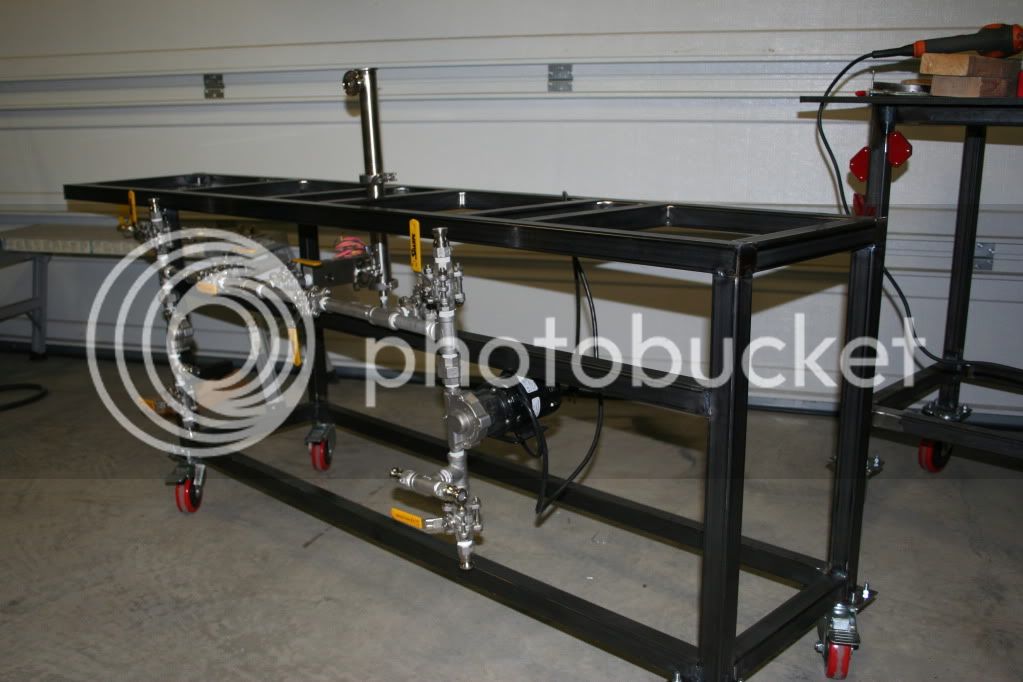
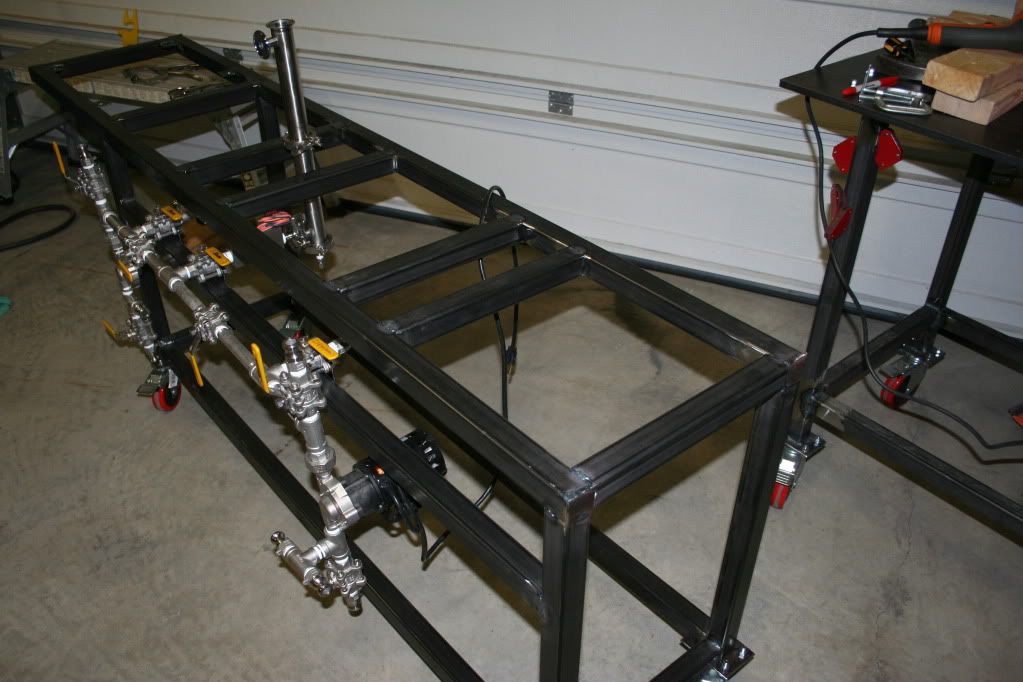
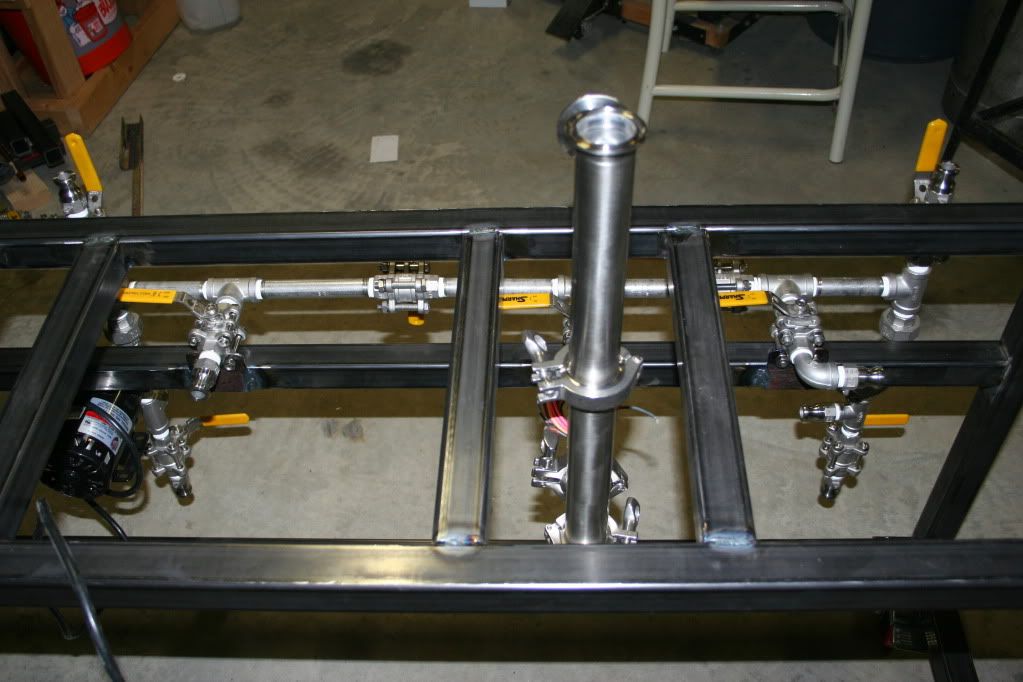
I've started building a brew stand for my all electric rig. The control box is finished, the vessels are complete (with the exception of maybe some spit & shine). I have been brewing for several months with the panel & vessels sitting on scaffolding. I still have quite a bit of work, but some folks have asked to see some pictures so here ya go...

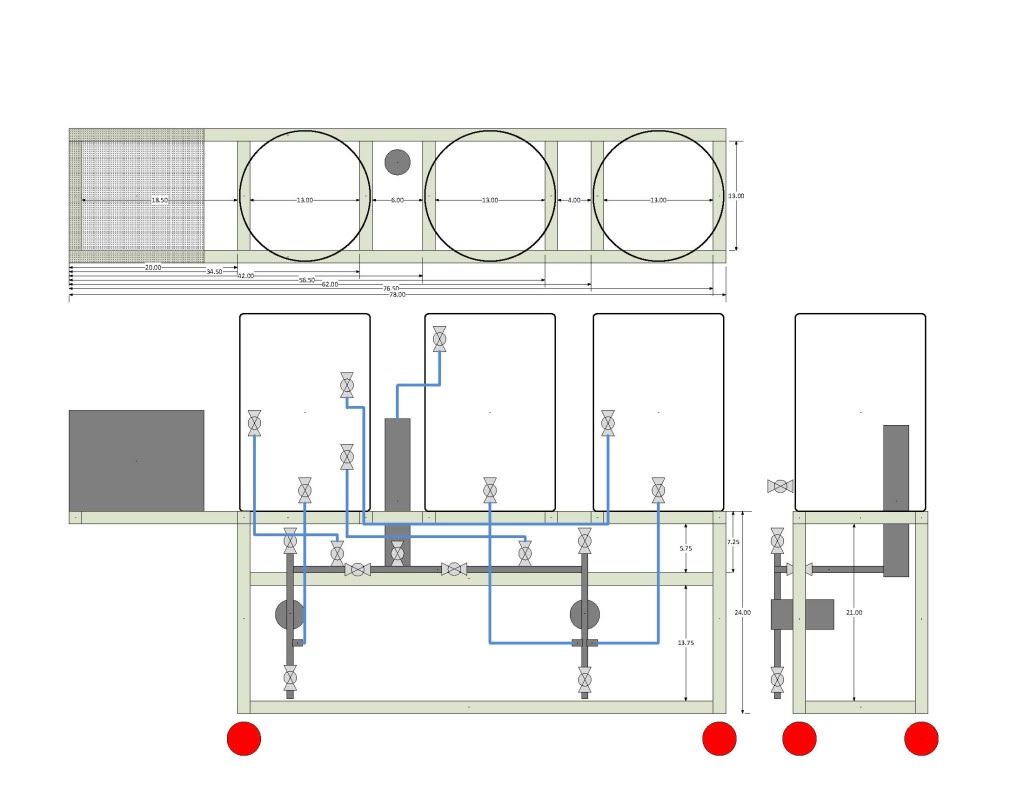
Here is the drawing I started with:
Visio-Standv11.jpg


With Panel & Vessels in place:
IMG_3560.jpg


IMG_3561.jpg


IMG_3564.jpg


IMG_3565.jpg


IMG_3570.jpg
 
Ohio- ed,
You got to be kidding me! Did you actually just build this? I mean, since the time you built your welding table and all? If you don't polish out those kegs,I'm personally going to come to your house and beat your A--! please take your stand and welding table to the powder coat shop as soon as you see this post. Put some color into it!!! That is an incredible build and something that deserves to be in a magazine. I love the design. My brutus is cool but I've been looking at electric. I would love to see you electrics, elements, etc... Nice, Nice, nice, job!
Snake10
 
Thanks guys, I appreciate the comments.

Snake - The welding table won't be powder coated or painted... I expect to be welding, grinding, and clamping all over it and I don't think a coating would last. The other thing is, the table is used as the ground for welding so I need to keep good continuity.

At this point the stand is just tacked together (but it is sturdy enough that I would be willing to brew on it). There are lots of things to be added in the way of mounts, brackets, etc. I will probably finish welding it as is and brew a few times to "figure out" where I want things mounted... water filter, chiller, etc... before I have it coated. This thread will probably be around for sometime while I work out the details.

Oh, BTW... The kegs are normally wrapped in 1" thick vinyl faced, polyurethane insulation. So I do need to clean them up a bit, but its not a real high priority. On the other hand, if you want to come over, drink a few and expend the energy you would use to "beat my a--" to polish them up instead, I'm all for it ;)

Again, thanks for the feedback.

Ed
 
Very nice! I know what you mean about not coating it. It seems like I change things every time I look at my stand.

That's a lot of Stainless. Cool.

Ron - Thanks.

The stand isn't stainless.
Maybe you are talking about the plumbing... It is really just a bunch of tee's, nipple's & valves. Well and a flow switch, RIM's tube and a bunch of camlocks.
The plumbing in the pic is just a manifold. I'll connect it with several short hoses. The idea is to be very flexible (pump from any vessel to any other) without changing hoses during the brew or cleaning process.

Ed
 
It's... it's glorious! Looking forward to seeing the electrical side of things (schematics and any other write-ups).

I got my kegs polished by using the same technique you described: Beer for work.

I noticed the little squares you made to cover the holes. I did the same thing.

Is the pump gonna get mounted to anything?
 
So did you TIG the whole thing?

Also, don't forget to weld on a pint glass holder/ bottle opener. It's all about the necessary equipment ;)
 
It's... it's glorious! Looking forward to seeing the electrical side of things (schematics and any other write-ups).

I got my kegs polished by using the same technique you described: Beer for work.

I noticed the little squares you made to cover the holes. I did the same thing.

Is the pump gonna get mounted to anything?

Thanks... but glorious is being WAY too generous.

I replaced the March Pump heads with Stainless Chugger Pump heads with the idea that I can just hang the pumps as they are. I'm thinking & re-thinking mounting the pumps also.

Here is the thread related to the BCS-460 based control panel build:
https://www.homebrewtalk.com/f170/electric-question-153310/

Ed
 
So did you TIG the whole thing?

Also, don't forget to weld on a pint glass holder/ bottle opener. It's all about the necessary equipment ;)

I am in the process of TIG'n it.
So far it is mostly just tacked, I still neet to go back and finish each joint.

I like the idea of the accessories...

A neighbor suggested a drink holder... this may have to happen. :mug:

Being that this is a BCS-460 based system, I'm also thinking about a pull out shelf under the control panel to hold a laptop.

Ed
 
Where did you get that control panel? And what is the name of it??

Thanks

I'm guessing you are talking about the box it's self.
It's called a Console Enclosure ad I got from a user here on HBT.

As for the working parts of the panel, I built it with a great deal of help from my friends here on HBT. And it's called the "Brew-A-Matic".

Some details of the design/build can be found here:
https://www.homebrewtalk.com/f170/electric-question-153310/

Ed
 
Needs more ball valve.


Very nice indeed.

_

Thanks for the input.

More valves? I've got em, where do you think I can use more? I don't have an addiction to valves.

Yea, I know... I got a deal and bought a butt load of valves. I really don't have that much money in them but I think they look pretty cool, and it's not like I can afford to paper the walls with stainless steel ;)

Ed
 
Nice job! You have one of the best looking control box set-ups I've seen.

Looks like you used some u-bolts to hang and secure the liquid metal pipe plumbing to your stand. Did the u-bolts do the job for you and hold all that heavy pipe to your satisfaction?

The reason I asked is I had a rather elaborate plumbing set up to run the gas through the Honeywell valves in the back of the stand and then to the needle valves in front of the stand, and then on to the burners. The metal thickness of my stand is to thin (0.16 gauge or 1/8 inch thick) to be able to tap threads, in order to use screws to use pipe hangers. I did a mock up with black pipe and u-bolts (I am going to use stainless steel on the permanent plumbing) and it held great. The stand will be moved on brew days to my back porch and stored in my garage when not in use. I think the vibrations from moving it around may cause a gas leak and I don't know if I trust it. I have since configured a much simpler set up with the needle valves in the back of the stand due to this. It looked so cool though with them in the front.............Oh well, I rather be safe though and not blow myself up.

Thank you very much.

The plumbing manifold is bolted, using the valve assembly bolts, to brackets that are welded to the stand. No u-bolts in the pictures so far. I say so far because I'm planning to use a u-bolt to support the RIMs tube.

Ed
 
Thank you very much.

The plumbing manifold is bolted, using the valve assembly bolts, to brackets that are welded to the stand. No u-bolts in the pictures so far. I say so far because I'm planning to use a u-bolt to support the RIMs tube.

Ed

Ok I see, then it is very secure!

Lots of luck brewing,

John
 
A minor update...
I had planned on a pull out shelf under the control panel for the laptop during the brew day. As I looked at it, I felt it was way to close to the HLT Return and the general "splash zone" for a laptop. So I decided on a rotating work platform to keep the footprint compact when stored and the laptop as far away from the wet stuff as possible. I still need to cut and mount the aluminum sheet but you get the idea:

1.5" square tube frame (way heavier than needed):
IMG_3604.jpg


3/4" Bolt welded to a 1/4" plate, 2 brass bushings, a couple brass washers and a couple nuts w/lock washer:
IMG_3605.jpg


Frame is bolted to plate so I can shim if needed to level:
IMG_3606.jpg


IMG_3607.jpg


Minimal extension of footprint:
IMG_3608.jpg


Laptop is a decent distance from the wet stuff and at OK height when sitting on a stool or standing:
IMG_3603.jpg


Ed
 
Ed,

Great setup! You mentioned some insulation earlier that you use on your kegs. Do you have a link to it, and is it readily available? I really need to insulate my mash tun and am looking at all options. How's it for holding temperatures? Of course, you have that beautiful rims tube!

Nick

Sent from my iPhone using HB Talk

Nick, thanks.

The insulation I have is from McMaster. It is "Flexible Polyurethane Foam Insulation" Item: 9385K53.

I never can link directly to a McMaster Item so, here are the specs:
Temperature Range: -20° to +200° F, unless noted
Heat Flow Rate (K-factor): 0.25-0.30 Btu/hr. x in./sq. ft. @ 75° F
Density: 2 lbs./cu. ft.
Color: Black
Made of polyester-based polyurethane, this open-cell foam insulation resists cracking and fading and allows moisture to evaporate. It has a vinyl facing that provides strength and abrasion resistance, and makes cleaning easy. For indoor use. Cut with a utility knife. Meets FMVSS-302 flammability requirements.
Adhesive-backed insulation has an acrylic adhesive for easy installation. Maximum temperature of adhesive is 150° F; low end is not rated. For rolls, please specify length.​

Obviously this would not be good for a direct gas fired vessel, but it has held up well with electric heat. Bobby_M has a thread related to direct fired insulation if that is the direction you are heading.

I took the new stand for a test brew last weekend and left all the insulation off so I could watch for any leaks. Good news, no leaks. Also good news, I hit and maintained temps without the insulation. Bad news... looks like I might have to address the appearance of the kegs a bit. :cross:

Ed
 

Latest posts

Back
Top