Earthbound's Conical Fermenter w/ Stand

Homebrew Talk - Beer, Wine, Mead, & Cider Brewing Discussion Forum

Help Support Homebrew Talk - Beer, Wine, Mead, & Cider Brewing Discussion Forum:

This site may earn a commission from merchant affiliate links, including eBay, Amazon, and others.

EarthBound

Well-Known Member
Joined
Mar 20, 2010
Messages
1,063
Reaction score
13
Location
Beer Capital of the World
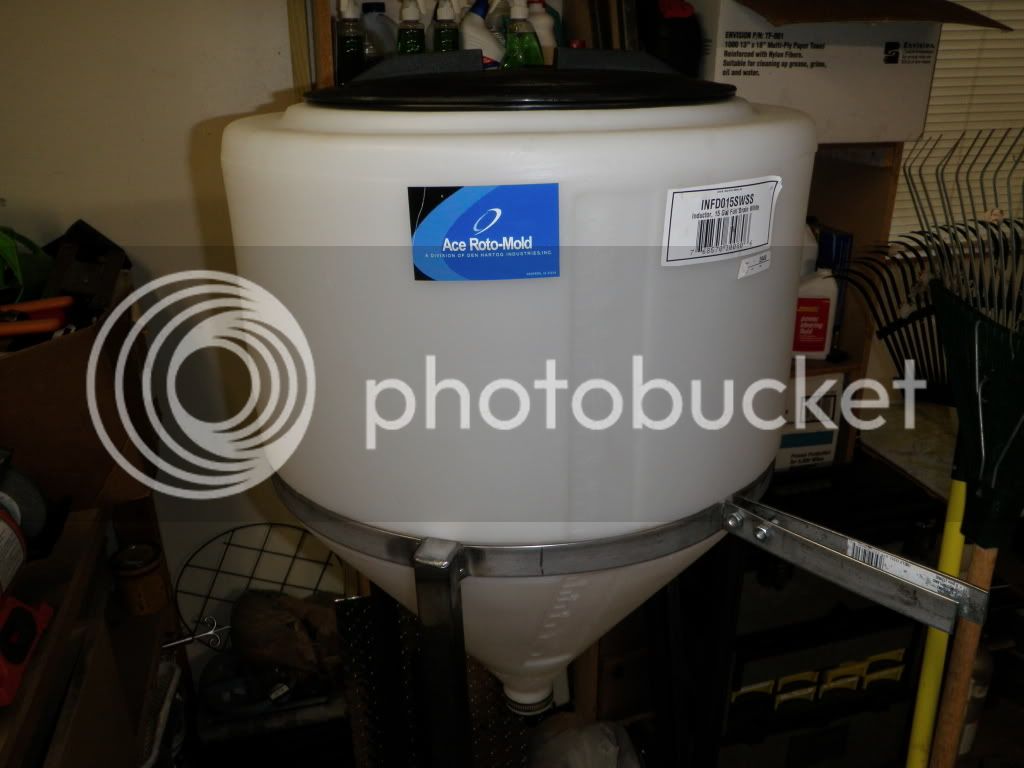
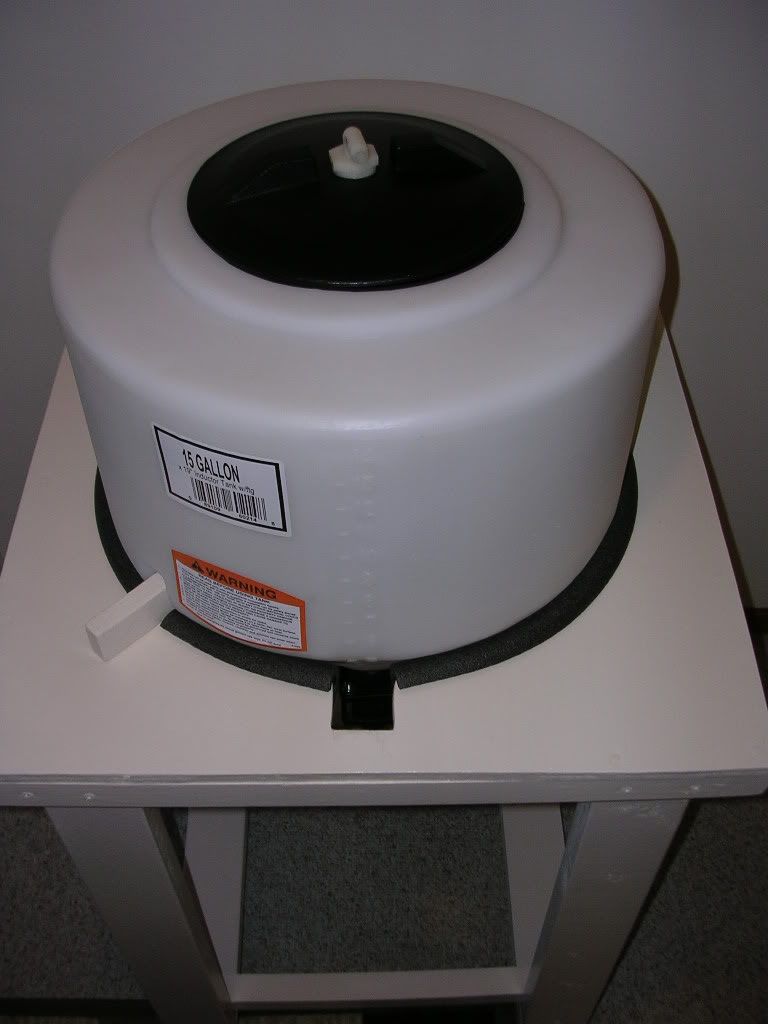
I bought the 15 gallon full drain inductor tank from tank depot. The stand that you can buy with the tank is not desirable...

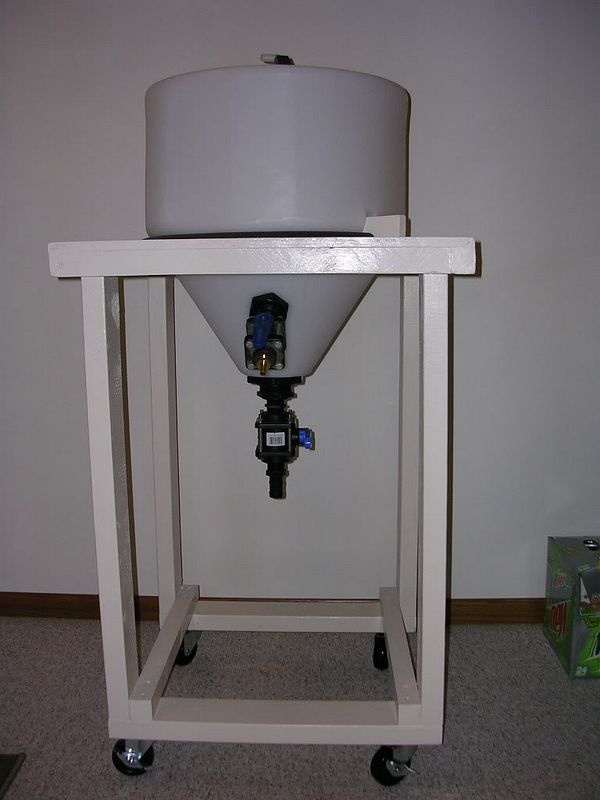
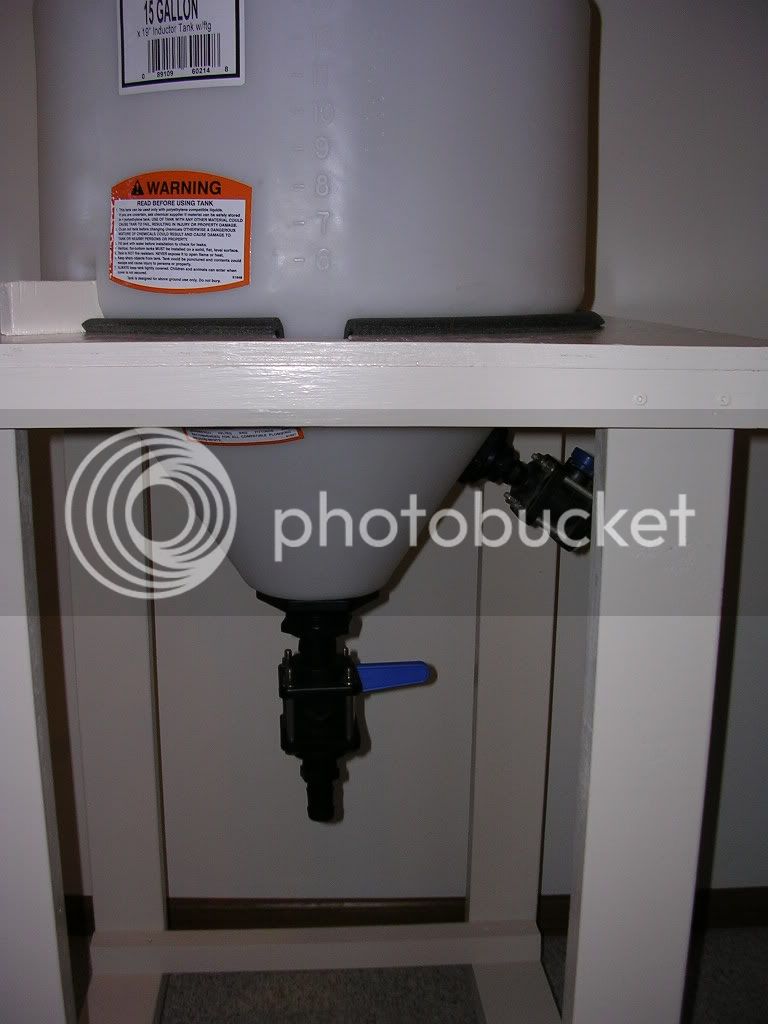
Their stand is too short: The bottom of the conical (after connecting the reducer, nipple, ball valve, and hose barb) is less than a foot off the ground!

Their stand is too expensive: The stand is about $61 (plus $37 shipping). I have a nice HH140 welder, so I was easily able to make a stand for cheap. For me, it was $30 for all the metal and $55 for the conical tank.

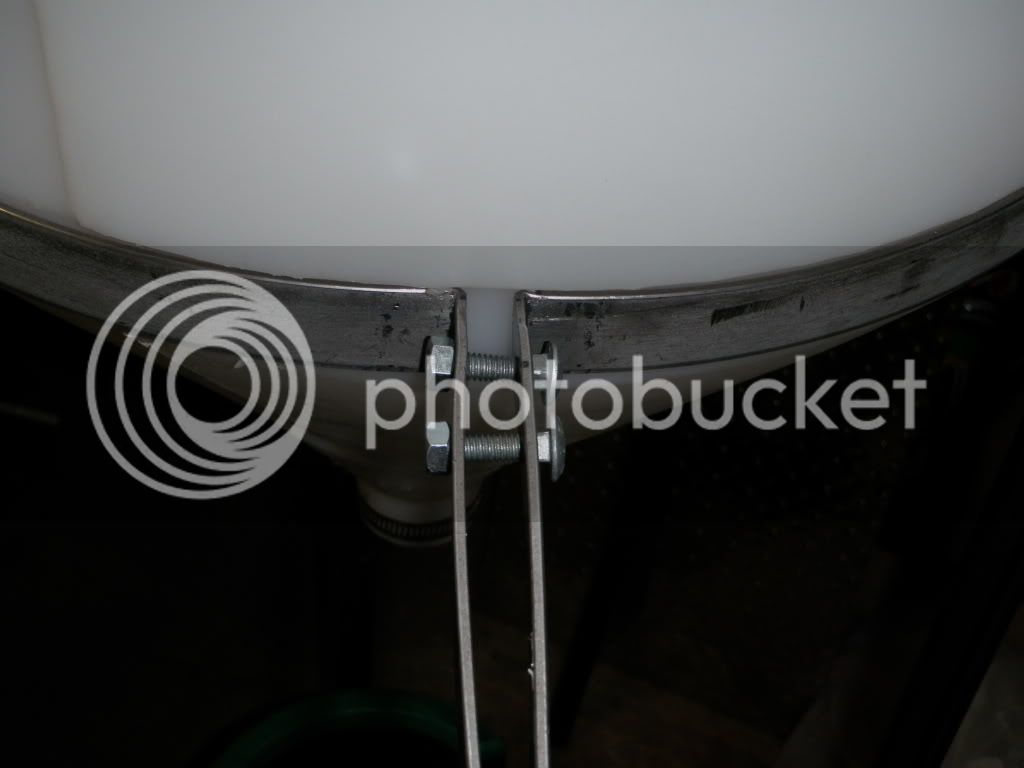
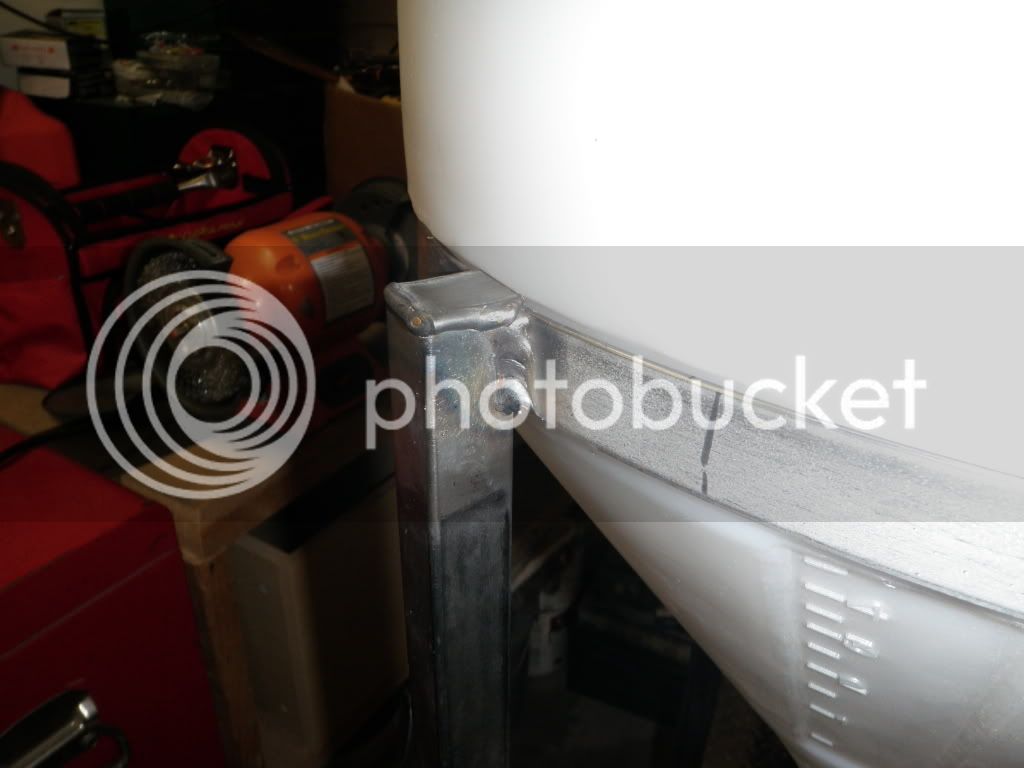
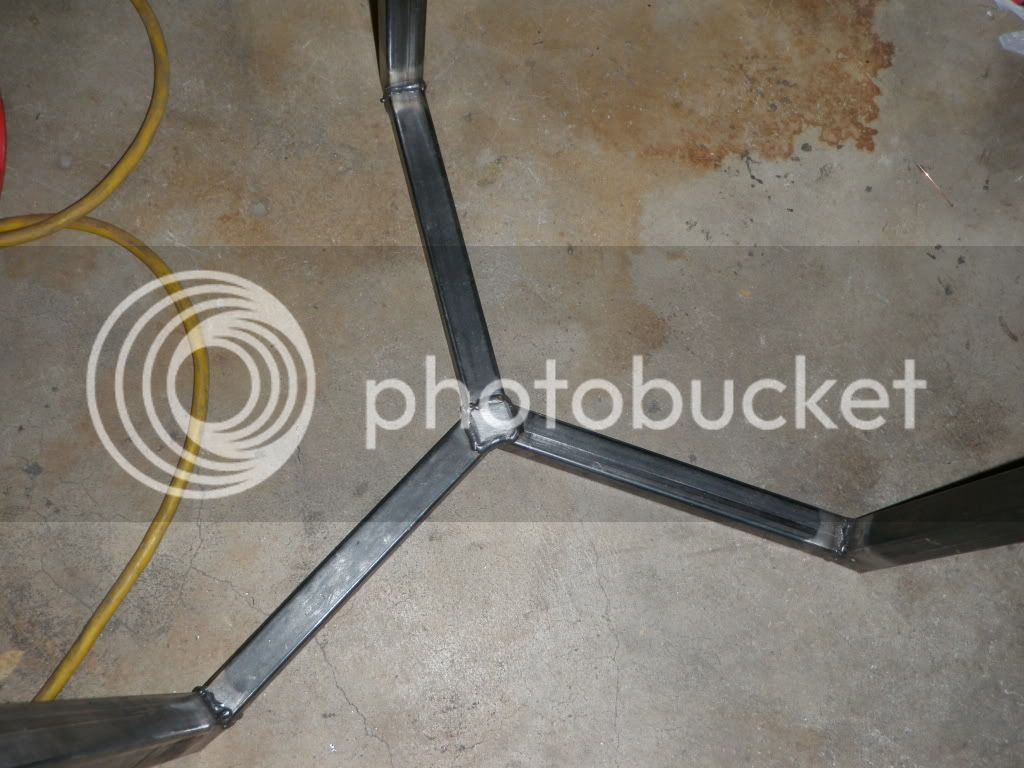
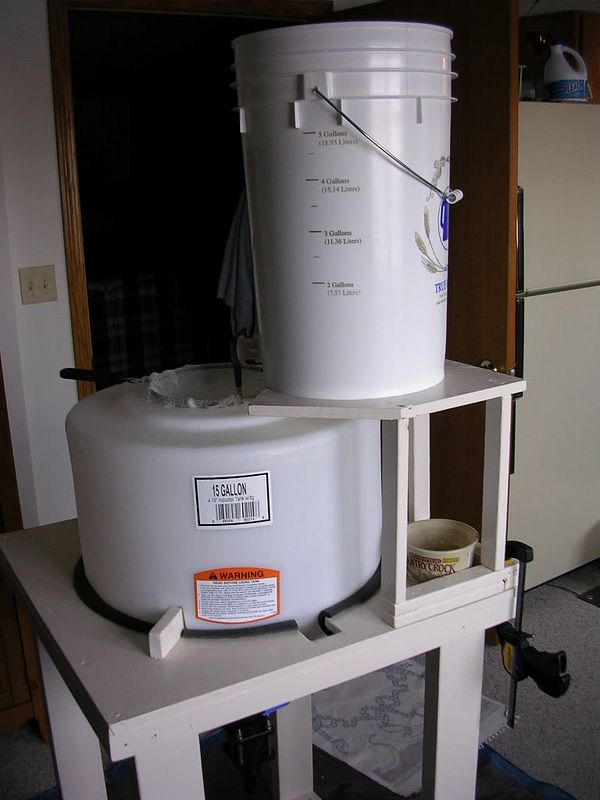
I used this guy's stand design to build my stand. I have different dimensions than he does, of course. I bought, cut, and welded all the metal after work yesterday and had it done before I went to bed. :D I took a quick crappy phone pic when I was done.


25109447606_ORIG.jpg


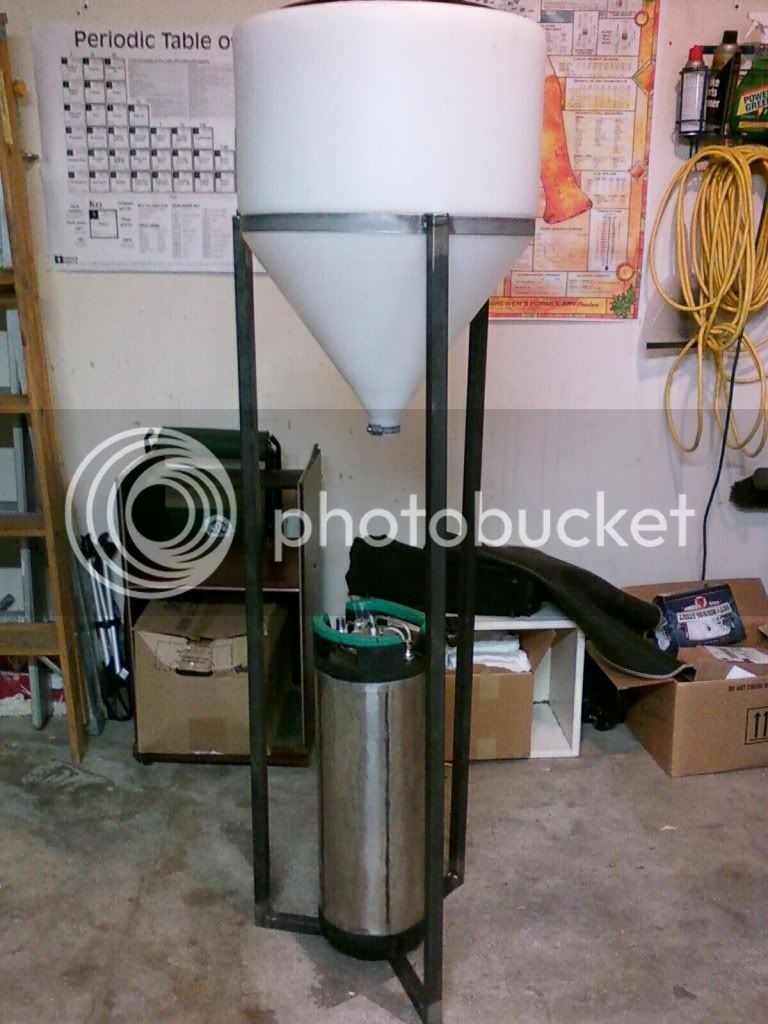
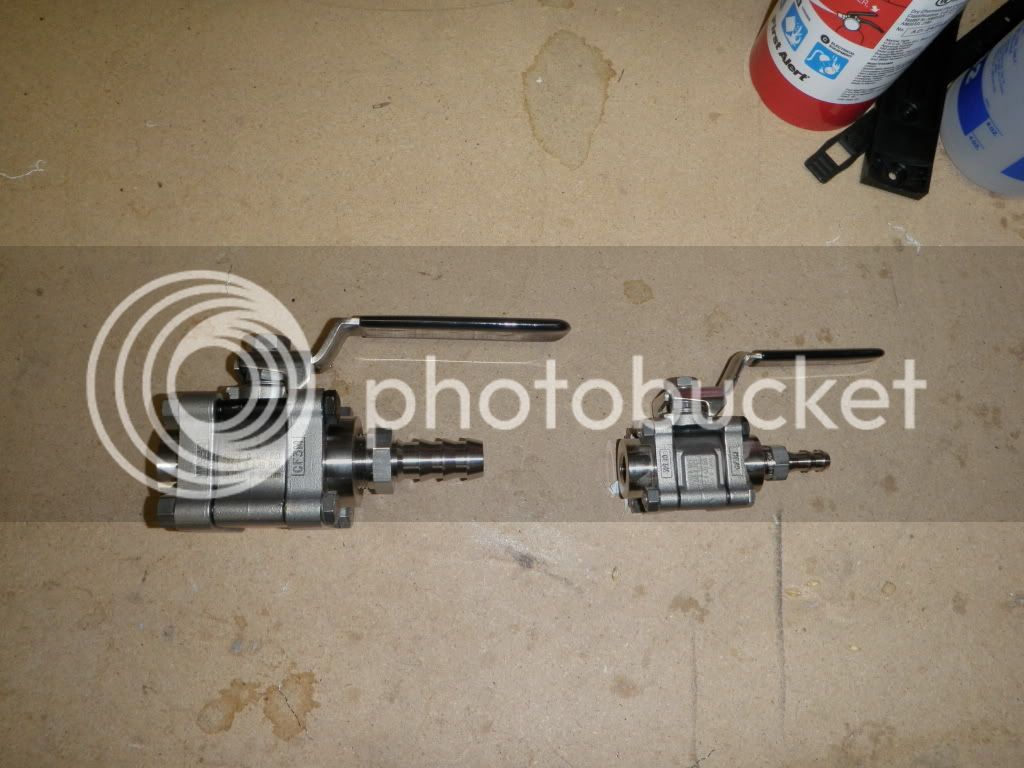
Looking at the pic, it appears that the leg on the right is a little ****ed up... I'll check on that after work today. I have all the pieces (reducer, nipple, ball valve, hose barb, and silicone tubing), but they were not connected in the above pic. I'll take some better pics tonight with a good camera and post them on here. I'm planning on using silicone to seal the lid better and installing a racking arm (no, not rotating).

Here's some links that are helpful:

http://frugalconicalfermenter.blogspot.com/

http://www.northchautauquahomebrewers.com/ferment/ferment.htm
 
That's will make racking to keg great. I'd totally be down for that setup if I could manage temp control. What's you plan on that?

Yes it will cuz all I gotta do is stick the keg under it and let gravity do it's thing. I haven't seen anybody build a stand that looked like mine, and I don't understand why (same could be said about my grain mill). Everybody's stand is made out of wood and is too low. I like metal so much more than wood for many reasons, and I don't see why someone would build a stand that you can't fit a keg under.

I'm not planning on a fridge or glycol jacket or anything like that if that's what you're asking. I have a few closets in my basement that I keep all my buckets/carboys in during fermentation. My basement is a perfectly temperature zone throughout the year and stays almost exactly at 68 degrees F. I can fit two of these con setups in each one of those closets. I'll install shelves in the closets to fit more buckets........... Basically, I'm just treating my con setup like it's a bucket... starting this Friday. :D
 
Basically, I'm just treating my con setup like it's a bucket...

Looks like your in for a ride.....I hope its a good one!

My guess would be that the thermal heat (mass?) would be a lot greater in that conical compared to a 6 gal bucket. Its about 3 times the size, with much less surface area exposed to that 68 F air temp.

I have to set my fridge at 60 F to get my buckets to ferment at 66 - 68 F. If you do some high gravity batches you may be able to use that conical as a space heater.

How do you plan of removing beer from it? Sorry, I don't know the terminology, but are you going to have a tube going up into the conical from the bottom, that way you can pull from above the settled yeast? Or do you plan on dumping all the the yeast out, then dumping the beer out?
 
Looks like your in for a ride.....I hope its a good one!

My guess would be that the thermal heat (mass?) would be a lot greater in that conical compared to a 6 gal bucket. * Its about 3 times the size, with much less surface area exposed to that 68 F air temp.

I have to set my fridge at 60 F to get my buckets to ferment at 66 - 68 F. * If you do some high gravity batches you may be able to use that conical as a space heater.

I almost always monitor my fermentation temperatures, and they have never gotten more then 2 degrees above ambient air temperature. It stays at a consistently cool temperature in my basement (more like 66 than 68, now that I think about it)... which is where the con will be. I will make sure to monitor this con closely for it's first use with two temp probes (1 for the con and 1 for the ambient), and I'll post the results on this thread.

I doubt it will be anything like you described.

From my research, it looks like yeast crank out 118 kJ per mol of glucose. Let's assume 5 gal (19L), 12 plato, OG = 1.050, and that all of the sugar is consumed. We have 19 * 1.050 * 0.12 = 2.394 kg of equivalent glucose which is 2394/180 = 13.3 mol. That means we are going to release 13.3 * 118 = 1,569.4 kJ. Assume that your fermentation is quick and it finishes in 24 hours. That means the average rate of energy release is 1,569,400 / (24*3600) = 18 W.

This is average, and not instantaneous. Who knows what the maximum wattage could be. You can probably assume that the watts you are losing through the walls of your fermentation chamber are more than enough to cool off the heat generated by fermentation.

How do you plan of removing beer from it? * Sorry, I don't know the terminology, but are you going to have a tube going up into the conical from the bottom, that way you can pull from above the settled yeast? *Or do you plan on dumping all the the yeast out, then dumping the beer out?

At the bottom of the con, I will attach a reducer (PVC) to a nipple (PVC) to a ball valve (3-piece SS) to a hose barb (SS) to silicone tubing that will go down to the bottom of the keg. Yes, I will dump the trub out before dumping the beer into the keg.

.....

I meant to take pics last night, but I didn't get around to it. I'll make sure to take them tonight and post them tomorrow.
 
It is a good idea for the racking, but that must be one huge fridge to fit that thing in. For me, fermentation raises the internal temp 7-11ºF depending on the yeast. I hope it works out for you!
 
For me, fermentation raises the internal temp 7-11ºF depending on the yeast. I hope it works out for you!

That's the camp I'm in too. My view is that if you are going to make that much beer at once, I would really want control over the crucial variables of fermentation, with temperature being the most important one.

I do like the conical tho. Is the "reducer" going to be sticking up into the conical like 6-8" or is it going to be flush with the bottom cone?

I don't have much experience with the conical or dome-shaped bottom fermenters, but the brew-pub in town moves his beer off the yeast to the serving tank, instead of draining all the yeast, then moving the beer. As in, the pipe opening that transfer the beer is at a fixed height above where the yeast settles. He has two valves underneath, one for transferring beer, and one for harvesting yeast.
 
I still don't like using plastic for fermenting. I know I am in the minority here, but to me glass is better. Of course, you have to be more careful in transport but I like to see my beer fermenting (after removing the cover to keep light out) and feel that sanitization is more effective on glass than plastic.

Just my $0.02
 
Try making a 15 gal glass conical

I know, I thought about that. My first option would be stainless steel. Still not letting any plastic into my brewery save maybe a plastic Ale Pale for sanitizing.
 
It is a good idea for the racking, but that must be one huge fridge to fit that thing in. For me, fermentation raises the internal temp 7-11ºF depending on the yeast. I hope it works out for you!

I'm surprised by your measurements. I'll decide what to do after I've taken my measurements. If it becomes a concern, I can just install my small evaporative cooler on the top shelf in the closet to keep it cool. Easy as that. It's just sitting in a box in the crawlspace anyway. Thanks!
 
It's a nice looking stand, the only thing that would worry me is "center of gravity" issues. Filled with 10+ gallons of wort it's going to go over unless you have something else going on that I am not seeing. How about some extended feet of some kind?

btw- I had a 15 gallon similar to yours mounted on a rolling metal stand that I build out of pipe and casters. Always worked well for me.

Thanks, but I'm going to have it in a closet against a wall, so no worries on that. :)

I was thinking of casters, but there would not be much use for them in my case because I will have the stand downstairs in a closet. I plan on carrying two buckets worth of wort down and just pouring it in.

I plan on building at least another one of these stands. The next may look different, or it may not... I'm not sure yet. :drunk:
 
Here's some more pics. I plan on receiving the reducer and nipple in the mail from US Plastic within a day or two. I still have to install the racking arm and seal the lid better with some silicone like the guy did in that second link I posted. I'll have that stuff done within a couple days, so that it's ready for brewday this weekend.


I plan on cutting off the metal that sticks out past those two bolts.
PA220007.jpg


Closeup of the "clamp ring." I like how I have the clamp right under the lip of the vertical part of the tank. Most people will just sit the tank on the cone part, but I like it this way better.
PA220011.jpg


Closeup of a MIG weld. It took me less than 5 minutes to cut and brush 4 little squares to weld over the square tubing holes.
PA220008.jpg


I used the 4th square to cover the triangular hole. :D
PA220009.jpg


Dump valve on left and racking valve on right.
PA220010.jpg
 
It seem to me I bought mine for 130.00 dollars with stand shipped and it fits perfect in my all fridge. Pat
img1571u.jpg
 
It seem to me I bought mine for 130.00 dollars with stand shipped and it fits perfect in my all fridge. Pat

Nice setup! :mug:

I assume you fill kegs with it, not bottles, and that you use the racking arm to do so. Can you step me through your process of dumping and filling? Also, if you could please get some closeup pics of the stand. I would like to see the details of what the stand looks like.
 
Nice setup! :mug:

I assume you fill kegs with it, not bottles, and that you use the racking arm to do so. Can you step me through your process of dumping and filling? Also, if you could please get some closeup pics of the stand. I would like to see the details of what the stand looks like.

That's the stand that came with it I don't know if I have a close up but I'll take one for you.
I pump mine from the boil kettle after cooling I just unhook my hose from the whirlpool line on my chiller and put a sanitized strainer in the top and let her rip. I'm going to build a hopback soon and add a plate chiller but it will still work pretty much the same.
Yes I keg and the racking arm is a stainless elbow with a piece of silicon hose on it as the pickup and the bottom port is to dump your trub it's a inch and a half plastic ball valve from mcmaster carr.

Pat
 
lehr - if you could, can we get a pic of the SS valve and one of the inside of the fermenter. I want to see what the racking arm looks like and how transferring from the conical to kegs would go.

Pretty sweet setup, because fermentation temps are really the most important thing to control.
 
Here's some more pics. I plan on receiving the reducer and nipple in the mail from US Plastic within a day or two. I still have to install the racking arm and seal the lid better with some silicone like the guy did in that second link I posted. I'll have that stuff done within a couple days, so that it's ready for brewday this weekend.


I plan on cutting off the metal that sticks out past those two bolts.
PA220007.jpg


Closeup of the "clamp ring." I like how I have the clamp right under the lip of the vertical part of the tank. Most people will just sit the tank on the cone part, but I like it this way better.
PA220011.jpg


Closeup of a MIG weld. It took me less than 5 minutes to cut and brush 4 little squares to weld over the square tubing holes.
PA220008.jpg


I used the 4th square to cover the triangular hole. :D
PA220009.jpg


Dump valve on left and racking valve on right.
PA220010.jpg

Nice stand build! :rockin:

I have one issue with it though. If you went through all the effort to cap the ends of the square tube why didn't you dress up those caridge bolts on the "clamp ring" too?

All you have to do is drill a hole in the bolt head end of the strap a little smaller than the square part under the head of the bolt and file it square with a small triangle file to fit the caridge head. I do this all the time because I just like using caridge bolts where possible to make ass'y and disass'y easy. Alternately, you can drill a round hole big enough for the square to fit into then tack the bolts in place with your welder.

Either way will dress up that already awesome stand a little bit more.
 
After receiving an upright fridge for free and after some research on here, I MIGHT want to shorten the stand a little bit - just enough to fit in the fridge. It will still be tall enough to gravity-drain into a corny keg and not have to be pressurized with CO2 just to transfer. I'm thinking of building a fermentation chamber instead of using the fridge though... I need to think about it a little more, but I definitely decided that I will keep it in a climate-controlled environment.

Based on this thread, I chose the probe placement to be insulated against the fermenter wall.
 
Thought I'd share some pics of my conical build for additional reference. Total cost for the entire conical setup was <$100. All the conical parts were bought from a farm store & I made the stand with wood I had around. I like wood ;-) ... Cheers!!!

I've since replaced the brass barb with a polyethylene one:
ConicalFermenter001.jpg


ConicalFermenter003.jpg


ConicalFermenter005.jpg


ConicalFermenter006.jpg


ConicalFermenter011.jpg


The fermentation box
DSCN1274.jpg


DSCN1281.jpg
 
Thought I'd share some pics of my conical build for additional reference. Total cost for the entire conical setup was <$100. All the conical parts were bought from a farm store & I made the stand with wood I had around. I like wood ;-) ... Cheers!!!

Thanks for posting those pics! Excellent job on the woodwork. I especially like the clamp-on setup you have for draining from the bucket into the conical.

You've helped me with leaning away from the fridge idea and leaning towards building a custom fermentation chamber. I have a good space for it in my brewhut, so it will work out well.

I'm definitely gonna shorten my stand to a height closer to the height of your stand. That way the fermentation chamber is not too big and the conical can still be drained into a corny keg (which was the point of building a stand in the first place).
 
Just wanted to update this thread to report that I haven't used this conical yet, but I'm working on the fermentation chamber.

I have the design finished. I plan on building an insulated wooden chamber that connects to the front of an old refrigerator (w/ top freezer). It'll be able to hold a minimum of 1.5 bbl. I won't start building the chamber until I finish the electric upgrade to my brewstand. When I finish the chamber, I'll shorten the existing conical stand and make another stand for a second conical, so it'll be awhile before you see this thread updated.
 
Back
Top