My Picobrew Thread

Homebrew Talk - Beer, Wine, Mead, & Cider Brewing Discussion Forum

Help Support Homebrew Talk - Beer, Wine, Mead, & Cider Brewing Discussion Forum:

This site may earn a commission from merchant affiliate links, including eBay, Amazon, and others.
One other question I'm curious about: did you ferment in the keg as the picobrew videos show?

I've always used Better Bottles. I realize the batches here are small -- around 2.5 gallons (which is actually great for me because it's an excuse to always brew more) -- but I was wondering if it would make sense to transfer to a carboy or BetterBottle to ferment. I realize this negates the ability to force the beer from the keg for fermenter to the keg for server via CO2 -- but I'm wondering if there are any issues fermenting in the keg.

My basement is a steady 65F -- and I plan to use Safale-04 for the first few batches -- but I'm leery about not being to actually *see* the beer fermenting. It's common, obviously -- big stainless tanks and all -- but I'm wondering if it would make any sense at all to transfer.

Did you run into any fermentation issues? Or was the in-keg fermentation fine?


I did ferment in the kegs, no issues per say aside from the infection (the kegs did sit dirty for 3 years, thus the sanitation issue,.) you need the shortened dip tube if you're fermenting in the kegs, and can rig a blow off with gas disconnect to open tube, or their silicon barrier to airlock that is provided.

For a primary I wouldn't worry about the headspace in a better bottle, there are frequent threads about this in the beginners section and the consensus is that the CO2 from fermentation will create the barrier you need and before that, oxygen is good. Might want kegs for secondary/carbing/serving. You can do low pressure transfers out of a BB actually, there was a thread about it somewhere from carboys I think.
 
if you're fermenting in the kegs, and can rig a blow off with gas disconnect to open tube, or their silicon barrier to airlock that is provided.
or build a spunding valve and ferment under pressure, i just did a all grain biab lawn mower on week end, and will secondary in keg with a spunding valve.
 
or build a spunding valve and ferment under pressure, i just did a all grain biab lawn mower on week end, and will secondary in keg with a spunding valve.

Yes, there are plenty of options - but if he's concerned about not seeing the fermentation process, I imagine he'll want to at least see airlock or blow-off activity even though you could rig the out put of the valve, etc. etc.

A gas disconnect to open tube as a blowoff is a KISS solution.
 
Yes, there are plenty of options - but if he's concerned about not seeing the fermentation process, I imagine he'll want to at least see airlock or blow-off activity even though you could rig the out put of the valve, etc. etc.

A gas disconnect to open tube as a blowoff is a KISS solution.

you will hear the pressure relief valve releasing co2, so you will know that fermentation is going on, and as added bonus once beer ready just chill and serve.
also blow off on gas post can get easily blocked up cause of small opening.
 
you will hear the pressure relief valve releasing co2, so you will know that fermentation is going on, and as added bonus once beer ready just chill and serve.
also blow off on gas post can get easily blocked up cause of small opening.

As it would on a pressure relief valve but that moot as its not likely fermenting 2.5 gal in a 5 gallon keg unless you have a massive krausen.

I personally will never serve from a primary as you're implying.l
 
As it would on a pressure relief valve but that moot as its not likely fermenting 2.5 gal in a 5 gallon keg unless you have a massive krausen.

I personally will never serve from a primary as you're implying.l

no you secondary in a keg with a spunding valve. and yeast produces enough c02 you can blow out the seals on a half full keg. and you cant depend on kegs build in relief valve it vents at 150psi, your yeast will be crushed at 20psi so about.
a spunding valve allows you to set relief pressure, set to about 10psi on secondary then once beer ready it also nicely carbed.
further more you can then filter from secondary to a serving keg.
 
Wait -- so if I'm following this, I can transfer from the primary keg to a secondary keg after primary fermentation is, attach the spunding valve, and then carbonate to 10psi or so with secondary fermentation? And then I can serve right from the secondary keg?

This sounds great. As I say, I've bottled -- so all this kegging stuff is new to me.

I see this:

https://byo.com/grains/item/397-build-your-own-spunding-valve-to-carbonate-in-the-keg

Is this essentially what I'd need to self-carb the secondary?

BTW -- I'd still low-pressure transfer from the primary to the secondary with CO2? Or would I use something like a march pump to simply transfer it?

I do it slightly differently. I ferment under pressure with a spunding valve from the get go. After 1 week in the primary I'm completely fermented and at 20-30psi for close to full carbonation at 65F. I then cold crash in the primary for another week. Then I transfer under pressure to a serving keg. Grain to glass in 2 weeks when I'm not dry hopping.

For dry hopping it goes: first week stays the same. Then I sanitize my dry hopping keg(s) and put the dry hops in them before sealing it up. Transfer under pressure into the dry hopping keg. Let sit for another week. After that cold crash for a week and transfer to serving keg as usual.
 
Thats cool - I'll get to it eventually, but the last thing I need right now is more hardware to purchase!

Speaking of hardware, I promised a post on my Scrubmaster -I grabbed some quick photos tonight:

Sorry for the potato quality photos - its dark down there.

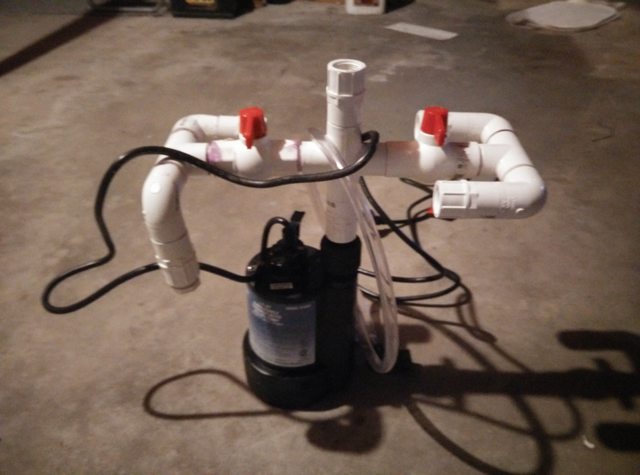
Here is the 1/5HP pump and 3/4" PVC unit I built - as you can see the left and right side can be turned on and off - and any of the corners can be plugged as necessary. There is a bit of redundancy here so if I were to do it again I would probably only build out one side (i.e. one ball valve). You'll notice that the sides are built out horizontal to the other piping, rather than perpendicular like the Scrubmaster thread - this is because I bought a short (cheap) tub, and figured this was the best option.

5sS6Wqzl.jpg


Like an idiot, I didn't pay attention to what I was taking a picture of. See that clear hose? It has a ball-lock liquid side disconnect on it and is attached to the Scrubmaster by a PVC 3/4" Male thread to 1/2" Female thread adapter, then a plastic (Nylon?) 1/2" male thread to 3/8" barbed hose fitting. The one drawback I've found of my horizontal sides is that this fitting and the hose adapter barely clear when being screwed in. The advantage to building out both sides with the ball valves is that I should be able to build the hoses I need, screw them on and not have to bother with them again.

TcP09OO.jpg


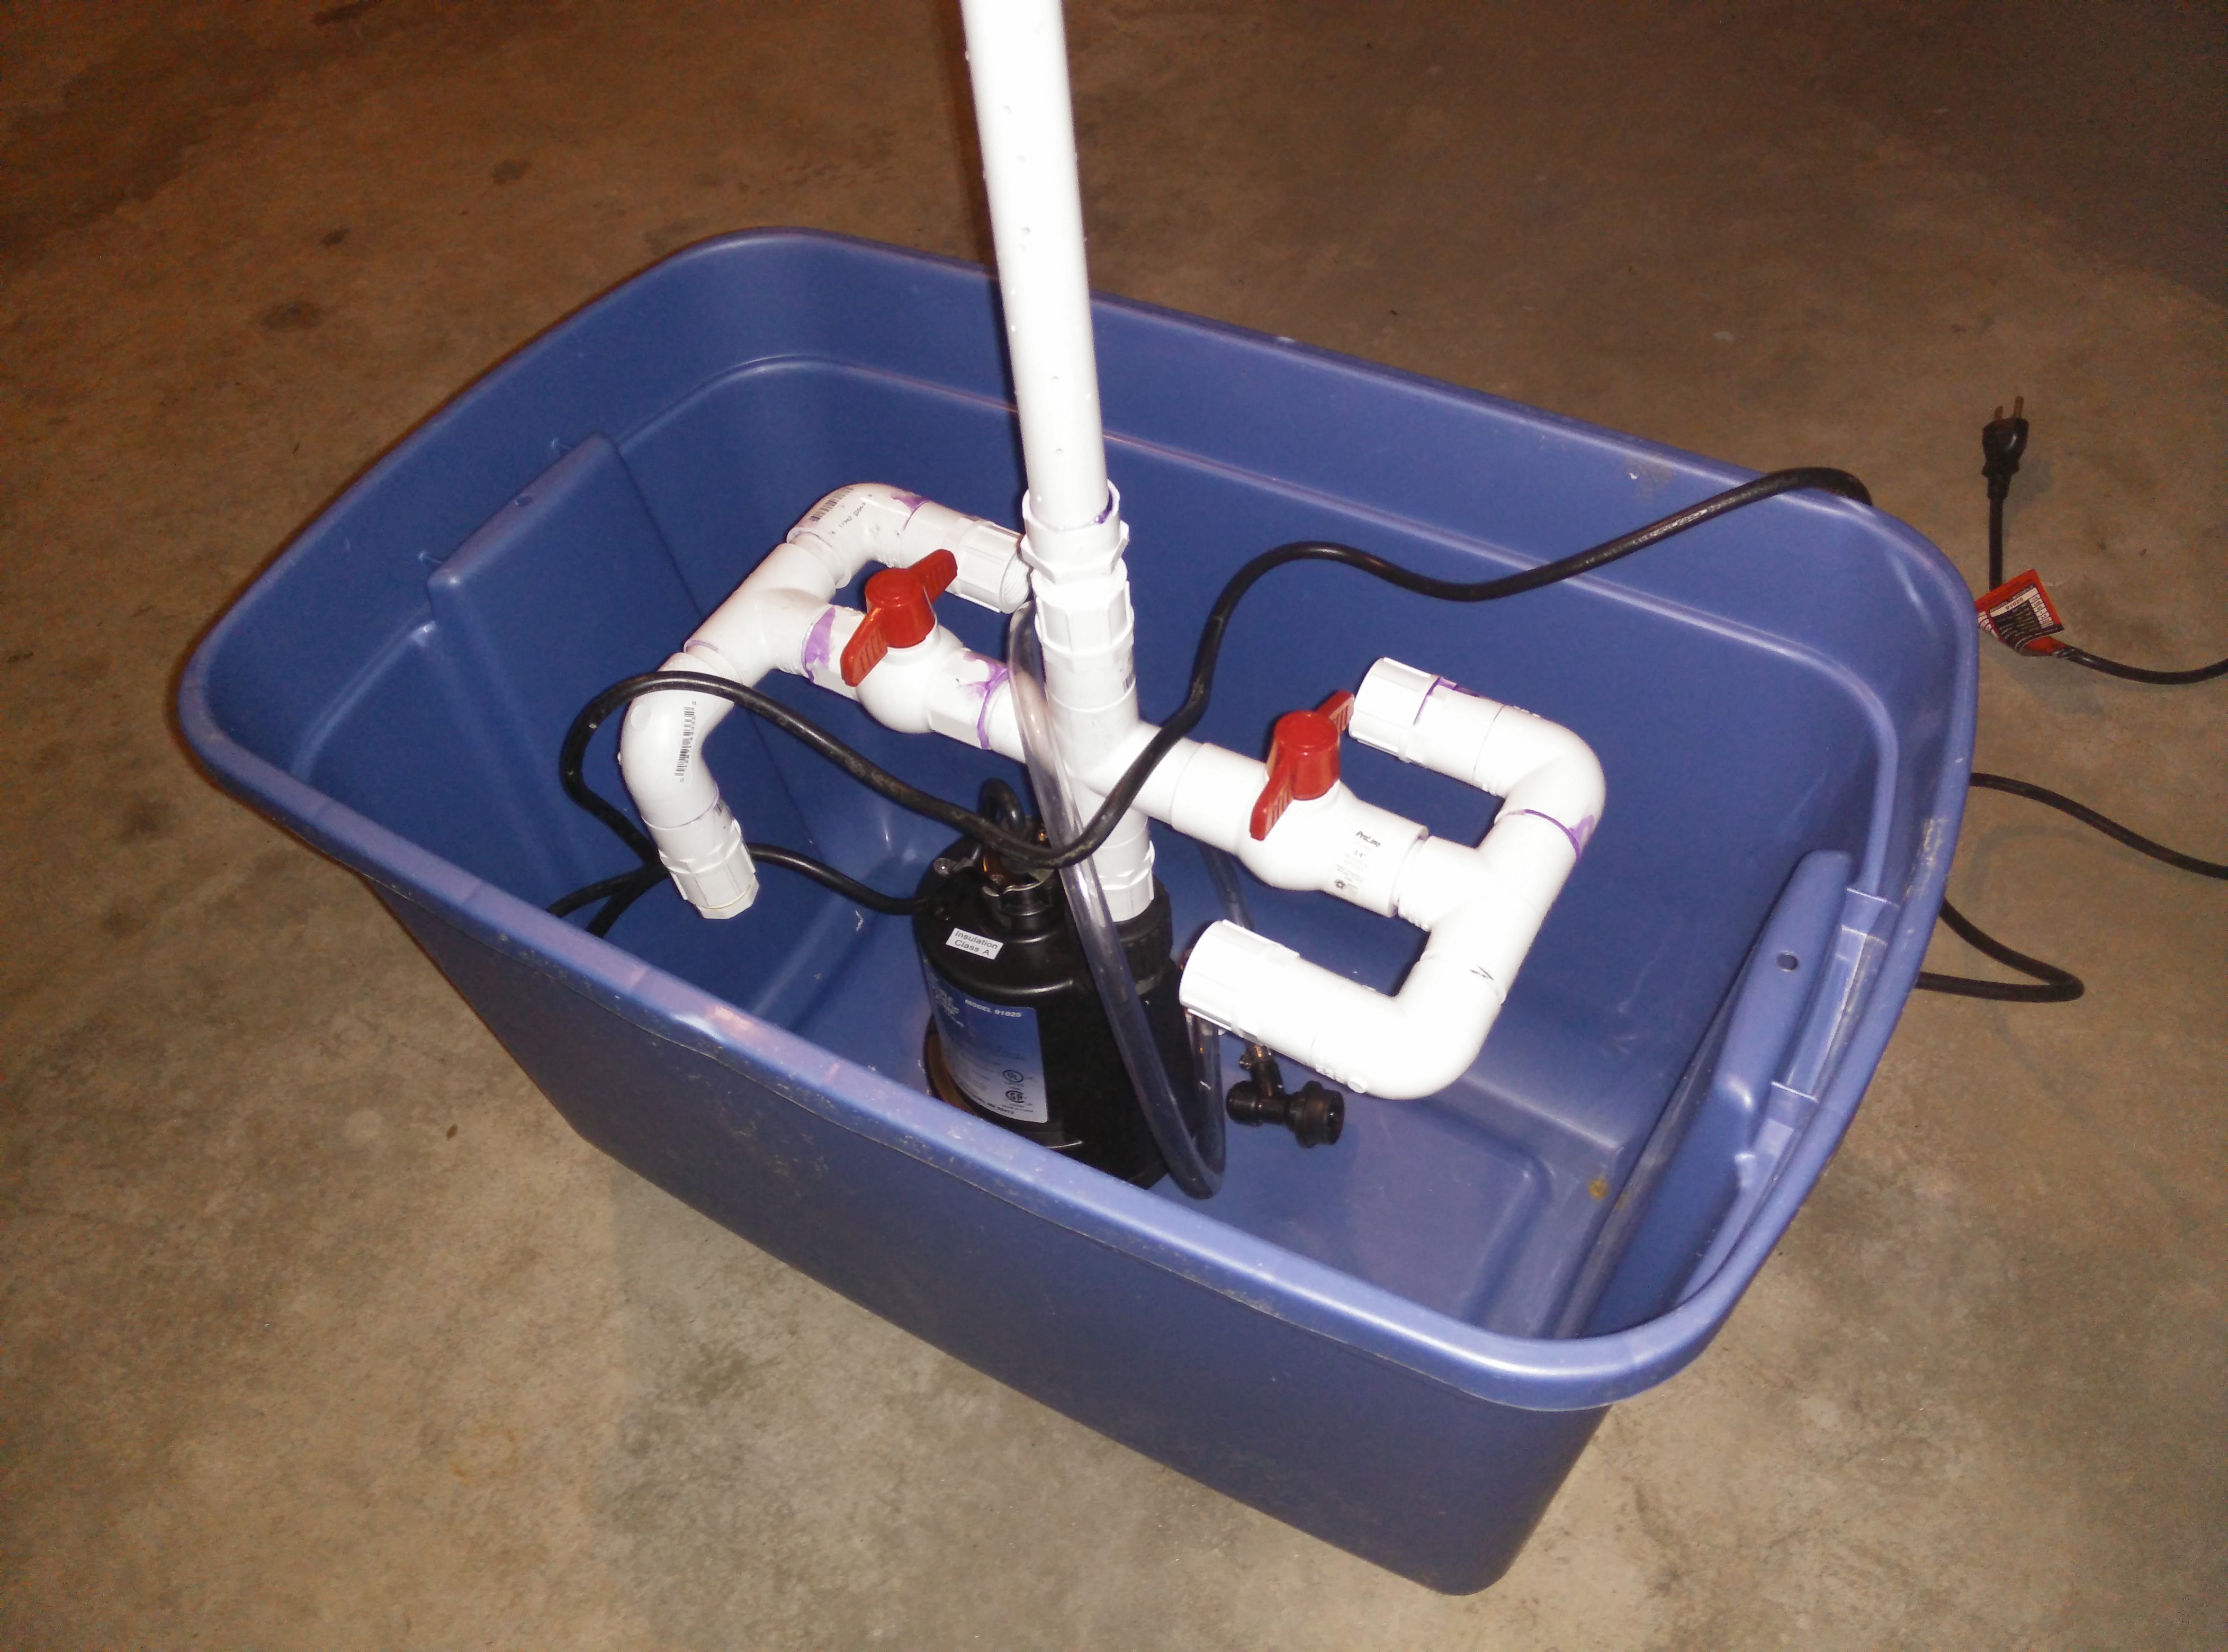
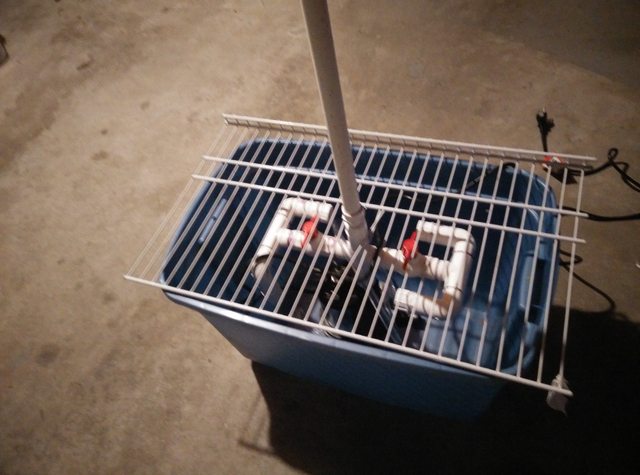
Here it is in my tote that was almost too small, with the cheap closet shelf I cut off to span the top. I clipped the connection for two of the cross wires, and am able to put the upright washing attachment through.

4I56XrEl.jpg


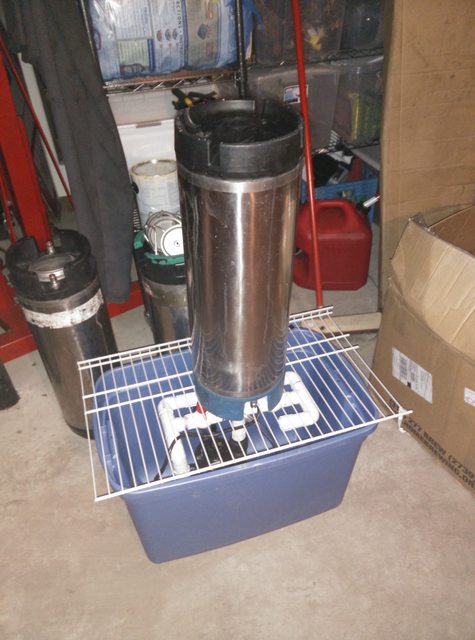
And finally with a keg on top. I'm going to have to build a shorter attachment for my 3-gallon kegs that showed up today.... more on that later!

WKqU9R3l.jpg
 
So yesterday my order if 3 gallon pinlock kegs showed up from adventures in homebrewing- they currently have used ones for $40/ea and ball lock conversions are $10 - which I consider to be a fairly good deal.

I don't think I've introduced my kegerator that I built in 2010 and have put exactly 2 kegs through. Its an Avanti and is wide and deep enough to accommodate two 5 gallon ball lock, pinlocks, or 1/6 barrels (with low profile Sankey adapters) and sports a 3-tap tower branded with the Alexander kieth logo and blue LEDs and (best of all) came with 3 European taps. I have all the parts I need to run any variant of the euro taps, stout or normal faucets, as can be seen below.

As I've mentioned before, I intend on using the fridge as a fermentation chamber as needed, but since it its already setup with a tower- the two processes don't have to be mutually exclusive. So I was pleasantly surprised to discover that my approximation that a keg would fit on the compressor hump without displacing the kegs in the floor was correct. I'll have the ability to run 9 (3x3) to 13 (2x5+3) gallons of beer in the kegerator OR in fermentation.

These need a good cleaning, which my 5 gallon kegs will also be receiving (again.) I will be making a shorter scrubmaster attachment for cleaning these, as well as fitting the ball lock attachments I received- which is in my agenda for Friday of I take the day off.

Hoping to get another batch brewed this weekend if I get my BrewPi validated for fermentation chamber temperature control. New England grain buy will be distributed April 19th, so I'll be stepping up my brewing after receiving those grains!

View attachment 1427905387570.jpg

View attachment 1427905400764.jpg

View attachment 1427905411734.jpg
 
You can just see in the last picture of my kegerator above that there is foam on the door. When I busted apart the racks on the door years ago I never finished the job, and I even took some of the door insulation off. Well today I was in project mode and heading to the store, so I measured the size of the door seal and picked up what I needed to finish the job. Spray foam to fill the void, a metal plate (galvanized sheet metal) and CASTERS. No before pictures, but here's how it came out:

Spray foam cans are one and dine since they seal up so I grabbed the cheapest one for $3, metal was $10 for 3'x2', casters required 2 threaded ones for the leveling feet on the front, and two that I could screw onto the compressor support. I also velcroed the thermostat adjuster up at the top.

View attachment 1428262280768.jpg

View attachment 1428262415310.jpg

View attachment 1428262430626.jpg

View attachment 1428262556691.jpg
 
Alright, its been far too long since I've posted- I tried to take a day off this week to brew - 3 times (seriously) and it didn't work out. Maybe I'll get to it some evening this week.

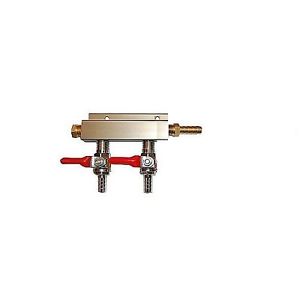
Anyway, found a pretty glaring source of infection :smack: :smack: :smack: .... my CO2 manifold was DISGUSTING. I'm so embarrassed by its condition that I didn't even take pictures of it - it was that bad. Seriously though, think crusty, moldy, IDKWTF... pretty much a smoking gun, considering my beers have gotten worse from bottling time --> now.

In better news, picked up ~#250 pounds of grain last weekend so I will actually be brewing a LOT more soon - #100 2-Row, #25 Golden Promise, #25 TF Pearl, #50 Marris Otter, #50 Belgian Pils.

Still waiting on my thermowells.
 
If you lower regulater preasure with out purgeing kegs first back presure could suck beer up into co2 system
 
Wow - you mean the "splitter" for the CO2? How would hat get dirty? Back flow of beer?

I mean who checks that?

I can't tell if you're being sarcastic, but if you are - yeah, I'm an idiot :D

It was one of these splitters - and I thought it had check valves in the shutoffs but I could be wrong. I did my best to prevent backflow but I'm sure it happened at some point (might get worse now that I have some pinlocks in the mix) because they came with red tubing (I think I got it prebuilt from Northern Brewer) - so I'll be replacing that with clear tubing to prevent future issues.

That, coupled with the fact that it sat for YEARS (like, 5 of them) unused - it had the potential to grow some crud.

Y2BYpeR.jpg


Thermowells came today, Hydrometer Wednesday - gotta get some time to brew!
 
I was not all being sarcastic - sorry if it came across like that. I meant really, who checks that? I don't have a manifold - I just put a "T" splitter on my gas line and I have a dual regulator to allow for kegs at different pressures.

To be honest - I was a bit shocked that you had contamination with the near boiling wort running through the keg for an hour - makes complete sense that it was a piece that didn't see those conditions when you think about it. Maybe that's how you ended up with the solution?

No, no not at all- its just that you can never tell online. And you're absolutely right- who checks that? It was REALLY my last option... And it took me two+ weeks of contemplating infection sources to even considering it- because, again, you're right that the kegs shouldn't have been an issue. Glad I checked it.

Onward with brewing. Might clean the kegs tonight and set one up to kick off Wednesday when I get home. Test out my pate chiller!
 
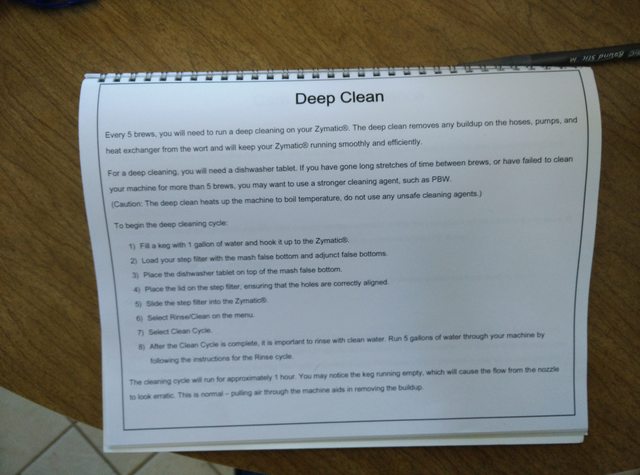
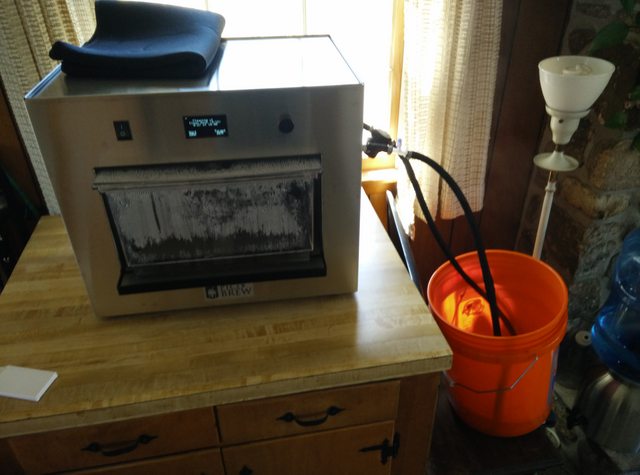
This morning I dropped my car off at the shop to have the summer sneakers put on it (a little late this year) and went grocery shopping - got home and set the Picobrew up for the cleaning cycle. The cleaning cycle is recommended every 5 brews in the product guide that came with my pre-order, but they've upgraded to doing the cleaning cycle every 4 brews. Since I've done three batches (and we know how those turned out and what I believe to be the root cause) and then let the Picobrew sit for a while, I decided to go ahead and run a cleaning cycle.

To do the deep clean, they say to put a diswasher tablet or PBW with the mash tun, and a gallon of water into a keg (I used a Homer Bucket and the keg wands included with the Picobrew) and run the cleaning cycle. The water heats to about 150F and does a preliminary run through, and then heats to 207 and runs through again. The whole cycle took a little over an hour and the results were pretty gross - there was very much some gross stuff stuck in the machine. After the cleaning is over and it drains, you're supposed to fill a keg with 5 gallons of fresh water and run the rinse cycle. Well the rinse cycle only circulates the water for 2 minutes and then drains - I'm not too stoked about that - so I might try making a custom ~10 minute rinse cycle as a recipe. I ran the rinse about 4 times, and then rinsed the step filter components separately again before setting up a brew.

pVMFb8vl.jpg


RCdHC1Al.jpg


I'm attempting to do a Ginger IPA recipe that I found online and I'm having some beef with the recipe crafter right now. It still doesn't allow first wort hopping, or save complex mash step temperatures aside from defaults when the recipe is edited for features like hop addition timings. Either way, I did FWH hop this recipe which means that 1oz of hops were in there for a whopping 90+ minutes @ ~150 during the mash.

I'll be attempting to use my chiller later and perhaps do a second batch this evening. So I'll report back later withe details and hopefully more pictures.

During the time that I've "been brewing" I've made lunch, walked the dogs, retrieved my car and put the tires in storage, cleaned around the house, and I'm about to go finish configuring my BrewPi. Love this thing!
 
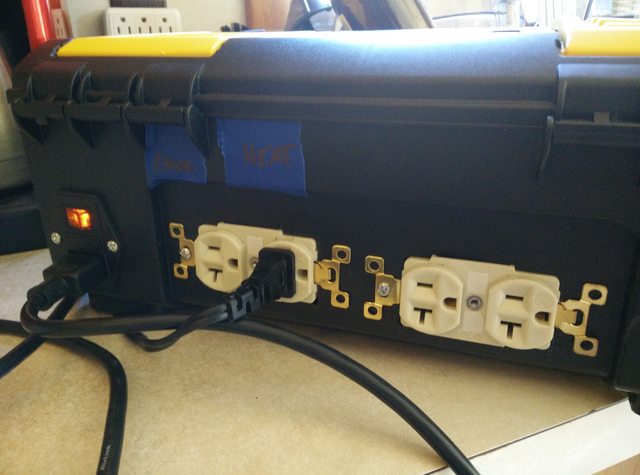
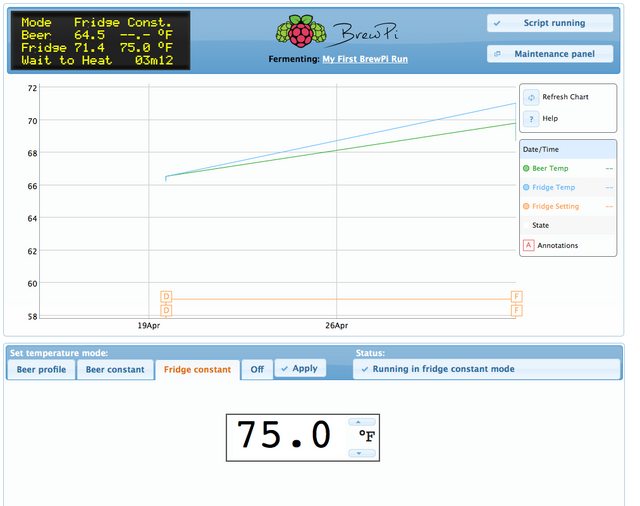
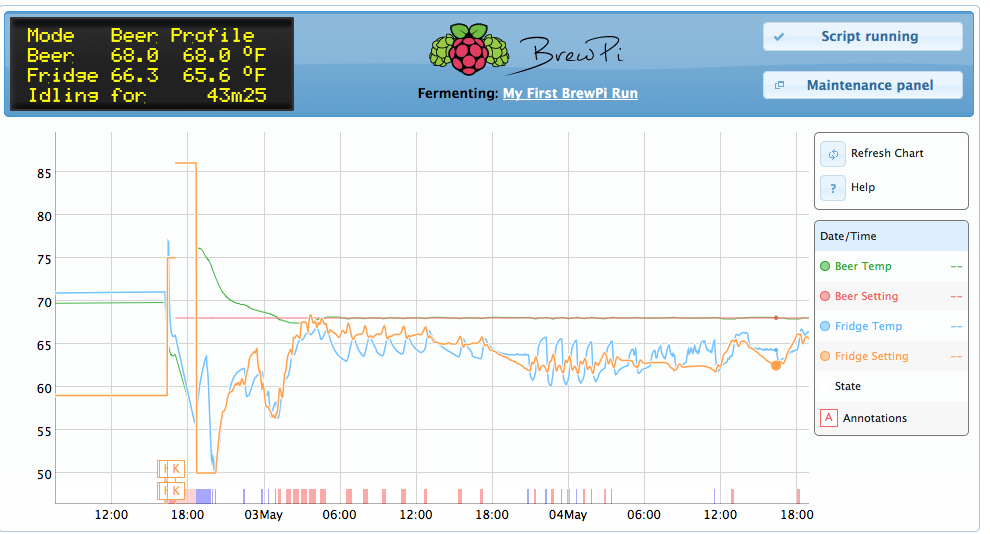
Ok - verified that the BrewPi is working. Still have two outlets installed in-case I ever want to set it up to run a second ferm chamber. Ironed out which temperature probe was for the beer and which was for the chamber, and which outlet controls heating and which controls cooling. The latter task I could have traced wires to figure out, but I was lazy.

CXDGURul.jpg


hjCRWKHl.jpg


Testing the heating and coolilng:
yAiHiTkl.png


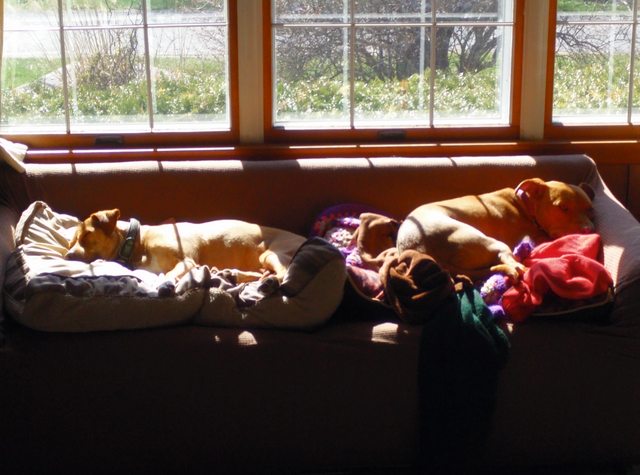
My brew crew is having a pretty rough afternoon.
vAGv1Qcl.jpg


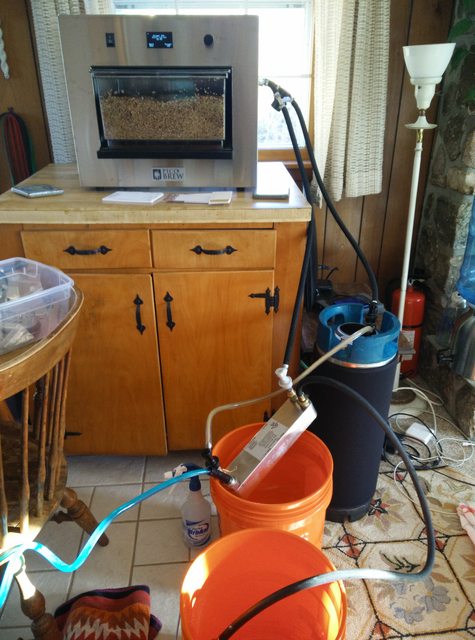
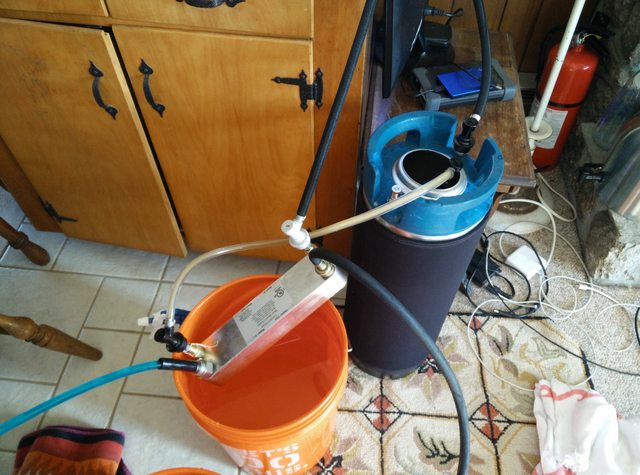
Cooling was a bit of a disaster. One might say that Murphy stopped by. This was largely my fault for not using teflon tape on my plate chiller adapters, so it was a bit of a sticky mess and I had to stop and start a few times until it stopped leaking. In the future I'll be dealing with this by leaving my adapters+ball lock fittings assembled and taking off the bottom (1/2" NPT) fitting to clean and sanitize the chiller.

Also, my original plan was to use gas in and then a gas jumper out of the chiller to get it back to the keg. Well I never got around to building my gas jumper, but I had my liquid jumper that came with the Picobrew - so I swapped the chiller wort-out from gas post to liquid post (since I had to buy 2 pairs of posts to make it work in the first place) and used 1 of the cleaning wands to return the liquid to the keg where the lid normally goes. I hope all that stuff was clean enough.

Once I got the chiller flowing it worked well and I dropped the temperature from ~180 to 70 in about 20 minutes - going through about 15 gallons of cooling water in that time. I reused a good bit of that water for cleaning.

WBEkDvKl.jpg


Edit - its a lot worse than it looks with the two buckets there - I had the second one in place because I didn't want to move the chiller after the bucket it was resting on started to get full.

JuvwNRXl.jpg


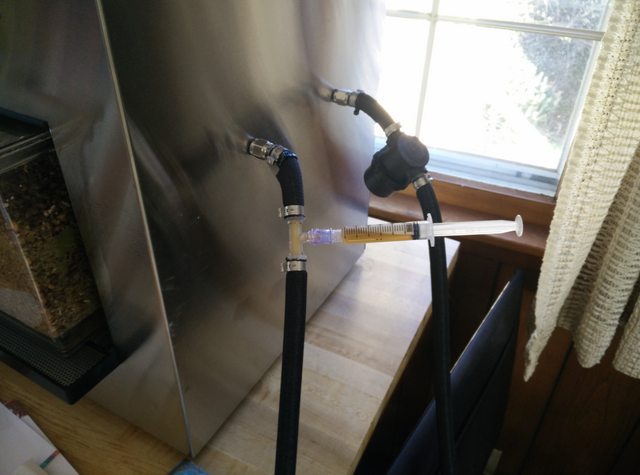
Also got a chance to check out the syringe sample port... only to realize that while I had a hydrometer, I didn't have a proper vessel for filling with a sample to float the damn thing :confused: - next time.

Q6oxM98l.jpg


So this is what the brew ended up looking like. While the chilling finished, I boiled 20 oz of water and added 10oz of honey to finish off the recipe. The ginger is supposed to be added to the secondary. The recipe also called for double pitching the yeast, so I used a whole packet of US-05.

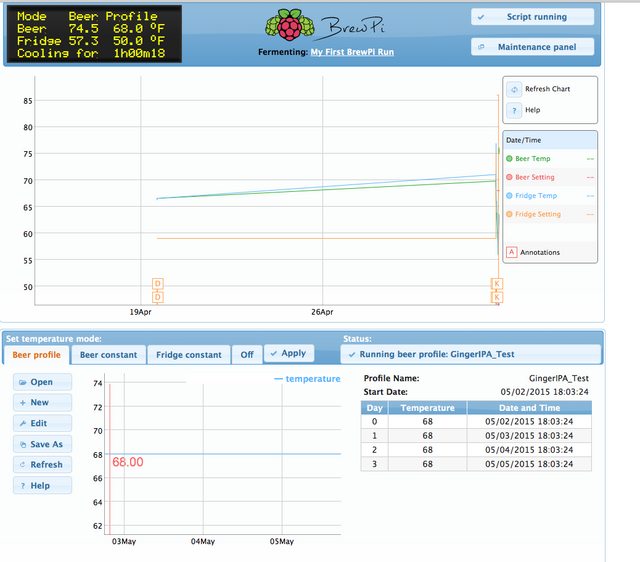
My brewpi is kicked off - going to keep an eye on it for the next few hours but it seems to be doing its job. I'm using the Picobrew silicone keg seal with a airlock for the time being, and snaked the thermocouple wire in the side and set it into the 20" thermowell I have in the wort. If the LHBS is open tomorrow I'll scoot up there and grab a stopper for an airlock - then I'll drill out one of my pinlock lids with a spot for the thermowell and a spot for an airlock - that way I can use that lid for fermenting without wasting one with a PRV.

PiemICUl.png


HDOHtObl.png


Not brewing again tonight. Might be tomorrow if I can fight for a spot in the kitchen.
 
Didn't end up brewing Sunday - couldnt find a beer that would use Nottingham in the same temperature region I'm keeping the IPA.

The BrewPi is working gang-busters. Hoping to brew again Friday, and by then I'll be able to check the FG to see how the IPA is doing.

uw45brt.png
 
Not a stupid question- the easy answer is more gadgetry :D

Really though- In a steady state condition, nothing that a dual output (heating/cooling) temperature controller and themowell/thermocouple couldn't. In a non-steady state it can allow you finer control of processes like allowing temperature to ramp over a few days, scheduling cold crashing, and remote access via the rPi webhost.
 
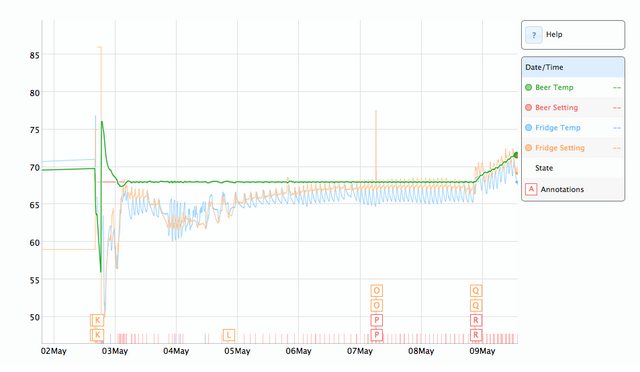
Yesterday I racked the Ginger IPA to secondary and took a hydrometer sample ~1.010 - if the OG prediction was correct that means it'll be about 8%. I added about 2oz of pureed ginger boiled with a bit of honey and another 2 oz of grated ginger - so we'll see if that flavor comes through.

I ramped the temperature at the end - I don't really know why or what I'm doing in terms of fermentation temperatures as I've always been stuck with static temps or by using a swamp cooler to stabilize temps. I'm going to do some reading and learning.

FZfHLwcl.png


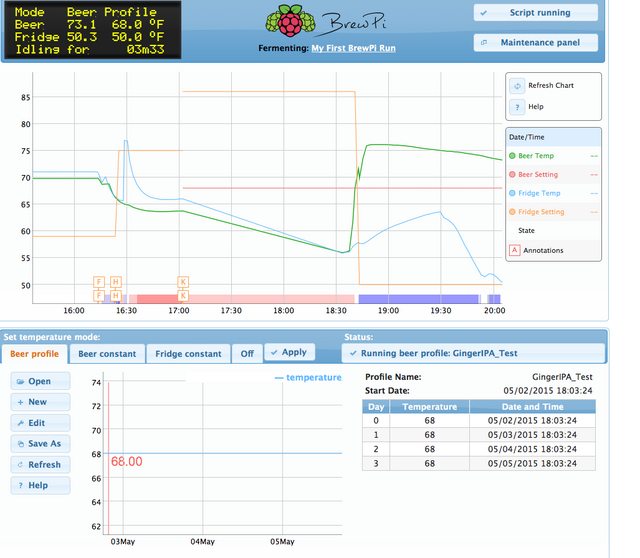
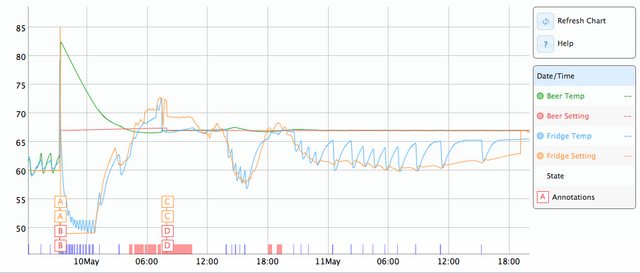
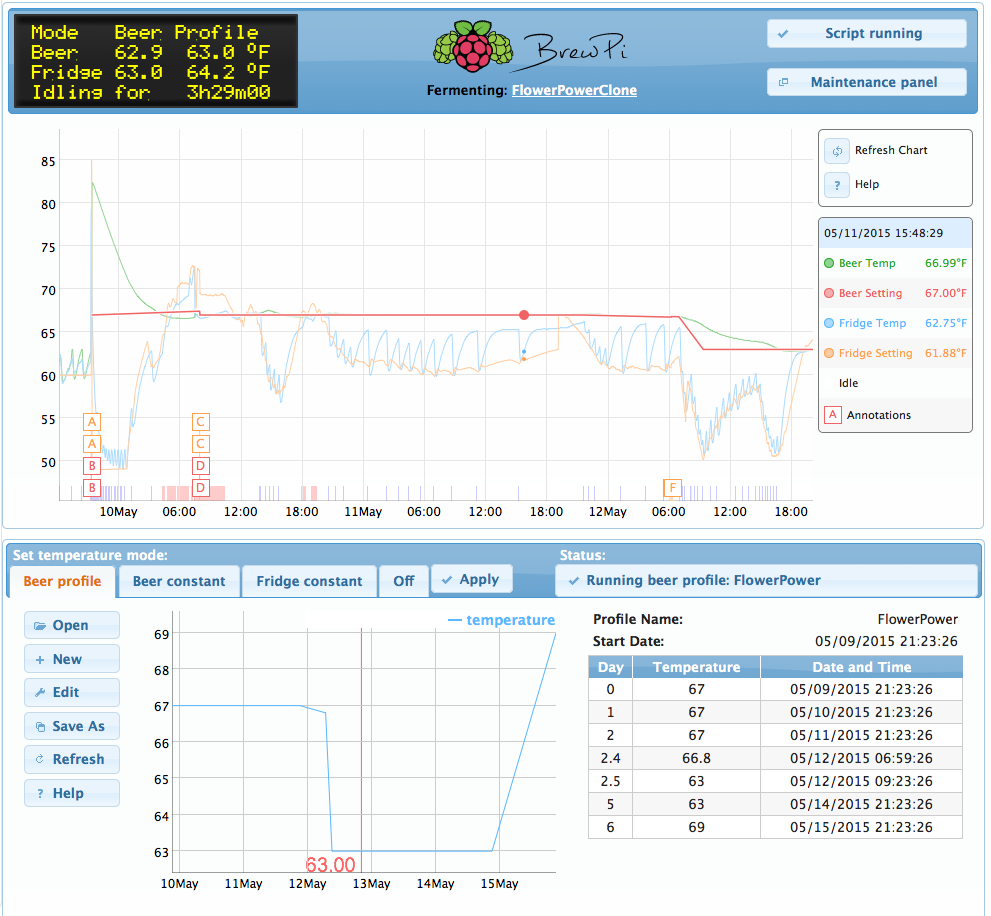
I also brewed a Flower Power clone yesterday. It went pretty well - I used my grain mill for the grains from the group buy and used hops that I had on hand. Had a foaming overflow during chilling so thats why the temperature profile cuts out mid-80's - I tossed the keg in my fermentation chamber with the thermowell and chilled the rest of the way in about 5 hours. Pitched washed yeast this morning.

kTdMjYcl.png


My picobrew has been banished to the basement/garage - so I picked up a stainless steel table with casters - more on that later.
 
I always ramp up farm temps towards the end to ensure complete attenuation. 2-4 degrees depending on how the ferment looks and perhaps where I started temp wise. I always wait at lest 3-4 days to start increasing the temp though to avoid off flavors. Not using brew pi mind you, but a fermwrap and a johnson temp controller
 
I always ramp up farm temps towards the end to ensure complete attenuation. 2-4 degrees depending on how the ferment looks and perhaps where I started temp wise. I always wait at lest 3-4 days to start increasing the temp though to avoid off flavors. Not using brew pi mind you, but a fermwrap and a johnson temp controller

Thanks FlyDoctor! Regarding your point about waiting to 3-4 days that makes total sense. The temperature is fairly constant in the basement/garage (its mostly underground except for the part with the garage doors) - so if you look back at the the picture (in case you can't see the text) Green = Beer Temp, Blue = Fridge Temp, Orange = Fridge Setting (Red = Beer Setting which is overlay by the Green most the time) you can see the fridge drop the set temperature to keep the beer temperature constant as fermentation ramps up, and then tapers it upwards as the active fermentation slows down. Graphs are fun.

MiPIl.jpg


The current graph looks like garbage, but it will stabilize.

TYcUx26l.png


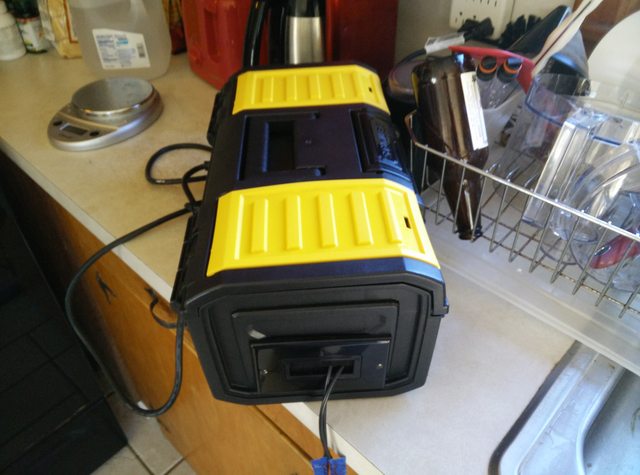
My current issue with the BrewPi is that the thermocouple wires are only 3' in length - way, way, way too short. To deal with this, I had to put the toolbox inside the fridge enclosure - run power in and the the fridge power back out. Wi-fi still gets out and all that, but its less than ideal. I'll be scrounging up some 3 conductor wire and heat shrink to extend the thermocouples to at LEAST 10'. When I do this I'll keep the tool box outside of the fridge, and run the thermocouples I need in - as well as maybe a spare to monitor anything that is in a (3 gallon keg) secondary and fluctuates more with the fridge temperatures.

Also - I apologize for using thermocouple interchangeable with the DS18B20 temperature sensors. Its easier to remember :cross:
 
I have to admit your thread has renewed my curiosity about the Picobrew. When it first started out I wanted to get one and play around with it, if nothing else to allow me to brew 2.5 gallons during the week nights . I really didn't have the money to jump in on the kickstarter and as the price looks to have about doubled, it doesn't look like I will ever have one to play around with and help in keeping something in my keezer.

Thank you for your continued posts about your process and how things are going with the system. I can at least live vicariously right? ;)
 
Baja - do you have any details on your brew pi build? Is there another thread with the details?

I don't have many details on my build aside from the few pictures scattered in here. Post #10 and a few later. Don't use a GFCI outlet like I did at first as they require a reset if power is removed. My build came in around $100 including the heater but not he fridge.

The official homemade brewpi thread is here: https://www.homebrewtalk.com/showthread.php?t=466106

The instructions worked perfectly for me except having to update the Arduino controller on the rPi as another step, which was a blip (since fixed) in the install packages- reading the last few pages in that thread usually alerts you to any software bugs and how to resolve them.

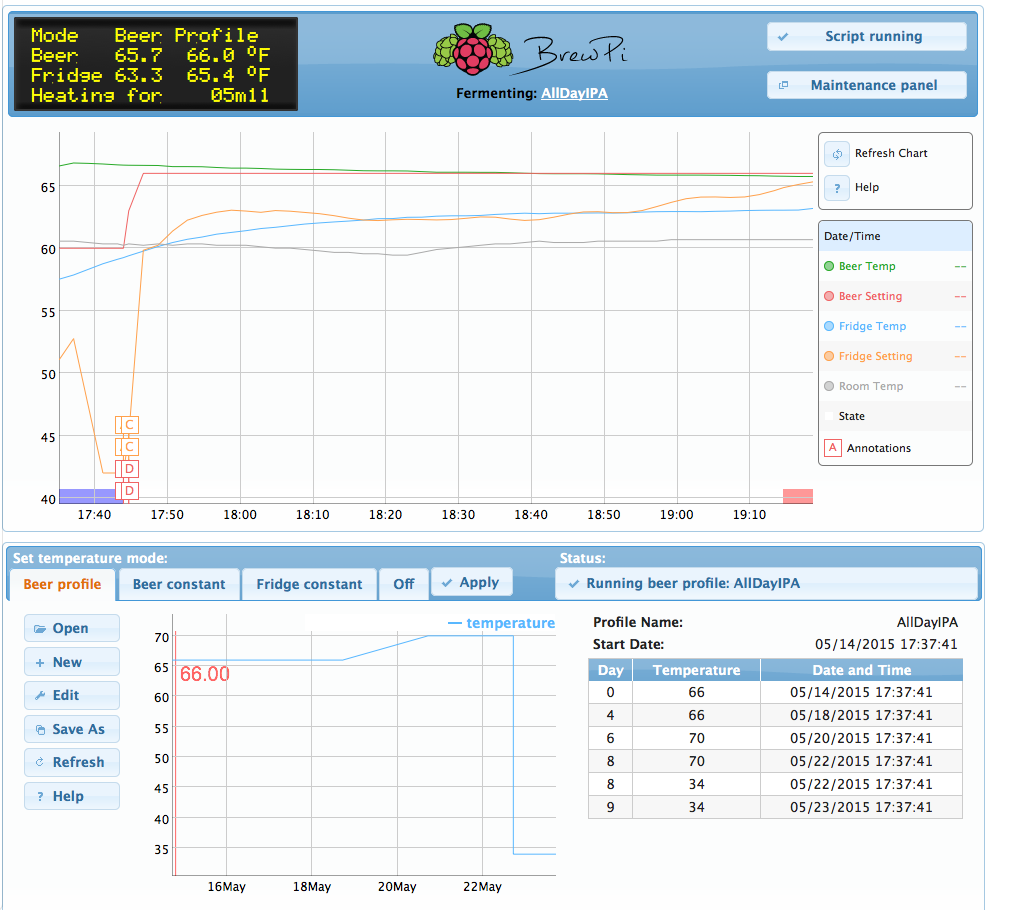
Edit - I think I've cropped this out in all the pictures I've shown - this is my current beer and you can see the profile that I've set for it underneath. I'm still messing around and don't exactly know what I'm doing - but you can build the table for the profile in anyway you like.

V2RzBJU.png
 
I have to admit your thread has renewed my curiosity about the Picobrew. When it first started out I wanted to get one and play around with it, if nothing else to allow me to brew 2.5 gallons during the week nights . I really didn't have the money to jump in on the kickstarter and as the price looks to have about doubled, it doesn't look like I will ever have one to play around with and help in keeping something in my keezer.

Thank you for your continued posts about your process and how things are going with the system. I can at least live vicariously right? ;)

Thanks for the reply- I was starting to wonder if I was talking to an empty chasm of the internet!

I'm glad I jumped in before the end of the preorders. That saved me at least 15% of the current cost. I'd really like to get to brewing on week nights, and I will, but I'm not there yet.

The PicoBrew recipe crater shows a pretty large gap in efficiency between the single step infusion mash 90 min and the multi step mash (mash in for 20 drain, mash 1 for 30, drain, mash 2 for 60 drain, mash out for 10 final drain. They don't publish the assumed extraction efficiency but the estimated OG shows a large gap for the same grain bill. I'm cheap (no- seriously, stop laughing!) so I don't like wasting the mash grain so I've been going for the longer mashes- which pushes the brew time to 6ish hours. There are several advocating for a delayed start/remote start feature on the picobrew forums - so hopefully that makes it into the next firmware update, meaning I could setup a brew in the AM, get it started at 3PM from my desk, and be on hand to chill around 830 after the dogs are walked and dinner is done. One can dream.

Feel free to ask questions!

I've been lurking myself and appreciate your posts too! I've been on the fence for a while about buying one and finally caved in last week after a very detailed reply to a stream of e-mails I sent to Annie. I can't wait to receive it and am too looking forward to the new remote start feature!

Cheers!

Cool! Care to summarize your specific concerns and how they were resolved?
 
Cool! Care to summarize your specific concerns and how they were resolved?

My number one concern was being able to operate at 240v which some of their kick-starter customers already had but these units were not available through the website.

Secondly, metric... I NEED to be able to measure in grams, kilos and litres. I was assured that this will be rolled out at the end of this month.

Thirdly, batch size... I have a 13gal sanke keg fermenter with corny keg in/out posts and so wondered if it would be conceivable to hook this up to the zymatic. Annie said I could and gave me some specifics around how this can be done.

Apart from that your musings as well as other users experiences gave me the info to make an informed choice.

Can't wait! :)
 
My pico renewed my "fun" in brewing. 13 batches over 30 days. I love it!
 
My number one concern was being able to operate at 240v which some of their kick-starter customers already had but these units were not available through the website.

Secondly, metric... I NEED to be able to measure in grams, kilos and litres. I was assured that this will be rolled out at the end of this month.

Thirdly, batch size... I have a 13gal sanke keg fermenter with corny keg in/out posts and so wondered if it would be conceivable to hook this up to the zymatic. Annie said I could and gave me some specifics around how this can be done.

Apart from that your musings as well as other users experiences gave me the info to make an informed choice.

Can't wait! :)

Musings is an eloquent way to put it - more like rambling since my GF gets sick of hearing it and people at work will just think I'm a drunk :drunk: :D Ok, not all of them.

So you're in New Zealand? I can understand those needs. Its interesting that before the preorder ended they were advertising with and without keg, and 220VAC w/ and w/o keg - now they only have one package (110VAC w/ keg) on their site. I think I did see a notice recently that they're ready to go international- but the brewers map shows customers in Europe, Australia and Brazil already. I'm really looking forward to this forth coming update. I hope that many of the recent feature requests on the Picobrew forum get rolled into it

My pico renewed my "fun" in brewing. 13 batches over 30 days. I love it!

Thats impressive! I've managed 5 in... two months? Yikes. I want to churn out a few low gravity beers so I can get to drinking and more brewing - the two high ABV ones I've done more recently will take a bit of time to even out. Whats your favorite recipe so far? All custom or stuff from the recipe library?
 
So you're in New Zealand? I can understand those needs. Its interesting that before the preorder ended they were advertising with and without keg, and 220VAC w/ and w/o keg - now they only have one package (110VAC w/ keg) on their site. I think I did see a notice recently that they're ready to go international- but the brewers map shows customers in Europe, Australia and Brazil already. I'm really looking forward to this forth coming update. I hope that many of the recent feature requests on the Picobrew forum get rolled into it

Yep NZ...I was in the middle of emails from Annie about how best to ship it here and she was great and was trying to slim down the box size and weight for me so that I could use my ship forwarder located in Portland - of course this meant that I didn't need the corny keg which cut it down from 3 to 2 boxes. At the time there were no 240v units available and didn't look like there were going to so I was also contemplating using a 240v to 120v stepdown converter. So as I was saying, in between emails to Annie I get a message from the VP of sales and marketing confirming that there are indeed 240v 'evaluation' units available and would I like one?! I said sure thing and he came back with a price for not only the unit but shipping as well!! and to sweeten the deal he'd throw in the corny for no additional shipping cost...brilliant!!


I'm really looking forward to this forth coming update. I hope that many of the recent feature requests on the Picobrew forum get rolled into it

Likewise - obviously Metric is at the top of my list ;)
 
. Whats your favorite recipe so far? All custom or stuff from the recipe library?

Tastiest one so far is a scaled down (for 2.5 gallons) version of Denny's Vanilla Imperial Porter. I skipped the vanilla, though, because I tend to find sweet beers a little tiresome after a while. But Denny's base porter -- with 3.75oz of bourbon added -- is fantastic.

Most interesting beer I've made -- and I think somewhat succeeded -- was a simple Maris Otter/Rye (3# of each) plus 8oz C40. It was based on ingredients I just happened to have -- 3# MO, 3# Rye, and 8oz C40 -- hopped with 3oz of Citra. Really good -- citrusy and spicy. I say "somewhat" because I didn't dry hop -- so the aroma is not as hoppy as I'd like -- but the bitterness and flavor are spot on.

I've also got a pumpkin ale priming and kegged and aging until fall.

I'm drinking a Moose Drool brown ale clone -- delicious -- and a simple Cream Ale (New Glarus Spotted Cow clone with corn). Both are tasting really, really good. I'm kegging at 10psi in an Edgestar dual-tap Kegerator @ 35F-- no force carbing -- and am trying prime in the keg pre-kegerator where possible, but I've been drinking them pretty fast. Friends and family say the beers are fantastic -- as good as any brewpub beers -- and as they age and gradually clear (the Brown Ale and RyeIPA especially) as good as anything bottled.

Really happy with the Pico. It's been a fantastic tool. I'm overnight chilling -- no added equipment -- and loving the fact that my gadgets right now are nil. No fancy chillers or hop backs. Just the Pico, a pH meter, a refractometer (sp?), 10 5 gal corny kegs, and 6 2.5 gallon kegs. Simple and direct -- but it's producing fantastic beers. I specifically tell folks they're non-filtered -- and for the lighter beers -- the cream ale, for example -- folks are a little dubious -- but even with a (still) cloudy cream ale, the taste is spot-on. 1 or 2 more weeks in the keg, and it'll be as clear as anything professional. I use Safale-05 exclusively, chill to 100F with a couple of Home Depot buckets of water, then chill overnight to 63F (my ambient basement) and pitch. Two weeks (give or take) in the fermenters, then CO2 transfer to 2.5 gallon kegs with .75 oz priming sugar in .75 oz boiled water. By the time they rotate to the kegerator, they're lightly carbed and somewhat aged -- and good enough to serve as soon as they're cold. The 35F and 10psi carbs them the rest of the way over the next week or so.
 
At the time there were no 240v units available and didn't look like there were going to so I was also contemplating using a 240v to 120v stepdown converter. So as I was saying, in between emails to Annie I get a message from the VP of sales and marketing confirming that there are indeed 240v 'evaluation' units available and would I like one?! I said sure thing and he came back with a price for not only the unit but shipping as well!! and to sweeten the deal he'd throw in the corny for no additional shipping cost...brilliant!!

Well thats pretty sweet - I imagine getting it over there isn't cheap - but I know that the more a company ships, the steeper the discounts they get from shipping companies - so I imagine starting to to international is working in their favor!

Really happy with the Pico. It's been a fantastic tool. I'm overnight chilling -- no added equipment -- and loving the fact that my gadgets right now are nil. No fancy chillers or hop backs. Just the Pico, a pH meter, a refractometer (sp?), 10 5 gal corny kegs, and 6 2.5 gallon kegs. Simple and direct -- but it's producing fantastic beers. I specifically tell folks they're non-filtered -- and for the lighter beers -- the cream ale, for example -- folks are a little dubious -- but even with a (still) cloudy cream ale, the taste is spot-on. 1 or 2 more weeks in the keg, and it'll be as clear as anything professional. I use Safale-05 exclusively, chill to 100F with a couple of Home Depot buckets of water, then chill overnight to 63F (my ambient basement) and pitch. Two weeks (give or take) in the fermenters, then CO2 transfer to 2.5 gallon kegs with .75 oz priming sugar in .75 oz boiled water. By the time they rotate to the kegerator, they're lightly carbed and somewhat aged -- and good enough to serve as soon as they're cold. The 35F and 10psi carbs them the rest of the way over the next week or so.

Either I've seen some of your posts over on the PB forums, or your story is similar to others in terms of scaling back equipment wise and all of that. Hearing your success in beers is awesome, I can't wait to have more of my own to try.

Looking through my recipes there is nary a beer under 6%ABV - which means longer for them to come together and mellow out. I'll be doing what I can to fix that. Speaking of which....

I managed to get a weekday off today (after a month of trying) and spent as much of it as I could doing brew stuff. I had to clean kegs and get water before I was able to brew, but I kicked off a batch around 9:15AM. This was my first 3 gallon (final product) batch with the Picobrew - but also my first mash under ~8lbs of grist. I realized after I started it that I should have pushed it to max grain/water capacity - so I reforumlated the recipe for next time (4.25 gallons of final product.) Everything went great after I started it and I even left for an hour to mow my Grandfather's lawn.

Chilling, however, didn't go so well. I don't know what the deal was, but I wasn't getting any flow. I called it off after it fell to 112*F but was starting to level off, and used 2 buckets of water, 1 with ice, to get it to ~68*F (like @bobbytuck) After I emptied the grain and rinsed the mash tun I did a full clean - kinda scary how much crud comes out.

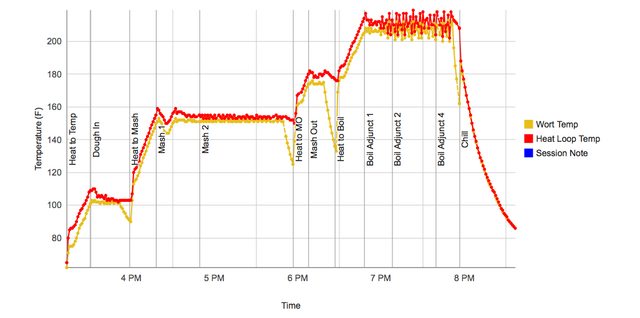
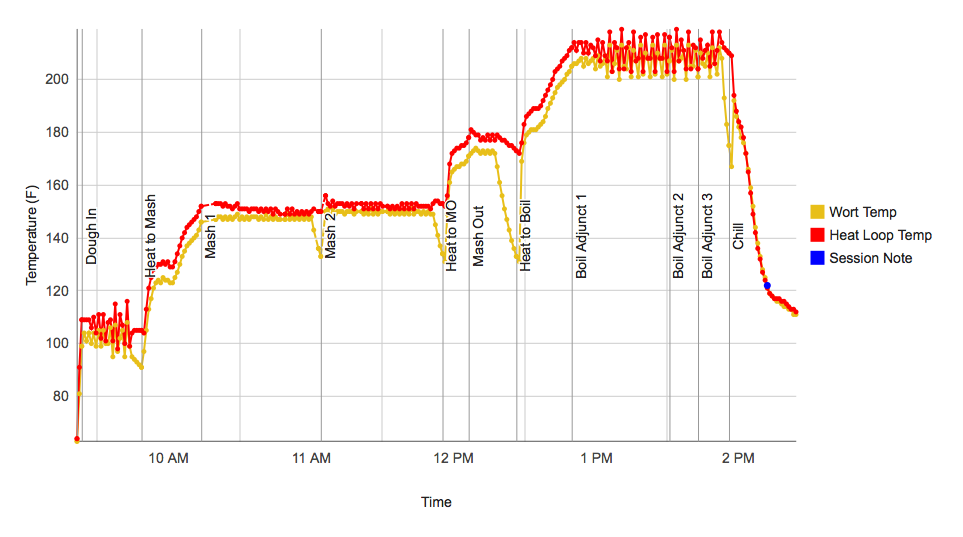
Here's today's brewing graph. Notice how much the "boil" temps are bouncing around? I think thats because I was having flow issues caused by the inline in-take filter starting to get clogged up - which may have also caused my cooling flow issues. I'd previously overlooked it in cleaning, but took care of that today.

1q4Q9oF.png


Between capturing the cooling water from my plate chiller and reusing rinse/clean water, I'm doing my best to minimize the amount of water I waste in brewing. The Scrubmaster I built really helps with this. After my last brewing session I used captured cooling water to fill and soak the corny keg that I used for a primary in the brew before. Today (a week later) - I emptied that keg and used the (hot!) deep clean water (with dishwashing soap) with the srubmaster to hit the keg hard, then I used the rinse water from the rinse you perform after the deep clean to finish cleaning that keg. The limited cooling water I produced today was used to presoak all the components except the step filter, which greatly helped me hand wash them (the hop filters can be a real PIA because the mesh screen is so fine.)

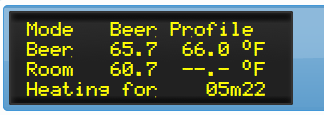
Last thing - I extended my temperature probe wires today while I was brewing - so my BrewPi tool box can now live outside of the fermenter/kegerator. Oh happy day! I did this by adding wire to two new probes, re-assigning the originals to take "room temperature" measurements. It will give me an idea of how stable my garage temps are if I want to secondary or do an external ferment.

1dlZYHn.png

7piC1Tl.png
 
Back
Top