1950s GE Fridge to Kegerator - with some mods

Homebrew Talk - Beer, Wine, Mead, & Cider Brewing Discussion Forum

Help Support Homebrew Talk - Beer, Wine, Mead, & Cider Brewing Discussion Forum:

This site may earn a commission from merchant affiliate links, including eBay, Amazon, and others.

aggies08brewer

Well-Known Member
Joined
Nov 30, 2011
Messages
50
Reaction score
8
Location
Houston
Folks here is a project I've recently started but have been planning for some time. Started off as a Craigslist find 1950s era General Electric refrigerator. I bought it with the intention of converting it into a homebrew sized kegerator capable of holding 4 - 5 gallon kegs of beer. 1 will most likely be a cider, the second root beer or cream soda for my nephew (and me) and the other two rotating seasonal taps.

Major features will be converting from a standard light bulb in the back to flush mount LED lighting on the interior, stretching the chassis 5.5 inches on the inside box and outside box to accommodate the four kegs (9" diameter each), plumbing the system for CO2, adding casters for mobility and of course, paint. Will also be adding a temperature controller for the ability to dial in an ideal serving temperatures. There will be a shelf on the top for bottle storage as well - should be able to hold 5 rows of 6 bottles. Any reasonable suggestions are more than welcome. :D

Starting with the chassis:


GE Logo on the door, will probably re-chrome this and paint the channels.


Door handle, I tried to polish this out later, it's very scuffed, will go to chrome.


The back panel. The compressor and coils come out as one unit. Another gentleman has restored one of these (just using black epoxy paint :scared:) and a "kill-a-watt" and calculated that running the same model fridge to be $6/month. Not having an auto defrost really makes these old units energy efficient.


Interior of the door. I believe this panel to be Bakelite?? Someone let me know if I'm wrong. It's very brittle, but not quite plastic like.


Freezer door, this is where the coils come into the fridge and cool the interior. Love the classic styling of the font. This will just be painted, letters and logo left intact.


Current incandescent interior light.


Compressor underneath the frame.


Lines running from coil through back panel into interior shell. Note the fiberglass insulation.
 
Shot of the temperature controller. I plan to cut out the current knob and put in a LCD programmable controller. I'll need to do some more research to see if it's rated for the temperature and UL67 rated for moisture resistance.


Inside shot of the door. Looks like someone replaced this fiberglass with a more modern flavor. It was in a plastic bag and not rotted/smelling.


Rust damage at the bottom of the door. I'm debating drilling weeping holes in the door... There are none now - thoughts?


Full shot of the interior as is. The stretch on the interior shell will happen right at the back, while the exterior will get stretched at the front. This is mainly to avoid dealing with the bead rolled floor and roof. It's also worth mentioning here that the shells are both 20ga steel. The interior is ceramic coated and is a bear to grind back for welding. I'm not sure yet how I'll tackle scuffing this for paint.


Detail of the inside of the door where the logo attaches. Interesting to me was that they used wax as a glue/sealant. The bottom of the exterior shell was covered in wax. Water got underneath and rusted it to hell. The rust wasn't a big deal, but removing the wax to paint will be troublesome. I've already washed it 3 times with AJAX.


More rust...


Insulation - 3.5 inches of fiberglass.


Cut out the bowl pocket for the light bulb to weld in a patch panel.


Here is where the bad ideas started - I used 22ga to make the panel, cut it too small and...


used a new welder with .030 wire and.....


oil canned it... Don't worry, I've already fixed it... More to come on that.
 
Most of the rust removed on the bottom of the exterior shell. Used a wire cup brush and naval jelly.


Rustoleum black appliance epoxy paint applied. I know I'll be cutting and welding into this but my reasoning is two-fold: 1) at this point I wasn't sure I wanted to keep going with stretching it because I just got done warping the hell out of the other piece and 2) I really wanted to stay busy and get it cleaned up and stop any more rusting because I washed everything down after tearing it apart. Everything rusts quickly in H-town.

Moral of the story is that I really like this paint and recommend it!


Slots cut for LED lights. 12" on each side and 8" on the top. More lights will be behind the regulators on the back wall and on the tap handles..


Miller Digital Elite glamour shot....
 
Preliminary LED attachment method... Used the 20ga strip I cut out, bent it, drilled it, countersunk the aluminum flush mount bezels and used a #4 countersink screw and nut. I don't think I'll weld the tabs after looking at them again, I don't see a reason to add more heat to this sheet metal. That, and the heat makes the ceramic pop and I'm worried about it flaking out or cracking later...


Bottom epoxied up. Once again, I really like this paint. Only flaw is that it has really terrible coverage or I over applied it.... Remember, no primer is used with this paint..


That's all the pics I have for now... More progress soon and thanks for looking.
 
This is going to be awesome to watch develop!

Thank you for reading!


@ h4mmy86 - No they don't... I was looking at my new Samsung fridge and A) it has a computer in it.. and B) the interior is all plastic. The best thing IMO that modern fridges have is water in the door and milk gallon holders... other than that.. they just lack style.
 
subscribed so I can check out the pics and follow this story later. Love the old style fridge.
 
Thank you for reading!


@ h4mmy86 - No they don't... I was looking at my new Samsung fridge and A) it has a computer in it.. and B) the interior is all plastic. The best thing IMO that modern fridges have is water in the door and milk gallon holders... other than that.. they just lack style.

heh, I don't even like those features. Our milk doesn't last as long when it's stored in the door and the water filters for the fridge are more expensive than they should be.
 
Wow. Those pictures look familiar! Good luck on the work. I'll definitely be following this.
 
These are just cool! Just found mine on Craigslist and am planning my restoration as well. Looking forward to sharing notes. Already checking out the LED idea :rockin: I'll start (yet another kegorator) thread next week. Good luck with yours.
49+GE+Fridge.JPG
 
heh, I don't even like those features. Our milk doesn't last as long when it's stored in the door and the water filters for the fridge are more expensive than they should be.

TRUTH!!

Why are those filters so expensive??? They are just blocks of charcoal in fancy plastic housings..... I've been getting mine online lately for at least half the price of the big box stores.

@ Danno - yours looks to be in better shape than mine! Don't use my ideas and make a cooler one before I even get mine put back together!! :mug:

Few LED pics coming soon..
 
LEDs came from superbrightleds.com

I picked up some aluminum channel, water resistant LED strips - cool white I believe, end caps for the channel, and a translucent plastic cover for the channel. Also got a waterproof AC/DC constant current converter to power everything along with a small but nifty switch that can make them fade, blink, flash and in general give you epilepsy if you stare at them.. Mainly will be used as a PWM dimmer to control brightness as I'm not too familiar with reading 5500K brightness and converting that into useful fridge brightness usefulness.

LEDs will be wired to the original door switch, power supply will be mounted to the chassis underneath with a grommet and quick disconnect leads for the wiring as the inner box just slides into the outer shell with 4 bolts at the front. This reminds me - if you need any tips getting it apart let me know, some of it is a little tricky.

The fridge already has a voltage splitter taking the incoming AC and splitting it to the compressor and the original light socket. I might rewire this to include a ground plug; currently only has a two prong wire, but the light and motor all use 14ga 3 strand??

On to the good stuff:

I cut out the entire back and replaced it with 16ga cold rolled sheet. This was to eliminate the oil canning from my poor fitment of the original light bowl patch. Nice and flat now, the 16ga and .023 wire make a big difference..


Shot of the LEDs and the channel. The water resistant ones like these come dipped in a plastic coating. You just snip them apart at predetermined lines, strip back the plastic and resolder on your wire leads. Interestingly, you don't have to jumper the ends, I guess the internals take care of that - very handy. I believe I got 8 LEDs per 12" channel.
 
TRUTH!!

@ Danno - yours looks to be in better shape than mine! Don't use my ideas and make a cooler one before I even get mine put back together!! :mug:

Few LED pics coming soon..

Its in amazing shape, came out of a church office. They were the original owners. Didnt have the heart to tell them what I was turning it into lol
 
Of course! I'm really looking forward to seeing what you do with yours. Mine is happily purring along.

It was you build that inspired me as well. The day I read your post is the day I found mine on Craigs List. Decided it was fate and was destined to build this! (Insert wifes eye roll here).

:mug:
 
Its in amazing shape, came out of a church office. They were the original owners. Didnt have the heart to tell them what I was turning it into lol

Mine came from a nice old couple who had it for years. They remembered their father keeping beer in it and were delighted to know that I would do the same. It's a bit unfortunate that they used white latex house paint to "restore" it, but who knows, maybe it looked really ratty before they painted it.

Bought my STC-1000 yesterday, plan to remove the original thermostat and fabricate a bracket to hold it in the same place. I sure do like the original knob and look, but would like to be able to dial it in. I'm still torn though, because installing a thermometer and using the dial-adjust would yield the same result in theory... but what's the point of modernizing it?

Does anyone have any thoughts on drilling some weeping holes in the bottom of the door and exterior shell bottom to help prevent future condensation/water buildup? I don't see how it could be bad, as car doors have them.

Next question - kerber - what did you use for a gasket? OE ones are very over priced...
 
Does anyone have any thoughts on drilling some weeping holes in the bottom of the door and exterior shell bottom to help prevent future condensation/water buildup? I don't see how it could be bad, as car doors have them.

I use a desiccant dehumidifier (this one) setting in front of my freezer compartment fan. As long as I'm not opening and closing the door all the time, it lasts months between drying. We'll see how it holds up through a humid ND summer.

My only concern with weeping holes would be breaking the seal on the fridge. While any small gaps in the gasket would be just as bad, I wouldn't knowingly introduce leaks.

what did you use for a gasket? OE ones are very over priced...

I used some 'Black High Density Rubber Foam Weather Stripping Tape' from Home Depot. It may not last years like an original, but It's a lot cheaper and very effective. The big trick is adjusting the gap of the door so that you get a consistent seal around.

Don't worry if the door is extremely hard to shut after first installing the tape. It will break in and conform to the gap.
 
Last edited by a moderator:
Sounds like a winner. Might have to try and find it in white as I'm going for a metallic "celery" green and with white interior. Hopefully they make it in different colors. I cannot fathom how an extruded rubber gasket without embedded magnets is $60+ !!
 
Got the last LED strip roughed in and wired up last light to show how it will look. the USPS man came and delivered another surprise today - My STC-1000 temp controller. Couldn't easily find the Fahrenheit version but no worries here. The bezel will get painted.

Here in Texas only the cooler side will be used :D

Out with the old....

oldcont.jpg


And in with the new:

stc1000.jpg


Got very lucky in that the panel fits right inside the old raised aluminum bezel. I was having design terror worrying that it might extend past the sides of the raised inner bezel and I would have to do some jonky mod to make it look right. I'd hate to lose the classic look of the current aluminum piece.


On to some lighting... I got the last piece cut and the channel fitted with end caps. Also got the wire leads soldered onto the top light strip. I soldered it from the bottom, but next time I think I will scrape back the water proofing layer and solder it from the top. Here it is with heat shrink - used two sizes to make it look like this.


Here is a shot of the top light off - I assume the strange angle is a result of the camera perspective. I spent a lot of time lining it up with the other two lights on the side... I also cut this hole a little larger to allow me to fine tune alignment.


I'm tempted to paint the aluminum track and the plastic end caps because they don't match each other very well. It's too bad they don't make aluminum end caps...

LED on - only thing I don't like here is the dark side on the right. This is caused by the heat shrink filling up the channel and blocking the light from reaching the end. Might have to trim it down some..


Couldn't find my real camera - sorry for the cell phone pics.. Any questions just ask!
 
Looking great!
You wont see the LED strip since the fridge height is only shoulder high. Agree Chrome would be sweet in keeping with the theme. Also glad to see the controller fit. I was having the same worry lol! I finally found the sweet spot with the analog dial but it swings between 38 and 40 depending on the garage temp. Looking forward to upgrading that. My teardown begins next weekend. Cant wait :ban:

The sweet spot was my concern.. However, there is a really awesome chrome nautical period correct dial thermometer on amazon and various other places that I would love to have mounted inside if I retained the knob. One problem, it runs about $250..... I'll just use my $20 STC..

Maybe I could chrome the bezels and just paint the end caps... Got a quote of $100 to chrome the handle, hinges and the other odds and ends. Might can get a few more pieces thrown in.... :ban:
 
I feel sad. I had a fridge just like that.

I put a tap in it, placed my C02 and Keg inside and just... you know. Drank beer.

My worthiness level < your worthiness level.
 
I feel sad. I had a fridge just like that.

I put a tap in it, placed my C02 and Keg inside and just... you know. Drank beer.

My worthiness level < your worthiness level.

Don't forget that you're drinking cold kegged beer right now and I'm not!!
 
I got the STC-1000 mounted up - spent some quality time with my jigsaw and even more quality time with hand files...

Ordered the steel to make my regulator mounts. 2x2 A36 0.065" wall. You can order steel from amazon, and if you play it right with Prime, you can get around 8 or 10 ft sticks with free shipping for as much as I can get them locally.

Also ordered the gauge faces - 4 of them - 1.5" diameter and only got 1... The rest are back ordered. I think tonight I'll start fabbing up the regulator tree and then decide on a CO2 distribution block tonight. As far as plumbing goes I am leaning towards 1/4" SS line with compression fittings. I'd like to do flare, but my flaring tool won't do stainless - new ones are ~$200!!

I'm also looking into swapping the way the door opens. Currently it opens to the right, I'd like it to open to the left. Not as easy as nowadays, I'd have to cut out the holes, patch the old ones... Might not be worth it.
 
This great thread immediately came to mind when I saw this just now, listed on Craigslist in the SF Bay Area. A 50's steel fridge that has some nice curves. Someone should definitely snag this. If I didn't already live in a cramped apartment with no space for another project, I'd probably jump on it, but I also don't even own a truck.


http://sfbay.craigslist.org/sby/for/3752349278.html
 
It would be tough to do the paint in an apartment! But, you can do like the rest of us hoarders and buy it now to build later!

Pay a buddy in beer for the truck rental!
 
Oh, I do all sorts or refinishing projects like this. It would be awesome to have this guy out on my little balcony! I've got a tall stainless work table that works perfectly as a small project spot. I've rebuilt a lot of vintage espresso machines and various gear like that using it. If I had easier access to a pickup, I'd probably jump on the chance.
 
Can't get imageshack to play nice - had to get a photobucket account. I really like the interface on photobucket... Anyways - on to the good stuff:

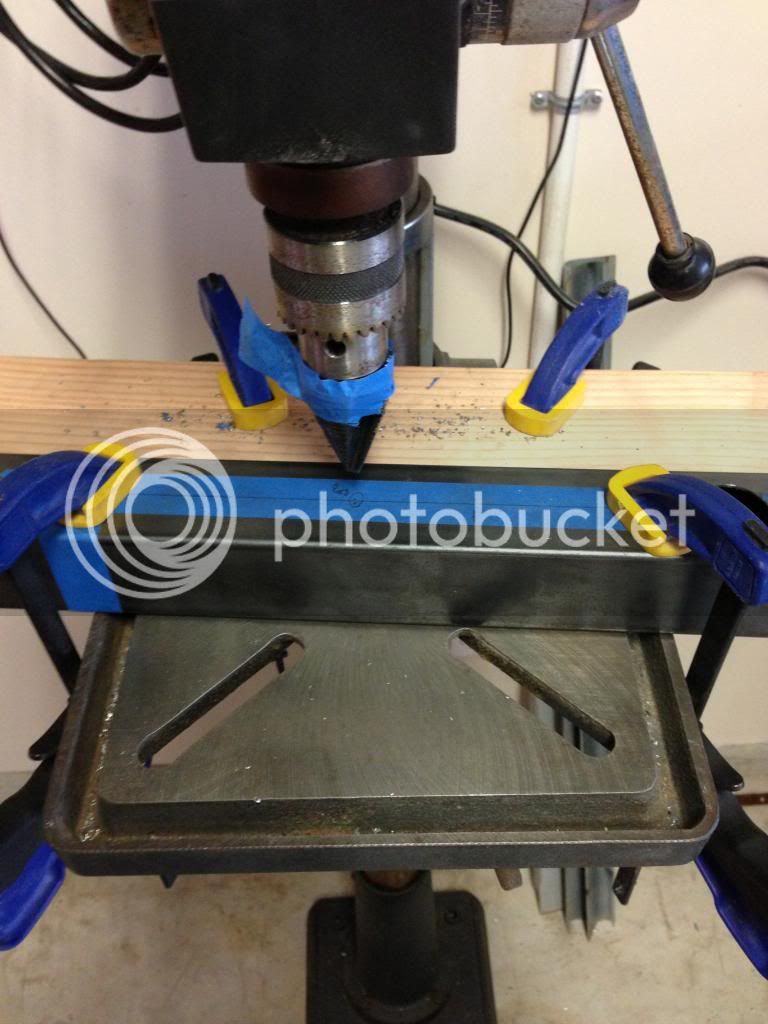
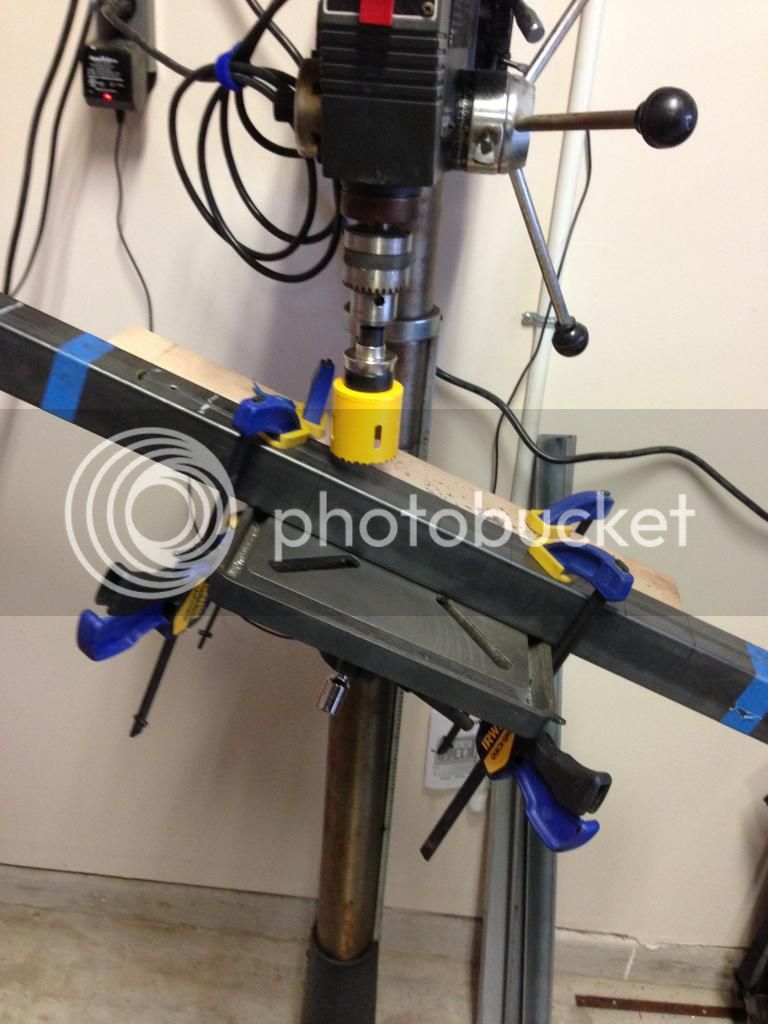
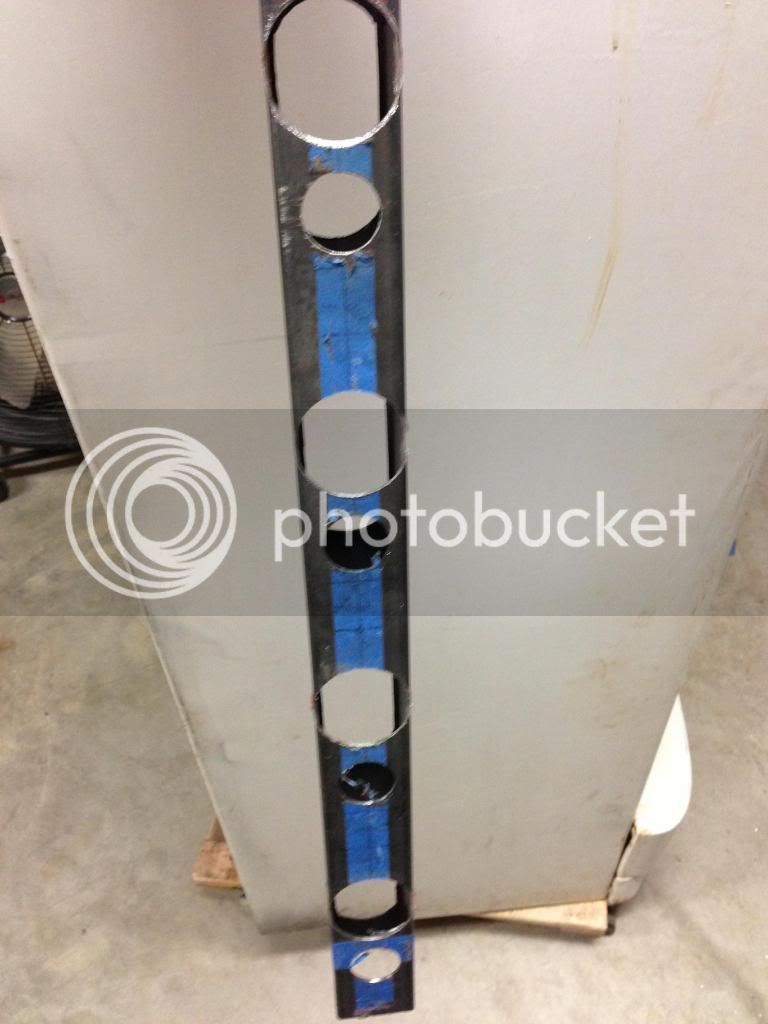
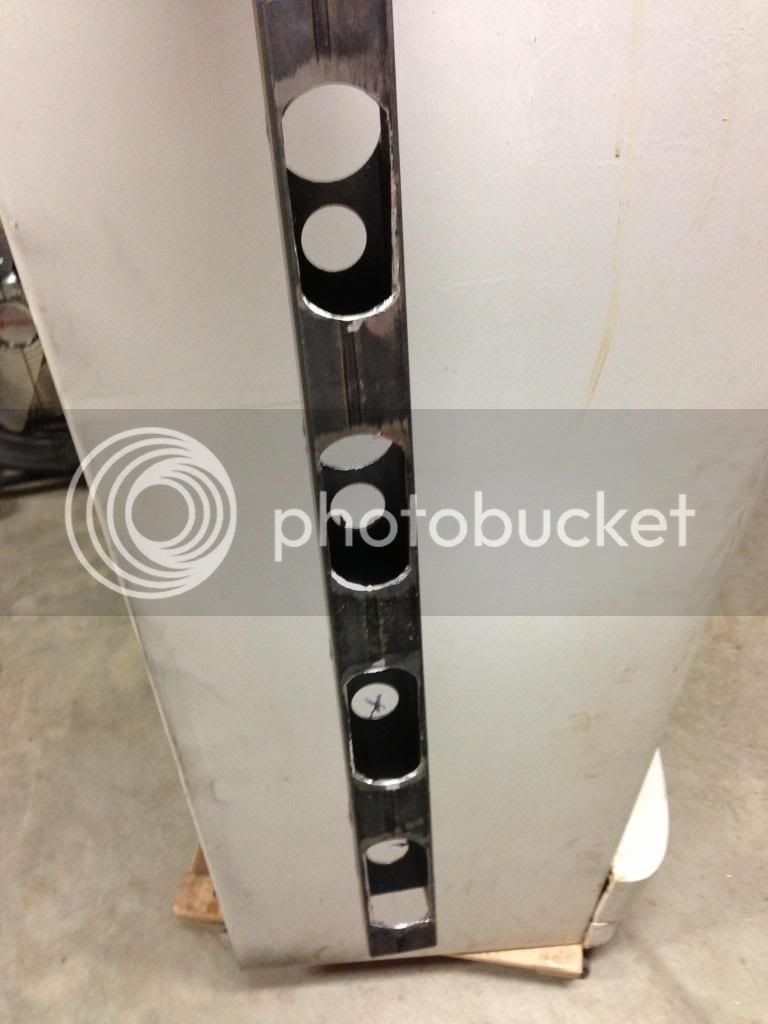
Bought some 2"x2" 0.065" wall tubing to mount the regulators to. Last night I got the regulator mounts and pass through slots cut out. Didn't have the correct hole saw size (or a plasma) so I got creative with the drill press. I wanted half round slots so I figured I would just use half of the 2" hole saw that I had... I cut the straights with a cut off wheel on my angle grinder.

Tonight I hope to cut the gauge holes out and weld in the standoffs.

Step drill bit to make the holes for the regulators.


Drill bit is an Irwin or Greenlee. I can't remember this morning. Works awesome.

And the shot for when you don't have the correct (1 3/4") hole saw and just need a part of a circle cut out. :rocker: I don't advise anyone to do this in any way.


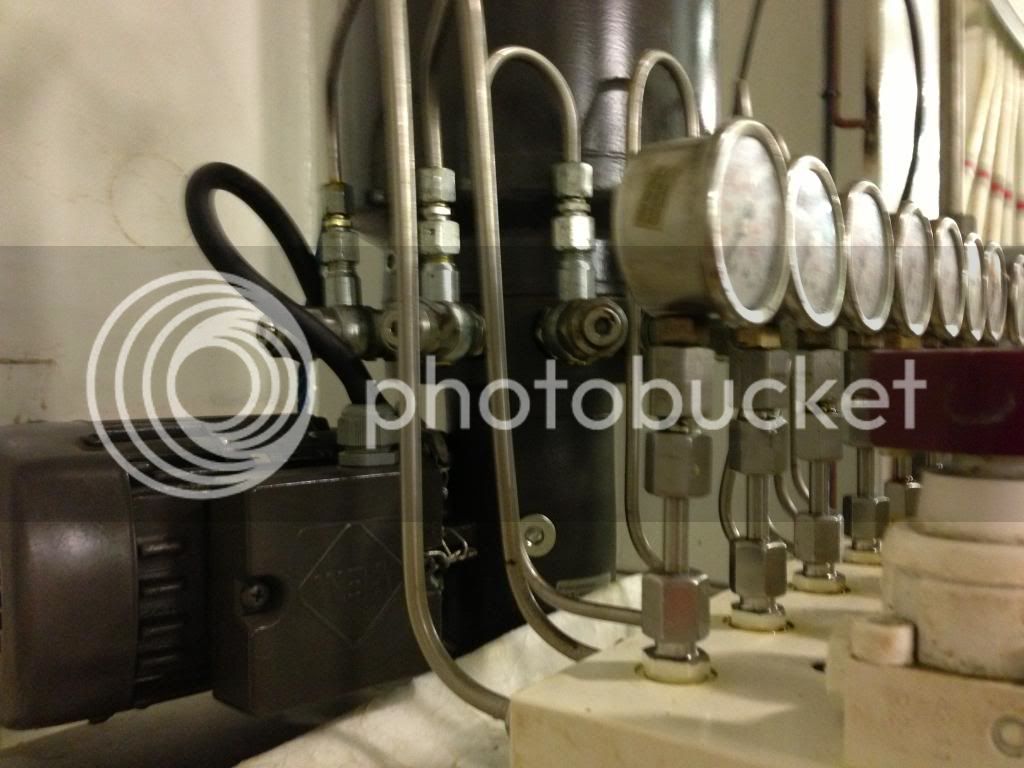
And lastly - part of my inspiration for the regulator mounts and plumbing. This is a high pressure air control board from a ship.

 
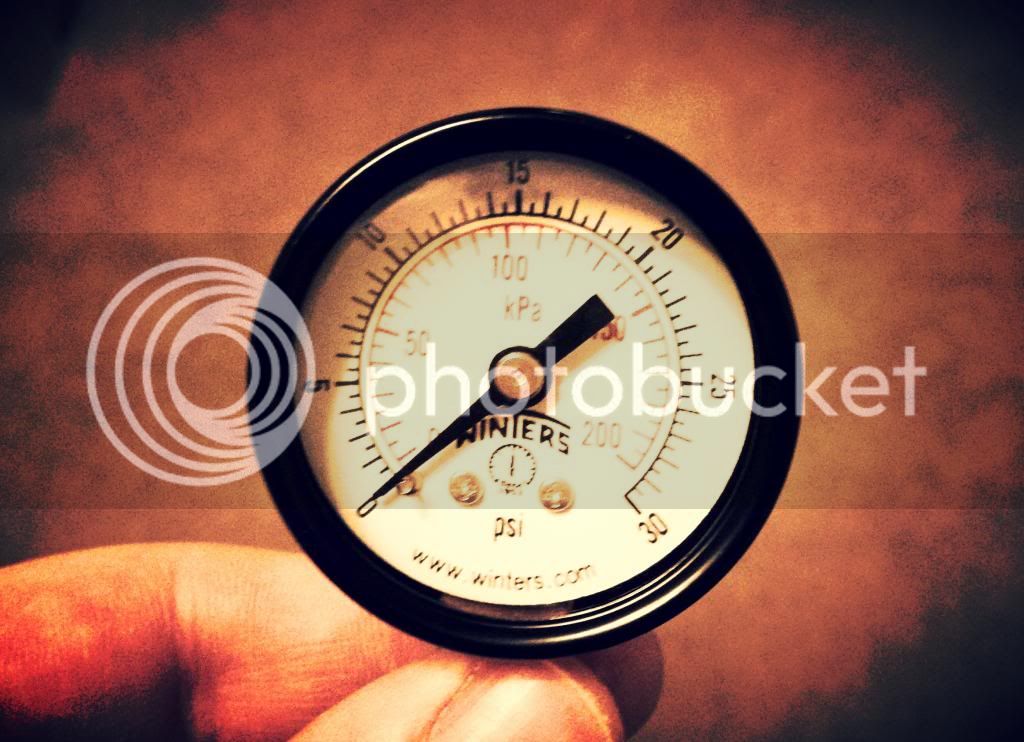
Gauges came in last night - 4 total Winters 0-30 psi; 3% accuracy over the full range. Should be good enough for a lager. Mounting cups should hopefully come tonight if I can find some steel on the way home.

 
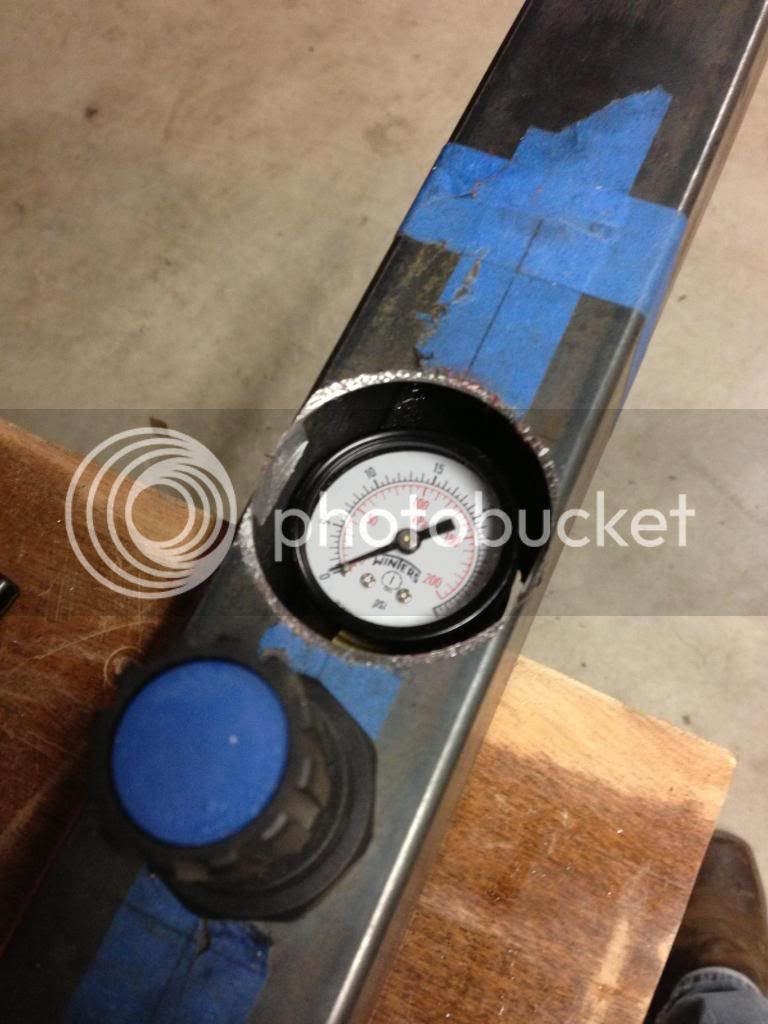
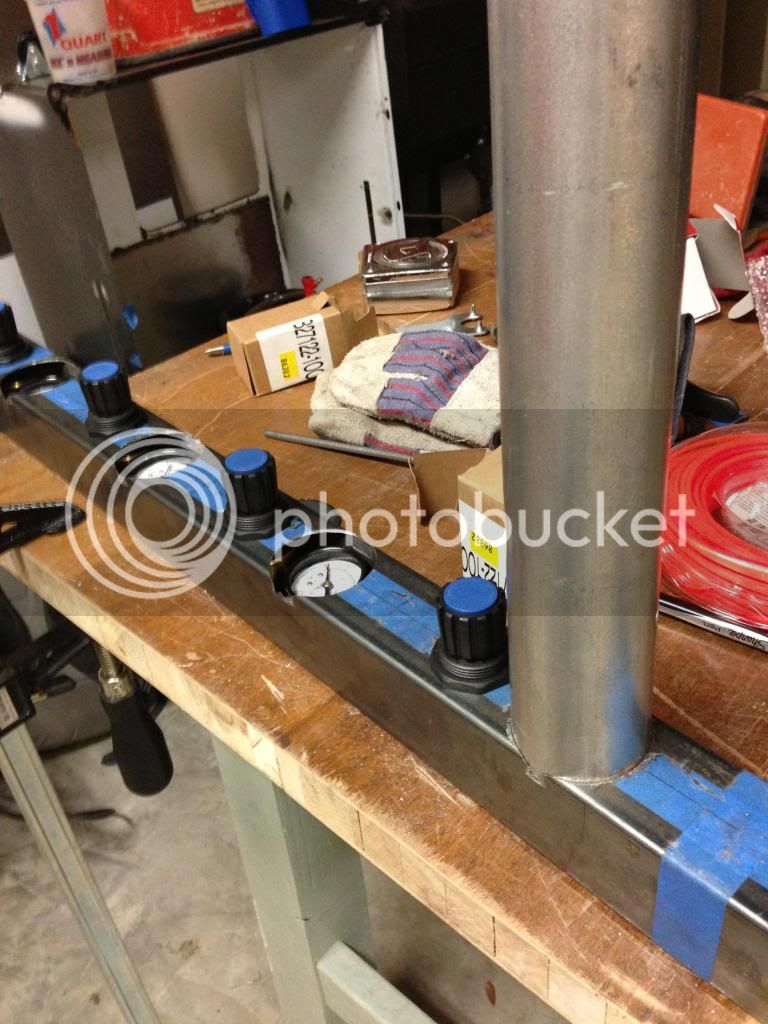
Test fit of regulator and guage in the "cluster holder mount thing." Drilled a 2 inch hole into a 2 inch tube about a 1/4 of an inch deep. Discovered one important thing - my drill press chuck is fubar'd. The spindle runs true, I took the chuck off, cleaned it, everything, but when you get a two inch hole saw on it it wobbles like crazy and makes cutting these tight clearance holes a real PITA.


2nd lesson: I am not a fan of DeWalt hole saws. I love their grinding discs, used to love their tools, but I guess since they got bought by Black and Decker (I believe) it's all gone down hill. In five holes, 2 teeth broke off, causing a lot of chatter on the rest of the holes. I used only a tiny bit of pressure and it's only 0.065" wall tube... Shame on you DeWalt.

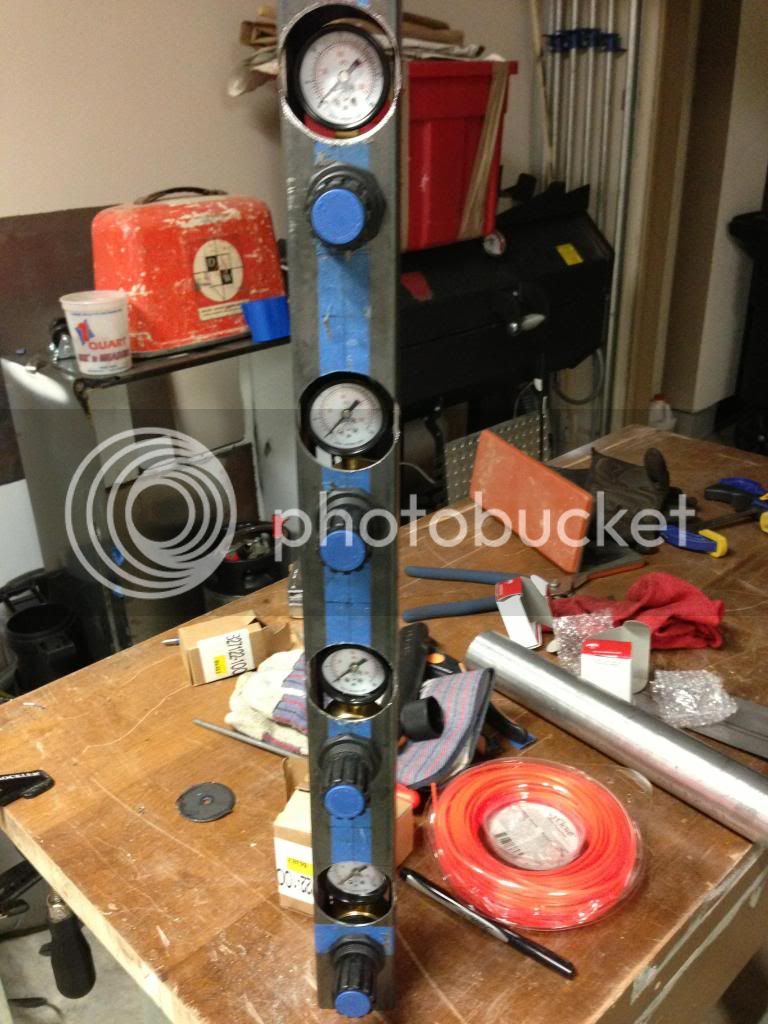
Here's the complete, albeit rough, regulator mount front:


and back: (I really don't like how this turned out, next time I'll buy the proper hole saw size or use a plasma)


Here is all of them installed:


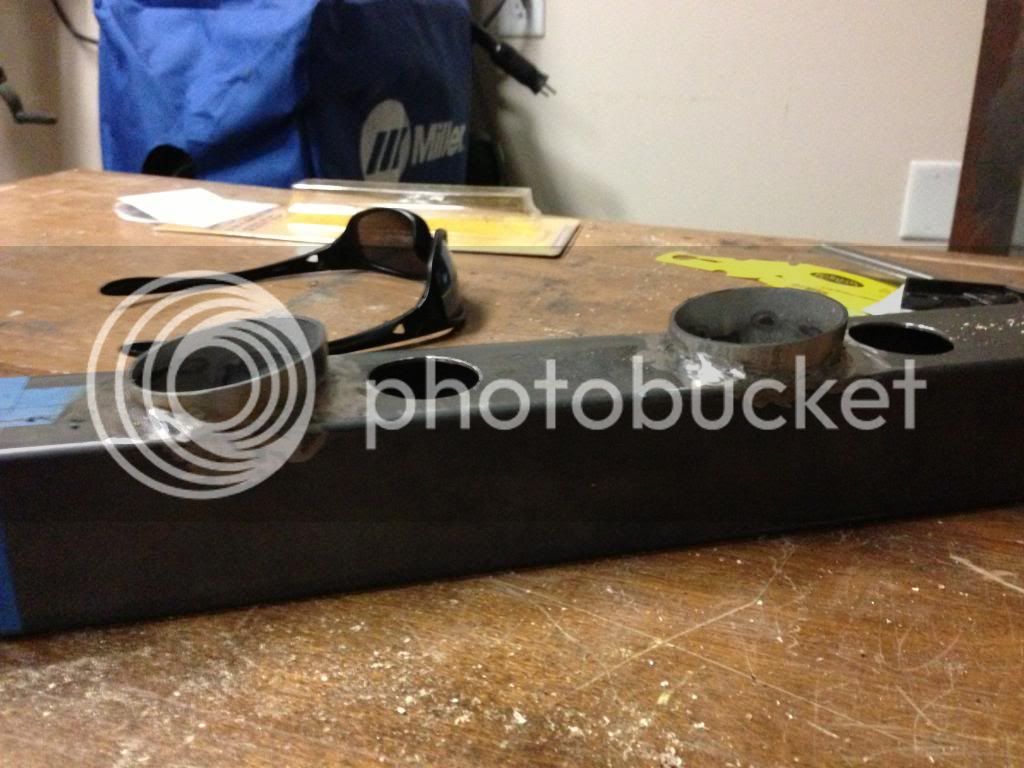
You may be asking yourself, why drill a two inch hole in a two inch pipe for a gauge that is 1 5/8" in diameter? Answer: Because the gauges will be inset from the face of the mount, I didn't want it to look like you were looking into a black hole while looking at the gauges. So, I had a pipe dream:


Can you guess what's going to happen next after I buy a "cold" cut saw this weekend?
 
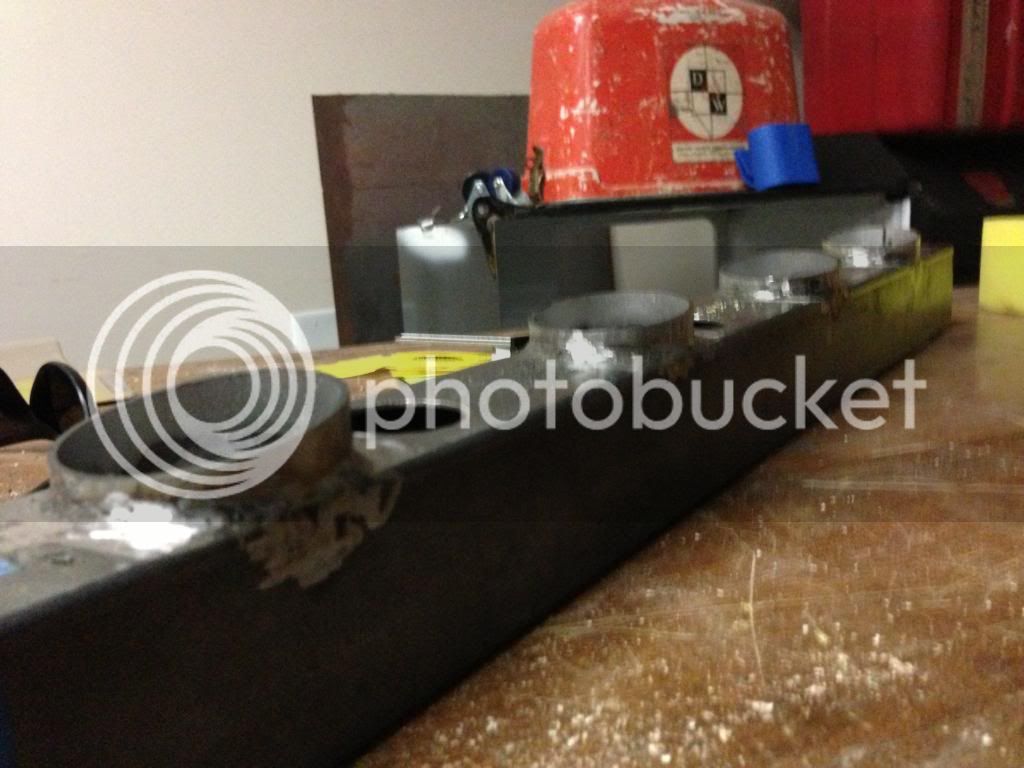
Pipe dreams realized. Gauge bezels cut and welded in. Bought a nice dry cut carbide blade "chop" saw. Cuts this thin wall tubing like a dream.

Sorry about the blurry pics..


I found it not exactly easy lining up the rings. Their heights were also a tad differing from each other due to no real way to make repeatable cuts without squaring the cut ends each time.
 
One of my favorite things about fabrication is building tools and or jigs to make other parts. I really enjoy it when home made things come out looking like they came from a factory. With that being said, I've got a lot of things to learn, but patience and research (and a little bit of money!) seem to help.

A major part of this kegerator is the plumbing. There will be 4 kegs which means 4 regulators which means an air manifold, CO2 in, 4 lines to the regulators, 4 lines from regulators to kegs, 4 lines from keg to door jamb, 4 expansion joints, 4 lines to the faucets and finally 4 faucets coming out the door.

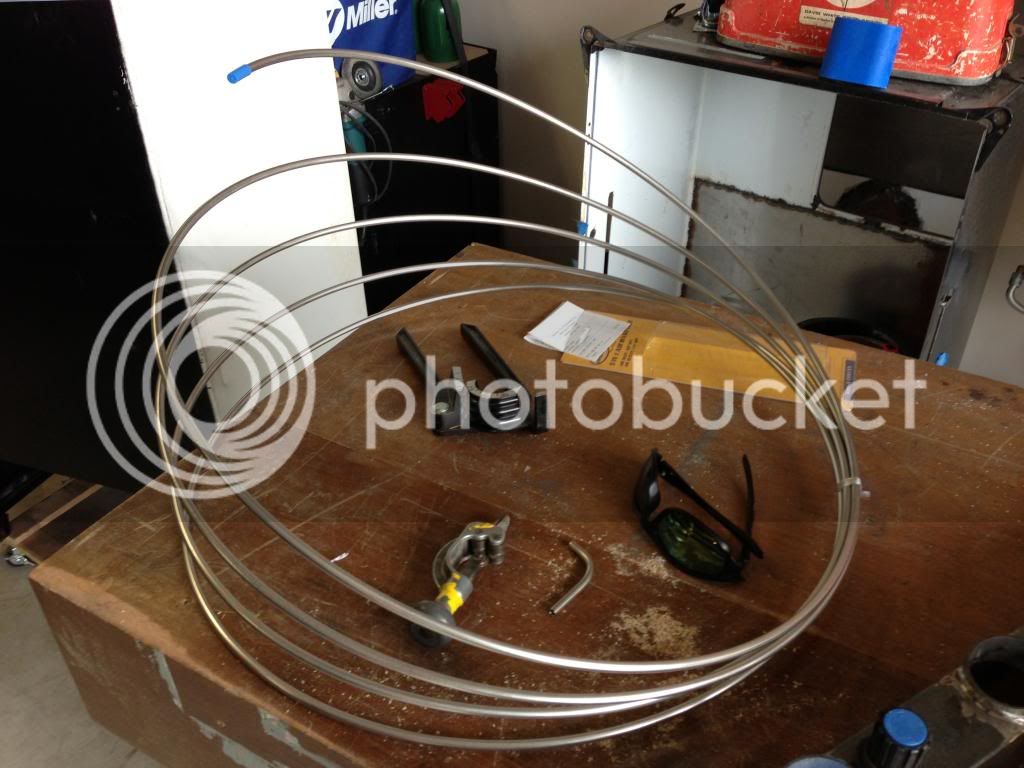
Naturally all of this plumbing will have to be in stainless steel. Naturally. The cheapest way to buy stainless tubing is in coils. Which are round. Which make plumbing straight lines hard.


How do you straighten that tubing? There is a lot of material on the net, mainly from hot rod types, on how to do this. I've heard wacko stuff like roll the tubing between 2x4s in your hands, uncoil it into the corner of the garage floor and wall using your feet... All of which don't give straight tubing or that "factory" finish that I mentioned.

So, my inspiration was the $2-300 tubing straighteners that you find online. The goal was to build one for about $20 and have it be expandable for different sizes of tubing down the line. Easy. :lol_hitti

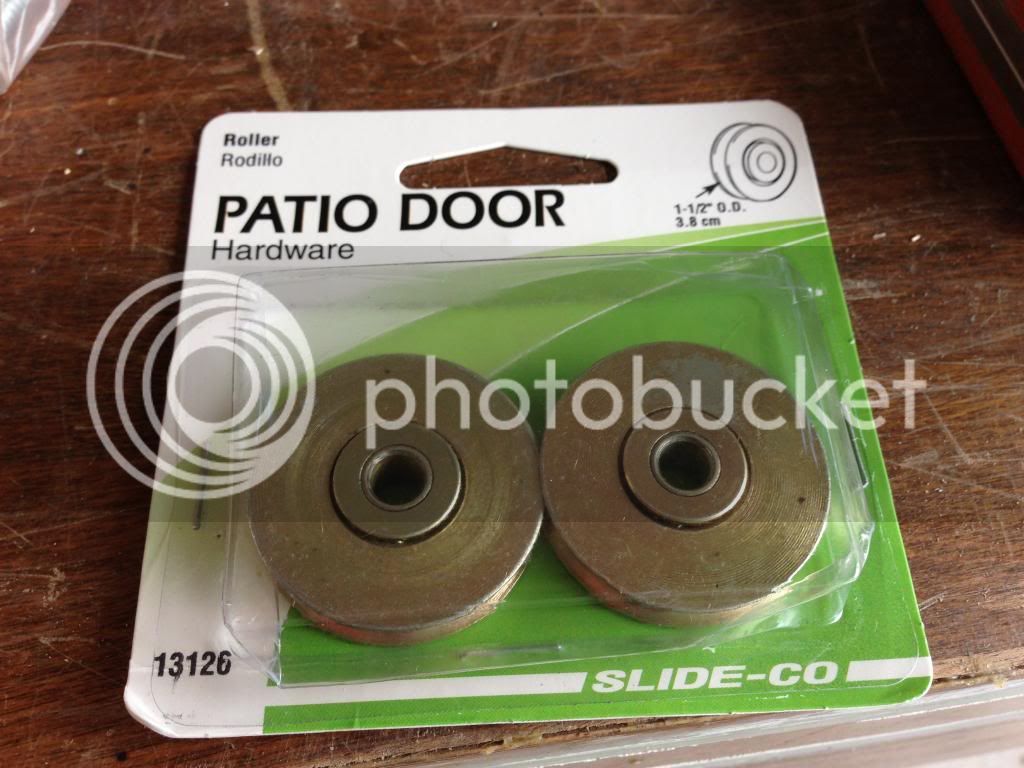
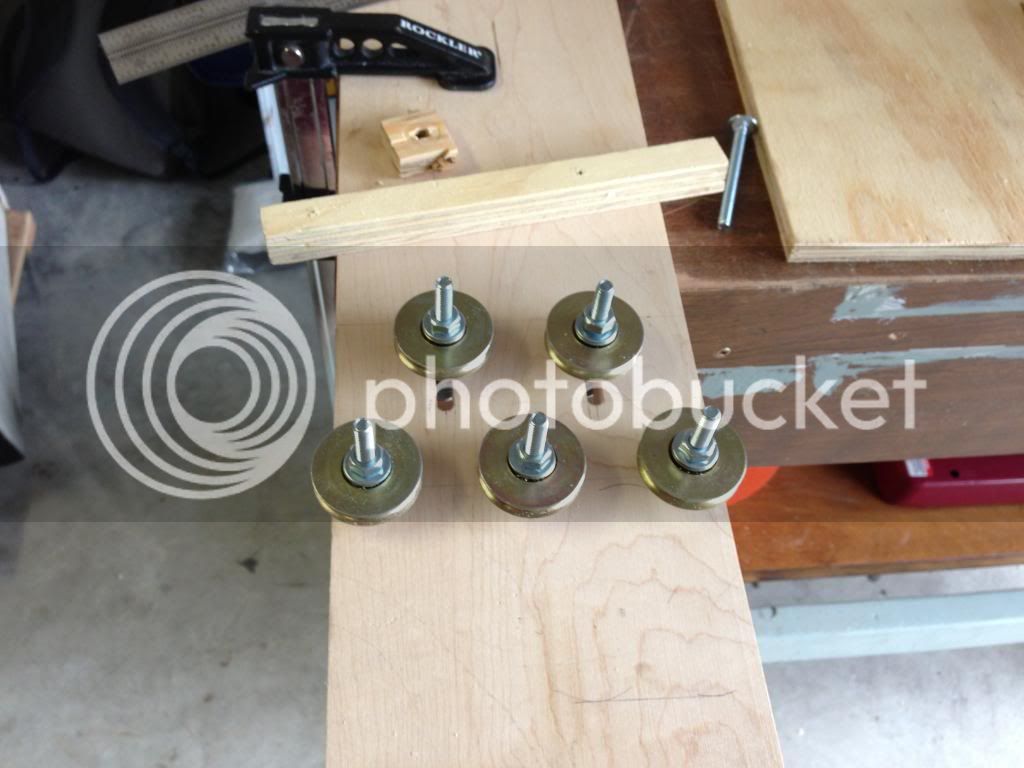
Enter the roller. From a glass door kit.


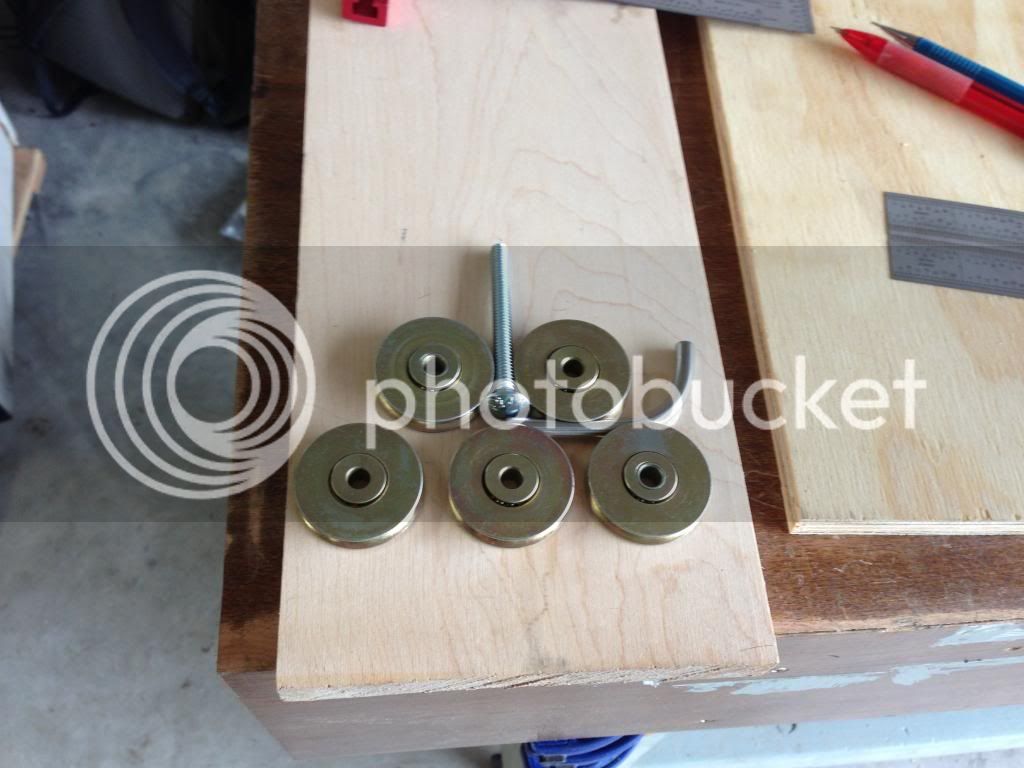
They are 1.5" diameter wheels, ball bearing action. They have a little bit more slop than a pro rig would have, but they were about $3 per pair. I bought 3 pair. I bought them from Amazon, about half the price of a large orange store in the area.
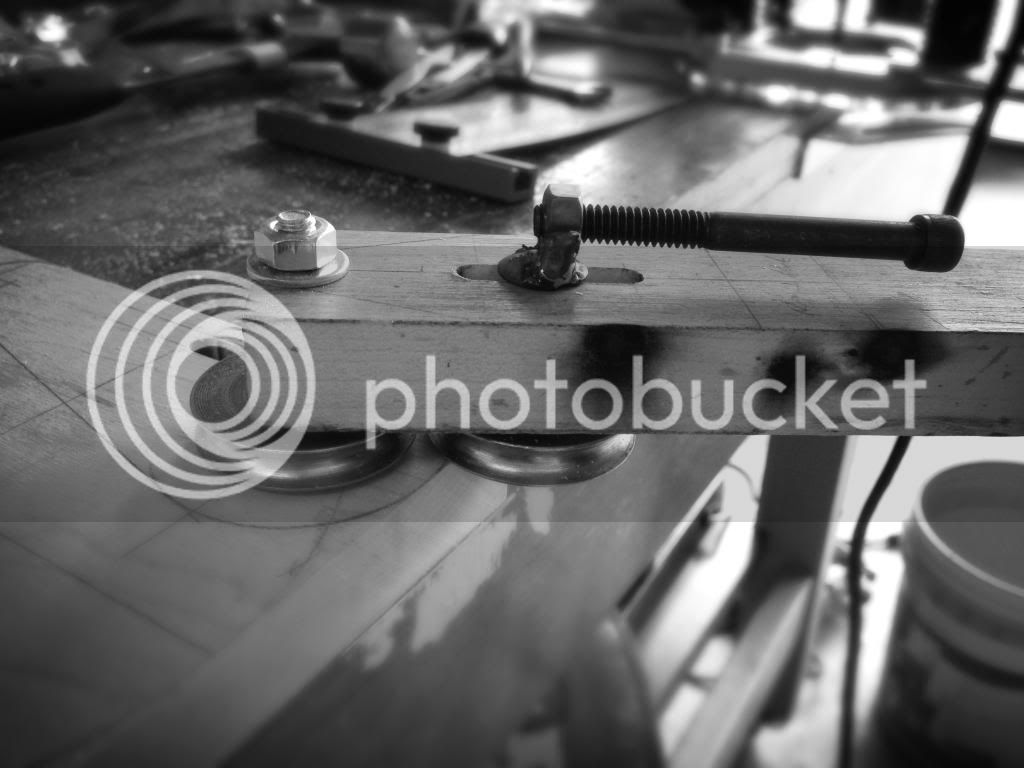
Grab some hardware from that orange store, (story on that to come) and some hard maple from the scrap bin. Lay everything out with a piece of stainless that I bent up with my crappy 3in1 tubing bender. Looks OK.


I bought 8 1/4"x2.5" carriage bolts, two packs of washers and nuts, some captive nuts and some all thread couplers just for in case. Long story short, the carriage bolts were from the bulk bin, no tag. The cashier charged them to me as 5/16" split washers. They rang up as 1 penny more than the bolts that they are, but I figured 8 cents wasn't worth me lecturing someone on the difference in a washer and a bolt. Oh America....:dunno:

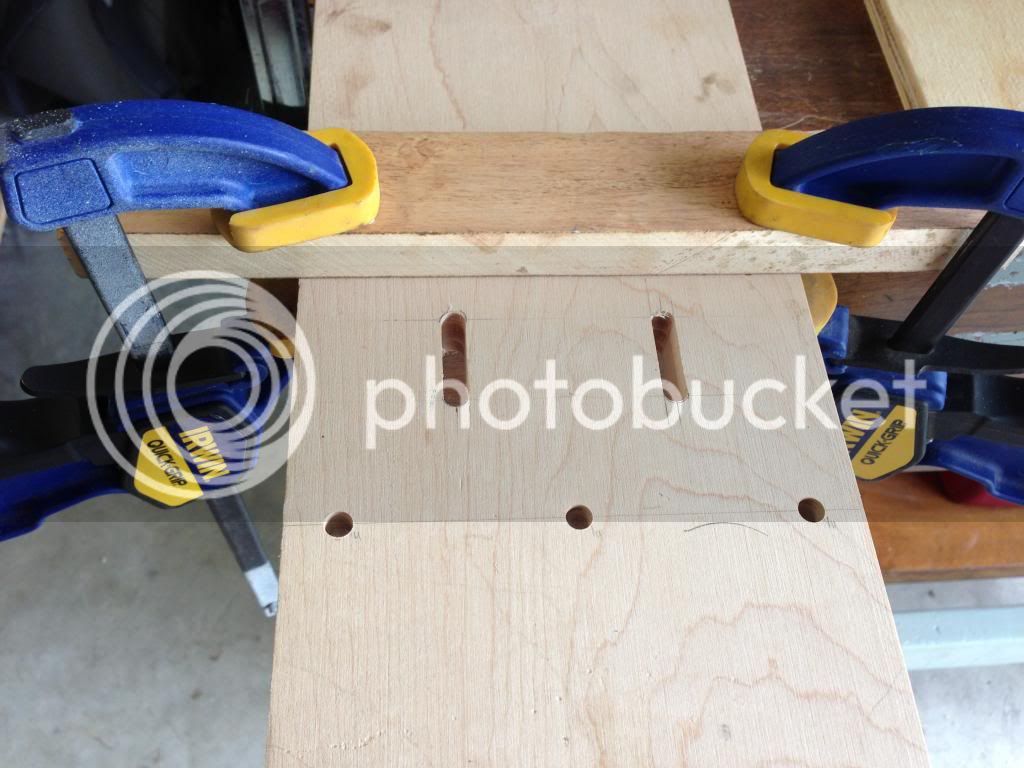
Drill some holes. Here's a trick I picked up last week while reading about drilling straight shelf alignment holes in cabinetry. The problem is getting them square without using a drill press. I had the same problem. I've chased the horrible runout on my drill press to the chuck. I used the marker test. I don't have a nice dial indicator with a magnetic base.

Bad chuck. Bad.


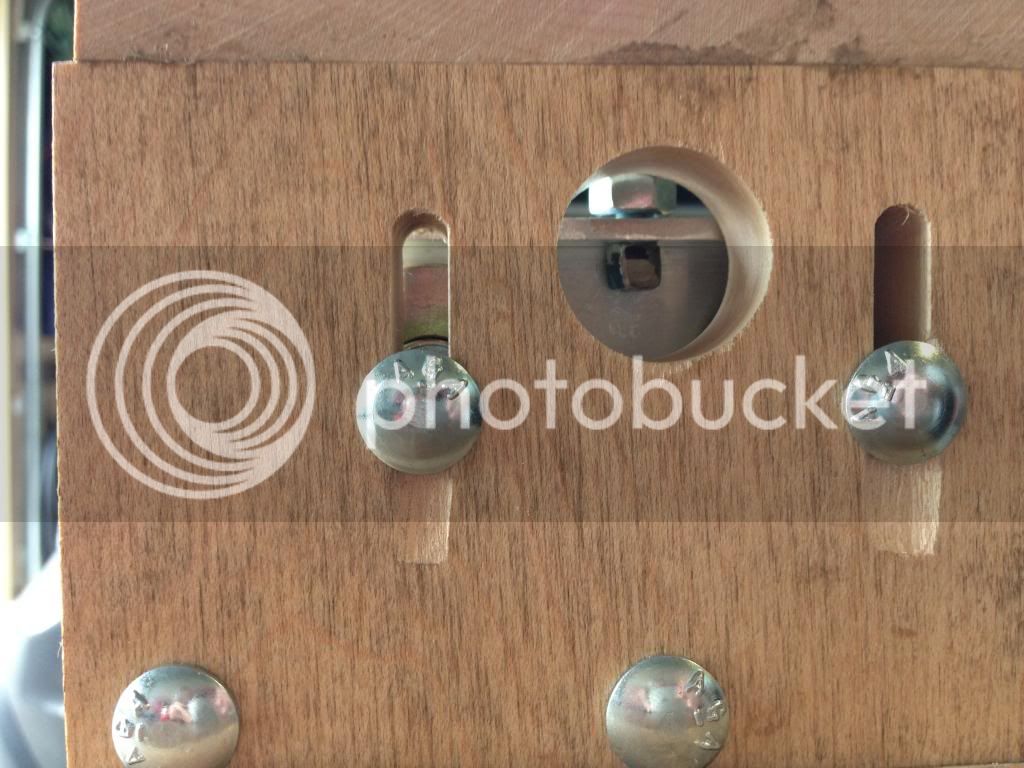
Oh yeah, the trick. Use your router to drill the holes. I have a plunge router and a bit that is exactly 1/4". Now, a nice spiral upcut bit would have been better, but my cheap-o straight 2 flute bit worked nicely. No egg shaped holes, perfectly square to the surface. I set up a temporary fence using scrap and some clamps for my centerline. It is imperative that the holes are all in the same plane or else you will coil your tubing instead of straightening it. I used my Incra rules to measure the offset of the bit to the router edge, mark the line and "plunge-drill" the holes.

I also routed the sliding grooves for the two top rollers. Similar jig, similar measuring techniques. These aren't as critical, you just want them to be parallel.

Voila.


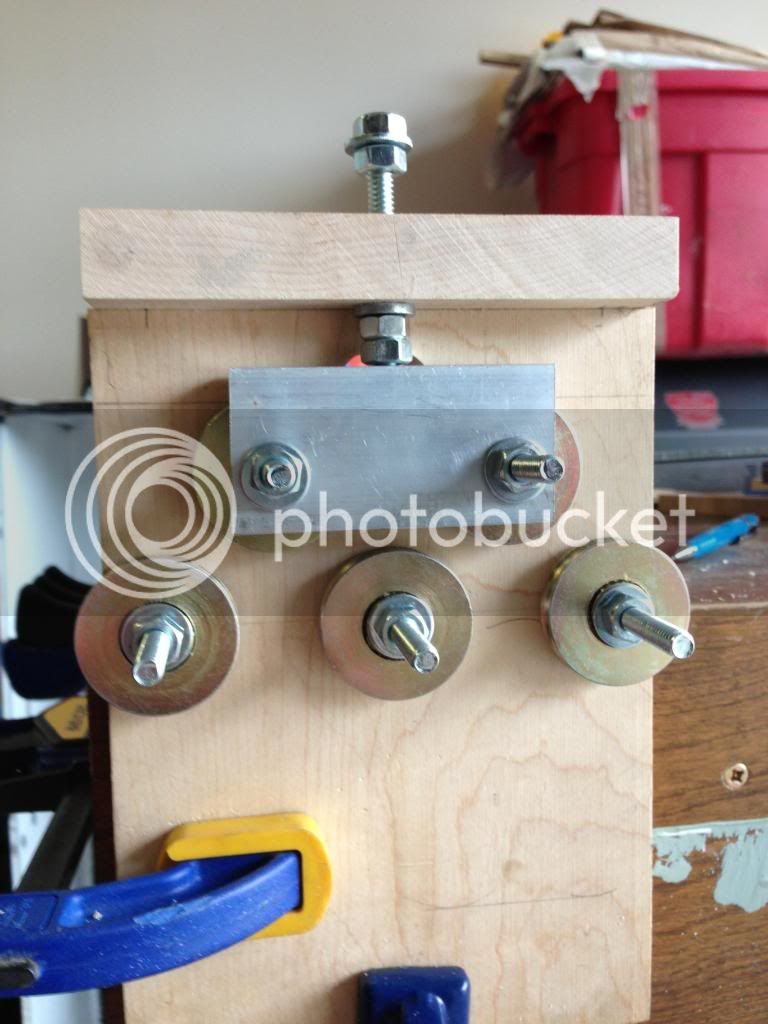
Here's the setup - minus the adjusting bar.


You'll notice that I squared the bottom of the slots to allow for the head of the carriage bolt to not bind in the rounded corners. One could probably use a regular hex bolt for these two. ***Edit - No you won't notice, I haven't uploaded that pic yet.***

Sorry to drag this out, but I didn't finish the slider bar - mainly because I'm thinking of changing the design. Note to everyone making one of these, it would probably be easier to make in steel. I didn't have anything that would work on hand.

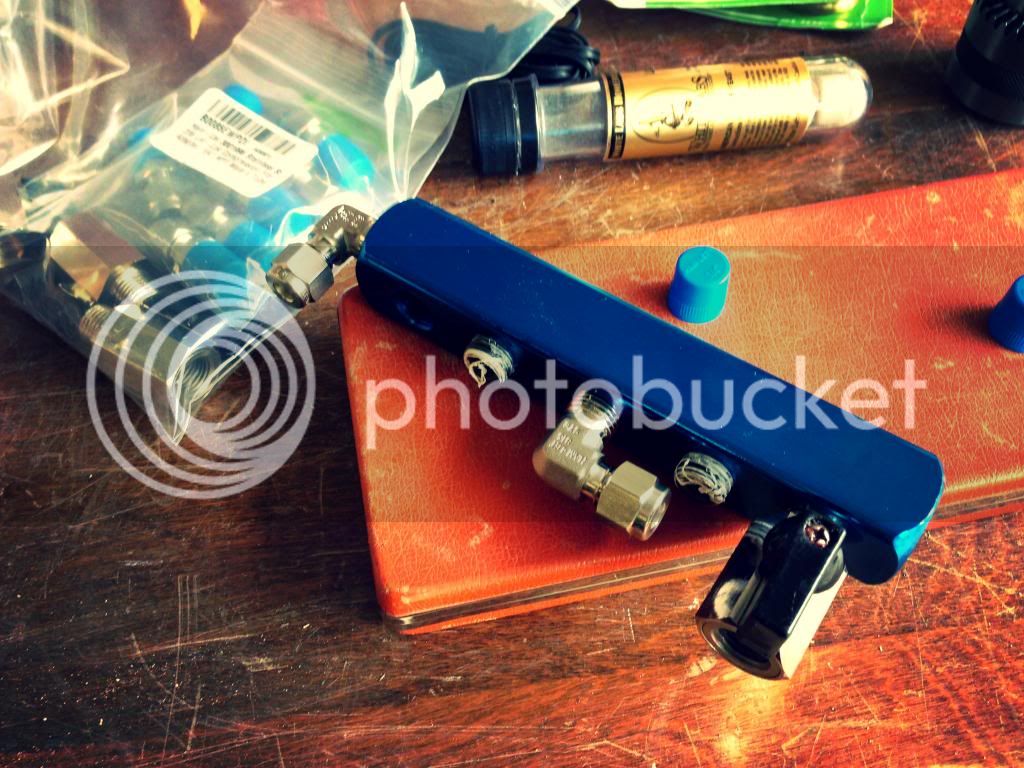
And an obligatory shot of stainless steel fitting goodness...


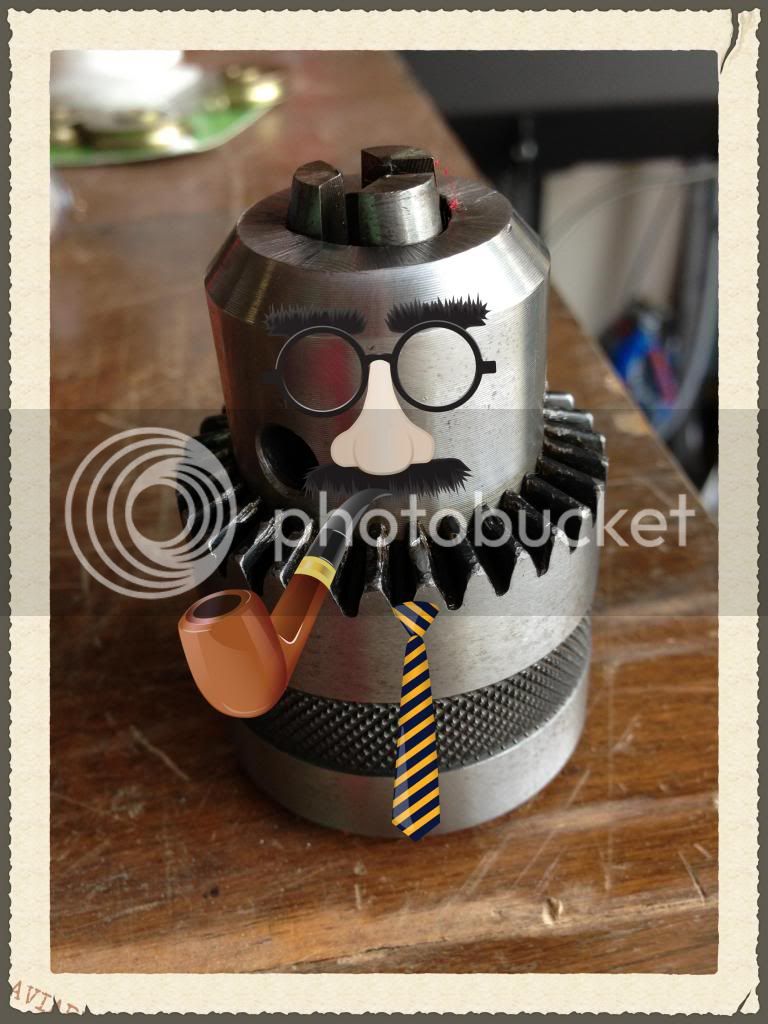
Stay tuned. Good chuck will make an appearance. Thanks for reading.
 
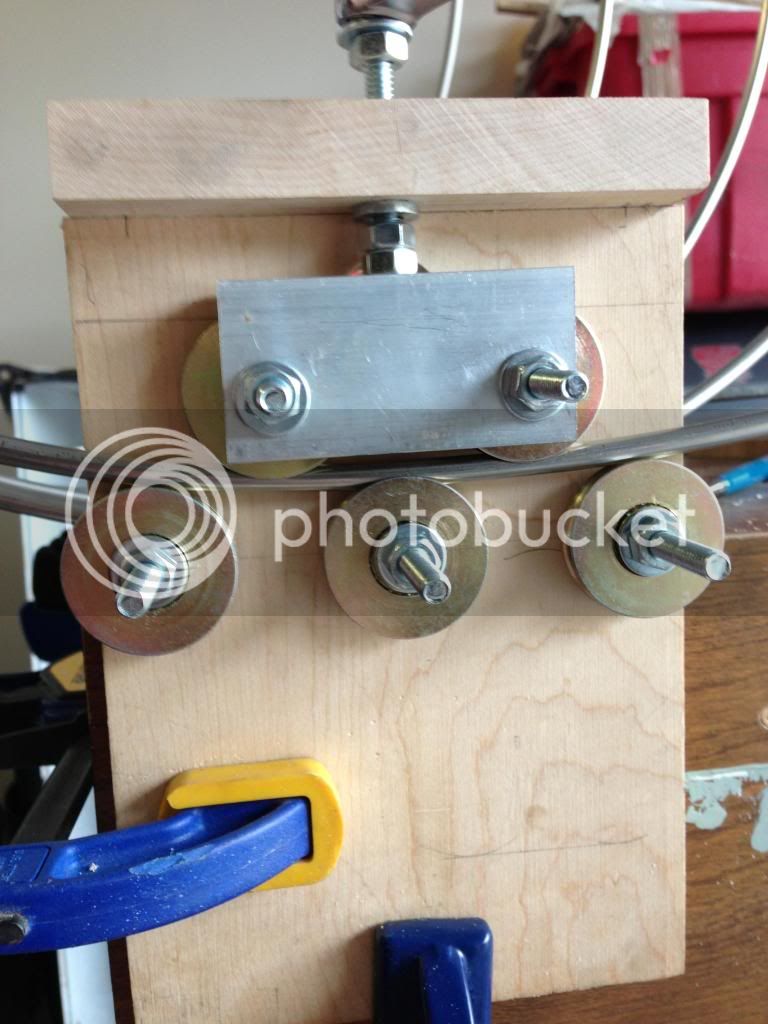
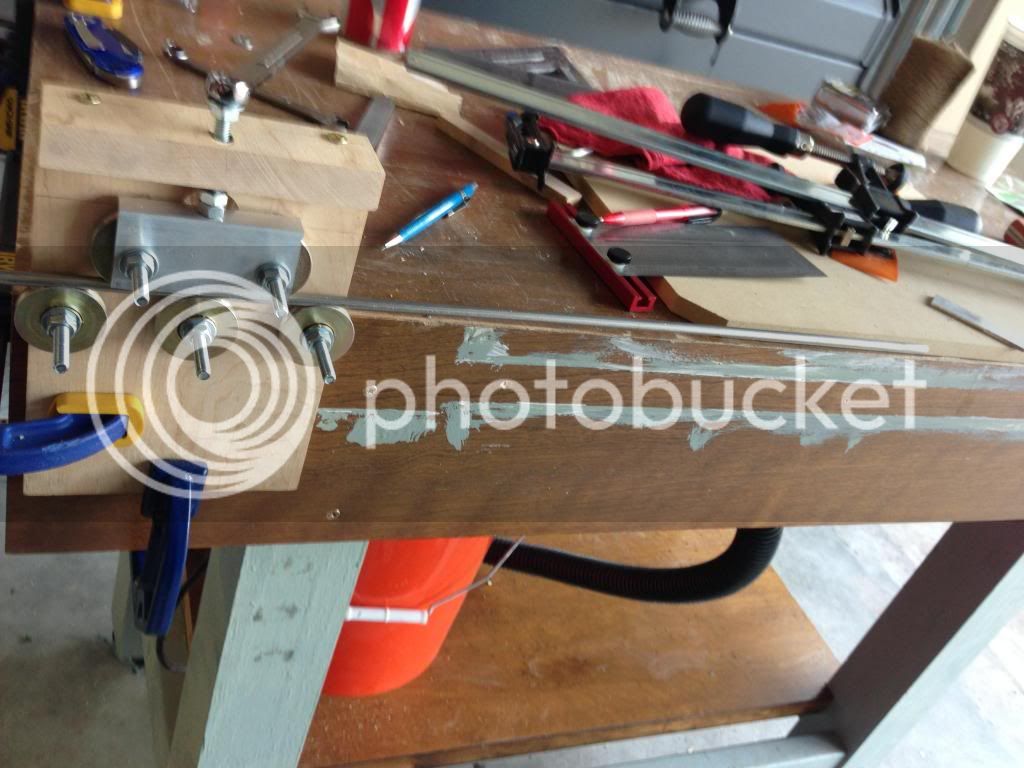
Only update here is my the completion and testing of my coil tubing straightener. By removing two wheels it can be used to make coils - i.e. for your herms, chillers or whatever. Stop trying to bend these around a keg with your feet and zip ties. $20 - perfect uniform coils.

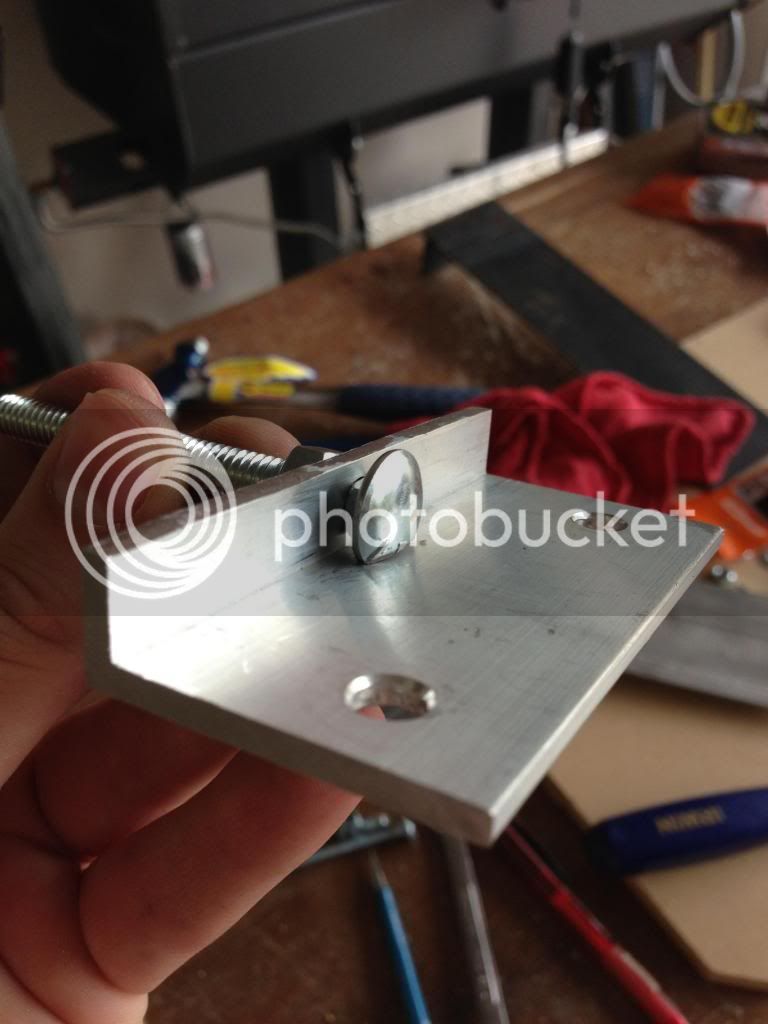
First I cut down some aluminum angle 1.5"x1.5" with the jigsaw. A band saw would have come in handy right about now. Then I blocked it all up in the drill press and drilled a 1/4" hole.


A carriage bolt was cut down for clearance. On the final product I ended up cutting off the entire head (see below). Here's where I'm not satisfied with the design. It would have been better to drill and tap this for 1/4"x20. Would have solved a ton of problems in one step and made it easier to build.

I don't have any taps and I'm suffering for it. Instead I needed the cross brace to be tapped and the sliding bar to be held captive but still allow the screw to rotate. The second problem with doing that is that I wanted to be able to take it all apart. I could have just welded a nut above the slider and problem solved. Instead I double nutted it and lost some clearance in the process. Moral of the store - drill and tap it next time..


Above, you can see how I ground down the carriage bolt for clearance. I also drilled an access hole just in case. I love using nice sharp Forstner bits. Note the tearout from chiseling the slider tracks out. Whoops.

The final product. I double nutted the top with a washer inbetween so my wrench could sit on it and not slip off to allow for quick adjustments. I think I may make a handle from maple once I can think of a simple way to attach it. If anyone has ideas, I'm all ears!


The first pass was pretty easy. I just chucked it up and then tightened the rollers another half turn. Then I pull the coil back until the end was at the last roller and began to push it through. Didn't take much effort at all.


After about 4 passes this is the result!


Next thing to do is cut the bolts down and give it some paint.

A couple of tips for anyone wanting to make one of these:

Get nylon rollers if you can find them. I got a few scratches on the tubing from these steel rollers. I'm not sure how because they are quite smooth.

After straightening the tubing in the "hard" direction, roll it to take out any curve from the natural helix shape that the coil is in.

Next I'll post up some stuff on bending the tubing and using the compression fittings if anyone is interested.
 
Keep it coming. I am interested in seeing this finished.

Must be the only one reading :D

or at least posting!

Just a small update on the bender. I spent the first night staring at parts and scraps and swatting mosquitoes. What an efficient use of my time.

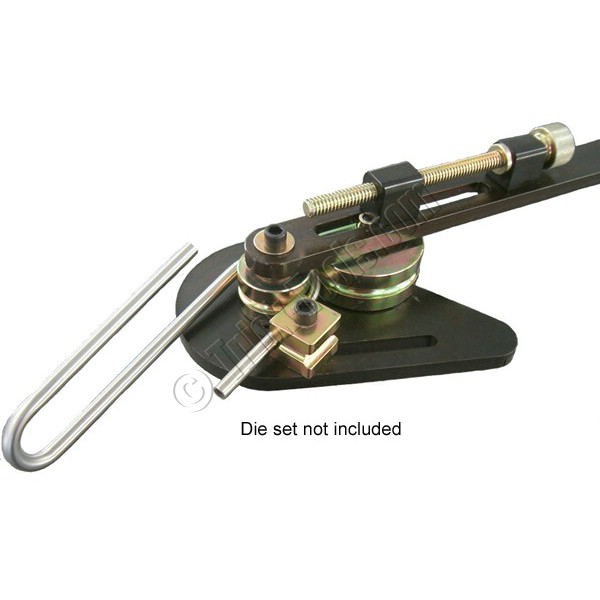
I was trying to create something like this from wood and carriage bolts:

hb1.jpg


It just wasn't coming to me. No surprise. I was befuddled by the bolt head sticking through the roller and causing interference with the carrier body. I finally decided to just wing it and not lock down the roller to the swinging handle and just let it slide loosely over the frame.

I grabbed some soft fir and drilled holed 1.5 inches apart (roller radius (0.75" x2 rollers). I clamped in a peg to hold the tubing and tried to roll it around.

It didn't work.

I immediately saw why the roller separation on the nice HB1 bender is adjustable. You either need to be able to drill very accurate holes and have very accurate bearings or have an adjustable slide.

I needed an adjustable slide. More work for me. Those $70 single tubing sized benders aren't looking so bad. I also determined that I needed a way to capture the roller rigidly to the arm. I was drawing a blank so I went inside and looked through some designs on the internet.

This is what I found:

rdb10-manual-bender.jpg


It's obvious. Make the carrier frame the same size as the inner roller. Then a nut sticking below the outer roller can traverse the entire arc without interference.

Here's what I got done before the wife got home:


I really want a piece of 1/4" aluminum for the handle. It would make it more compact and much sexier.

Here's to some more progress :beer:
 
Back
Top