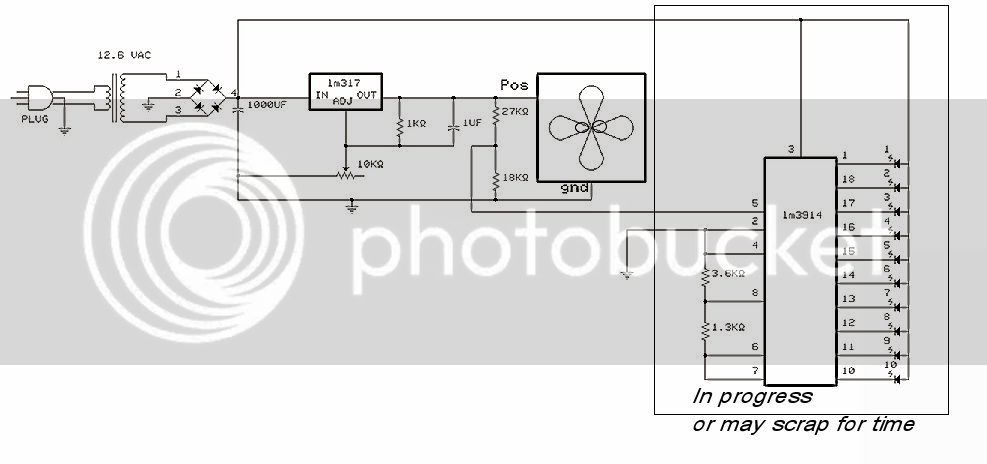
Of course I have found the important information throughout the post regarding the schematic and even the picture to show what it looks like. However, I'm more curious about the underside of what the board looks like, so I can make sure I'm doing it correctly.
Because this is my first project, I have no other experience, I've consulted the web to hopefully find answers to my question. Since the board suggest in the parts is a general purpose pc board, I'm left wondering what the underside (copperside) of the board looks like either half way done or when completely finished.
I would assume these boards are also called Stripboards right? However, based on the photos I've seen of stipboards, there should be solid strips of copper that run the width of the board. However, the pc board listed for this project does not have these. Only each hole is surrounded with copper.
I know it is not PCB (printed circuit board) which means there are no guide lines to help make sure things are in the right spot which is pretty important according to
http://www.kpsec.freeuk.com/stripbd.htm Appearantly, vertical placement errors can cause problems on stripboards. I'm trying to aviod those.
Also, that same site states that components can be connected to one another by use of uninsulated wire. Since no pictures of the underside (copperside) of the board were supplied, I wondering if that was how this poject was done.
As easy as this project is and sounds, I have questions. Does it mean that I shouldn't attempt it, no! I'm trying to learn and am only asking for some help along the way.