Pickup tube for boil kettle

Homebrew Talk - Beer, Wine, Mead, & Cider Brewing Discussion Forum

Help Support Homebrew Talk - Beer, Wine, Mead, & Cider Brewing Discussion Forum:

This site may earn a commission from merchant affiliate links, including eBay, Amazon, and others.

Schmidty

Active Member
Joined
Nov 7, 2007
Messages
28
Reaction score
0
Location
Central Wisconsin
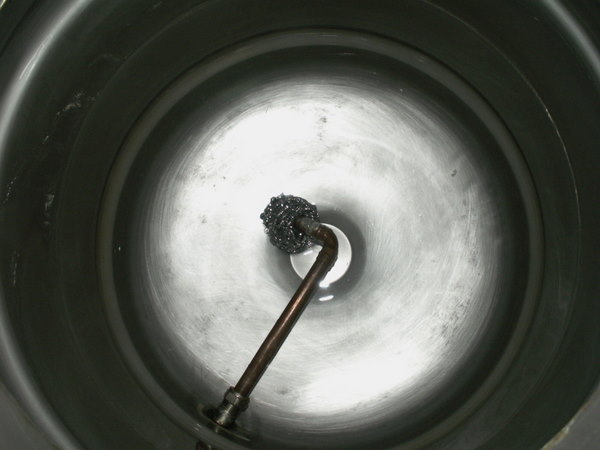
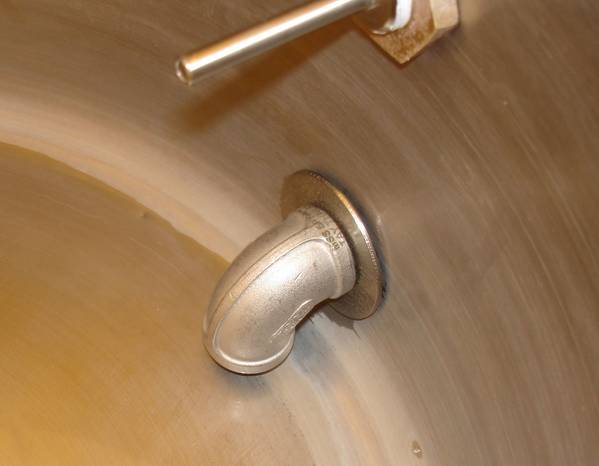
I'm going to be adding a spigot to my boil pot, not a keggle, and I was wondering if the size of the dip tube from the spigot makes a difference. I was thinking that I'd go with 1/2" hard copper pipe. The only problem I may run into is that my pot is 11" tall and 20" around, so leaving too much space at the bottom could mean that I'm leaving quite a bit of wort in the bottom of the kettle. Here are some pictures of my new kettle http://picasaweb.google.com/bjschmid/NewBrewpot. With a 1/2" left in the pot that comes out to about 1/2 gallon. I'm thinking I'll try to keep the dip tube close to the side of the pot and use a bazooka T on the very bottom of the pot so I can tilt the pot when it gets low, or I could just up my recipes to 5 1/2 to 6 gallons. Has anyone run into this before? Any suggestions?
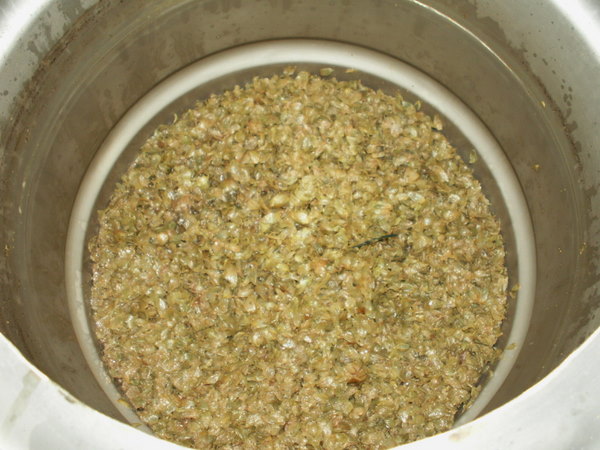
Oh and I'm going to be using a CFC so it needs to be somewhat filtered
 
I've not heard many people say they were satisfied with their bazooka tubes. FWIW they're fairly coarse mesh, too.

The Hopstopper has gotten rave reviews from many brewers on this forum. Many people have DIYed it too.

That being said, I've not found a huge need for any screen. I'm adding a dip tube to my keggle sometime soon, and I plan to just make it bend down 1" from where the hole currently lies. If you whirlpool your wort for 20 seconds after you turn off the flame, then let it sit for about 60 seconds before you open the valve to flow through your CFC, it forms a nice cone of "gunk" in the middle of the kettle, and your dip tube doesn't suck nearly as much crap up.
 
Use hop bag and just run the dip tube wide open. Leave 1/4" gap between the bottom of the kettle and the bottom of the dip tube. You could run it right to the bottom, but make a few 1/8" slots in the very bottom edge.
 
Can't get simpler than this apart from tipping.

2028-Syphonandscrubby.JPG


it does a good job.

2028-brew-15.JPG
 
Well I got it drilled and the dip tube is in. I did a test run today and I only left about 2-3 cups of water behind. I think I'll just put a choreboy scrubber around it and call it good. I got to test my CFC too, went from 180 going in and 65 coming out. I guess I'll need to play around with my flow rates a little.

Thanks for the ideas everyone.
 
It sounds like your flow rate must be fine. 65 coming out is ideal for pitching most ale yeast, and it's better to start out a little cool than a little warm. The yeast, when they become fruitful and multiply, will warm up the ale over the next few days.
 
So today was the day I set aside to finally install a thermometer and ball valve in my stainless, flat-bottomed kettle. I got a thermometer from eBay, a weldless kit from Bargain Fittings, and some miscellaneous fittings and copper tubing from a local hardware store. My plan was to fabricate a dip tube from the tubing and attach it with a compression fitting adapter. The tube was to gracefully turn and arch down to the bottom of the pot right near the edge...it wouldn't be easy, but I filled the tubing with salt and taped the ends to make bending easier. I did all the easier stuff first: drilled the holes, mounted the thermometer, and saved the tricky copper shaping for last.

Then I notice the 1/2" stainless elbow I bought. Hmmnn....the dimensions seem right. Yep, if I replace the coupler with the elbow, the other end of it sits about 3/16" off the bottom of the pot. Plus it's right by the edge, so it won't interfere much with whirlpooling, and should pickup clear wort. I use a hop-bag rig when I boil, so I don't need a screen. As an added bonus, there is a lot less copper and brass on the inside of the pot...just the retaining nut for the thermometer.

Can it be this simple?!? My preliminary test left about a cup of water in the kettle, if I tilt it slightly towards the end.

stainlesselbow.jpg

I'm really interested in what some of the forum guru's have to say about this. Makes sense to me. :mug:
 
Looks awesome to me... The only conceivable issue is the threads, but sitting in a boiling liquid for an hour will take care of anything that could have been growing in the threads anyway. I think you have a pretty slick setup there! :mug:

btw: you should replace that locknut with a stainless one ;) just so it matches all the bling!
 
Looks like a winner to me. You should be able to easily rotate or remove the elbow after each brew to spray off the threads with a high pressure hose.
 
Or even better, I'd use a drum with a Dremel and just sand the threads off. :D
 
I'm not overly concerned about the threads, as I can just flush it out thoroughly. The whole thing disassembles easily enough, and as pointed out, boiling takes care of any nasties hiding inside.

I'm looking forward to trying out my new and improved kettle, no auto-siphon or floating thermometer necessary. Two less things to sanitize on brewdays. :ban:

Of course now it's got me thinking about plate chillers and march pumps. Seems like every dollar I invest in homebrewing gear inspires me to spend five more!
 
But at least it's inspiring you!!!! Each dollar I invest in homebrewing just irritates me into spending 10 more. Oh well beer is beer! There's no beer like good beer, and it's great beer when it's my beer!
 
Just buy one thing at a time and you will have the whole sculpture built in no time. Meanwhile your brewing should continue and evolve. I started in buckets and now have the whole nine yards. Refrigerators and all-grain made the biggest difference in the quality of my beer.

A good food grade welder could weld a 10 inch ring on that pot and that would help with boilovers. I think 11 inches high is a bit short.
 
I made a deal with my wife to control my spending and give me a realistic time table. I take $50 cash out of each of my paychecks and set it aside for brewery purchases. With this schedule, I should be brewing on my new system by the new year (fingers crossed).
 
By way of an update....

Yesterday I used my kettle for the first time since adding the ball valve and stainless elbow, and it worked brilliantly. By simply tilting the pot a few degrees, a mere 1/2 cup of wort was left in the pot. What a joy, to not have to mess around with a racking cane or auto-siphon!

Of course now I've got all the parts I bought to make a "proper" dip tube...maybe I'll put them in my MLT.
 
Good job. That is a clever dip tube for a flat-bottom pot. Clean and out of the way. Did you whirlpool before draining?
 
Did you whirlpool before draining?

I did, with my usual lack of success! I don't know why, but I never manage to get that nice neat cone of trub at the center. At this point I'm pretty much resigned to getting most or all of the cold break into my fermenter. Hasn't been a problem though, everything quickly settles out, and the beer ranges from excellent to spectacular. :tank:
 
That dip tube looks great. IMHO, simple is better. The less parts you have to use, the better. Maybe you could stuff a small bit of ss scrubbie under there for extra protection.

From experience, I'd give yourself a little longer on the whirlpool though....like 15 minutes. Get a STRONG whirlpool going for about 30 secs, then give all the particles ample time to move to the center and settle to the bottom. You'll be pouring crystal clear wort ;)
 
Maybe you could stuff a small bit of ss scrubbie under there for extra protection.

From experience, I'd give yourself a little longer on the whirlpool though....like 15 minutes.

A scrubbie in the boil makes me nervous, ever since I dipped one in StarSan for a few seconds and watched it decompose before my eyes, into a smelly pile of black crumbs. Maybe I'm buying the wrong kind...I can never find ones that actually say "stainless" on the package. Clearly others use them with no issues.

This last batch I waited about 10 minutes after the whirlpool, next time I'll give it twenty.

I use a copper chore-boy. They should be pretty easy to find.
 
I dont think the BYO article he was talking about is shared online. They only post a minority of articles up there. Makes me annoyed, but I understand why they do it. I just don't do this whole "paper books" thing. :p
 
You must get some wicked evaporation rates at full boil.
Yes I am. My first batch was an extract kit, and between not letting the trub set and evaporation I only ended up with 3.5 gallons of high gravity wort in my fermenter. I topped up to 5 so I was OK, but I ended up losing 2 gallons. My second run with my first all grain I let the trub set and upped my pre boil a bit more. Still ended up with 4.5 gallons in the fermenter, but only 1/2 gallon lost to trub, so I am getting close and was able to figure out that I have about a 25% evaporation rate / hour.
 
...and that article was about...? link?

It was a dip tube made out of copper pipe that was oriented down towards the bottom of the kettle in order to get all the wort out when drained. I tried to find the article on the brew your own website but could not. I just received my copy in the mail two days ago.
 
It was in the latest BYO. That's a good design for a dip tube...you could probably even build a diverter plate into it.

+1 on the copper choreboy....as good as SS, I guess.....
 
Weird i know but new to this so what is the purpose of adip tube?


Not weird, we all learned someplace.

In general, a dip tube allows you to siphon from the very bottom of a kettle. Some folks have stands that allow them to drill a valve into the bottom center of a concave-bottomed kettle, which is ideal. For those of us that rest our kettles on a burner (as opposed to having a heating element inside them), a center-drain kettle is not an option. So, when we install a spigot in the side of our kettles, it has to at least be above the bottom corner of the kettle. Without a bent dip tube, you'd leave a lot of wort behind, and that wasn't easy to make. This is particularly true with a keggle that has a concave bottom, like mine.

So, dip tube for all my friends.


Sparky
Making beer and hard cider in Southern Virginia since 2011.
 
I came across this thread and thought I would pitch in my setup. I am new to brewing so anything I devise comes from great minds in the brew community. Thank you everyone.

I chose 3/4" valves for flexibility down the road. The 1/2" mash tun valve will go into a cooler (sole reason it is 1/2"). The 3/4" valves will go into kegs. Washers, o-rings and lock nuts are not shown. The copper stub out will be replaced with a short piece of soft copper tubing for side pick up. The pink line represents the keg/cooler wall.

How high up from the bottom of the keg is recommended for the spigots?

weldless-setup-64910.jpg
I would place the valve as low on the vessel as possible before you get to where the side curves into the bottom as you want to be certain that the surface is flat to ensure a good seal. If you feel that you are leaving too much hot water (HLT) or wort (BK), you can always add a pick up tube.
 
Back
Top