Stumps Clone build underway

Homebrew Talk - Beer, Wine, Mead, & Cider Brewing Discussion Forum

Help Support Homebrew Talk - Beer, Wine, Mead, & Cider Brewing Discussion Forum:

This site may earn a commission from merchant affiliate links, including eBay, Amazon, and others.

dfess1

Well-Known Member
Joined
Mar 11, 2011
Messages
1,418
Reaction score
109
Location
Flourtown
Sunday 5/22 (yes, we made it through the rapture), I started to learn to weld. After running some sample beads on a piece of scrap, I graduated to these two pieces.

firstWelds.jpg


They didn't come out too bad for only a half hour in!

Then it was onto the fire grate. This is a shot of it still "warm". Tomorrow morning I'll be back out to grind down the welds. These aren't quite as nice as the test pieces, but Dad says they should hold no problem. Maybe once they are ground down, they'll look a little nicer.

fireGrate.jpg


Should start on the shelving tomorrow, or possibly the frame, not sure yet. We'll see, but I"ll be updating this (hopefully daily, all depends on how tired I am, and whether I remember to take pics along the way).
 
Ok, time for an update. We have the frame welded up, and the angle iron for the trays. I will be welding up the expanded steel for the trays as time permits, and we aren't working on the frame itself. We're still waiting for the firebox to come back from the fabricator, as Dad doesn't have the equipment to weld 1/2" plate.

Here's a shot of the frame:

frameHeadOn.jpg


The lower piece in the front (the really crappy looking one) is just tacked to hold it square. We are keeping the bottom support to do towards the end so that we can get in and weld in the cook chamber skins. This way it isn't completely in the way.

Saturday we pick up a trailer and try to modify that to suit our needs.
 
Ok, It's tues 5/31, and we got some more accomplished this weekend.

First off, let me start by correcting a mistake. The firebox is going to be 1/4", not 1/2". And we're using the firebrick in hopes that it will prevent the burnout and not need to use the 1/2". Also, we were waiting for the material, but that's because it was being cut to his drawing specs.

Anyway, on to the pics.

I got all 6 shelves made up. 2' deep by 3' wide.

grate.jpg


Here is the firebox, about 75% complete. Still to weld to it (at this point) are the angle iron pieces. Since we aren't sure that the firebrick is going to hold, we're making it so you can unbolt the firebox if we need to make changes. That small hole there is for the transfer tube.

firebox80PercentDone.jpg


Here's a shot from the other side, with just the grate poking out.

fireboxGrateStickingOut.jpg


Saturday morning we got up early and hit the public market. Then, this little fella followed us home!

untouchedTrailer.jpg


So the trailer is wider and longer than we are going to need, but at the price we/I was willing to pay for a trailer, it was the best we could find. After half of saturday and half of sunday (needed time out to go fisihing), this is what the trialer is reduced to:

trailerInPieces.jpg


Monday saw the arrival of my brother (for only the day, he is leaving today to head back to Philly). With his help we got the rest of the angle iron tacked onto the firebox, the metal cut that will hold the brew table in place on the trailer, and we got the inside ceiling welded into place (no pic of that at the moment), as well as the inside and outside backs cut out for the transfer tubes and the exhaust stacks. I'll get pics of those tonight.

Here is my brother and father with the frame, and the firebox mounted to the frame. My brother is holding the frame level while dad finished the welds holding the mounting bars for the firebox to the frame.

DadDustinFirebox.jpg
 
So here's the progress from last night.


insideDone.jpg


The inside is done with welding! All of the interior skins are welded in place.

heatDeflectorMount.jpg


This hole is where the transfer tube will come into the smoke chamber from the firebox. The supports above it are for the heat deflector and the grease deflector. These pieces are cut, just need to be bolted in.

drainRail.jpg


The ugly bar that was there previously has been removed. The front bottom rail is welded in place. It's a U channel with a 2" drain in the center. The grease pan will be mounted below the hole. The floor has a bit of a slope to it. Hard to see in this pic, but it should carry the grease to the front rail, then out the hole.

shelfSupports.jpg


All of the shelf rails and stops are welded in place. 4" between each shelf.

racksInside.jpg


Here's just two shelves in place. Need to clean up the welds a bit on the rest of the shelves to get them to slide nice.

trayOut.jpg


The stops work great. No sag to the shelf, and it isn't going anywhere when full extended.

backFireboxMount.jpg


Here is a shot of the backside. These were the firebox mounts from an earlier pic. The firebox will bolt to the back of the smoker. This way, if we need to modify the plan at a later date, we can. And we won't need to do a buttload of grinding to fix anything.

Tonight we start cutting insulation and putting on the outside skins!
 
Work from 6/2:

Last night we were able to get the insulation in place, and get the outside sheet metal welded on. Dad did most of those welds, mainly because you are going to see them. I am definitely not to that level yet, but welding is pretty fun. Already have a used one scoped out to pick up on the trip home!

Anyway, he did the welding, I cut the insulation, then ground down some of the welds after he was finished. Also packed the legs full of insulation as well, and ground down some of the welds on the shelves so that they slide easily on the shelf rails. Don't have a lot of pics this time around though.

skinOnFullRacks.jpg


You can see with all of the racks in, it's going to hold a ton of ribs. This thing with the insulation and outside skins, now weighs a ton. Actually, when we're all done, we figure a little over half a ton (1300 lbs give or take).

The firebox that was so heavy before, was mounted to the back of the chamber to make sure if mated up. Before my brother had to stand on the frame so it wouldn't tip over. Not anymore! The firebox feels light compared to the cook chamber!

firboxHangingOffBack.jpg


The top holes are for the two exhaust stacks. Need to make those. Ran out of the smaller diameter wire last night, and used up the bottle of gas too. Getting more tonight so we can make it through the weekend.
 
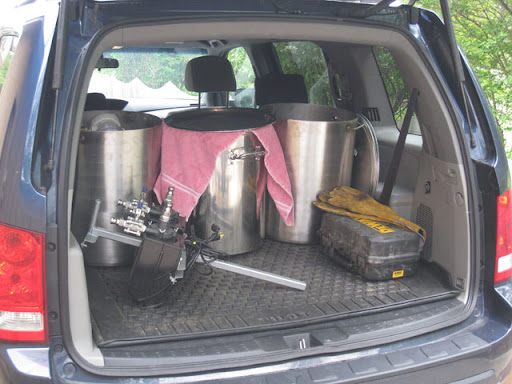
work from the weekend of 6/4-6/5

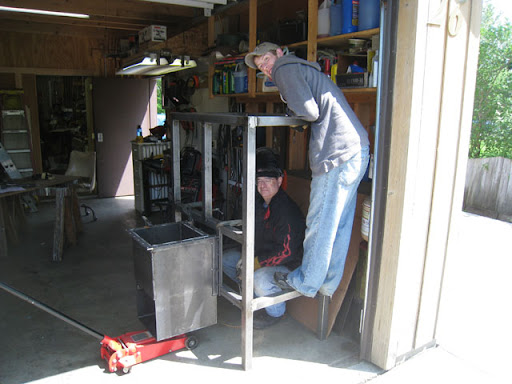
Ok, the weekend saw two solid uninterrupted days. So we got alot of work done, but not neccearily a ton of pictures of the work in progress. More like we're done with this piece, here's a pic. So..

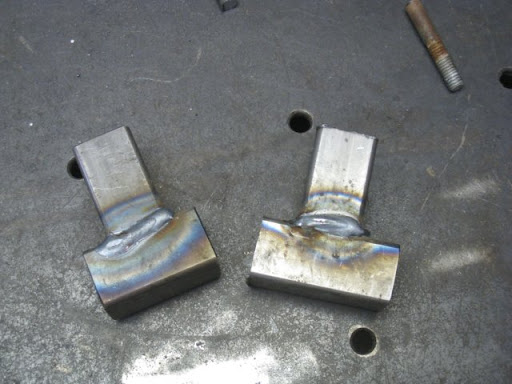
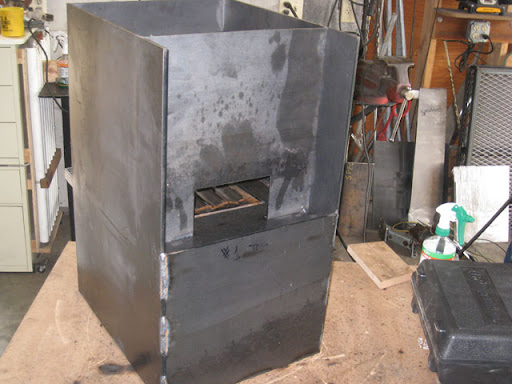
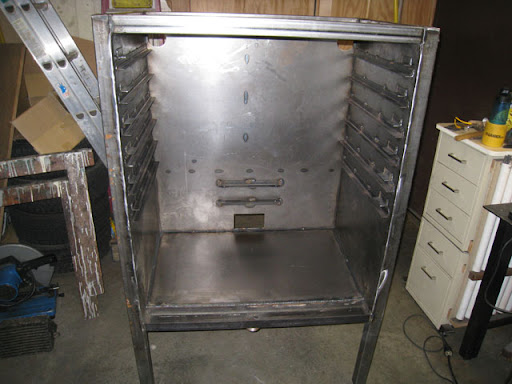
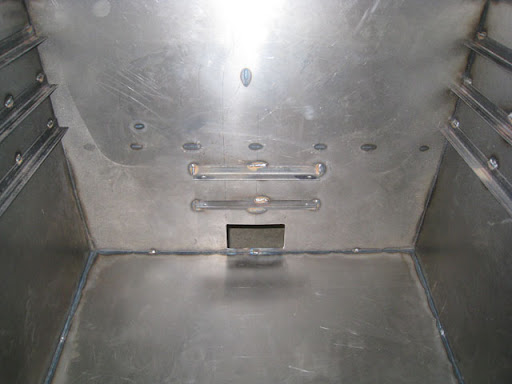
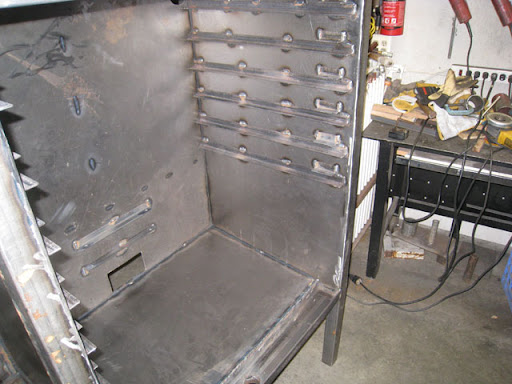
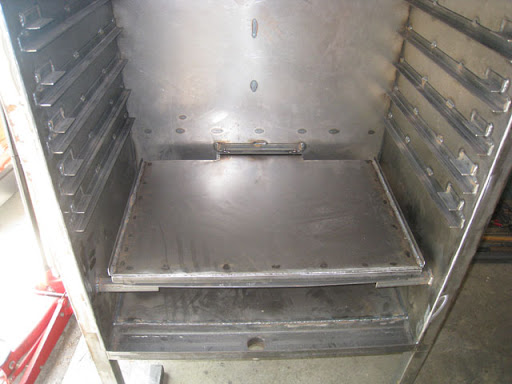
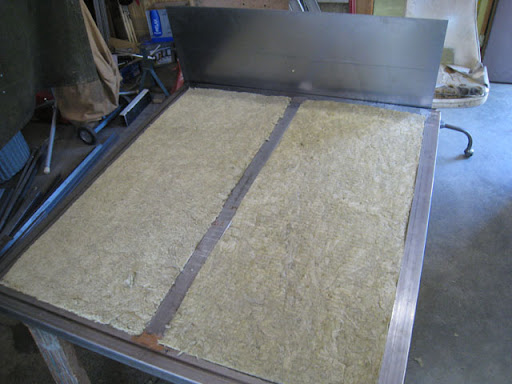
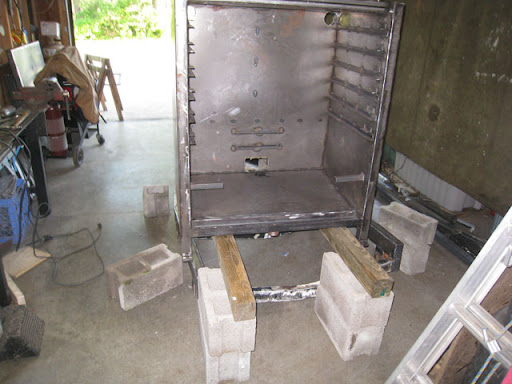
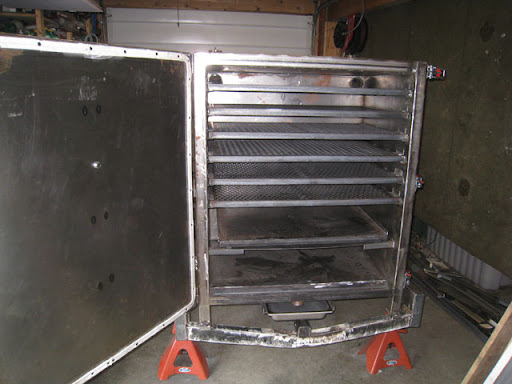
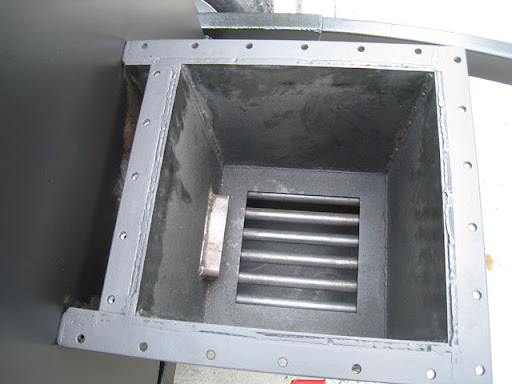
The heat deflector plate mounts were welded in. If you recall in an earlier pic, there are two pieces of angle welded across the back. The heat deflector and the grease deflector utilize pins to hold them in place.

heatDiffuser.jpg


Here's a crappy shot of the heat deflector. You can see the rests that are mounted on the walls for the front of the deflector.

greaseDeflector.jpg


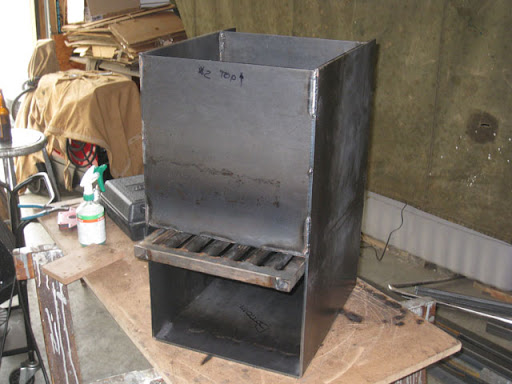
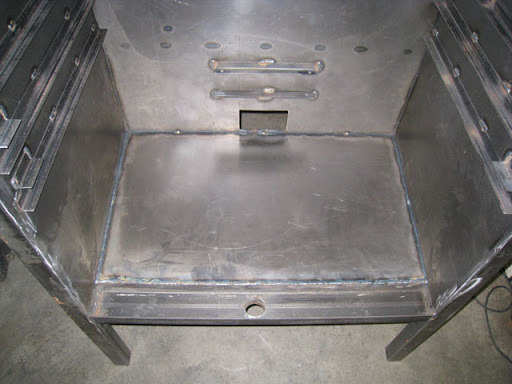
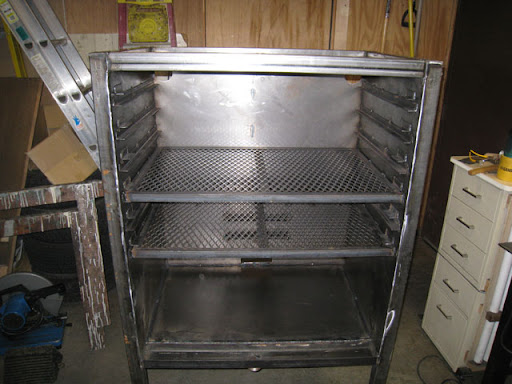
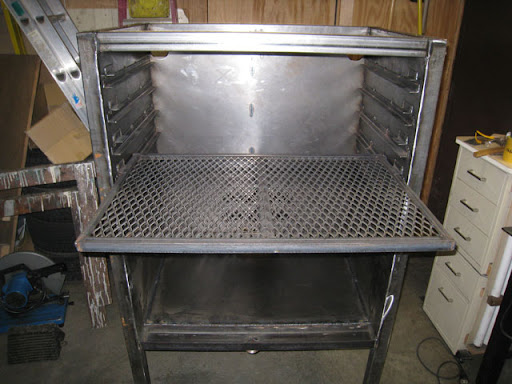
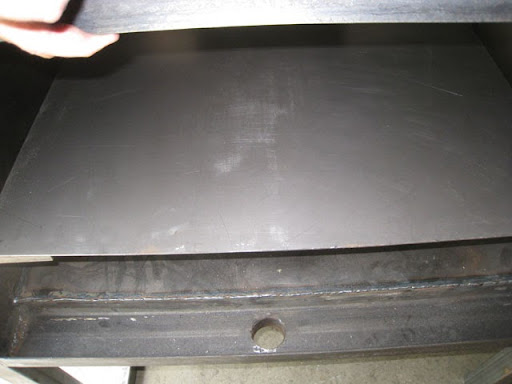
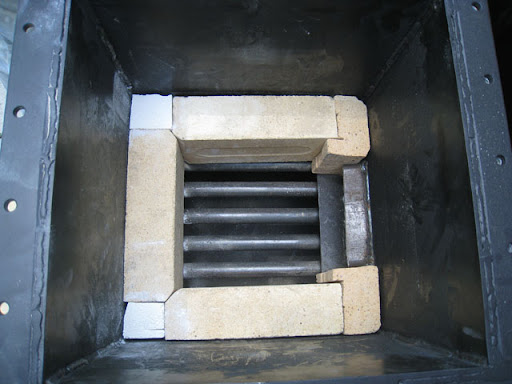
Here is the grease deflector on top. It's hard to see, but the pins for this piece poke up through the rear angle. Then there are two cotter pins that hold the deflector in place. They can come out easily so that you can pull the whole thing out for easy clean up. The grease deflector is also larger than the heat deflector, and had angle iron along the edges to catch grease and funnel it towards the front of the smoker and into the grease trap.

insulationInDoor.jpg


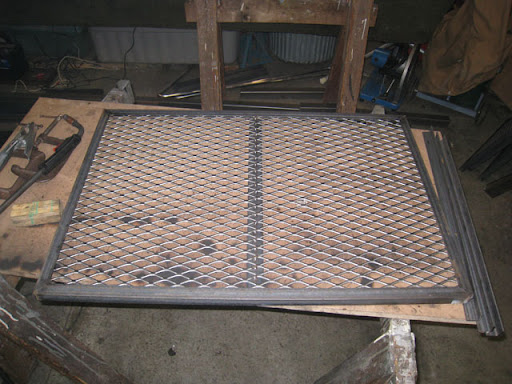
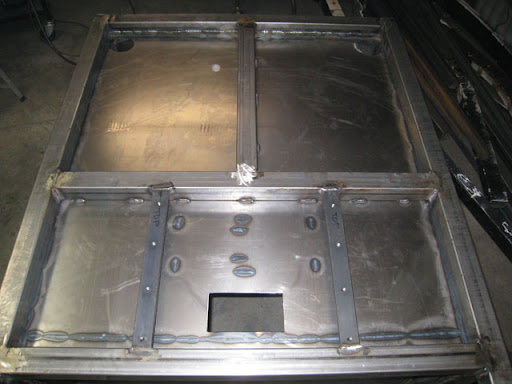
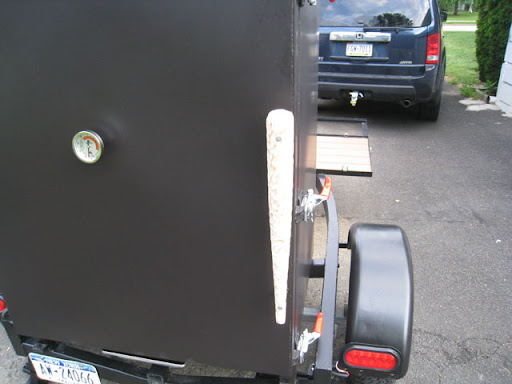
Here's the door getting stuffed. This is the only shot we took with insulation going into it. Need to find a handle for the door, and order a thermo and we'll be good here.

trailerAndAxel.jpg


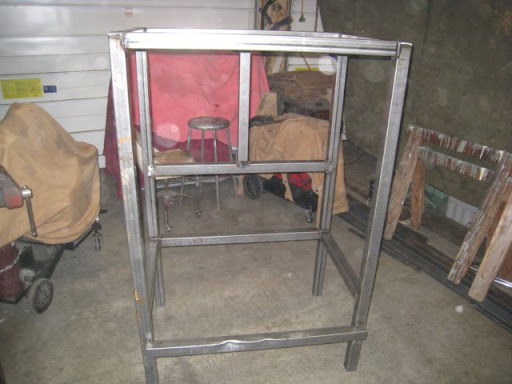
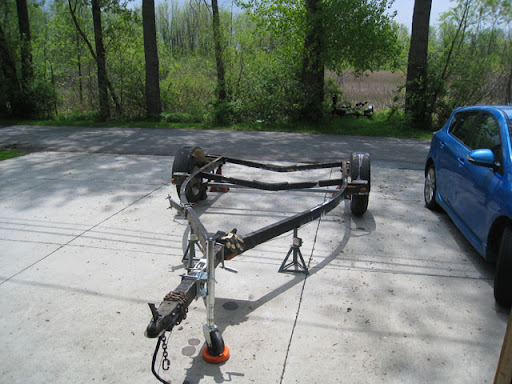
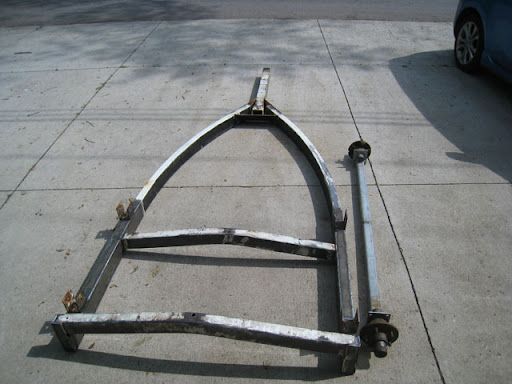
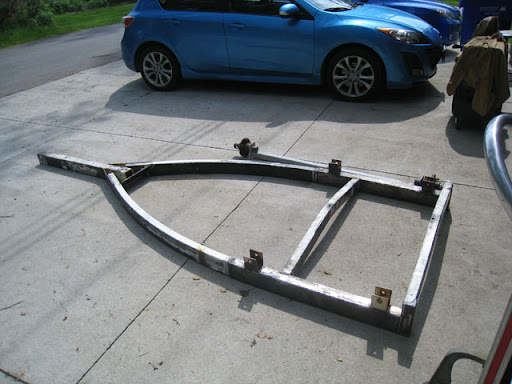
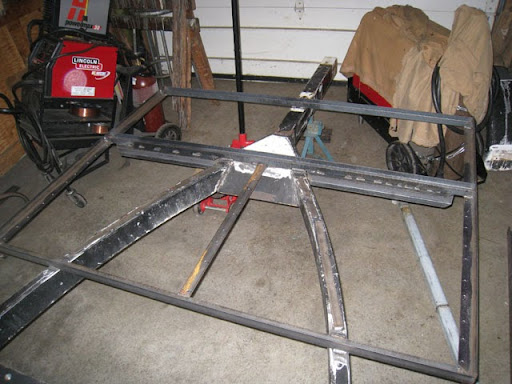
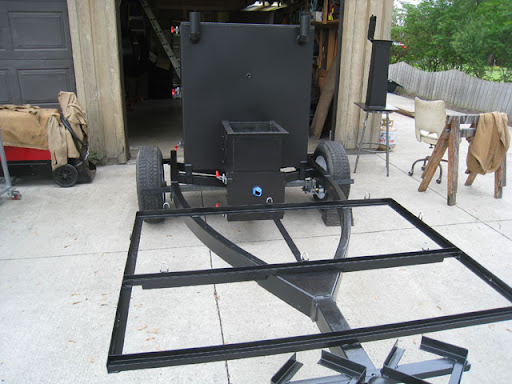
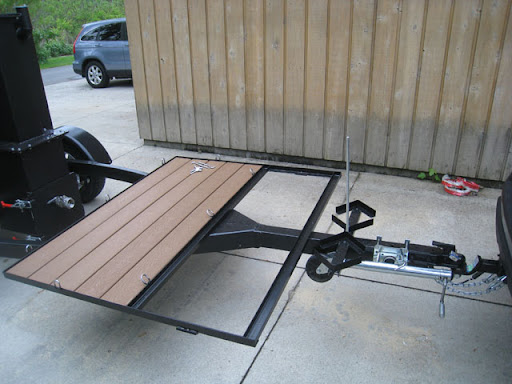
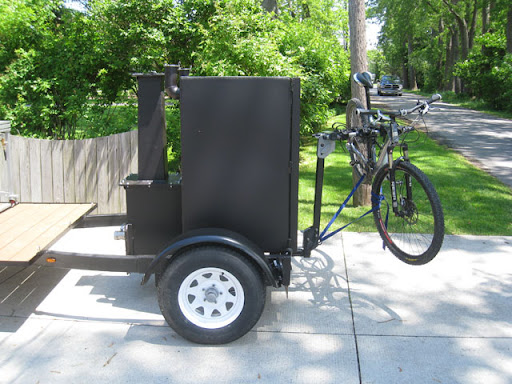
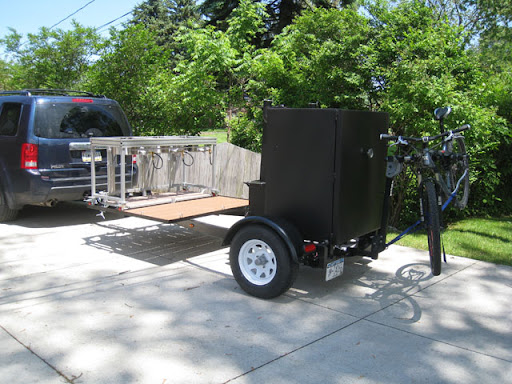
Hey look, our trailer is back together! A little shorter and a lot narrower than before!

trailerLength.jpg


And it's about the length of a mazda3 hatch! So it won't take up a ton of room in the driveway.

SmokerOnBlocks.jpg


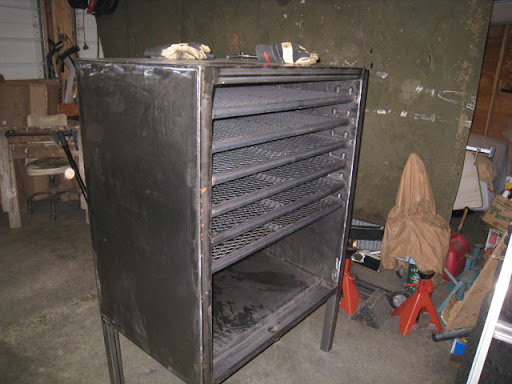
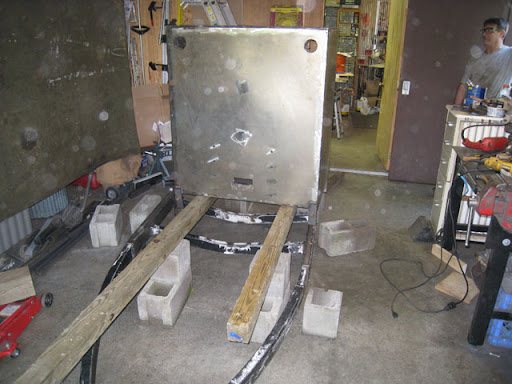
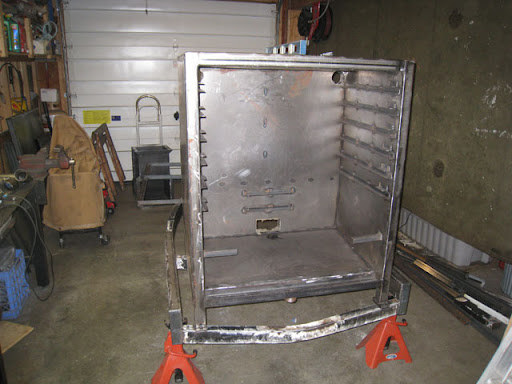
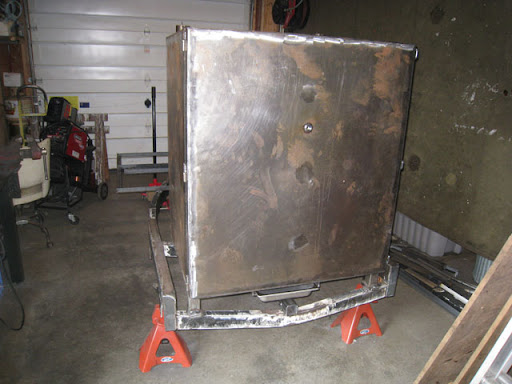
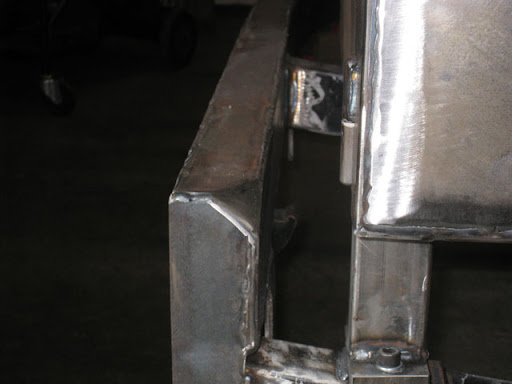
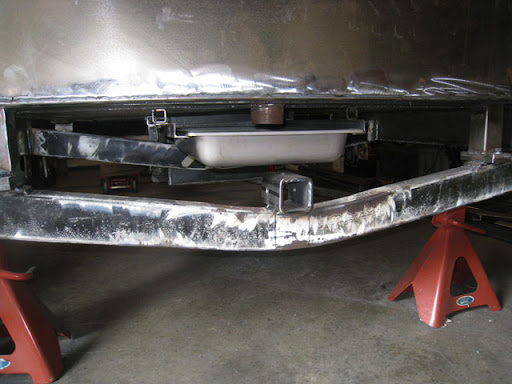
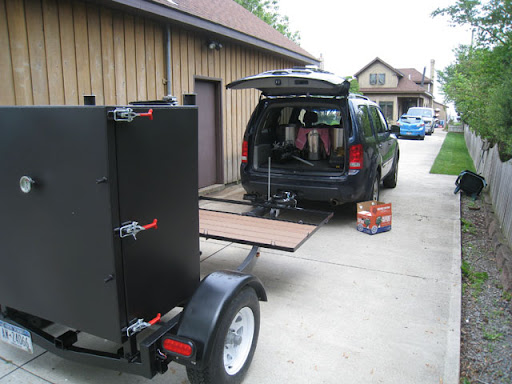
So a bit has happened by this pic. We cut the legs down on the smoker, and welded on some feet. The smoker is going to be bolted to the trailer now, instead of being welded in. This way in the future, if we decide to take it off the rig, we can. A couple of grade 10 bolts and she won't be going anywhere. We also had the smoker jacked up and on blocks. Had to get the trailer under there somehow. Not like we were going to dead lift it.

smokerOnBlocksRear.jpg


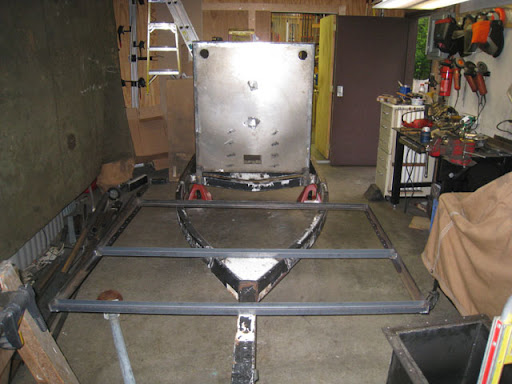
Have the trailer slid back and in place. Now it's time to slowly set her down on the frame.

stacksWelded.jpg


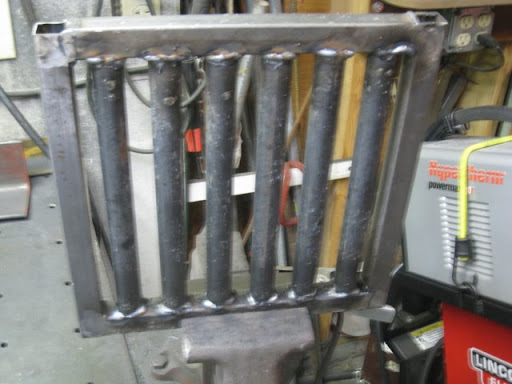
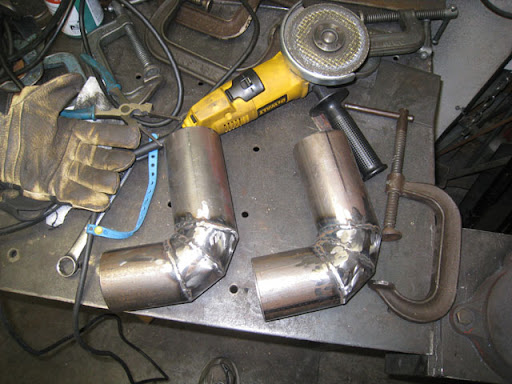
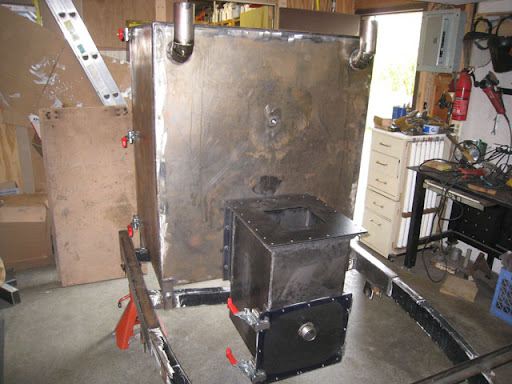
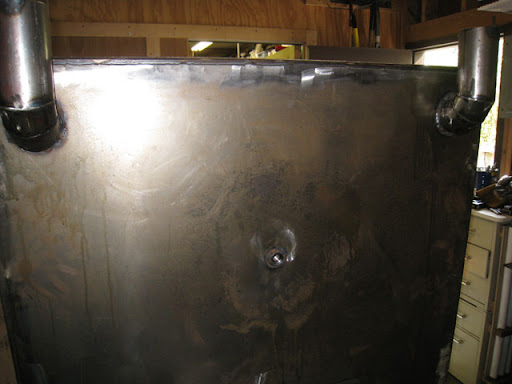
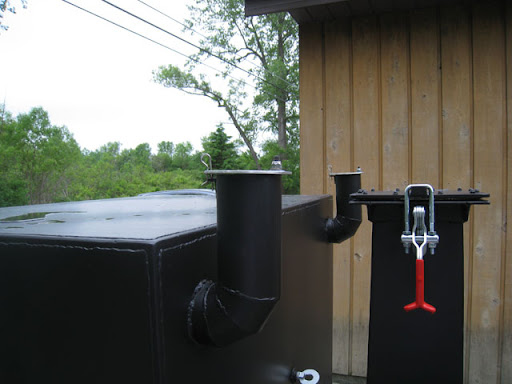
Stacks cut, welded up, and cleaned up.

stacksInPlace.jpg


Just resting in place. Need to weld on some rod so that we can put dampers over them.

brewStandFrame.jpg


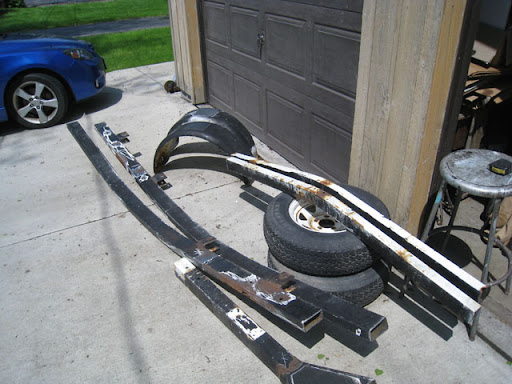
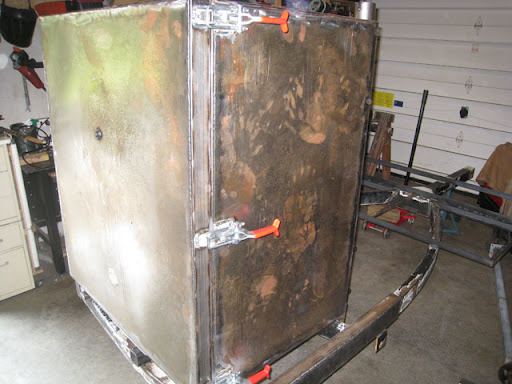
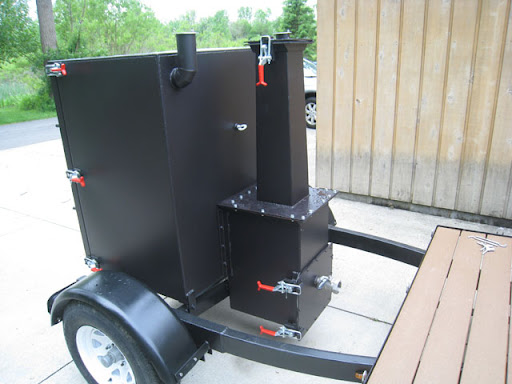
At this point, the trailers new feet (well their mates actually) have been welded to the frame and the the smoker is securely bolted to them. The trailer is now up on jack stands. Will be picking up the pieces for the springs tonight, so we can get those and the axle back on.

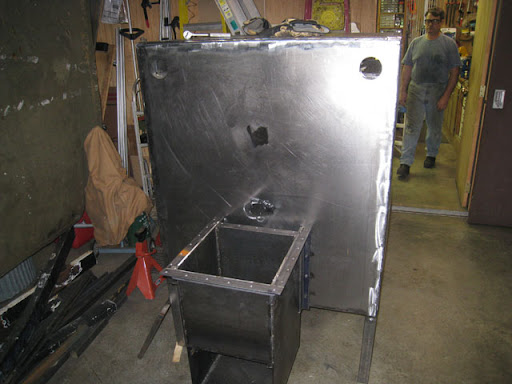
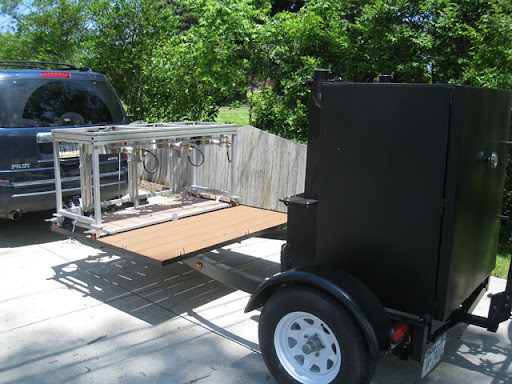
Now, the frame in the front is where the brewing rig/3 burner stove is going to go. It's just laid on there at the moment. Need to put in some supports for that, but that will come once we get the firebox bolted on and finished up. The firebox door will be opening toward the rear of the brew platform, so we need to account for allowances.
 
smokerMountedToTrailer.jpg


And here's a shot of the rear of the trailer. This is pretty much it's final height. I'm 6' and I can see over the top of the smoker. So it'll be nice not to need to get on a step ladder to get at any of the racks. And the majority of the weight will be distributed over the rear axle.

We're getting there. Still on the to do list:

1. weld up ash pan
2. weld up chimney
3. cut fire brick to fit inside firebox
4. weld up supports for brew platform and weld brew platform to trailer
5. weld on rear jack/leveling supports
6. put on springs/axle
7. install light kit
8. weld on fender supports and fenders
9. finish up stacks
10. paint

there's probably more in there, but I'm forgetting at this point.
 
nope. Just want to be able to have more capacity than I already have. And to take it tailgating/camping. maybe into competition here and here, maybe. I don't know. never done one. But it's been pretty fun. There's a single tier brew sculpture that will be sitting up on the front of this. There's a link to that in the DIY section.
 
this build has been alot of fun. One of the main goals was to be able to cook 35-40 racks of baby back ribs in one shot. I have a big bbq coming up where we do this many, and I had been doing it in 4 hour shifts on my little brinkman. That gets old when you have to do it around the clock, and add fuel every 45 min. Theoretically, I won't have to do that anymore!
 
We're getting down to smaller stuff to get done. Between monday and tuesday, we got some more accomplished.

doorHung.jpg

Last night we got the smoker door hung. Before we could do that, we needed to screw down the gasket material. Then get it lined up, hinges welded, and then the latches. Also have a coupler for my thermo that is coming shortly. On the outside it's a 1/2" female fitting, on the backside it's a 1/2" male threaded into the female. So the thermo will screw in on the front and the end of the termo will sit nicely between the two racks.

latches.jpg


man these latches are heavy duty. Really sucks in the door, and gets a good seal on the gasket.

groundCorner.jpg


When we opened the door to see if it swung freely, we noticed that it was hitting on the corner of the trailer, and making it stop a little over 90 degrees. So we cut the corner off the trailer, and will be welding in a stop so it can't cam up on the corner that is there. Going to add a little rubber bumper as well so it doesn't chew up the paint.

fullyLoadedSmoker.jpg


Everything is now back in the smoker, deflectors and grates.

dripPanBikeHitch.jpg


Here is the grease catch pan and assembly. The pan is not designed to travel here, hence no stops or pins/clamps holding it in place. Also below that is a reciever for the bike rack. yes, I wanted to be able to take the bikes with us as well.

fireboxAttached.jpg


Firebox is bolted on, and the firebox door is mounted. Have a piece of 2" nipple for the 2" ball valve that arrived yesterday. Also have the smoke stacks welded in place.

probeHole.jpg


Have another fitting welded in place in the rear of the smoker, same as the front door. This is so that we can feed the probe wires for the Stoker unit (digital temp controller). Will make for a nice clean look.

brewRigPlatformWelded.jpg


Brew rig platform is welded into place, with additional supports for the decking. Remember, I won't be brewing beer while this is mounted to the trailer. Will only be using it as a 3 burner stove, so it won't see much weight on it at all. When brewing beer, the rig will be on solid ground, as 3 15 gallon pots are quite heavy.

swimming.jpg


The dogs weren't the only ones dieing of the heat yesterday! That lake (Lake Ontario) is still a brisk 65'ish. Wasn't in for long, that's for sure.
 
I can't wait for you to invite us all up for the inagural BBQ.

HINT HINT HINT!!! :eek:

well, this smoker was made primarly for my "Caveman BBQ", which is right after the 4th of July. I make 35-40 racks of baby back ribs, 5 bags of salt potatoes, and some corn on the cob.

When the food hits the table:

1) not talking! Only pointing and Grunting is allowed.
2) no utensils, no napkins etc
3) if you are caught talking, whatever is closest to the person that caught you talking is getting chucked in your general direction.

You're kiddding! That sounds so awesome!

I make caveman steaks on my Big Green Egg. I get the thing up to 700+ degree and toss the meat straight onto the coals for 60 seconds a side, flipped by hand (weldgers glove). Then pull them out and close the Egg to bring the temp back down to 400 before putting them back on to cook to temp.

They get totally black and crispy but can be rare on the inside. Any fat on the edges is like candy.
 
This is going to be the 6th year. I even had T-shirts made last year. Says Caveman BBQ on it, in the style of chisled out stone, with Captain Caveman standing on the end holding his club!

In fact, we have something like that planned for the door handle. Going to try to chew up a baseball bat to look like a caveman club.
 
Well, it's 6/13 and I'm back home in PA, with a smoker in tow. The last few bits when pretty quickly, so there may be some holes in the picture timeline. There are some cool tricks that I forgot to take pictures of, but will get those later on. Anyway, without further ado...

trailerOutside.jpg


Frame and smoker are painted. The springs are on, the axle is mounted, and the tires are on. You can see the coal chute in the background. It's also all welded up and painted.

emptyFirebox.jpg


Here is an empty firebox.

fireboxFirstLayer.jpg


First layer of firebrick is in. The white bricks in the corners are a soft brick. I cut it with a hacksaw. These are there just to take up the space in the corners, to try to keep the firebricks from moving around.

fireboxFullBricks.jpg


And the top layer is installed. We ran out of the soft brick, so the top layer has a piece in each corner, but it's only half the height of the final firebrick layer. Holds them in place no problem.

emptyBrewCarrier.jpg


The decking has been installed on the platform at this point. There are D rings welded in around the outside of the platform so that they can be used for tiedowns. In front of this platform is the propane bottle holders. I didn't have any up there with me, so these remained empty for the trip home. Also in this picture, the last time we saw the handle for the third wheel.

damperPins.jpg


The dampers are on top of the stacks. They have some repurposed hairpins that secure them when under tow. The hairpins came from my camlock fittings for the brew setup.

toggleClamps.jpg


The firebox has been buttoned up. Now that's alot of toggle clamps! The trained eye may notice a couple of empty bolt holes. We miss counted by 5. Picking them up on the way home tonight to finish it off.

rearView.jpg


Here's a shot from the back. We installed some nice LED lights, so they should be pretty bright. The fenders are on, and the thermometer is installed. I used a Tel-Tru thermo, which I thought was fitting.

subcat_bbqan_alum.jpg


It's tough to see, but the bottom of the face says "Rochester, NY". Since we made the whole rig in Rochester, NY, I thought it was a nice touch!

bikeRackMounted.jpg


Bikerack and the Bike have been mounted. This ended up towing pretty well. The bike did bounce a decent amount, but it made it home unscathed.
 
brewTableMounted.jpg


The brew rig is mounted and securely in place. It didn't move at all on the way home.

gettingPacked.jpg


Getting packed up for the trip back home. Can't believe 3 weeks went by that fast.

gettingPackedCloseUp.jpg


Good thing I could fit most of the stuff INSIDE the pots. Allowed for the big stuff to still have a place in the back of the car, and for the dog to have the full backseat to himself.

overallTrailer.jpg


Overall shot of the fully loaded trailer. It wasn't too long, and will be even shorter minus the bike rack.

handle.jpg


It's pretty hard to see in this picture, but this is the door handle. Here's the background. Every summer my wife and I throw a "Caveman BBQ", no talking (only pointing and grunting allowed), no utensils (eat with your hands), no napkins (use your shirt!). Last year, it was our 5th annual BBQ, so I had T-shirts made up that have "Caveman BBQ" in what looks like stone block that has been chisled out, with Captian Caveman at the end of it. So, Dad took an old bat, put this really nasty looking wheel in the grinder, and went to town. The bat now looks like it's a hand carved club. Once I get a coat or two of stain, and some laquer on it, it'll have a permanent home on the door.

dadAndI.jpg


And here is Dad and I, in front of this beast. It was a blast being able to spend time with him, and learn all that I could from him. I enjoyed welding, and am currently looking for a used one I can add to my stable of tools. More of a problem would be where to fit it in my garage now. But we'll find a way.

There was one thing we weren't able to finish up before I left. We picked up a big electrical box to house the Stoker unit and a wireless router. Just ran out of time to mount it, but I wasn't sure where I wanted to do that anyway. So once I play around with it, we can mount it over the July 4th weekend (when I'll be back up there). It's really more of a rain shield for the units for an overnight cook. Tonight I need to give it a test fire, also ran out of time to do that up in Rochester. Sure we could have done it, but I wouldn't have gotten home until super late sunday. SWMBO has been pretty good with the fact that I was gone for 3 weeks (and took the dog mind you), didn't want to make her wait any longer.
 
Thanks! I am pretty happy with it, and it was a blast to build. Was really cool at the end seeing everything come together.
 
So the test burn/seasoning has been going extremely well tonight.

Now, I just need to figure out what to smoke this weekend to break it in! I'm thinking "pig candy" to go along with something else. What, I'm not sure. Perhaps a brisket??
 
That's one Bad Azz Rig you got there sir. Its cool that you spent time with your Pop building that beast. I'm sure it was built with alot of blood, sweat and tears. Job well done
I myself have thought of going the Homebuilt route for a smoker(currently have an old 125 gallon air comp tank taking up too much space in the garage). But with the garden and family (and Brewin) I just threw down some cash and bought a nice Propane fired Masterbuilt XL to get the job done.
Traditionalists may frown but I'm sure it'll make nice Q'ue.
 
thanks! We have a few mods we'll be making to it this weekend, but otherwise it's pretty much finished. I'll have more pics of it's big cook this weekend, and how the probes go in/out of the chamber.
 
Great build thread. You suck, and you suck, and I want to learn to weld you suck. Godddammmmnitttt.. Suckola. I want to do what you did.

I feel better. Thanks and carry on folks.

hehe, I know. THat's how I felt the whole time doing it. Had one big arse grin from ear to ear.

AWESOME Build wish I had the room for a tow behind rig, one day I hope

THanks. I"m down in Flourtown/Erdenhiem area, you'll have to check it out and have a brew!

Very nice build! I hope to see it in person at a contest one day!

I have never been to a comp before, and really have no idea what is involved. Add to that all of the other hobbies I already have, and I"m not sure my wife would be willing to go!! But it has piqued my curiousity.

Man thats pretty amazing. What a great build! Don't forget to post some pics of it in action when you get it loaded with ribs.

Will try to remember to take pics today. Have cornbread to make, as well as a crap load of other appeitizers.
 
thanks! We have a few mods we'll be making to it this weekend, but otherwise it's pretty much finished. I'll have more pics of it's big cook this weekend, and how the probes go in/out of the chamber.

Update? How'd the big Caveman BBQ go this year? I'm sure it was an absolute hit with that new beast you've got! Congrats on an awesome build!!!
 
I forgot to update this, good catch!

Ribs were procured, "conditioning" in the spare fridge.

unprepped_food.jpg


hmmm, wonder what this will be...

making_abts.jpg


about 90 ABT's!!!

abts_done.jpg


Ribs all rubbed down, and put in their own foodsaver bag (love that thing) to sit overnight.

food_prepped.jpg


Libations were all carbed up and ready to go. These were the "on deck" kegs...

lager_fridge.jpg


As the kegerator was already full

beer_on_tap.jpg


Smoker up to temp, time for some ribs...

racks_going_on.jpg


Ribs are all done!

racks_full.jpg


And the last pic took of the day, people lining up at the table.

food_on_table.jpg


All said, there were about 55 people total. Even had the local radio station show up. It was good times!
 
So I couldn't have been more pleased with the way this baby has worked all WINTER. Granted it hasn't been much of a winter, but it's still been below freezing. I never could have used my Brinkman SnP in colder climates. I had this baby chugging away at a group brew event two weeks ago in the SNOW!! That was nice, finish up a 1.100 RIS and chow down on some ABT's, Chicken, and Ribs!! The rest of the homebrew club was happy too!
 
So after four years, it was time to strip this puppy down and get rid of some rust. She sits in the driveway, unprotected. The elements have taken a toll.

qiO62-NIEDTR13gfU657QDxkSuU7JRKcxMI5Y-hMYeM=w506-h897-no


6IHLnZpje717_2247ghoNJlDBQODqx4cbiVFMbNzs8I=w506-h897-no


BIlvxsIcQTSMW--i-OjTZbj3J3LCUa3BBEuJSGQGfAY=w506-h897-no


I stripped everything off that could unbolt, and taught my wife how to use an angle grinder with a wire brush attachment. We went to town on all of the rust spots on the frame/smoker/firebox.

rONwMHKZTKrkSUwzXWtlIZXNN0cHHKAL0QBlab8Ev3Q=w1596-h897-no


z99prC6kLsygAyEBaxAhXbqvN1lwDe5_839RWimyp-M=w1596-h897-no
 
The fenders had this really hard epoxy primer, and the original paint never really took to it, as you can see in the previous pics. So i took them down to metal, shot with primer, and then put on the same paint as the rest of it.

JVITaJutYC5TPRzz_QioXMPyCYyE4gi776Mxv2MTRMQ=w1596-h897-no


Next up were the wheels. I had a bearing go bad and pretty much detonate on both sides. Puked grease all on the inside of the rim. A full bottle of dawn, and an hours worth of elbow grease got the crap off the rim, so I could then get rid of the rust spots and reshoot them with a metallic blue.

1iKCZDhKqmVb6aPMaONPS5Pv-f4zlQAymX1MRXL18qM=w1596-h897-no


V01zxQ_eHRleZYUmYuZPmW4qiAong1B3N-3SAIvxz3M=w1596-h897-no


8EqKRxJ264GGbHDDjgd9l3jfedLQI0EXTWPK-MO2wAo=w1596-h897-no


I took the box I have that holds the Stoker unit, striped it of the blue it had and repainted that as well.

TmZCh1NvxLgPqfOKYXAj9FYX7QbFoYAvW81zp2pW468=w1596-h897-no


d5mix_g23NnrtFYmkye66sBknoHtxPfEbgbJ7Bq-ZT4=w506-h897-no
 
Back
Top