BLING BLING Electric HERMS Conversion

Homebrew Talk - Beer, Wine, Mead, & Cider Brewing Discussion Forum

Help Support Homebrew Talk - Beer, Wine, Mead, & Cider Brewing Discussion Forum:

This site may earn a commission from merchant affiliate links, including eBay, Amazon, and others.
Pol,

Again Thanks for doing this post. I had been 80% sure on how to do this set up and this will help a lot. I am only doing an electric boil kettle for now, but myself and 2 friends just started doing all grain, so Im sure the hlt will be soon.

Cant wait to see your finish build. :mug:
 
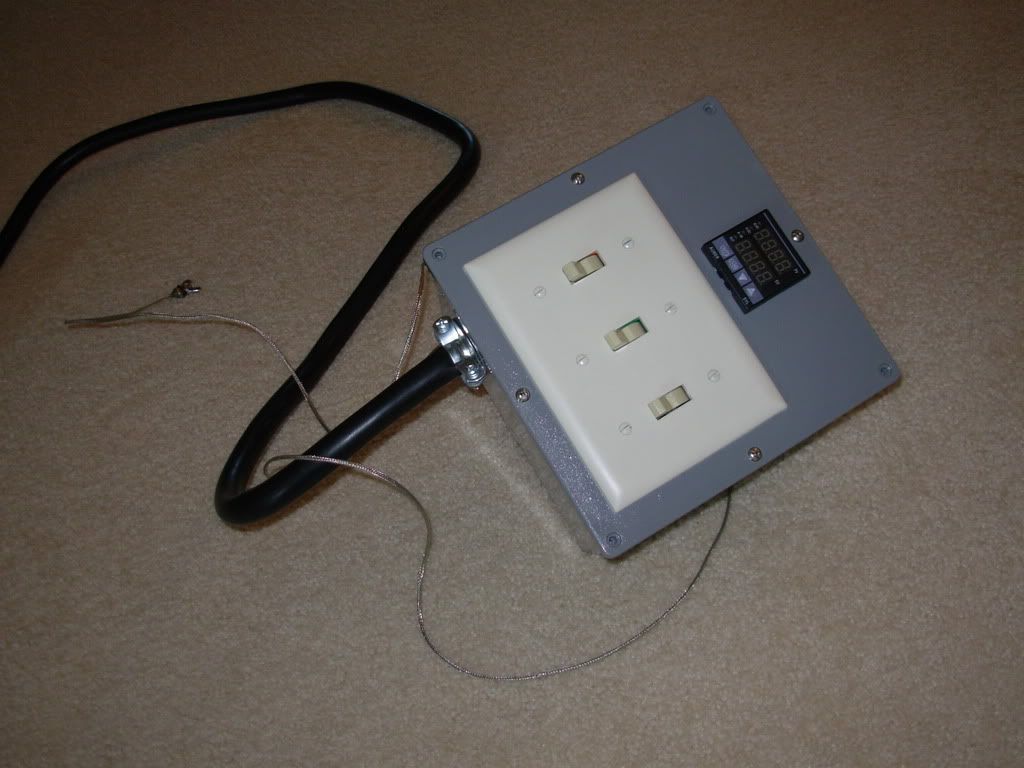
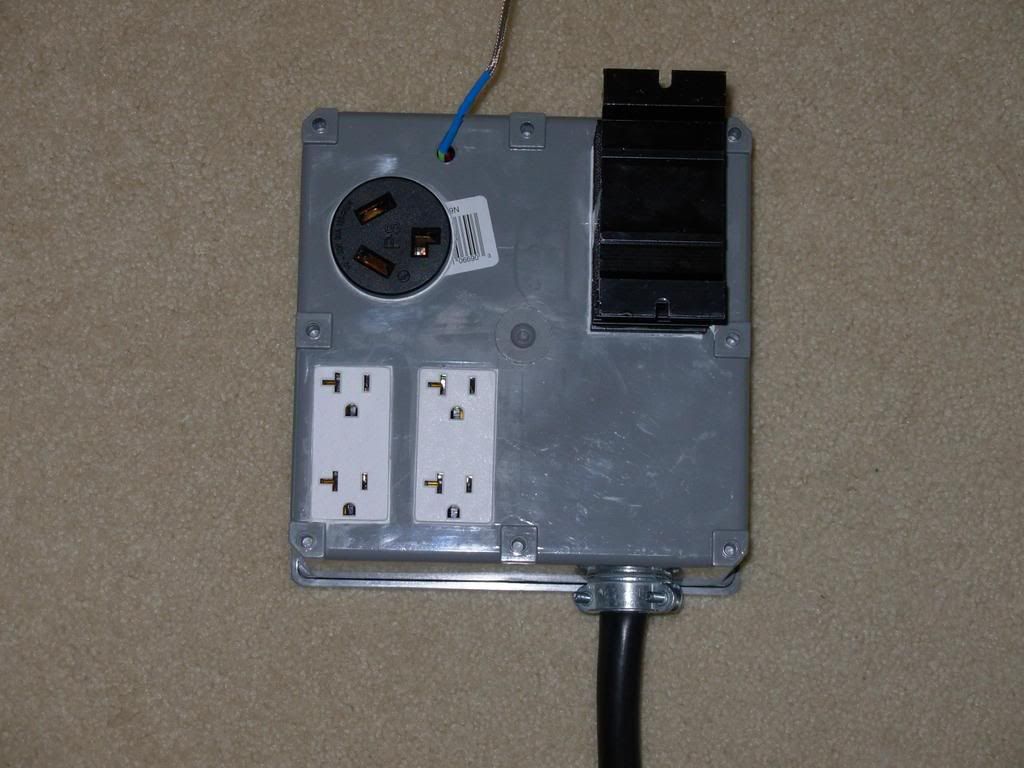
I would suggest that anyone else doing this build when I am finished, buys a 12x12x6 junction box. The 8x8x4 is large enough, but it is extremely tight and requires some very dextrous fingers!

+ 1 for the Pol. This is great advice. I, myself like to use two boxes, one for the controls, like the PID and switches, and the other to house the SSR's and connects for the equipment.

Another note: For the control wiring, wiring that is not to power elements and pumps, can be sized at #16 AGW or #14 AGW as this part of the system does not carry, but a few amps at most. This will make some of the control wiring easier. The wire for the elements and pumps should still be sized for there respective loads. S.
 
+1 from me as well!

You have inspired me to order a 40A SSR from e-bay last night (with included heatsink) for $19 that I am planning to control from an old PLC i had laying around. (I will program my own logic to do the PWM of the heater element).

Just need to scrape up the cash for the 30A 240V GFCI!

Thanks!

You may want to double check that SSR... is it DC or AC? I have seen many DC SSRs on EBAY with heat sinks.
 
You're using stranded wire, right? In such a tight space, even stranded will be stiff. My "control box" is part of the sculpture and is about 18x18x12, so I had a bit more room. I have seen other examples, where all the 120V stuff is in one box with DC lines ran to all the 240V stuff in another box, I suppose that would make things somewhat easier.

Yes, this is all stranded THHN insulated wire. It would be impossible to wire this size of a box with solid core wire, impossible. Even with strnaded wire it is taking a lot of patience and work to get it all to fit. But, it will, and the box is so small, but does so much!
 
Sweet, just wanted to make sure... someone sent me a link to an SSR on Ebay that was a DC SSR... didnt want you getting the incorrect component :D
 
I am finishing up the wiring of the control panel tomorrow (12-29-08). At that time I will begin dumping pics on here, update my final parts list on the OP and add as many instructions as I can.

Of course, your inquiries will be needed, I cannot imagine all the questions that will need to be answered, since this is my baby and I have been dreaming it up for a couple months. Much of it seems intuitive to me, but it is all based on my intuition....

Thanks for the continued inquiries and support HBTers!
 
In case you care, I use 2 techniques when actually using my electric BK. Since you have same PID you can probably do the same:

When I am going to be around to watch BK closely, I set it to manual mode 100%. Since I batch sparge, I do this at first run-off. Usually I'm about to a boil when the second sparge is done (I generally use 2 equal sparges).

If I'm not going to be watching closely (I'm always in the basement, but I may be tending to kids, racking something, eating, etc.) I set it to Auto around 200 degrees. I do this after first run off. I can then do whatever I need to do, and come back to the BK. It's usually holding steady at 200, then I'll flip to manual 100%. Only takes a few minutes to get boiling. This is what I really like about electric, I don't have to watch it like a hawk every second. (Disclaimer: pay attention, don't follow my example, etc.)

I can usually then turn the PID to manual 60% or so to maintain my boil in my insulated BK. It has a single layer of Reflectix on in. I probably need to add one more layer, as it's pretty warm to the touch when boiling - I may could cut it down to 50% or so. When I recirculated through my plate chiller to sanitize it, I bump it up to 75% to overcome the slight heat loss for about 5 minutes, then turn it back down to 60%.

Electric brewing rules! It took me about a year of piecing together info before I built mine, but I can't imagine it any other way. I'm sure you will enjoy it.

Slightly off topic, but for various reasons, I think I have decided to go RIMS in my setup. It will probably be my b-day present and I'll be sure to post info when I do it.

Enjoy!
 
In case you care, I use 2 techniques when actually using my electric BK. Since you have same PID you can probably do the same:

When I am going to be around to watch BK closely, I set it to manual mode 100%. Since I batch sparge, I do this at first run-off. Usually I'm about to a boil when the second sparge is done (I generally use 2 equal sparges).

If I'm not going to be watching closely (I'm always in the basement, but I may be tending to kids, racking something, eating, etc.) I set it to Auto around 200 degrees. I do this after first run off. I can then do whatever I need to do, and come back to the BK. It's usually holding steady at 200, then I'll flip to manual 100%. Only takes a few minutes to get boiling. This is what I really like about electric, I don't have to watch it like a hawk every second. (Disclaimer: pay attention, don't follow my example, etc.)

I can usually then turn the PID to manual 60% or so to maintain my boil in my insulated BK. It has a single layer of Reflectix on in. I probably need to add one more layer, as it's pretty warm to the touch when boiling - I may could cut it down to 50% or so. When I recirculated through my plate chiller to sanitize it, I bump it up to 75% to overcome the slight heat loss for about 5 minutes, then turn it back down to 60%.

Electric brewing rules! It took me about a year of piecing together info before I built mine, but I can't imagine it any other way. I'm sure you will enjoy it.

All good information. Thanks for sharing. These are some of the reasons I'm going electric as well.

Some other food for thought for people looking at going electric:

It seems most guys around my neck of the woods use two 3000W/240V elements in their BK without any PID or controller of any sort. They are directly wired to power with simply a couple of cheap light switches to turn them on/off independently.

Both are on initially (6000W total) to get up to boil, and then one is turned off for 3000W to maintain the boil. Seems to work perfectly for 5-15 gallon batches I'm told.

One of the nice features is that a 3000W/240V element only draws 12.5A so you can use standard wiring/plugs/etc for some of the setup. You'll still need 30A coming in from the panel of course.

I still think a single 5500-6000W ULWD element with PID/SSR gives you more control and I plan on going that way. Just food for though for others.

Kal
 
You noobs make me laugh.....

I've decided to go with a mini Plutonian core based fusion system for my BK and will rely on a quad switched Valcon monitor with a combined lead and concrete containment housing to make it all work. I've already core drilled a 2500ft ejection shaft in case of a system meltdown.

It's a bit pricy i know, but if i don't keep one step ahead on Pol...... well he just makes me look silly :D
 
No updated today fellas. Declared an Emergency flying into New York last night... today is filing paperwork and a report on that. Then, flying til midnight again. Sorry to keep yall hanging, been a hectic week here.
 
No updated today fellas. Declared an Emergency flying into New York last night... today is filing paperwork and a report on that. Then, flying til midnight again. Sorry to keep yall hanging, been a hectic week here.

Yikes, glad you are OK Pol. Anytime I hear "emergency" from a pilots mouth makes me really nervous ;)
 
this is all very fascinating. I am starting to rethink my upcoming system build and maybe go electric. I have pretty cheep utility rates here (except for gas) so it would probably be quite a bit cheaper to brew.
 
Yikes, glad you are OK Pol. Anytime I hear "emergency" from a pilots mouth makes me really nervous ;)

It turned out fine, kept the ppl calm... I did though discover that our prescribed procedure for this emergency is, let me say lacking. We improvised and did something completely different to obtain a suitable outcome. They are reviewing some stuff now due to this situation.

I will be TRYING to finish my control panel tomorrow, err, today... 12-30-08 before my inlaws arrive for our Xmas get-together. Thanks for the support and staying tuned!!!
 
No updated today fellas. Declared an Emergency flying into New York last night... today is filing paperwork and a report on that. Then, flying til midnight again. Sorry to keep yall hanging, been a hectic week here.

I'd like to hear more about the emergency.. You've made me curious.

If it's not classified. :)
 
I'd like to hear more about the emergency.. You've made me curious.

If it's not classified. :)


Abnormal SLAT/FLAP deployment on final approach. My FO did a great job flying though, had to buck up and land with a 20kt gusting to 32kt cross wind up there that night on top of it all. The biggest issue became the lack of a suitable checklist for the situation that we had :confused:
 
Wiring is complete on the box... doing some finishing touches... it will be posted by this evening!!
 
Abnormal SLAT/FLAP deployment on final approach. My FO did a great job flying though, had to buck up and land with a 20kt gusting to 32kt cross wind up there that night on top of it all. The biggest issue became the lack of a suitable checklist for the situation that we had :confused:

Glad it worked out ok. We had a similar problem on our Falcon 50EX in Orlando. We had an asymmetry light and of course they stopped moving so had to land slats only. Turned out to be just a bad micro switch.
 
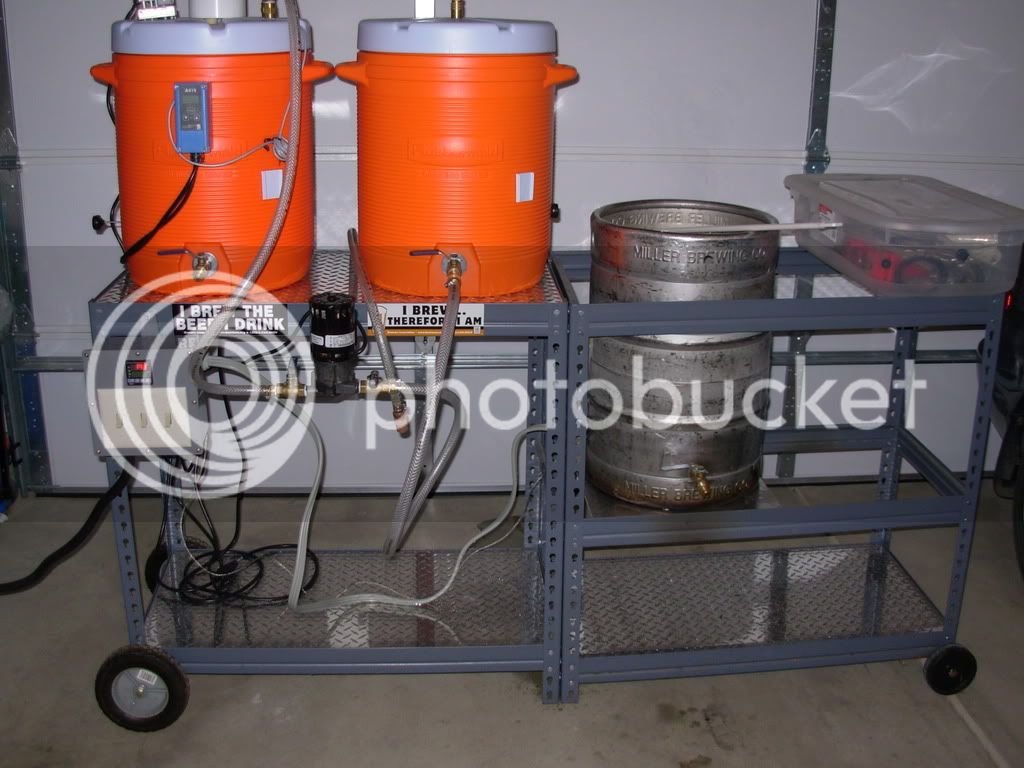
IT IS FINISHED!!! It boiled up some water, ran my pump, heated my HLT... It is great, it is awesome... I am so in love!
 
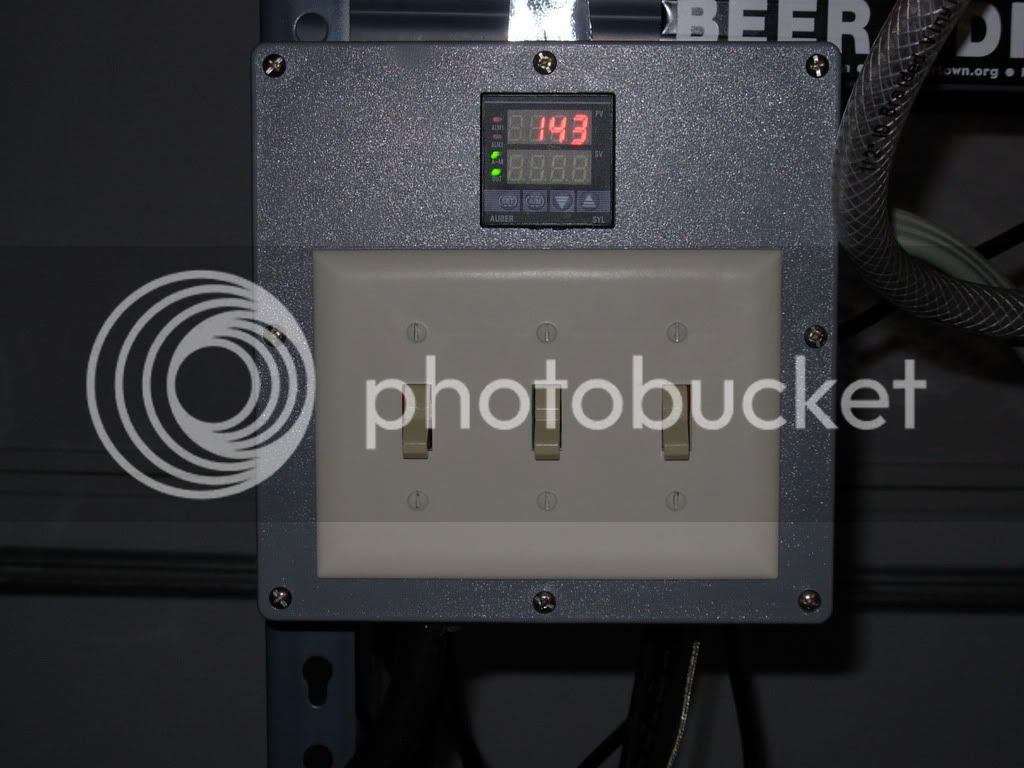
Here it is!!

DSCN0986.jpg


DSCN0989.jpg


DSCN0990.jpg


Switch #1 controls the HLT.
Switch #2 controls the BK (PID directly above).
Switch #3 controls the March Pump.

The BK swtich switches BOTH HOTS to the element. It cuts off the HOT before it reaches the SSR, the other HOT before it reaches the element outlet.
 
#1. After a lot of debate about the dielectric capabilities of JB WELD... Id say it handles 240VAC pretty well. No issues.

#2. DO NOT overtighten the element when you intall it in the keg. The water heater element seal works best when it is ONLY FINGER TIGHT. No wrenches, no leaks!

#3. DO have a multimeter (volt meter)... they are great for checking connections and trouble shooting!

#4. My 5500W element keeps a nice rolling boil going with 6 gallons in the BK at about 75%. I can turn it all the way down to 60%, but it will pulse a little.

#5. If you build this, you wont be disappointed.
 
How long did it take to get the 6 gallons to a boil? Mind posting a picture of the back of the control panel all finished up? Also, did you attach the ground to the same place your thermocoupler goes? Are you planning to wrap the ekeggle in insulation?
 
6 gallons to a boil from 70F took about 24 mins. Should take about 13 minutes to get 7.4 gallons to a boil after the sparge!

I do not have a finished picture of the back, you can get the idea from the "in process" photo that was posted previously. It turned out really well... I am really pleased.
 
How long did it take to get the 6 gallons to a boil? Mind posting a picture of the back of the control panel all finished up? Also, did you attach the ground to the same place your thermocoupler goes? Are you planning to wrap the ekeggle in insulation?


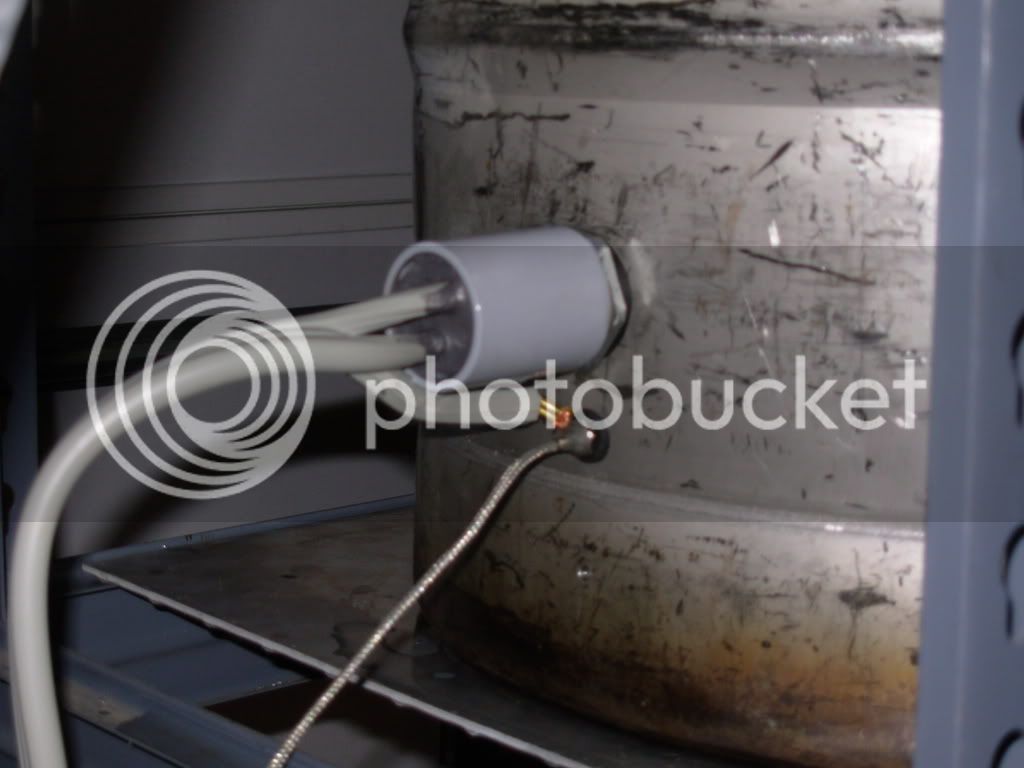
The ground is attached where the thermocouple goes into the BK. The instructions for doing this are posted in the OP with the element construction instructions.

I am not going to insualte the BK, there seems to be no need. The boil time is short, and I can keep it boiling at 60% power, and 75% keeps it boiling with no pulsing.

NO MORE GAS!!!
 
I used water proof switch boxes and covers. But I'm messy, so maybe it won't hurt you. (Example, one of my quick disconnects on my chiller disconnected spontaneously yesterday and I got a quart of Belgian Golden all over my rig. I guess I never had it clicked all the way... No golden shower jokes...)

I too would like to see a shot of the back if possible... Pretty please ;)

Let me know how you like the PID as compared to the other temp controller you have. I'm debating what to do with a possible RIMS build:
https://www.homebrewtalk.com/f51/ranco-love-rims-pid-95129/
 
My rig has been pretty much DRIP free for a while now. I suppose that if a disconnect blew off, Id test my GFCI!


The PID is cool... but keep in mind I just use it in manual mode really, so the true value of its capabilities are lost on me.

My A419 is more than suitable for my HLT... the PID in manual is nice for the BK... PIDS and SSRs are cool, you just need room to wire them up. This box is REALLY tight inside... REALLY.
 
Nice system. I think you will really like it.
What is the cycle time set on your PID? I found that I needed to decrease my cycle time to 1 sec to prevent "pulsing" in the manual mode.
One thing you might consider is using a copper lug to attach the ground to a hole drilled in the bottom skirt of your keggle. You really can't overdo grounding.

I will check my cycle time... if I can reduce the pulsing, I can turn it down to about 60% to boil a 5 gallon batch!

EDIT: Cycle time was at 2 seconds... I set it at 1... I will run a test tomorrow. Dont have to worry about wasting gas! ;)
 
Congrats and thanks for all the work you did getting the info posted. I'm going to spend some time tomorrow really going over all the details so I can get started on upgrading my system to electric.
 
stupid question I'm sure, is there any concern of the element scorching the wort since it's in direct contact during the boil?
 
Pol,

Looks real nice and clean. I love electric brewing, so easy and quiet!! No more propane. Nice system!

As for the question about scorching. I have a low density element in mine no the ultra low density that others use and I have had no off flavor or notice of scorching in my beer. It maybe 1 or 2 srm darker than a batch done with propane but I have not done a side by side comparison.

Good tip on the cycling time. I have to check mine.

Mike
 
pol,
is there a pic of the inside of the control panel on this thread?
i would like to see how you situated everything.

There IS a picture in the thread of the inside of the box... it is VERY tight in there so the internal layout is really important. I also have the pics in my gallery! :mug:
 
Back
Top