Soldering Stainless steel

Homebrew Talk - Beer, Wine, Mead, & Cider Brewing Discussion Forum

Help Support Homebrew Talk - Beer, Wine, Mead, & Cider Brewing Discussion Forum:

This site may earn a commission from merchant affiliate links, including eBay, Amazon, and others.
If it's too good to be true, works great there will be some "Greenie" on the Fed payroll sucking our money up with a large staff that will ban the product. Like th MTBE they forced on us. Major pollution problem dairy cows farting, install catalytic converters on 'em next?
 
It's hard to tell from the size of the picture, but it looks like you have way too much solder there. It also looks like it's not really well bonded to the keg.

Wow, how can you tell its not really well bonded? Is there something in the pic that clues you to this? I ask because, like I said before, it was my first time soldering SS, so I need to know what to look for in a good joint. BTW, did I mention no leaks?

As to the MAPP gas issue. I understand its not MAPP gas, but I just used that acronym because that whats most people know it by, and BernzOmatic (not "Benz O Matic") is now marketing Propylene as MAPP's replacement. I guess the point I was trying to make was that brazing is not too hard to do with a little practice. If I can pull this off, prettymuch anybody can.
 
As to the MAPP gas issue. I understand its not MAPP gas, but I just used that acronym because that whats most people know it by, and BernzOmatic (not "Benz O Matic") is now marketing Propylene as MAPP's replacement. I guess the point I was trying to make was that brazing is not too hard to do with a little practice. If I can pull this off, prettymuch anybody can.


They are all marketing propylene as MAAP replacement. Yea, I did spell it wrong. If I am going to be specific I guess I should spell the name correctly.

Again, I wasn't trying to be an a$$. My deepest apologizes if I offended you in any way. Keep on rock-n.:mug:
 
Wow, how can you tell its not really well bonded? Is there something in the pic that clues you to this? I ask because, like I said before, it was my first time soldering SS, so I need to know what to look for in a good joint. BTW, did I mention no leaks?

Take it with a grain of salt, because I'm no expert...I haven't even soldered SS. Do have a little Cu experience.

But the bonding angle (I'm sure that isn't the right tech. term) looks steep (like it was beading). If that is the case then it might not have wicked into the thread right. I'm not sure how you got that much solder on there. Wouldn't it flow away when it was heated? That being said it sounds like it is solid and working for you.
 
As I said it is hard to tell from the picture but it does look like it is beading up on the surface of the kettle. If that is the case, it is not making a strong bond with the metal and is sort of just sitting there. Beaded solder may appear to stick but usually with a little force it just pops right off. You may have enough solder there to basically be acting as a "nut" holding it together.. but after a few times opening and closing the ball valve it may weaken the joint.

Take a look at some of the other pics in the thread here to compare the amount of solder vs how much you have. Here's one in particular:

DSC00962-sm2.JPG
 
Sorry if this has been addressed already. I haven't followed this thread completely.

Is anyone bothering to follow the clean up steps of the stay clean flux? Or is everyone just doing the wet rag right after soldering.


This is from Harris's faq page.

What is the procedure for removing Stay Clean® Flux residue?

1. Soak soldered parts in two ounces tri-sodium phosphate or bicarbonate soda added to one gallon of water heated to 120ºF.
2. Rinse in detergent treated water, heated to 120ºF.
3. Rinse in clean water heated to 120ºF.
 
And the burning question I have is what happens if I don't clean it up? Do I get a 3rd eye link Blinky on the Simpson's? Is it toxic? Or are you bringing it up purely as a question?

I just boiled a hot oxi solution for around 30 minutes.
 
And the burning question I have is what happens if I don't clean it up? Do I get a 3rd eye link Blinky on the Simpson's? Is it toxic? Or are you bringing it up purely as a question?

I just boiled a hot oxi solution for around 30 minutes.


Correct. I am just wanting to know cause I know nothing of flux and its properties. I am a weldor, I don't use flux. I have done very little brazing and only the standard home soldering.

What started my thinking on it is, I found another brand of liquid flux that is listed to solder SS. I want/need to make a bulkhead fitting for my MLT. My new system is going to use a cooler for the MLT. I thought it would be nice and easy to just solder it up. The flux I found says it has Zinc Chloride as the main ingredient. It also has Ammonium Chloride as the second ingredient. This made me wonder.

So I asked Harris if their flux was safe for potable water systems. They said if the cleaning procedures are followed then yes, it will be fine. So I looked at their ingredients for the Stay Clean liquid flux, it has the same stuff in it (as the stuff I found) plus one more. They have Hydrochloric Acid in theirs. So I guess mine is known as an acid free flux, right?

Acid free or not, I found a flux at the local hardware store that has the same stuff in it as the Stay Clean flux. Not really too my surprise, the tech guy for the company of the flux I found, couldn't answer my questions. Scary huh? That put me here.

Since you replied how you cleaned yours, I did a little searching around and found out that. Tri-Sodium Phosphate has been mainly substituted with sodium carbonate. Which is one of ingredients in oxy. Of course the other method (bicarbonate soda) is just Baking Soda. Simple enough. I do believe I will be going the extra mile with my stuff and go through the cleaning process listed by Harris.

Aside from all that I typed. Don't you think it is better to know something, then just hope what you did was right?

Edit; Oh yea, folks would probably like to know what I found. I found this stuff. Like I say, it is local for me and was only $8 locally.
http://www.whittemoredurgin.com/selcleanflux.html
 
Greenmonti - Lowes sells TSP (trisodium phosphate) and phosphate free TSP. Obviously the latter isn't actually trisodium phosphate but rather sodium carbonate or something. I use it alot when refinishing furniture and can tell you that the stuff with phosphate degreases much better. I think some states have banned phosphates though, but not in Ohio.
 
Greenmonti - Lowes sells TSP (trisodium phosphate) and phosphate free TSP. Obviously the latter isn't actually trisodium phosphate but rather sodium carbonate or something. I use it alot when refinishing furniture and can tell you that the stuff with phosphate degreases much better. I think some states have banned phosphates though, but not in Ohio.

Nope, not in Ohio TSP is da bomb! I'll hit my solder joints with some TSP just for good measure, although I suspect if they were going to kill me it would have happened quite a few batches ago! ;)

Thanks Monti for being thorough, you're a good dude!
 
Greenmonti - Lowes sells TSP (trisodium phosphate) and phosphate free TSP. Obviously the latter isn't actually trisodium phosphate but rather sodium carbonate or something. I use it alot when refinishing furniture and can tell you that the stuff with phosphate degreases much better. I think some states have banned phosphates though, but not in Ohio.

Yea, I have used it before to scrub down walls before painting. It's some good stuff, for sure. It has only become an issue due to an overuse over the years because it works so well. That's my understanding anyway. So, yes your right. The substitute is Sodium Carbonate, which is one of the ingredients in oxy-clean.

Nope, not in Ohio TSP is da bomb! I'll hit my solder joints with some TSP just for good measure, although I suspect if they were going to kill me it would have happened quite a few batches ago! ;)

Thanks Monti for being thorough, you're a good dude!

I am sure your right. I may be over thinking things a bit. But I like to be sure.:D

I must say bravo to all of you that have successfully soldered SS. I did two quick tests today and found out real quick that the heat input is really important. I burned up my tests and only got one to kinda stick. It is different to me that's for sure.
 
I just remembered something that might be important for anybody out there being frustrated by not getting enough heat with propane.

When I used propane to braze, I used one of these

http://www.productreview.com.au/uploads/images/items/89852_bernzomatic_ts4000t_welding_torch.jpg

That torch puts out a much bigger flame than the standard version.

http://www.nakka-rocketry.net/ablative/ul100.jpg


Also, I apply flux twice. First when the metal is cold, then again just before applying the silver. Seems to work much better than just one application.
 
A torch on any mesh or screen object will instantly overheat then your doomed for not having solder flow out to braze the intended parts, use a big iron or soldering gun for proper heat control.
 
Ok, after my last failed attempt, I'm trying the homemade keg tool detailed by Blane in Greenmonti's keg tool thread.

Of course, my 5/8" bolt doesn't fit inside the coupler by a few thousandths of an inch, so for this test I just used 5/16" threaded rod.

Started by drilling a 7/8" hole with a step bit and deburring the inside by running the bit around.

dimple_hole.jpg


Next I assembled the tool in place, putting the reducing coupler in the hole from the inside. I used a little WD-40 on the coupler.

dimple_inplace.jpg


Then just ratcheted on the nut until the coupler popped through. It required almost no effort, just slid right through.

dimple_pullthrough.jpg


The hole is still a little too small for the straight coupler, so it will need to be pulled through. Unfortunately, the 5/16" threaded rod isn't up to the task of keeping the coupler straight. That'll have to wait until I can either grind the coupler or get a 7/16" bolt.

dimple_withcoupler.jpg


The dimple sure was nice! No tearing this time :)

dimple_done.jpg


-Joe
 
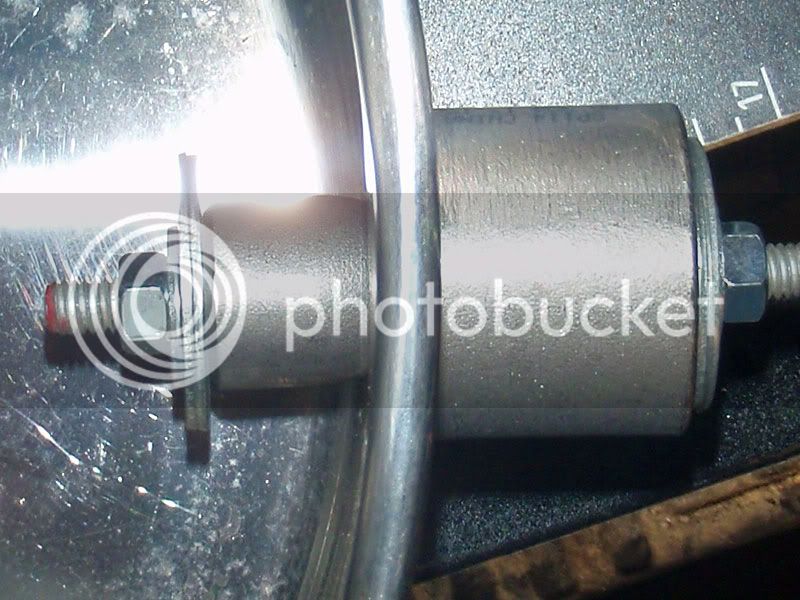
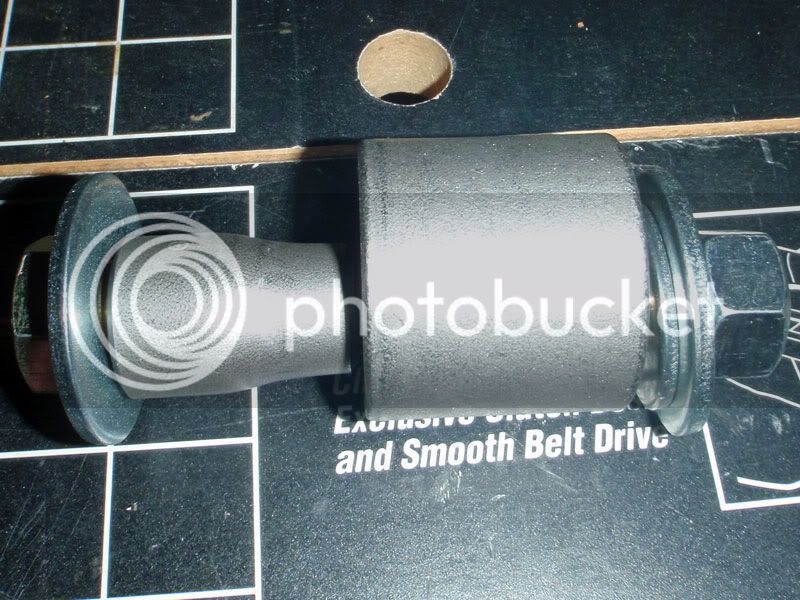
Stopped by my local big box tonight. Picked up a tungsten carbide bit for my Dremel, which allowed me to open the tapered coupler up enough for the 5/8" bolt to pass through. So I was able to finish the tool properly.

Left to right parts are:

5/8"-11 x 4 1/2" bolt
5/8" washer
3/4" to 1/2" stainless steel butt-weld pipe fitting
1" stainless socket weld low pressure coupling
1/2" washer (drilled to 5/8" with the step bit)
5/8" washer
5/8"-11 nut

dimple_tool.jpg


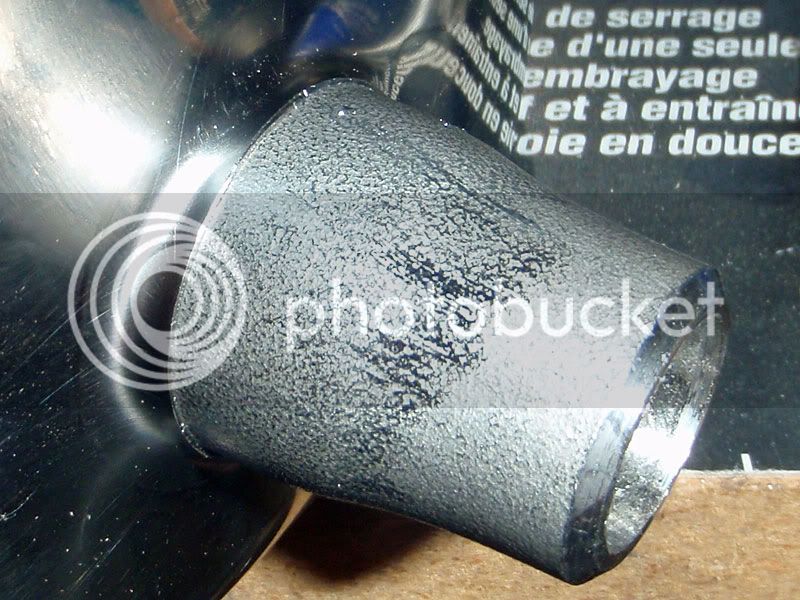
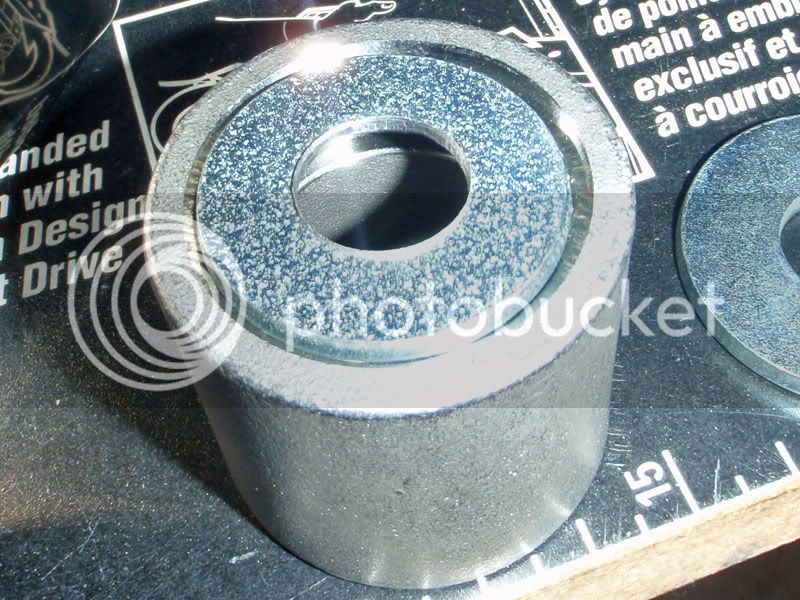
The reason for the 1/2" washer is to center the coupler on the outside. It nestles perfectly in the slight taper at the end of the coupler.

dimple_washer.jpg


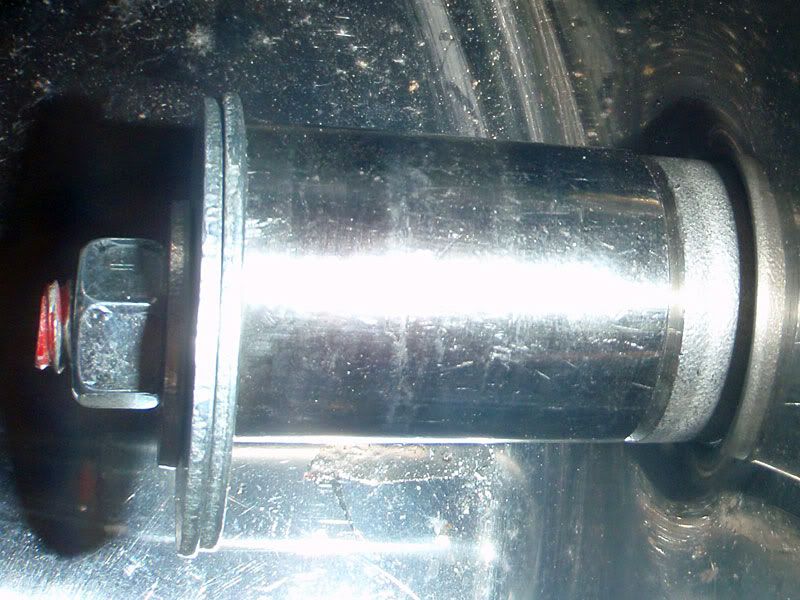
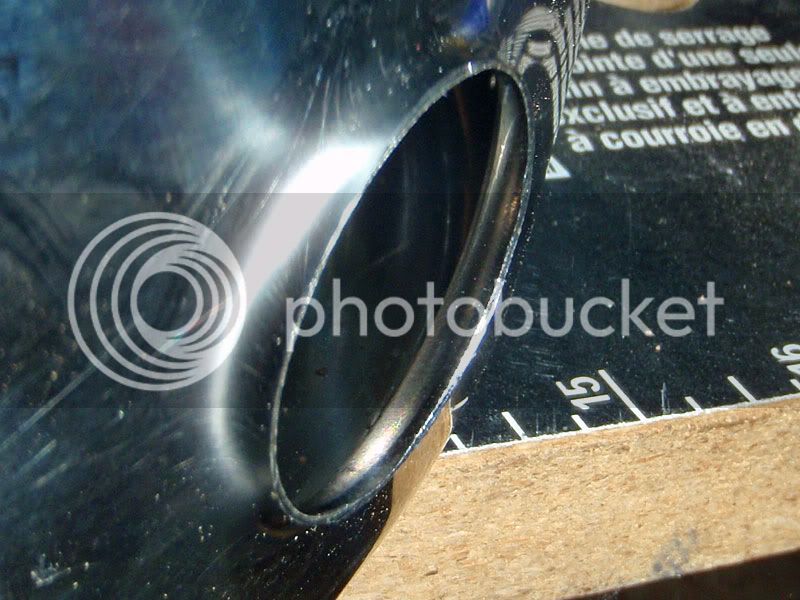
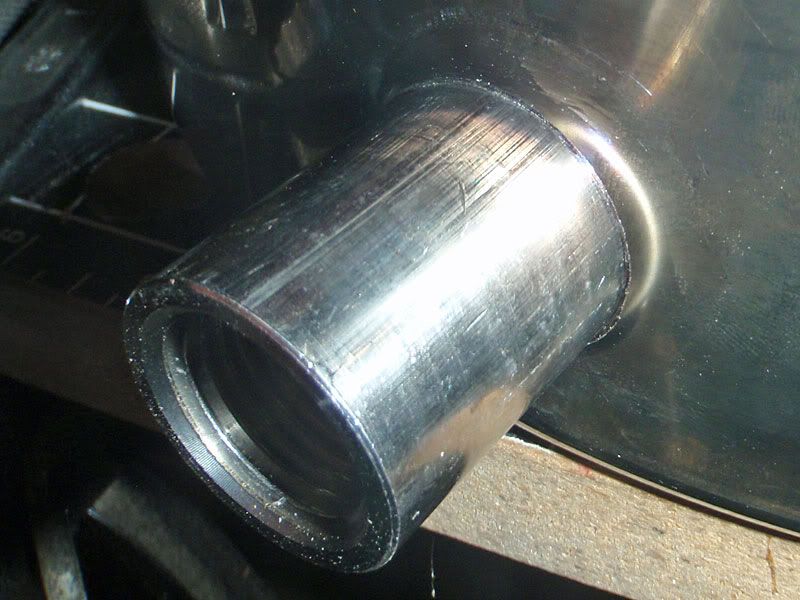
Here's the fitting pulled all the way through. It is a tight fit. Completely unmovable by hand. Exactly what I was hoping for.

dimple_outside.jpg


And the inside. The end of the fitting is actually level with the inside wall of the kettle. I'll probably draw it in just a little deeper, but I like the fact that there is plenty of surface for solder.

dimple_inside.jpg


Now I just need to grow the cojones to do this to my real kettle...

-Joe
 
Can you advise where you got all the parts for this from? Part numbers for the less common parts would be appreciated. Thanks for the very detailed pictures. Nice write up and looks great.

Edit: I guess the two couplers are the least common parts.
 
Edit: I guess the two couplers are the least common parts.
Yepper. Also I got a grade 8 bolt from McMaster. Probably overkill, but that's what I do best.

In case the links don't work, part #'s (including that nice, shiny coupler and half coupler):

45605K711 Std-wall 304/304l Ss Butt-weld Pipe Fitting, Unthrd, 3/4" X 1/2" Pipe, 1-1/2"l, Reducer, Sch 40
4335T64 Unthrd, Low-pressure 304 Ss Sckt-weld Fitting, 1" Pipe Size, Coupling, 150 Psi
92620A810 Grade 8 Alloy Steel Hex Head Cap Screw, Zinc Yellow Pltd, 5/8"-11 Thrd, 4-1/2"l,fully Thrd

4464K224 Type 304 Ss Thrd Pipe Fitting, 1/2"pipe Sz, 1-1/16"od, Half Cplg,1000 Psi,11/16"l
4464K214 Type 304 Ss Thrd Pipe Fitting, 1/2" Pipe Size, 1-1/16" Od, Cplg,1000 Psi, 1-3/8"l

-Joe
 
She's a beaut Joe. I suppose you'll try laying the solder into the crease on the inside? As long as it's laying down with the fitting side down, you should be able to get the flux to pool in there, apply heat only to the coupling from the outside, and it should flow. Got a MAPP tank?
 
She's a beaut Joe. I suppose you'll try laying the solder into the crease on the inside? As long as it's laying down with the fitting side down, you should be able to get the flux to pool in there, apply heat only to the coupling from the outside, and it should flow. Got a MAPP tank?
Thanks! Yes, that's exactly what I was thinking. Yes, I've got a MAPP tank. When I did the test solders, I used a little butane torch, which seemed to have plenty of power for this application.

The only thing I'm worried about is fumes inside the kettle. Those 25g barrels are pretty deep. I've got a full-face respirator that I use for woodturning with a remote air intake, but it may be too big and bulky in there. We'll see.

-Joe
 
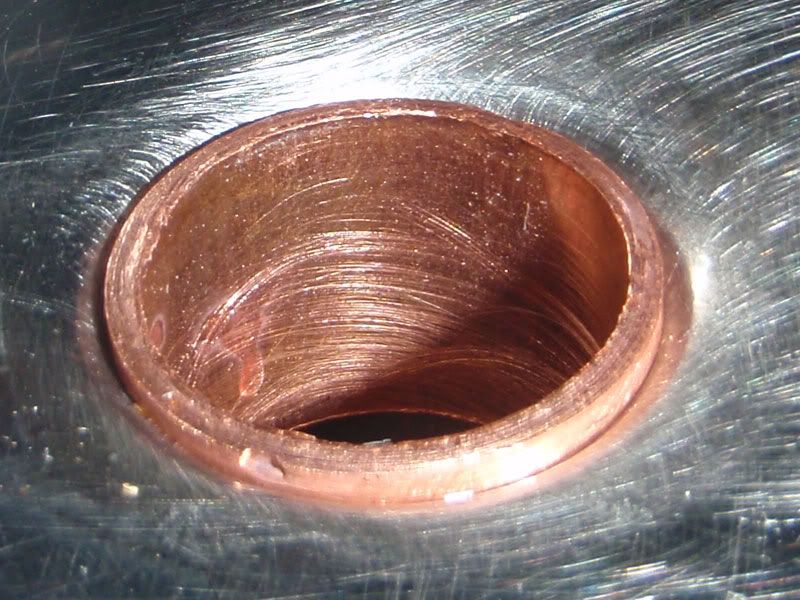
Gave it a try this morning. Used a 3/4" copper coupler, since I didn't want to solder up my shiny stainless yet.

I inserted the fitting about 3/4 of the way, then added flux all the way around before pushing it a little below the rest of the kettle surface.

dimple_copper.jpg


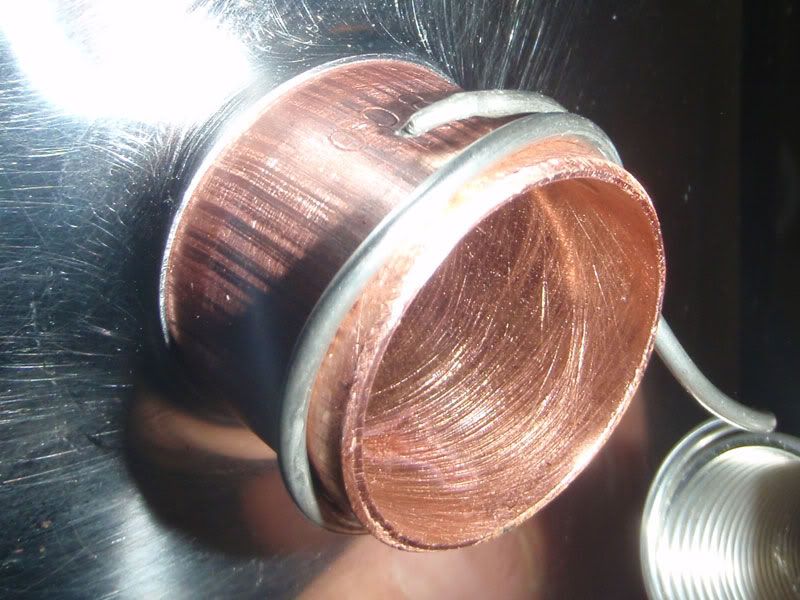
Wrapped a loop of solder around the outside of the fitting, then cut through both pieces to make a perfect loop.

dimple_soldertwist.jpg


Added some more flux then positioned the solder loop.

dimple_presolder.jpg


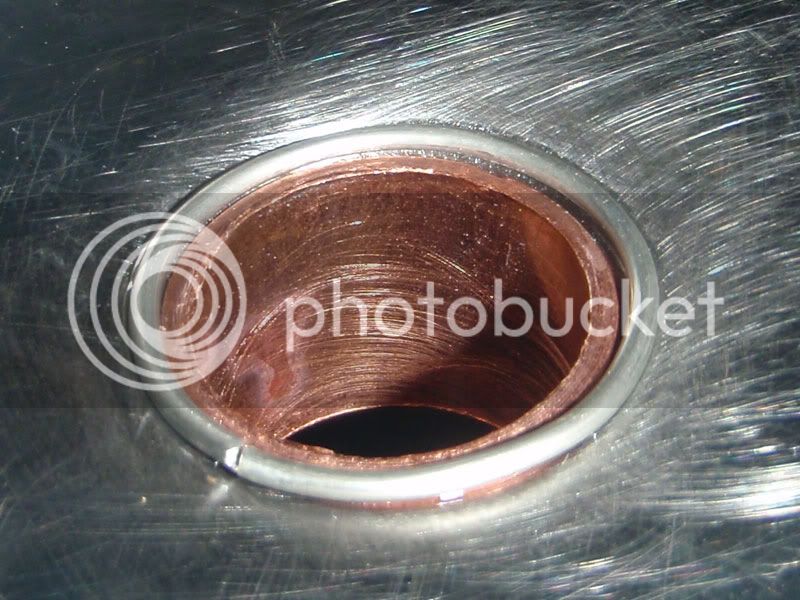
Then I just gently heated the fitting with a normal propane torch until the flux bubbled and the solder flowed. Took all of about 30 seconds.

dimple_soldered.jpg


Looks pretty nice to me! I may do one in the bottom and do a leak test for giggles, but I don't think it'll be an issue.

I was wondering if I should bother also putting a bit of solder around the outside, but I don't think it's necessary. Anyone with more experience have any input on that one?

-Joe
 
I don't think it will be necessary. It should have wicked into the crevice to the outside if you look. If not that means you have a very tight joint.

Glad it worked out that well.

Edit: Polish up that joint and it will be crevice free it looks like.
 
Very nice job nostalgia. Do you think you'll need more btus on your torch with the stainless coupler?
 
Very nice job nostalgia. Do you think you'll need more btus on your torch with the stainless coupler?
I don't know. The solder has a fairly low melting point, so I may not. I'll probably use my MAPP torch anyway, since it's got a remote handle and is easier to jockey around.

-Joe
 
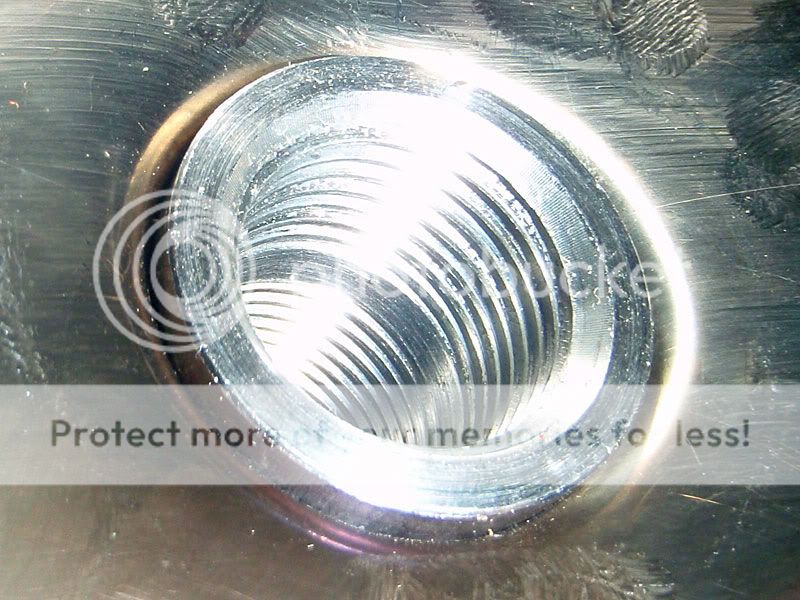
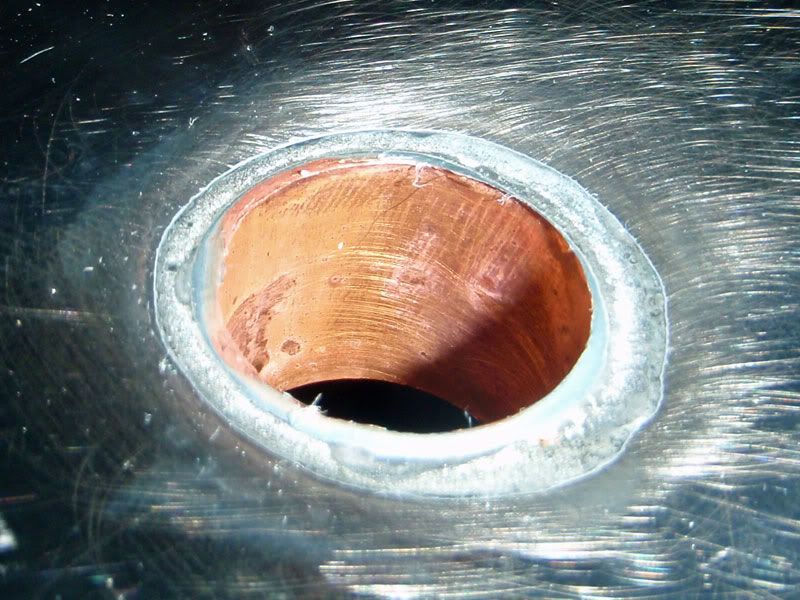
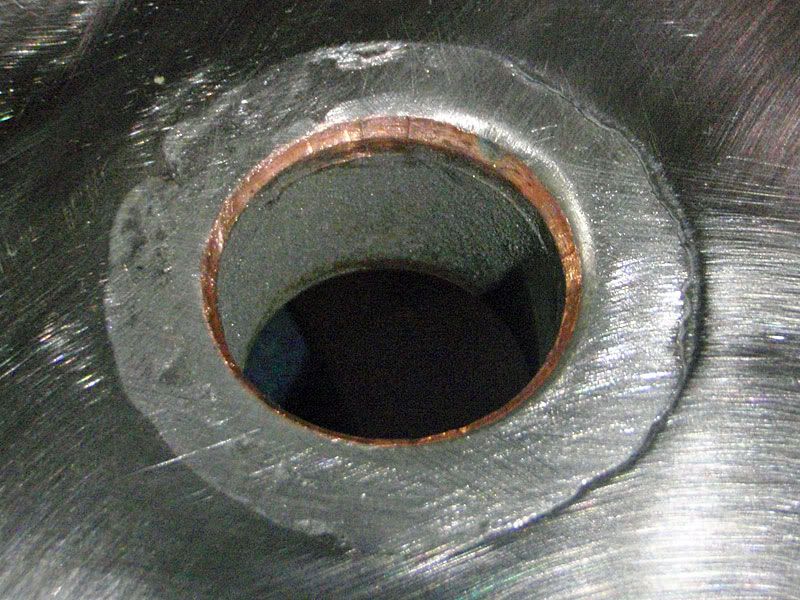
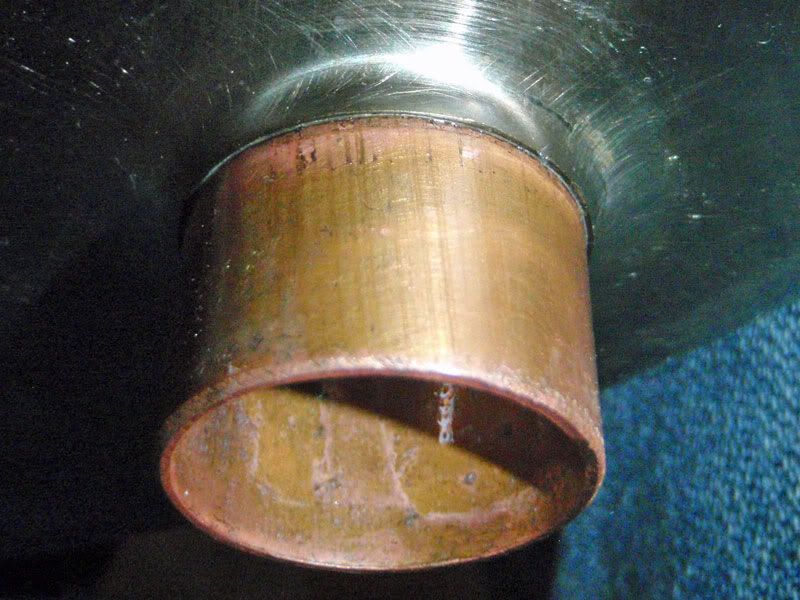
Ok one more test solder. This one came out pretty darn nice, if I do say so myself ;) Things I learned: set the coupler a little lower than the surrounding area so you can blend the solder in properly - note I'm doing a bottom drain here, not a full coupler, so being flush or a bit below is where I want it.

Also make sure the entire area is very clean, and you've got flux everywhere you want solder to stick. You'll notice I didn't go up high enough in the top right sections to get a nice blend. Structurally it probably doesn't matter, though, since there's plenty of fluxed surface below it.

dimple_test2_inside.jpg


dimple_test2_outside.jpg


I'm leak testing now, but I don't expect any issues.

-Joe
 
That looks really good! I can't wait to see how your stainless pieces turn out.

On the other hand, now I have to upgrade my whole system... :)

Any idea how to do this with a tri clamp weld ferrule? You wouldn't be able to push it through like a coupler.
 
What solder and flux did you use? Looks very professional! Thanks for documenting your procedure so well. I might just have to emulate it.
 
That's a great idea; wrapping the solder around beforehand. I wish I would have thought of that! Strong work! :mug:
 
This may have already been asked but, do you always pull the keg tool/coupling from inside the keg to the outside or can you reverse it and pull the tool/coupling from outside the keg in? Does it matter which way? Seems it would be easier to solder the outside of the keg.
 
This may have already been asked but, do you always pull the keg tool/coupling from inside the keg to the outside or can you reverse it and pull the tool/coupling from outside the keg in? Does it matter which way? Seems it would be easier to solder the outside of the keg.

You'd be pulling against the natural curve in the keg that way, not sure if it would work or not.
 
Back
Top