Starting my 120V Rims Tube Build - Oh Baby

Homebrew Talk - Beer, Wine, Mead, & Cider Brewing Discussion Forum

Help Support Homebrew Talk - Beer, Wine, Mead, & Cider Brewing Discussion Forum:

This site may earn a commission from merchant affiliate links, including eBay, Amazon, and others.

andrewprime1

Active Member
Joined
Jul 28, 2014
Messages
30
Reaction score
5
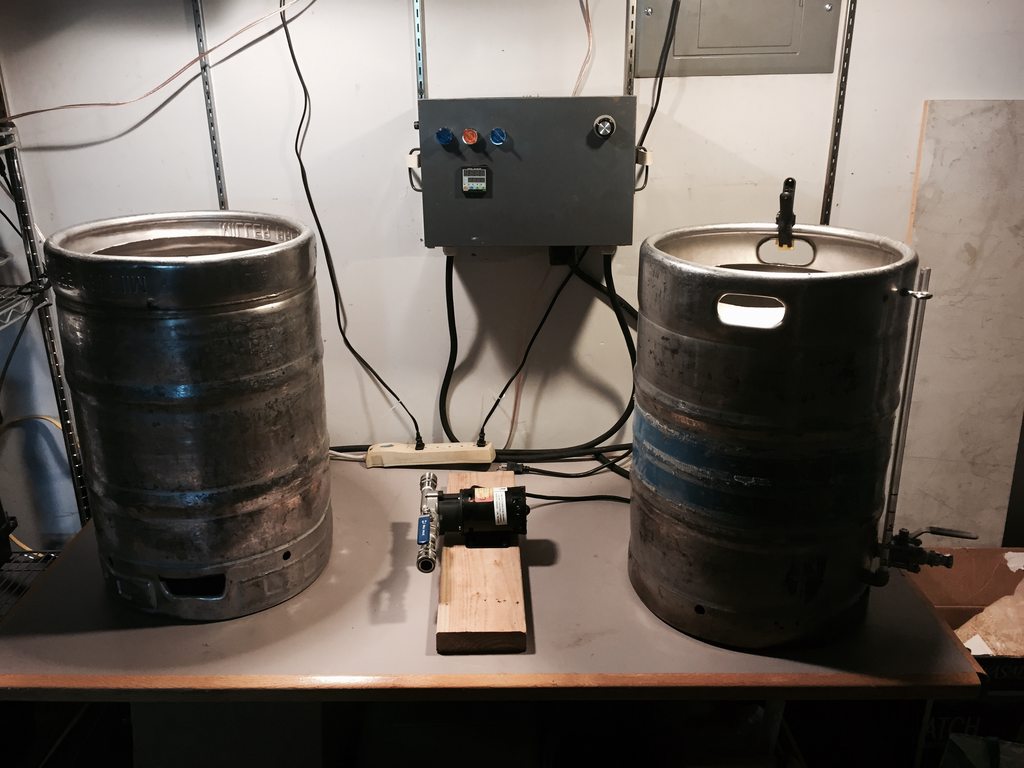
I have had my StillDragon controlled 240v BK running BIAB for a while now, and boy is it an improvement over hauling all my **** out onto the front porch, running out of propane, long heating times, etc. But low efficiency and a chronic need to project have got me ready to make the jump to a RIMS tub setup!

Here is the BK in all her glory!
View attachment ImageUploadedByHome Brew1430321178.856653.jpg

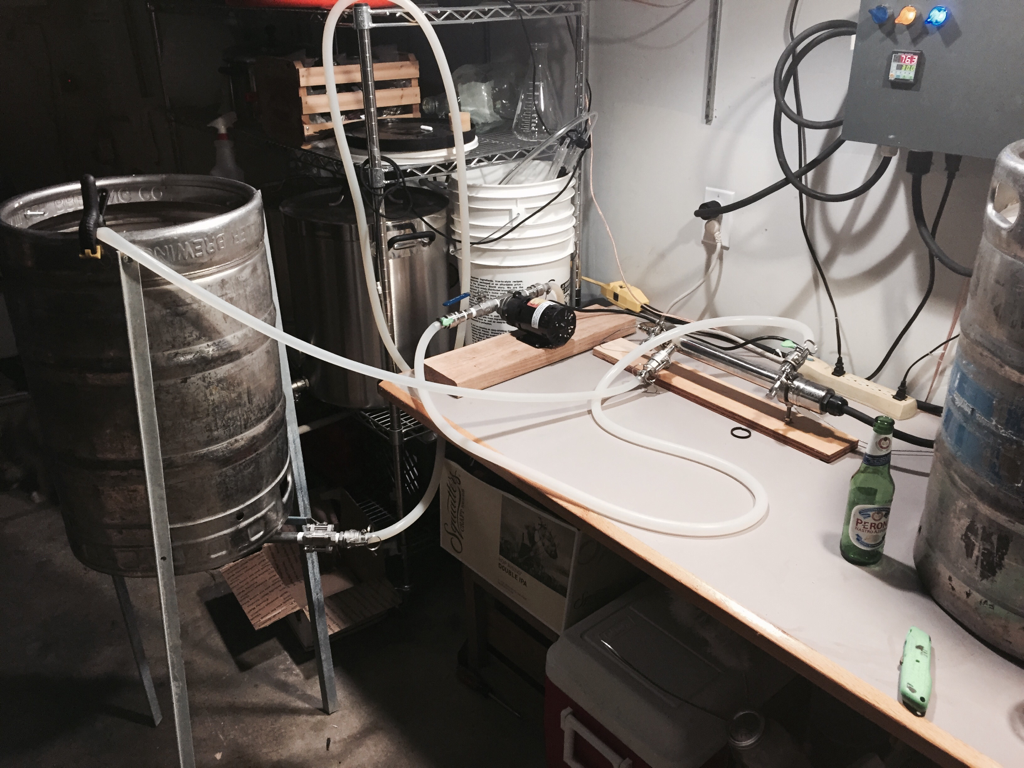
What I want is a nice, simple, two vessel system. I will leave the BK to be controlled by the StillDragon potentiometer and have the MT controlled by one element running at 120v controlled by one PID. Heat water in BK, pump in to MT, maintain temp with RIMS tube. Simple.

Here is what I have so far -

Sanke Keg (obtained legally)

Chugger Pump

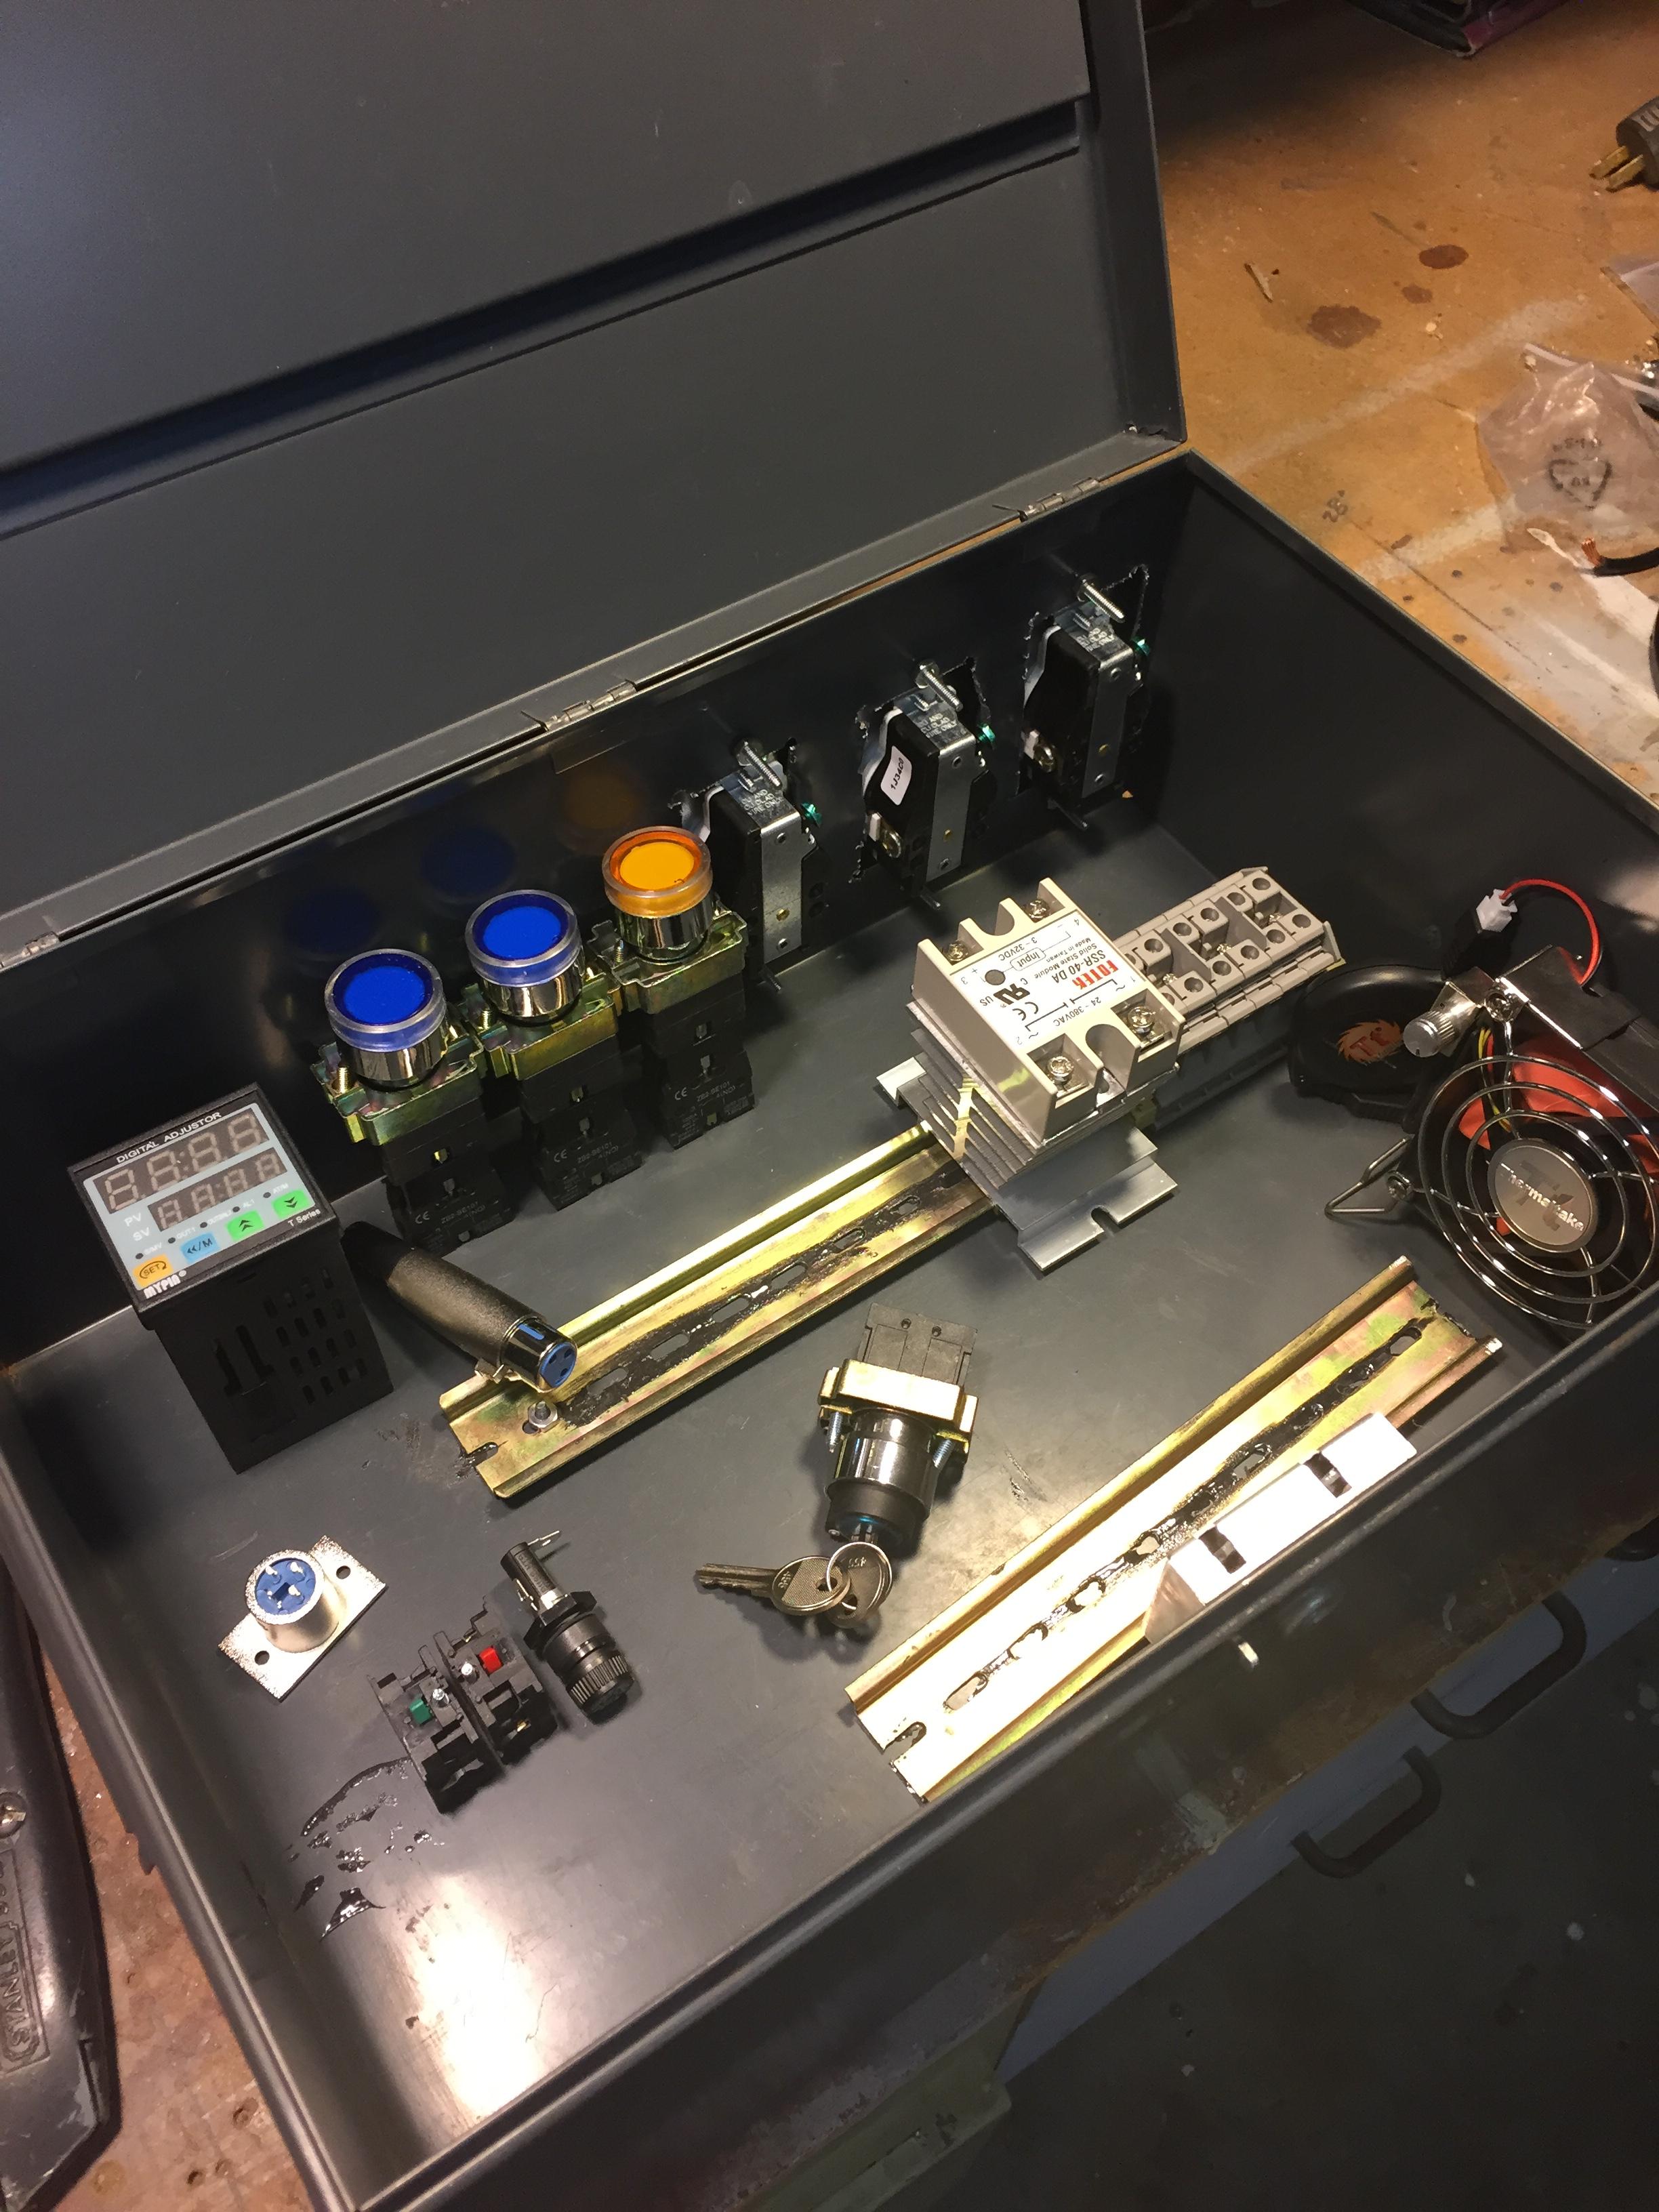
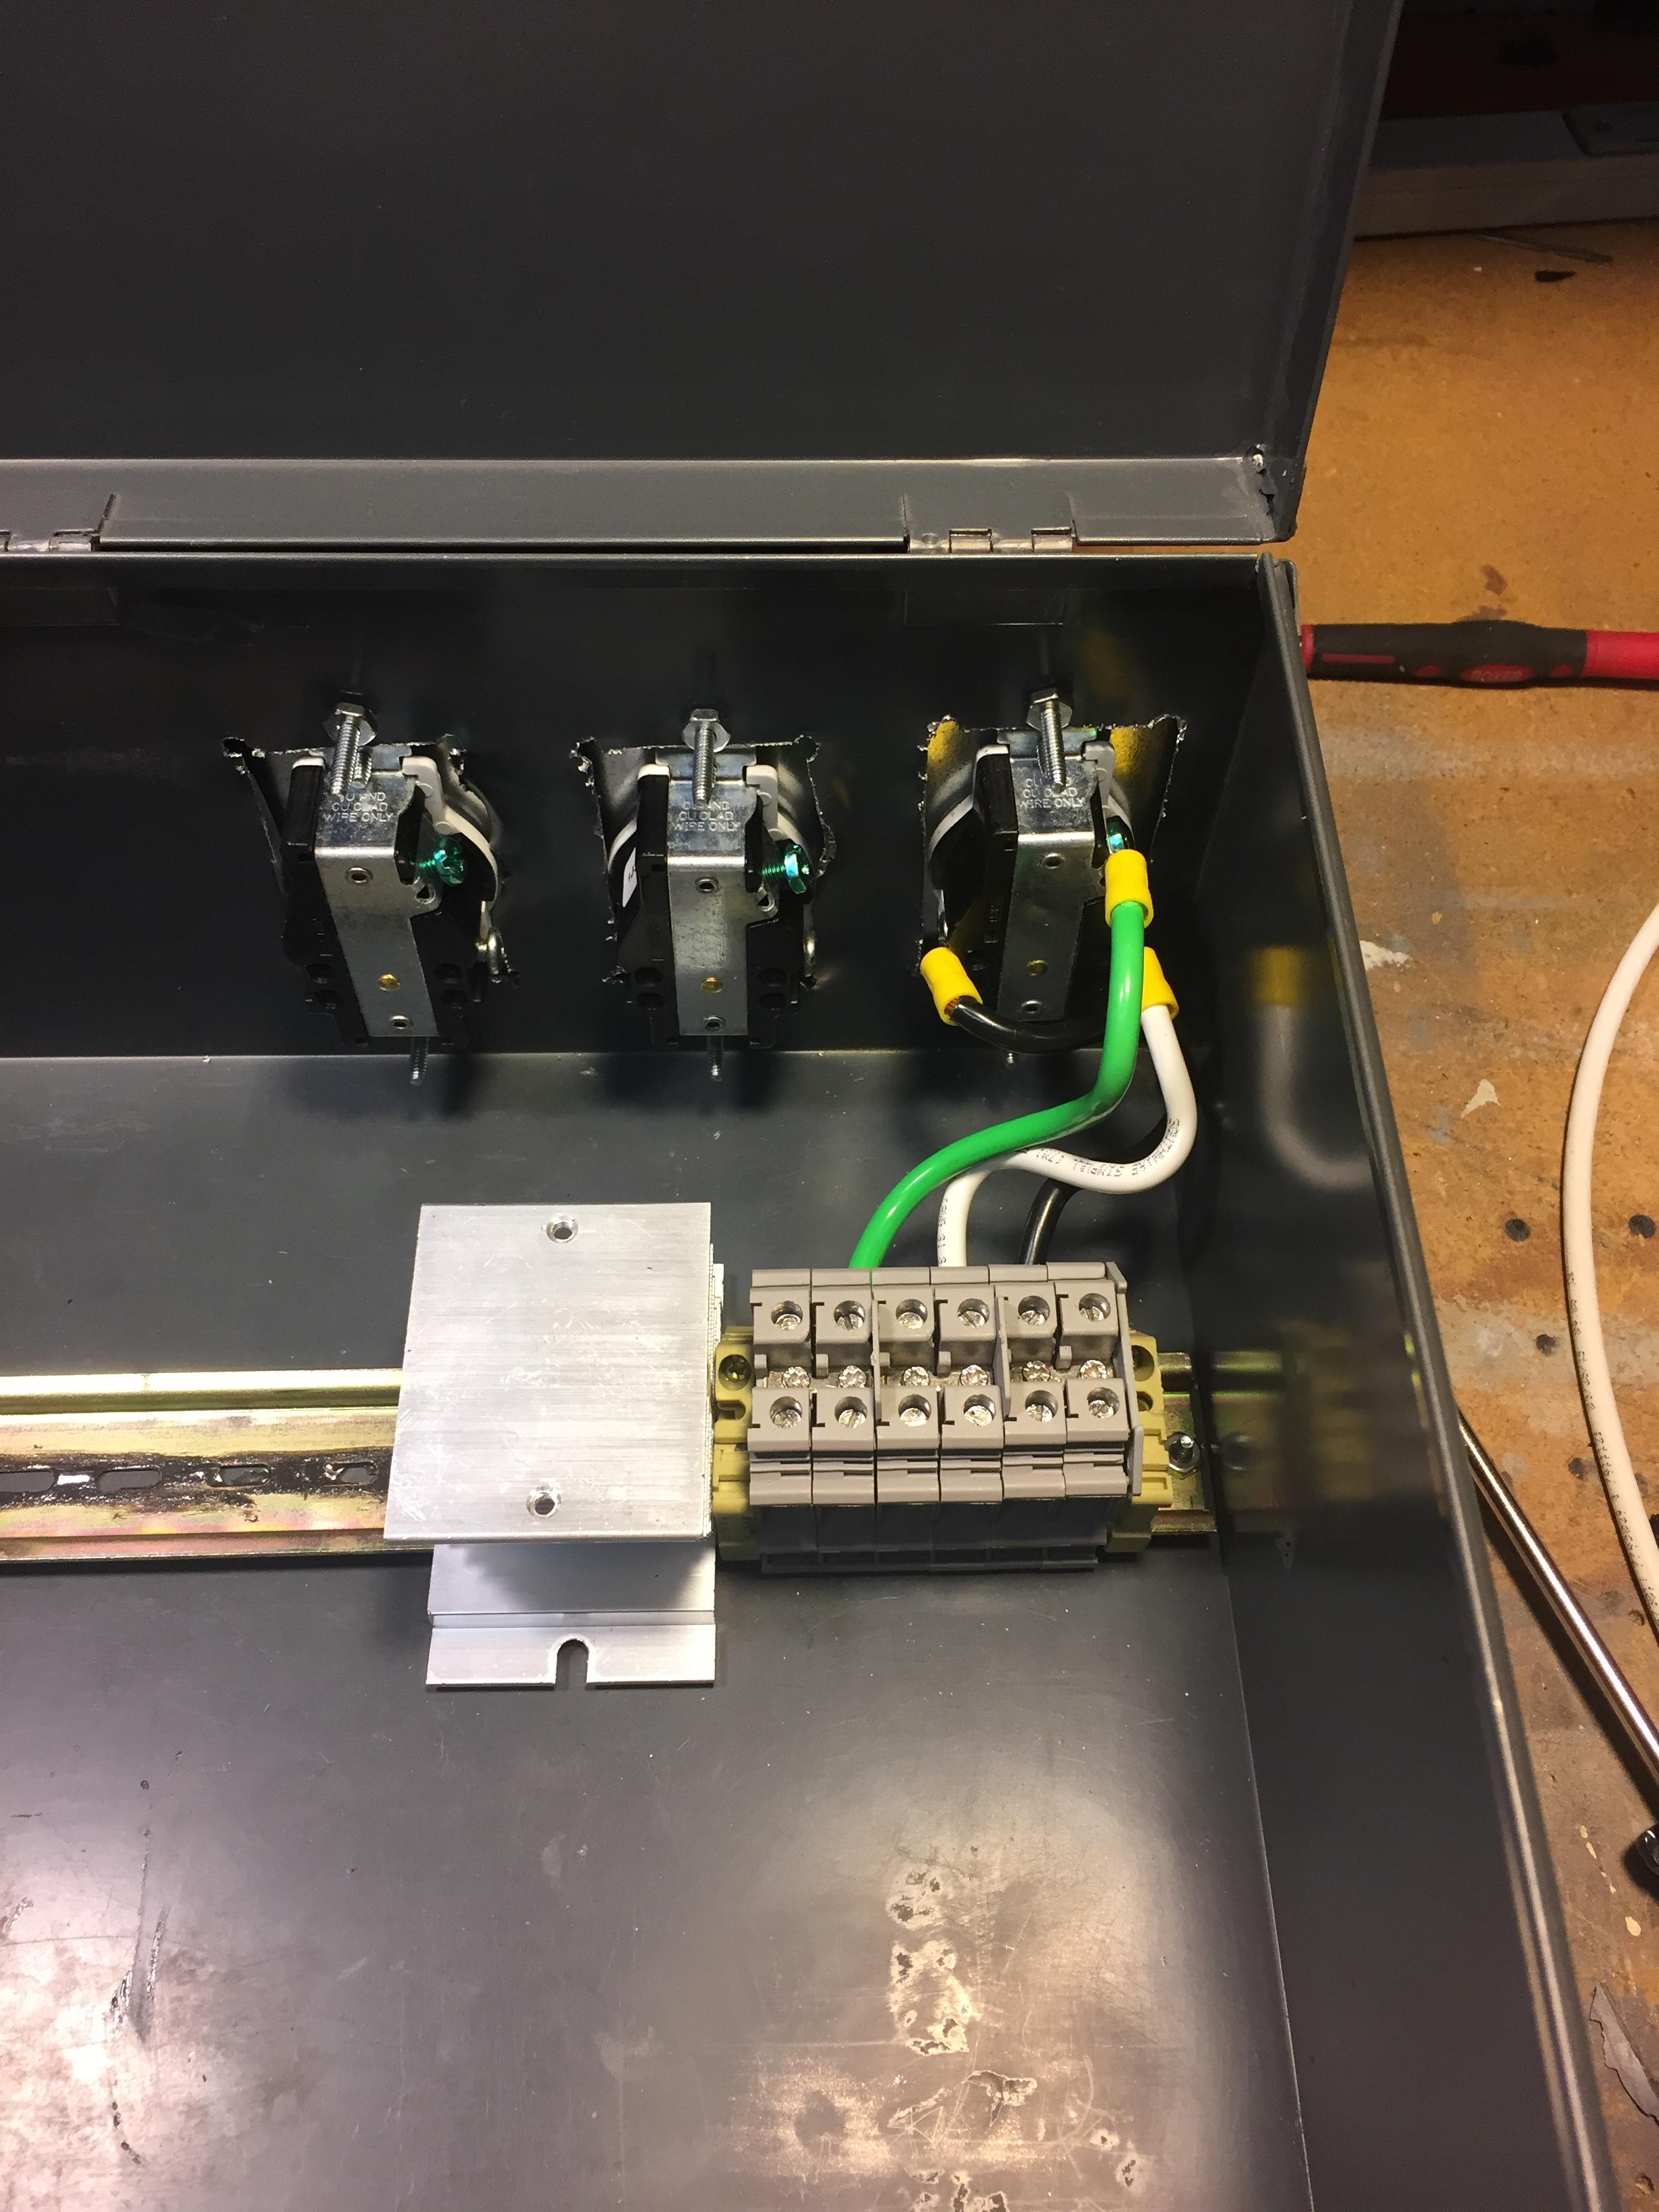
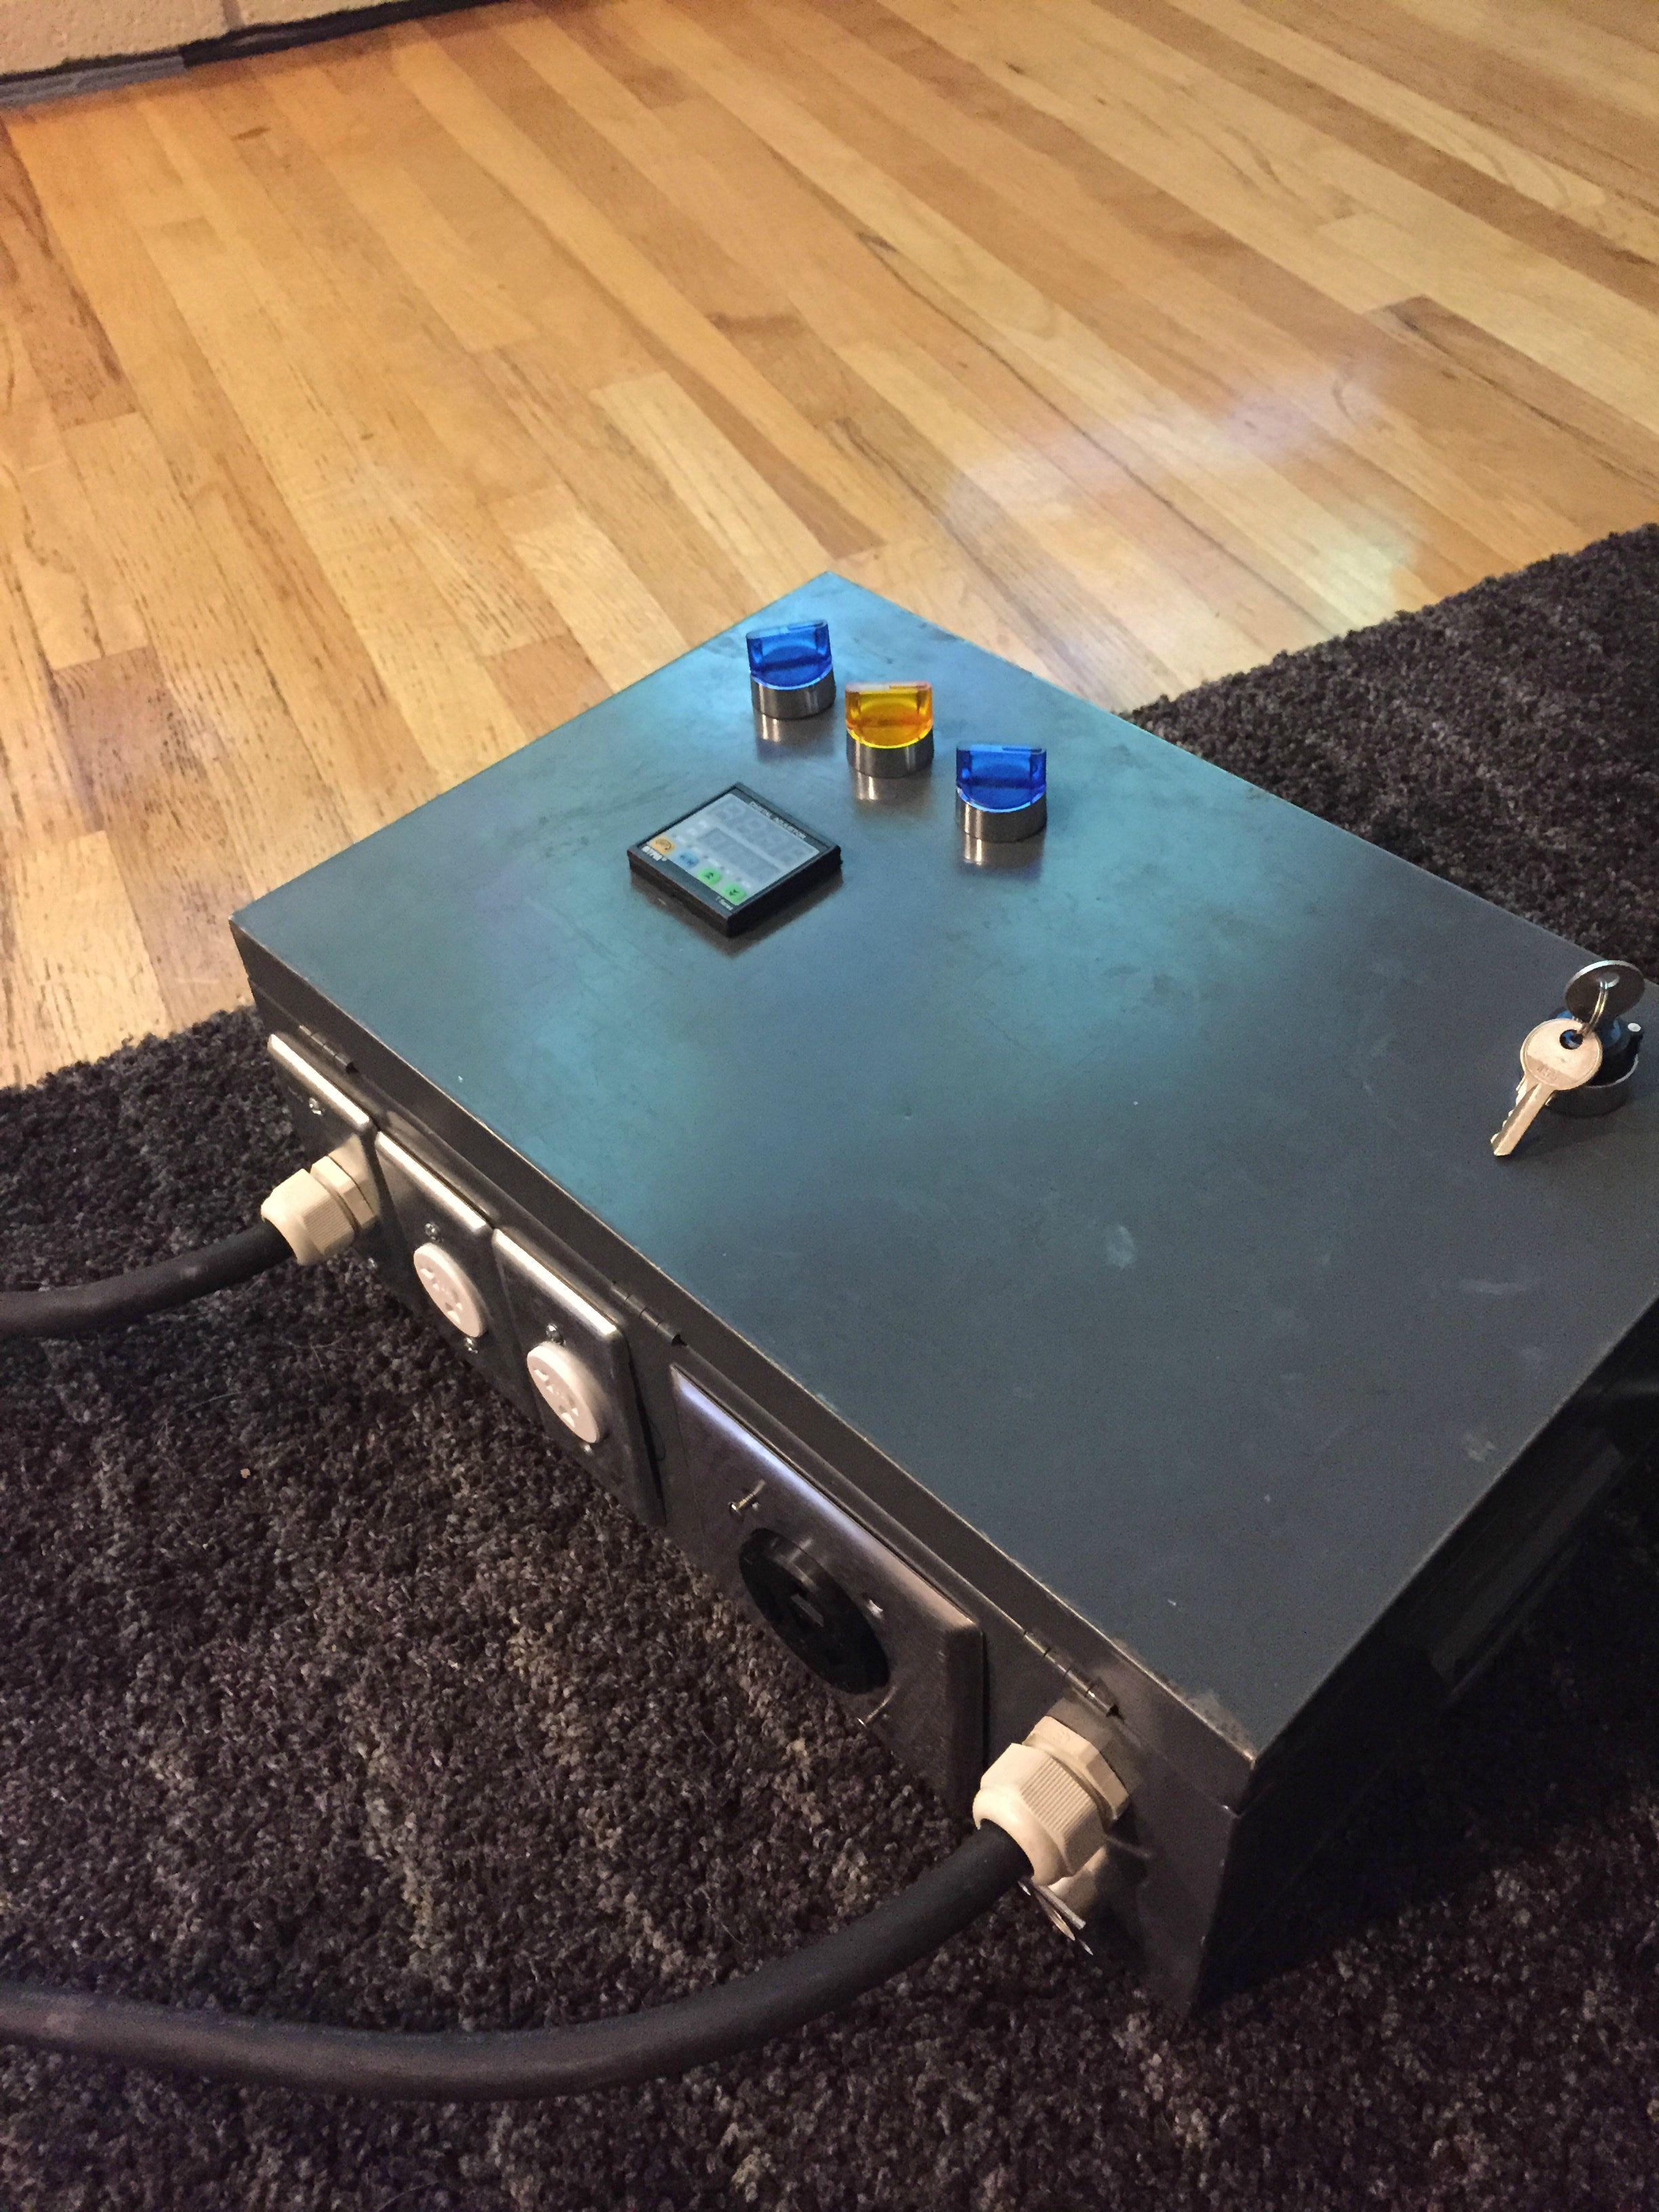
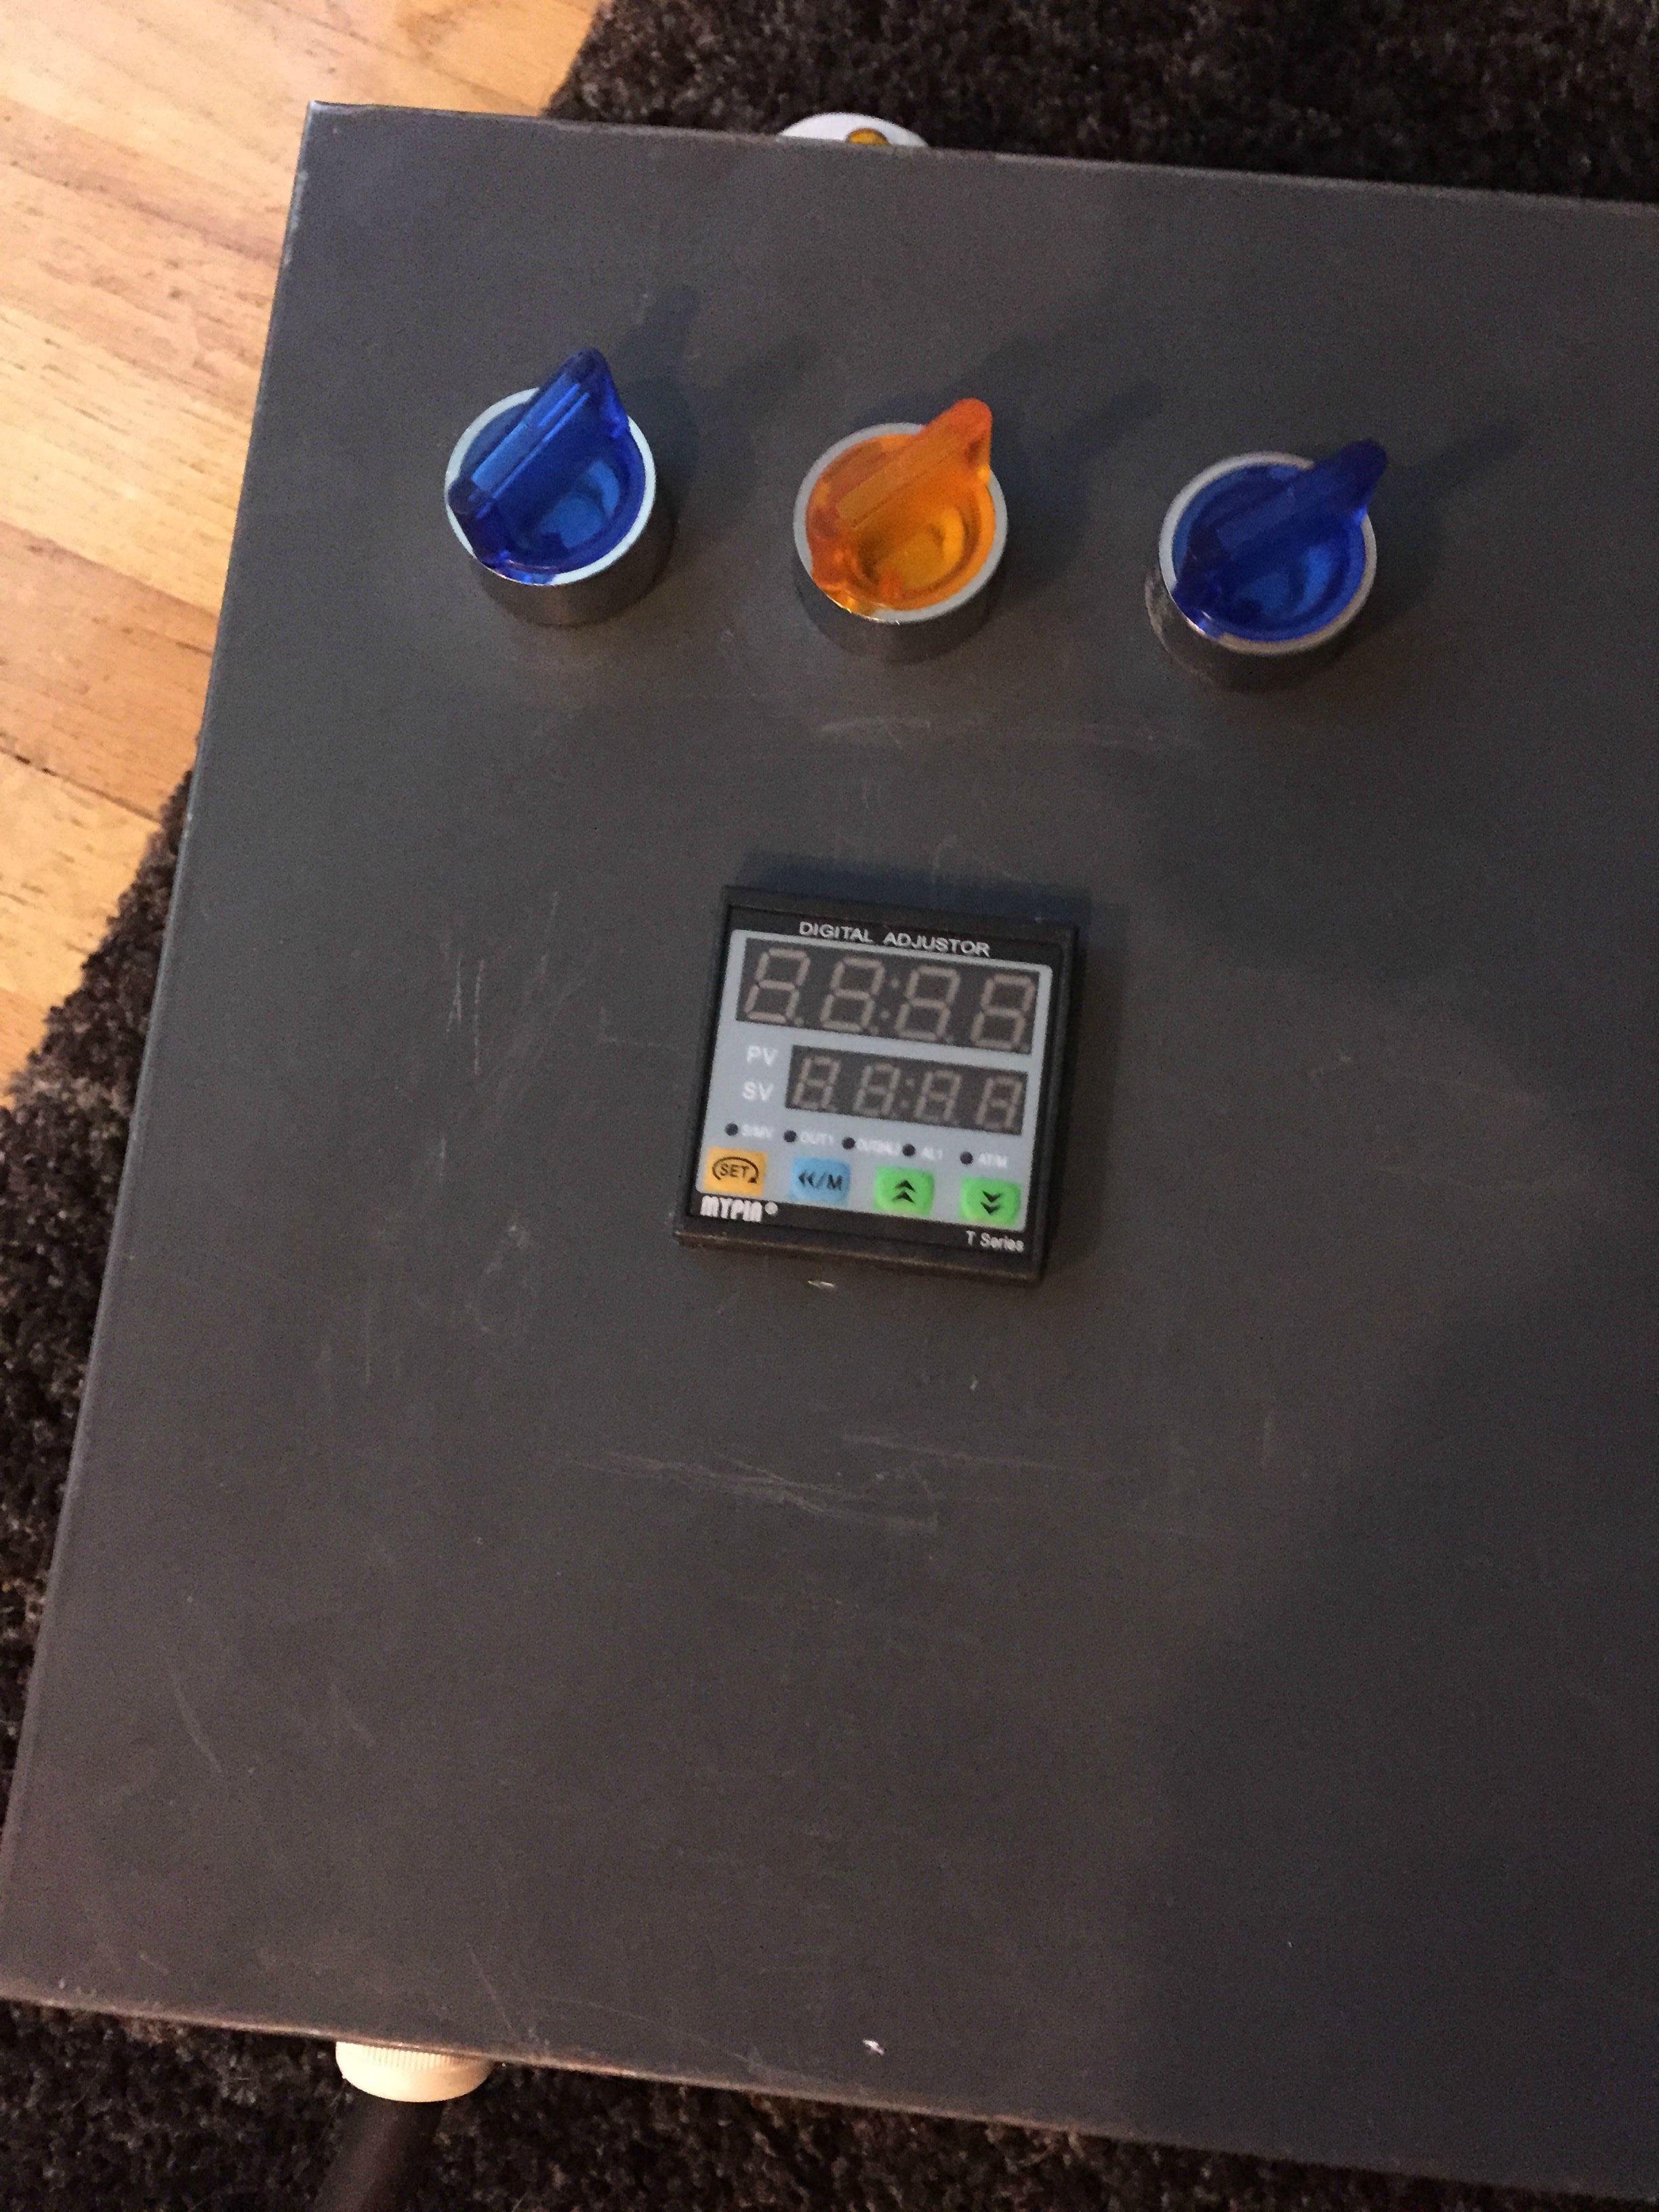
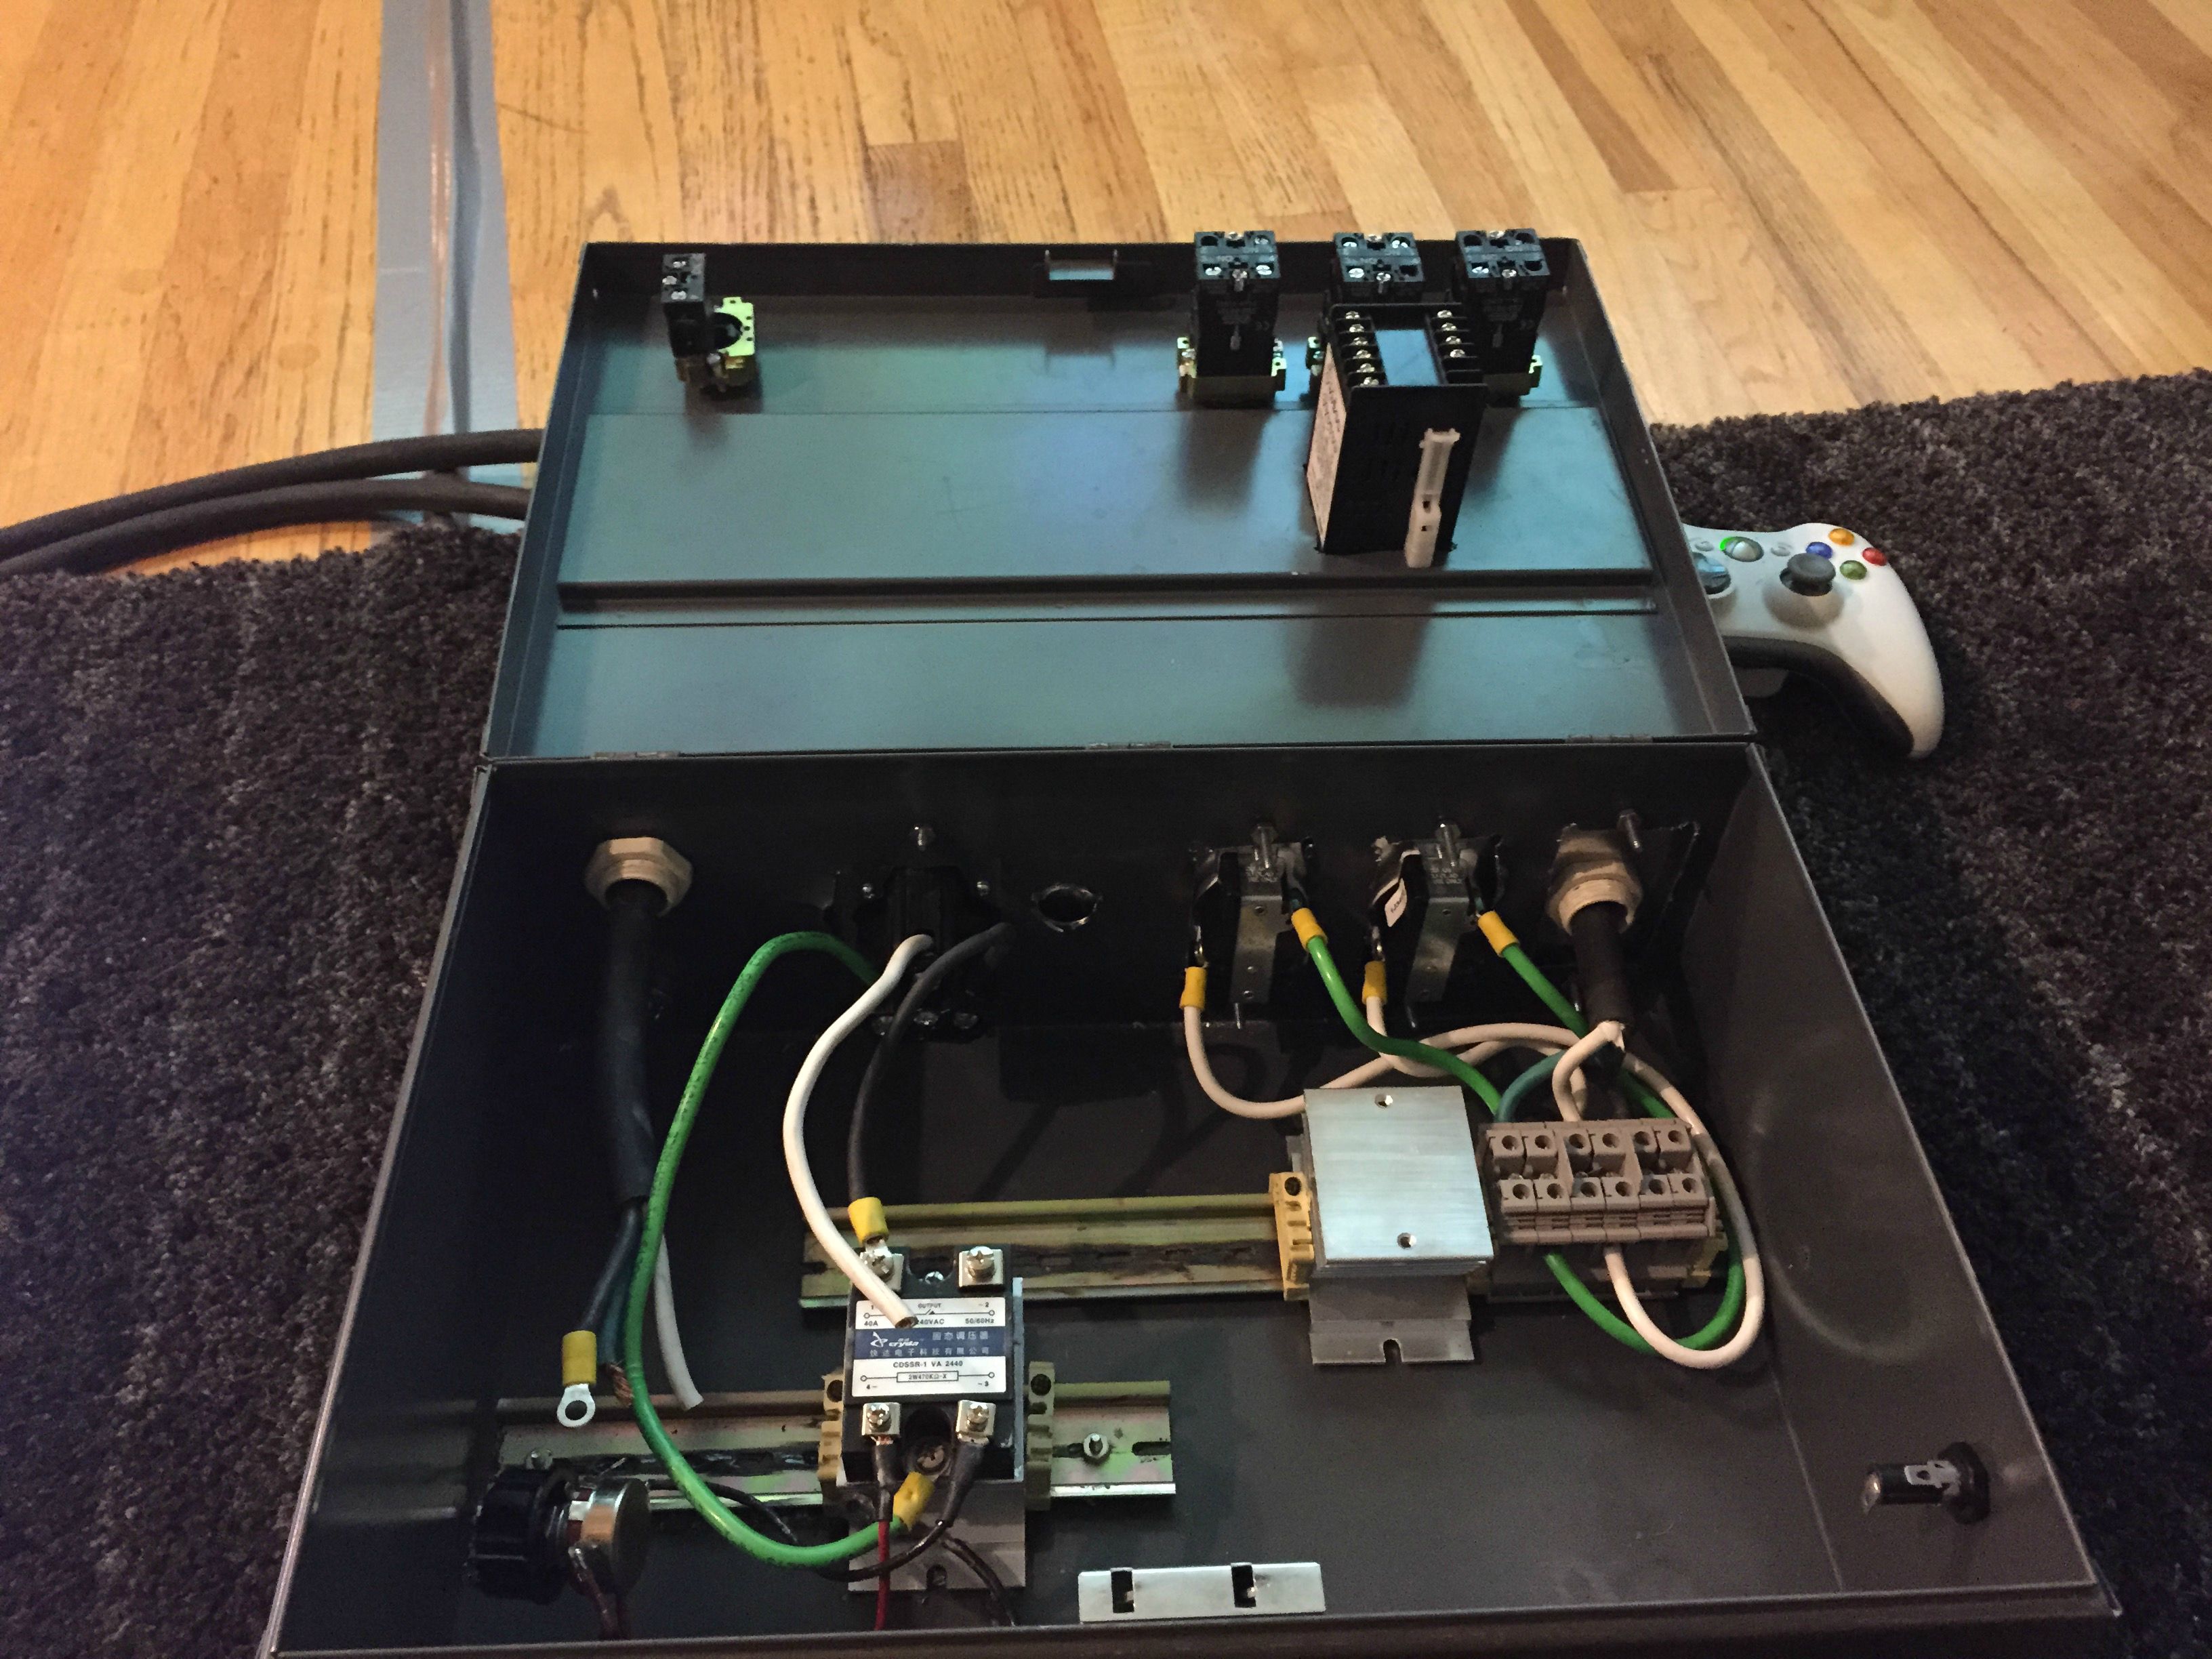
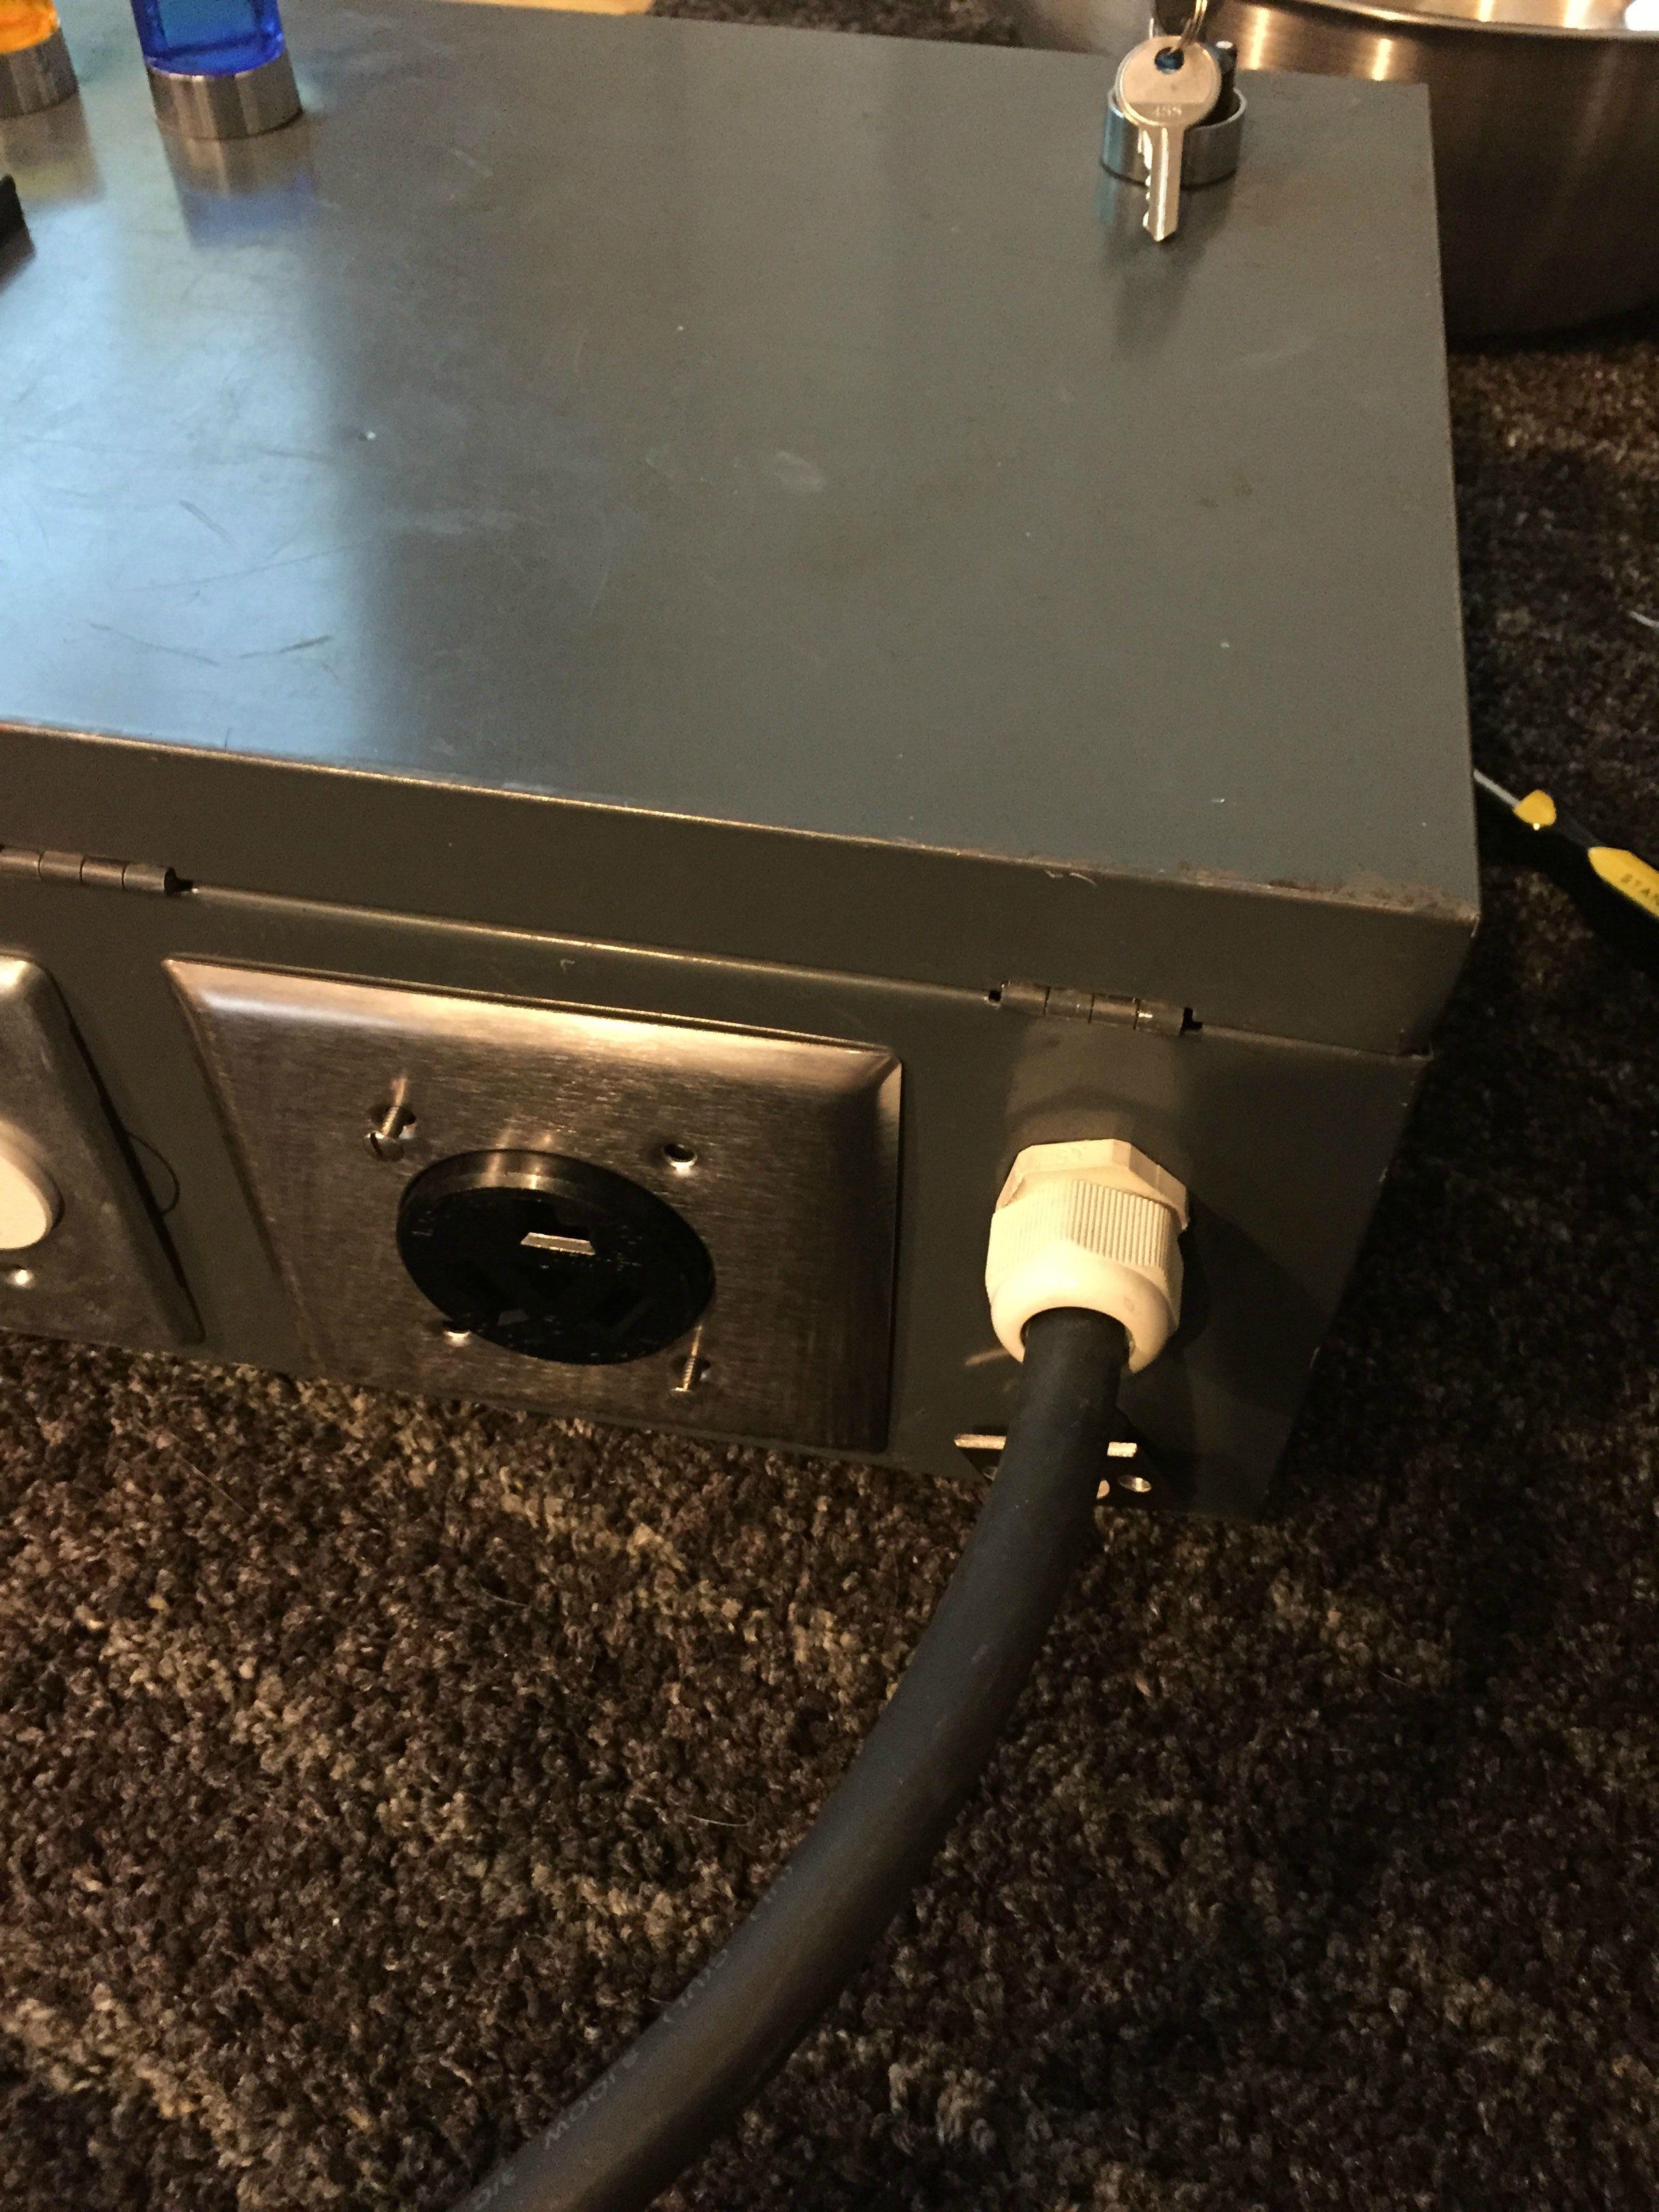
An 18”x12” metal box I scored from savers for like 8 bucks!

View attachment ImageUploadedByHome Brew1430321439.304114.jpg

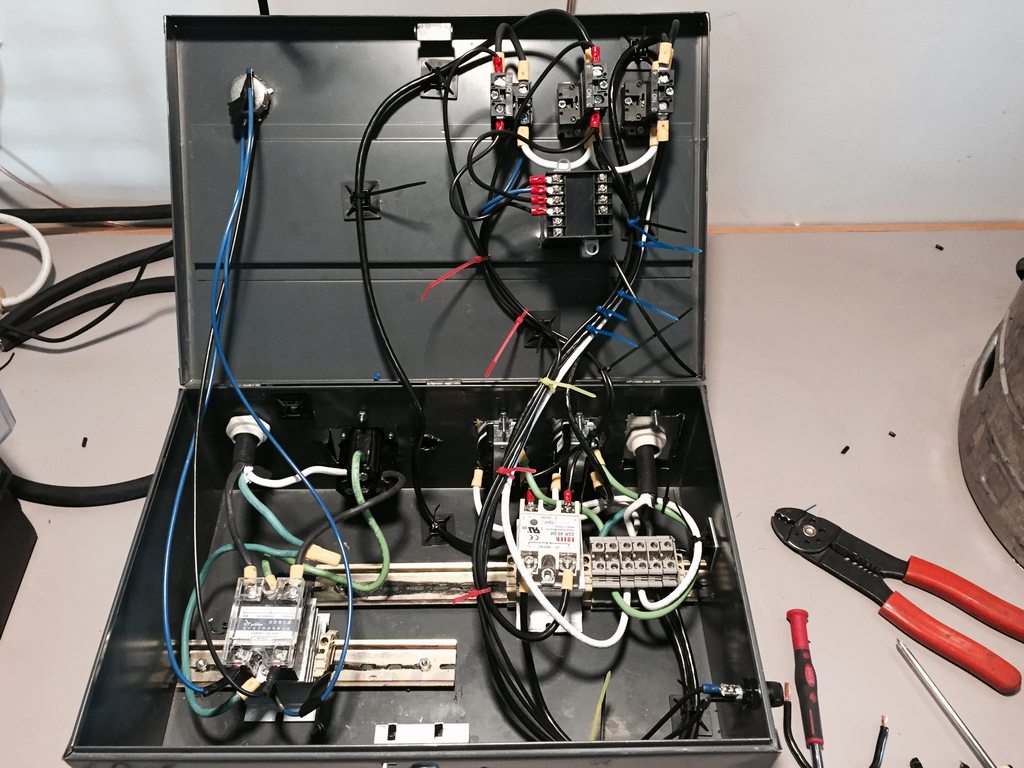
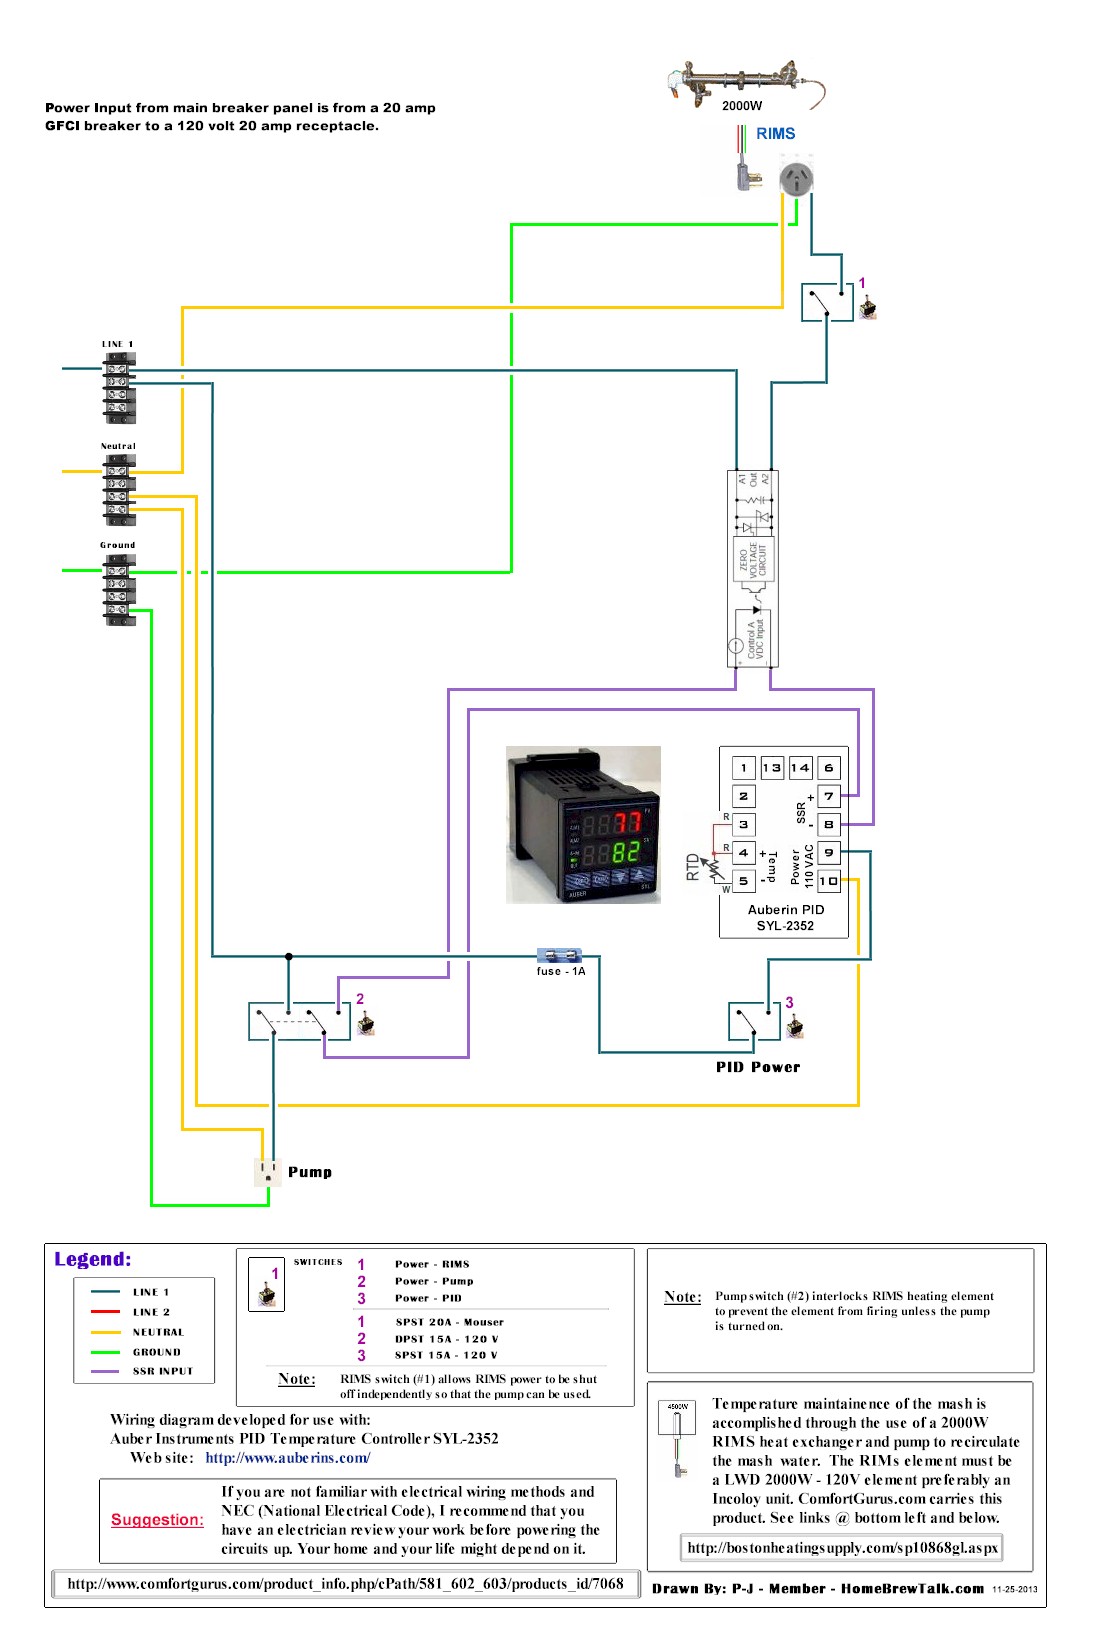
I found this diagram (thanks P-J) and based my parts list on it.

pzP4Jyr.jpg


I have done lots of studying and think that the parts list I have compiled is right, but I could always use another set of (more talented) eyes to make sure.


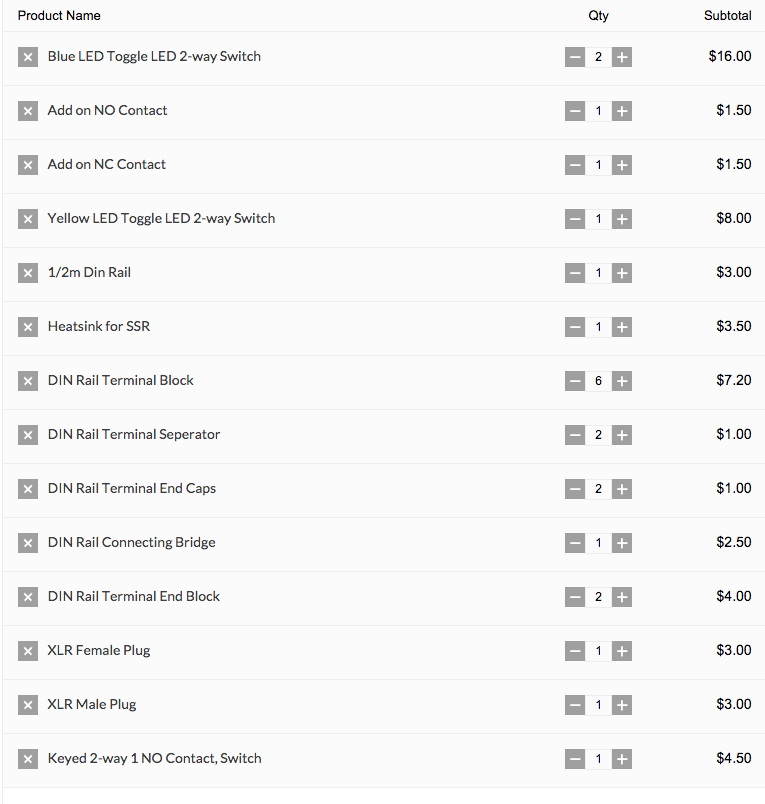
NIXED THESE FOR LOWER COST ITEMS -
Auber PID SYL-2352 - $46.50
eBrewSupply 40amp SSR & Heatsink - $15.50 Total
Auber Liquid-tight K type, 2 in probe, 1/4" NPT Thread - $21.95

Instead, went with -
eBay MYPIN TD4-SNR w/ 40amp SSR - $35.99

And-
eBay RTD PT100 Temperature Sensor & Detachable Connector - $14.99

eBrewSupply LED Two Way Switch - $8.00 (3x)

eBrewSupply 1/2 Meter DIN Rail Cut - $3.00

eBrewSupply Terminal Blocks - $1.20 (6x)

eBrewSupply Terminal Block Separator - $1.00 (2x)

eBrewSupply Terminal End Caps - $1.00 (2x)

eBrewSupply Terminal Block End Block - $2.00 (2x)

eBrewSupply DIN Rail Terminal Bridge $2.50

Plus, of course -
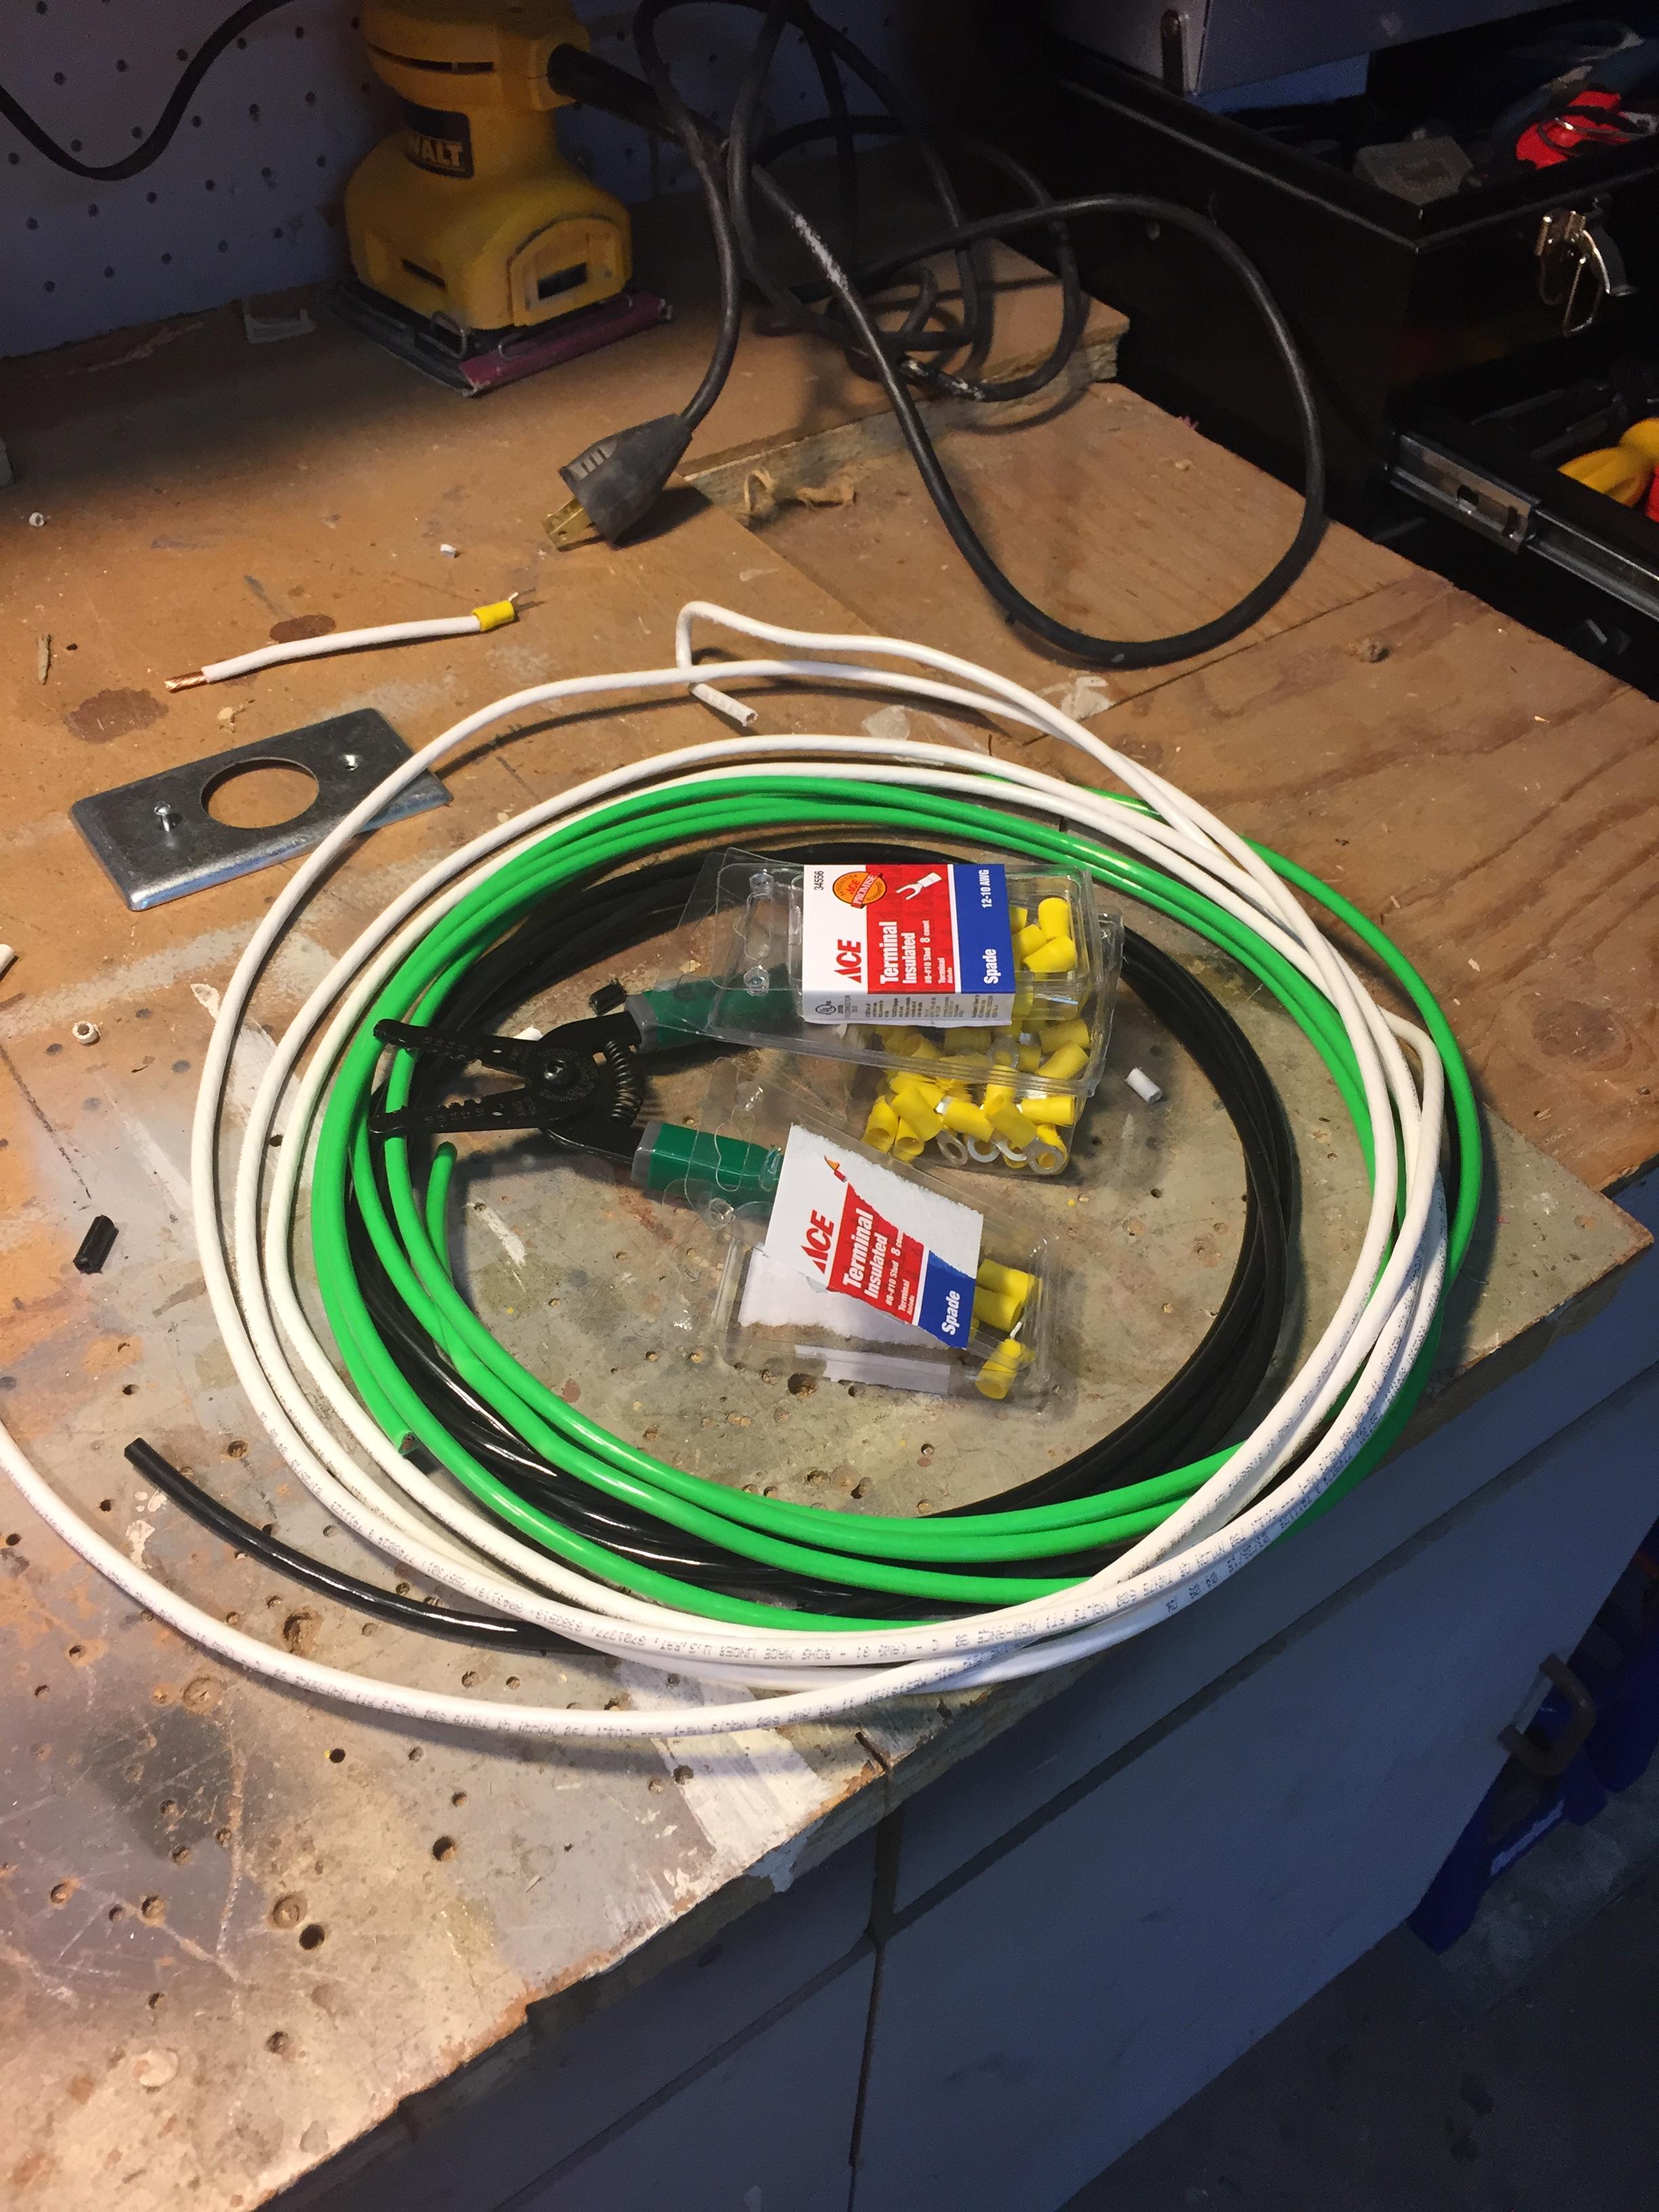
4 Colors 10 Gauge Wire - 5’/ea
10 Gauge Spade Terminals - a bunch
Brew Hardware RIMS Tube - 12” w/ Camlocks - $149.99
Brew Hardware 2000w LWD SS Element - $29.99

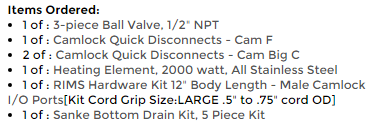
I think this is everything! The only thing in unsure of is the switches.. In the diagram, the #2 switch that controls the pump has six posts, I assume this is because it interrupts power to the element of the pump isn't on. I think the switches I am getting don't have that many post, so is an add on contact my solution? Should I get a NO or NC contact? Are they compatible with these switches?
 
Thats over $300 in parts for just that rims setup alone.. I dont know if cost is a factor for you but you can build one for $150 that will work just as well...
The one in my signature build thread cost about that to build and control...
 
Thats over $300 in parts for just that rims setup alone.. I dont know if cost is a factor for you but you can build one for $150 that will work just as well...
The one in my signature build thread cost about that to build and control...

I mean, cost is always a factor, right? Haha, lets be honest with ourselves, this isn't exactly a cheap hobby... Most of my build's cost is in the rims tube alone, but I really like the BrewHardware tube. It costs about as much as everything in the control panel, but it's worth it IMO.

Maybe if I am feeling poor after the CP is built I will piece together a tube with some SS tubing found locally, who knows...

I have read your build thread before, its awesome! In fact, I owe you thanks for turning me on to those little pumps :mug: they are great. You built your brewery to your liking and that's great. Who cares how much mine will cost though? I mean, people spend this much having an electrician put in 220, people buy $30 locking plugs with matching $30 outlets. I think this is relatively cheap, honestly.

Now to go reread your thread for more inspiration! Cheers mate.

EDIT: Maybe getting a MYPIN TD4 PID off ebay for $35 including SSR is a good idea, that would have me a bit of coin for sure. Looks like I can get a cheaper thermocouple as well..
 
I mean, cost is always a factor, right? Haha, lets be honest with ourselves, this isn't exactly a cheap hobby... Most of my build's cost is in the rims tube alone, but I really like the BrewHardware tube. It costs about as much as everything in the control panel, but it's worth it IMO.

Maybe if I am feeling poor after the CP is built I will piece together a tube with some SS tubing found locally, who knows...

I have read your build thread before, its awesome! In fact, I owe you thanks for turning me on to those little pumps :mug: they are great. You built your brewery to your liking and that's great. Who cares how much mine will cost though? I mean, people spend this much having an electrician put in 220, people buy $30 locking plugs with matching $30 outlets. I think this is relatively cheap, honestly.

Now to go reread your thread for more inspiration! Cheers mate.
no problem at all,
I just saw the pics of the stuff you had already cobbled and figured you might be trying to save as much as you can... There are advantages to everything even the pricey stuff... I get it. (I mainly get upset when I see the cheap stuff being passed off as pricey stuff by sellers) I changed out stuff like my cooler mashtun for a stainless one mainly because of looks and cleaning advantages. and I LOVE my conical over carboys...
The SS pipe rims work well especially with a 1"camlock for easy cleaning although with the 25" ULWD stainless cartridge element I really have no buildup to clean that a flushing doesnt remove on its own.

Definitely appreciate the advice. I do want to save money where I can, and you actually already have helped me to do so. No need to buy anything from Auber now!

Can you speak at all to adding a contact to the two way switch for the pump control/dry-fire fail safe?
 
Definitely appreciate the advice. I do want to save money where I can, and you actually already have helped me to do so. No need to buy anything from Auber now!

Can you speak at all to adding a contact to the two way switch for the pump control/dry-fire fail safe?

according to what I'm seeing thats a double contact (2pole) NO relay controlled by a 24v coil....

I use a flow switch myself which I feel is more effective since it shuts off the element if actual flow stops through the rims ... The relay wont help if you get a stuck sparge/plugged mt drain. and thats the most likely real world scenerio for rims issues.
 
When I made my original post I was on my phone and didn't upload the hi res diagram, fixed now. From what I can see, P-J lists this as "Switch #2" and in the reference box at the bottom it is "Pump - Power" and below that "DPST - 15amp - 120v"

Any reason to use a coil over just a switch?

Here it is again for reference -
pzP4Jyr.jpg

yes now that you mention it and I take another look it looks to just be a double pole switch with both sets of contacts in the same state in either position vs one NO and one NC like many...

you can find small stainless versions of what your looking for at the home depot, radioshack or any auto store. sold as a "DPST" switch as you described above...
 
Oh boy, went ahead and pulled the tirgger, got the PID/SSR/Temp Probe on ebay and saved a bunch of money (thanks augiedoggy) and then ordered all this from Electric Brew Supply! Now we wait...

pTzCxS4.png
 
I am planning something similar with a keggle and a Rubbermaid mash tun (might upgrade this though). I just got my chugger pump delivered- please keep us updated- I'll probably end up copying your design!
 
I wish I could take credit, but I am basically copying a bunch of other builds too, haha! I will definitely post updates as stuff happens. Right now I am just waiting for the parts to come in. Should start getting packages by Wednesday. I may cut the bottom off my SANKE keg tonight though! I'm getting antsy...
 
The parts all came in! Well, most of them. I have yet to buy the RIMS tube, element and some other hardware, but here is what has come -


GYG5Ik9.jpg


I decided I needed to add the key switch to the system, you know, for reasons... Electric Brew Supply actually sent the wrong switches though, but the customer service was great. They are rushing me out the correct ones at no cost. Would highly recomend them to anyone!


JUiMu9T.jpg


Picked up the wiring supplies from Le Depot. Went with 8 stranded wire for some reason... Mega overkill, but I like it!


3BeM5gI.jpg


I go the 120v plugs installed. I didn't a great job of squaring them up, but it aint too bad. They'll be on the bottom, fairly invisible anyway, so Im not super upset.


gVpoSac.jpg


Got the main power in wired to the DIN mounted terminal blocks! Just waiting for my switches to come to really dive in.
 
If I'm looking at this correctly, your power in will need to have a live male plug connector which is very dangerous. You should replace the female receptacle with a male receptacle.
 
If I'm looking at this correctly, your power in will need to have a live male plug connector which is very dangerous. You should replace the female receptacle with a male receptacle.

Good catch! I agree if it every accidently came unplugged at the panel you have the recipe for disaster...
 
Wow, I hadn't even thought of that, good catch indeed! Pretty much the whole reason I want to post my build is so people can tell me when I overlook a critical detail. That's a lot! Will replace.
 
Okay, so I have made really good progress on my control panel! I finally have all the parts and have started making holes. I will post some updated pictures after work.


First off, I decide to simply hardwire the 120v input to eliminate the exposed male plug possibility (good save, thanks guys)! Marked out all the holes for the switches and the PID which I plan to get installed tonight. After that the real fun of wiring this beast together begins.


Actually, there in lies my problem... I am a bit stumped on how to wire the switches properly. Once again, I have these guys from Electric Brew Supply. There is a NC and a NO side with two holes on each near the bottom. There is also one hole near the top of the block that I assume powers the LED?


For my diagram above, do I wire both in and out into the NO (NC) side? Or wire incoming to the NC side and another out the NO side? Finally, do I bridge one of these lower ports to the upper hole to power the switches LED?


Thanks in advance guys! Updates to come soon
 
Got all my switches installed in the box, including my Still Dragon controller and the 240v power and outlet. This is what's going to power my boil kettle. I need to pick up some smaller gauge wire for the PID and the potentiometer. Still not really sure how to properly wire the switches.. but I'm sure I'll figure it out. Why does there have to be some many damn holes?

Getting really excited to brew on this setup, still so much work to do thought!

Q8PJHQe.jpg

Ta-da

k7jVsW7.jpg

Switches and PID installed

2KBXIdU.jpg

The guts, if this turns out half as clean as other's I've seen on here I will be so happy!

hFqOFWI.jpg

120v In, pump and element

BnIIAOx.jpg

240V in and out
 
Another thanks for you all! I could not have gotten this far without your help.

DdNn863h.jpg

I have finished all the wiring! Well, I have to wire in the thermocouple still, but that can wait until I actually get the RIMs tube.

EjGeXSa.jpg

I cut out the bottom of my mash tun. Just freehanded it, but I am pleased with how well it came out. Fits my lid perfectly! I plan to use the cut out bit for the false bottom.

6Niv7gAh.jpg

The (almost) complete system. MT on the left, BK on the right. I will post another update when I get the thing fired up for a test run.

One final question, I wired the neutral line for the PID into the switch from which it draws power, but in the diagram it shows the neutral going back to the terminal block. Is this a problem? I did so partly out of convenience and partly because I didn't want to run a 16g wire into the terminal block, and I new a 10 gauge wire wouldn't fit into the PID. Thoughts?
 
One final question, I wired the neutral line for the PID into the switch from which it draws power, but in the diagram it shows the neutral going back to the terminal block. Is this a problem? I did so partly out of convenience and partly because I didn't want to run a 16g wire into the terminal block, and I new a 10 gauge wire wouldn't fit into the PID. Thoughts?

Switches, lights, PIDs all use minimal power draw. You'll be fine piggy-backing.
 
Another thanks for you all! I could not have gotten this far without your help.

DdNn863h.jpg

I have finished all the wiring! Well, I have to wire in the thermocouple still, but that can wait until I actually get the RIMs tube.

EjGeXSa.jpg

I cut out the bottom of my mash tun. Just freehanded it, but I am pleased with how well it came out. Fits my lid perfectly! I plan to use the cut out bit for the false bottom.

6Niv7gAh.jpg

The (almost) complete system. MT on the left, BK on the right. I will post another update when I get the thing fired up for a test run.

One final question, I wired the neutral line for the PID into the switch from which it draws power, but in the diagram it shows the neutral going back to the terminal block. Is this a problem? I did so partly out of convenience and partly because I didn't want to run a 16g wire into the terminal block, and I new a 10 gauge wire wouldn't fit into the PID. Thoughts?

your pid power wire should be fused (or breaker if bling is your thing) so im not sure why running it off the terminal block would be some sort of danger? 16g is perfectly safe for 120v ac... I use 18g myself for the 240v going to my pids but since they are only drawing less than 1/2 an amp anything more would be pointless unless I was using the pid as the fuse. I would think either would work but I havent looked at your schemetic. normally you want to be able to kill the power signal from the pid to the ssr but not switch off the pid since its useful to see the temps even when the pid is not being used to heat anything.
 
your pid power wire should be fused (or breaker if bling is your thing) so im not sure why running it off the terminal block would be some sort of danger? 16g is perfectly safe for 120v ac... I use 18g myself for the 240v going to my pids but since they are only drawing less than 1/2 an amp anything more would be pointless unless I was using the pid as the fuse. I would think either would work but I haven't looked at your schemetic. normally you want to be able to kill the power signal from the pid to the ssr but not switch off the pid since its useful to see the temps even when the pid is not being used to heat anything.

The power in does actually does have a 1 amp fast blow fuse. The neutral I pig tailed off the switch doesn't have a fuse. I don't think it needs one, but I wasn't sure...

I also wasn't sure if it was a bad to put a smaller gauge wire on to a block that is fed by a larger wire. Either way, I guess I am fine with it hooked off the switch's neutral.

Switches, lights, PIDs all use minimal power draw. You'll be fine piggy-backing.

Thanks mate!
 
I haven't posted an update in a while, sorry. This was partly because I was building up my project fund account to buy the RIMS tube and bits to go with it. This was slowed down substantially by a new addition to my household. Meet Lyra!

n58yZaP.jpg


Anyway, I did finally put in a nice, big order to Bobby at Brewhardware.com and I am eagerly awaiting it's arrival. I also (mostly) finished up the control panel and mounted legs on my MT. Can't wait to give the system a test run!

Here's the parts I ordered -
Y7wNevA.png
 
7zzeY7C.jpg

It's alive!

Fired the control panel up for the first time, after finally getting around to buying a plug. The RIMS tube and the other goodies come tomorrow and I am pumped! Gonna have to learn how to use the pid, plan on a test run this week.
 
sSs99Vn.png
Everything came and I have been tinkering every chance I've gotten. I am doing some light troubleshooting, however, as it seems like the RIMS tube isn't getting power. Can anyone tell me how to test a ssr with a multimeter? I think it may be the culprit here.

It's weird because with nothing plugged into the RIMS outlet the led in the switch is illuminated slightly, a bit more dull than the others. But if you plug something in the switch is quite faint.

Any help is appreciated! Thanks guys!
 
Back
Top