Connecting flush mount breaker box to control panel

Homebrew Talk - Beer, Wine, Mead, & Cider Brewing Discussion Forum

Help Support Homebrew Talk - Beer, Wine, Mead, & Cider Brewing Discussion Forum:

This site may earn a commission from merchant affiliate links, including eBay, Amazon, and others.

Roadie

Well-Known Member
Joined
Jul 27, 2013
Messages
1,914
Reaction score
170
Location
Summerville
Ok I need some help. We've moved to the south where basements don't exist due to elevation (Charleston, SC is 12' above sea level) so I'm now forced to become a garage brewer. We have a 2 car garage that's finished - meaning it has walls and a ceiling and painted to look nice. The breaker panel is in the garage and is flush mounted into the wall. I need to run a new electrical circuit/line from the panel to the opposite (parallel) wall where the brewery will be set up. I don't want to mess up the drywall to do this so plan on using .5" metal conduit (EMT) with the 10 gauge wires inside ran along the ceiling and down to a surface mounted metal box and then paint the conduit to match the wall color.

I've never ran conduit before (used romex in the basement for the old brewery but it was unfinished when we started so easy to do) and am puzzled how to connect it to the new breaker in the panel. Do I make a hole in the drywall by the panel and place a surface mounted box there with the wires coming in the back and conduit hooking into the side of that box? If so, do I simply use it as a pass through, or do I pigtail off inside the box to the wires running to the other side of the garage making this a true junction box? If not, what method do I use to connect the conduit to the box?

Any and all ideas/suggestions are appreciated.
 
Before committing to EMT . . . .

Do your ceiling joist run from across the garage from side to side, or front to back? Will the new receptacle be straight across the panel?

Reason I ask is it would not be terribly difficult to run ROMEX through the joist cavity if it's running the right direction.

The hardest part is cutting(or drilling) the ceiling/wall junction for cable clearance.

'da Kid
 
I'll have to check that out. There is finished space over the garage so can't easily just drill holes and run wires in that space.
 
On with a plan . . . .

Carefully open up the wall above your panel.
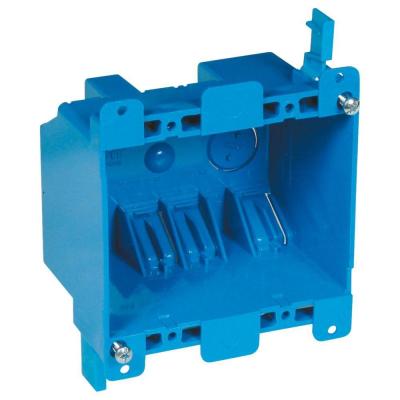
Use this box as it will allow you room to reach inside the wall to feed a wire into the panel:
1e3c4d7c-1c41-4409-a1f0-acf3c29785e1_400.jpg


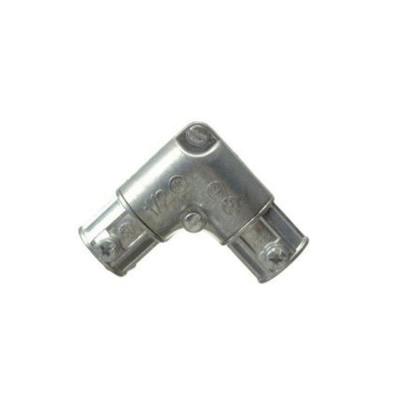
Mount this to the above box and continue your conduit from there.
TP564_m.jpg


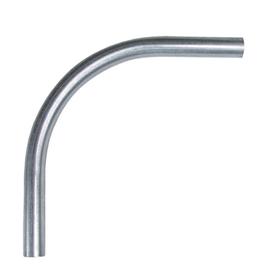
Use a couple of these if you're not fluent in EMT bending:
feb4f62a-efbf-4f0b-99bd-aef07c40709e_400.jpg


'da Kid
 
On with a plan . . .
'da Kid

Would the wire be one continuous run or would it be a short piece from the panel to the box with pigtails/wirenuts off for the long run across the garage? Why not a metal box?

I definitely plan on buying corners but saw some where the sweep was more gradual and thought it'd be easier to push the wire fish through them, or do you push the fish into each piece as you hang it and then it's a "simple" matter of hooking wires to it and pulling back?

031857005412lg.jpg
 
Would the wire be one continuous run or would it be a short piece from the panel to the box with pigtails/wirenuts off for the long run across the garage? Why not a metal box?

Go for steel! :)

I definitely plan on buying corners but saw some where the sweep was more gradual and thought it'd be easier to push the wire fish through them, or do you push the fish into each piece as you hang it and then it's a "simple" matter of hooking wires to it and pulling back?

031857005412lg.jpg

Use the style of corner you like!

The corner connectors split open and you pull the wire through them.

If you use the elbow, you can attach a vacuum to one end of the conduit and suck a string through. Which is then tied to the three conductors to pull.

'da Kid
 
On with a plan . . . .

Carefully open up the wall above your panel.
Use this box as it will allow you room to reach inside the wall to feed a wire into the panel:
1e3c4d7c-1c41-4409-a1f0-acf3c29785e1_400.jpg


Mount this to the above box and continue your conduit from there.
TP564_m.jpg


Use a couple of these if you're not fluent in EMT bending:
feb4f62a-efbf-4f0b-99bd-aef07c40709e_400.jpg


'da Kid

I highly suggest you do not use that bend, as far as I know to pass inspection because it's not safe to bend that much in most places that is to tight of a radius bend. What he posted of a long sweeping bend is what should be used.
 
Hey Roadie, just want to wish you luck on the new brewery in your new house! You built an awesome electric brewery and I know your anxious to get her going again in your new home. I know even though it won't be in a basement this time you will make it work the best way for your new place.

John
 
Hey Roadie, just want to wish you luck on the new brewery in your new house! You built an awesome electric brewery and I know your anxious to get her going again in your new home. I know even though it won't be in a basement this time you will make it work the best way for your new place.

John

Thank you man! Hopefully be brewing again by the end of the month.

I'm sure you've experienced things in brewing in the heat that I'm about to; like chilling with water that's warm - out of the "cold" spigot no less! Hoping the ferment and hop fridge compressors don't mind running in the garage here in the summer. Also need to figure out venting beyond just opening the garage door and maybe having a box fan blowing that direction. I have no drain in the garage either so cleaning the kettles will be a challenge. This house is much smaller than our last and the kitchen sink is dinky which won't help. It will all come in time.
 
And don't forget to post some pics for us beer voyeurs.. I'm currently running 6 gauge from an exterior panel, down through the foundation, and into a unfinished basement. A PITA to get it there, but once in the basement, the wiring is cake. I'm using some 2" conduit, and an LB elbow for the corner, then into a 12"x14" junction box between the ceiling joists of the basement. From then on, its cake.
 
And don't forget to post some pics for us beer voyeurs.. I'm currently running 6 gauge from an exterior panel, down through the foundation, and into a unfinished basement. A PITA to get it there, but once in the basement, the wiring is cake. I'm using some 2" conduit, and an LB elbow for the corner, then into a 12"x14" junction box between the ceiling joists of the basement. From then on, its cake.

My last brewery was in an unfinished basement room and it was simple doing wire runs and water supply lines, heck even the drain for the sink wasn't that bad. We framed, ran all lines/pipes, tiled, drywalled and had a brewery we were proud of. I still don't have a clear vision for this one yet.
 
Yes sir, our tap water is a lot warmer here than your used too. In the summer it's like 78 degrees! So you will probably experiment with ice in either your mash tun or hlt, to bring it down through a chiller to pitching temps. Many of us Floridians have refrigerators and even freezers in our garages for extra food storage. My wife always makes an extra pan of lasagna when she makes it to freeze for another time (gotta love her for that!), and she puts it in our extra freezer in the garage.

You can run the fermentation chest freezers or refrigerators also with no problem in the garage. It's does work harder on the compressors in the summer months and they sweat a little extra from the heat and humidity, but mine have run for 20 years with no problems. A box fan will work for the boil vapor and a portable air conditioner will cool off that garage of yours. The welder that welded the 2 inch tri clover ferrules for my electric elements on my kegs ran a portable air conditioner in his garage when he did the job, man did it work great cooling off the garage.

John
 
Yes sir, our tap water is a lot warmer here than your used too. In the summer it's like 78 degrees! So you will probably experiment with ice in either your mash tun or hlt, to bring it down through a chiller to pitching temps. John

I don't know why I never thought of dumping ice/water in the HLT and recirculating through the HERMS coil to cool off in the summer but that sounds like a great idea! Or just use it as a reservoir for chiller water, either way. Thanks!!

The moving company (Wheaton Van Lines - don't EVER use them) got my control panel here but the power cord for it is nowhere to be found. We also never found the cords for one of our TVs and my office phones. I had stained 3 large wooden disks for under each kettle and only 1 of the 3 made it here. How a 10' long 10 gauge cord with huge connector on the end goes missing along with the disks with a larger diameter than the kettles is beyond me. But along with the other stuff they broke and/or damaged in the move I guess I shouldn't be surprised. Replacement parts for cord should be here by the end of the week.

About the only question I have left now appears to be box type for the conduit and if I should make a junction inside the box or have one continuous run from breaker to panel. I was going to use a surface mounted metal box beneath the panel (far from where the main lines come in the top) with a small hole in the drywall behind the box to run supply in then use an offset connector to run the conduit (EMT) from there up to the ceiling, around the garage and down towards floor on the opposite wall for dryer plug. I'm guessing one continuous run instead of a junction inside the box is best.
 
About the only question I have left now appears to be box type for the conduit and if I should make a junction inside the box or have one continuous run from breaker to panel. I was going to use a surface mounted metal box beneath the panel (far from where the main lines come in the top) with a small hole in the drywall behind the box to run supply in then use an offset connector to run the conduit (EMT) from there up to the ceiling, around the garage and down towards floor on the opposite wall for dryer plug. I'm guessing one continuous run instead of a junction inside the box is best.

continuous runs are 'better' than runs with intermediate terminations since there are fewer termination points that could have an issue (e.g. loose wire nut). if connections are properly made, intermediate terminations are not a problem.

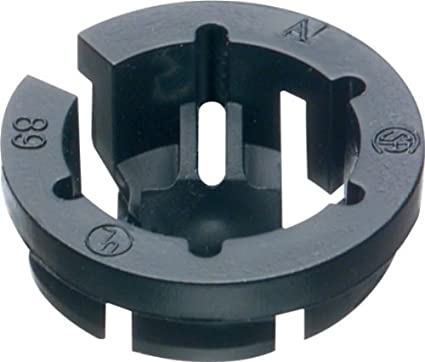
i believe you are running four individual conductors as opposed to a single cable? if so, consider the transition from your surface-mounted box into your panel. single conductors (like thhn) must be installed in a raceway, they cannot be 'fished' through finished walls. romex can be fished through finished walls so you may want to use a short piece of romex between your junction box and your panel, such that you don't need raceway in that part of the run. you could then transition to your single conductors in the junction box. note that the romex would need to be secured where it enters the panelboard. easiest approach would be to use a plastic nm connector:

41zMTUjBV2L._SX425_.jpg


knockout one of the pre-punched holes in your panel, insert the plastic connector and push the nm cable through to your surface mounted junction box.

note the above assumes nm cable is allowed in your area, some locations do not allow it.

Thanks for your help. Seems like this answers my questions. Romex from panel to junction box, thhn out of box into conduit to surface mounted box on other end. Going to try and pick up parts tonight after work.
 
you will also need to secure the cable at the plastic old-work box that is flush-mounted with the wall. if you use the two-gang box pictured above, the cable entry 'tabs' at the rear of the box will provide the necessary securing.

i took a look at the summerville building code and they enforce to the 2011 nec, with no amendments. you will be good to go with the above approach!

And make sure to get it inspected when your done! Its usually a $50-60 fee to have them come out and inspect it and sign off on your workl
 
And make sure to get it inspected when your done! Its usually a $50-60 fee to have them come out and inspect it and sign off on your workl

if going the inspection route, go get a permit first! calling the building inspector to come check out unpermitted work is a recipe for trouble (double fees, possible fines, being 'on the radar' of the building department, etc.)
 
I was just going to do the work (to code but no inspection) and call it a day.

Do realize that if there is EVER a fire at your house they will look for unpermitted electrical work and insurance can (and will) deny your claim even if it had nothing to do with the electrical work you did. They look for any reason not to pay out...just pay the $50 bucks :)
 
if going the permit route, you may want to consider stating you are putting a 30A receptacle in for a welder or something like that. if you say 'electric brewery', it might open up a bunch of other questions (i.e. is your brew panel ul rated). just a thought...
 
Ok, I'm official now as I picked up the permit this afternoon. I think I have everything required. Going to start installation tomorrow. Can brewing be far off?
 
if going the permit route, you may want to consider stating you are putting a 30A receptacle in for a welder or something like that. if you say 'electric brewery', it might open up a bunch of other questions (i.e. is your brew panel ul rated). just a thought...

I just left it at DRYER receptacle. Before inspection I will move the fermentation fridge (about dryer size) which is in that area and leave the control panel in the house.
 
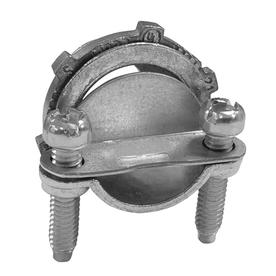
Finishing this project shouldn't be this hard. I failed to put F'ing push in connectors on the box because I didn't think I needed them. I have this nice weatherproof box View attachment ImageUploadedByHome Brew1445557010.620487.jpg which mounts against the garage wall here View attachment ImageUploadedByHome Brew1445557065.887239.jpg with Romex entering the back middle of the box. The wire enters the box in the back middle so you never see it. Inside the box is a junction to THHN which exits the offset connector you see on the box going through EMT conduit. These connectors may fit the $1.98 metal box but the $8 weatherproof box I bought has threads and the connectors won't push into them.

View attachment ImageUploadedByHome Brew1445559230.164227.jpg

Do I really need to use these meaning can't I just run the Romex into the box and call it a day?

This has to pass the city inspector.
 
how about a regular metallic nm connector?

031857456504lg.jpg


i believe that is a 1/2" opening on the back? try a 3/8" connector. the threads are probably too small to thread into the box threads but the lock nut will hold it in place. attach the nm cable and tighten everything up, then mount the box to the wall.

I'm not sure that will fit into the hole I drilled into the wall. Maybe if I mount it backwards with the lock nut on the outside of the box? Then I have to deal with a similar issue on the panel itself.
 
Roadie, You have to anchor that box to the wall with two screws . . . no less.
Also have to use a weathertite cover.

The "dryer plug" end will also need the weathertite cover. May be hard to find one with the 2¼"(?) dryer receptacle opening.

'da Kid
 
Roadie, You have to anchor that box to the wall with two screws . . . no less.
Also have to use a weathertite cover.

The "dryer plug" end will also need the weathertite cover. May be hard to find one with the 2¼"(?) dryer receptacle opening.

'da Kid

I do have a weather tight cover for the junction box and it is fastened with 2 screws. Not so sure on the receptacle end as I just bought a regular dryer cover plate. This is INSIDE the garage after all.
 
Back
Top