Basement Brewery Build (illustrated and alliterated)

Homebrew Talk - Beer, Wine, Mead, & Cider Brewing Discussion Forum

Help Support Homebrew Talk - Beer, Wine, Mead, & Cider Brewing Discussion Forum:

This site may earn a commission from merchant affiliate links, including eBay, Amazon, and others.

Howhownow

Well-Known Member
Joined
Apr 15, 2014
Messages
391
Reaction score
71
Location
Chapel Hill
Hello!
It's been a minute (~6+ months) since I have been active on HBT and brewing at all due to my recent purchase of an 85 year old house. I decided to put brewing on the back burner while I got everything fixed up, but to always keep it in mind with my home improvement plans.
Long story short, all of the big work is done, and I finally got my shed put in a few weeks ago to convert a single space (basement) that was unusably cluttered with both tools and brew gear to two very functional spaces. Workshop in the shed, brewery in the basement. :D
I chose that setup for many reasons, the main ones being access to water/ electric in the basement, and the convenience if being able to brew without ever leaving the house. That said, brewing in a basement will create its own set of challenges (will cover later).
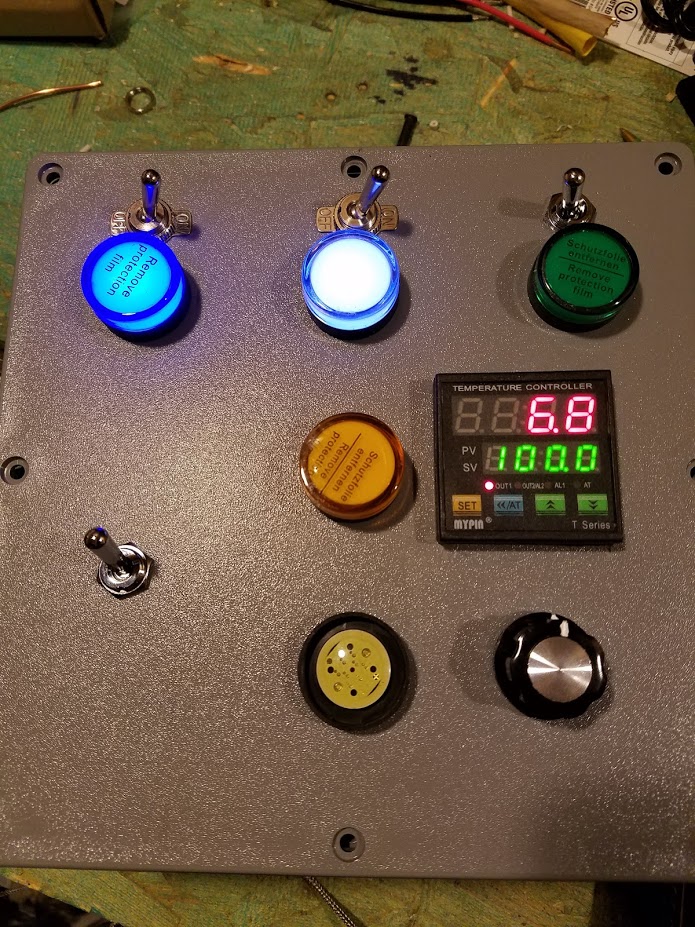
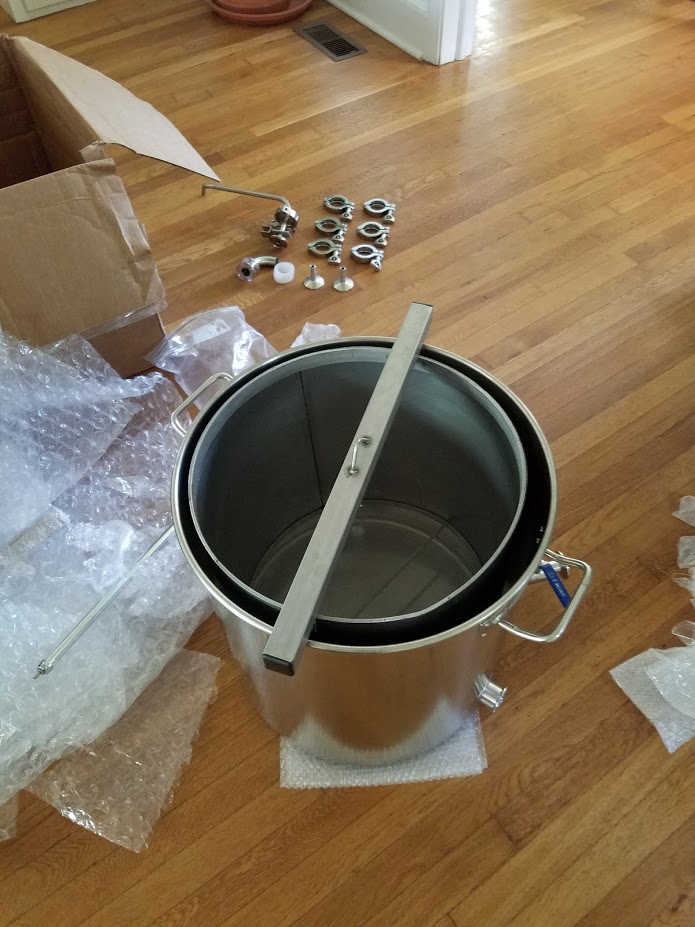
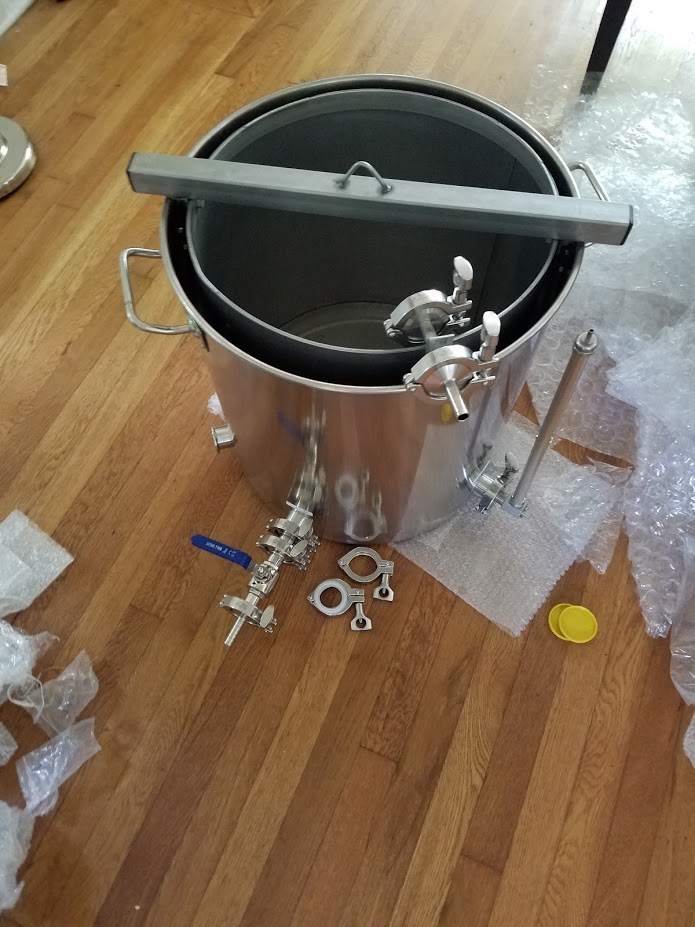
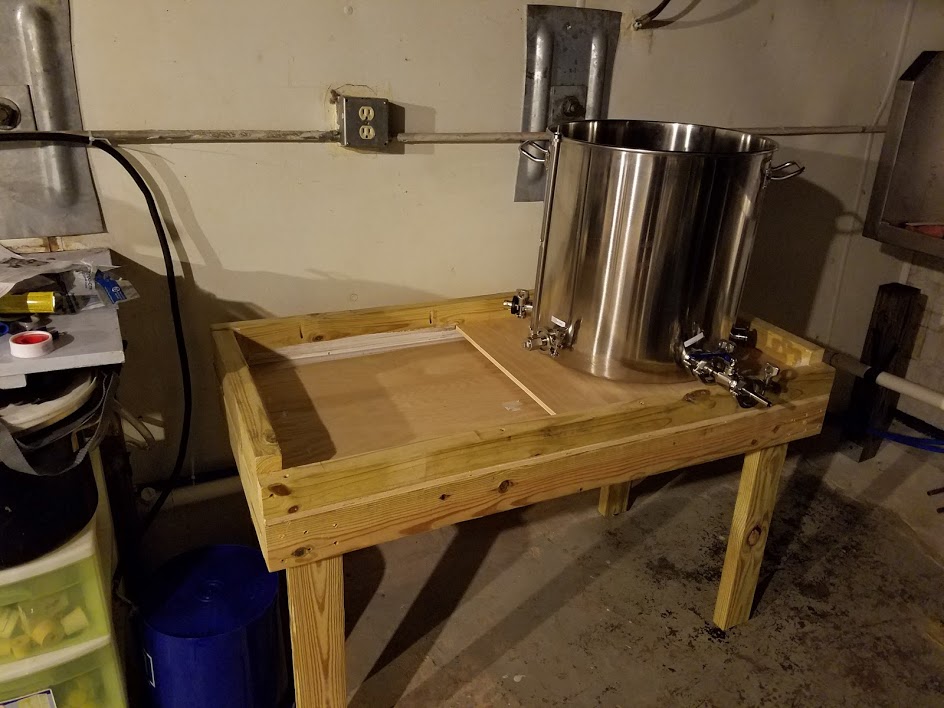
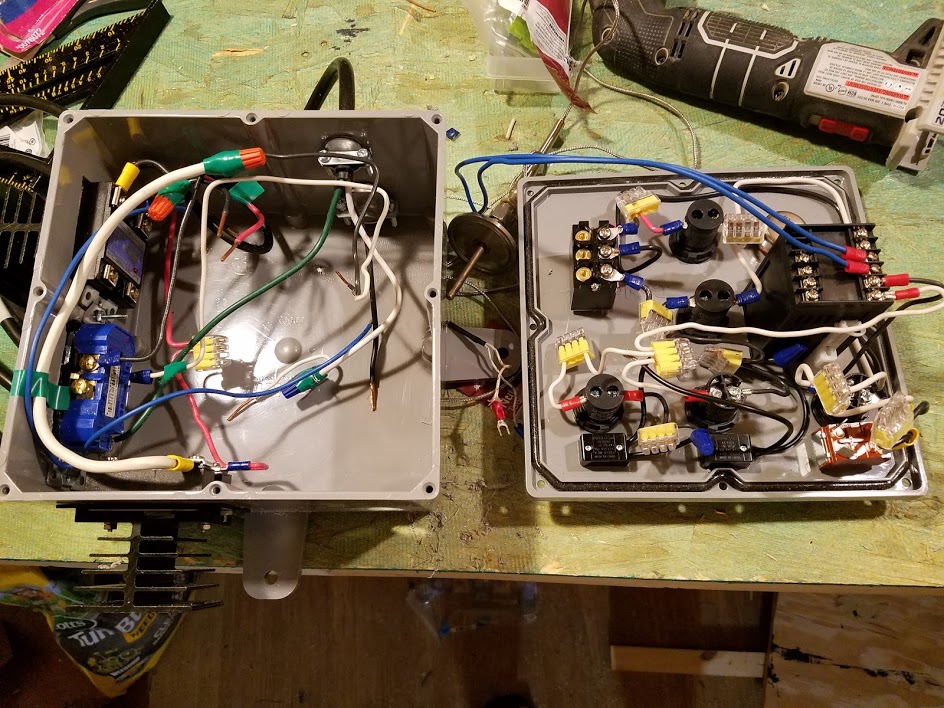
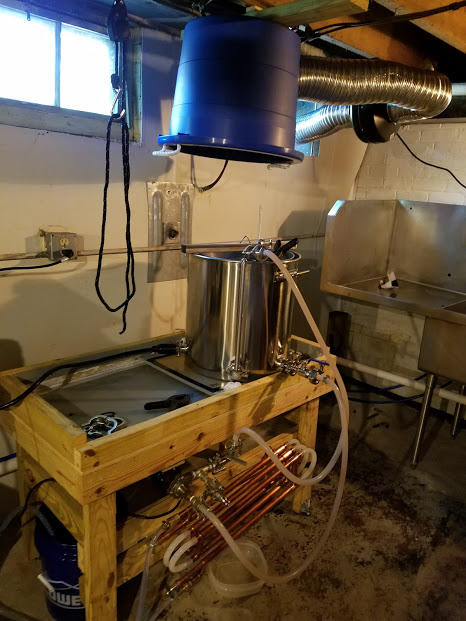
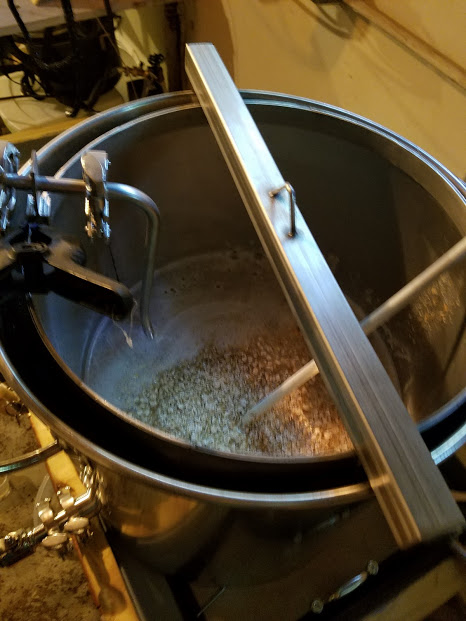
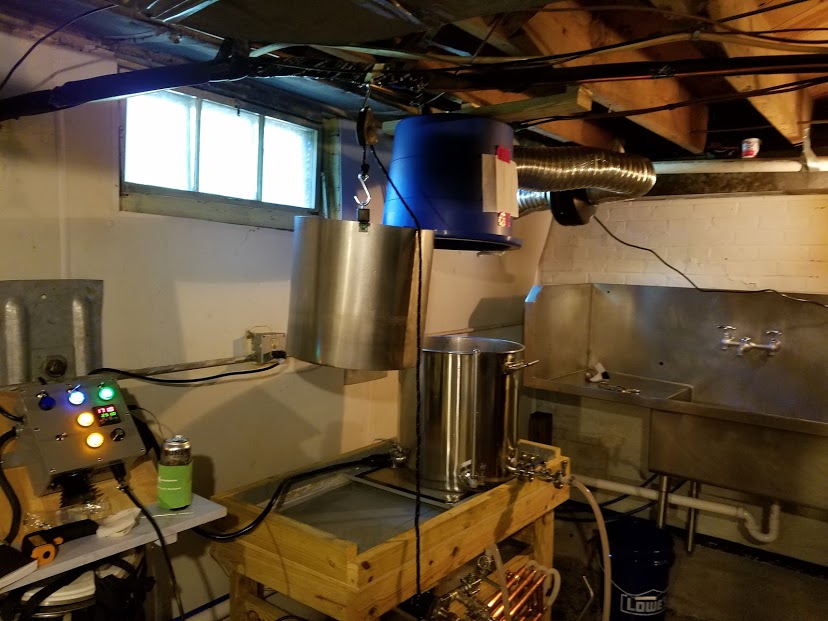
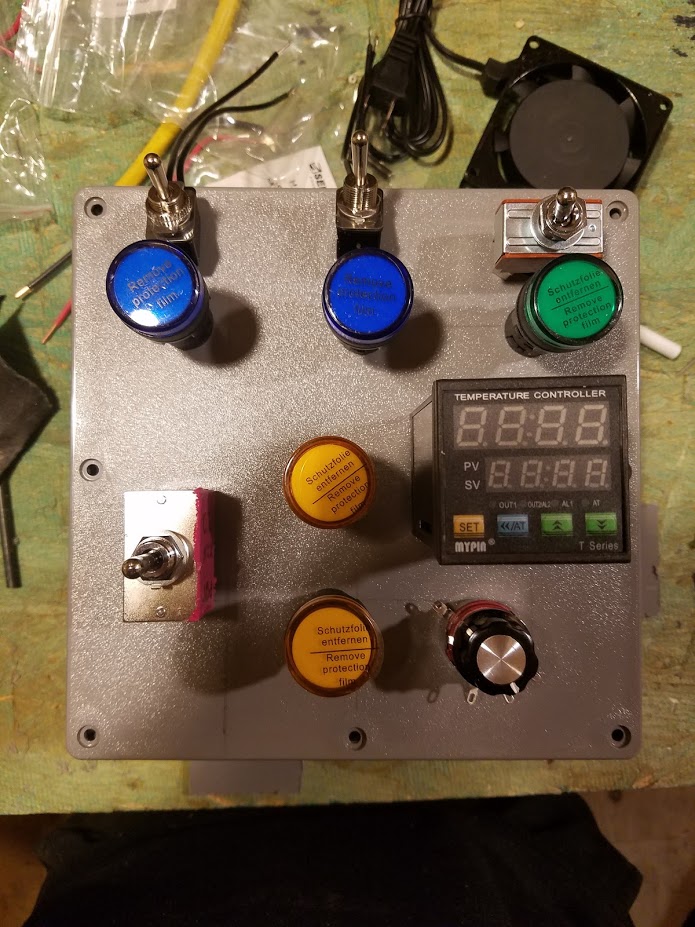
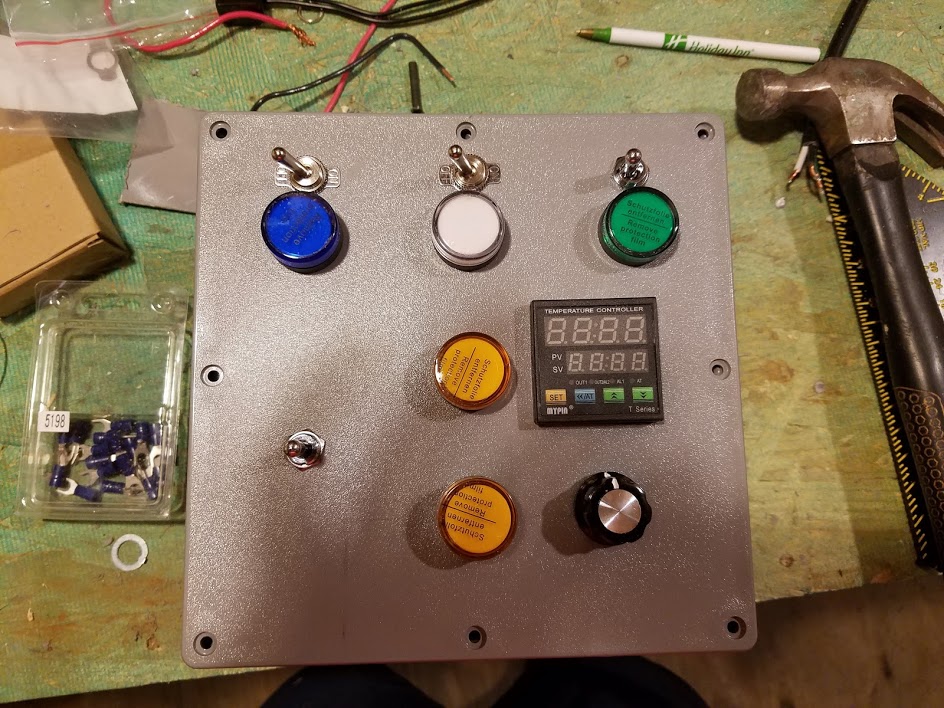
I also am choosing to overhaul my whole setup and process. I am currently running a hybrid LP (boil)/Electric (mash via RIMS tube) 3 vessel tiered system, using both gravity and a pump. I'm brewing in 5 gallon batches. I'm brewing good beer, but it's a lot of moving parts and a PITA to set up and clean out. It also has a big footprint. I'm selling everything except my burner, RIMS tube, and control box and starting fresh. My new goal is 5 OR 10 gal batch flexibility in a single-vessel, no sparge BIAB to cut down on size, brew time, and cleanup. I intend to keep my RIMS Mash and gas boil approach, though convert to NG (already run in the basement). After much (MUCH) planning, research, and design, I decided to with the Colorado Brewing Systems Single vessel BIAB system. For features, quality, flexibility, and value they just couldn't be beat. I am currently in the process of getting that specced out and ordered (excellent customer support over there, FYI). The plan is to build a wooden pedestal that the burner and kettle will sit atop, and to the front of that I'll mount my RIMS tube, pump, potentially a plate chiller(TBD). I'll bring my strike to temp with either/both burner/RIMS. Add my grain, recirc using pump and RIMS, winch grain basket, boil with burner, whirlpool, chill.

Whew... that was all really long winded, but it was good to write it all out. To summarize:
Challenges:
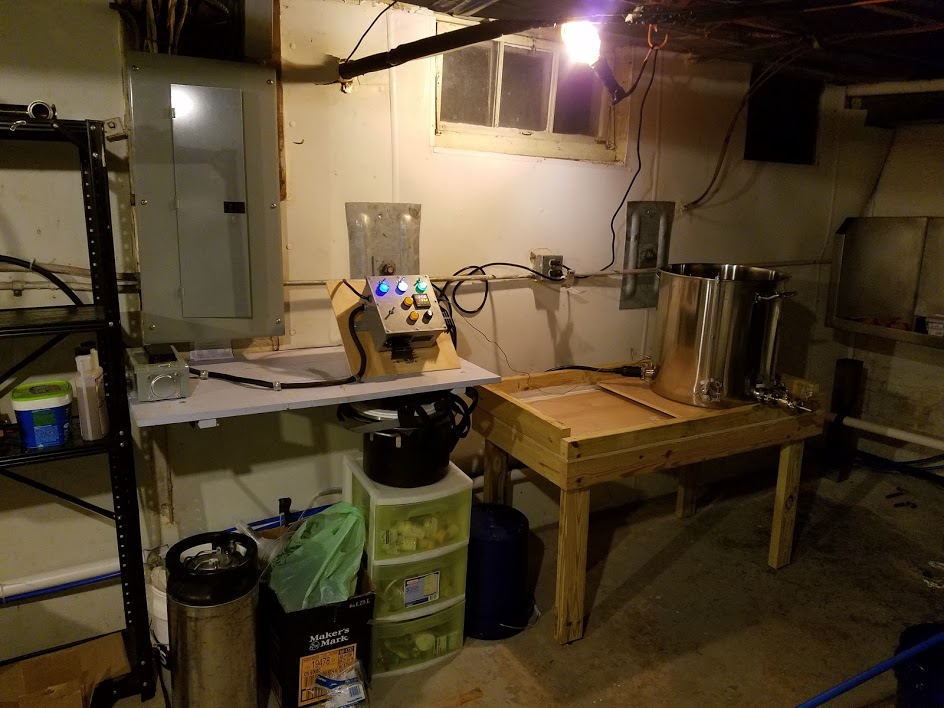
- Low ceilings (~7'+) covered in 80 years of layered gas, water, electrical work
- While floor generally slopes towards sump, that slope is variable (especially near walls)
- Walls are generally unsuitable to mount things on due to existing waterproofing measures.
- Want to keep system and gear organized and laid out efficiently and attractively. It is not a finished or pretty basement, but I don't want unsightly and potentially dangerous clutter messing with brew day
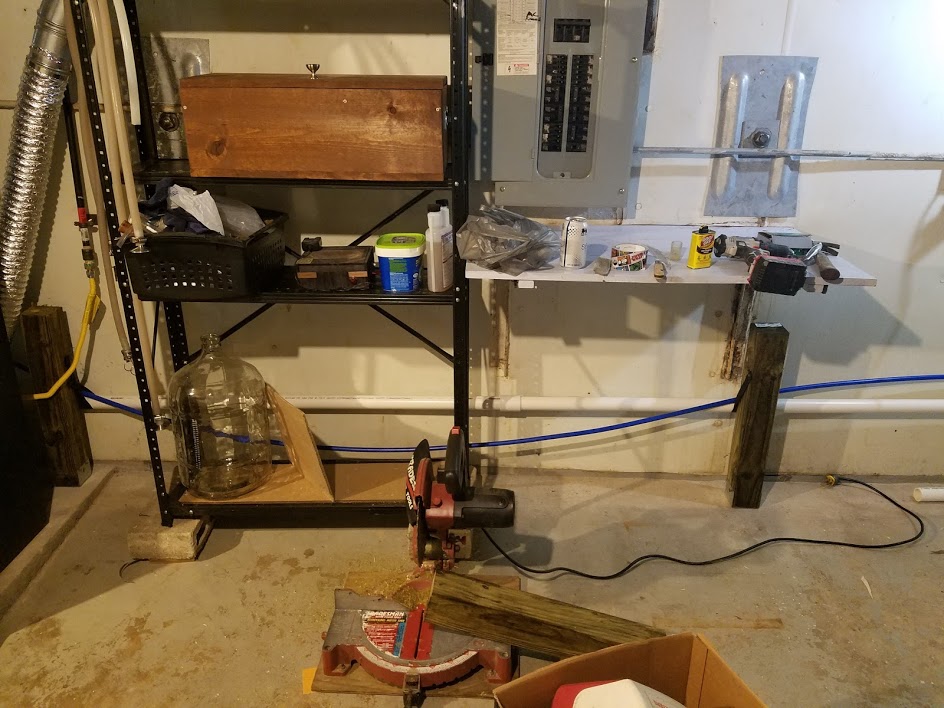
- My main electrical service breaker is basically right in the middle of the main wall

Remaining projects that I hope to document here:
- Build brew stand (pedestal)
- Build ventilation system
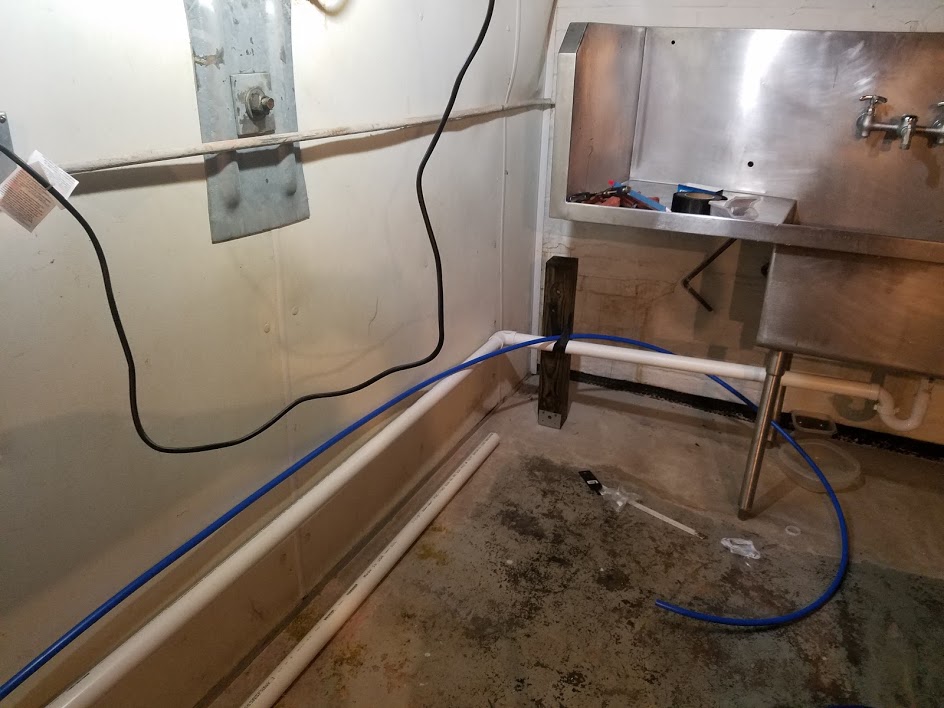
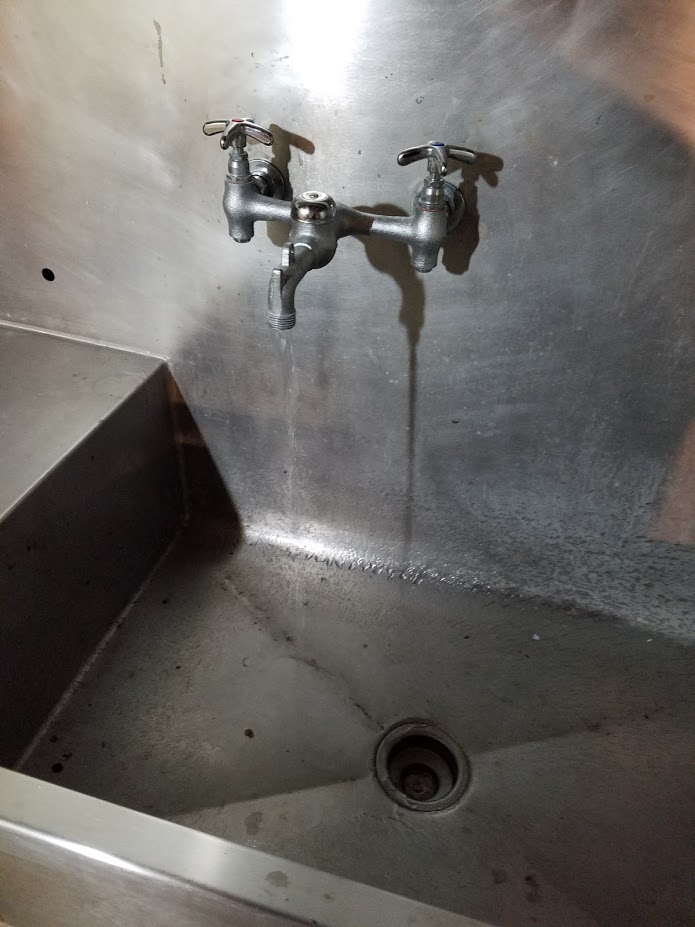
- Plumb GIGANTIC new (to me) utility sink, avoiding existing electrical stuff and not mounting to wall
- Convert burner (Bru Burner) to NG
- Put everything together and order balance of fittings, hoses, etc.
- Figure out my chiller strategy
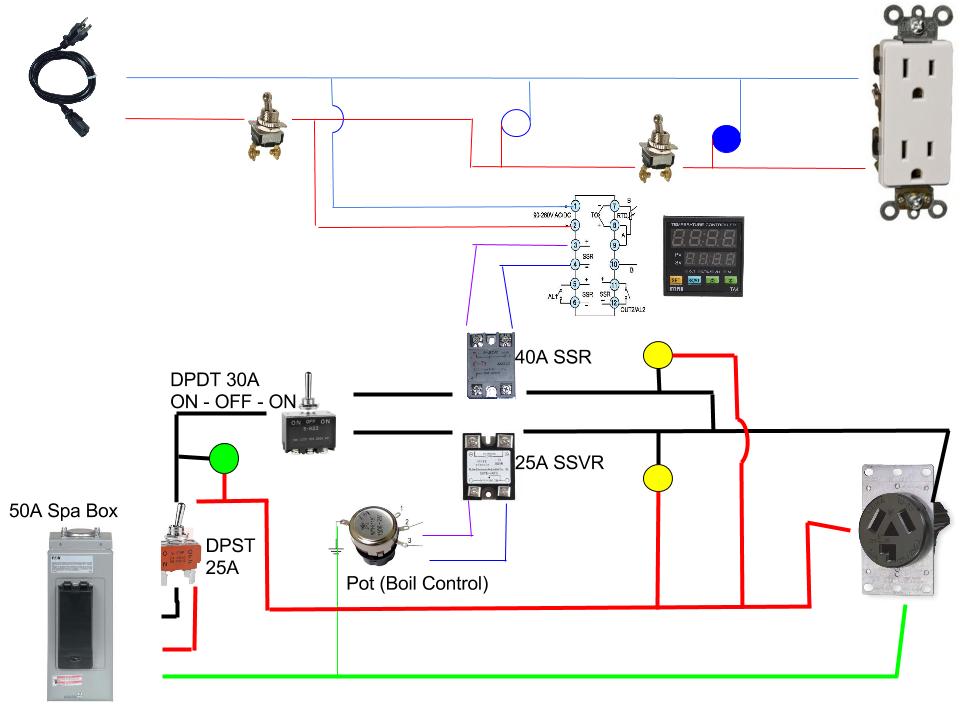
- Recalibrate controller
- BREW (maybe someday)

If anyone has any suggestions, tips, etc... fire away!

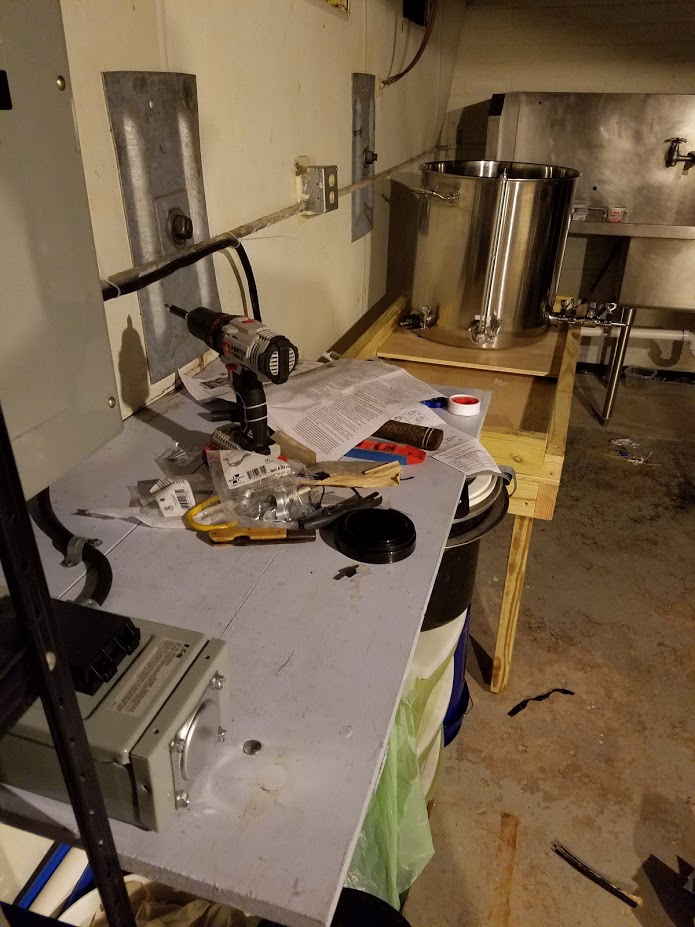
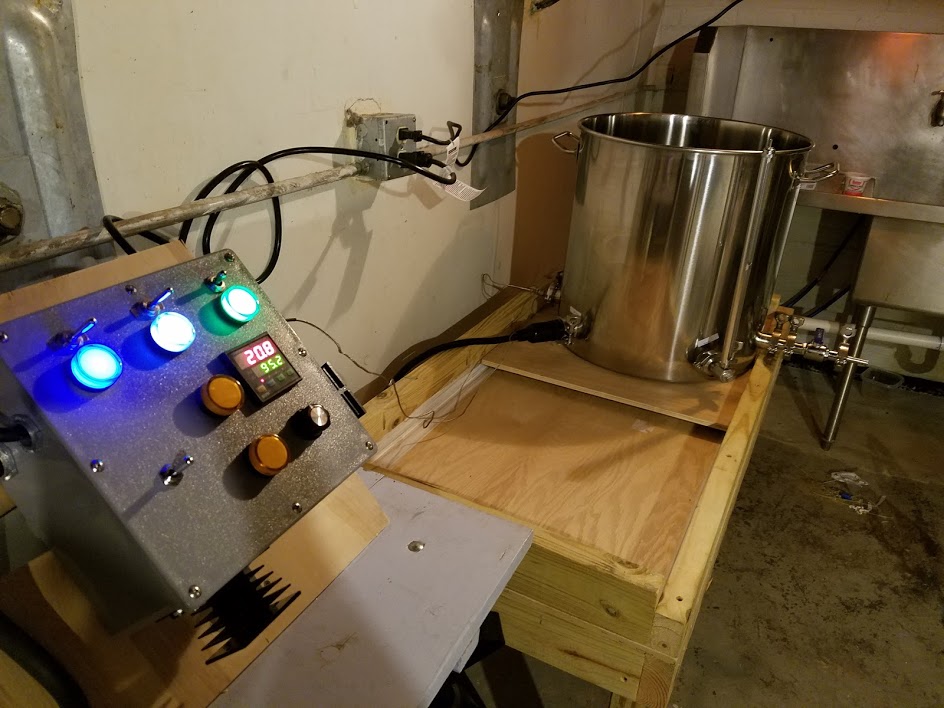
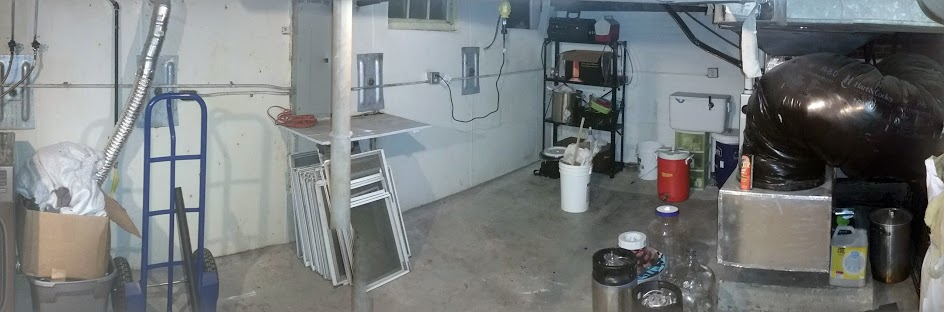
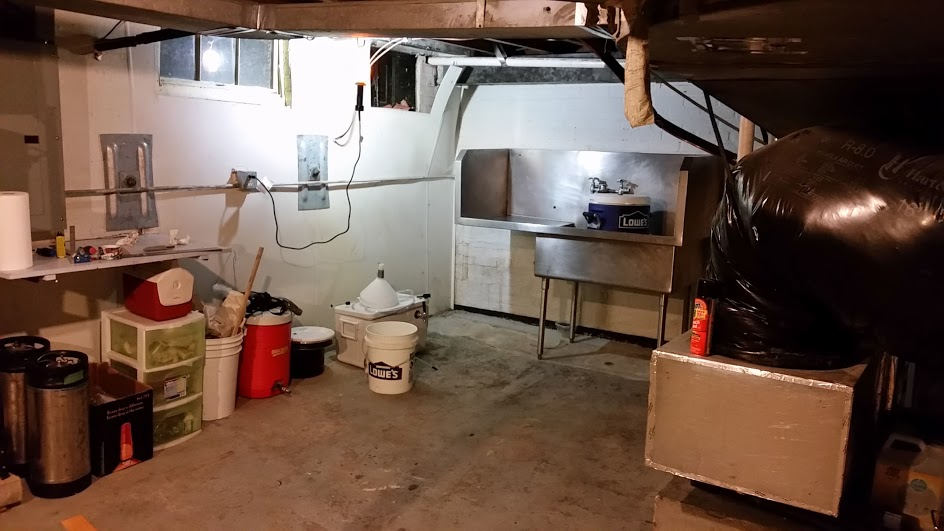
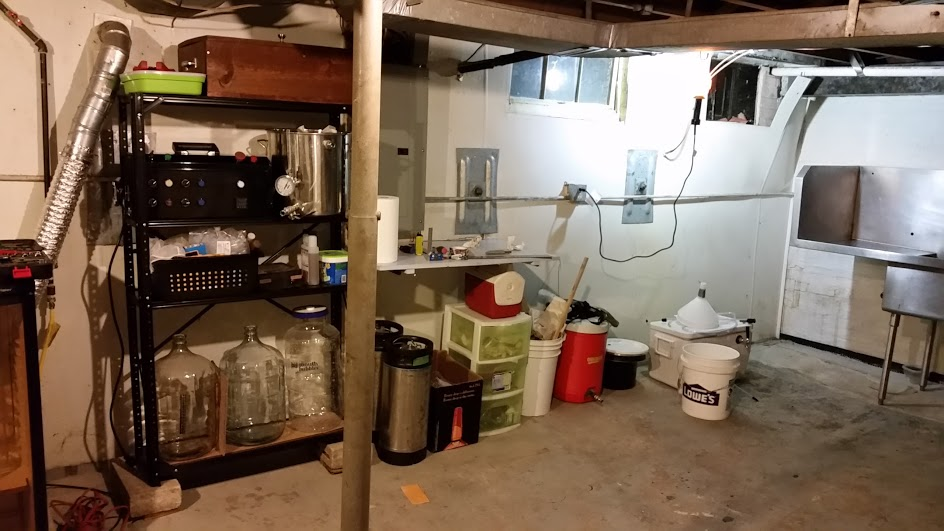
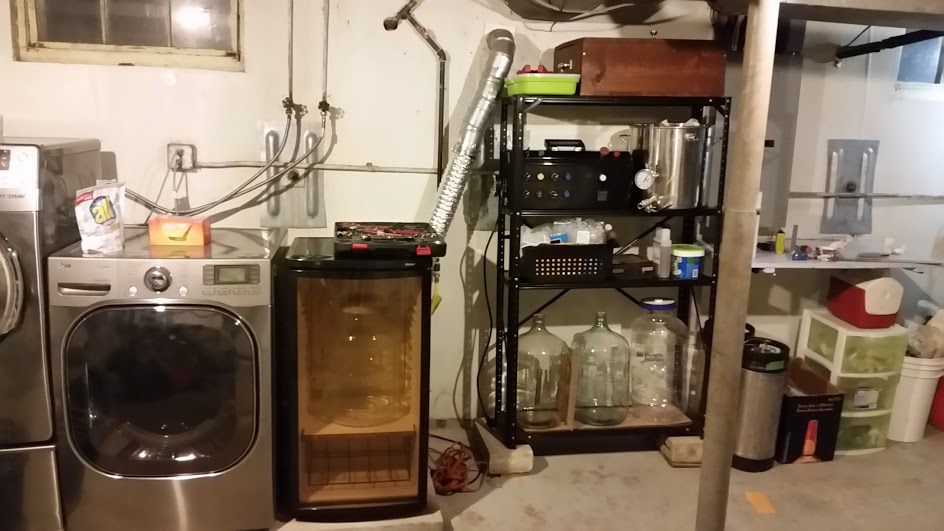
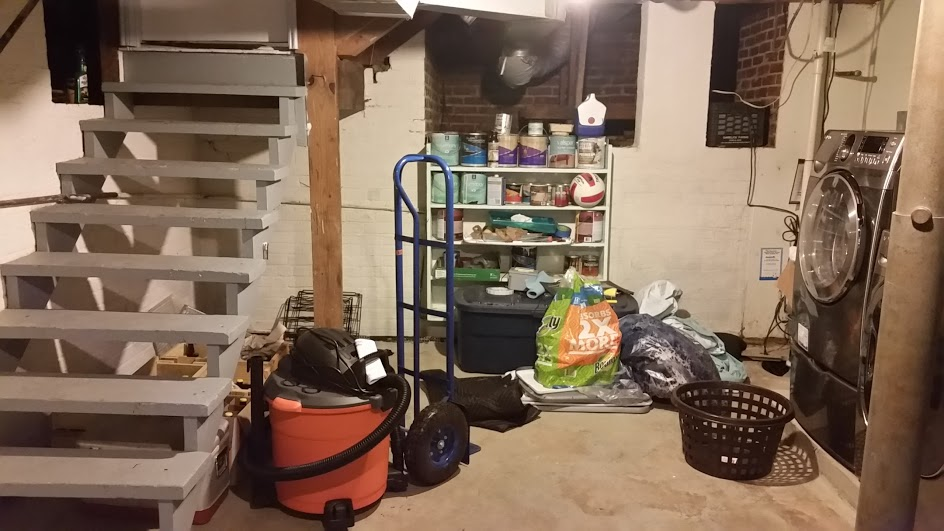
Stay tuned for pictures of old system and some 'before' shots.
--
 
Old setup (keeping control box, pump, RIMS, dog). Will miss brewing outside on days like this.
aJb8UGe.png

fJwuKzB.png
 
Does anyone around use induction to boil 10Gal batches? I am looking into it, as it would give me the ability to ditch gas completely. I have a vacant circuit/plug from the dryer.
 
Does anyone around use induction to boil 10Gal batches? I am looking into it, as it would give me the ability to ditch gas completely. I have a vacant circuit/plug from the dryer.

Yes, I believe @AnOldUR does. He uses a neoprene keg koozy to insulate the pot. If you want faster you could always add a heat stick + induction for ramping. 3500w will maintain boil fine
 
Any reason not to go the heating element route?

Looks like this questions is a good one. I got in touch with Colorado Brewing- the pot is 304 Stainless, and won't work with induction.

I was looking into it for two reasons. First, simplicity- I don't want to build and have to use another control box. My current PID controlled RIMS control is 120v. The second reason is a simple design one: I was going to use the vacant element port in my pot for a sight glass. This second part isn't the end of the world, and I think I can make it work anyway.

Currently looking into simple element control designs. No temp settings, etc., jsut a power dial and small box would be preferable. May even be able to integrate into current control box.
 
FYI, as a Supporting Member, you can attach images directly to your posts, rather than linking to external image hosting sites. Many of us cannot see images hosted on external sites like imgur because they're considered to be social media sites and are blocked by workplace firewalls.
 
For what it's worth, you don't technically have to have a power control at all. On/Off might be enough for you, as long as you don't mind only having one "boil" setting.

If you were concerned about building a controller, or cost, or whatever, you could use a 2kw 120v Hot Stick and see if that's enough to maintain a boil. If you went that route, you could still use your RIMS box (on a separate breaker) along with your pump to get some "boost" heat while you get up to boiling temp.


If you're not scared of wiring, I would suggest just building a boil controller around a simple SSVR:
http://www.auberins.com/index.php?main_page=product_info&products_id=332

If you put that in a box with an on-off light switch, you could probably do the whole build for well under $100 including the stainless steel element and mounting hardware.

-B
 
If you're not scared of wiring, I would suggest just building a boil controller around a simple SSVR:
http://www.auberins.com/index.php?ma...roducts_id=332

I am not scared of this simple wiring, this is pretty much precisely what I am looking for. I just didn't want to go through the PITA of wiring a bunch of manual stitches and temp controls. It's a bit outside of my comfort zone, and I'd have to get help. I am looking for simple manual control.
 
I am not scared of this simple wiring, this is pretty much precisely what I am looking for. I just didn't want to go through the PITA of wiring a bunch of manual stitches and temp controls. It's a bit outside of my comfort zone, and I'd have to get help. I am looking for simple manual control.

All that's left is to figure out the GFCI situation. Your dryer plug is probably not protected at the breaker which means you'll need to figure out some other option.
 
All that's left is to figure out the GFCI situation. Your dryer plug is probably not protected at the breaker which means you'll need to figure out some other option.

BB Thank you for your help.
I'm not at home and can't check, but I would assume that there is no GFCI protection. Would something like this suffice? I am planning on changing my old 10-30 outlet no matter what. I also saw replacements for the breaker box, though they were more expensive.
Anyone have a recommendation?
 
Last edited by a moderator:
Not for a 240v element.

To get the full 5500w you'll need ~23 amps at 240v, most people stick with a 30 amp breaker.

Price is a strange thing in the world of GFCI breakers.

1. In-Line like you linked for 240 is expensive (well over $100 unless you find the magical unicorn GFCI)

2. For some strange reason, 30 amp panel GFCI breakers are more expensive than 50 amp panel GFCI breakers.

3. Most Dryer or RV outlets are wired with 10/3+1 instead of 6/3. This means you can't use the 50 amp breaker in y our main panel.

4. Both styles of breaker actually usually cost more than a "Spa Panel" with a 50 amp breaker inside (lowes or home depot).


When most people do this, they pull the power from their dryer outlet into the Spa Panel to get the GFCI, then they run from the spa panel into an outlet that they can plug their controller into. Since your "controller" is basically a single SSR and a knob, it might actually fit inside the spa panel enclosure, which would be nifty.
 
Great suggestions. The more I research, the more a spa panel seems like the way to go. I definitely like the idea of integrating the controls into the panel- saves space and the need for an additional enclosure.

My next engineering challenge is plumbing the sink. I got a great stainless one for a steal, but it's large enough to restrict the install location. The spot in the pic below is where I think is the final location, moved a few feet to the left to the corner of the basement. The issue is getting water to and from it, or specifically how to mount that plumbing.

I have the washer supply lines that I intend to tie into and run pex over to the sink. I also have a sump that I'll drain into. The problem is that I have no studs, and even the brick exterior wall is covered in a moisture barrier that I just would rather not mess with or penetrate. My working plan right now is to get some concrete anchors and mount them, then install some posts as stand-ins for studs. I'll mount the plumbing to/though those. It's roughly a 30' wall, so 3-4 should do it.
1qMDCueCnNaLEYP9A
 
I picked up a spa panel from Lowes last night just to familiarize myself with it. Looks pretty straightforward, and will suit my needs. I think it will have room to integrate my controls into the single unit if I am careful with planning/spacing.
I have my build list nearly complete, but the one thing I am struggling with is the on/off switch. For space, I'd prefer something small(er than a 'light switch' style), like this.
I cant seem to find any maintained switches with a 30amp minimum rating that aren't huge or $$$. I am currently searching other threads for leads, but haven't found anything yet.

**EDIT** to elaborate on this last bit- I do not have room for a contactor in there. The more I research the more I am thinking it may be a bad idea to run the current directly through the switch. Not sure what my other options would be.
 
I cant seem to find any maintained switches with a 30amp minimum rating that aren't huge or $$$. I am currently searching other threads for leads, but haven't found anything yet.


I used this:

http://www.lowes.com/pd_541753-1571-PS30AC2WCC6_2z8vk__?productId=50182285

$12 from Lowes, it's working great for me.

From the power input to the element I wired it like this:

Hot 1 - Switch Side 1 - Element
Hot 2 - SSR - Switch Side 2 - Element

That way I know that if the switch is off, there is no power in the plug I'm using for the element. The switch is rated to disconnect at full power without arcing, in my rig it always switches with a nice silent action, I have no concerns with the safety.

If you put the switch in the panel, and then ran from the panel to an outlet box, you would actually be able to turn the outlet off when you weren't using it. Possibly somewhat safer.

<edit> Point 2 - You can use one of the hot legs and the neutral line on the load side of your GFCI box to give a standard outlet GFCI protection without buying the more expensive socket. Saves a couple bucks and gives you something to plug your pump into. A double-outlet box can give you room to have a pump plug-in and a switch :)


-B
 
After much deliberation I have decided that it makes sense to sell off my control box and RIMS tube. Using the 240v element directly in my kettle will give me all the functionality I need, with more power to reach strike temps and mash steps.
That said, I am now in the market for a new 240v controller. Having already gone through the adventure of building one, I think I'd prefer to buy off the shelf and focus my time on other brewery projects. So far I have three in my sights:
High Gravity
Brausupply
Hosehead

They all have the power and function I need, and at basically the same price point.

Does anyone have any experience with any of these three controllers? I'd be very interested to hear feedback.

Also, if anyone is interested in the control box or RIMS, I have them listed here. They are both great units and have brewed a lot of good beer.
 
Also I picked up a spa box and necessary connectors, wires. I figured I'll need it no matter what option I go with.
I have been continuing my electric research, and am finding some conflicting information that may pose a potential issue.
The dryer plug I am trying to use is a NEMA 10-30, an old 3 prong plug. From what I can find, it's 2 hots and one 'shared' ground/neutral. I have seen a few places folks saying that this will not work with a GFCI breaker- that a dedicated neutral is needed. Can anyone validate this for me? If so I've got some work to do with my line/plug that I was REALLY trying to avoid.
 
The dryer plug I am trying to use is a NEMA 10-30, an old 3 prong plug. From what I can find, it's 2 hots and one 'shared' ground/neutral. I have seen a few places folks saying that this will not work with a GFCI breaker- that a dedicated neutral is needed. Can anyone validate this for me? If so I've got some work to do with my line/plug that I was REALLY trying to avoid.

I can only tell you what I've read:

1. The neutral and ground should only be bonded in the main panel, never the sub panel (spa box).
2. All the GFCIs I have seen need to have a neutral connection on the line side, not on the load side.
3. The element should be connected to Hot-Hot-Ground

https://www.nema.org/Products/Documents/NEMA-GFCI-2012-Field-Representative-Presentation.pdf


Typical installation would go Main Breaker -> Spa Panel -> Existing Wall Outlet. This means that you only need the three wires at the wall outlet (Hot-Hot-Ground) because it is the load side of the GFCI.


I do not know how much risk there is with sharing the ground/neutral at the GFCI breaker / spa panel, especially since that plug is basically the only thing on that circuit... An electrician would have to weigh in. It may just be that the GFCI trips all the time, or it might be that you're exposing yourself to current on the ground leg and electrocution every time you touch the box, or it could be everything works fine.
 
Yep- that is basically the extent of my understanding.
I will say that in the wiring directions for the Spa box (which were nicely detailed- much more than a simple diagram) it specifically stated that 3 wire configurations would not have a white (neutral) wire, and in that case, just do not connect anything to the neutral bus.
That said, it doesn't say anything about the results of doing so.
 
Been quite for a bit as I have been collecting parts and doing other unphotogenic work. Also STILL waiting on my kettle to be fabricated, at which point the project will kick into high gear. Notable items since my last update:
- Decided that because of my pickiness and unwillingness to compromise that I am going to go ahead and build my own controller. It's going to have separate 120v and 240v power sources, the former to power the PID, pumps, etc, and the latter dedicated to the element. This was the best option to get PID control, easy manual burner control, and auxiliary power outlets, all with the ability to run my 240V throgh a GFCI. The cool part now is that I get to pick my own aesthetics. I am going with just a regular large grey plastic Lowes project box and using all old school toggle switches. Been busy sourcing 30A versions of those, but they all arrived the other day
- (See above) selling my 120V control box and RIMS tube. Anyone in the market?!
- Sold all my old 3 vessel AG gear- pot, HLT, MLT, burner. No Turning back now. Was actually able to sell it to a good friend's brother, so happy to see it go to a good home.
- Got a couple awesome boxes in the mail. One with a nice 412cfm inline fan for venting. Other was from brewhardware.com and most notably contained their new 5500w TC ripple element with integrated twist-lock plug. Will be able to un/plug the element at will without removing from pot.
- My ferm fridge got a twin! Now I can actually ferment the 10+ gallons I'll be able to produce.

Projects remaining:
- Build controller. This has just started. I'll post pics when I have stuff to show.
- Run ventilation. I am going to use one of those big rope handle tubs to start, as I on;y have one vessel to cover.
- Plumb sink. Still have to do this. Need to get my hands on an impact drill
- Decide on chiller. 90% sure I'm going with the Jaded CFC. Easy clean, good price, can mount to stand for even fewer 'moving parts'. Simplification has become an opsession for this project. Anyone have any experience with this chiller?
- Build stand. I have decided to overengineer this a bit. With a single vessel, low ceilings, and the need for a hoist, I have the decision to move the kettle or move the vent hood when I need to hoist. I chose the former. I am going to make it 2x the kettle diameter wide, with one side under the vend, the other under the hoist. Got some nifty mountable ball bearings that will go on a platform that the kettle will sit on, allowing it to glide back and forth. Building a 'track' around the perimeter of the stand top to guide the platform. Also had the idea of caulking and sealing in the raised edges of the stand top, making it a defacto 'sink'. I'll install a little drain and it should make cleanup very easy- just wipe drips/spills right over to the drain (will flow into a 5gal bucket under stand). Hopefully that all makes sense. No plans drawn up, yet. Waiting on kettle for exact measurements.

A few pics, should be more to come next week.

This thing is BEEFY
xPhpv7I.jpg


My Shrine to Fermentation:
nQepKY9.jpg
 
Last edited by a moderator:
FINALLY received shipping confirm for my kettle- it'll be in by the end of the week. That means projects are going into high gear after weeks of collecting parts and plans.
Last two days have been the decidedly unsexy task of plumbing my sink- complicated by having to install stud stand in's to run the lines. Finished that late last night, so it's a big relief to have that off the list. I also ordered the JaDed CF Chiller yesterday, so that's off the list as well.

Remaining projects:
- Run ventilation
- Build controller
- Build brew stand (After kettle arrival)
- Set up system- plumb all lines, mount pump and controllers, make sure I have all fittings and hoses, and test/ configure system (After kettle arrival)

Below is my wiring diagram for my controller (feedback PLEASE) and some unsexy plumbing pictures.
OWPEAay.jpg

Before I ran PEX supply lines
wXTFjyf.jpg

jqaEVwq.jpg

After running lines (obviously)
NoqJgQr.jpg
 
Many people like to use a 30A DPDT switch to isolate both legs of 240 from the element at the control box instead of just cutting off the "controlled" leg.

http://www.lowes.com/pd_89198-334-3032PL___?productId=3568846


That way, when the switch is off the element is fully disconnected. I wired my switch downstream of the SSR.

Excellent note. The switch I have for that is actually a DP, I just identified it as single as I would only be using one. I'll run both legs back through it- is safety the main reason for this?
 
I'm not an electrician so I can only say that it "feels safer" to me to know that there is no power outside of the controller box when the switch is off.

In truth, the safety difference might be negligible with the GFCI there, but since you have the switch already, just put the other side on it :)
 
Wow brewing is an interesting hobby.
Last two days I was a plumber. Yesterday and tonight an electrician, soon a woodworker. And I haven't brewed a drop of beer this year.
This is my (hopefully) final controller diagram. It incorporates suggestions, as well as all switches, lights, etc.
xFF2Lgw.jpg
 
Ugh, I'm the worst, I didn't read your first diagram well enough to notice that you already had a center off 30A DPDT in there. No need to add a second disconnect switch when you could just use that one.

xFF2Lgw.jpg
 
Ugh, I'm the worst, I didn't read your first diagram well enough to notice that you already had a center off 30A DPDT in there. No need to add a second disconnect switch when you could just use that one.
Definitely agree. I had originally planned to go that route, but eventually decided that I liked I switch that only served to turn the system on/off. I'm thinking of it as an E-Stop lite version.
 
Got some work done with the controller box last night. Struggled with spacing originally because of mounting the heatsinks- they occupied a lot of room and I couldn't put anything over them. Eventually knocked a couple holes out of the walls and will mount them externally. I'll have to figure out a new use for the cool little 120V computer fan I originally got to cool them. Anyway, after that I think I settled on a pretty good layout.
Y8uNP5F.jpg

hEUax8F.jpg
 
Hey look I made a thing that will tell you the temperature and also you can plug a lamp into it if you plug in the thing first (by all that I mean the 120V side is wired).

ANNNNNND tracking says my kettle is arriving today!!! :ban::rockin::fro::ban::fro::D:goat::goat::goat:
xizakBT.jpg
 
Lots going on this weekend and last night!
- Kettle came in Friday, so was finally able to build my stand. It is 2x kettle width, and the kettle sits on a floating platform. Left side for mash (winch mounted above), right for boil (hood above). Other nice thing is that this design makes a trough on the stand top that I caulked in (and will paint). I'll put a drain through this and all brewery spills go through that into a bucket below.
hryNgAz.jpg
52mzC0q.jpg

Note: that electrical outlet above the stand is getting a GFCI and an outdoor waterproof cover!!
zWPYNL7.jpg

- Spa panel wired and mounted
egEtKrg.jpg


- Controller is 90%+ complete. Only need to solder XLR connector and pot, make final connections, and put the lid on (all assuming that the wiring works)
PmNpxWx.jpg


Things are finally starting to come together!!!
With any luck I can finish my controller tonight and do a water test!
0Y6xWva.jpg
 
Also realized while wiring the box that the yellow lights would only work subject to the controls for the SSR/SSVR (the SSR/PID one would flash with the fire signal), so I switched those to before. I shouldn't be any impact otherwise.
J81GnrM.jpg
 
Also realized while wiring the box that the yellow lights would only work subject to the controls for the SSR/SSVR (the SSR/PID one would flash with the fire signal), so I switched those to before. I shouldn't be any impact otherwise.

Many panels will use a light to indicate power is on to any element with the switch indicating which control is active. Then they use an indicator light to show them when the element is actually firing.

I'm sure that it doesn't matter at all which route you are going with. I don't have any lights at all, but at times I've thought that a nice glowing light to indicate "Element Firing" would be fun. I feel like I saw a build where the person wired the Firing light directly into their element enclosure. That way the pot itself is lighting up when power is running.

No matter what, I'm sure you'll enjoy the build.
 
Well, yesterday was a very good day.
After work I was able to get all of the big bits installed and the electronics tested. Getting the controller plugged in and running has relieved a huge amount of anxiety. It was the only part of this whole thing that I wasn't 100% confident in my ability to do myself. As should be clear by now, I am by no means an expert with electricity, and have never worked with 240V before. Definitely an anxious moment checking the final connections, putting on the lid, and hitting the switch for the first time. That said, it looks like my research and ambition paid off, and it all appears to work (water test pending). There is one issue with the lights that may not be a bad thing after all.

Remaining Tasks:
- Jaded CFC comes in tomorrow. I'll mount that to the stand and run permanent water to it
- Paint stand and drill drain
- Reinforce stand legs with frame
- Finalize pump orientation and placement, mount
- Plumb beer route for pump/CFC
- Mount vent hood and fan
- Clean piles of wire pigtails, sawdust, switches and spades, tools, brewing equipment that are basically covering my house.
- BREW.
I think all of this (except brewing) can be knocked out in basically a single day.
Here are a couple shots of the nearly finished product, though it's tough to get glamour shots in my seriously unglamourous basement at midnight.

NhmbwRr.jpg


JTOXMSO.jpg
 
After a final push, the brewery is done and first batch brewed this weekend!
Mash
sEDW4ya.jpg

LEtGI6u.jpg

Drain
kIMphyy.jpg

Boil
HP6uCzn.jpg

mDdl9Zg.jpg


Overall, everything went smoothly. I do have a couple of items I wanted to get some feedback on.
First, a bit into the boil, I started to get a pretty decent drip going out of the bottom of my inline fan. It's not on a long run, and it seems to be exhausting great, so I'm not sure what the problem is. Here is the fan model. Do I A) RDWHAHB and put a bucket under it? B) caulk the bottom seam and hope it blows out (may cause moisture/mold buildup)? C) Change my vent setup?
Only other area of concern was with my heat sinks. I am used to running 120V, where the heat sink barely got warm. The temp when I was at full power approaching boil was 150+, very hot to the touch. Am I concerned, or is this normal?
 
Back
Top