E-HERMS Build 4500W Elements with Pics

Homebrew Talk - Beer, Wine, Mead, & Cider Brewing Discussion Forum

Help Support Homebrew Talk - Beer, Wine, Mead, & Cider Brewing Discussion Forum:

This site may earn a commission from merchant affiliate links, including eBay, Amazon, and others.
Joined
Mar 24, 2011
Messages
227
Reaction score
267
Location
Norton
I have been toying around the idea to switch to electric brewing for a couple months after reading all of the people building their systems. It came to a reality when I pinched a nerve in my back lifting a pot of wort. It was the justification I needed to get my swimbo's approval.
I need to thank a couple of people for inspiration on this endeavor. PJ for your generosity in providing the wiring schematics that so many have used, to Kal from The Electric Brewery for his detailed build along with the many HBT'ers that have built and are currently building their electric systems that shared their builds.
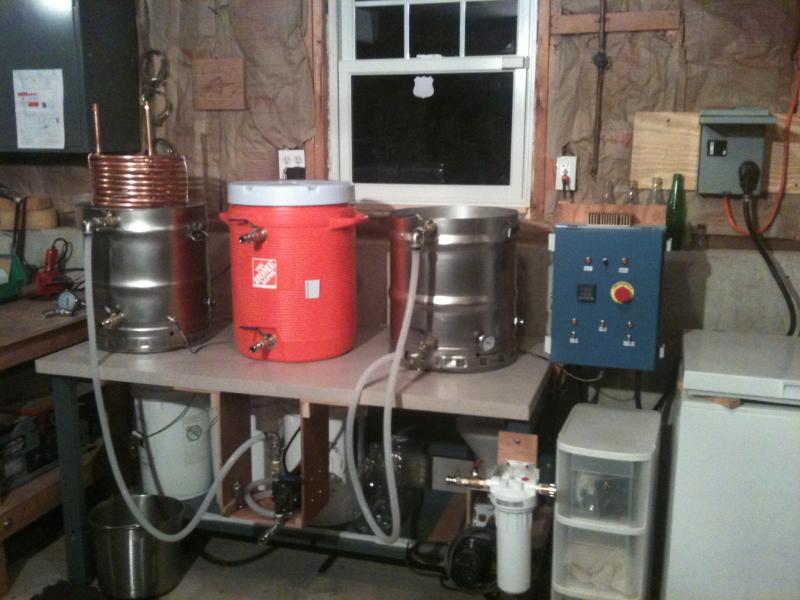
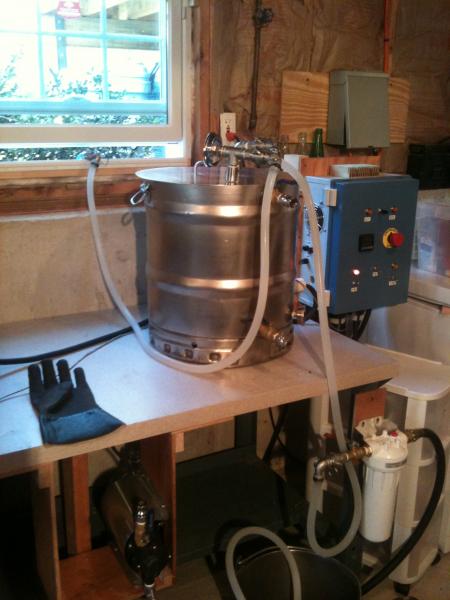
I decided on a 3 vessel single tier system that uses 2 4500W ULWD elements controlled by 1 PID and 1 pump. I don’t mind switching hoses for now to keep costs manageable.
I had my 50amp GFI spa panel installed by a licensed electrician to a 30 amp breaker in the main panel. In the spa panel is a 4 wire outlet.
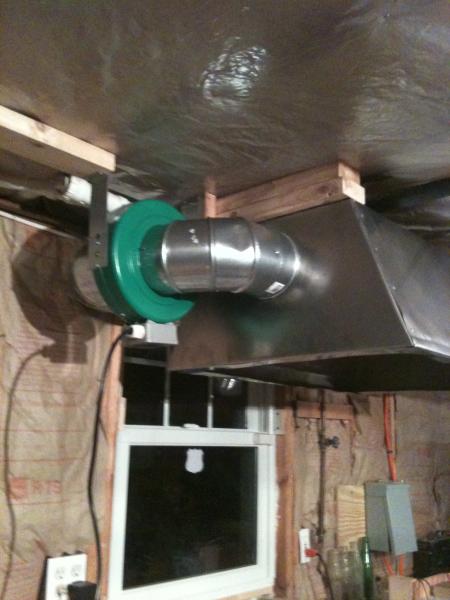
I do not have a garage so I have set up my system in my basement. I plan on making a simple exhaust hood powered by an 8” inline fan that will be made to fit in the basement window to handle the moisture issue.
The single tier system will be on a 30” x 60” table that was surplus at my work.
I started ordering material 3 weeks ago and I am almost complete. What’s left to do is mount the elements (waiting on SS nuts), wire the elements, complete the herms coil and then work on the ventilation.
Pictures to follow
 
Here where I am at as of this afternoon

IMG_1124.jpg
 
Are those sacrificial anodes on the back-right side of the kettles? If so, what kind did you install?
 
Gotcha, what brand element did you go with? I'm trying to find a 4500W that will fit comfortably in a 10G blichmann. Any issues with rust?
 
Malric,
I use a camco element and I plan on covering the element with some food grade silicone sealant as soon as I can source some.

Bagpiperjosh,
The enclosure is from Fibox model CAB, all plastic rough size is 12" x 16" x 7", found it a a local surplus store for $30. It was tucked away in a corner. The only one they had and did not know where they got it.
I have a detailed parts list on my home pc that I will post this evening.
 
Excellent job dude! If you're using a single PID I wonder, are you using thermowells and a single k-type probe or two fixed probes in the kettles on quick disconnects? Also, what kind of k-type probe are you using? Thanks!
 
Brewing Clamper,
I am using an Auberins RTD temp sensor on the HLT and a 2" diameter bimetal thermometer on the boil kettle.
I plan on using the PID in auto mode for the HLT then switch to manual mode for the boil. I will just adjust the on/off time percentage on the PID to maintain the boil as others are doing.
 
Nice looking build you got there. I am planning on pretty much the exact same setup (single tier one pump 4500 W elements in Sanke HERMS HLT and BK, 10 gal cooler MLT.
I have a few questions for you if you dont mind:

1. Do you have a wiring diagram for your control panel?

2. Where did you get your indicator lights and e-stop?

2. Looks like you used brass fittings for your connections, is that correct? What kind of QD's are you using?

3. Are your fittings all weldless? I would probably be leaning this way since I dont know any welders but it scares me trying to make all those fittings leakproof. I feel lucky that my eHLT and single valve fittings/sight glass/therm dont leak now.
 
Thanks.
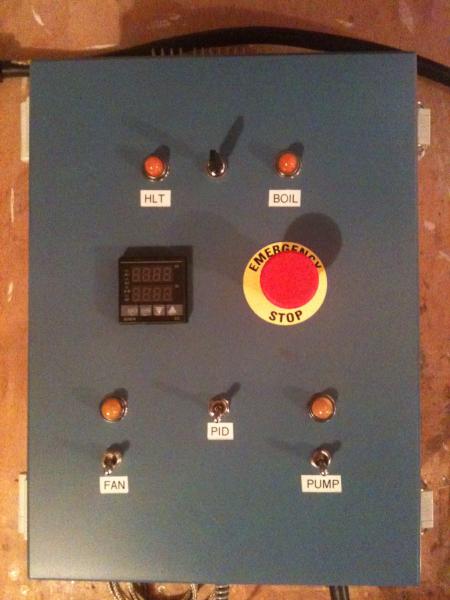
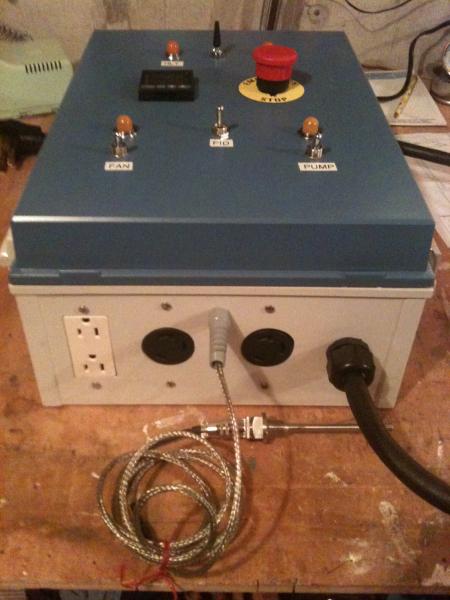
Here is the wiring diagram. I modified PJ's by adding lights for the pump and internal cooling fan and added the 6 volt DC power supply for the fan.
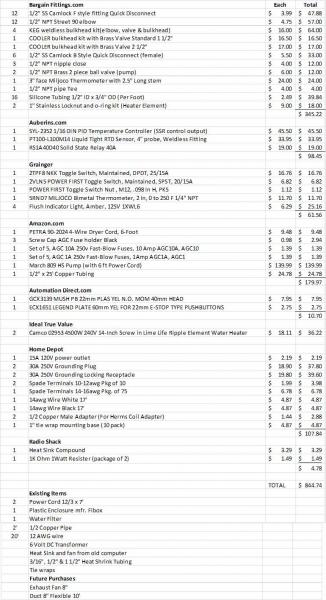
I also included my parts list that will answer your questions.
In regards to the brass ball valves, strictly cost and functionality. They will work fine as long as you pre-clean them. I use the John Palmer method of “2-to-1 volume ratio of white distilled vinegar to hydrogen peroxide”.
Yes the fittings are weldless. I may end up soldering the heater element nuts for mounting the elements.

Schematic.jpg


Material List.jpg
 
Wow this is awesome thank you so much Dan. I feel somewhat comfortable around electricity but 220 makes me a bit nervous and having basically all the details of the system I want to run makes it much more easy!

I have a few other questions but they are less about the electric and more about your brewing process, I will PM you (if you dont mind) to keep this thread on topic. If you think the questions are worthwhile to the thread let me know and I can post them here.
 
Kpr121,
Pm reply sent.
Just respect electricity, it can kill you. Follow PJ’s (the electric guru) schematics and you will have no issues. Double or triple check all circuits with a multimeter before powering up.
Good luck with your build. Post a thread when you are ready for all to see and comment.
Dan
 
Thanks for the info Dan. One more Q: Do you agitate the water in the HLT at all? It seems like that is a big disadvatage of only having one pump.
 
Right now I plan on just lifting the HERMS coil a few times during the mash. I will have to see how it all plays out and decide if another pump is necessary. Or add a small motor on the HERMS cover with a paddle to stir things around.
 
I thought I would give an update on my progress.
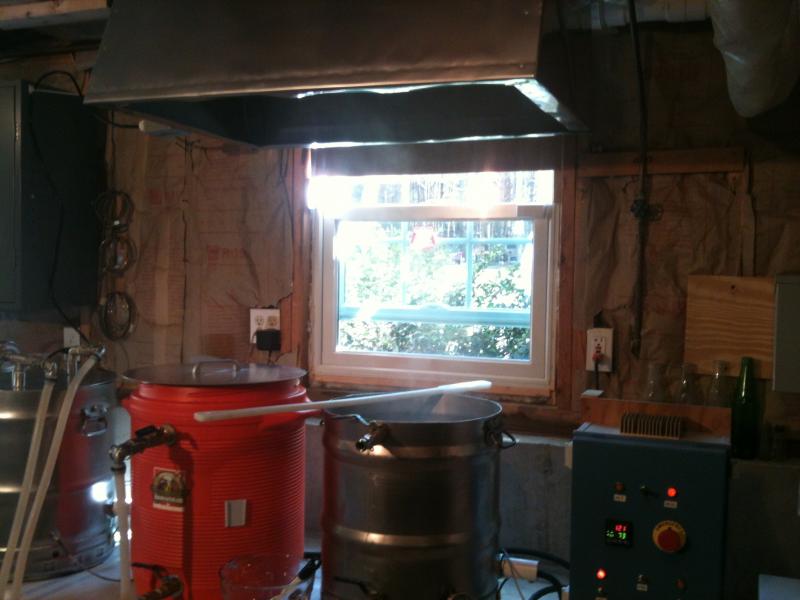
I installed a vortex fan and completed the duct work. I have the duct running behind my hood with an elbow at the top opening of the basement window. (wife doesn’t want a hole in the side of the house) I made a plywood panel that I slides in the window opening to seal most of the open space. I then add a 2’ section of duct on the elbow to bring the opening outside. I also built a dimmer switched outlet to control the fan speed.

I did a test run with water only and all went very well. The HLT element heated 8 gallons of 48 degree water to 150 in about 30 minutes and then after transferring to the BK another 12 minutes to a boil. The HERMS /Immersion chiller took around 20 minutes to get down to 80 degrees. This was vast improvement compared to brewing outside, especially when it was cold outside.

Last weekend was the inaugural brew. I brewed simple blonde ale. Everything mechanically and electrically went smooth. The area that needs refinement is in the process. During the mashing, I had the flow running thru the HERMS coil to fast and compacted the grain bed and caused the flow to go to a trickle. After I realized this, a stir to the mash to loosen the mash up and setting the flow lower things went well. The temperature in the mash tun held consistent throughout the 60 minute mash.

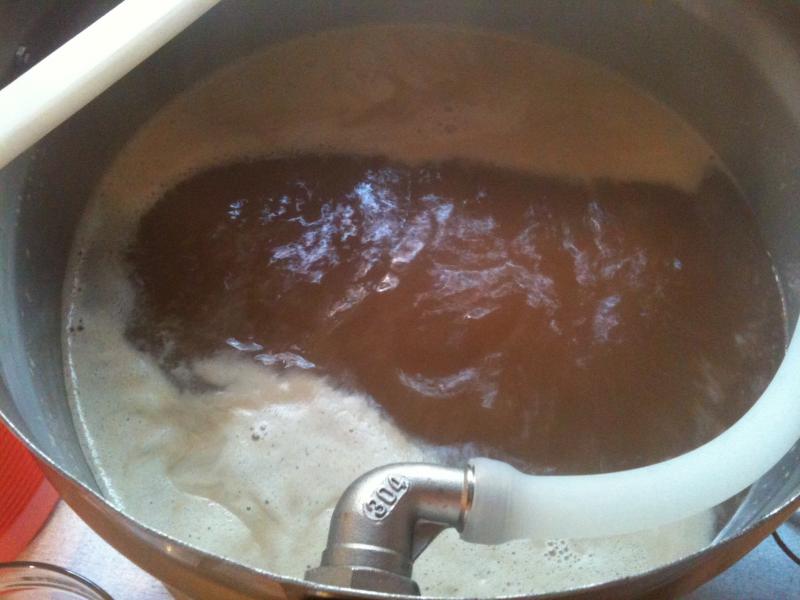
The other issue I ran into was my evaporation rate was less than anticipated. I planned on 10% and saw only 8%. After the wort came to a boil I set the PID at 75% but thought that was too strong of a boil so I turned it down to 70%.


I do recommend to anyone planning on using 1 pump is to have a small cup to catch the small amount of liquid that leaks out form the camlock fittings when you disconnect them to change the hose locations. Also wear some heat resistant gloves. The fittings do get HOT and in case of a spill (say, you disconnect a fitting and forget to turn the valve off) this almost happened.
My only regret on going electric is why I didn’t do this sooner.

Thanks again to all on HBT for sharing information on electric brewing.

All that is left to do is more brewing.:D

Pics are of the completed vent hood, boil at 70% and the ventilation doing it's job.

IMG_1135.jpg


IMG_1140.jpg


IMG_1141.jpg
 
dan6310,

Awesome. I just spotted your thread and read it for the first time just now.
I am very pleased that you could use my drawing to accomplish your brewery mission.
Thank you for your thread. It is really appreciated to see feedback on your success and any help that I might have provided.

P-J
 
I added pics of the herms /chiller coil. Pic of the mash-in process as well as the cooling process.
The only thing I may add in the future is a low rpm motor in the center of the cover with a paddle to elininate any hot /cold spots.

image1.jpg


image2.jpg


image3.jpg
 
Back
Top