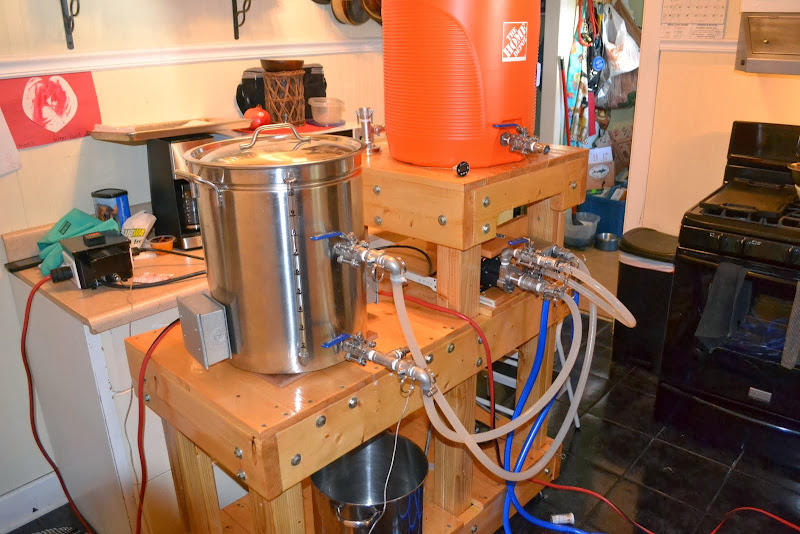
Countertop Brutus 20

Homebrew Talk - Beer, Wine, Mead, & Cider Brewing Discussion Forum

Help Support Homebrew Talk - Beer, Wine, Mead, & Cider Brewing Discussion Forum:

This site may earn a commission from merchant affiliate links, including eBay, Amazon, and others.
Good Morning All.

I have just about completed a build but there is something I'm not sure of/don't understand and that is what temperature to set.

For example if the set point in the boiler is 70F and the system is recirculated until it reaches a steady state the temperature at the M/T inlet would be less than 70F. The temperature difference would be due to heat loss as the water travels through the pump and the (not in use) chiller coil. This would be easy to measure by putting a probe onto the M/T inlet for this example let's call it 68F a loss of 2F.

If I want 70F in the M/T should I use a boiler set-point of 72F thus allowing for losses?

Many Thanks. aamcle
 
If you're doing a recirculating mash, keep in mind there will also be starch conversion happening in the boiler as well so if you set the boiler to 72F so the M/T is 70F, one could argue you're mashing at an average of 71F. So maybe set boiler to 71F?
 
For example if the set point in the boiler is 70F and the system is recirculated until it reaches a steady state the temperature at the M/T inlet would be less than 70F. The temperature difference would be due to heat loss as the water travels through the pump and the (not in use) chiller coil. This would be easy to measure by putting a probe onto the M/T inlet for this example let's call it 68F a loss of 2F.

If I want 70F in the M/T should I use a boiler set-point of 72F thus allowing for losses?

I don't mean to jump in, because I've not read the entire thread. Do you really mean 70F (farenheit)? Where I am, that is right around room temp. Do you, instead, mean 70*Centigrade/Celsius which comes out to 158*F? I've used a strike temp of 158*F in BIAB.

Respectfully,
Keith
 
Err yes I'm in the UK I should have typed C not F but they were only example values.

I ran a batch, the first in the B20, had major issues with my pid and grain syphoning back into my pump. I still got wort and it tasted good, it's all tucked up in a F/V now.

I've sorted out both the pid and the back flow into the pump so next batch should be much smoother :)


ATB. Aamcle
 
Just checking in...

Cool to see this thread is still kicking and people are building CB20s. I still brew on mine and love it. If anyone wants to see a full CB20 brewday (edited down to 20 min, thankfully), I posted a vid a while back. CB20 Brewday
 
Excellent. What new pot did you end up going with? I'm having a hard time finding good SS 28-32qt pots, seems like most are 36.
 
Excellent. What new pot did you end up going with? I'm having a hard time finding good SS 28-32qt pots, seems like most are 36.

32s are all over the place. Even Walmart sells 'em (Bayou Classic). Best deal out there IMO though is the new Tall Boy Kettles at Northern Brewer. Fantastic construction and they're nice and tall. 32 quart is only $90.
 
Excellent. What new pot did you end up going with? I'm having a hard time finding good SS 28-32qt pots, seems like most are 36.

I've been using my CB-20 for a couple of years now and recently upgraded my brew pot and fittings to stainless. Previously, I was using the same aluminum turkey fryer as jkarp, which works fine, but I just wanted to upgrade. If anyone is interested in my old pot, just PM me. . . I'll make you a deal :) It's predrilled for the water heater element, sight glass, and bulkhead valve. The lid is drilled for the inlet bulkhead.
 
Lately, I've been running into a problem with the switch on my PID controller box, specifically, the one controlling the heater. I'm using the same combination switch/plug as Jeff, and it has worked fine for a couple of years. Awhile back, it quit, and I noticed that the switch didn't click like normal, it was kind of floppy. I replaced it with the same switch, which lasted exactly one brew day. This time the switch seemed okay mechanically, but no contact. I replaced it a third time, but again, it lasted a brew day.

Now I know I'm drawing 20 amps through a switch rated for 15, but I don't understand why the first one lasted so long, and the replacements don't (it is the same switch). Is there anything in my wiring that might be causing a high resistance through the switch? Does anyone know of a similar type combination switch/plug that's rated for 20+ amps that doesn't cost an arm and a leg? The Leviton models I see online are over $26.
 
Bonwit said:
Now I know I'm drawing 20 amps through a switch rated for 15,
There is your problem right there. You can pay the $26 and not fry your stuff, or keep replacing $9 switches and take the chance on cooking your rig.

Spend the cash and do it right.
 
Yeah, I saw that one coming lol. I'm just curious why the 1st switch lasted so long. Guess I'll have to spring for the 20 amp.
 
I recently did my first brew on my new system, a sort of CB20 variant - https://www.homebrewtalk.com/f51/dual-element-5-gallon-batch-120v-build-419598/

DSC_0609.JPG
 
I know that this thread is a little old but I wonder if any of you who have this system can help me. I recently converted my traditional three vessel herm system into a system like the one on the original post in order to save space and perhaps some time. I made my Belgian Tripel on this system for the first time on Saturday and ran into some problems.
1. When I transferred my strike water from the kettle to the MT I underestimated the temperature drop from the kettle through the chiller and into the MT. I had to add almost a gallon of boiling water to the MT before I added the grain so my water to grist was a lot higher than my usual 1.3qts.pound
2. I crush pretty fine, so I had to vorlouf a lot to get the wort clear before I recirculated the sparge water from the kettle through the MT. Even so I noticed a lot of grain chunks floating around in the kettle
Paranoid of these issues I took a gravity sample of the wort yesterday (3 days into fermentation) and took a taste. The wort taste really grainy and terrible. I never remember it tasting this before. Is this batch ruined from the grain matter that ended up in the kettle? How do you keep the grains out of the kettle with this system
 
It's more a problem with your mash tun than the build, friend. Your false bottom or whatever is letting grain through. If you think it's from your crush then don't do it so fine.
 
Makes sense. I guess when I had my herms and would recirculate the entire hour all of those bits settled on top.

Wonder I i would recirculate for about 10 minutes after the hour mash directly from the mt into the pump through the chiller and back into the MT. I bet the temp would drop some, would it hurt my mash


Sent from my iPhone using Home Brew
 
... 1. When I transferred my strike water from the kettle to the MT I underestimated the temperature drop from the kettle through the chiller and into the MT. I had to add almost a gallon of boiling water to the MT before I added the grain ...

You'll see from post #14 (wow, more than 600 ago!) that Jeff recirculates the strike water as it approaches the strike temp (to warm up the MLT) before dough in (and then wait for it to ramp up again, of course) - you could do that as well. Handy tip: keep some chilled water in case you need to cool the mash a little if it gets too hot.
 
Makes sense. I guess when I had my herms and would recirculate the entire hour all of those bits settled on top.

A bit of extra messing around but what about putting a sieve under the kettle/hlt return hose to catch the bits of grain?

Wonder I i would recirculate for about 10 minutes after the hour mash directly from the mt into the pump through the chiller and back into the MT. I bet the temp would drop some, would it hurt my mash

Provided it's not a plate chiller. If your setup can easily reconfigure the hoses, just connect the MLT, K/HLT & PUMP in a closed loop.
 
i'm sure this is a dumb question, but i just got a free stc 1000 controller from a friend who has to give up brewing.
can this be used to control the heating element? i ask because i see everyone is pretty much using a PID controller in their builds
 
1650 watts will not boil 5 gallons of wort in a timely manner. I am using a 3000 watt 120v element and can boil 6.5 gallons. My ramp speed is a fraction less than 3 degrees/min.

Nealm


Sent from my iPad using Home Brew
 
The 7.5 boil coil is only 2000 watts, it will be tough to boil a 5 gallon batch.

Nealm


Sent from my iPad using Home Brew
 
I want to make sure this system is portable for me. Because I can't always ensure a GFCI outlet where I'm brewing, I want to build it into my controller.

Do you think it is better to install GFCI outlets like this one http://www.leviton.com/OA_HTML/ProductDetail.jsp?partnumber=X7299-W&section=65908&minisite=10251 into the box.

Or use an extension cord with GFCI on it like this, http://t.homedepot.com/p/Tasco-3-ft...gclid=CI72i9e38cECFePyMgodb10AAQ&gclsrc=aw.ds

J


Sent from my iPad using Home Brew
My understanding is that it is better to use the inline GFCI rather than the receptacle. With GFCI in the power cord the entire controller is protected by GFCI rather than just the outlets.
 
1650 watts will not boil 5 gallons of wort in a timely manner. I am using a 3000 watt 120v element and can boil 6.5 gallons. My ramp speed is a fraction less than 3 degrees/min.

Nealm


Sent from my iPad using Home Brew

Is that on a 20A circuit?
 
I'm wading into a build and wondering if I should stick with the 3/8"OD sizing after the pump (JKarp's orginal build). My current pump and CFC setup is plumbed with 5/8" OD stuff and my plan is to build it so it could be used with either my CB20 or my larger rig (Keggle/ghetto cooler style setup). Keeping it 5/8" would be easier/cheaper, but I'm willing to make the switch to 3/8" if there is an advantage. My CFC coil is 3/8" FYI.

thoughts?

Also, anybody have the source of the black rubber insulation in some of the builds...I like the look of that more than reflectix.

Thanks!
 
Thanks for the replies!

Another question on something I'm mulling over. I mentioned building the system so parts could be used between my future CB20 and my full size setup. Should I consider a 10 gallon cooler MT for the CB20 that can also be used in the 10 gallon setup?

A 10 gallon MT for the CB20 might not be worth the hassle as there are batch size and gravity limits with the system.
 
Wow.

So many awesome CB20 builds, so many clever innovations! You guys are awesome.

I still brew fairly regularly on mine, but life is taking me in a new direction as I work towards opening a craft distillery this year.

Keep on brewing!
 
Back
Top