Beginning my EBIAB Brewery Build..

Homebrew Talk - Beer, Wine, Mead, & Cider Brewing Discussion Forum

Help Support Homebrew Talk - Beer, Wine, Mead, & Cider Brewing Discussion Forum:

This site may earn a commission from merchant affiliate links, including eBay, Amazon, and others.
Just picked up the finish screws for the panel face, and as soon as I install those, I can call this part of the build "DONE!"

Then I'll post this in the thread where everyone shows off their controllers.. ;)

I have another project I have to get to before I start on the crane, but I'm itching to get the crane done because as soon as it is, I'm like 'right there' on finishing the brew side of this system upgrade, and then I can brew a couple batches before I move onto upgrading the fermentation/kegging side of things...

:ban:
 
What are thinking for your basket? Are just going to recirculate into the top or where you doing to build/buy a brew boss cofi filter?
 
I have Bayou Classic boil/fry basket, and I plan to build a COFI tube..

As I've been reading in threads here and there, I can plan on a larger crush than I used before, and also will probably have to punch out some of the holes to increase open area, all to avoid stuck sparge/overflow in the basket.... :eek:
 
I am curious what you end up making. I am moving to BIAB myself but am likely going with a close sided basket similar to Colorado brew systems'.
 
Awesome!

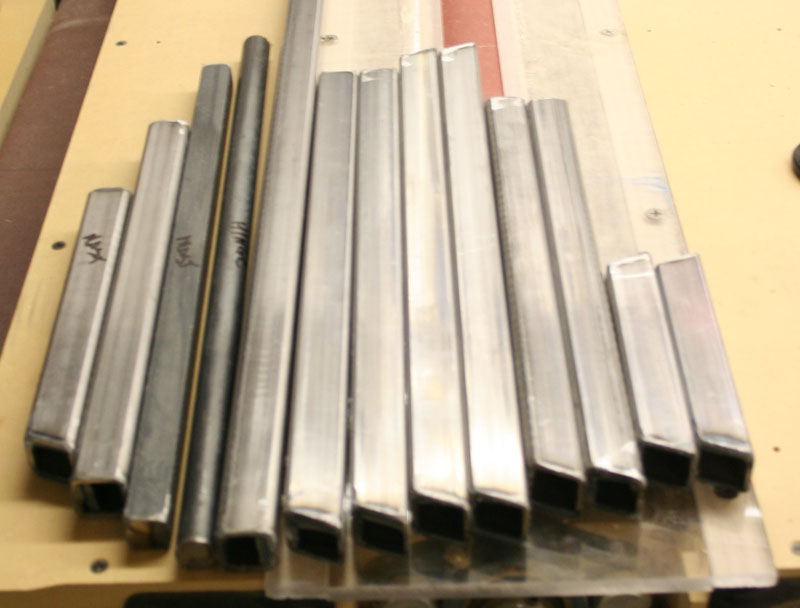
Cut all the pieces, angle cuts, round bar, square bar, square tube, everything to complete the crane for my Brewery!

All I gotta do is pick up some MDF to make a welding jig from and then once I cut that out, I can weld it all up...

Then I'll be 'real' close!
:tank:

Brewery---crane-pieces.jpg
 
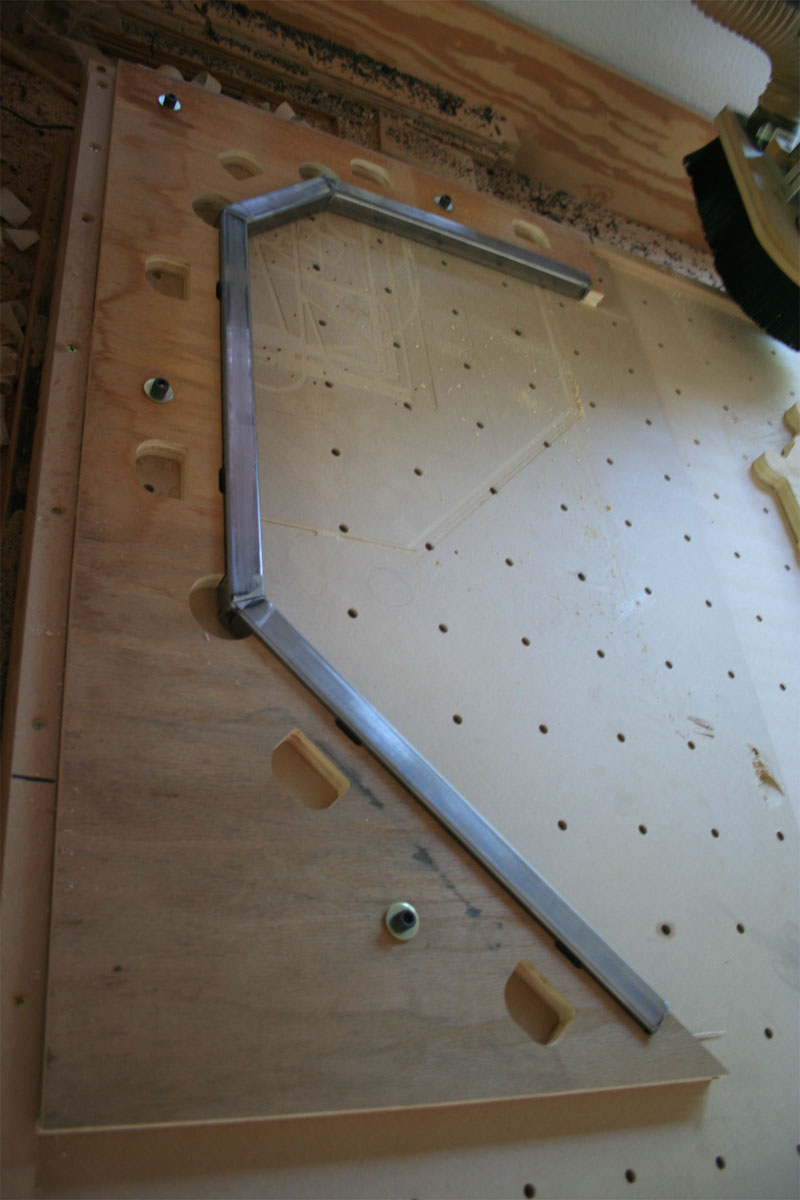
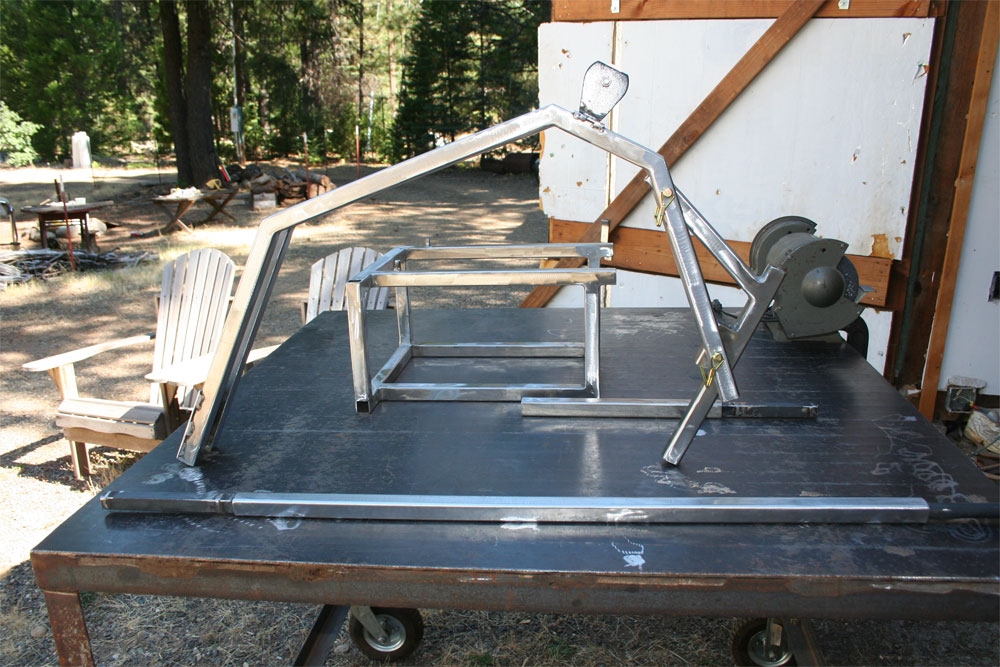
Just finished the welding jig for the crane boom, and test fit the pieces I cut last weekend..

I think it's gonna work awesome..

So because of the heat, I'm home for the rest of the week, and will have the early morning hours to start welding it up...

I have to make two of these assemblies, both must match identical.. So the jig was a necessity, at least with my limited welding skills...

So all I gotta do is take the jig out to the shop and start welding, grinding, sanding, drilling, etc..

Brewery-Crane-Welding-Jig.jpg
 
Welded up the two boom arms and the mast structure this morning...

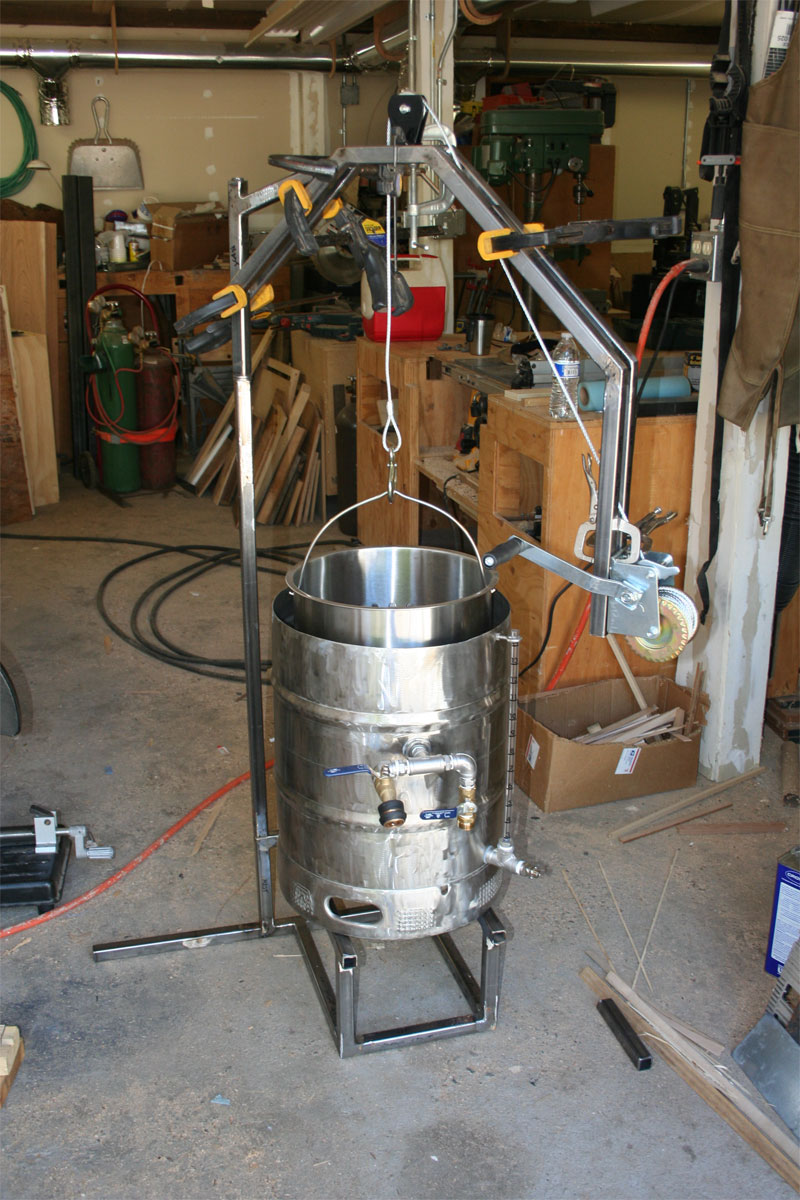
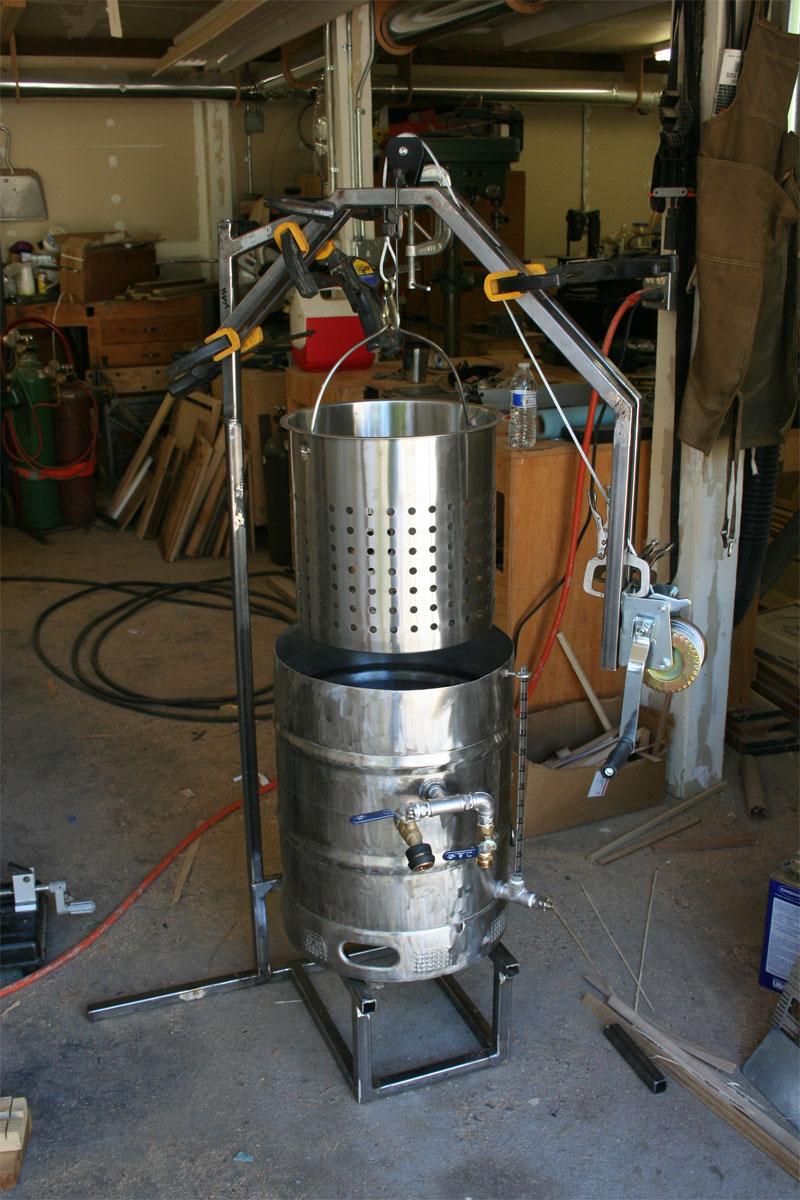
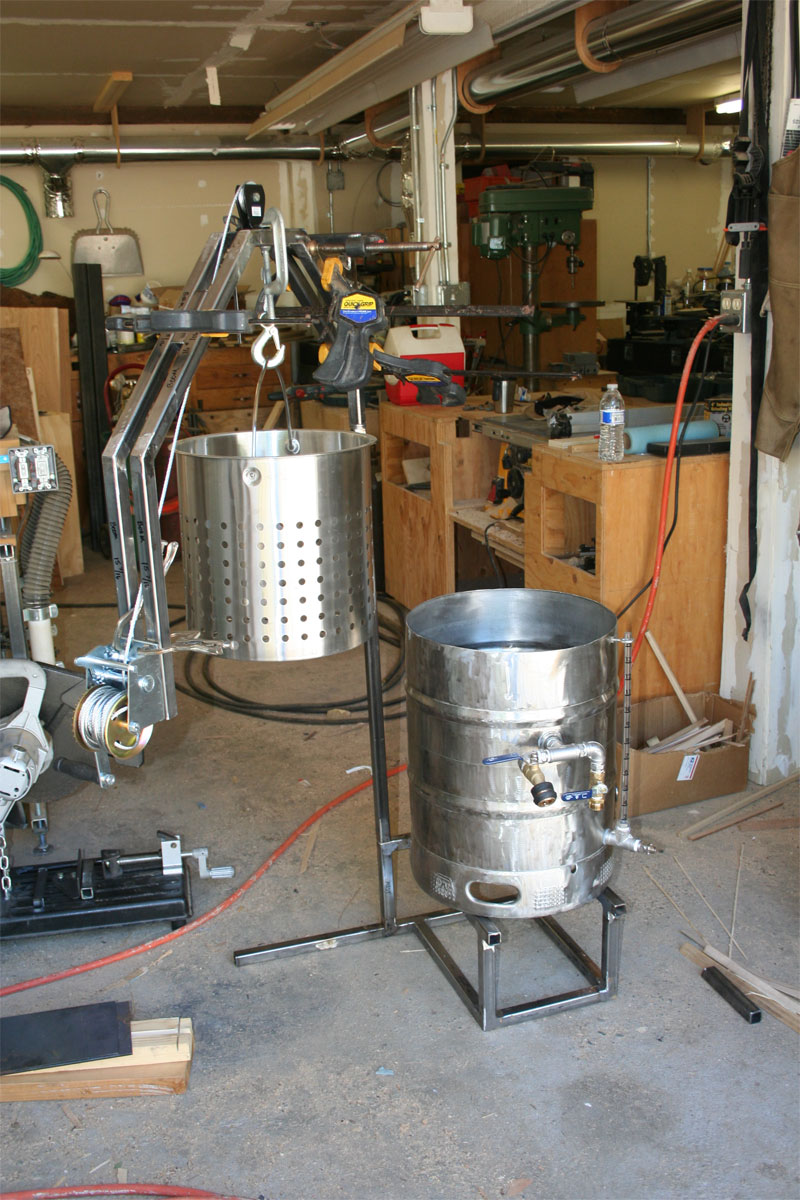
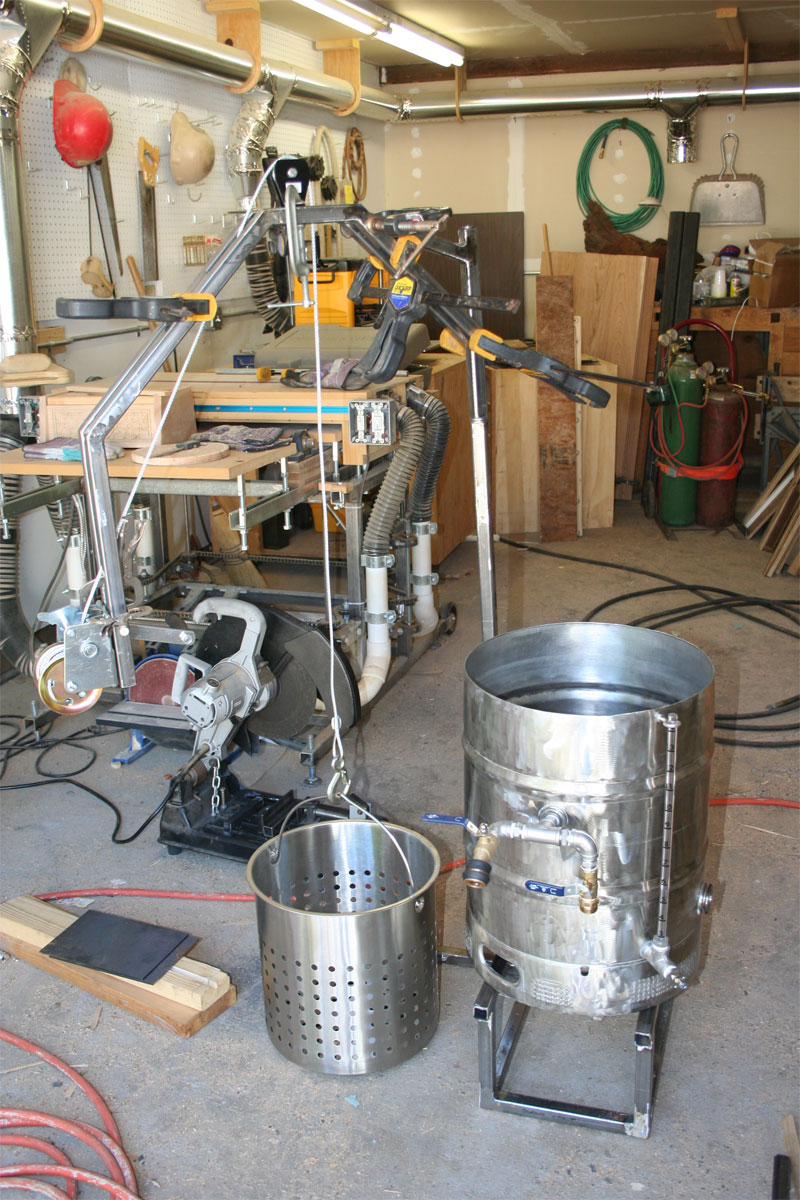
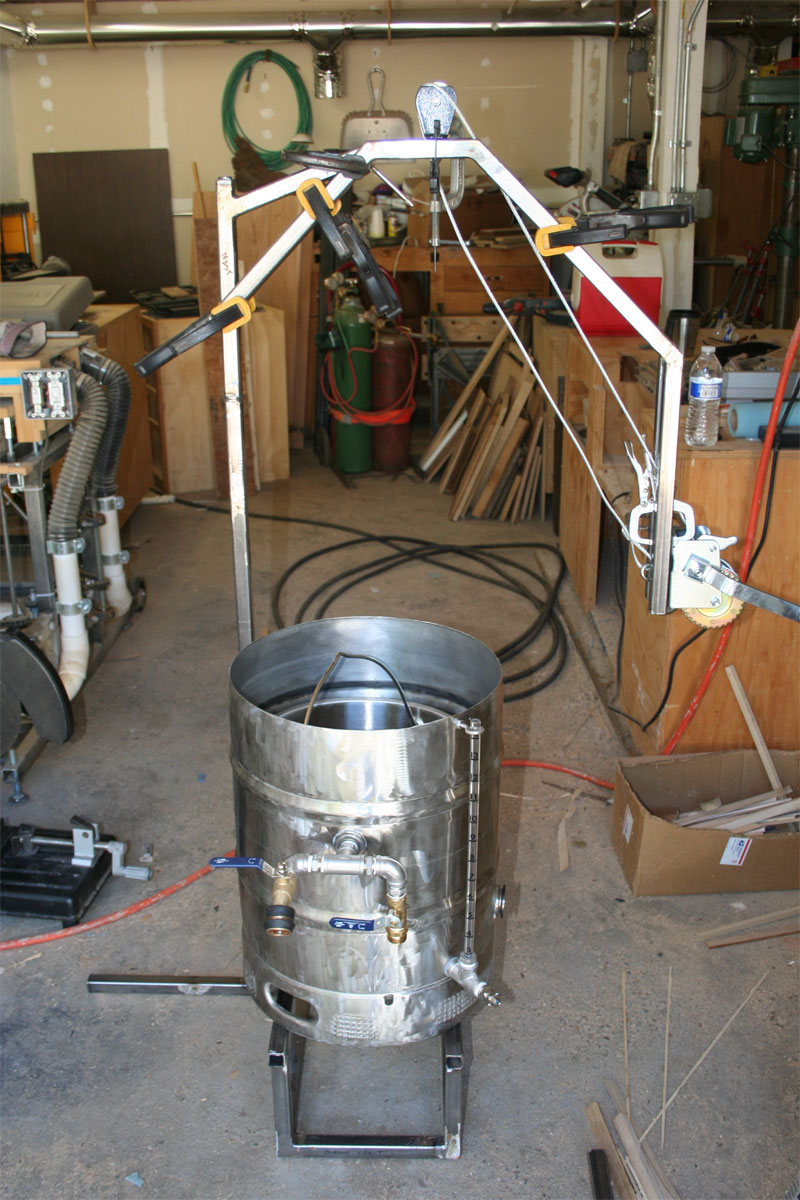
Put it all together using clamps, and put the kettle on it and tried it out.. Gonna work awesome!

Brewery---Crane-2.jpg
 
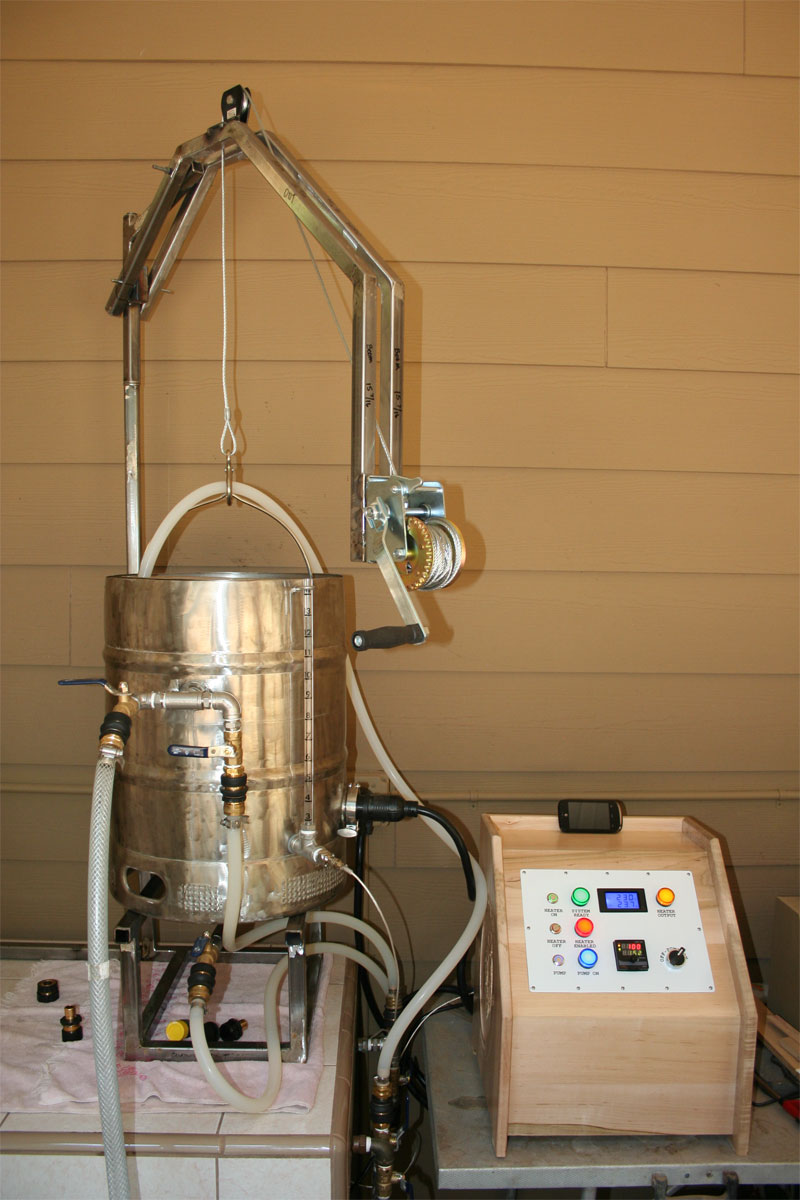
Basket lowered to ground (or table top).. Also, how it will all swing out of the way and back against the wall when not in use...

The mast leans a little one direction or the other due to slop in the slip joint I installed to allow disassembly.. It's not any issue structurally, but it bugs me.. So I will probably drop a few welds on the piece inside, and then grind them down to take up the slop but still allow insertion and removal without hassle...

So I need to make mounting plates for the winch and sheave, and then weld them to the two boom arms.. I need to drill a couple holes for pins to attach the boom to the mast, I need to drill and tap the 3/4" bar at the very top of the mast so I can install a keeper screw and washer... I need to resolve the slop issue, then just go through the hole thing and inspect the welds, making any repairs if needed, take a flap disc to the whole thing to clean it up, coat it with something.. Thinking I might use spray on truck liner or even that spray on rubber stuff.. then install some rubber feet, and some plastic skid plates on the two rails where the keggle will sit..

Then I can call the crane 'done' and I'll be like right there... Only need to mod the basket and make a COFI tube...

It's getting really really close now... I'll be brewing in no time!

Brewery---Crane-5.jpg


Brewery---Crane-6.jpg
 
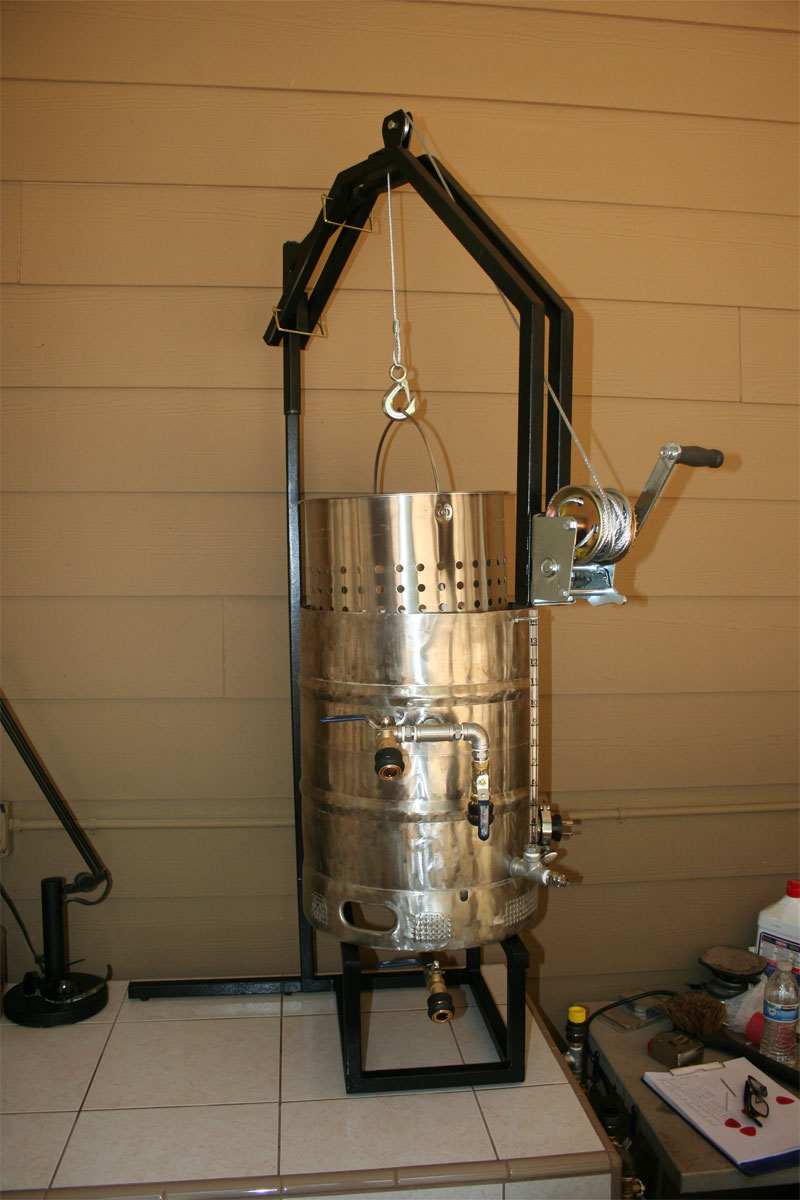
The crane is essentially done.. All welded up, sanded and ready to paint...

I am planning on drilling and tapping for the rubber feet tomorrow morning, cleaning the whole thing off with acetone, and than spraying with truck bed liner..

Since it is an acetone based product, after I let the first coat dry thoroughly, I can cut some runners for the keggle to sit on from textured 1/8" ABS, and then spray a second coat of truck bed liner on the keggle support and then stick the ABS on the rails while the spray liner is still wet, and that should create a permanent bond, as the acetone in the truck bed liner will melt the ABS, and then the ABS should bond to the truck bed liner as if they are one....

That's the plan anyways.. If for some reason that doesn't work, I guess I'll use some RTV to attach the ABS....

Other than that, I need to drill and tap a bolt hole on the end of the hinge shaft so a keeper washer and screw will make the mast and boom hinge stay together as one piece...

I've got a couple of keeper pins coming (should be here today), that will allow the whole stand and crane to break down into four pieces for storage when the pins are removed....

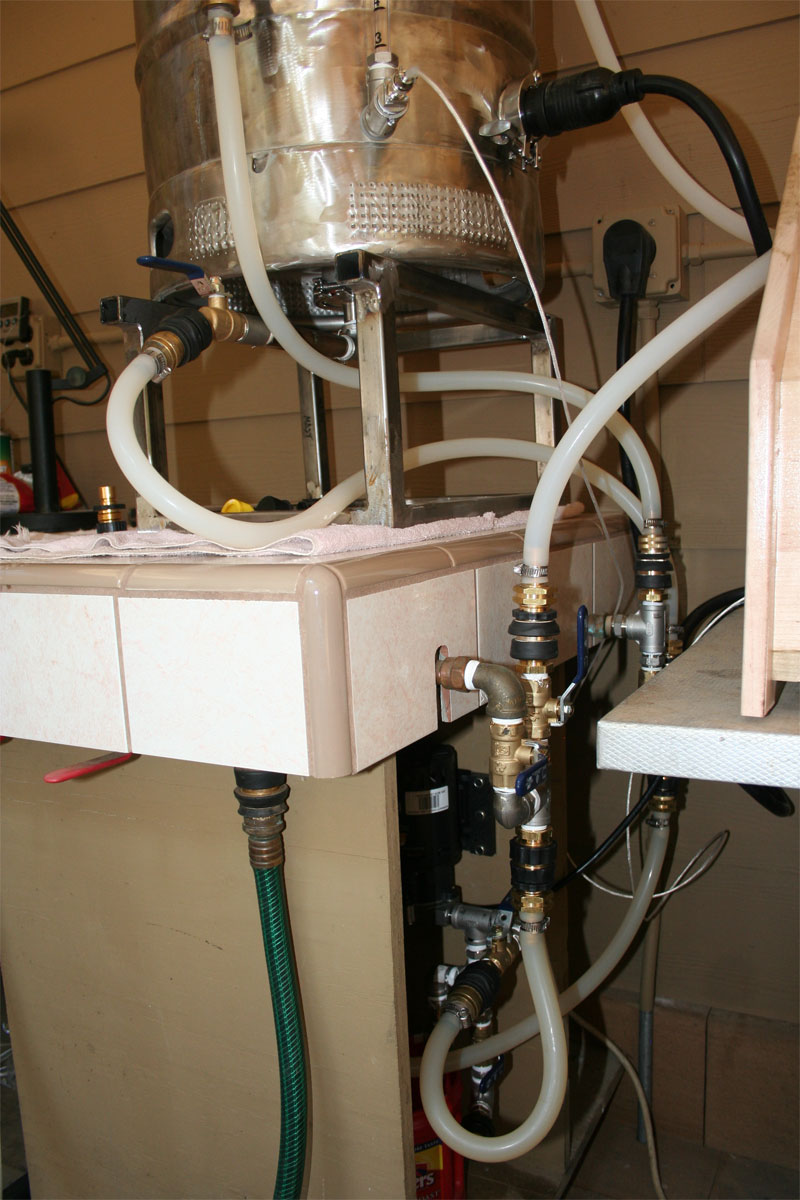
I'm also going to pick up some cam lock fittings this week, as I want something more robust and safe than the Garden Hose Quick Disconnects I am currently using.. Plus the lower profile of the cam locks will allow me to build the second tile topped cart, and have them slide together when not in use, to hide all the plumbing and give me plenty of space to store the entire brewery and related equipment underneath when not in use... Turning my brew stands into a tiled 8' long counter for general use on the porch when not brewing...

So now, onto deciding what I want to do about the grain basket and COFI tube and all that..

Other than that, I gotta clean out the fermentation chamber, and move it to the patio (I decided that it would be better there, and I'll deal with heating it during fermentation this winter when I get there, as the current 60w light bulb I am using now probably ain't gonna cut it when the temps drop into the teens)..

Ordering some 1/2" ID braided clear vinyl/PVC hose this week end for transferring from brewery to fermenter....

Then I'm ready to try it all out... Unless I decide to go ahead and order the plastic conical and do that first, which is a definite possibility... ;)
 
After being coated with truck bed paint...

I had thought I would be ready to go on to the basket and maybe try the system out at this point on a brew, but there are two things left to do on it, and one of them has shown itself to be something that can not wait..

The first thing is to make and attach the ABS rail protectors (to serve as a anti-scratch surface between the rails and the keggle bottom), which can wait..

But the second is the keeper nut on top of the mast section... As it turns out, the bearing set up I incorporated for the mast head swivel, works 'too' good, and gravity will not allow me to just move the crane boom to where I want and forget about it.. Nothing is 'that' plumb, and even if it were, it would change depending on the amount of grain used..

So I have to drill and tap the large 3/4" hinge pin sticking out the top of the mast, and install a couple washers (one a 3/4" washer around the hinge pin and the other a 5/16 or 1/4" fender washer, depending on which I decide to use that the bolt will feed through) with a teflon washer in between them.. By tightening or loosening the bolt on top, I will be able to adjust the drag on the crane boom mount/swivel...

But other than those two things, the crane is pretty much done....

brewery-crane-1.jpg


brewery-crane-2.jpg
 
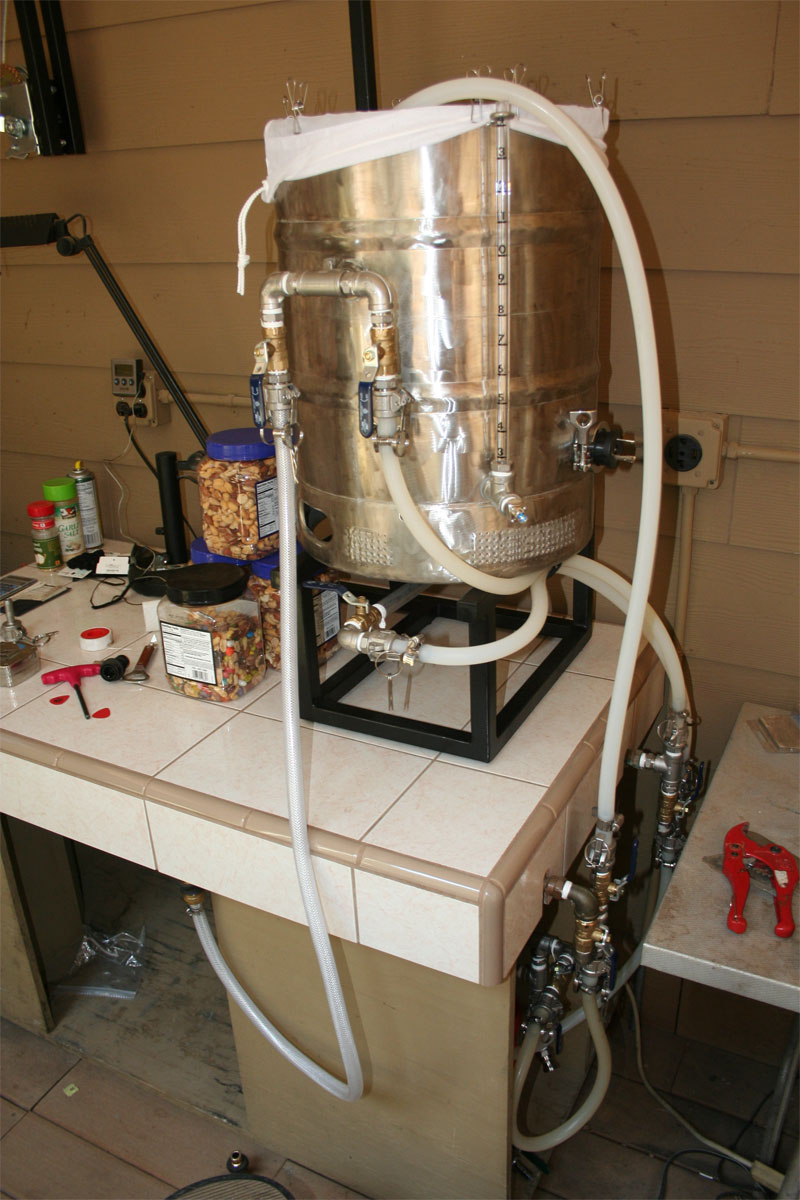
Here's a couple of shots showing the general plumbing.. I'm planning on changing out the QT fittings with cam lock style fittings, probably before I brew my first batch.. I have had two of the ten leak a little if the hose has any side to side pressure at all...

So, after discussing the mash basket strategy in a new thread in the BIAB forum, I think I'm going to wait on the COFI tube and sparge system, and just clip the hose to the side of the basket so that it creates a little bit of a whirlpool as it goes in, for the first batch.. and then modify it afterwards...

Thinking about going ahead and punching out the basket to increase flow before I bother with the first batch.... we'll see...

brewery-crane-9.jpg


brewery-crane-10.jpg
 
Ordered a book on water for brewing yesterday along with all the 1/2" line I need to transfer wort to fermenter... Also ordered a loc line setup for the mash...

Picked up enough cam lock fittings today to replace everything with those, I also got the tap and drill and hardware to create the adjustable tensioner doo hickey on top of the crane swivel.. Bought a 60L Speidel fermenter and a couple SS accessories for it... Also had a 1/2" bung welded into the bottom of the bowl on the bottom I cut off of my keggle, which once I make a little stand for it, will be 'perfect' to set the grain basket on, and squeeze out whatever wort I can from it.. Should just run out the bottom of the new dish dealie through a hose into a collection container as I squeeze...

Almost there!

Also asked and found out that they carry all the chemicals/minerals I might need for water treatment at the local HBS....

Within a week or two, I might actually be ready to think about brewing a batch of beer! I sure hope so, because the money thing is starting to get out of hand.... ;)
 
Cool.. Drilled and tapped the end of the 3/4" steel bar on the crane mast, and installed the tensioner.. It's gonna work, but I will have to use a little loc tite on the bolt to keep it from loosening with use...

My attempt to punch out the holes on my bayou classic basket was a huge fail.. Apparently my punches are too dull from punching heavier stuff to slice through such thin metal cleanly...

So, I'm giving up on the basket for now, and gonna have a custom bag made for my keggle ($39 including shipping from brewinabag.com), that will still allow me to clear it with the crane... Hoping that works and I don't need to have a custom mesh basket made.. Those are way expensive and I don't want to spend the money...
Still need to install all the cam lock fittings (to replace the Garden Hose type quick disconnects)...

I need to cart the fermentation chamber outside and blow it out and spray the shelves with some rust converter and then paint them....

Gonna order a false bottom from brewhardware for use with the custom bag ($30)..

Need to hit the old keg bottom with a flap disc to clean it up and build a little wooden stand for it.. That will be my wort collection plate to set the bag of wet grains on after pulling it from the keggle and pressing the grains...

Received the 1/2" line for transfer from brewery to fermenter, and waiting for the loc line stuff to arrive...

I think that's all that's left before I can try brewing a batch...

Mostly all small and easy stuff now.. All the big projects are done...

Getting close!
:ban:
 
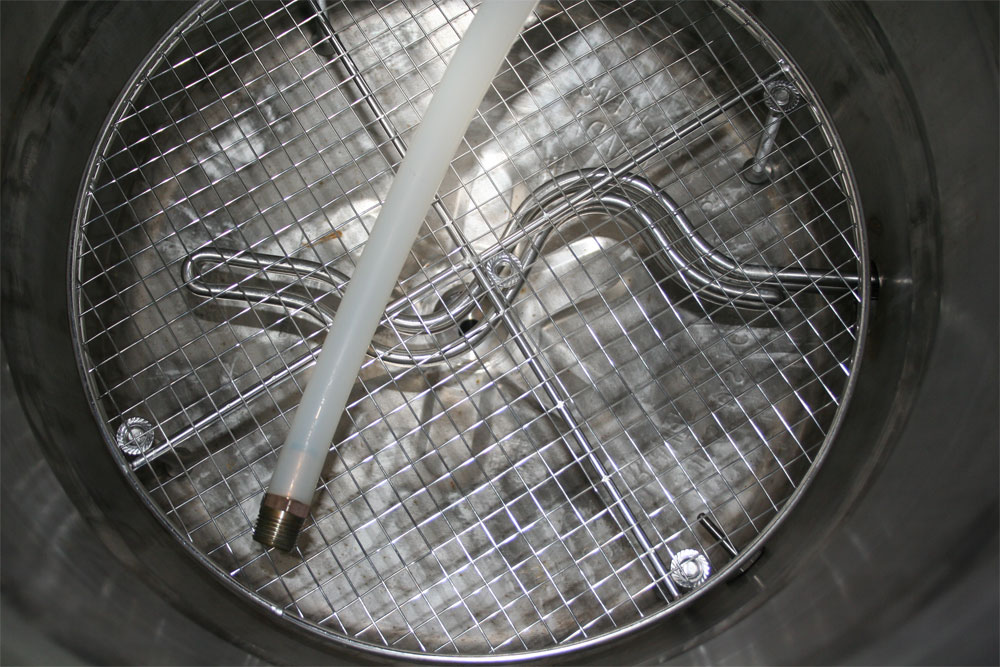
Okay, so I received and installed my new false bottom from @Bobby_M....

There is only about 1/2" clearance between the top of the grid (where the bag full of grains will sit) and the top of the heater element..

This seems close to me... Should I get longer screws and raise it up another 1/2" ?

Or even more than that?

brewry-build-1.jpg
 
So, today/this weekend, I'm going to work on a stand for the 'drain basin' I made from the old keggle bottom...

After that, the brewery itself is pretty much done (already changed out all the fittings), and I can turn my attention to the transfer tube and fermentation chamber...

Almost there!
:rockin:

brewery-1.jpg


brewery-2.jpg
 
Okay, been almost a month since I updated... Been making some minor changes, finishing things up, and am pretty much 'there'....

First step was to take my fermentation freezer all apart, wire brush all the rust on the cooling coils/shelves, wash it out, treat the rust, and then coat all the metal to protect it from further rust....

Then I cleared out, and scrubbed the deck on the half the porch where the fermenter will sit...

I wired up that exterior wall of the screened porch with five more receptacles, two of which are facing outwards so that I don't have to run extension cords all the way around from the front of the house any more... Then I brought the fermentation chamber in, plugged it in and made sure it all still worked okay...

Next I built a little box for the new speidel 60L fermenter to sit on, so that there is plenty of room to gravity feed it's contents into the kegs, post ferment...

There is a compartment in the box so that I can store the long 1/2" tube that feeds the fermenter from the brewery, and also the silicone tubing that will be used for either draining the wort squeezed from the spent grains post mash, or for draining the fermenter into the kegs..

fermenter-01.jpg


fermenter-02.jpg


fermenter-03.jpg
 
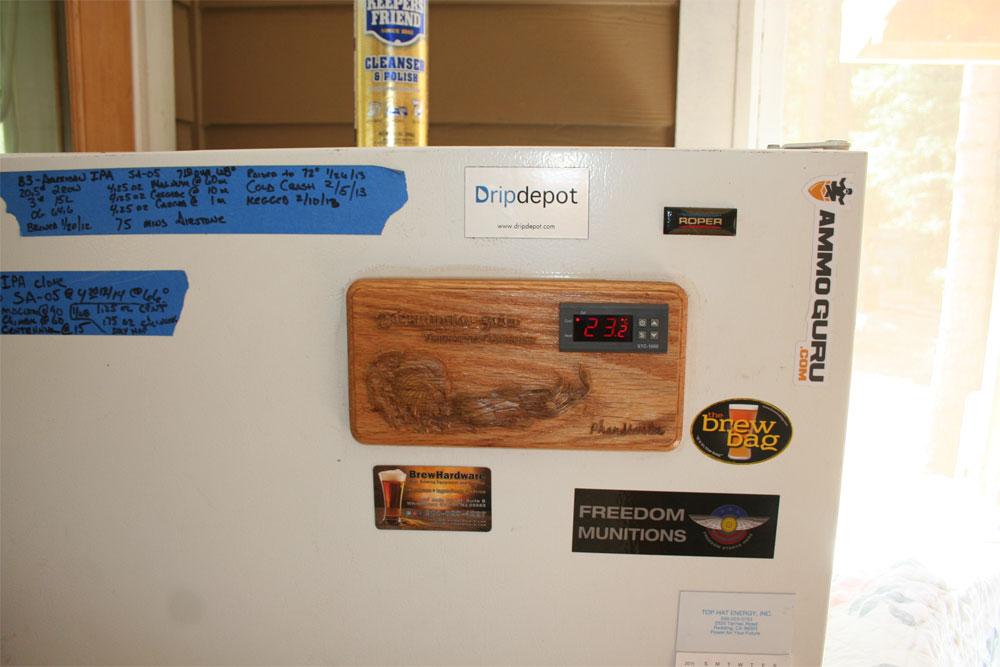
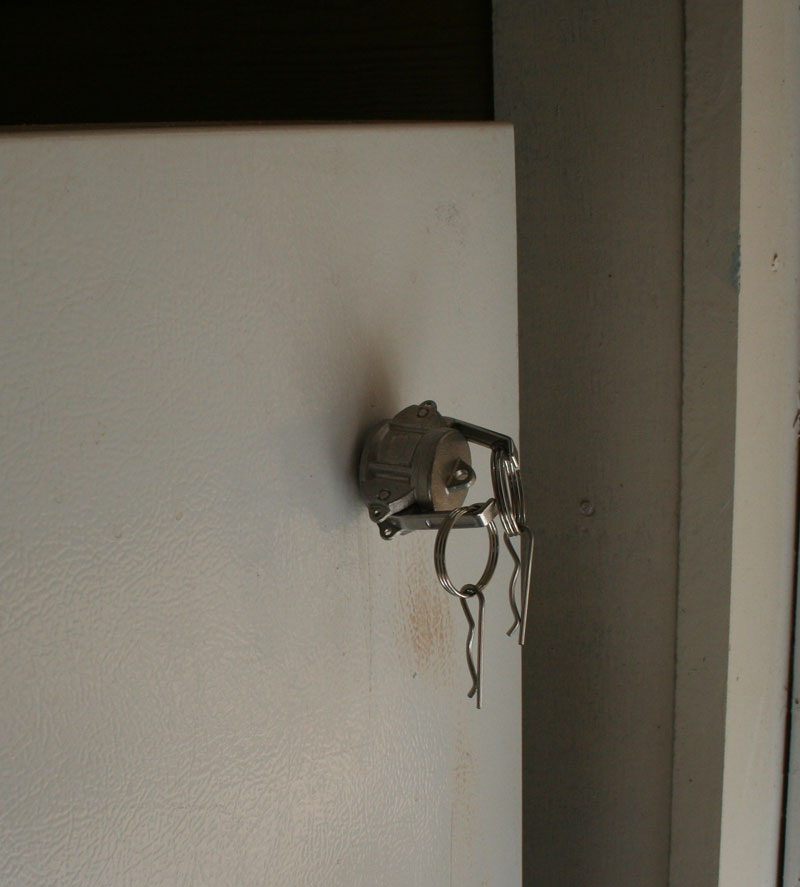
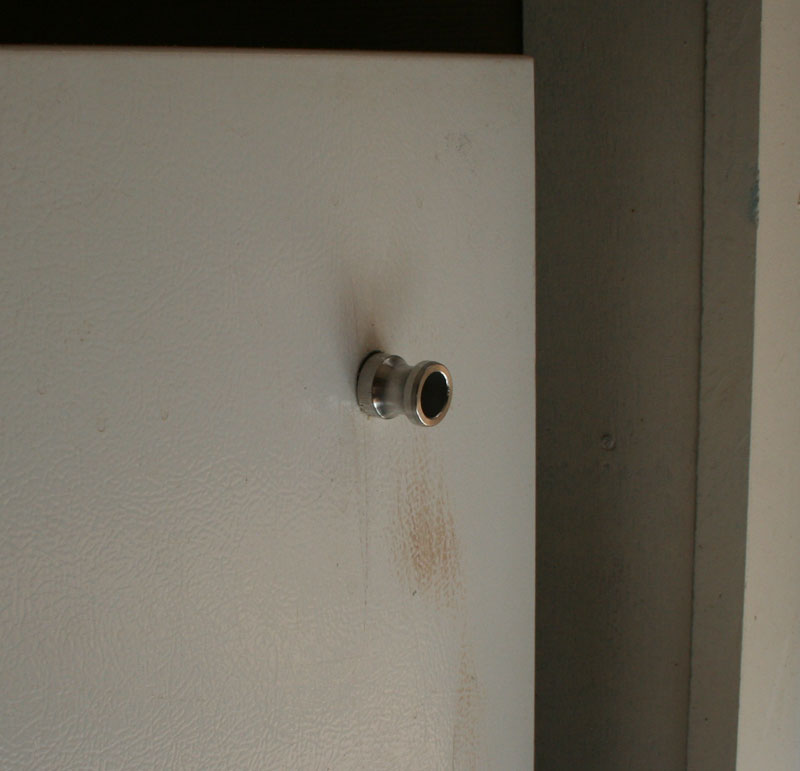
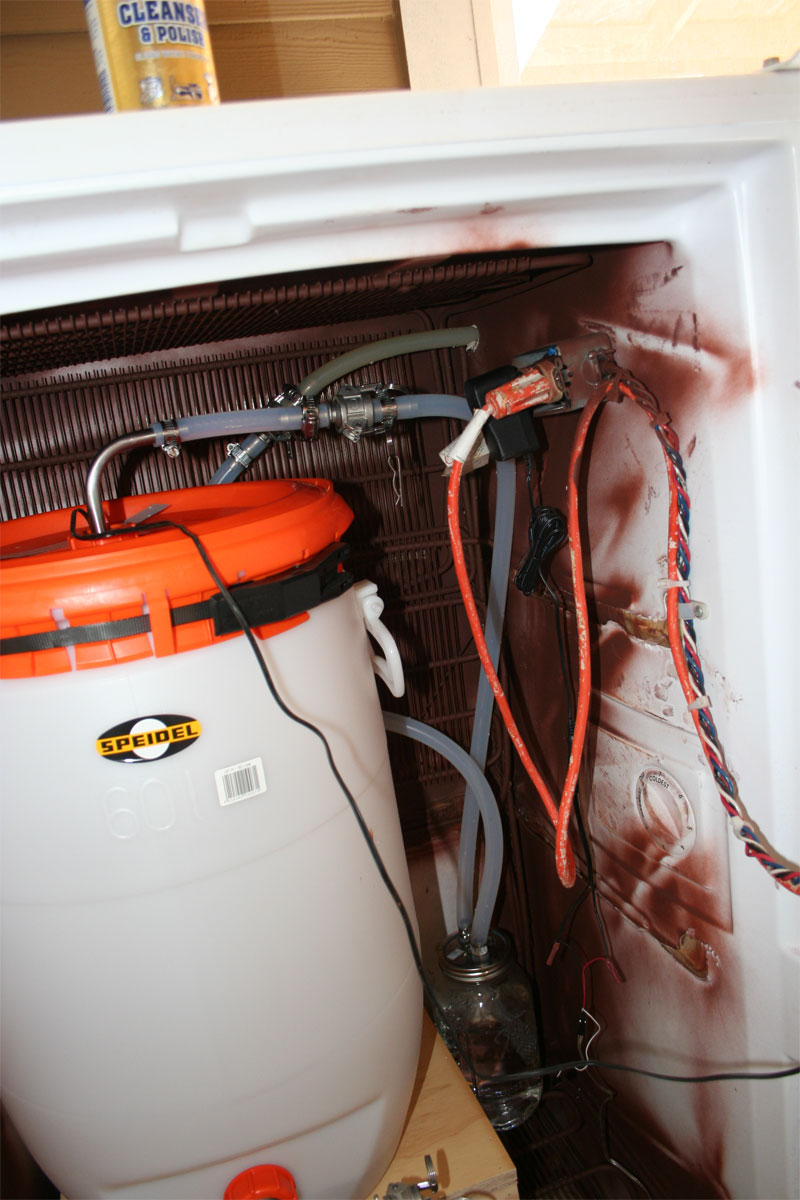
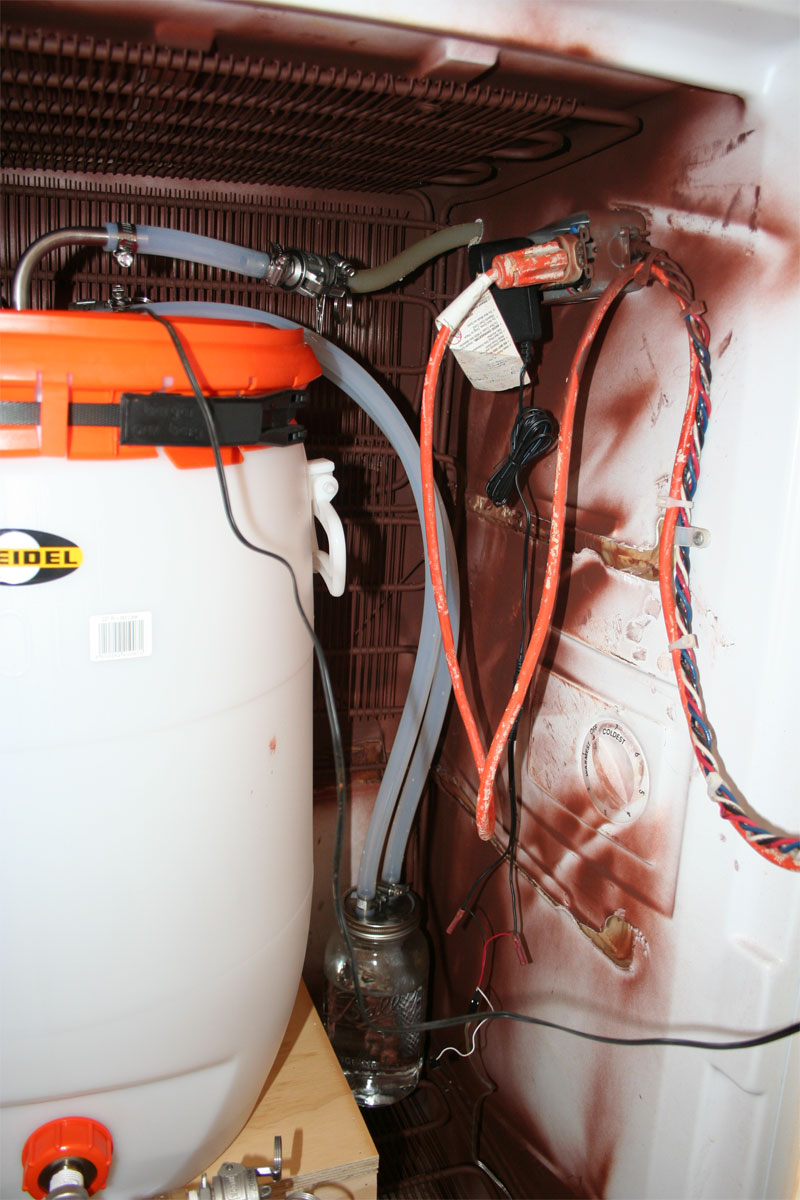
I set up the plumbing in the fermentation freezer so that I connect the brewery pump output to a cam lock fitting at the top of the fridge..

This allows me to simply raise up the brewery end of the 30-40' long tube and gravity drain the wort into the fermenter... I will use a sanitized glass pitcher at the pump to collect any remaining wort in the brewery system, and if there's enough to bother, I will dump it in the fermenter...

01-fridge-in-port.jpg


02-fridge-in-port.jpg
 
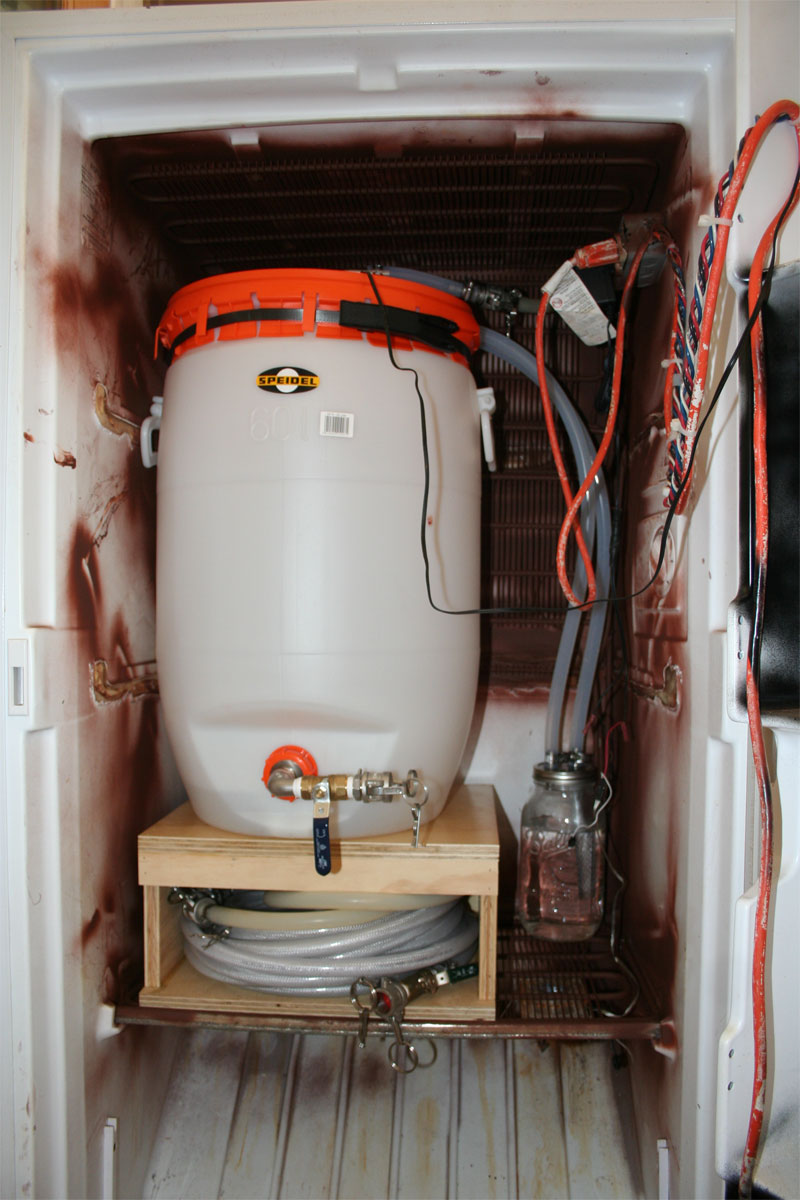
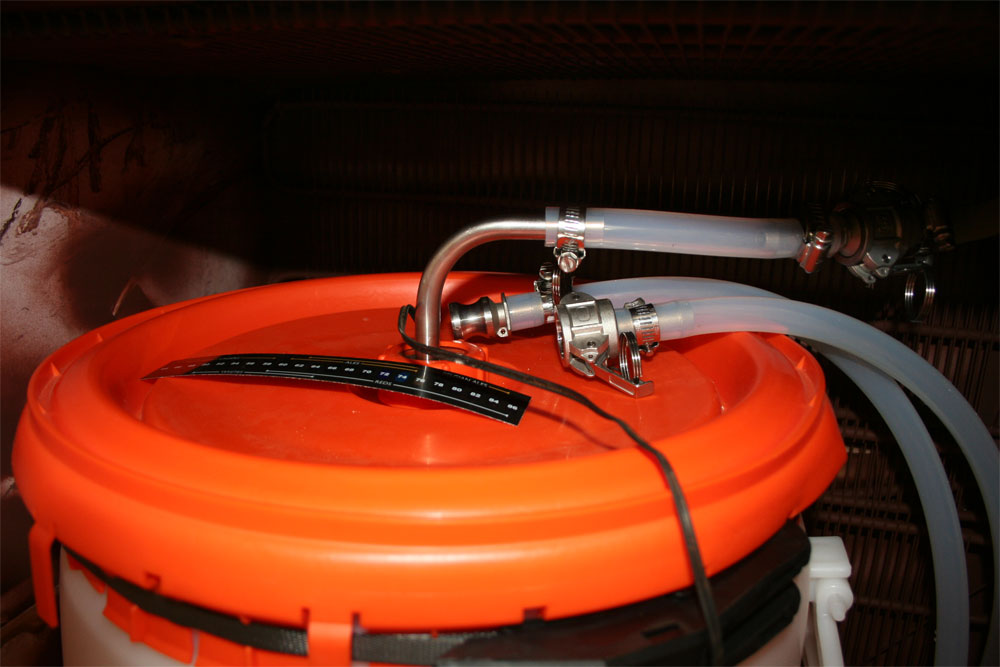
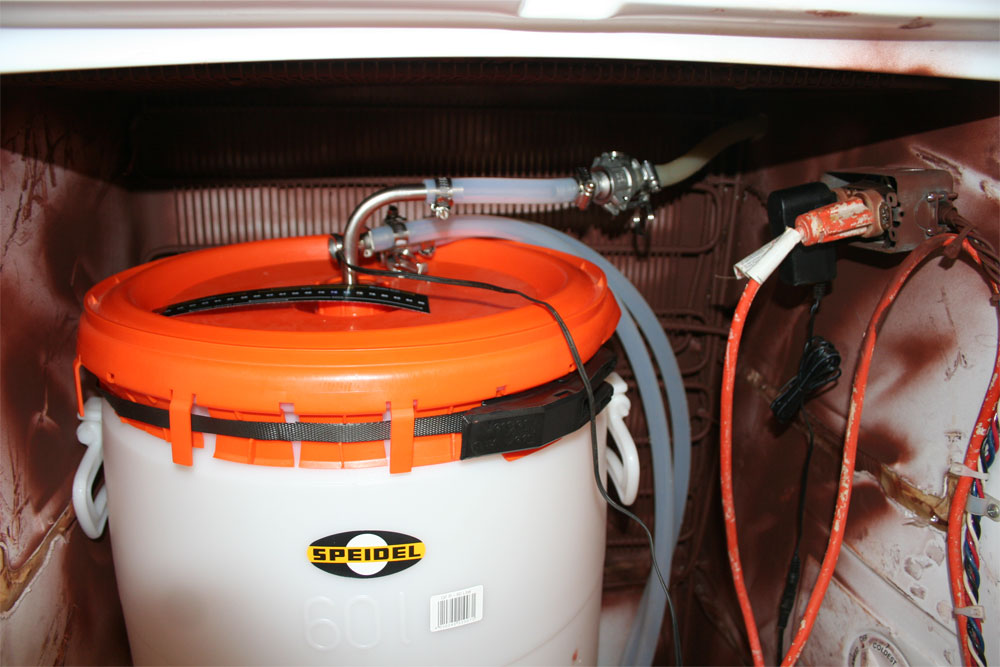
Inside the ferment chamber, I connected the cam lock port on the outside to another inline to the blow off tube on top of the speidel... This will be how I pump the wort into the fermenter...

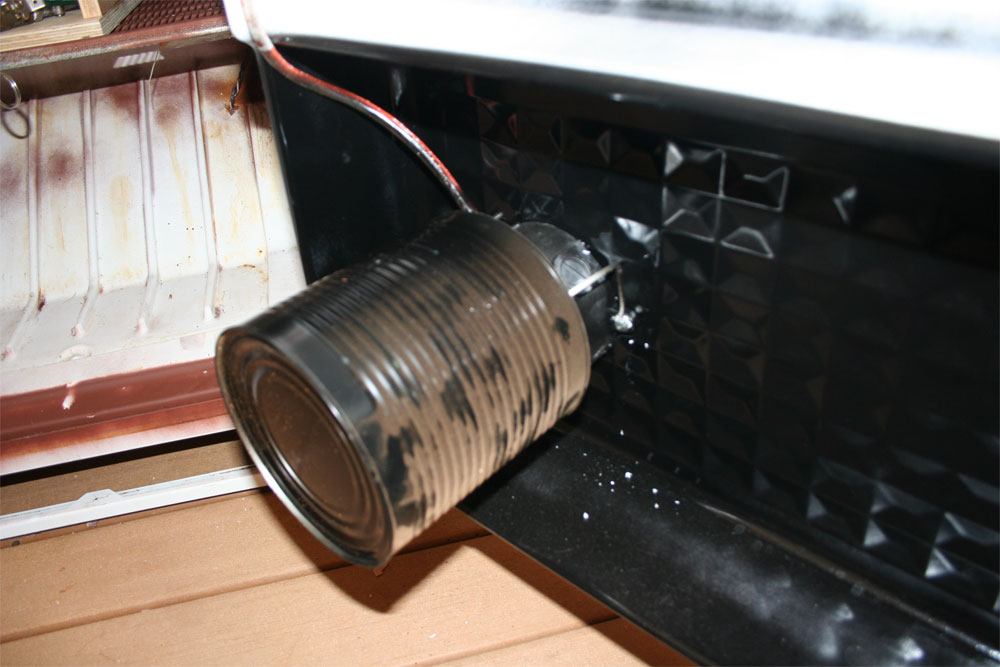
Once all the wort is in the fermenter, I dump the yeast int, seal the top and then disconnect the cam lock coupling on the output of the fermenter and insert a mason jar with sanitizer in it as my air lock.. Then the gasses are ported back out of the freezer through the same cam lock port that was used to fill the fermenter...

blow-off-01.jpg


blow-off-02.jpg


blow-off-03.jpg


blow-off-04.jpg
 
I relocated the light bulb I used as a heater to the bottom of the door, and the 12v equipment cooling fan from hanging off the coils at the top of the freezer to the bottom side of the lowest shelf, pulling air from the bottom to the top, to circulate the air and keep the temp constant throughout the freezer during heating....

Switched the 60w bulb out to a 100 w bulb seeing as this thing will be outside now in very cold weather..

I'm thinking of buying a 150w reptile heater (that screws into a light socket), as that will be more reliable than a light bulb, which often fail...

Everything that light might hit is painted black to keep it dark in there...

heater-01.jpg


heater-02.jpg
 
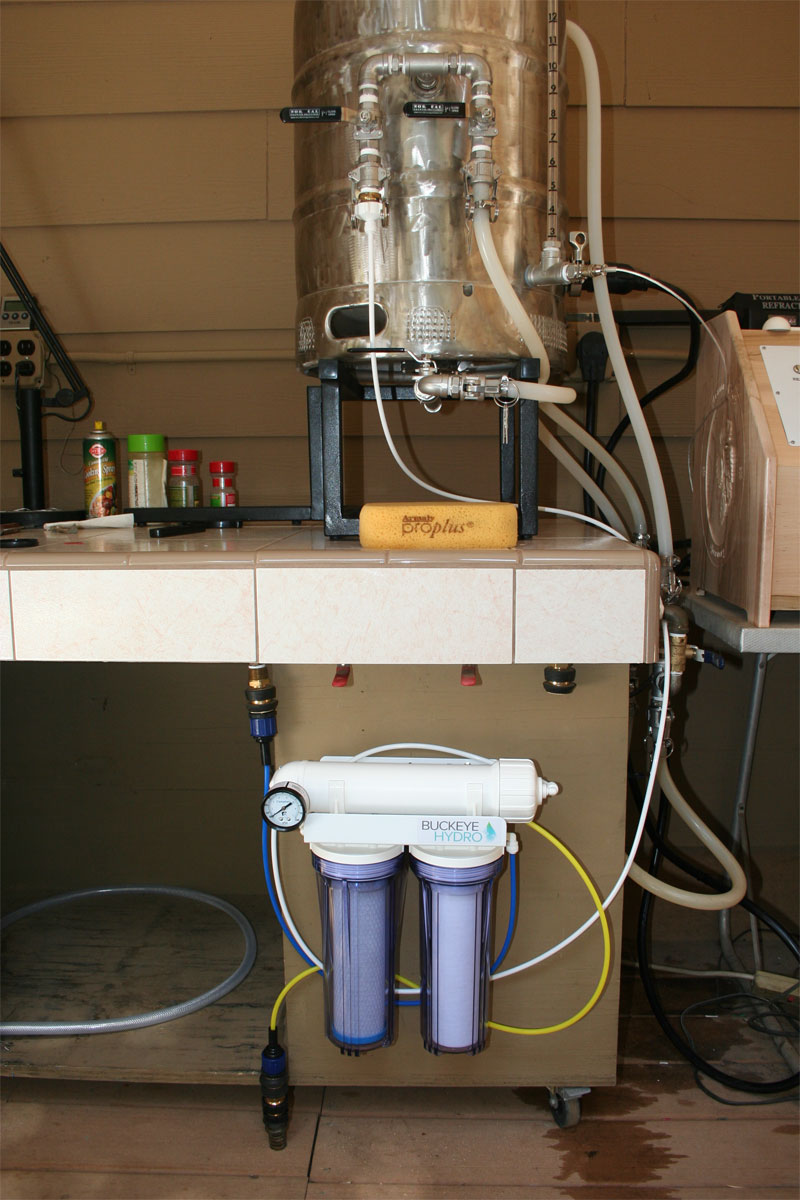
Next, I hooked up the RO filter that arrived last night.. I's hung loosely on a couple screws and plumbed using the quick disconnects so that I can bring it inside when not in use...

Next year, I want to get a 14g under sink bladder tank and mount the filter permanently under the kitchen sink with an auto shutoff, a sink top purified water faucet, and plumbing to the ice maker on the fridge as well as a 1/2" line from the tank to the brewery out on the porch...

That will give me 11 gallons of pure RO water to the brewery on demand, plenty for use for drinking/cooking/ice making, and while I'm mashing, the tank will be refilling for use with grain rinse, make up water...

RO-Filter-01.jpg
 
I changed out the three brass ball locks on the kettle to stainless steel ones this morning, as the guy at buckeye hydro told me not to have any metals other than stainless in contact with the RO water as it is very corrosive in it's pure low PH form..

Anyway, all I have to do is make some sort of little stand for the drain bowl that I will use to squeeze wort from the grains... It is the old keg bottom that I cut off at the beginning of this build, with a 1/2" bunk welded into the center of it, and plumbed underneath to a SS 90 elbow and another male cam lock fitting..

The same tube that is used to drain the fermenter into the kegs will be used with the drain bowl to collect the wort into a container...

I am scheming how to set this thing up so that later on down the line, I can use a hand held spray faucet on the output of the RO tank to rinse the grains after squeezing, and then squeeze them again... Sort of a cool water sparge.... But that's down the road a piece yet...

and with 'THAT' I am essentially ready to brew.. :mug:

I was planning to brew Saturday, but am thinking I might wait a week to give me plenty of time to dot all my I's and cross all my T's seeing as I haven't brewed in like three years, and there are some process changes with this new system (a lot of them in fact)...

But essentially, it's DONE!:D :rockin: :ban: :mug:

I have all the buffer stuff, grains, yeast, hops, etc. that I will need and I'm all set.. Just gotta put a solid plan together first and then give it a whirl...

So.. now my 'to-do list' looks like this....

*) Change out little brass adapter with nylon one where RO water connects to keggle...
*) Slap together temporary stand for drain bowl...
*) MAKE BEER!

:rockin:

brewery-01.jpg
 
Oh, BTW.. I machined an adapter out of HDPE for the speidel to be used with NorCal's stainless dip tube adapter, that centers his tube and allows it to be adjusted while the fermenter is full 'without spilling a drop'.... It works 'excellent' and uses the same gasket that came with the speidel, as well as an additional small silicone gasket and goes between NorCal's dip tube mounting plate and the fermenter...

I might be making these for sale soon, as well as a nifty ABS pump mount that allows you to hang the chugger pump vertically, and will likely modify it so that you have a choice to mount it vertically or horizontally by selecting mounting hole.... Also thinking of making a wort splitter that I designed when I was using two glass carboys with the old brewery....

More on all of that later... after I get a brew under my belt...

I also filled my 20# CO2 tank, and so all I have to do is to clean up my kegerator and replace the beer lines.. That can all be done while I'm waiting for the beer to ferment...

Will be designing a real sweet multi faucet kegerator top soon as well..
:tank:
 
Several hundred dollars more than I planned on and a couple months later than I planned on, but I have started my first brew...

Calculated the recipe for an American IPA, calculated the water needs...

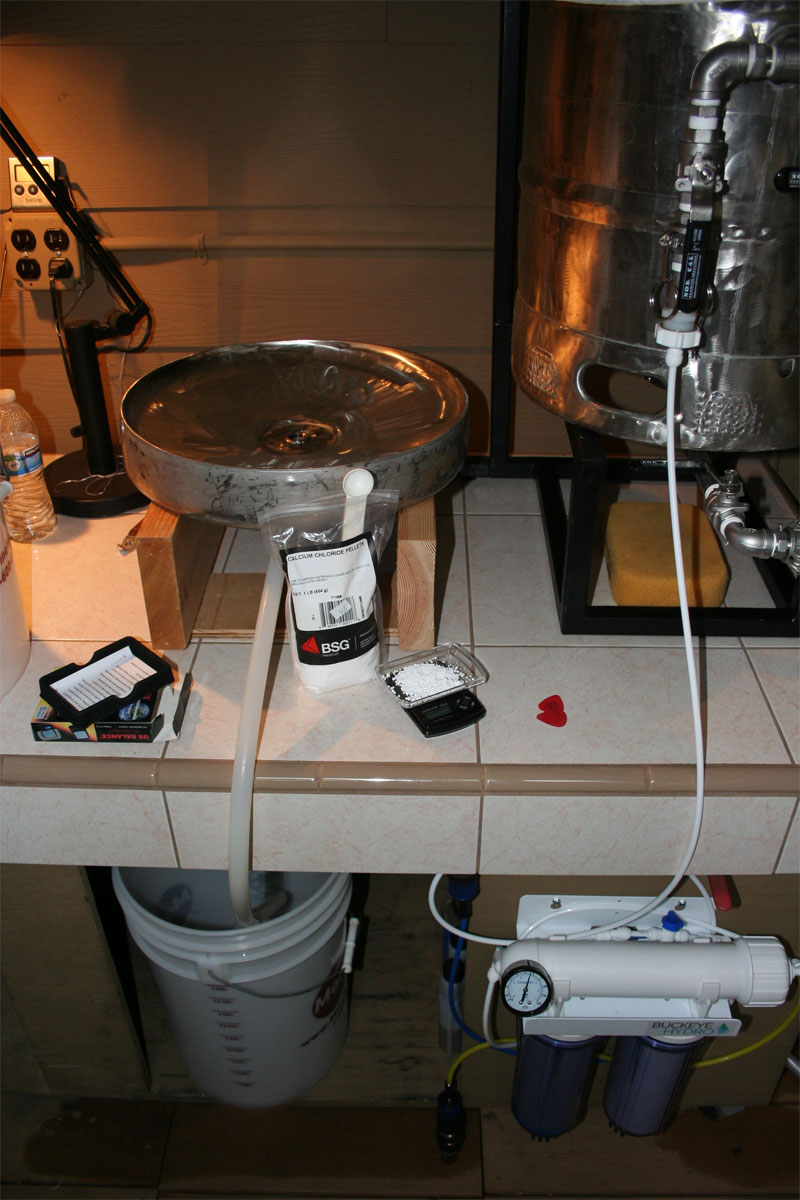
About 6 gallons into filling the keggle with 10.75 gallons of RO water, already added the calcium chloride... Star san soultion in the transfer tube and fermenter (had to do that now so I could free up the keggle for the RO water)

The bucket on the table top is for the additional water I will need, and I have already measured out the calcium chloride for that... To be filled as soon as I am through filling the keggle....

Bag and false bottom are already in the keggle, Drain bowl (made from the old keg bottom) ready to collect wort from the grains after removing them from the wort...

All I have left to do tonight is measure out the grains and crush them, and then tomorrow morning, it's time to brew!

So happy!

While it is fermenting, I can work on replacing the tubing in the kegerator, and maybe even upgrading the top... Ordered a tower cooling fan, so that I don't have to deal with foaming anymore..

in about 20 days, I will be drinking Homebrew again! Oh yeah, baby! :ban:

:mug:

First-Brew-Session-1.jpg


First-Brew-Session-2.jpg
 
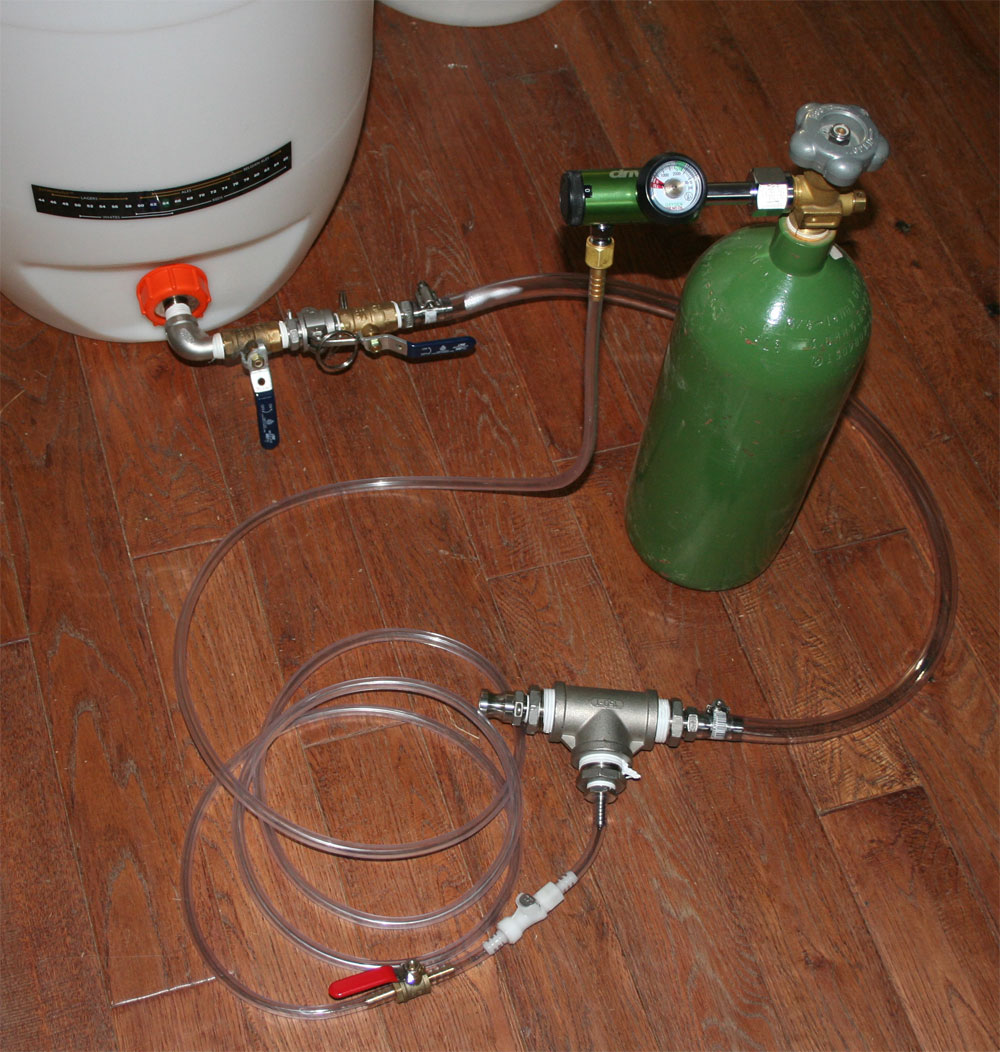
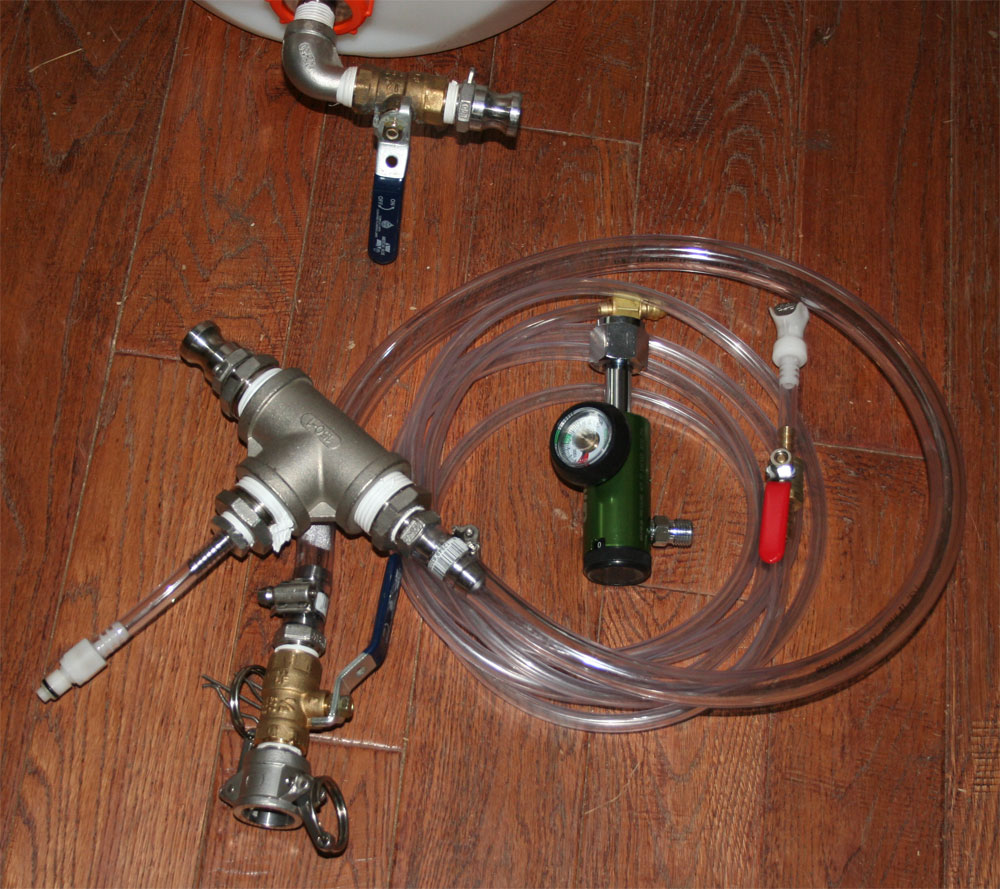
So, the 1" Tee, and the (3) 1" x 1/2" reducers finally arrived yesterday, and I put my new in line oxygenation system together... (shown in disconnected ready to store mode)

Oxygenation-system-2.jpg
 
Here it is all hooked up... The 1/2" line that is used to pump the finished wort from the brewery to the fermenter will be hooked up to the cam lock connector on the other (left side in the above picture) end of the 1" Tee, and there is a 0.5 micron Stainless Steel air stone inside the tee hooked to the 1/4" line coming from the oxygen cylinder regulator...

This will be used to inject oxygen into the wort so that the yeast will be happy and 'completely' ferment...

I have all the stuff to make the CFC anti freeze heating system (to protect any liquid that might still be lurking in the pipes from freezing and bursting the copper tube) during the winter ('I've just got a 100w light bulb underneath it right now).. and then I have to either get a small pressure booster pump for the RO water filter, or change out the flow restricter in it to account for the lower system pressure of my new pressure pump out in the well pump house, that feeds water to mi casa....

Then I'm ready to try brewing another batch!

Oxygenation-system-1.jpg
 
Just to avoid any confusion...

I changed out the three brass ball locks on the kettle to stainless steel ones this morning, as the guy at buckeye hydro told me not to have any metals other than stainless in contact with the RO water as it is very corrosive in it's pure low PH form..

The primary thing that drives the aggressive nature of demineralized (RO or DI) water is that it is... demineralized - very low TDS, rather than a very low (acidic) pH. RO water from "typical" tap water can be under 10 ppm.

Russ
 
Nice work! It is a shame to hide that chiller though; I think all that copper looked cool. Are you happy with the height? I haven't built my stand yet and am debating how high I want it. Too high is harder to lift, but I want to be able to use gravity to get the last bit of wort out of pump/chiller.
 
Nice work! It is a shame to hide that chiller though; I think all that copper looked cool. Are you happy with the height? I haven't built my stand yet and am debating how high I want it. Too high is harder to lift, but I want to be able to use gravity to get the last bit of wort out of pump/chiller.


Well, I added the crane to deal with the height/lifting issues, and the height allows for gravity priming of the pump and what not..


I have done four brews on it now (the first two being disasters because of grain that stored for far too long), and am learning much..

The biggest PITA is squeezing the bag and rinsing... But I think I came up with a solution for that too.. I wish there was a way to rinse with 170 degree water without adding another vessel.. Currently rinsing by squeezing, and then pouring about a half gallon of cool mineral adjust RO water at a time into the top of the bag of grains.. I may end up adding a rims tube to things for that purpose as a plastic bucket should be able to handle 165 degree or so water... Just circulate it from the bucket through the grains as they hang...

Also realizing that when I mash in, the temp of the water jumps way up, so I may have to figure out a way to recirculate to keep mash temps consistent throughout the grain and keggle..

Really liking using the pump to move water around, especially that I can recirculate it through the chiller till the temp is right, and then just pump it into the fermenter, injecting oxygen along the way.. and the fermenter is high enough that I can use gravity to transfer it into the cornys..

Super easy...

So, I have those three issues to solve still and then everything should be super repeatable/predictable...
 
Back
Top