Nate's brew kettle with pick-up tube

Homebrew Talk - Beer, Wine, Mead, & Cider Brewing Discussion Forum

Help Support Homebrew Talk - Beer, Wine, Mead, & Cider Brewing Discussion Forum:

This site may earn a commission from merchant affiliate links, including eBay, Amazon, and others.

kegtoe

Supporting Member
HBT Supporter
Joined
Sep 11, 2009
Messages
1,231
Reaction score
26
Location
Stevens Point
I thought i'd share my revised brew kettle. This 5 gallon kettle is used for extract batches and sometimes as an HLT in all grain.

Last year I had cut the hole and installed a bulkhead from Northern Brewer. I was thinking about adding a dip tube / pickup tube to it. But looking at the whole set-up, it seemed that it would get pretty bulky on the inside. Originally there was close nipple through the kettle. A coupling holidng a washer and a silicon gasket to the inside of the pot and a lock-nut and gasket on the outside o the kettle with a valve.

IMG_04921.JPG


IMG_04931.JPG


IMG_04941.JPG


After a year of leaving too much stuff in the kettle, or having to tip it or lean it i came up with a plan to have a dip tube, but not add a pile more fittings. I looked around and found some spare fittings from BargainFittings from an old project. Here is what I came up with:

New fitting set-up
IMG_08391.JPG


Getting things put together
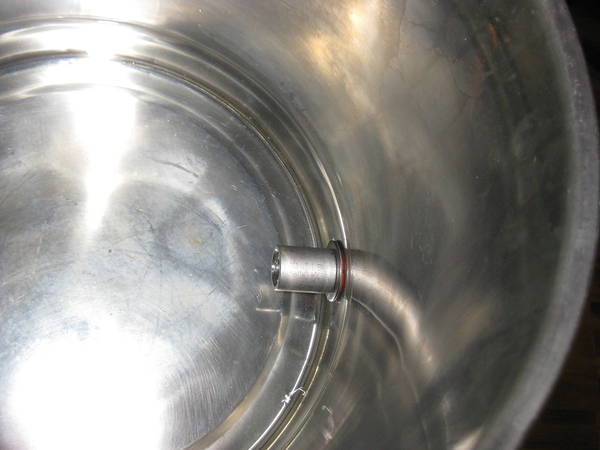
IMG_08401.JPG


Inside complete
IMG_08412.JPG


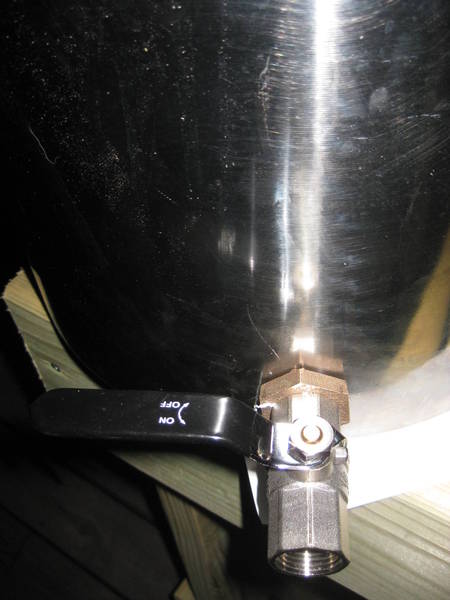
view from the outside
IMG_08422.JPG


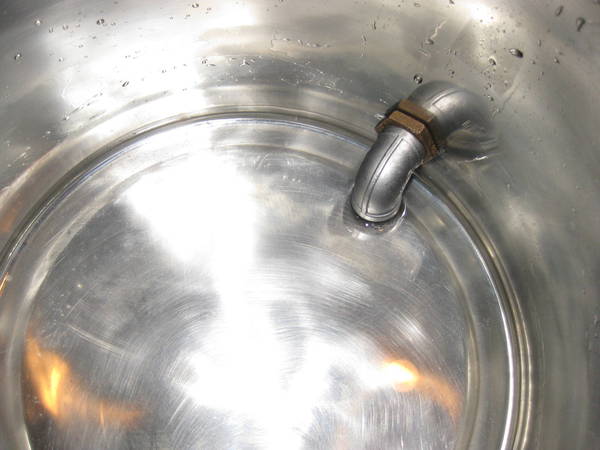
water test for leaks and ensure complete draining, about 1/8 inch left
IMG_08431.JPG


Thoughts? Questions? Comments?
 
Uh, brilliant! That's perfect for a flat bottomed kettle, and using the stuff you had on hand makes it even better. That's gonna be super whirlpool friendly I believe.
 
I had exactly the same setup in my kettle until I upgraded to a keggle with soldered-in couplers. It worked great, and even did a pretty solid job of screening out the trub and hops after the boil. At one point in time, someone suggested putting a stainless scrubbie pad around the base to help with the filtering, but that never worked for me.
 
Nice fit.

I suppose since you're boiling it's not all that critical, but I'd flush the hell out of that fitting when you clean. Those internal threads can grow all kinds of nasties.
 
How do you thread the 90 degree elbow on the inside? Are you able to remove it easily for cleaning? I would do the same if I could easily take it off.

I did something similar for my bottling bucket. A 90 degree PVC elbow, ground down a bit to lift it off the bottom of the bucket about 1/4 inch. It is stationary and the spigot valvle threads into it vs. the inverse.
 
My assembly was off the bottom enough where the elbow threaded on easily. I risnsed it well, took a bottling brush to it and rinsed it again. I am going to replace it with a street elbow and then grind the threads off with a dremel, that way i dont have to worry as much about build up. Im not really all that worried cause this should always be in contact with boiling fluid.

I like your Idea on the plastic bucket, do you have a picture o what you did? you have a threaded elbow that screws onto the threads of the spigot?

How do you thread the 90 degree elbow on the inside? Are you able to remove it easily for cleaning? I would do the same if I could easily take it off.

I did something similar for my bottling bucket. A 90 degree PVC elbow, ground down a bit to lift it off the bottom of the bucket about 1/4 inch. It is stationary and the spigot valvle threads into it vs. the inverse.
 
Yes, just a 1 inch 90 degree elbow, it replaces the nut for the spigot. I had to grind it down a bit to elevate it off the bottom. The concept is exactly the same as yours.

It works well.
 
I was going to do a 90 with a dip tube attached but now that I see this it makes a lot more sense. Since you left an 1/8" of liquid on the bottom, what was the distance between the bottom of the fitting and the kettle?
 
Back
Top