No experience AG 10 gal 1 tier rig build help!!!

Homebrew Talk - Beer, Wine, Mead, & Cider Brewing Discussion Forum

Help Support Homebrew Talk - Beer, Wine, Mead, & Cider Brewing Discussion Forum:

This site may earn a commission from merchant affiliate links, including eBay, Amazon, and others.

sanch

Well-Known Member
Joined
Jun 14, 2009
Messages
256
Reaction score
4
Location
Mesa town
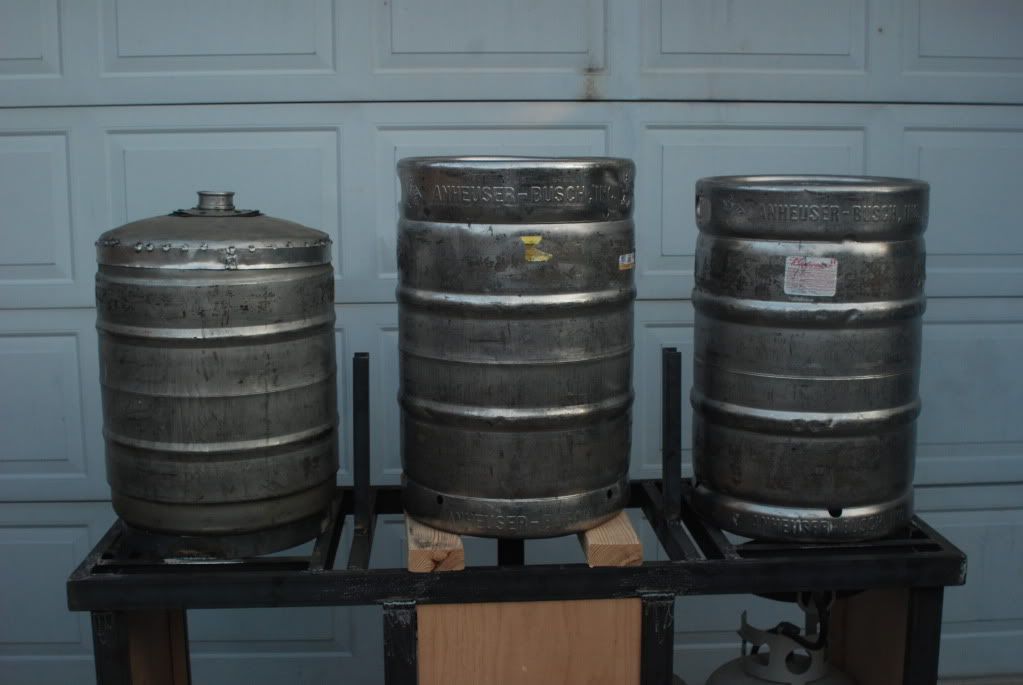
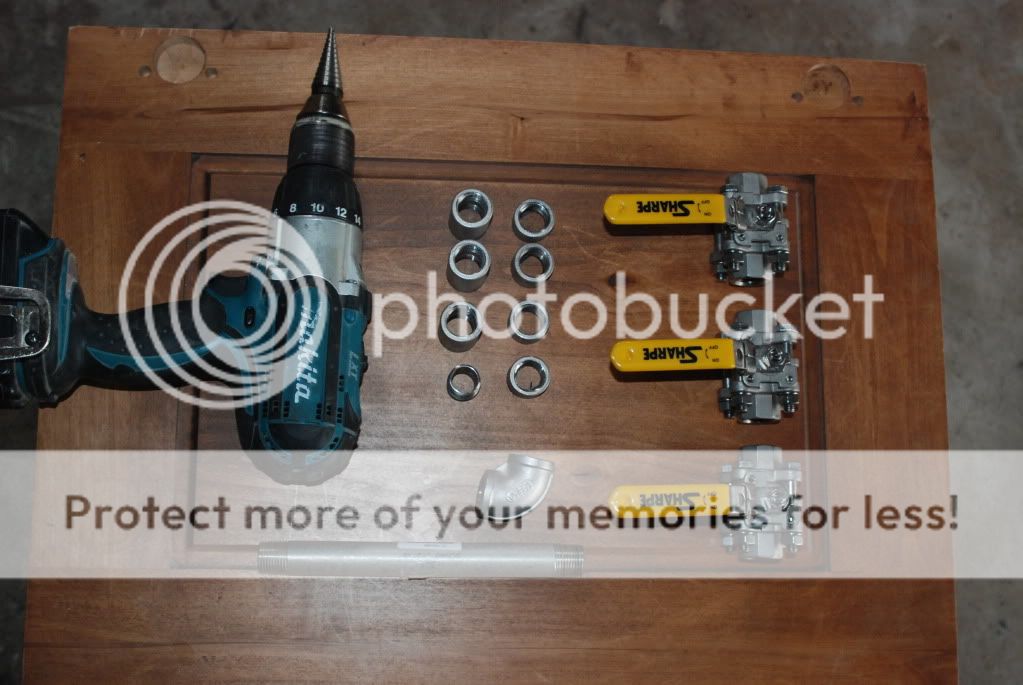
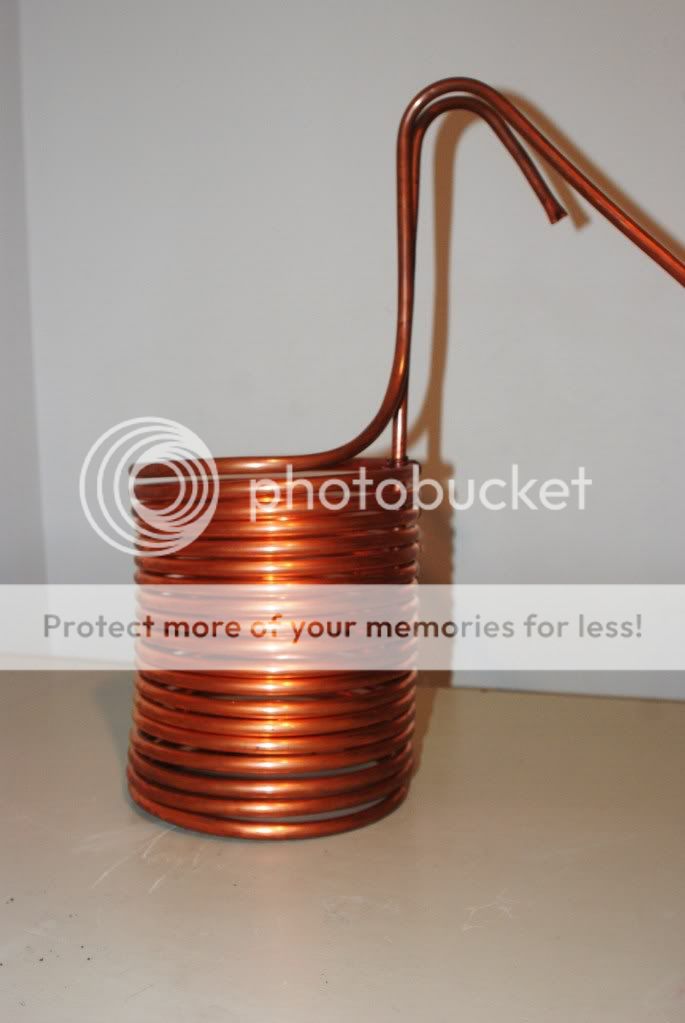
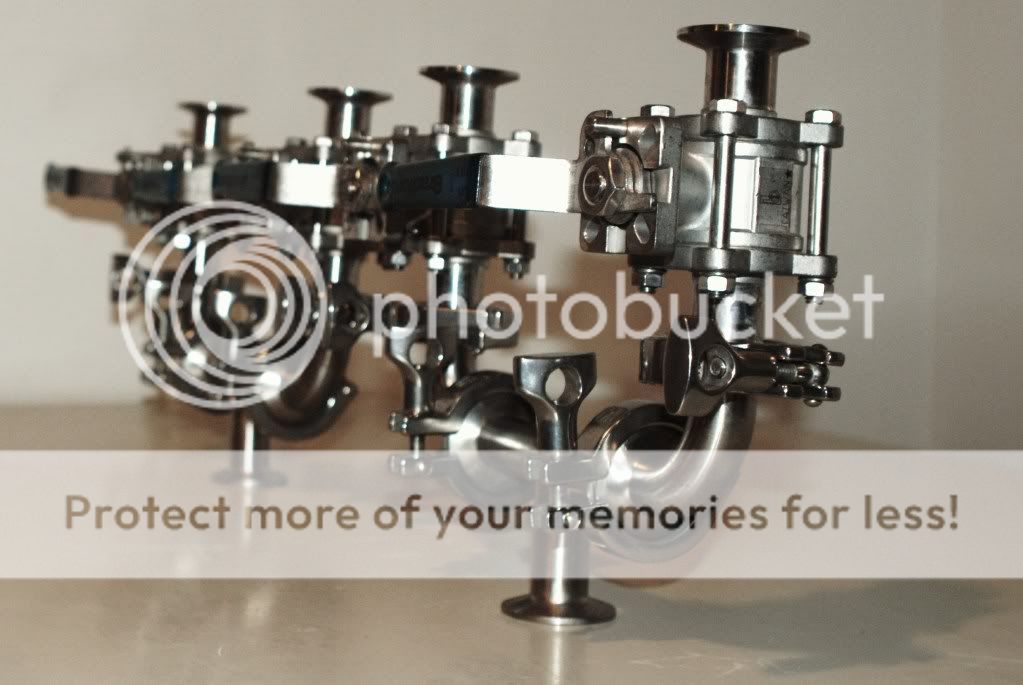
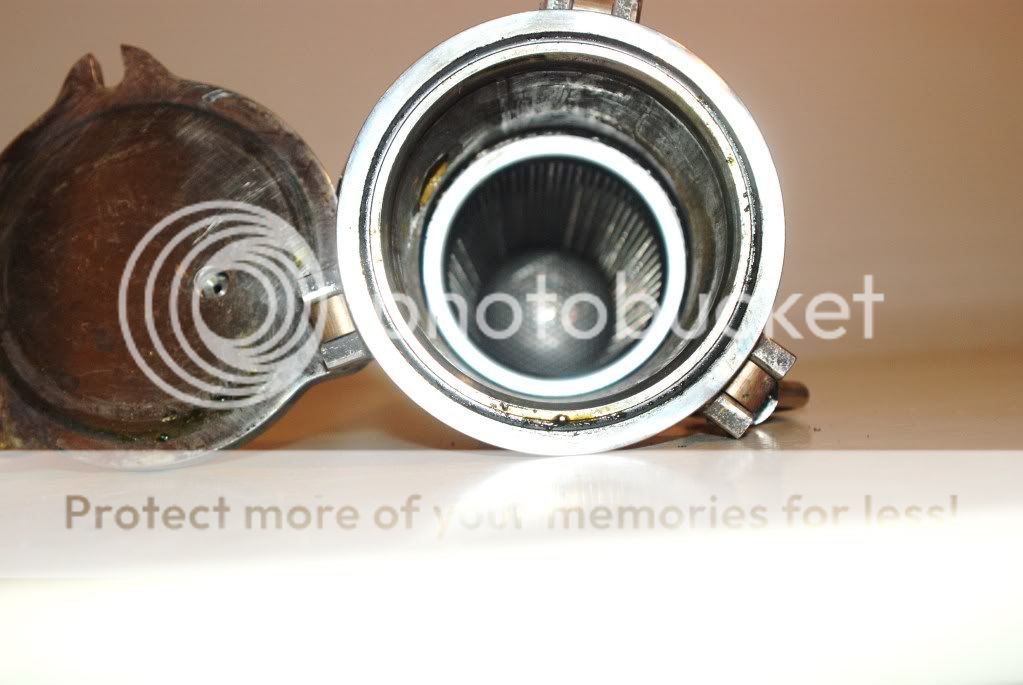
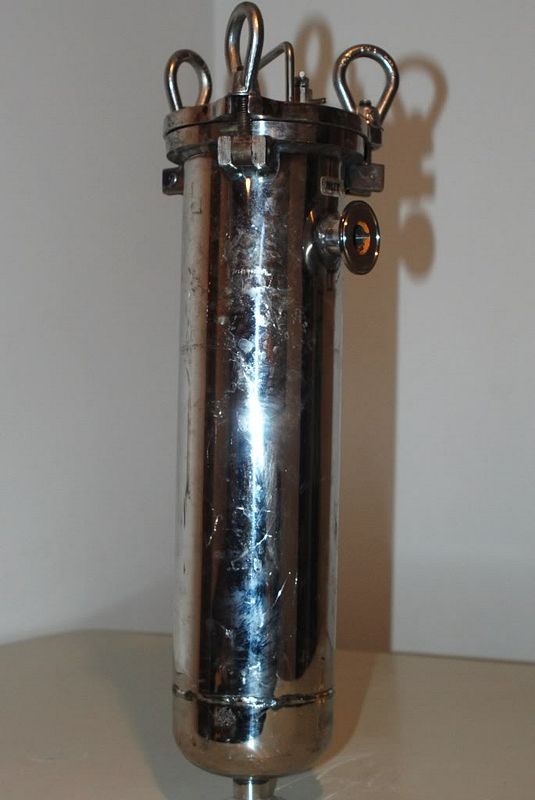
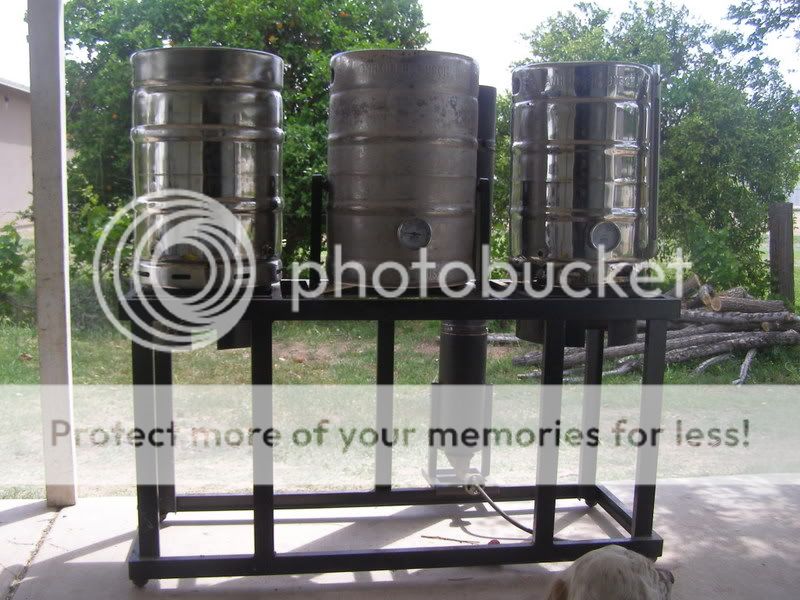
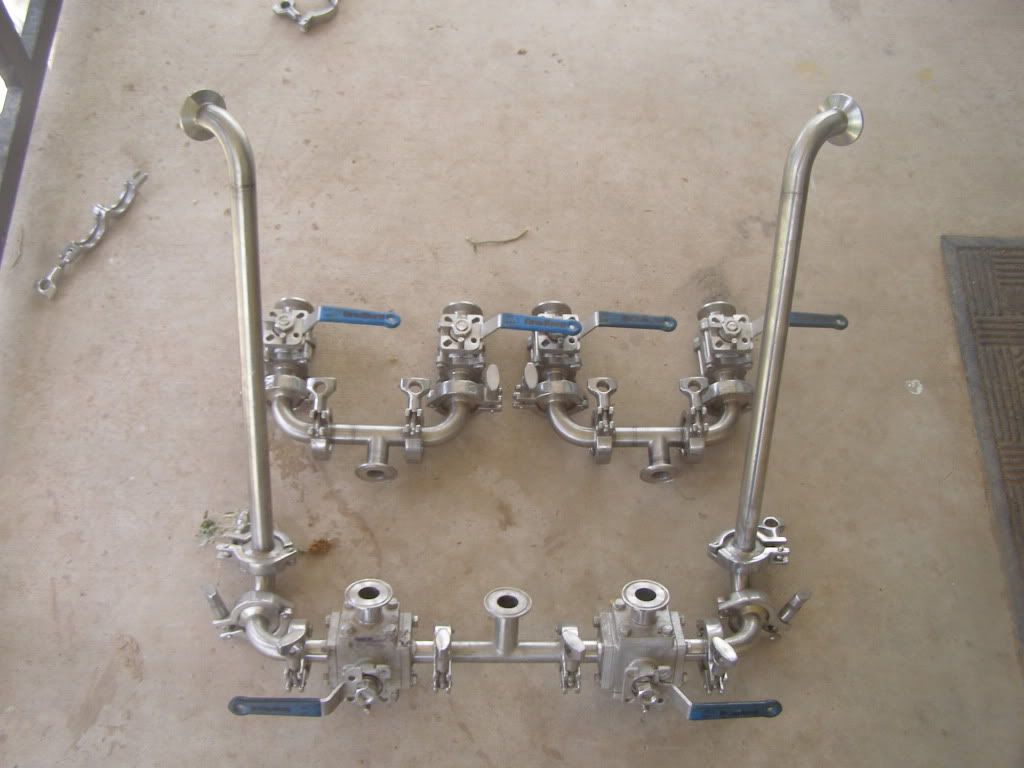
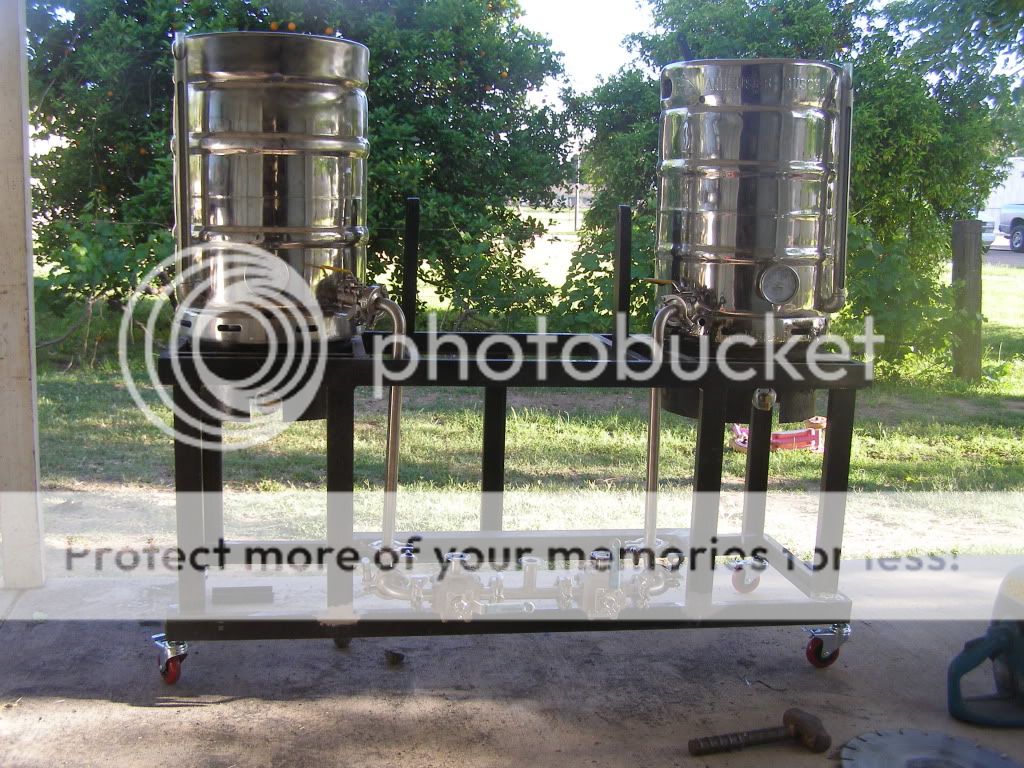
I have found my hobby! my favorite thing to do on the weekend is build stuff and better yet build stuff and drink beer so what better than brewin i am so excited to build this brewery i cant even contain myself. I have never brewed all grain and have only brewed half a dozen extract brews under my belt my last brew was so hectic i resolved to build a brewstand to help organize the madness. my previous stand was a few 8x8 timbers below my turkey fryer it was unstable and a pain in my a$$. i had an improvised keggle w/out valve and a poorly built wort chiller. i was on my own doing what i could, then i found home brew talk i have read every thread on this site, a plethora of information many sleepless nights and doodling and here's what i came up with if you see anything that could use improvement speak up i need all the help i can get!!!! i just picked up my valves and a bunch of fittings and have a meeting with the welder tomorrow. i built the stand a few weeks ago and NEED to get all the good stuff on asap so at least i can brew extract i plan on two pumps and hard lining everything, sight glasses the works!!! if any thing is worth doing right its a brewery,without further a due here it is!

026.jpg


028.jpg


031.jpg


breweryplussome013.jpg


breweryplussome011.jpg


breweryplussome016-1.jpg


breweryplussome017.jpg


breweryplussome024.jpg
 
I mean you no disrespect, but before you spend a lot of money on a brewing system, perhaps it would be beneficial to brew at least a few all grain batches first.

A cooler mashtun (with conversion kit), turkey fryer, and immersion chiller will cost around $150. You can do it a lot cheaper if you make some of the components on your own.
 
I wholly disagree with Darwin, there is no reason to spend money to find out if you like it and then spend money again to build what you want. A few words of warning on your stand. When you are using the right side burner get the bottle out form underneat it. I also am not fond having wood so close to the burner. Weld a couple of pieces to hold your middle keggle and lastly nix the piece of wood covering the middle of your rig. There will be alot of heat buildup in there.
 
What is the function of the kettle on the left with the perforated top? Also, you may want to plug the hole in the BK skirt just below the valve. A lot of heat will be coming out of that hole and it will most likely heat up the valve more than you would like. It's best to offset all fittings from the holes in the keg skirts. That's a lot of heavy steel for a brew stand. Do you know how much it weighs? Not that it matters as it's equipped with casters so you won't need to lift it. but it looks like it could support a small pickup truck no problem.
 
Hey people thought I was nuts when I built my rig and had never brewed before....I started brewing March 22 and have brewed 165 gallons since.
GO FOR IT.. Pat
img144121.jpg
 
I also disagree with Darwin. Don't waste money on cheap stuff. Your rig looks good and you will be able to tailor it however you want when you begin brewing and grow as a brewer.

I have a excel workbook with a lot of build info if y9ou want a copy PM me your email addy.
 
If this guy wants to build a sculpture right off the bat, more power to him. I'm all for that too.... however.... for new/prospective brewers that don't want to spend a lot of money, by all means use that cooler in the garage and ghetto the whole thing. It WILL make beer. No problem.
 
Hey people thought I was nuts when I built my rig and had never brewed before....I started brewing March 22 and have brewed 165 gallons since.
GO FOR IT.. Pat
img144121.jpg

I absolutely love your rig! It is one of the neatest, well thought out rigs I have ever seen.
 
One of the greatest satisfactions in life is the joy that comes from something you made with your own two hands. That is why i brew, Besides that the challenges and problem solving are half the fun. Just ask lehr. As for the wood panels I wanted to incorporate wood in some way, but form follows function so they are going to be removed. One is already gone, only slightly charred. They will be replaced with stainless panels or aluminum diamond plate,along with a stainless top. The mlt is not fired but will have a steam manifold powered by a modified pressure cooker below. The 2x4s bellow the mlt are temporary. It will be suspended by the verticals beside it on a pivot to dump out the waste, the pivot point will double as the in and possibly the out for the mlt, if the dip tube isn't to long i haven't laid out the mlt yet i am still looking for a rubberized keg and need to test how much waste is created by the longer dip tube. Yes the stand is heavy but the steel was free so i cant complain. I want to hard line everything i am still debating on stainless VS copper i like the look of copper and the price, lots of people have copper piping does it have any adverse affects and if so are they significant enough to justify the cost of stainless and if stainless is the way to go can you use welded or the more expensive seamless stuff. the propane tank is only stored there i pull it out when im brewin. thanks for the input.BREW ON !!
 
Hey people thought I was nuts when I built my rig and had never brewed before....I started brewing March 22 and have brewed 165 gallons since.
GO FOR IT.. Pat
img144121.jpg

Dude, that's a thing of beauty! Is there a thread on how you made it? I know a guy who is thinking about building one and that looks like a great model for us to use.
 
Sanch,
Lehrs rig is amazing for sure. I agree that building the rig is amazing fun and self satisfying. Its definitely a boost to your manhood, especially if it brews as good as it looks. Its cool to use your skills and your brain. Not many people have the "skills".
Bartman

BrutusTenBA.jpg
 
Sanch,
Lehrs rig is amazing for sure. I agree that building the rig is amazing fun and self satisfying. Its definitely a boost to your manhood, especially if it brews as good as it looks. Its cool to use your skills and your brain. Not many people have the "skills".
Bartman

You left out one tiny item, the power tools, saws, Tig, clamps and the equipment to build these projects. Your talking a chunk of change.
lehr didn't punch those panel holes by hand, a big punch and dimpling tool was required. A big shop with the equipment at hand plus a direction in the build already set. Lehr's build or the poster brewery build a 10+++++.

Lehr; hows' the progress on your friends build will there be pictures posted when it's finished? I recall in the past a posting of a brewery in progress not knowing it was your friends but looked great. I got correced by a PM, small world with many biers to chose from.
 
Lehr,

That is a beautiful stand my brother! Did you purchase the kegs from Sabco...they are too beautiful to be homemade?

SOLID WORK!!!!!!!!!!!!!!!!
 
Halfpint there is a thread on my rig you can search my posts I think it's called my rig.

Brewbeemer, how's the back I did convert some kegs for some young guy's in our brew club yesterday and I'll be adding a electric RIMS set up to my rig this month so I'll have an update soon.


Ilovebeer those are kegs from an old micro the shut down in michigan I just polished the hell out of them.

Snake10 nice rig !

Thanks Pat
 
You left out one tiny item, the power tools, saws, Tig, clamps and the equipment to build these projects. Your talking a chunk of change.
lehr didn't punch those panel holes by hand, a big punch and dimpling tool was required. A big shop with the equipment at hand plus a direction in the build already set. Lehr's build or the poster brewery build a 10+++++.


getting the work done is not a problem. I own a small cabinate shop about 4000 sq ft with more tools than you could shake a stick at. most of my tools are for woodworking but i love to build stuff so i do have welders, grinders etc. if there is any tool or skill i lack, i have a Buddie from high school that runs a full cnc machine shop(they build the mini gun that goes on the bottom of the Apache helicopter) getting it done is not a problem. i have a plan and am merely looking for advice like (cover the holes in the bk skirt below the valve) I never would have thought of that. thanks catt22 I mainly have plumbing questions layout schematic is the only info i cant find. + will a march pump fill a keggle from the bottom up ? (in through the out valve):mug:
 
I mainly have plumbing questions layout schematic is the only info i cant find. + will a march pump fill a keggle from the bottom up ? (in through the out valve):mug:

Figured I could chime in on this one. Yes - a march pump can fill a keggle from the bottom valve, although it won't be too speedy by the end. However, I stopped doing this for a couple reasons. First off, at the time I was batch sparging, and if I didn't pay close attention, the pump would suck air and getting it primed again was a pain, required taking disconnects off, moving valves, etc. (lol commas) The other issue I had is that some grain bits inevitably make it through my false bottom, esp. right when it's pumping out the last 1/2 gallon or so of the liquid. Because I have a screen on the bottom valve in my BK, the grain bits would be trapped down there for the brew session, and then would get pushed through my chiller at the end.

Obviously, all that relates to pumping from the mash to the bk. I also used to fill the mash tun from the bottom, honestly can't remember why I stopped doing that.

edit: and good job on going all out - be careful, it's an addiction!
here's my stand sparging on a barleywine so big I had to mash in my old cooler and the keg. It's a decent setup, I'm happy with it.
IMAGE_030.jpg
 
Right. If you have a screen on your boil kettle, you don't want to do it. If you just have a wide open pickup tube, it works great. I'm wondering what losing prime on the pump has to do with pumping into the BK drain?
 
Right. If you have a screen on your boil kettle, you don't want to do it. If you just have a wide open pickup tube, it works great. I'm wondering what losing prime on the pump has to do with pumping into the BK drain?

If you're filling from the top, the low pressure and even just the momentum is enough to get past occasional priming issues. If you're filling from the bottom, all that head pressure means that if you lose prime, the only way to get things going again is to shut all the valves, pop off the qd, run it into a measuring cup, hook it back up, etc. (either that or install an air bleed valve) Not really a big deal, just a couple extra steps.
 
Ok, I get ya. I finally got used to how my tun reacts and learned to really really slow the draining down when I get to the last expected gallon of runoff to give the wort time to filter down into the FB underside.
 
If you're filling from the top, the low pressure and even just the momentum is enough to get past occasional priming issues. If you're filling from the bottom, all that head pressure means that if you lose prime, the only way to get things going again is to shut all the valves, pop off the qd, run it into a measuring cup, hook it back up, etc. (either that or install an air bleed valve) Not really a big deal, just a couple extra steps.

Wouldn't just turning off the pump momentarily to allow some of the wort to flow back to the MT through the pump pushing any air out and re-priming the pump in the process. At that point you could turn the pump back on and resume pumping and prepare to close the valve just as the pump starts sucking air.

I pump from the MT into the outlet of the BK regularly without problems.
 
I've been working for a couple of weekends here is what i accomplished here is the immersion chiller that will eventually become a pre chiller for a plate chiller
DSC_0751.jpg

the out manifolds for the pumps
DSC_0744.jpg

i found this thing at the scrap yard im thinking maybe a really cool heat stick or maybe my steam boiler although i don't think it would hold enough water. It was just to cool to pass up, any ideas ????
DSC_0750.jpg

DSC_0746.jpg
 
? has any body tried to thread poly carbonate tubing like for a sight glass or anything ?
 
I've been working for a couple of weekends here is what i accomplished here is the immersion chiller that will eventually become a pre chiller for a plate chiller
DSC_0751.jpg

the out manifolds for the pumps
DSC_0744.jpg

i found this thing at the scrap yard im thinking maybe a really cool heat stick or maybe my steam boiler although i don't think it would hold enough water. It was just to cool to pass up, any ideas ????
DSC_0750.jpg

DSC_0746.jpg

There's all your pix for you. The tags all look correct, you probably just don't have enough posts to embed images yet. That manifold looks sweeeeet.

I've never heard of anyone trying to thread the polycarbonate, I'm curious as to how it would hold up. Most of the setups I've seen use a compression fitting with a couple high temp o-rings. This is a pic of my sight glass/thermo port (since converted to welded)
DSC_0822.JPG
 
i am trying to stay all ss and the compression fittings are big $$ how brittle is poly carbonate i don't have any experience with it. thanks for the pic help
 
Morebeer sells sight glasses that are all-stainless, and if you look up the page at Bobby_M's signature he's also selling sight glasses that are (I believe) all stainless.

edit: since morebeer has a bad rap, and forrest does so much to support the board, here's a link to Austin Homebrew's sight glass. It does have one brass nut, but that goes on the outside of the kettle. Also, if you were to pick up a 1/4" stainless coupler and get it welded into your kettle, you could use the sightglass from AHS without the brass nut.
 
Well the time has come to finally knock the dust and cobwebs off this old thread. It has been a long time, I beilve I started this particular project in the fall of 09. Amidst the madness of life I have not had the time nor the funds to work on the brew rig mutch. I have recently brewed a few extract batches and that has peaked the intrest of a few friends, they have been motavating me to get moving on it again.

here is the rig as it sits know

927.jpg


as i said before i scored a bunch of tri clover valves, pipe and fittings and I have been piecing together the blumbing. Here is the kettle outlet/pump inlet manifold the valves are three way and they enable me to pull wort from any of the three keggles and direct it to either pump. the two manifolds on top are the pump out manifolds there functions from left to right are

1 boil kettle #1
2 plate chiller
3 mash recirculation
4 boil kettle #2

929.jpg


the kettle valves are out geting a tri clover flange welded on them i asked my budie to take pics i will post ass soon as i get them. Thanks for all the input along the way.
 
for some reason the first page on this thread is all sideways it didnt use to be that way if any body knows how to fix it please let me know
 
I got the pictures and the valves back from my buddys machine shop. I love those guys, I give them a sack of stuff and tell them what i want and they bring me back finely machined beautiful parts that fit perfectly every time. by the time this thing is done I am going to have to brew for a week just to pay off my beer debts.

Here they are milling the hex off the end of a three peice valve.

photo-5.jpg


Using a lathe to cut a tri clover flange off the end of a piece of pipe.

photo-4.jpg


Getting rid of the threads on the valve end.

photo-3.jpg


finished valve body end no threads ready for welding.

photo-2.jpg


The Burro welding away he did not know about back gasing and i didnt think to tell him.
its ok i will take a die grinder to them tomorrow the sugaring is fairly minimal.and they are BK valves anyway.

photo-1.jpg


I will snap a few pics of the finished product tommorow. I am also going to work on attaching the lower manifold section. there is a little grinding on the stand i need to do to make it all fit properly.
 
Well after much thought I decided to make the stand a little shorter. I was not happy with the rollers i installed before, and the casters i puchased would add 4 1/4" to the toatal height. and that made it just a little taller than I would like, I put this off for some time trying to justify the height. and finally bit the bullet and pulled out the big saw to chop it down.


Here is a shot of one of the rollers.

P1011163.jpg


I ended up cutting 6" off of the frame, and the rollers "about one inch" and adding the 4 1/4" casters. that put the top of the keggle at 50" from the floor.this made the top of the keggles 3" lower than before , much better for a man of 5'9". If you have to cut your stand down I highly recomend this tool, It made short work of the job.


P1011161.jpg


SWMBO took a few action shots, here is one of them.


P1011167.jpg


Here is the valves my buddy cut and welded for me. Sorry i forgot to post them.


P1011173.jpg


Here is the rig with its adjusted height, with the new casters and the lower wort manifold installed.


P1011172.jpg


I spent all day yesterday at my buddy's machine shop getting a boat load of stuff done. Klaude came out and did some fine work on the gas vaves and the flash boiler water input. We got all the panels built, a handfull of tri clover conections made and the pumps mounted. I am hopfull that we might finish the gas and water input this coming weekend. I will post pics of the work done yesterday as soon as SWMBO emptys the camera. I always screw it up so I dont bother any more.
 
Back
Top