First AG brew tomorrow, setting up today

Homebrew Talk - Beer, Wine, Mead, & Cider Brewing Discussion Forum

Help Support Homebrew Talk - Beer, Wine, Mead, & Cider Brewing Discussion Forum:

This site may earn a commission from merchant affiliate links, including eBay, Amazon, and others.

Haasobrew

Well-Known Member
Joined
Feb 24, 2011
Messages
70
Reaction score
17
Location
Lafayette
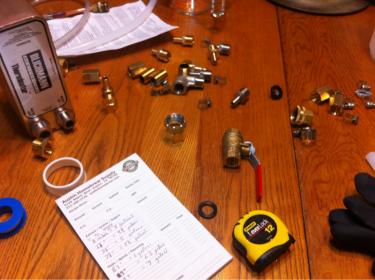
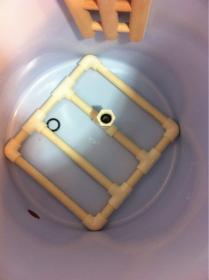
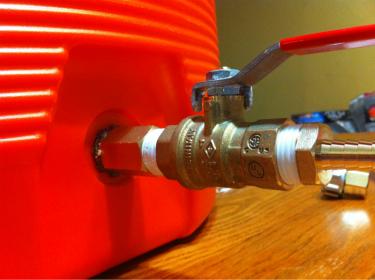
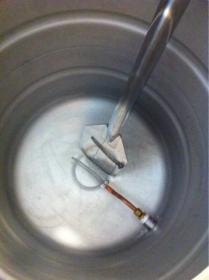
Ive brewed up 8 extract batches, with great results since i started this wonderful "brewing" lifestyle. Over the last couple week I've been acquiring parts for my switch to AG. Built a home depot 10 gallon mash tun with a cpvc inscribed square manifold. Got my hands on a therminator . Refitting my old man's ancient keggle later today. It's got a mesh screen tube clamped to a copper tube attached to the bulkhead. I'm thinking I'll just hit all the brass and stainless fittings with a wire brush to take off the old Teflon, then maybe pbw, then fresh Teflon. Gotta make a trip to home depot tonight for a few fittings and hoses (and in-line screen?filter) for that glorious therminator, as well as an oxygen tank to aerate before pitching(got a regulator and diffusion stone). Tomorrow I'll give this AG thing a shot, got a Austin homebrew wheat lemongrAss kit swmbo picked out. I'll be batch/ fly sparging, I guess by just scooping hot water out of my old 22quart extract boiler into the mash tun attempting to keep an even couple of inches on top of the grain bed while keeping my eye on the sparge temp.
Any thoughts to help out my possible frustration or low efficiency or possible nasty first batch or just general advice or comments would be appreciated.
 
I remember my first AG batch, it was a nightmare. I got a stuck mash and had to empty my cooler of the grain to fix the steel braid. I was like a chicken running around with his head cut off. BUT, in the end I still made a fantastic dry stout. I guess what im getting at is to relax and remember to have fun with it. I few beers def helps and watch those temps and water levels.
 
Get a great hot break and cold break. Had a bad experience with boil being a mini simmer rather than a rolling boil, it left me with a cloudy beer. Make bunch of buckets of ice to bring that boiling brew down to cool too, I have rarely had too many.
 
+1 on the plan, timetable.

The "Beer Smith" software has a good set of instructions that shows every step along a timetable, perhaps Austin Homebrew will have a rocking plan for you, if not, you can get a demo install and print out those "Beer Smith" instructions. Ask tonight if anything is kind of unclear to you.

A ruler/stick with your pre-boil amount marked on it? For a given boil kettle diameter you can calculate how many inches deep you need to be for a certain number of gallons.

Have cold beer on hand, relax and have fun.
 
A ruler/stick with your pre-boil amount marked on it?

So simple, but such a great piece of advice. I think you should really take it one step further, and mark off quarts between say....4 and 7 gallons. That will take care of all your measurements from strike water, sparge water, and pre/post boill volumes. And don't forget about dead space!

A couple other simple things.

1.) Start heating your sparge water as soon as your mash is set. With that, heat far more sparge water than the instructions claim you will need. It is better to have it and not need it than the other way around. You can just stop collecting when you hit your pre-boil volume. Use unused sparge water for cleaning the cold side equipment.

2.) Have every boil addition laid out in a line, with the time of the addition clearly written on the container. This includes your hops, foam control, whirlfloc/irish moss, servo/yeast nutrient - whatever applies.

3.) Have all of your post boil (cold side) equipment cleaned, and on its way to be sanitized while the boil is rolling. Sanitize everything before you start cooling. I have not done it, but it is very easy to dump wort into an unsanitized carboy when you have so many other things going on.

Have fun,
Joe
 
So I didnt get to set up last night. Today I'm getting everything clean and assembled. I got my measurements for kettle depth/volume. Ill try to grab a dowel to mark up and keep on hand. Hopefully I can get started soon. Advice from you guys is golden. I'll try to take a good bit of photos.

image-2212757237.jpg


image-4081120447.jpg
 
Mash is underway. Austin homebrew sent some nice instructions with the kit. Ideal mash temp 150. They said strike with 20 degrees higher . A couple ice cubes later and the lid went on. Earlier I got the hoses set up on the therminator so chilling should be a breeze. This all grain thing isn't so scary afterall. I threw together a little in-line filter to hopefully stop hops and crap from finding it's way into the plates. Went through 1 1/2 rolls of Teflon assembling all those fittings on everything. Turns out my boiling paddle has welds that happen to perfectly mark the 6.25 gallon volume line in my keggle. Anybody have any quick thoughts before I start my first sparge in half an hour?

image-4276552297.jpg


image-1089685883.jpg


image-1229867795.jpg


image-2490487828.jpg


image-1508541815.jpg


image-225465390.jpg
 
Recirculation begins. I have the tun sitting on a stool on top of the table. I'm currently conducting a labor intensive manual fly sparge involving me scooping 175 degree water out of my old extract brew pot from the stove to the tub. It requires me slowly dumping water as to not disturb the grain bed. Tapped keg of innkeeper extract nearby keeps my mug full... Possibly the most important perk of this process.

image-2507175054.jpg
 
Yesterday turned into a very long day. getting everything cleaned and put together took a long time. I didnt have too much trouble with the brewing though. A couple of things a ran into:
The water hose fittings i got for the therminator were no good. I got 3/4" garden hose to 3/4" NPT... oh ****.. Luckily i had a couple 1/2 barbs and hose clamps laying around because i switched from 1/2" hose in my mash tun to 3/8". Worked out great for my garden hose through-the-window plate chilling set up. Also, i scratched my head like a ******* staring at no flow through the gravity operated therminator rig for far too long... until finally i tilted it back and fourth a couple times,thus getting out the air bubbles, and allowing the laws of heat and mass transfer to move the hot wort to the cold carboy.
Oxygenation was another issue. The hose between the regulator and the diffusion stone was all coiled up, so submerging the stone to the bottom of the carboy for the most effective oxygenation was impossible. Ill grab a wand of some sort for next time. By that time it was about 1am and i had been at this thing since 10am. I just did the best i could, then went ahead and pitched. Its now been almost 12 hours and no airlock activity yet. I'll check it again tonight and see if i need to mess with it.

Here's the product:
Lemongrass wheat ale
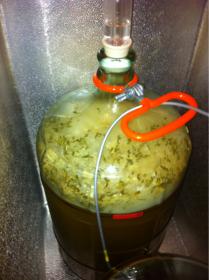
and that is, in fact, lemongrass floating on my beer


All and all it was a good first shot at ag. I know what kinks i need to work out and i think next time will be a breeze.
I think i'll get a nice starter going for "Me vs. AG"-Round 2: Surly furious AG kit from NB.

*update*
Checked it out this morning. Fermenting like a champ.

IMG_0302.jpg
 
Back
Top