the shelves ARE the coolant lines...

Homebrew Talk - Beer, Wine, Mead, & Cider Brewing Discussion Forum

Help Support Homebrew Talk - Beer, Wine, Mead, & Cider Brewing Discussion Forum:

This site may earn a commission from merchant affiliate links, including eBay, Amazon, and others.

Budzu

Well-Known Member
Joined
Mar 11, 2009
Messages
745
Reaction score
21
Location
Chattanooga, TN
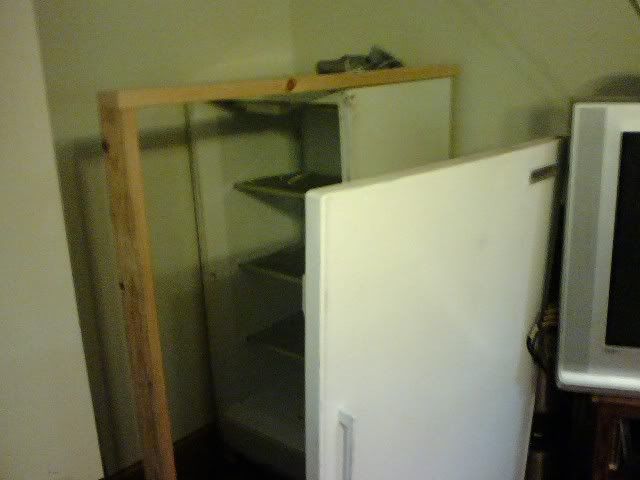
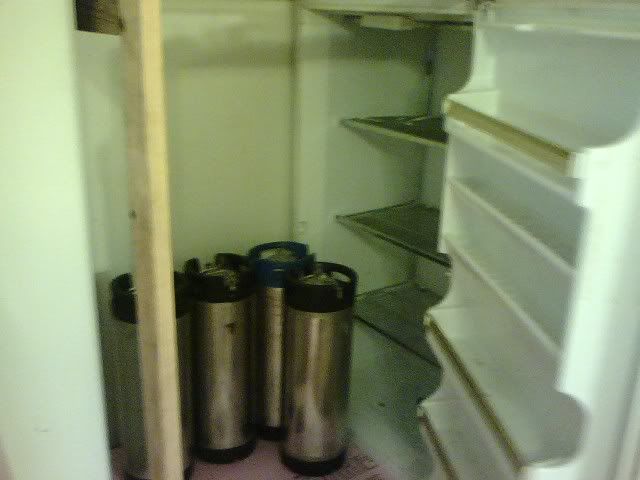
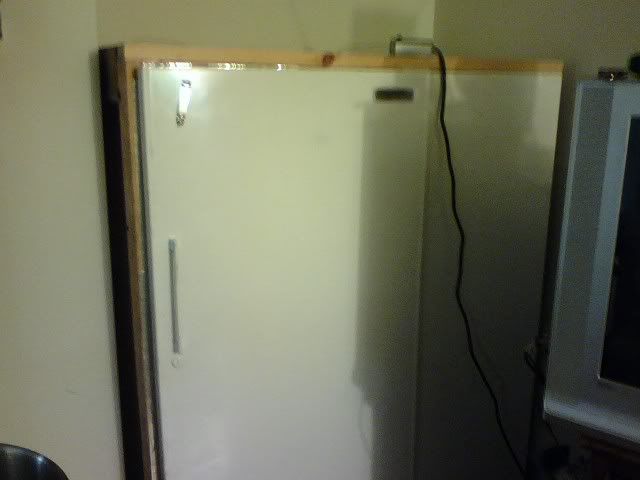
Hi all, I just picked up an upright freezer with the hopes of converting to a keezer. Its a nice big unit that I paid 75 dollars for in perfect working order. I was told the shelves are removable but once it had thawed I realized that each of the 4 shelves in the unit are made up of the actual coolant lines, which run from the top coils against the ceiling of the freezer.

Ugh! I see a few options here...
1. bend each shelf carefully back flat against the back wall
2. Cut and crimp most of the coolant lines off so that only the top coolant line remains (would this work or destroy the fridge?)
3. Build on to the unit and double its size with an insulated cabinet portion so that I have open space to work with

Does anyone have any experience with this type of freezer? Is it ok to cut off >50% of the coolant line and re-crimp the end? There are soldered connections between each of the shelves... these could be unsoldered and sealed up at the site..

Please advise if you can.. I'm losing hope.. this is my second unit toward this project.. the first fridge I got pooped out after a few days, after I had sanded/painted/cut out the internal door segment.

thanks in advance, cheers and happy memorial day!
 
I did #1.

I wouldn't mess with #2.

I'd weigh the purchase of a new chest freezer against the cost of #3. More efficient, less hassle, possibly cheaper (depending on your buildout plans for the upright).
 
#1 is possible if done carefully - some fail some work - even the slightest pinhole will kill the deal.
#2 is impossible unless you have the ability to recharge the system which would most likely cost you more than you paid for the thing.
#3 as Bike N Brew said ain't worth the time/effort

#4 take it back to the guy who told you the shelves are removable and get your $$$ back.

I would vote for #4 if possible
 
Yeah, I've walked away from many a "good deal" when someone told me the shelves were removable. Then I want to go see the fridge/freezer and said no thank you. Take it back (if you can)...
 
At this point I am pretty set on building onto the freezer. If I do, I will end up with a very large open space (the door is quite wide, this will almost end up like a small walk-in cooler). This will allow me the space to chill about 9 kegs. But I figure I can keep it pretty cheap using only insulation board, and covering the sides and top with a cloth sheet rather than painting and trying to blend the insulation with the actual freezer visually. It will give me a good bit more room to work with than even the entire empty freezer itself without shelves. The door hinges will need to be re-drilled and set on the side of the freezer. I know of a few threads here with similar projects so I have the info I need to make sure it seals properly.
I saw this at first as another set-back, but now it seems an opportunity to have a larger keezer than I ever thought! I'll update..
Cheers!
 
I ended up with the same thing. I ended up popping the clips off the bottom of the shelves, leaving one shelf on top and one above the floor. I got a tubing bender from the HVAC guy at work and used it to put a 90 in the tubes.

If you go that route, bend each of the lengths a little at a time - assuming you have multiple legs on each shelf. Patience and the right tool can yield some decent results. I put a love controller on mine and have a decent lagering chamber.

Good luck!!!
 
Well guys I just finished the cabinet build. It did quite a bit more than double the size, I now have what is nearly a walk-in cooler. This puppy will fit up to 9 kegs on two layers (if and when I do install a shelf) for a total of 18 kegs potentially. It's framed by 2x4 planks and insulated by 2" thick polystyrene. I sealed it up and ran it all night without temp control and now the whole cabinet is well below 30 degrees. 75 dollars for the freezer and around 50-60 for materials (I had some scrap 2x4's) with 2 afternoons of work .. now I have so much more cooling space than I thought I'd ever have :)
Maybe I can get some pictures up, but I'd like to dress it up a little first, its still showing its gibblies.

Cheers and thanks for all the great info and inspiration from this site!
 
Pics please!

Someone else might be in the same predicament and might be able to use your pics as a guide. The "gibblies" are the best part. (For a DIY project anyways.)
 
I will add pics, I'll have to borrow a digi cam (these cell phone pictures aren't so hot) and finally subscribe here so I can display them proper. Hopefully this evening I can show off my new "beer tomb" :D
Only sad part is I only have 7 kegs to put it in.. I'll have to get brewing big time! Maybe that's not so sad..
Also I still should put in laminate flooring.. we all know what happens in a kegerator.. at least in mine. The floor right now is only bare polystyrene.
 
This does sound great, I'd be interested in pictures as well... it would be great to have a walk in cooler :)

Hmm maybe I could frame out and super insulate the smaller extra bedroom upstairs... I'm sure my wife would go for that...
 
I will add pics, I'll have to borrow a digi cam (these cell phone pictures aren't so hot) and finally subscribe here so I can display them proper. Hopefully this evening I can show off my new "beer tomb" :D
Only sad part is I only have 7 kegs to put it in.. I'll have to get brewing big time! Maybe that's not so sad..
Also I still should put in laminate flooring.. we all know what happens in a kegerator.. at least in mine. The floor right now is only bare polystyrene.

If ya feel like showing off (even crappy) pics before ya join - it's easy.

Host pictures on photo hosting site (photobucket, flickr, etc)

Get URL of picture

Replace URL below with same address

 
Back
Top