Not just any keezer build....it's my keezer build

Homebrew Talk - Beer, Wine, Mead, & Cider Brewing Discussion Forum

Help Support Homebrew Talk - Beer, Wine, Mead, & Cider Brewing Discussion Forum:

This site may earn a commission from merchant affiliate links, including eBay, Amazon, and others.

DirtyPolock

Well-Known Member
Joined
Jan 17, 2010
Messages
293
Reaction score
6
Location
Durham, NC
So thanks to my SWMBO for getting me my starter kit and this forum, you are quickly draining my funds, but I am loaded with excitement for every new project.

I have begun my keezer conversion today. I will try to post updates as I go along. It will not be a daily event but I am sure at least something will happen at least twice a week. I may ask some questions along the way but this forum has helped me out tremendously. Once I post to the show us your kegerator thread I will surely become a premium member for all your guys help.

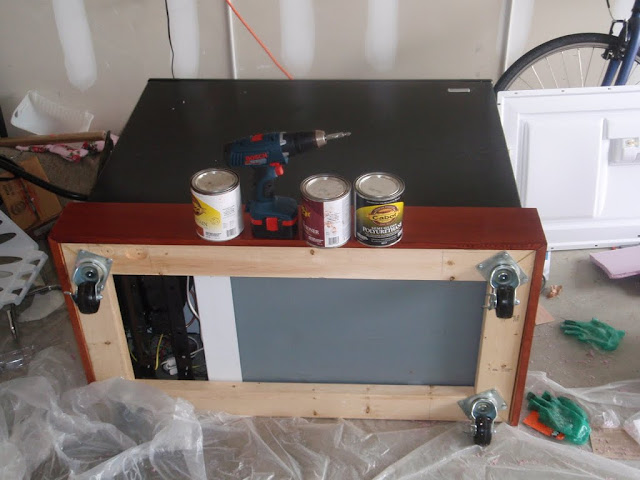
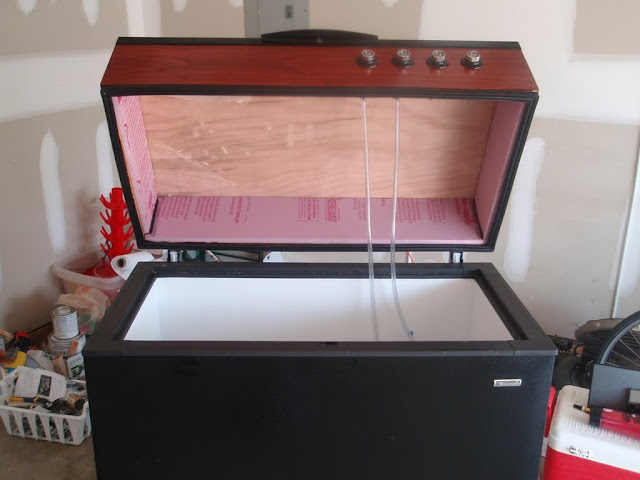
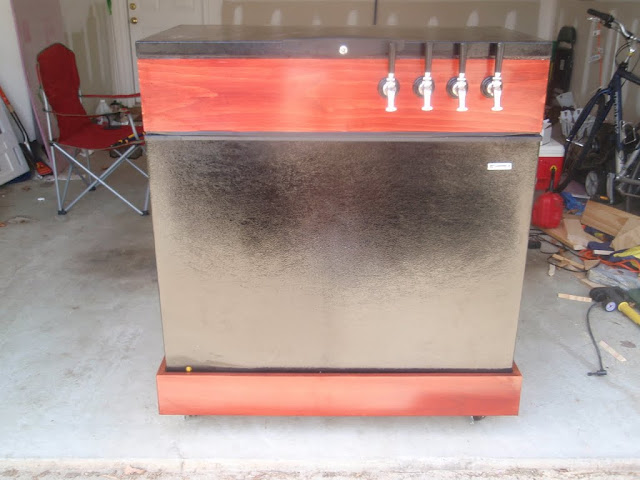
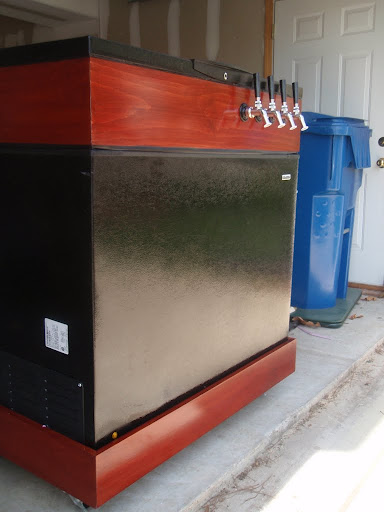
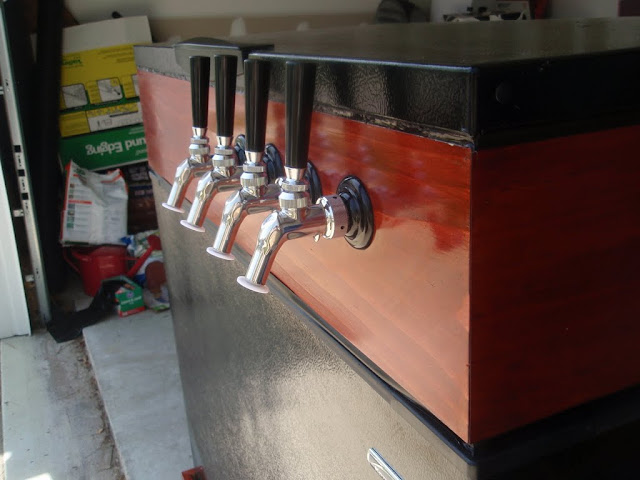
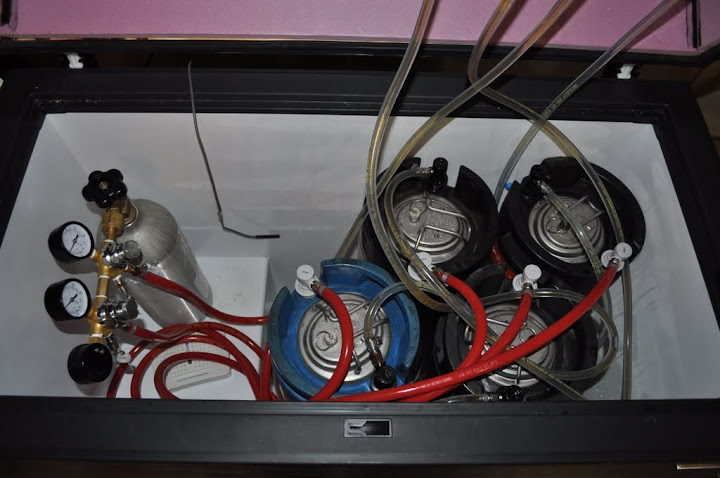
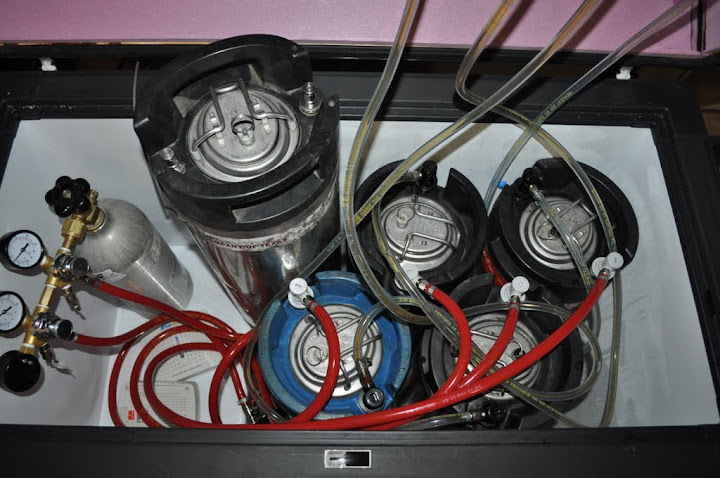
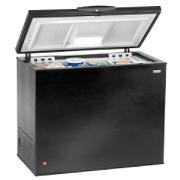
Step 1: Purchase chest freezer - Kenmore 8.8 cu ft - black

04616949000-1.jpg


Step 2: Purchase pine lumber, wood stain, and other maintenance items for all parts needed.

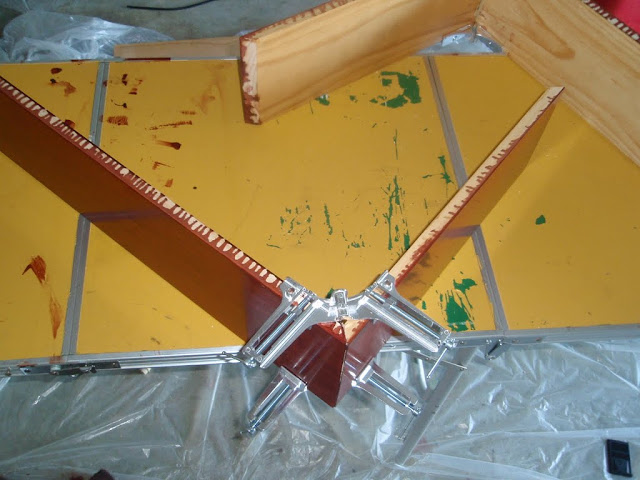
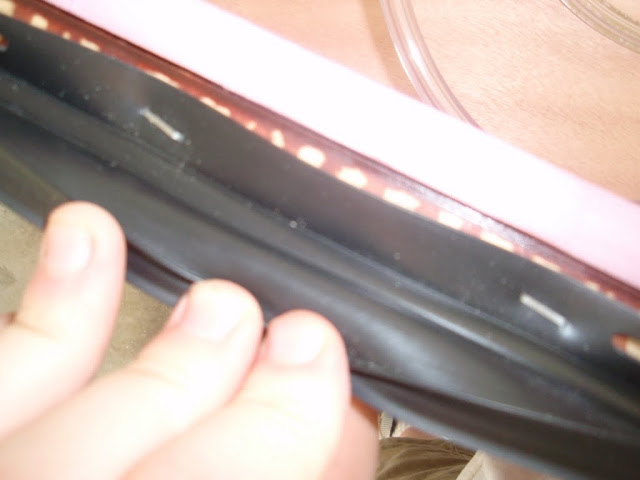
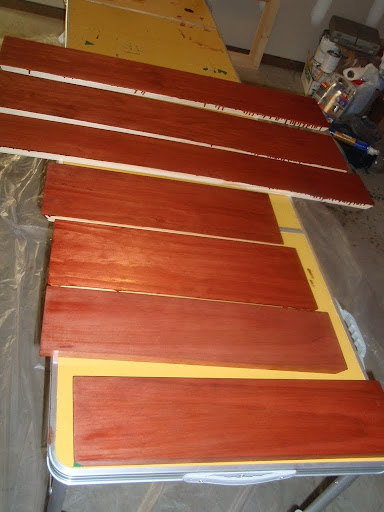
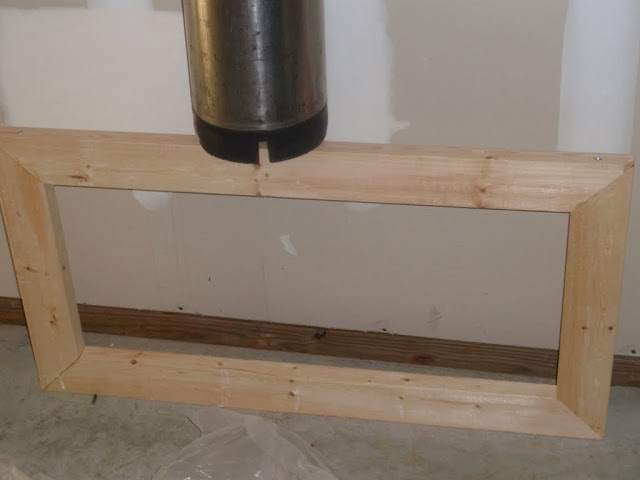
Step 3: Mider cut all parts to hopefully give a smooth look. This was my first time doing any wood work so we'll see what the finished product looks like.

P3230212.JPG


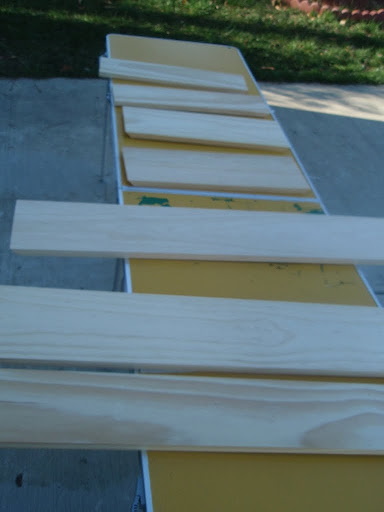
Step 4: Sand all wood before staining

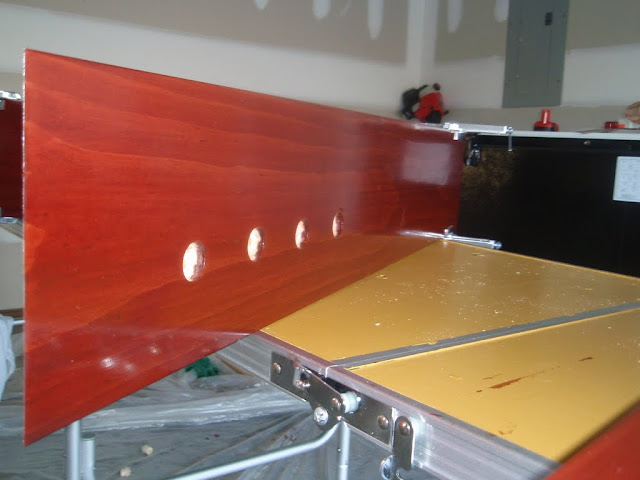
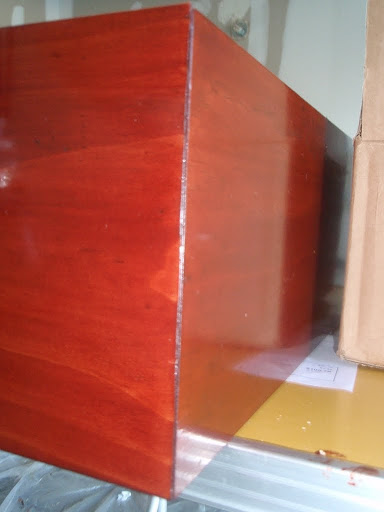
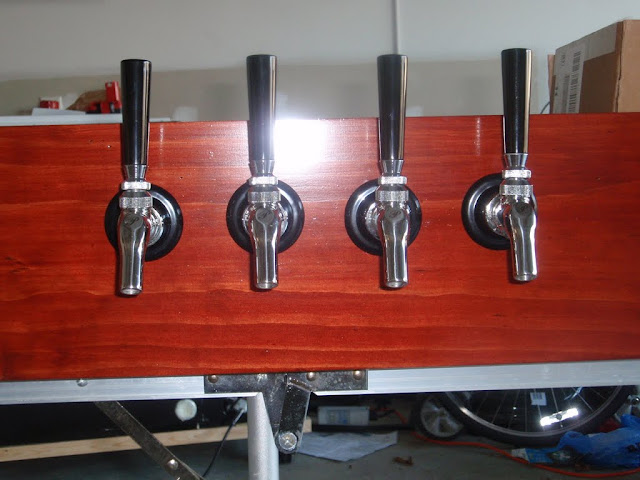
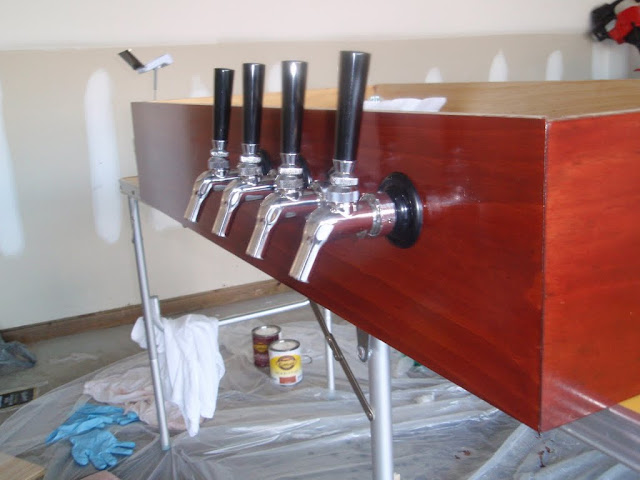
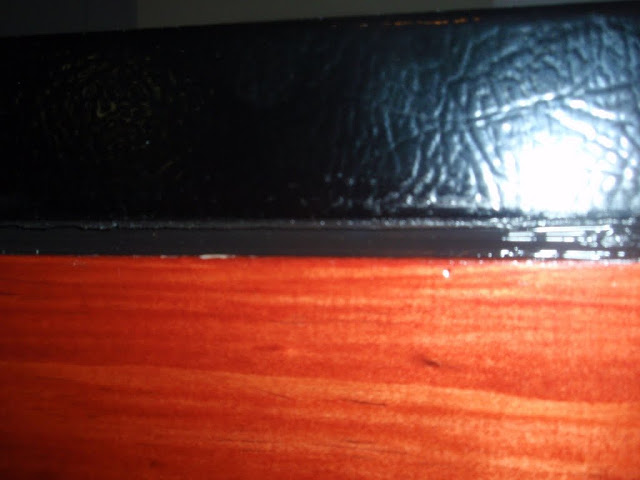
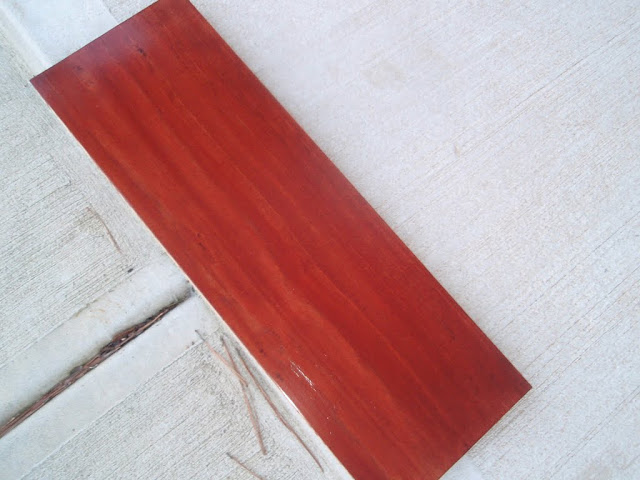
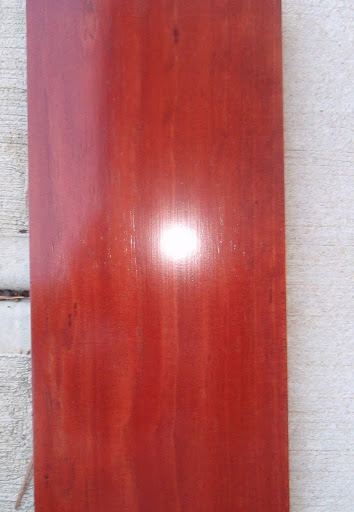
Step 5: I used wood staining pre-treatment and then quickly stained with Cabot cherry wood stain. I will let dry for about 48 hours before the second coat

P3230218.JPG
 
Step 6: Build my base for the keezer, using 2x4's. This will add a little bit of height to the taps, and I will also place some casters on them as well to make it more portable, and add more height. I used some wood screws and liquid nails to help hold it together.

P3230216.JPG


The next phase will be just to add one (maybe two) more coats of stain on then seal it up with some gloss.

That was it for the day. I hope to get this done sooner or later so I can park in my garage again.
 
Please enlighten me... You have 4 shorter section and 3 longer sections... what are you planning for this? Looks like too much for a collar but not enough for a coffin box.

Nice work so far, I'll be a few weeks behind you on my build and I can't wait. Just today I received my 4 Perlick faucets and SS shanks from AHB. We're relocating to FL in 5 days (not that anyone is counting) and will have a nice sized house instead of a cramped condo, so SWMBO has given me approval to build a sweet keezer. I'll be starting it as soon as I can find a used freezer at a decent price to convert.
 
On second thought... I bet you're building a collar, and then using the two extra short pieces and one longer piece to go around the bottom of the freezer to cover up the 2x4 base...
 
On second thought... I bet you're building a collar, and then using the two extra short pieces and one longer piece to go around the bottom of the freezer to cover up the 2x4 base...

We have a winner!!! :ban:

It's fun working on this project. It kind of makes me fell like I missed out on a lot of stuff since this is my first real DIY project. Good luck on the move and keep getting your parts lined up for your build.
 
As a little update for anybody who may be curious. My Perlick faucets came in yesterday, and continued with the project.

Step 7: Drill holes for 4 faucets. For those who never did this before I drilled a small started hole, and then used a 1" hole saw using the started hole for guidance. Also to help save the wood, drill the hold half the way on one side then finish the hole on the other side again using the starter hole.

Step 8: I sanded the boards with a fine sandpaper and gave the wood a second coat of stain.

I hope that tomorrow I will be able to get the first coat of varnish or poly-urethane on the wood.
 
Looking good. I bet you are itching to try out those perlicks. I know I was when i got them.
 
I bet you are itching to try out those perlicks.

You betcha. They look great and from all the comments that I read here, there really is no other faucet.

I am just looking forward to getting this project finished since I already have a beer kegged, waiting to be chilled and poured.
 
Step 9: I used a fine sandpaper after the second coat of stain then I added a coat of semi-gloss polyurethane. Below is a picture of one of the boards outside with some natural sunlight.

P3270212.JPG


Depending on the temperature in my garage I am hoping to get all the coats of polyurethane in by the weekend so I can start gluing everything together soon.
 
I got the second coat of the polyurethane on the external sides today.

P3290213.JPG


P3290212.JPG


I plan on getting a single coat of urethane on the internal sides just to help prevent from some humidity damage. I think that I should be able to begin gluing some of the things together starting Friday.
 
When I purchased my freezer I put pulled apart a dolly and remade it 2' X 4' out of 2/4"s.

Now I can move it around the garage even with 8 kegs and a canister in it. ;)

I don't have that much extra cord in the back to install a 6" collar, but I think I can do 4"...which is great for a 2X4.
 
I just cut my light cord and will eventually splice it so that it can power a small fan inside of the freezer. I figure that I really don't need a light that bad.

Building the base was pretty easy and I will put some casters on it as well this weekend to help wheel it around. But it seems like the interesting part will be to make a place for the freezers "feet" to sit in on the base. I think that I will get a router bit to be able to be able to make the "shoes" on the base. This way the majority of the board is holding the weight of the freezer and not just where the feet are touching the board.

The build is going well and pretty easy considering I never did anything like this before. I think that I should be able to have it ready by late next week (4/9)...hopefully.
 
Step 10: I bought four 3" swivel w/ brake casters and installed them on to my base board. I installed them at a bit of an angle hoping to give a little free room so that I can lower my wodden skirt.

P3310215.JPG


Sorry for the bad angle but i took the picture after step 11, so this is an updside down picture.

Step 11: I couldn't really create a groove for the feet of my freezer to sit in so I just placed a heaping amount of liquid nails on the feet and set the freezer on top of the base board with 3" rims.

P3310213.JPG


Step 12: I purchased four 90 degree angle clamps and began gluing my collar together, again using liquid nails.

P3310212.JPG


Here you can see my future home to four perlick faucets. You can also see the slight gloss from the semi-gloss polyurethane.

P3310216.JPG


Tomorrow I should be glue the two halves of the collar together and hopefully set it on the freezer Friday, and begin chilling my kegs this weekend. :rockin:
 
Looks great, I recently purchased the same freezer and hope to start building mine up this weekend.

What size pine is that you went with?
 
Did you get any poly on the ends of the boards where you're gluing them together? If so, you may want to reenforce those with some angle brackets or something. You want bare wood together when gluing.

Just mentioning since you said you don't have a whole lot of woodworking experience. My dad's a hobbyist woodworker and had drilled that into my head numerous times.

Looking great. The stain is purdy!!
 
Looks great, I recently purchased the same freezer and hope to start building mine up this weekend.

What size pine is that you went with?

I went with a 1"x8" piece of pine. I was originally hoping to leave the top plastic cover on, but I may be replacing that with some thin plywood.


Did you get any poly on the ends of the boards where you're gluing them together? If so, you may want to reenforce those with some angle brackets or something. You want bare wood together when gluing.

Just mentioning since you said you don't have a whole lot of woodworking experience. My dad's a hobbyist woodworker and had drilled that into my head numerous times.

Looking great. The stain is purdy!!

I don't think that I got any poly on. Thanks for the heads up though. I may add on some angle brackets later on. I am pretty impressed with my stain since this was my first time. I appreciate all the help!
 
So it seems as though I had to follow JetSmooth's advice in reinforcing the wood with some angle brackets because after 24 hours the liquid nails it didn't really help. So there was a little backtracking, but no big deal.

Step 13: Re-glue the ends then I used the 90 degree clamps to help stabilize the joints while I added some angle brackets.

P4010216.JPG


I repeated this on each corner and the last corner lined up nearly perfectly. :D

P4010219.JPG


Just for giggles since I am getting really excited about the build I put the shanks, and perlicks in just to see what it looks like, and it looks glorious!

P4010212.JPG


P4010218.JPG


I am going to get some plywood tomorrow and put it on the inside of the lid. I will also sand the top and bottom edges of the collar then glue it to the lid so that the collar will lift with the lid. My ETA to finishing is Monday 4/5.
 
looks alright man, good kob

Thanks, the idea for the base with wheels was actually borrowed from your project. I think that it is a great option to help move it around if needed and also raise the facuets a few extra inches.
 
glad i could help, I meant to say Job up there. Make sure you have good casters, i bought mine at menards for $7 apiece - i thought they were good quality. The whole unit is hard to move, though. the casters don't swivel well and the unit moves very tough. I think it is becuase of the weight of the unit.
 
Step 14: I cut a piece of laundry board and used this as the replacement for the plastic on the top of the lid. I still used liquid nails to glue it to the lid.

Step 15: I glued and angle bracketed the skirt to cover the base in the same manner as step 13, then I glued the skirt to the base.

P4030218.JPG


Step 16: I saved the original stripping to seal against the bottom of the chest freezer and then used a staple gun to secure it to the collar.

P4050219.JPG


Step 17: I carefully lined up the lid to the top of the collar and then glued it to the laundry board on the lid. It lined up almost perfectly.

Step 18: I used some black silicone to use in the gap between the top lid and the collar since I used a thin piece of laundry board to replace the plastic cover on the lid.

P4050218.JPG
 
Step 19: Install the shanks, and tubing the the two kegs that I have for now....don't worry more kegs are on the way from midwest (hopefully).

P4050220.JPG


Step 20: I found a small piece of metal the lined up with the holes on the hinges to use as extra support on the collar. I think that I read somewhere that this will help prevent damage to the collar. I used some wood screws and screwed the collar to the hinges.

P4050221.JPG


You can see that the hinges can support the weight of the wood, shanks, and faucets with no problem.

P4050222.JPG


And now the (near) finished product....

P4050223.JPG


P4050224.JPG


P4050226.JPG


All that is left is for my upgrade to the kegging system to arrive from midwest supplies so that I can add in more kegs, and a regulator. But beginning on Wednesday after my kegs can chill for 48 hours I will pour my first pint from my kegerator. :rockin: :mug: :tank:

I may add a few more pics eventually once I actually add in all the kegs and the regulator. I may also add in two more faucets since I can supposedly fit 6 corny kegs in with the collar.
 
What's the front to back width of this freezer? Does it hold a commercial 1/2 barrel?
 
The inside dimensions are about 24"x16" and a height of 27" without the collar. I don't know the exact size of a half barrel, I'm using the plastic ale pail's to brew.
 
Bump! Just curious if you have any pics of the inside of the finished product. I have a similar freezer by Woods that has inside dimensions of roughly 16.5 x 26.5 x 27. But with the frigging compressor in the one corner, I only figure I can get 3 Cornys in it. Were you really able to get 4 in that one?
 
Here is a picture with the inside as is. I never did anything specific with the gas/liquid lines so they are all over the place.

DSC_0463.JPG


The small space next to the compressor cannot hold an additional keg as seen here:

DSC_0464.JPG


I can PM you the dimensions of the inside once I find my measuring tape.
 
Thanks for posting the pictures! In post #27 you listed the inside dimensions as 16x24x27. Mine is slightly different, but my compressor shelf looks smaller than the one in your photo. I should probably cut out 4-5 circles that are 9" in diameter to see how they would fit. I just did it on paper originally.
 
Back
Top