Motorized Grain Mills: Time to show them off!

Homebrew Talk - Beer, Wine, Mead, & Cider Brewing Discussion Forum

Help Support Homebrew Talk - Beer, Wine, Mead, & Cider Brewing Discussion Forum:

This site may earn a commission from merchant affiliate links, including eBay, Amazon, and others.
This is mine. I put it on a board sized to sit on two homer buckets side by side. That way, for really big grain bills I can just pick it up and turn it around to mill into the second bucket. Not a lot of cool innovation, just the Williams motor I got on sale, the Cereal Killer I've been using, a wood board I got from Menards and a 5/8" Delrin cutting board for the riser on the mill.

MotorizedMill.jpg
 
Keeping it simple with a drill driven mill - works well for small batches ;-) The shirt sleeve channels the milled grain with a minimum of fuss and dust to the collecting bin.
MillandDrill.JPG
 
Last edited:
A few pictures showing my automated mill.
Filling the hopper, milling and conveying milled grain is initiated by the brewery controller requesting grain from the grain processing system.
The milled grain is conveyed with air for thirty feet into the toy brewery hopper.
Multiple sensors let the system know about any problems or slow downs.
My goal is to upgrade the mill and silos by removing all cables (15) with a wireless system by the end of the year..

100_9455.JPG


100_9612.JPG 100_9428.JPG MillAutomation (28).JPG MillAutomation (11).JPG LineVac1.JPGLineVac3.JPG 100_9545.JPG
 
A few pictures showing my automated mill.
Filling the hopper, milling and conveying milled grain is initiated by the brewery controller requesting grain from the grain processing system.
The milled grain is conveyed with air for thirty feet into the toy brewery hopper.
Multiple sensors let the system know about any problems or slow downs.
My goal is to upgrade the mill and silos by removing all cables (15) with a wireless system by the end of the year..

View attachment 577740

View attachment 577741 View attachment 577744 View attachment 577745 View attachment 577748 View attachment 577749View attachment 577750 View attachment 577752

hah love how overkill this is.
 
A few pictures showing my automated mill.
Filling the hopper, milling and conveying milled grain is initiated by the brewery controller requesting grain from the grain processing system.
The milled grain is conveyed with air for thirty feet into the toy brewery hopper.
Multiple sensors let the system know about any problems or slow downs.
My goal is to upgrade the mill and silos by removing all cables (15) with a wireless system by the end of the year..

View attachment 577740

View attachment 577741 View attachment 577744 View attachment 577745 View attachment 577748 View attachment 577749View attachment 577750 View attachment 577752
Just guessing...
Mechanical engineer?
 
My newest mill.
 

Attachments

  • IMG_2520.jpg
    IMG_2520.jpg
    614.1 KB · Views: 521
  • IMG_2521.jpg
    IMG_2521.jpg
    952.4 KB · Views: 532
  • IMG_2568.jpg
    IMG_2568.jpg
    602.8 KB · Views: 521
  • IMG_2569.jpg
    IMG_2569.jpg
    563.9 KB · Views: 519
  • IMG_2570.jpg
    IMG_2570.jpg
    653.5 KB · Views: 528
  • IMG_2571.jpg
    IMG_2571.jpg
    595.6 KB · Views: 521
  • IMG_2573.jpg
    IMG_2573.jpg
    616.8 KB · Views: 533
  • IMG_2578.jpg
    IMG_2578.jpg
    712 KB · Views: 518
  • IMG_2579.jpg
    IMG_2579.jpg
    702.4 KB · Views: 540
  • IMG_2581.jpg
    IMG_2581.jpg
    848.5 KB · Views: 515
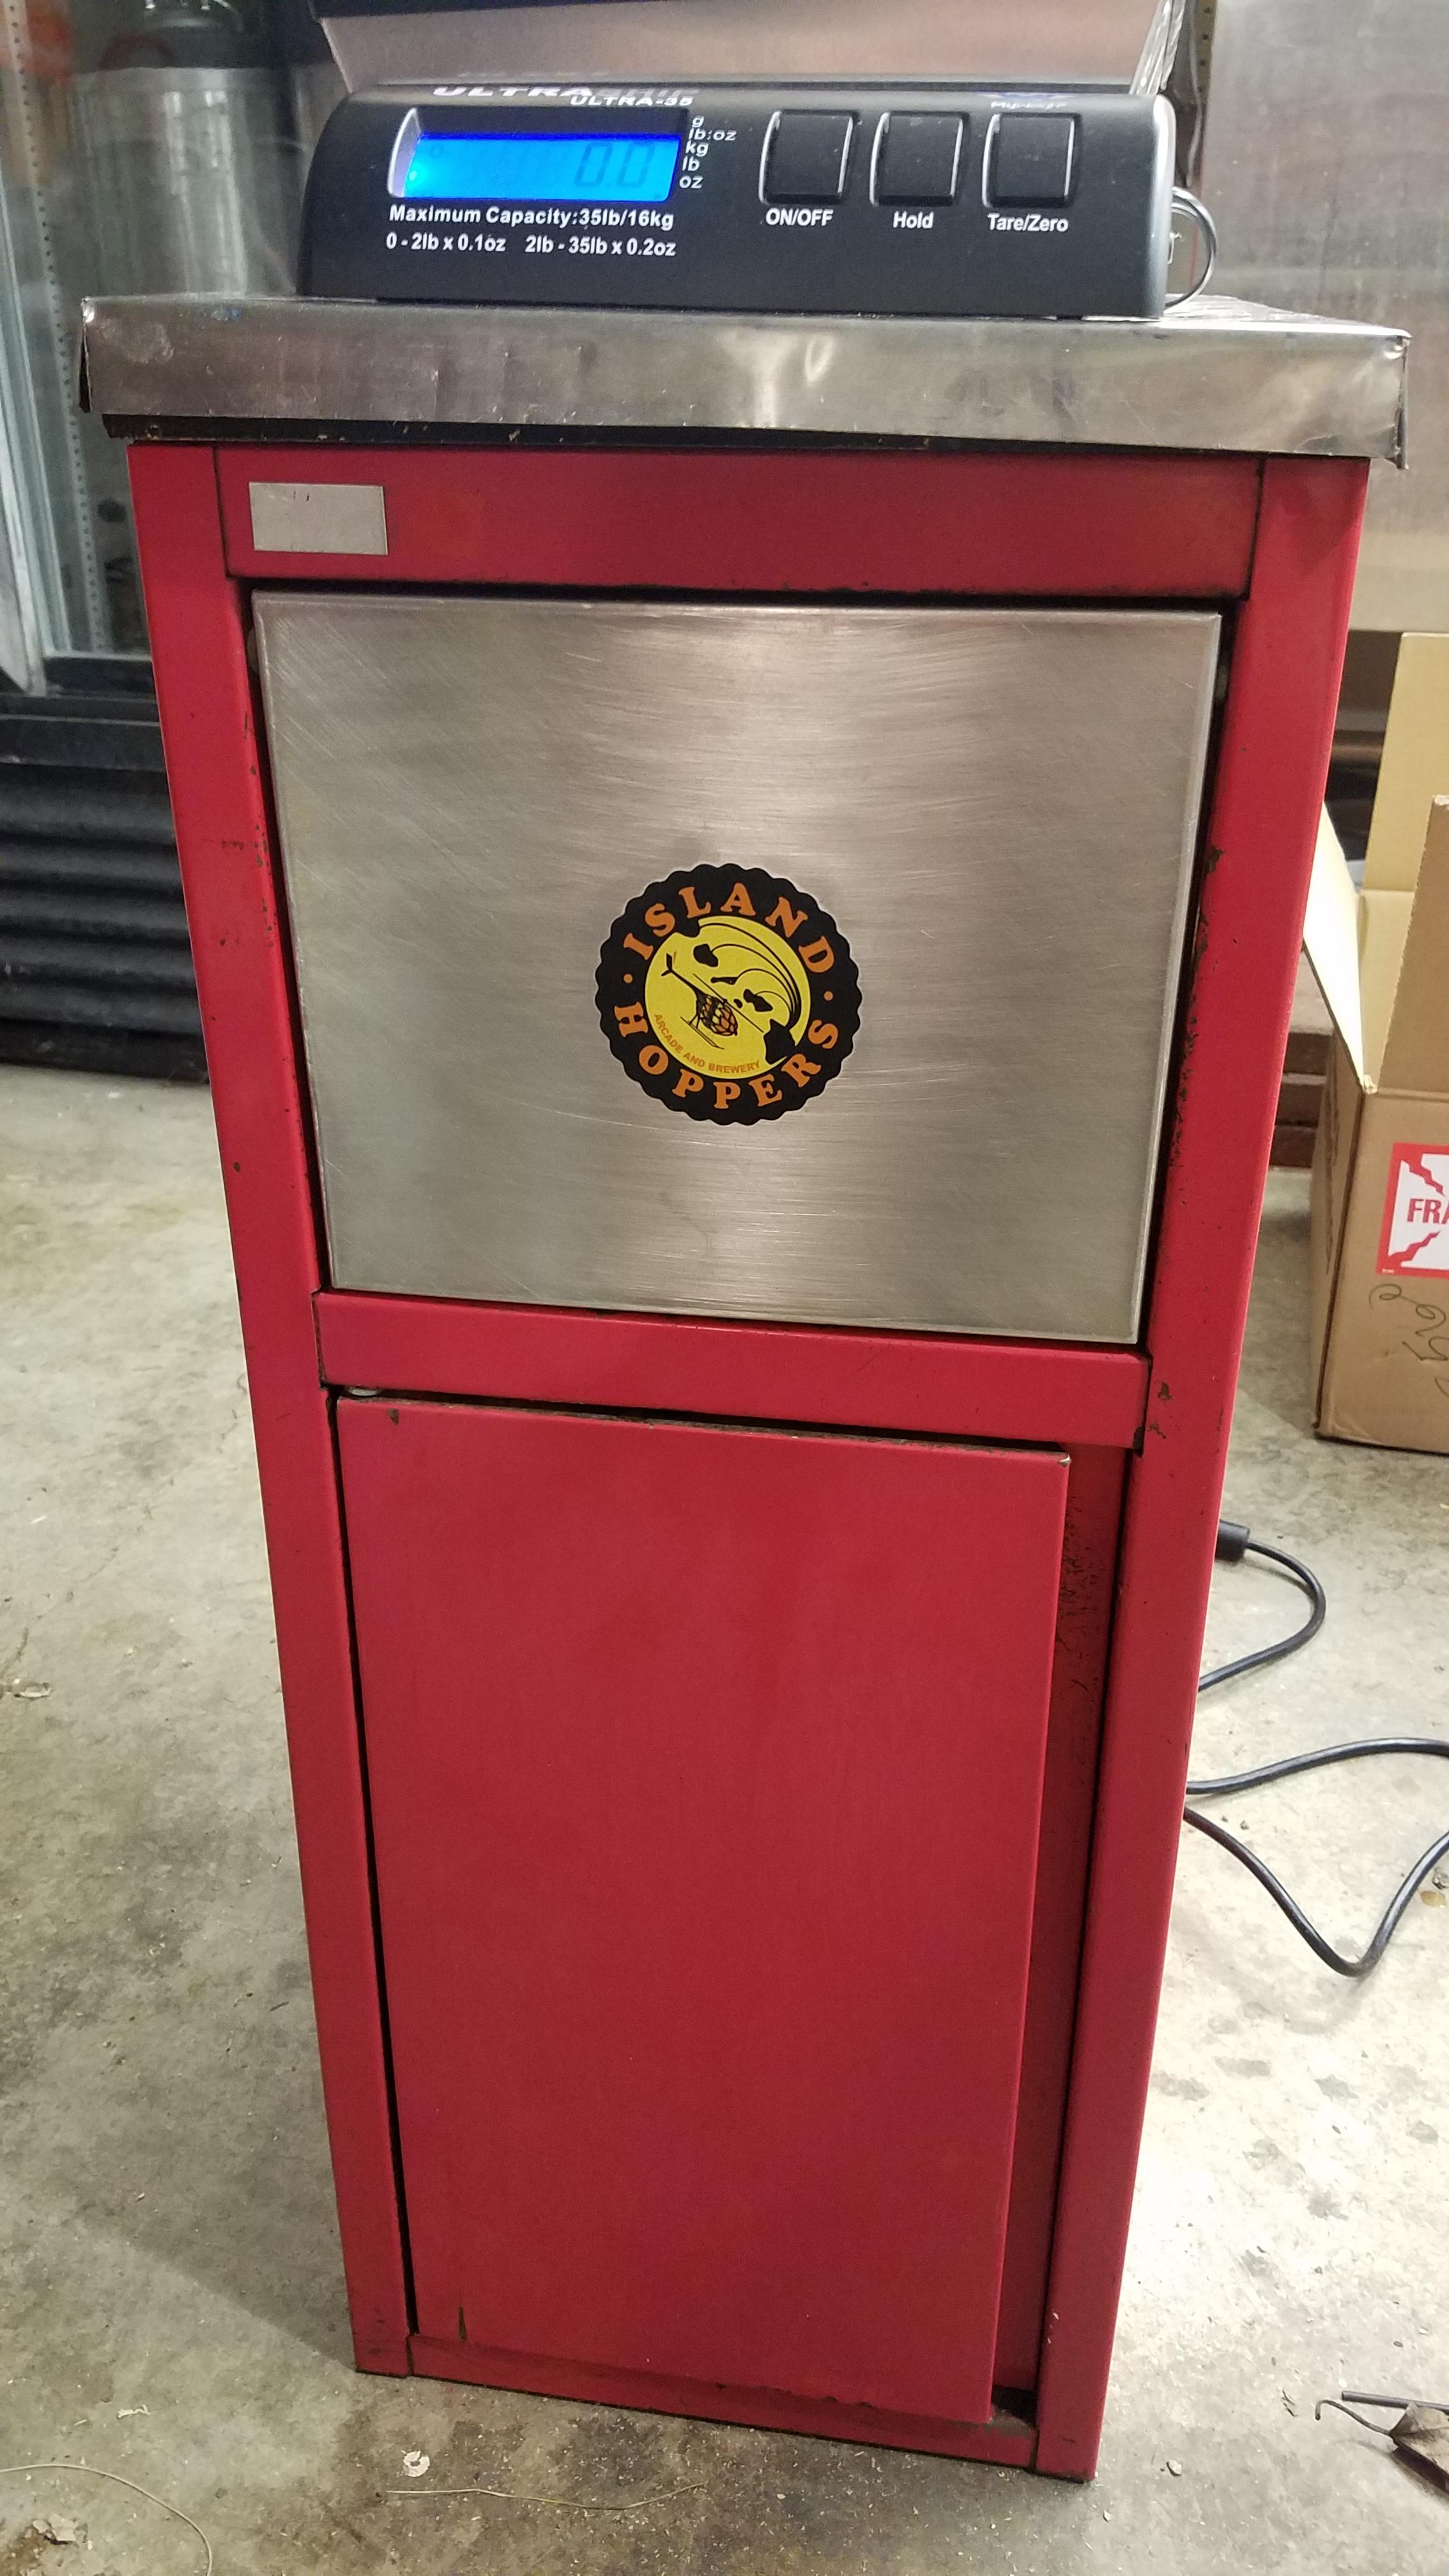
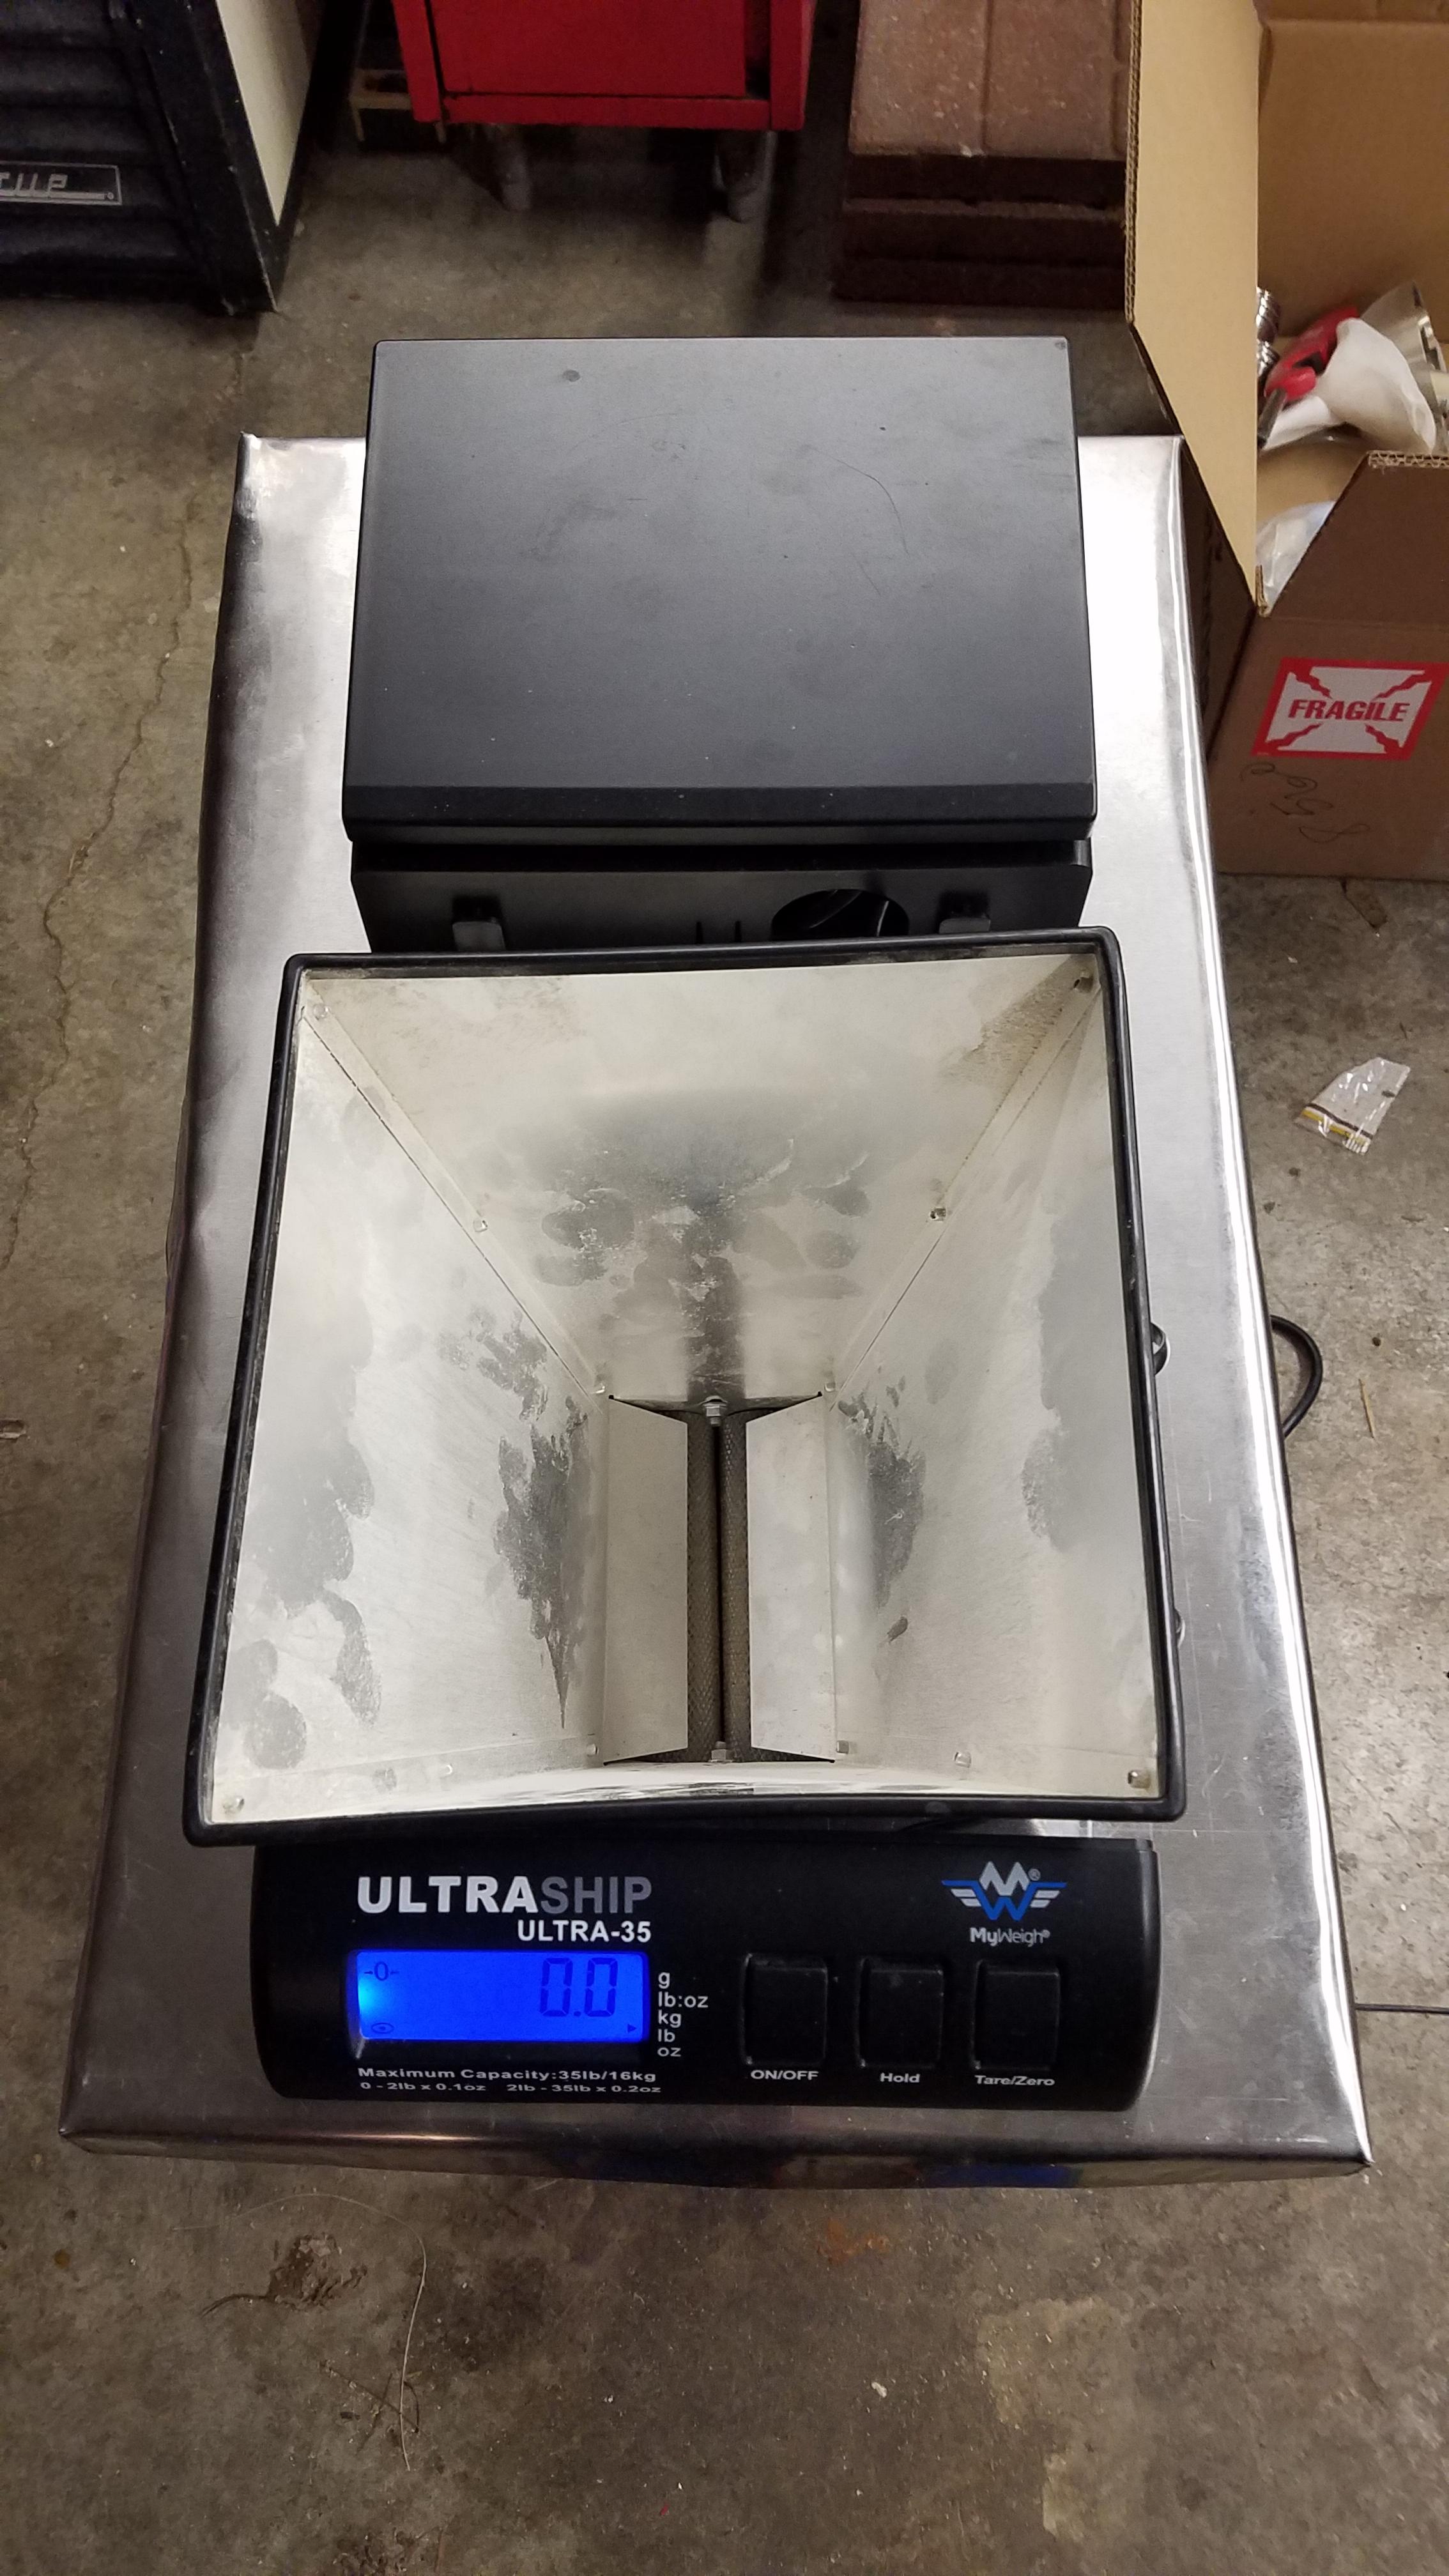
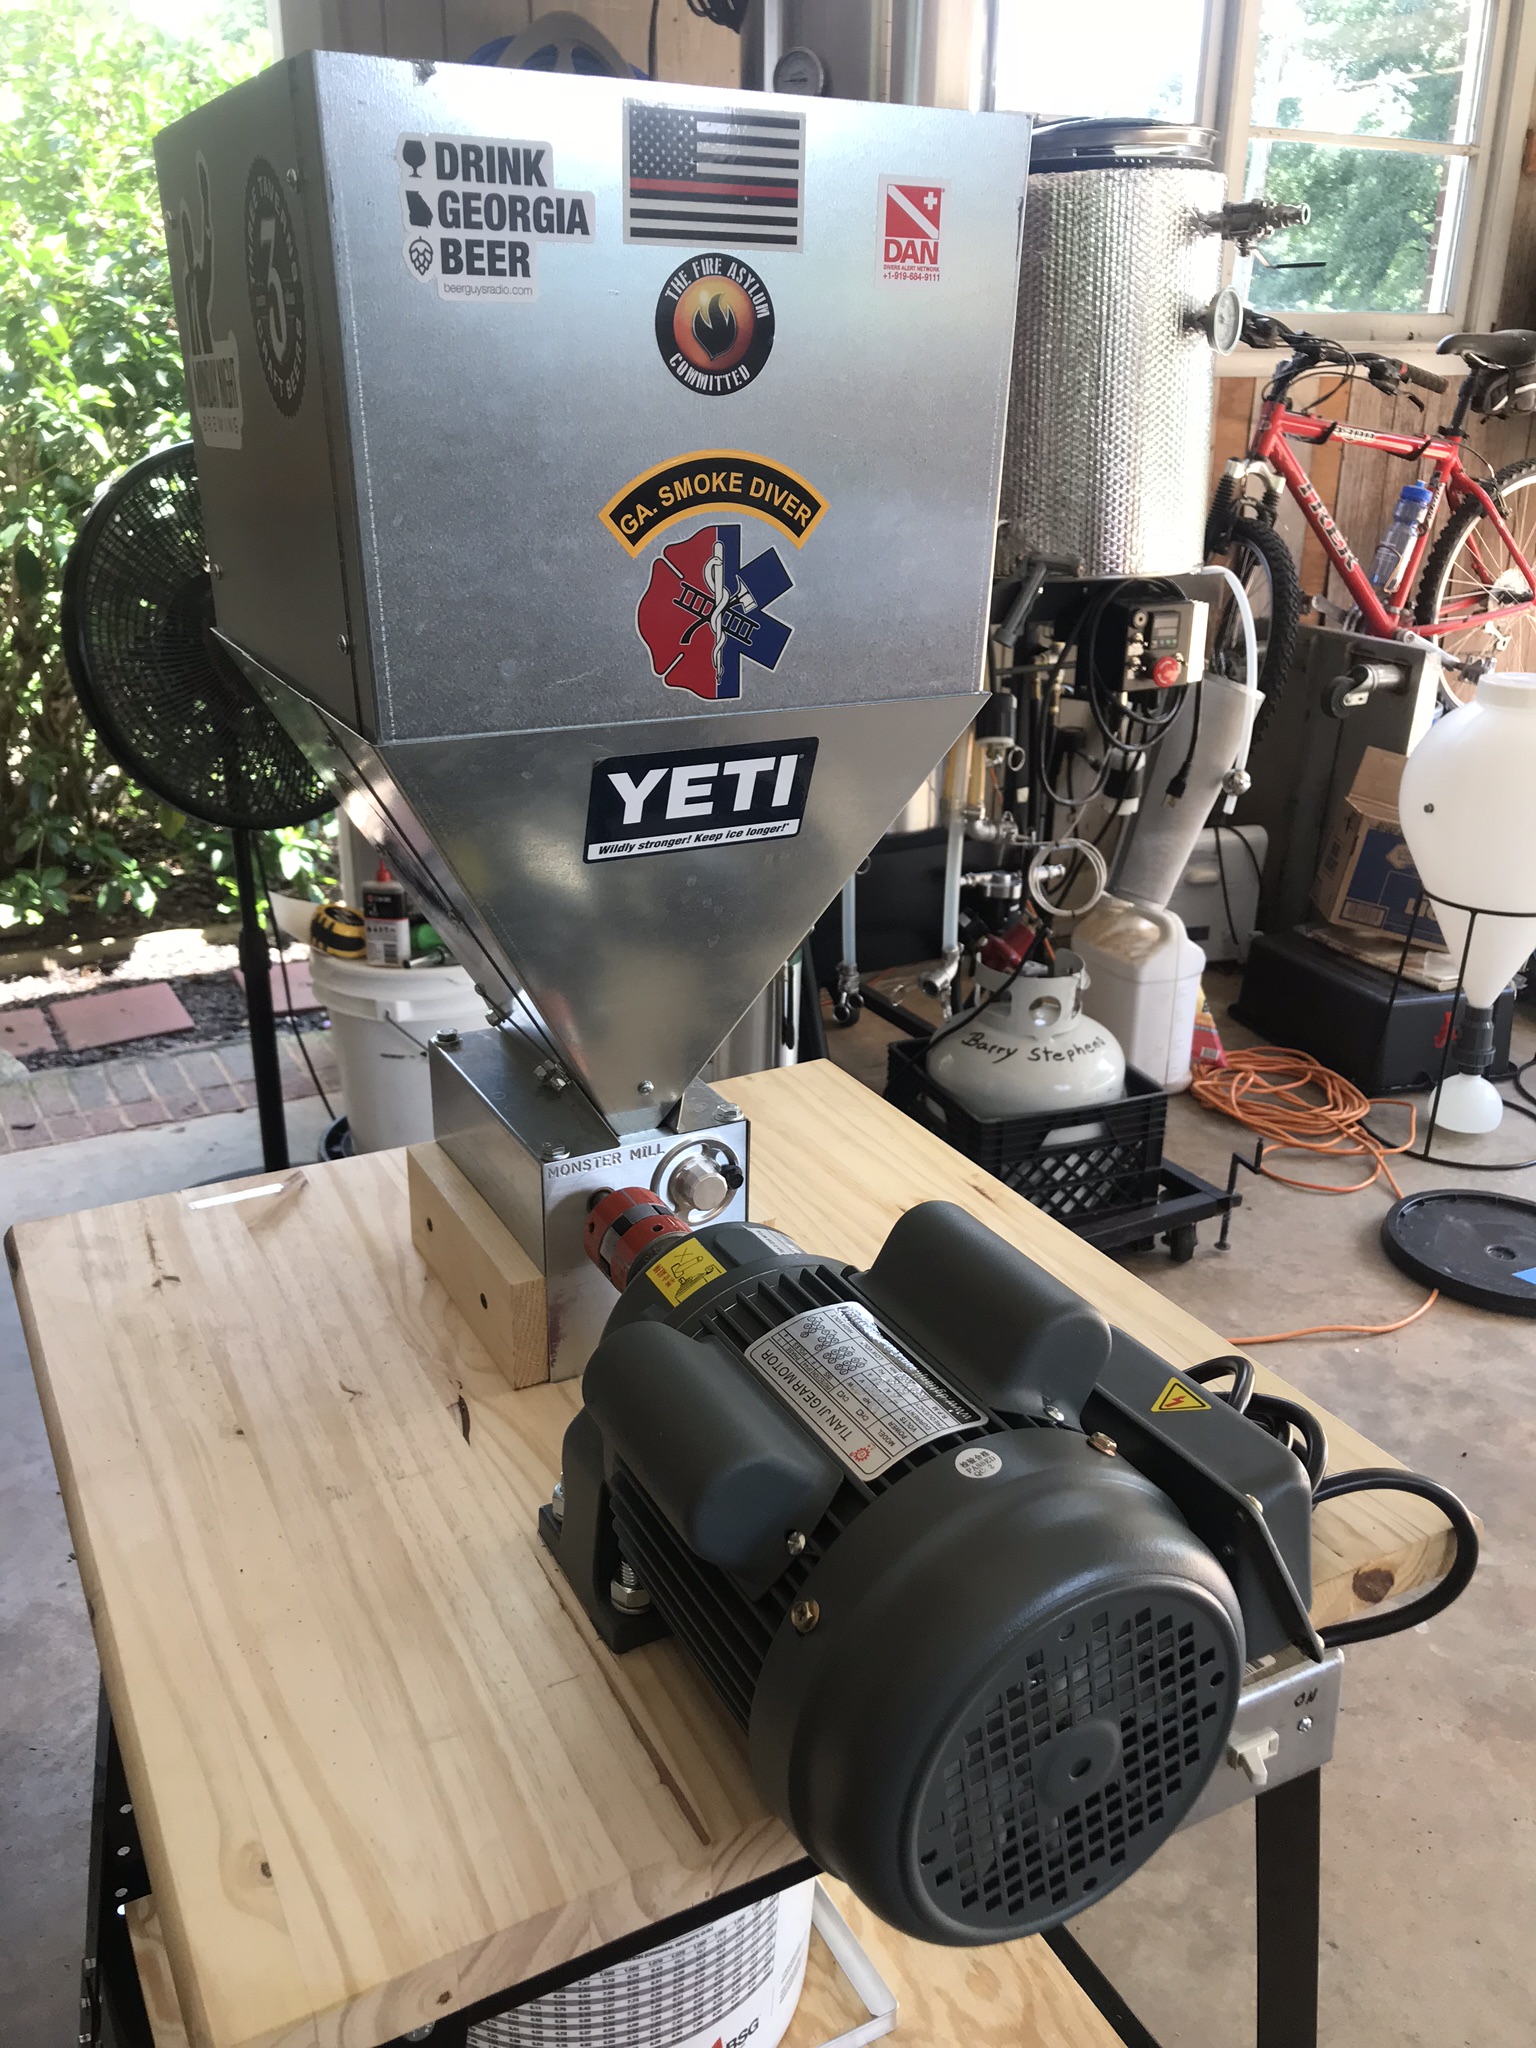
I've been milling grain using a DeWalt handheld 20 volt drill since I purchased my Cereal Killer grain mill from Adventures in Homebrewing last year. It isn't terribly inconvenient, but since I brew alone it gets dicey pouring grain while manning the drill at times. I started shopping for a motor and found a Maytag washing machine motor from I'm guessing the 1960s for $25. When I plugged it in for the first time I was amazed at how smooth and quiet it ran.

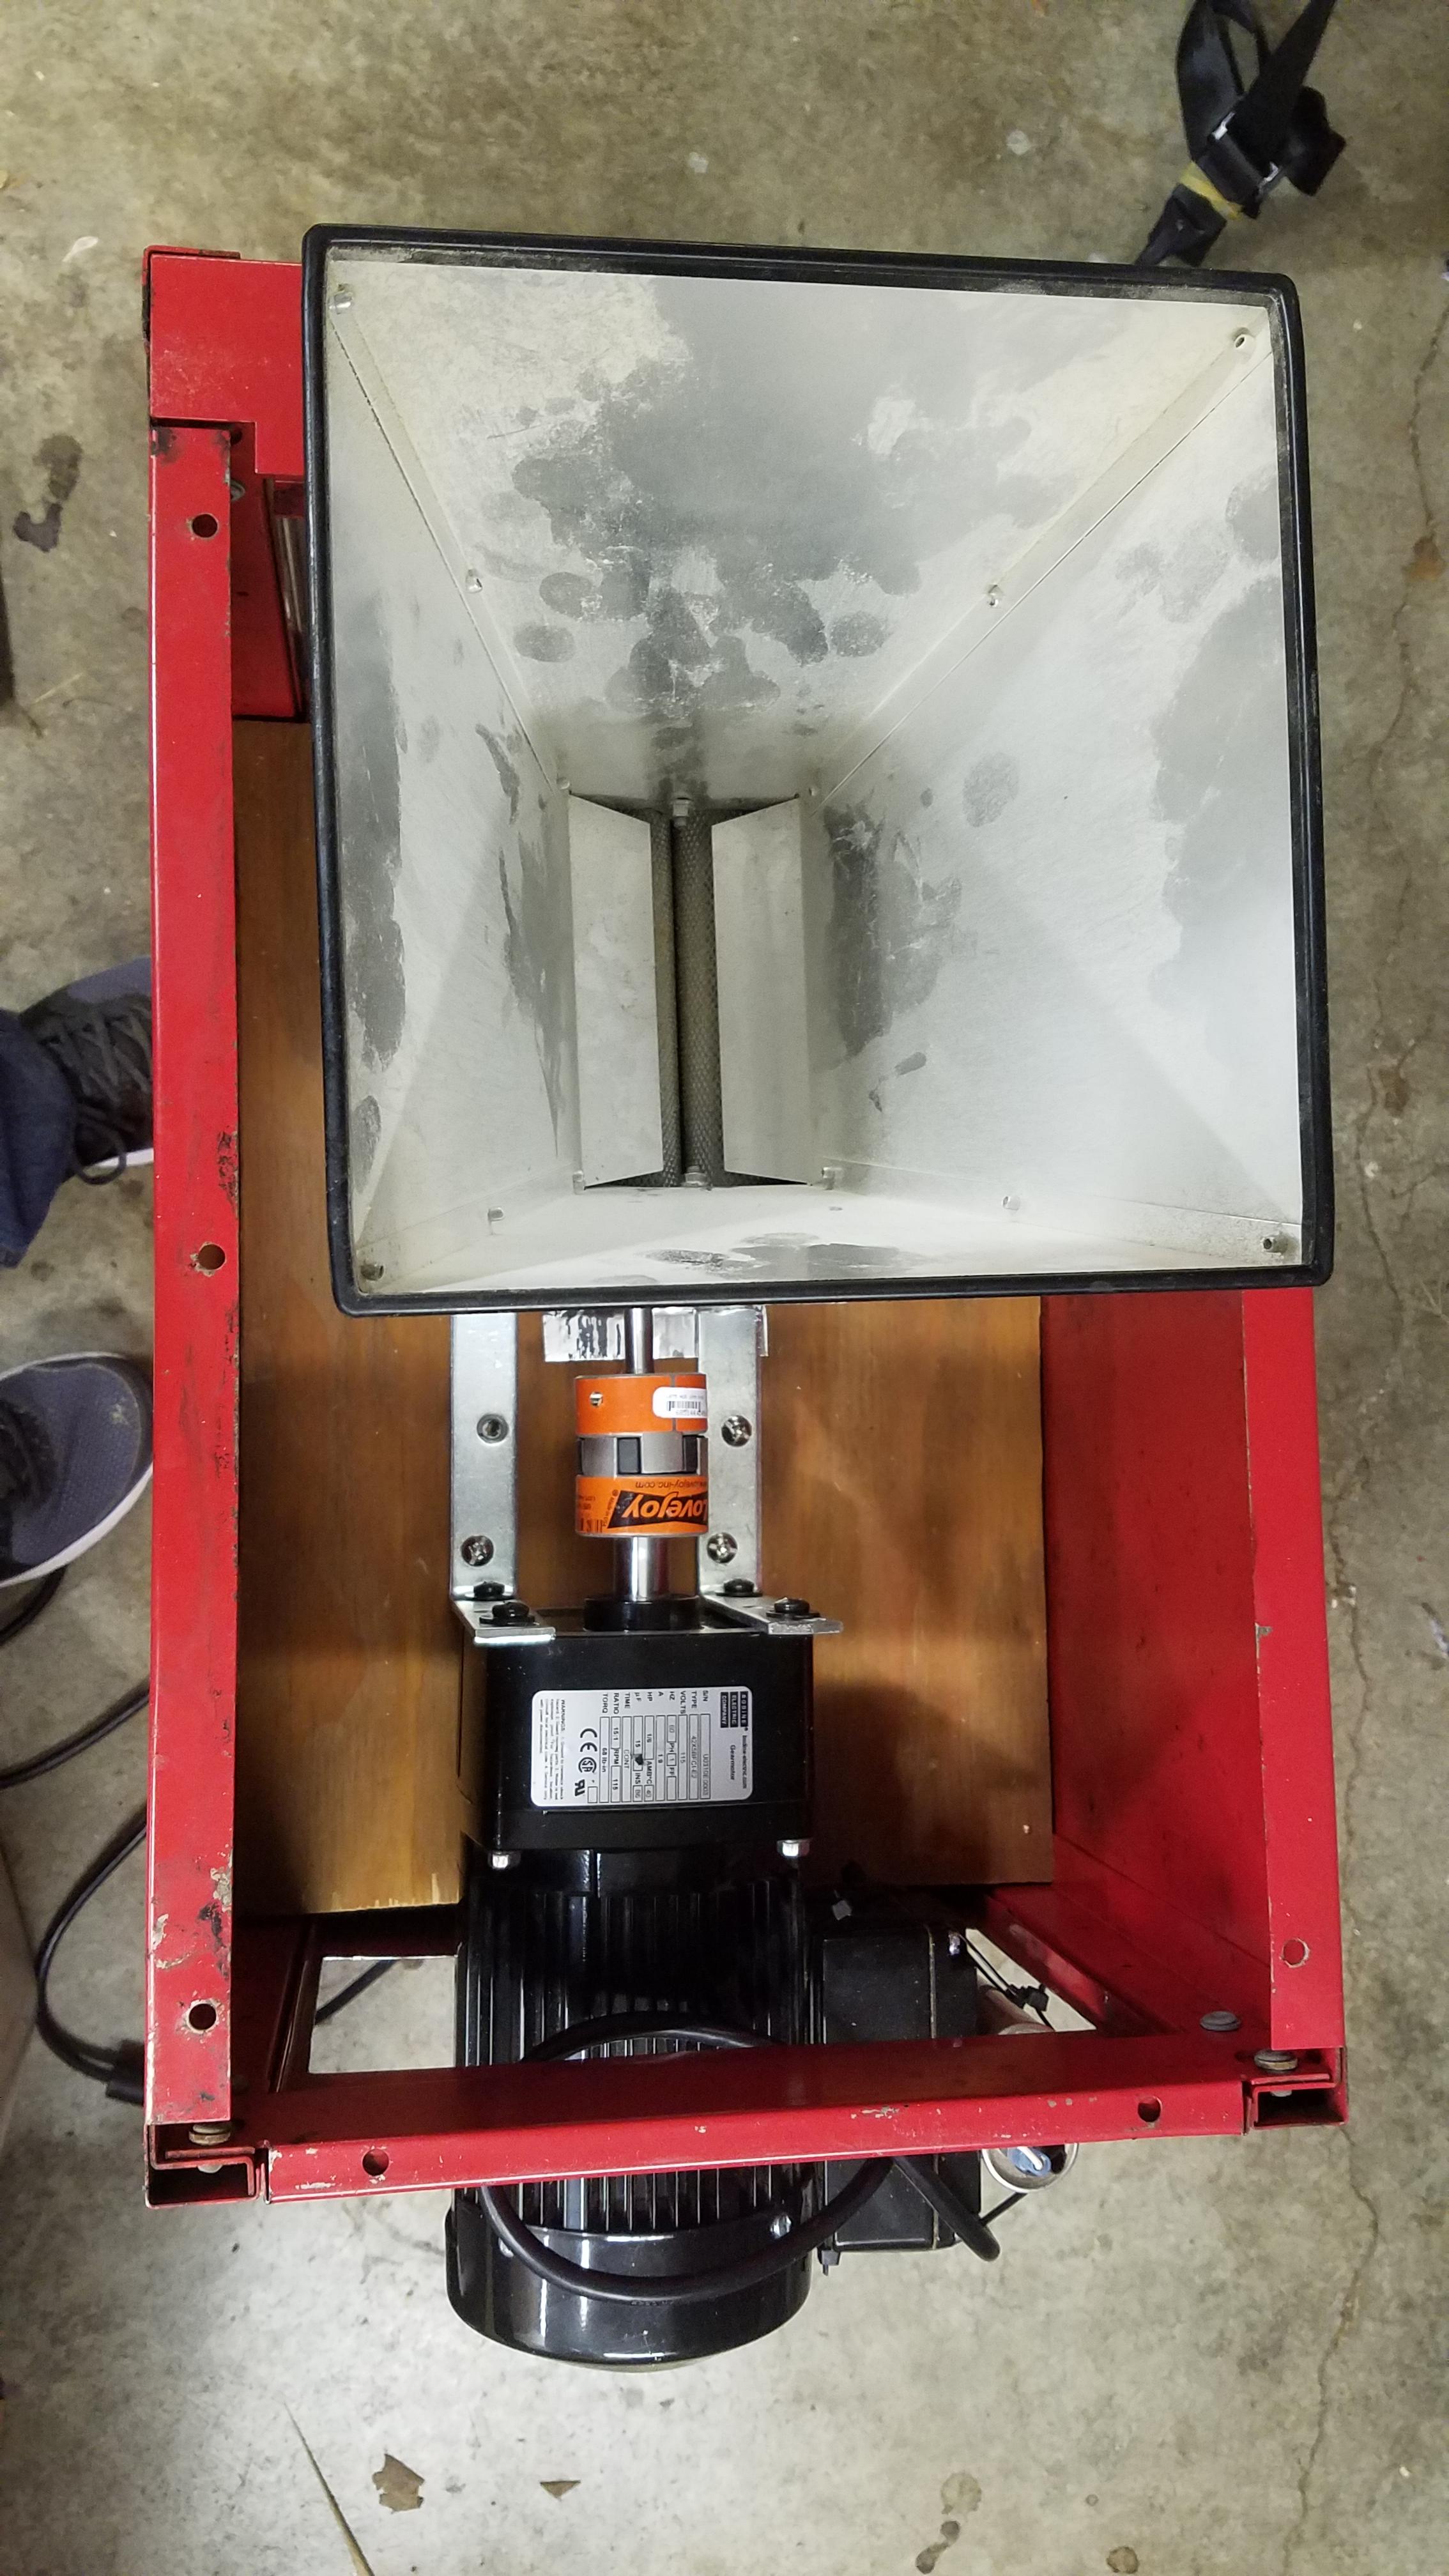
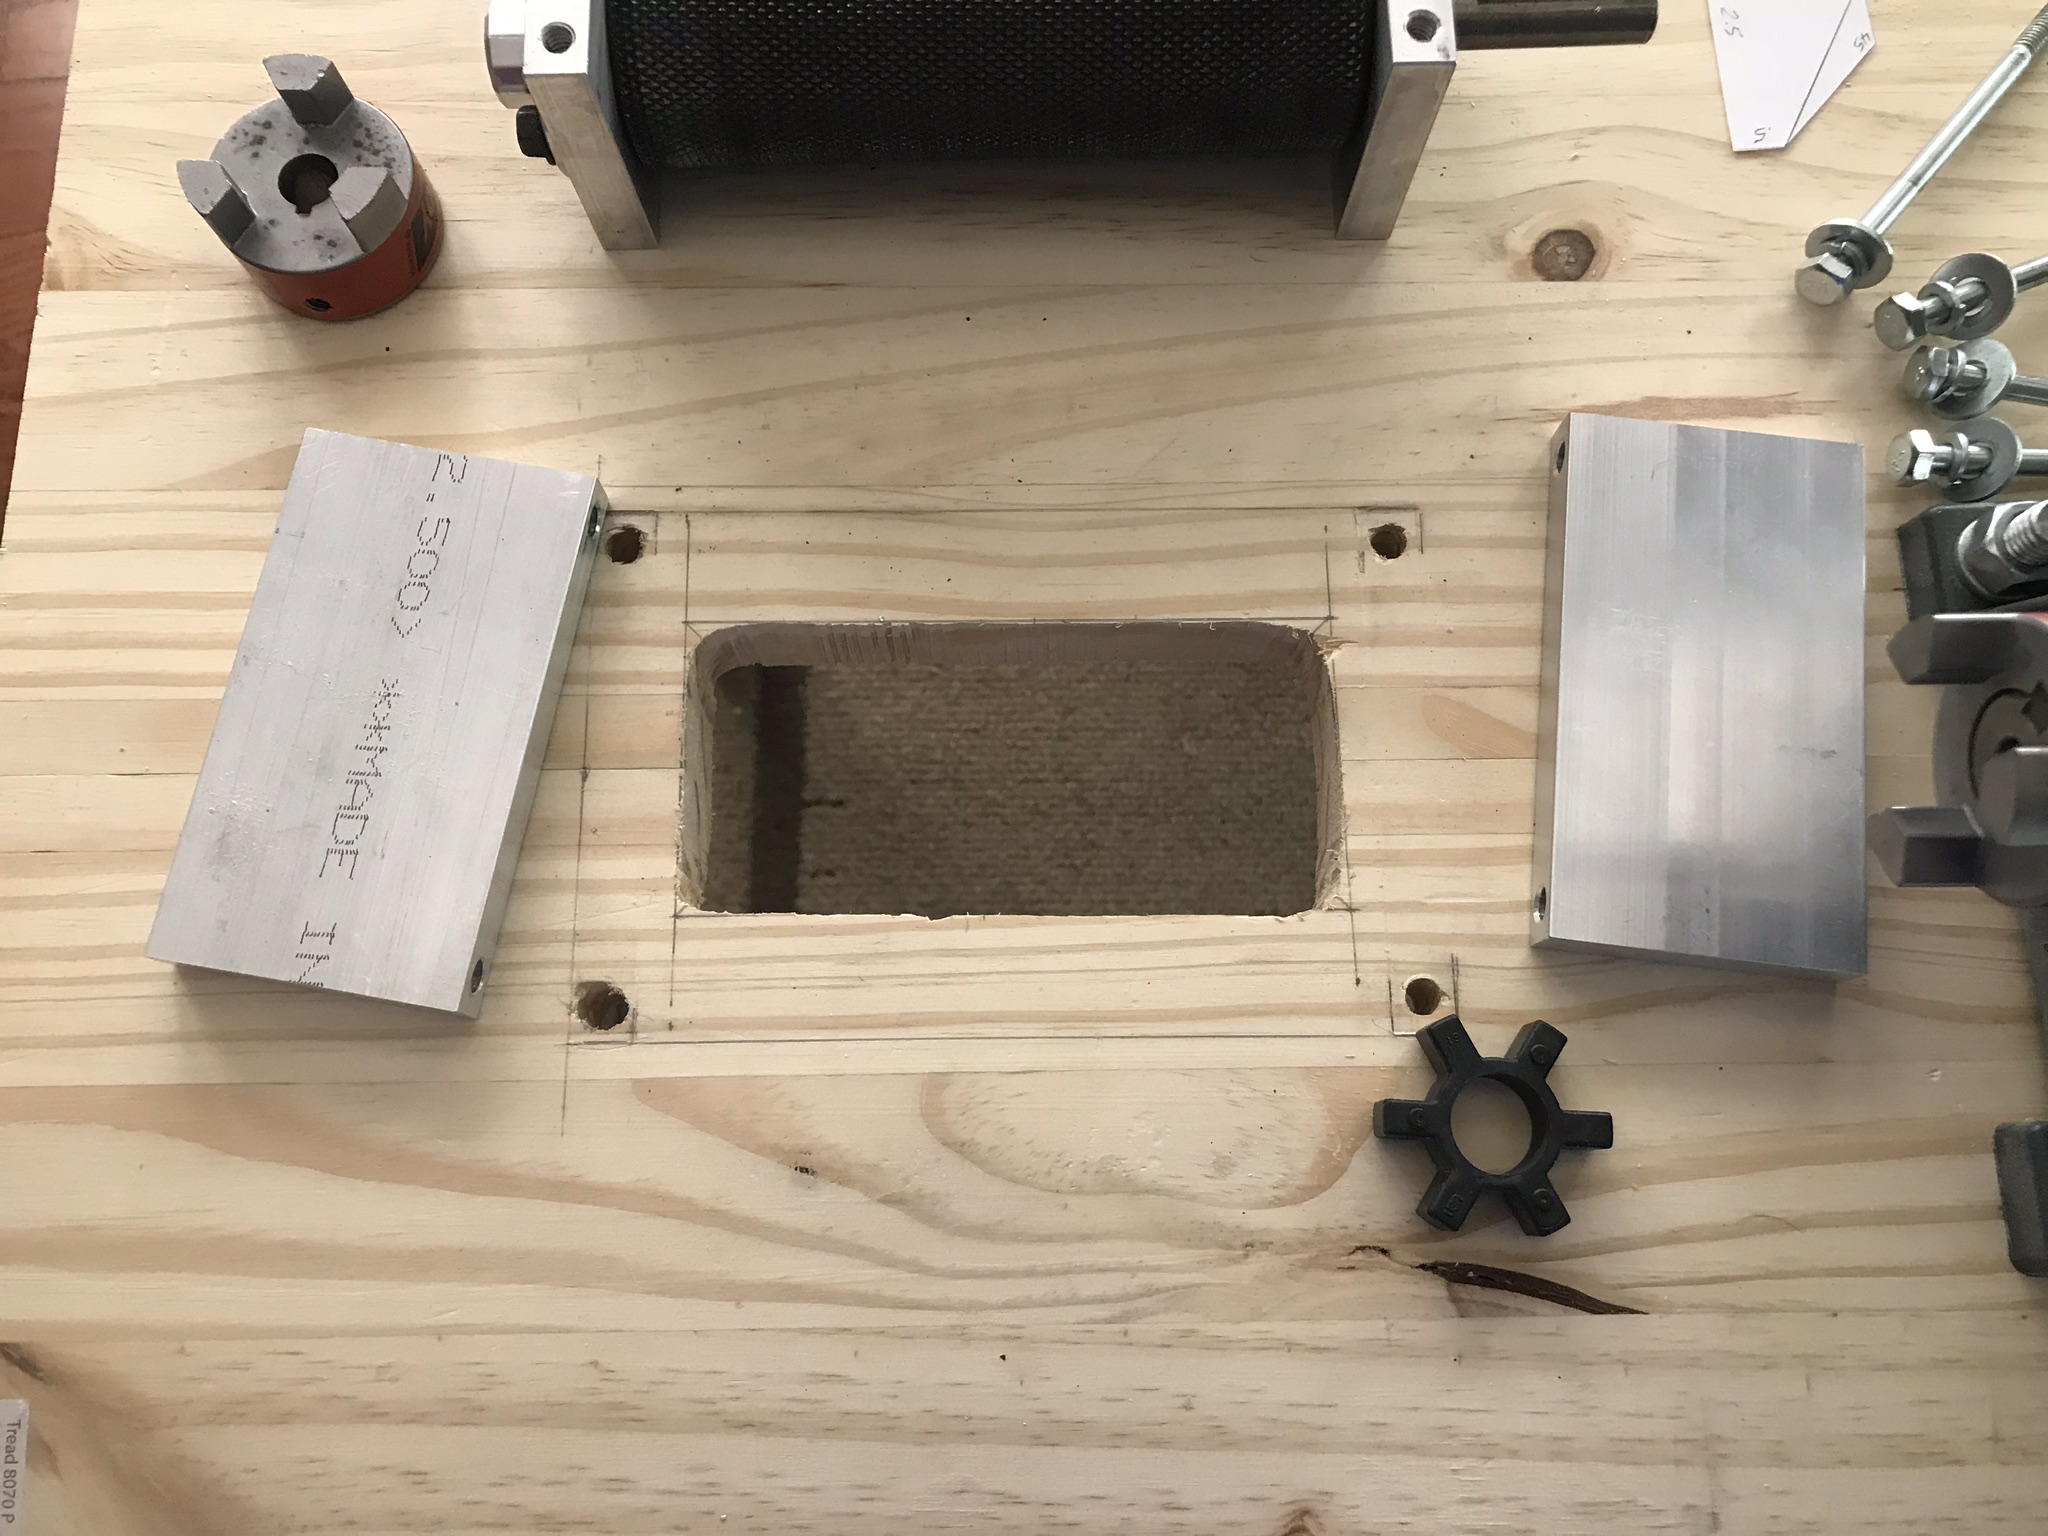
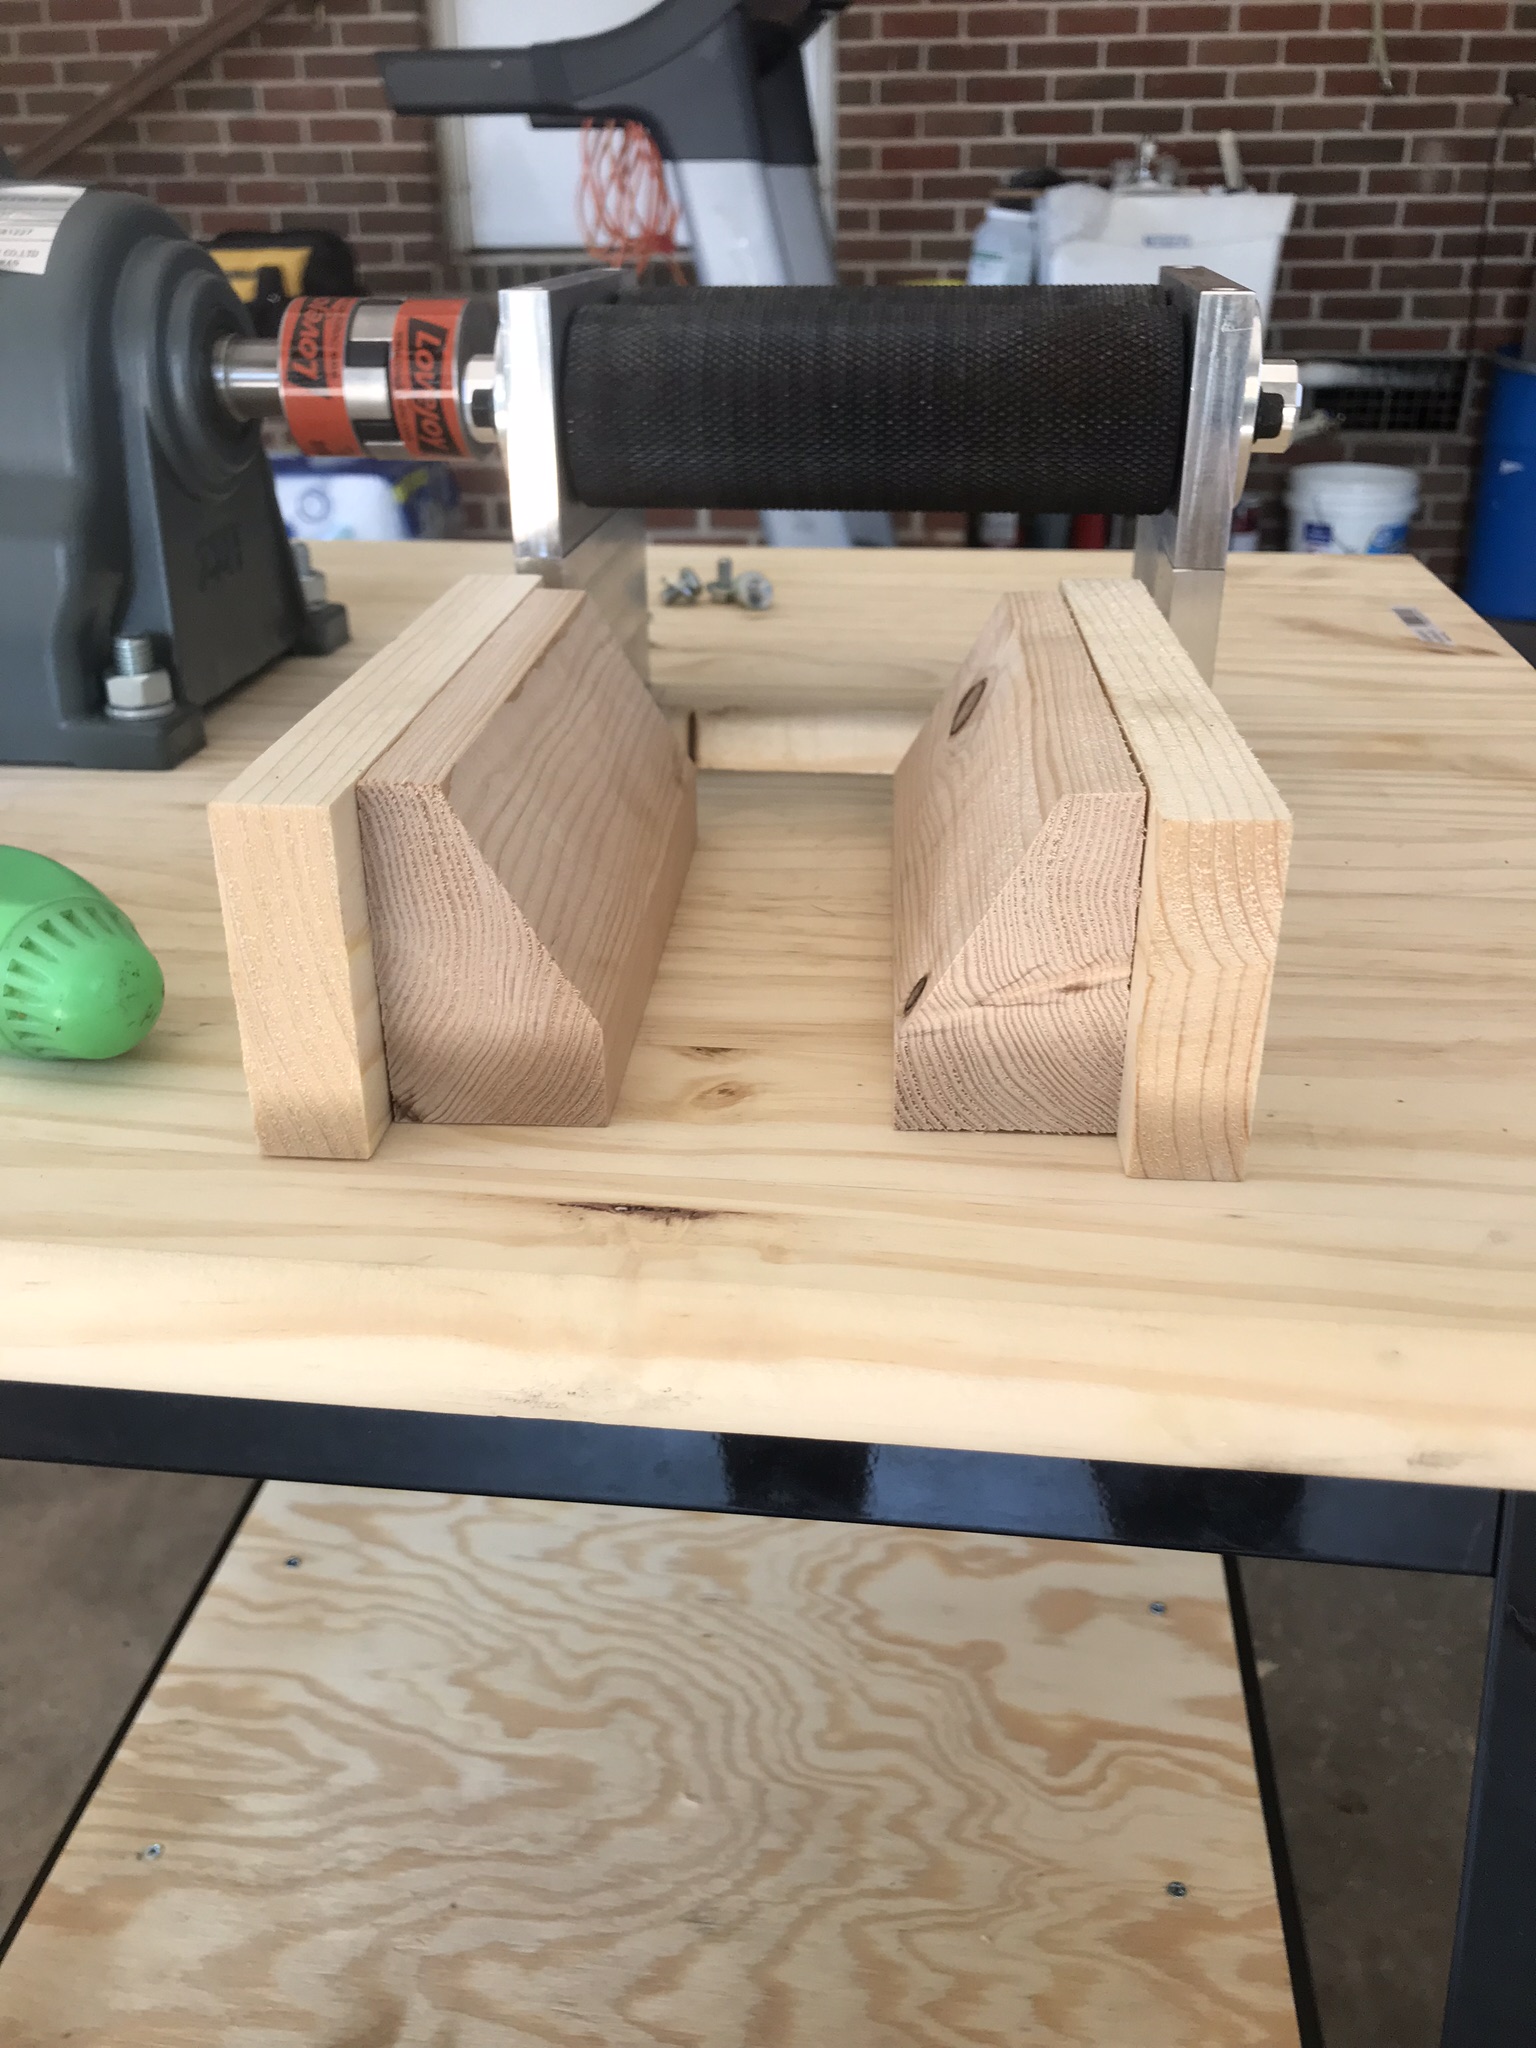
I crunched the numbers with some help from online calculators and found that in order to slow down the 1725 rpms of the motor to around 200 rpm I'd need either a 12 or 14 inch drive sheave for the mill. The smallest diameter sheave I could find for the ½” bore of the motor was 1-½”. I picked up a 12” sheave on eBay for $44 and a 1-½” sheave from Grainger for $10. I also picked up an adapter for a ⅜” bore shaft to fit a ½” bore sheave. Regrettably, I measured my drive shaft to be ⅜”. Only after the fact did I look up the specs to my Cereal Killer mill and find that the shaft is actually 10mm. That is about .394” as opposed to the .375” I mistakenly measured. So the ⅜” to ½” bore adapter didn't quite fit on the mill's shaft. A metal file and some elbow grease helped me shave off about .02” so the adapter would fit.

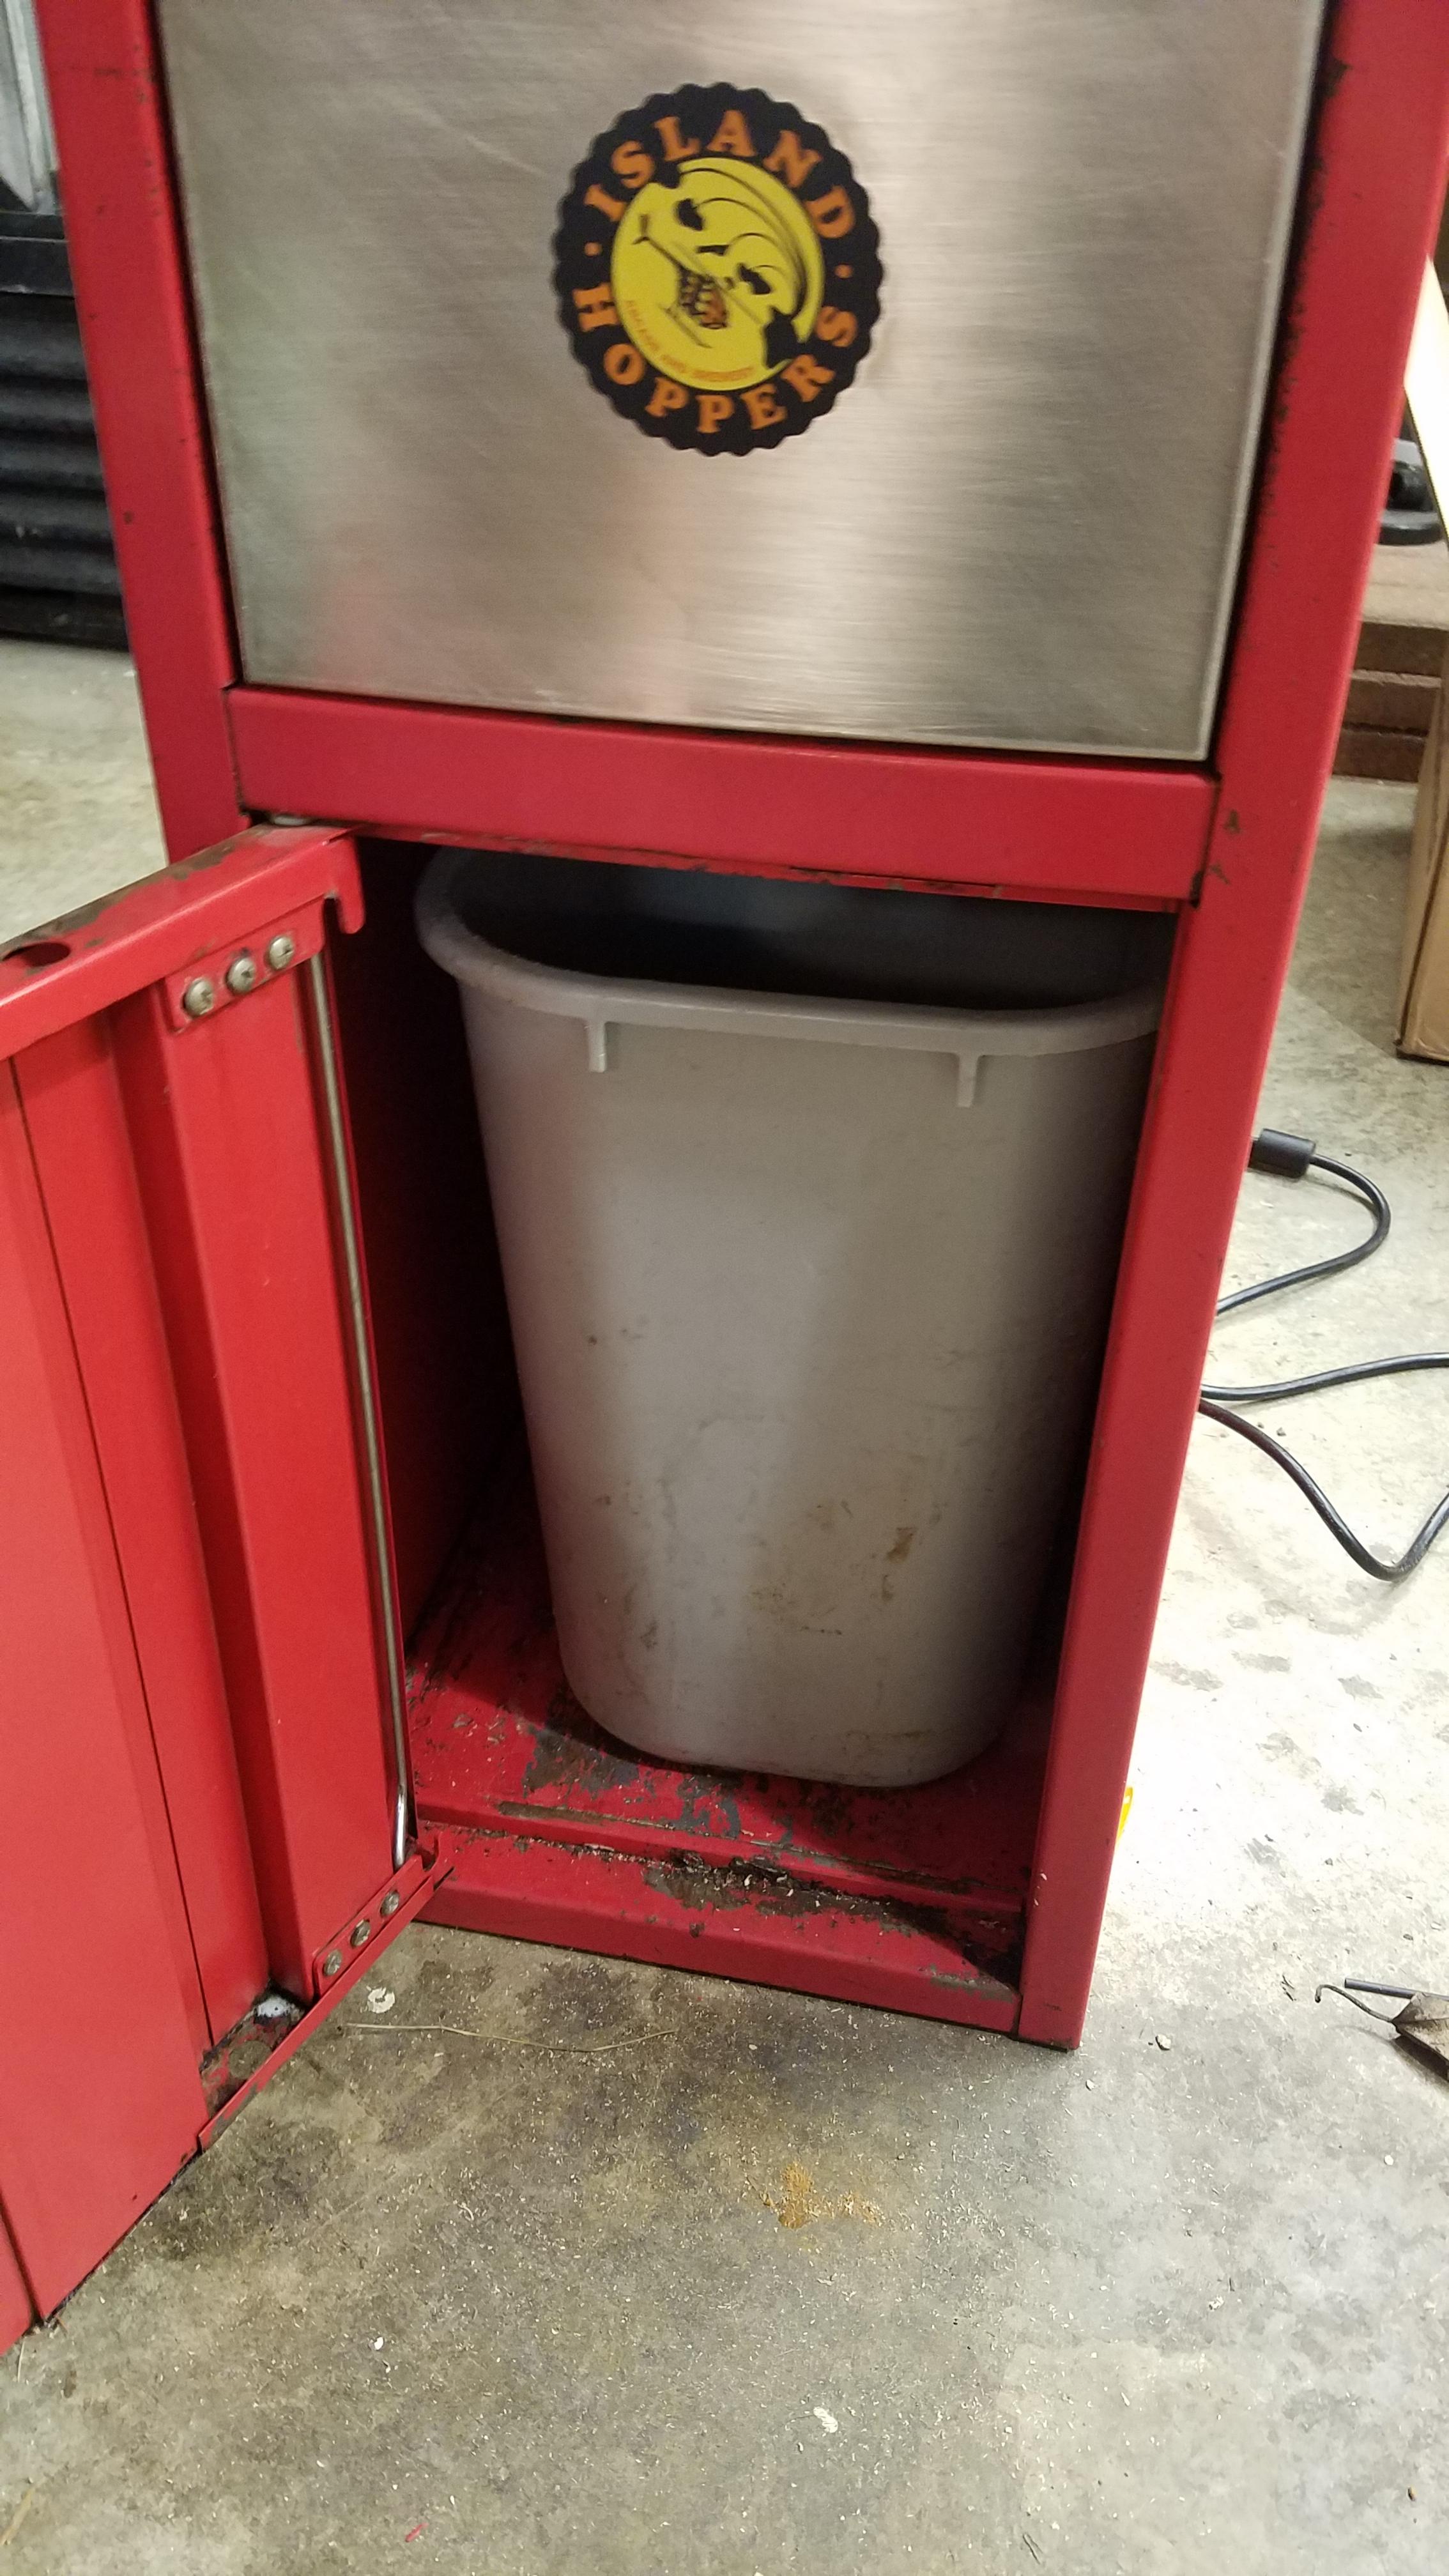
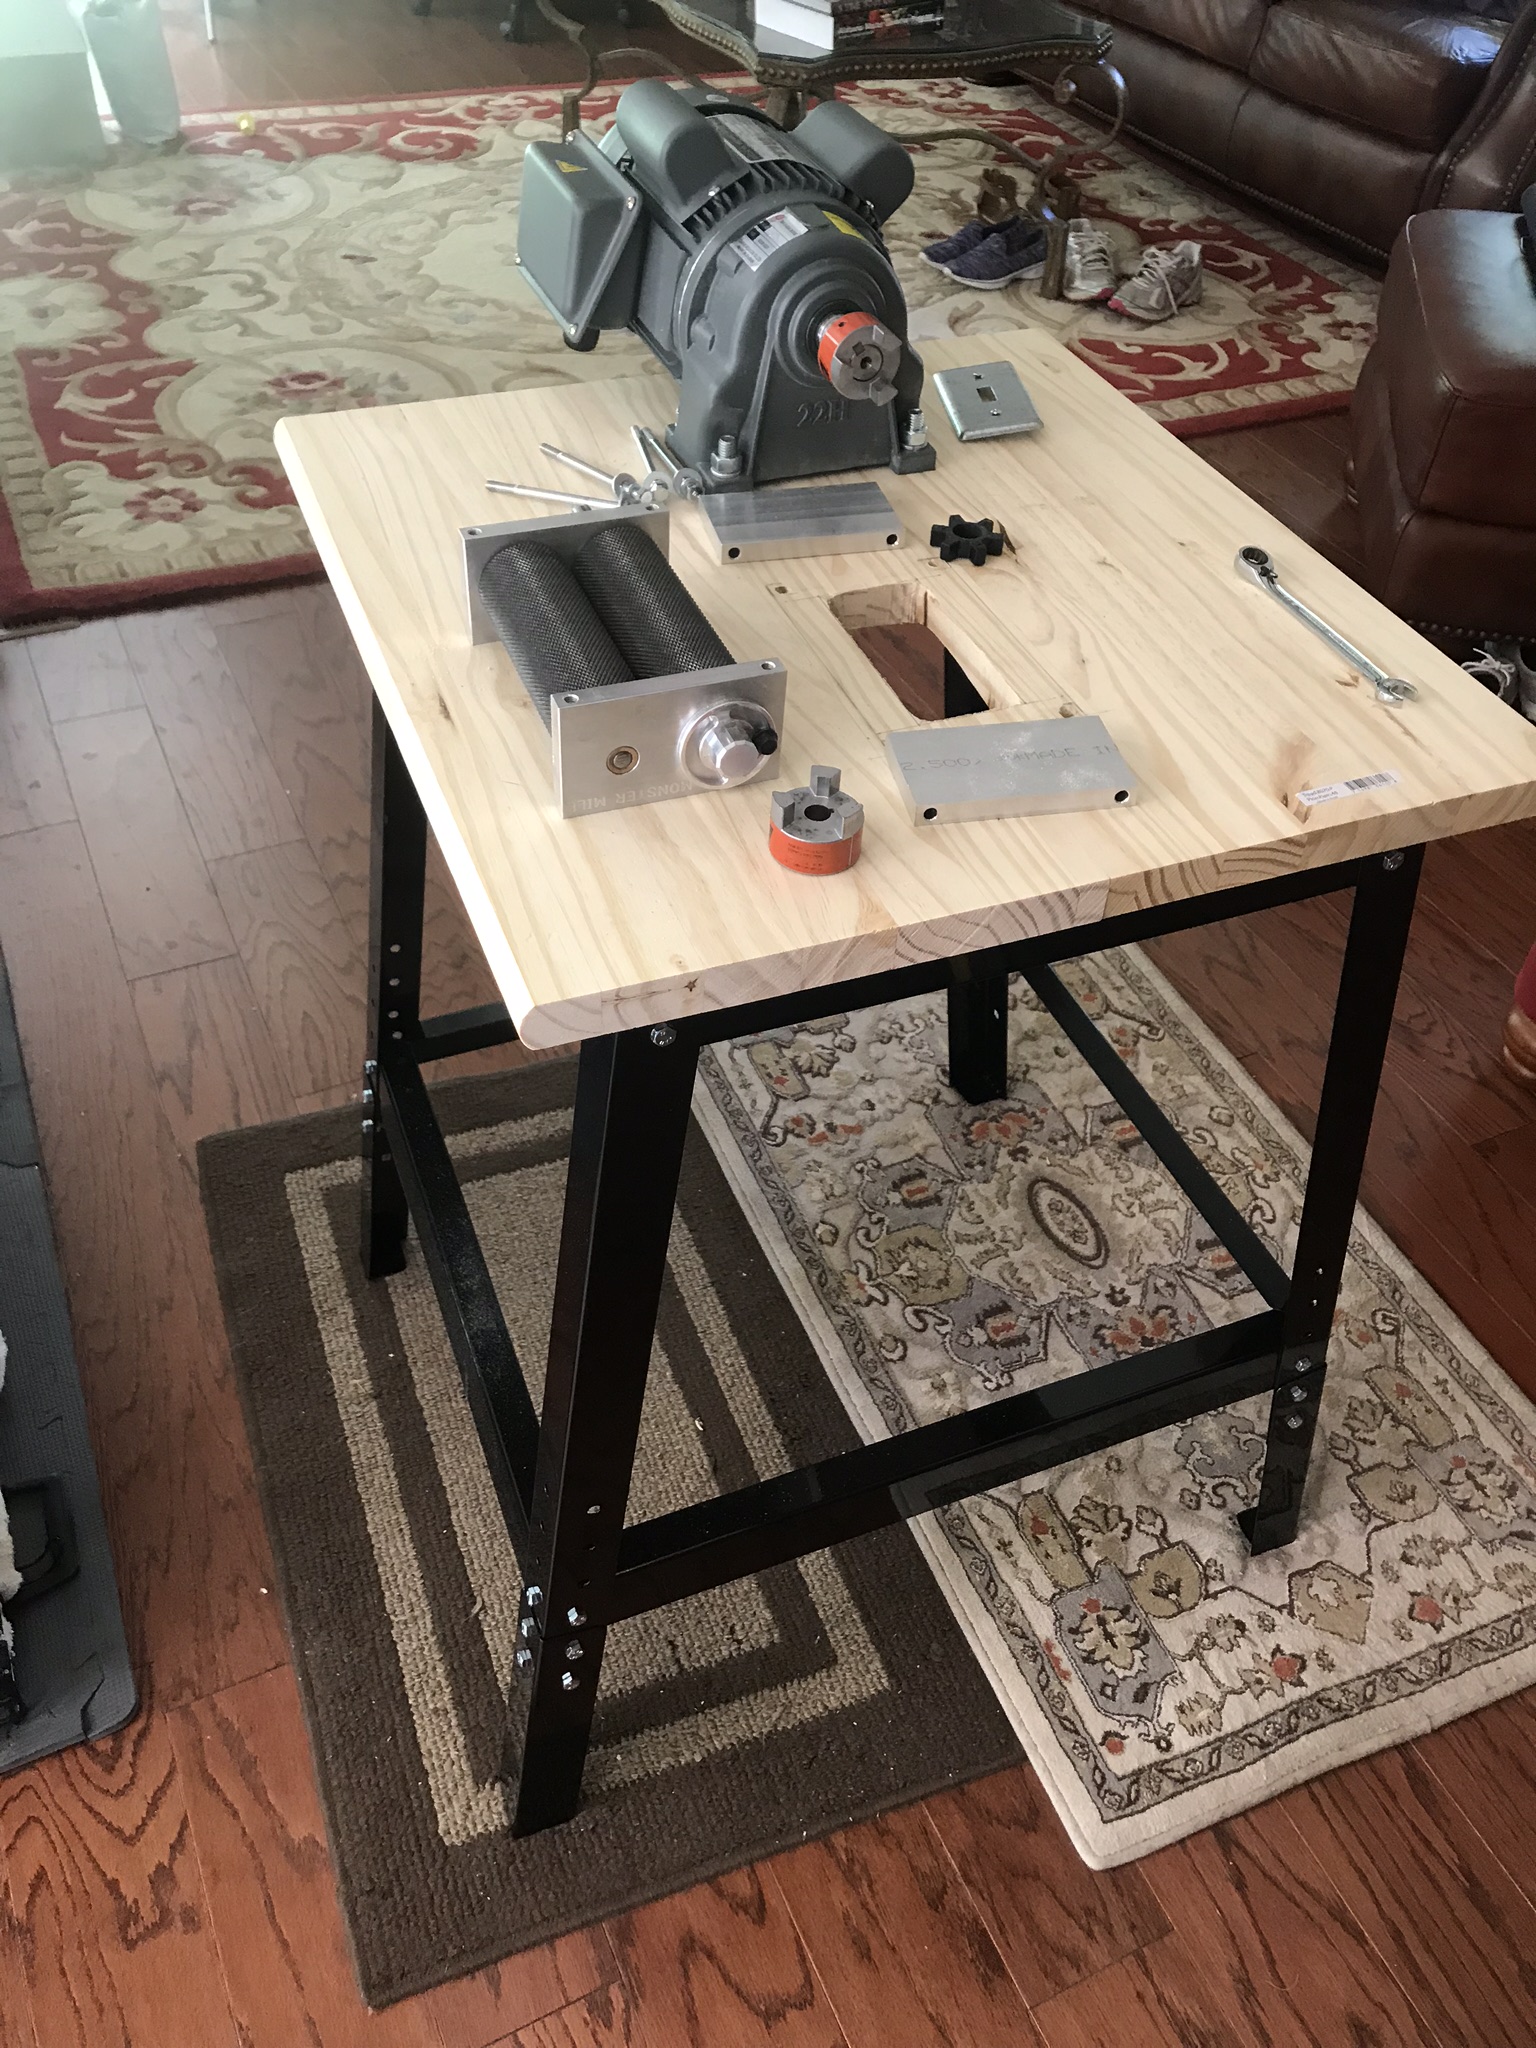
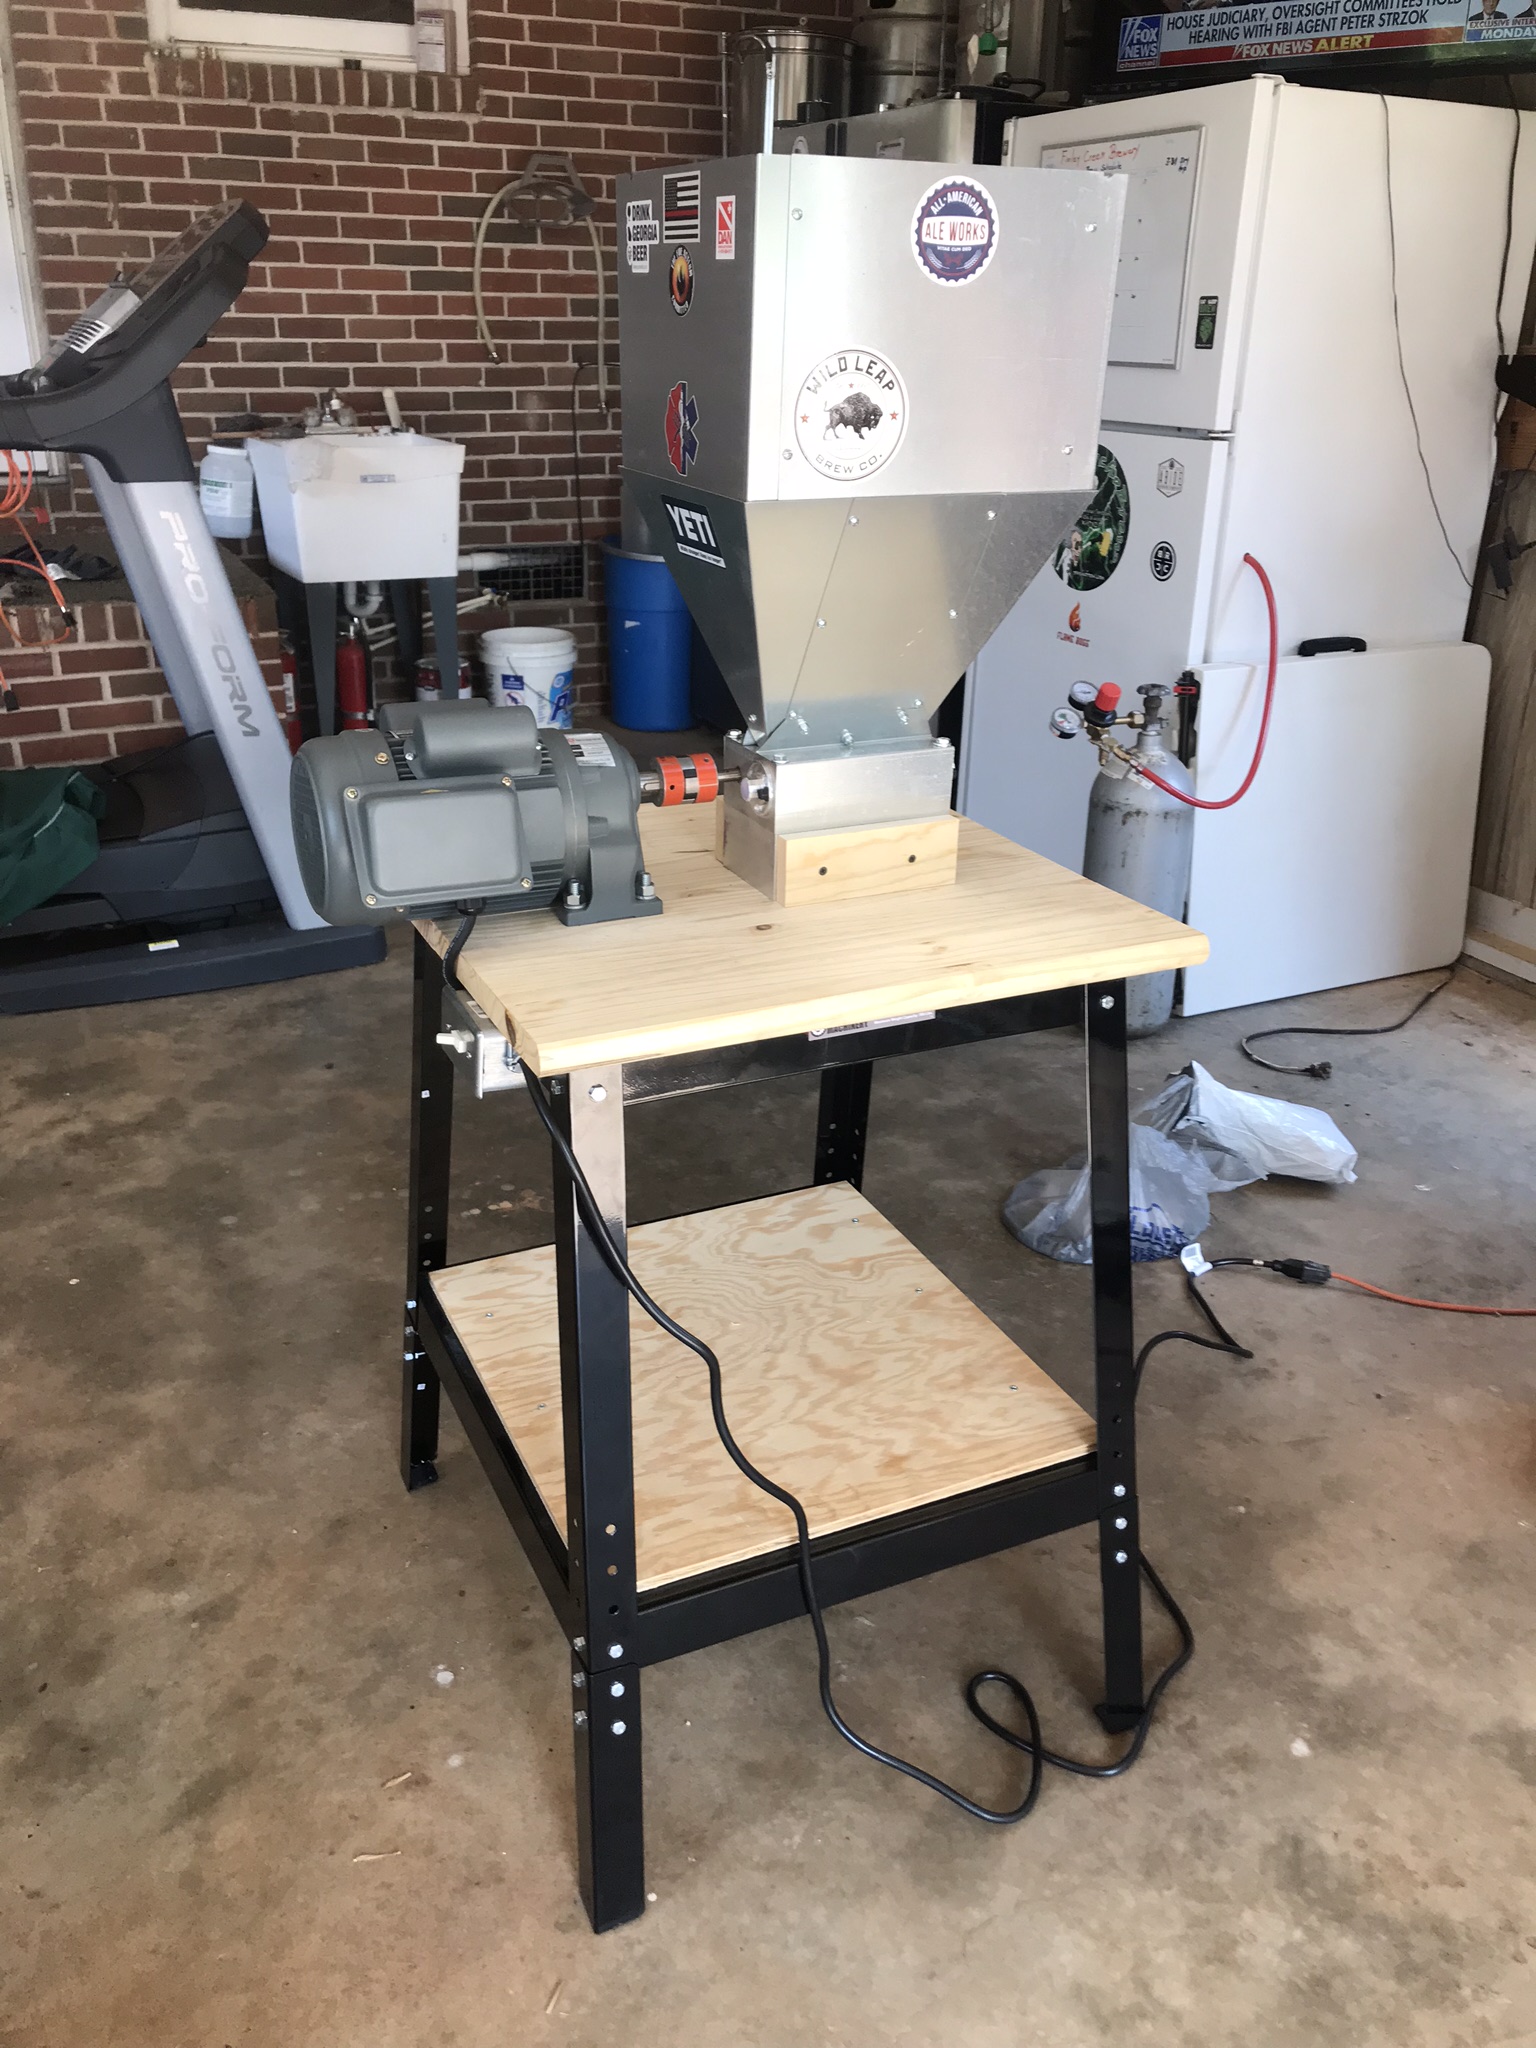
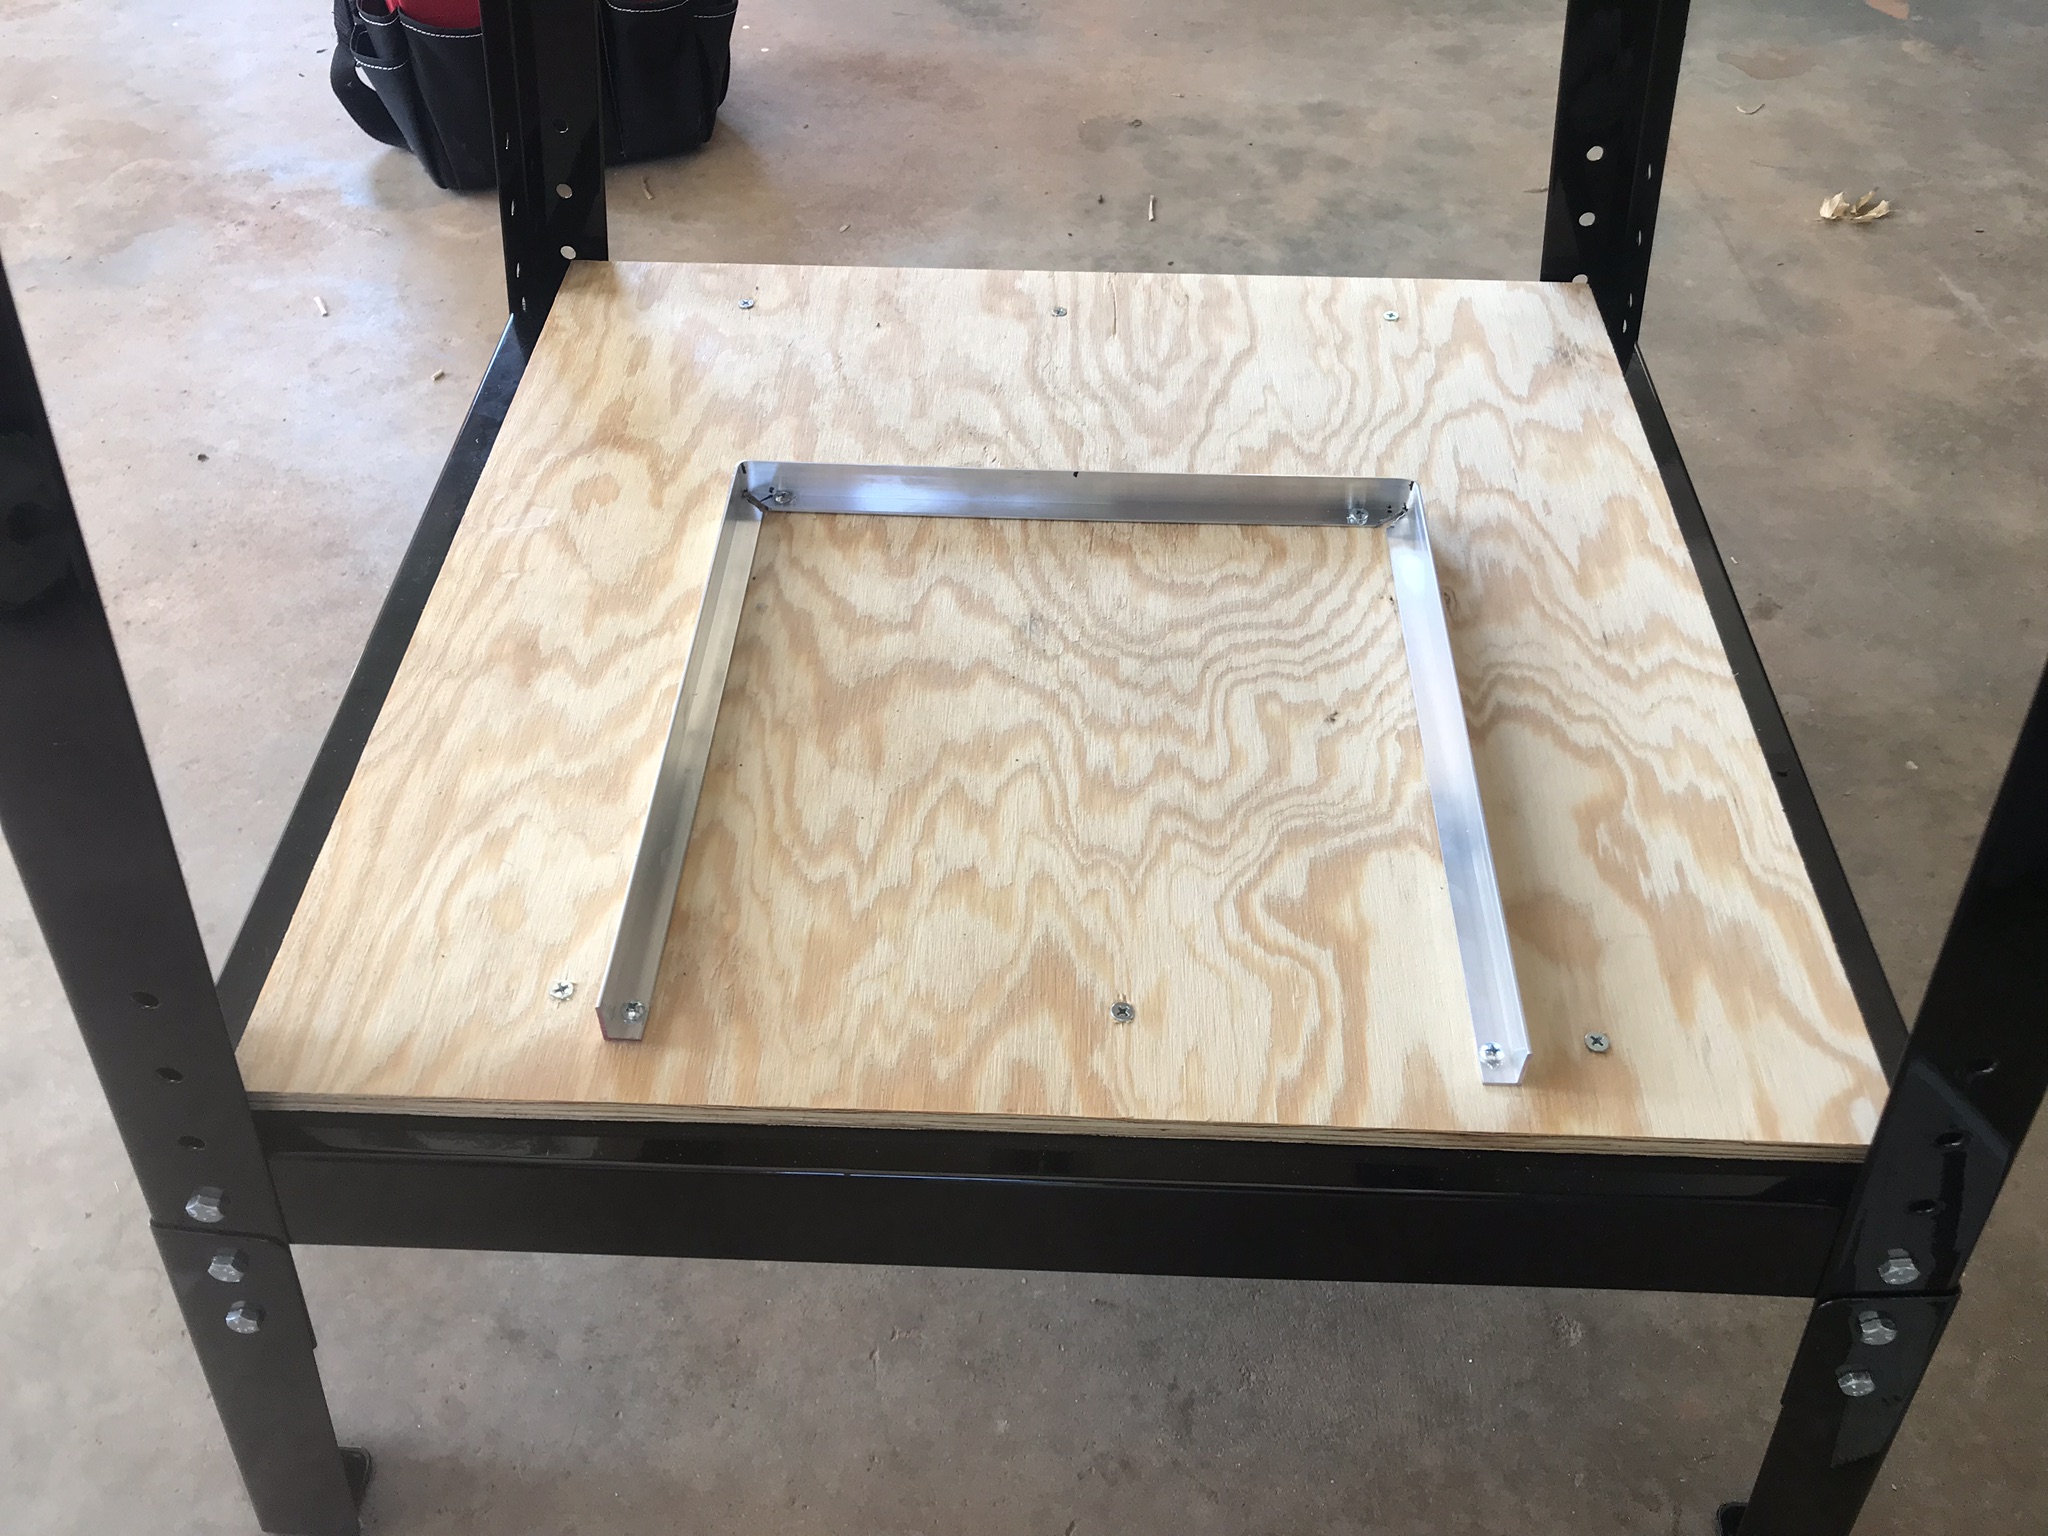
Next I started building a station to mount the mill and motor. I found a convenient spot between some shelving and my deep freeze, near my basement brewing setup. I decided it would be nice for it to be on drawer slides so it could be tucked away when not being used and pulled out to place a bucket underneath when milling.

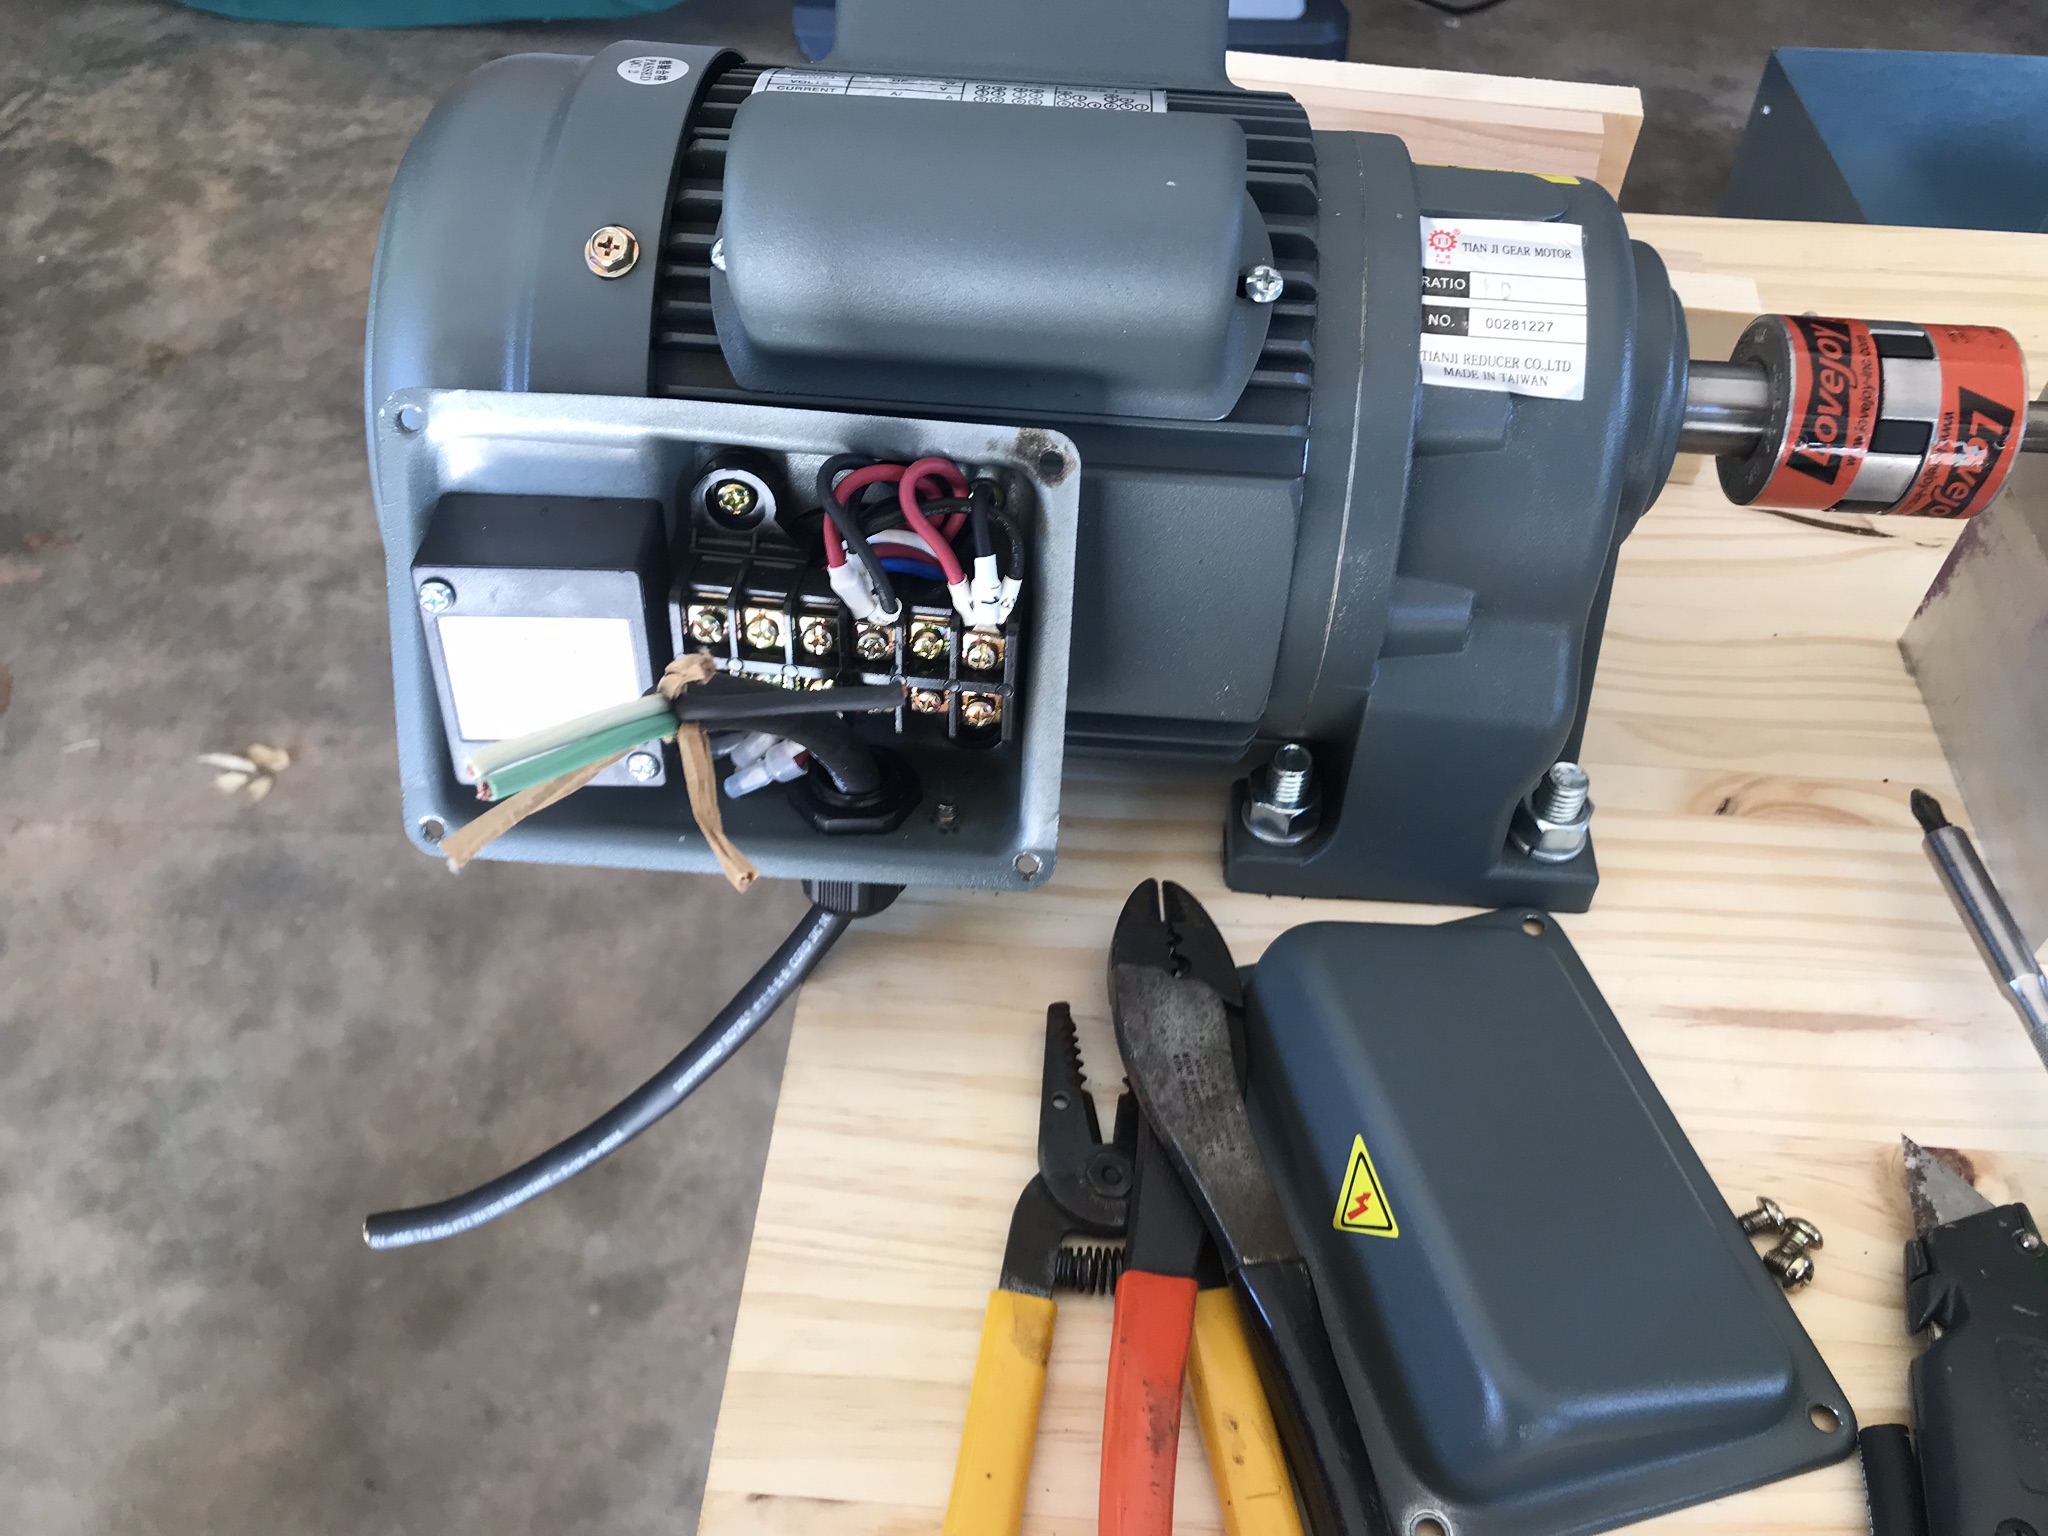
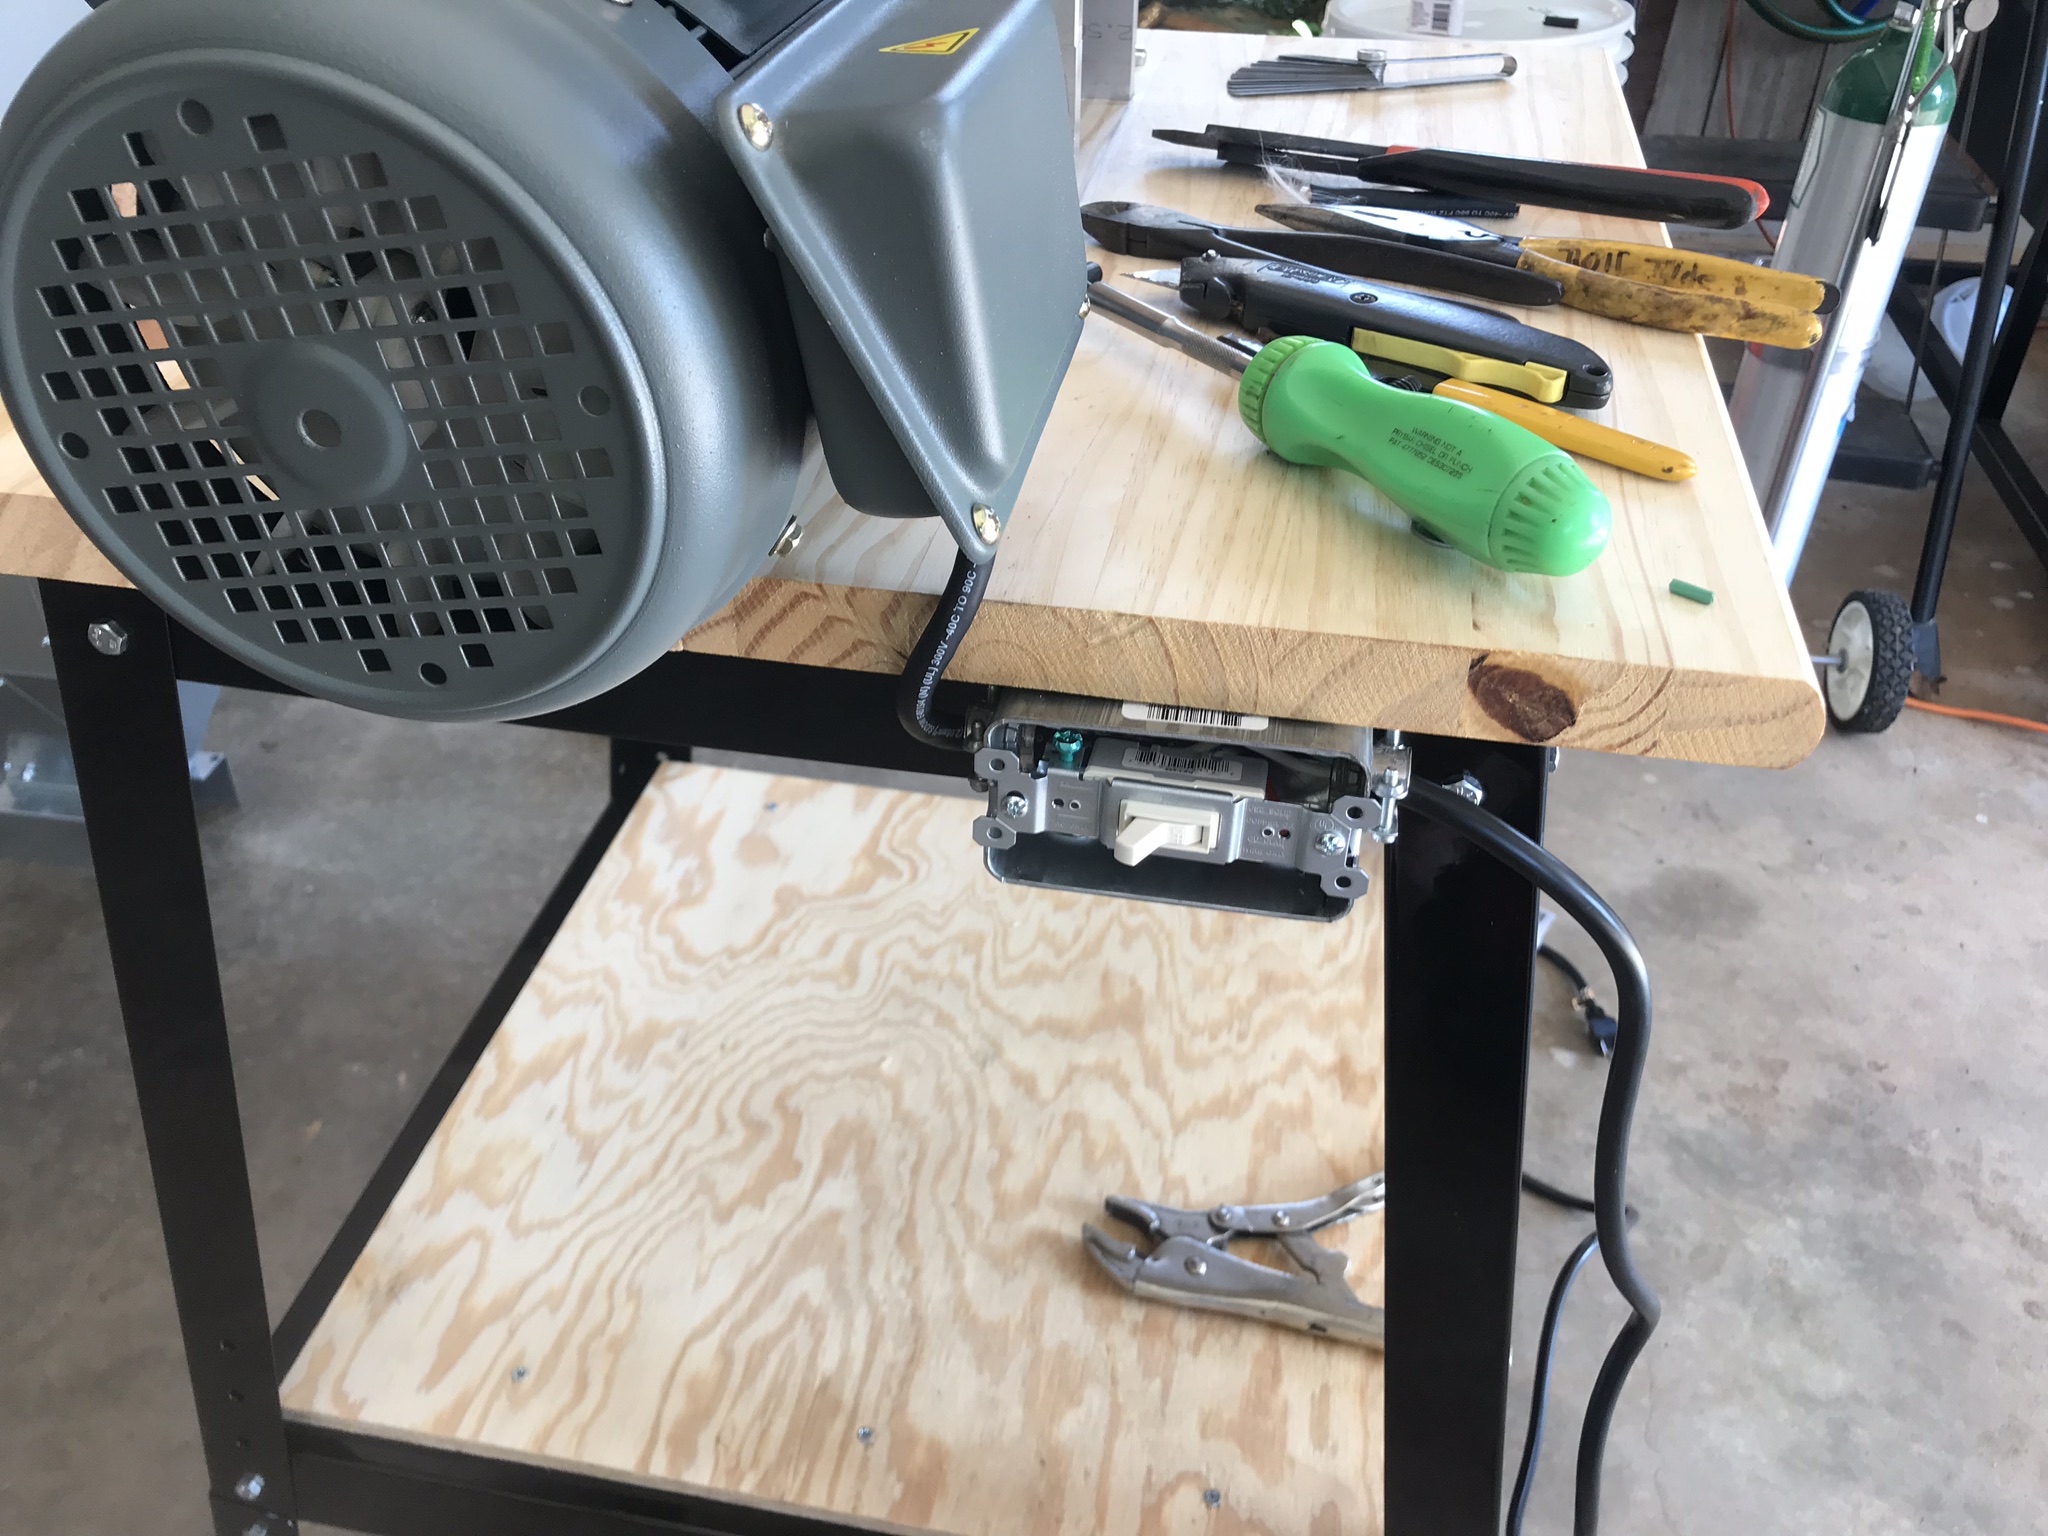
Not knowing a lot about the motor, I hoped I could reverse the polarity to throw the mill in reverse if needed so I picked up a double pole, double throw switch. When I powered it on, despite triple checking the wiring, it unfortunately only goes one way. If I ever get a stuck mill I'll have to turn it off and reverse by hand. Haven't had that problem yet with using a drill so I don't anticipate this happening much if at all.

All in all it was a fun project. Not including the cost of the mill I've got $172 in it which includes the motor, sheaves, belt (I picked up a linked belt from Harbor Freight for $33 which I already like a lot), some lumber and other miscellaneous hardware. For anyone who has a Cereal Killer mill wanting to motorize it be prepared to do some minor metal work unless there's a 10mm to ½” adapter available somewhere that I didn't find in my fairly extensive research.
IMG_20180728_213644.jpg
IMG_20180728_213627.jpg
IMG_20180728_213552.jpg
IMG_20180728_213547.jpg
 
I'm drooling over all these tricked out mills. Has anyone looked at using a child's ride on toy car motor & gearbox like this? Really inexpensive vs AC motors & gear reduction. Pro's and con's?
https://www.amazon.com/dp/B076Q3XTWB/?tag=skimlinks_replacement-20

From what I can tell they have ratio's ranging from 110-160 or so looking in the 200 rpm range for output. Speed might be easy to control with motor voltage?
 
Last edited by a moderator:
I'm drooling over all these tricked out mills. Has anyone looked at using a child's ride on toy car motor & gearbox like this? Really inexpensive vs AC motors & gear reduction. Pro's and con's?
https://www.amazon.com/dp/B076Q3XTWB/?tag=skimlinks_replacement-20

From what I can tell they have ratio's ranging from 110-160 or so looking in the 200 rpm range for output. Speed might be easy to control with motor voltage?

From my experience with my kid's power wheels type toys--- these motor won't offer enough torque to be effective milling grain. Just my $0.02! :mug:
 
Last edited by a moderator:
I'm drooling over all these tricked out mills. Has anyone looked at using a child's ride on toy car motor & gearbox like this? Really inexpensive vs AC motors & gear reduction. Pro's and con's?

From what I can tell they have ratio's ranging from 110-160 or so looking in the 200 rpm range for output. Speed might be easy to control with motor voltage?

Well, there was this article a while back on HBT.

Cheap DIY Option for a Motorized Grain Mill
 
Last edited:
My new mashmaster mill required too much torque and the 3D printed herringbone gears I showed above were not up to the task (even though they worked on my cheap Chinese mill).
So this weekend I got a gate motor from a mate and turned an oldham coupler and mounted on it all. The worm gear in this motor cranks out torque as well as giving a nice slow speed. All driven by 12v so it's mobile too.
20180819_165501.jpeg
 
Last edited by a moderator:
I tried reversing the supply wires to no avail, and asked williams support. Was told it cant be reversed, that it is hard wired for their mill. Perhaps it is the wires between the switch and the motor that need to be reversed?

At any rate, the bottom mount provided a more elegant solution so it was a good problem even if only due to my cluelessness.
yes you could wire a drum switch to it to give it both forward and reverse.
 
I just recently put together my grain mill table and thought I’d share here. I wanted to go with something pretty economical, safe with no large moving sheaves or belts, and something that is aesthetically pleasing.
I started with a Mighty Mill three roller geared mill that I picked up on sale for $140, powered it with a HF high torque low speed 1/2” drill on clearance for $32, a metal breadbox from Amazon for $29 to hide the drill, a metal shelving unit for $50, a leftover IKEA tabletop, added a router table start/stop switch from Amazon for $32, and will be installing an Amazon $18 digital tachometer to monitor the RPMs.
All in all I’m pretty happy with how it turned out and the whole setup was less expensive than some of the purpose built mill motors I’ve seen, which I’m sure work wonderfully, but ultimately still look like an ugly motor sitting on a table.
I kept the drill mostly intact and only had to cut off the bottom couple of inches of the handle to fit it inside the enclosure. I drilled/punched some holes in the breadbox for where it attaches to the mill shaft, the table, and for the power cord. I mounted the mill and the enclosure to the table using some marine grade weather stripping to cut down on vibration/noise. The drill speed is controlled by placing a hose clamp around the trigger assembly and fine tuning by tightening/loosening the clamp. I will be able to further fine tune this once I install the digital tachometer. This was all pretty basic and required little skill.
BD3D5360-C7A4-43F6-9C65-8EE6C5DB5EA4.jpeg
AFBED590-8C4E-4136-9FCF-53D2417F5853.jpeg
DE9318AF-CF24-435B-A727-A97DAB2B6C5F.jpeg
E1E43BC4-D136-4AE2-BFF4-506C06E616F7.jpeg
83E63E93-CF5C-4544-8928-F10FAA6A7ABF.jpeg
89C889E8-9B7A-481B-9C19-000A5FB28B1F.jpeg
56BDF2BD-0E38-452A-BF6F-FB30234A210E.jpeg
 
1035AF18-21B4-4ECA-BB24-847946E3593C.jpeg
23EE7702-EE01-44E6-BCBD-925BED595FA5.jpeg
DAA4BFBE-0B99-4674-972E-95B7F6F9A1DD.jpeg

Today I added in a start stop switch and the digital tachometer to monitor my milling speed. About 225 RPMs is the slowest I can get it to go with my current configuration.
 

Attachments

  • 66787868899__8220E824-0121-4605-A833-A1356666B805.MOV
    1.4 MB
Back
Top