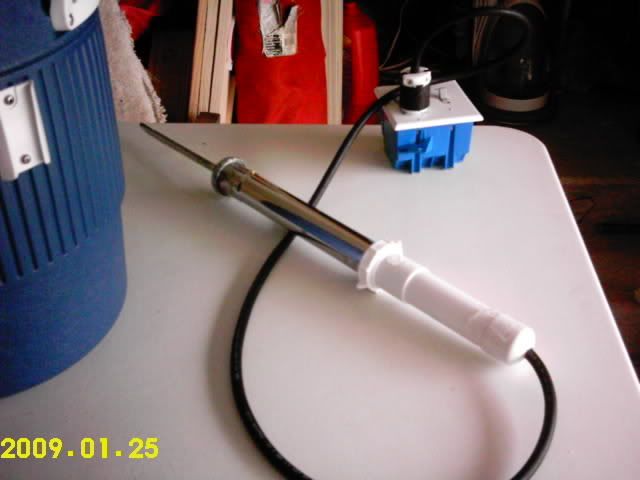
Heatstick = awesome!

Homebrew Talk - Beer, Wine, Mead, & Cider Brewing Discussion Forum

Help Support Homebrew Talk - Beer, Wine, Mead, & Cider Brewing Discussion Forum:

This site may earn a commission from merchant affiliate links, including eBay, Amazon, and others.
Yes it would be worth it...

1500W will add over 5,000 BTUs to your stove top. I use 18,000 BTU to reach a boil, 13,000 to maintain a boil off of 1.3 gal/min. So you are adding A LOT of additional power when coupled with your stove. Then, as you said, you will be able to boil more vigorously.

Depending on the size of your stove top element, you will be more than doubling the BTUs that are getting into your kettle.

From my math, if it takes you ONE hour to reach a boil from 140F, with 6 gallons, that is about 1200W being applied to the kettle.

So, if you add 1500W directly to the wort, you are more than doubling your heating power, and recuding your heating time by more than half.

I say do it.
 
I use 18,000 BTU to reach a boil, 13,000 to maintain a boil off of 1.3 gal/min.
Man, that's a hell of a boil. :p

I finished my 2000W heat stick last week, used it over the weekend and it works like a champ. I can heat up 5g from 60 to 170 in about 45min. I just need to work on a stirrer and a more permentant HLT setup.

Thanks everyone for the great input on this thread...made the build a breeze! :mug:

Typically, after a period of time, the wort starts to slosh back and forth in the kettle and will rock the entire rig back and forth :D
 
Using two 2000 watt heatsticks and a banjo burner, I figure I can take 10 gallons of 150*F wort to full jumping boil in a little under 10 minutes.

So, a tank of propane should last all year...?

Also, with my new dual 2000 watt element lid for my HLT, I should be able to bring 8 gallons of 60*F water to 170*F in about 20 minutes, without ever going into the kitchen or turning on the stove. Which will make SWMBO very happy.

:ban:

4000W? Easy... You are nearly propane free.

I set my PID for 180F while I am sparging and it takes me about 5 mins. to reach a boil after the sparge is complete. If you were able to set your BK temp. to 180F it would take you 12 mins. to reach a boil with NO propane.
 
Quick question, I do stove top brewing in my apartment, and I can get a slow rolling kind of boil in my insulated 7.5 aluminium pot. But reaching that boil can take over an hour, and heating up the mash water also adds another half hour or so.
Would a 1500 watt heat stick be worth making?
How much time would it cut off of heating?
I know it would add enough heat to get a strong boil, which would be nice.


I was in your same situation. I live in a really small apartment with a 1/2 size stove. Straddled over two burners, i could barely even get a soft boil using 6.5 gallons. I either had to cut down the volume, or use the lid. I made a 120v 2000w stick and it boiled the ba-jesus out of my 6.5 gallons with very minimal help from my stove burner (had them on ~half heat).

I used the cedar creek site as a guideline, but modified it slightly. I used a small cpvc coupling that slipped tightly over the end of the heatstick. I then ran the wires to the element, through the coupling, then filled the coupling up with JB weld. When that dried, i sanded the outside of the coupling down so it would fit tightly into the end up the drain pipe. Put more JB weld on the inside end of the drainpipe, then shoved the coupling/element in the end of the pipe. Hard to explain, but i think it provided a more reliable seal then dripping JB weld through a 12" pipe, hoping it gets good coverage. This also allows you to use a drainpipe with a 90 degree end and there is little, if any, JB weld in contact with the wort.
 
I used a small cpvc coupling that slipped tightly over the end of the heatstick.

I like the sound of what you did here.... does the coupling you used look something like this:
_AR66403.jpg
?

Do you recall what diameter you used for this? Looks to me like it would be a 1" ID or 1 1/4" ID
 
I'm rebuilding a couple of heat sticks that I have. Whenever I put them into water and plug them in they instantly pop the the gfci on the outlet. Does that mean they are just getting wet or does that mean that the elements are shot and need to be replaced also? (they are 1550 watt elements) Thanks guys. :mug:
 
I'm rebuilding a couple of heat sticks that I have. Whenever I put them into water and plug them in they instantly pop the the gfci on the outlet. Does that mean they are just getting wet or does that mean that the elements are shot and need to be replaced also? (they are 1550 watt elements) Thanks guys. :mug:

Grab a meter and set it to the highest ohms setting. If it doesn't read overrange between hot and ground, you need to start over.

EDIT: By "Ground" I meant the part of the heating element that touches the water and keg! You don't want current going there.
 
Well I finally finished my heat stick a couple days ago and used it for the first time today... I went with a 1500W heating element, I didn't feel like switching out a 20A outlet to GFCI, and I was able to buy a 15A GFCI adapter for $12 at Home Depot, so that made it easy.

My only regret is not making one sooner! This this is indeed as great as advertised. I use it to supplement my stove top burners. It used to take me about 30-45 minutes to get my strike water heated, and it would take me another 30-45 to get ~7 gallons boiling, and even then, it wasn't a very hard boil...

With the aid of the heat stick, my strike water was ready in a little over 10 minutes, so fast that I wasn't even ready for it, I was busy cranking my barley crusher and overshot my temp by 10 degrees, so I just let it cool in my MLT before doughing in. Boiling was achieved in about 10-15 minutes as well, and it gave me a MUCH more vigorous boil. In fact, once it got going, I was able to shut off both of the burners and maintain a nice boil with only the heat stick. It would slow down after about 10 minutes, so I ended up just leaving one of the burners on around med-high and that kept it going great.

I'm glad that I read your posting. I purchased the parts, including a 2000W element, weeks ago, and they've been sitting on my workbench. I have a 20 amp outlet in my kitchen, dedicated for the over-the-stove microwave, but the whole part about replacing it with a GFCI didn't occur to me until I read your post. I knew I needed a GFCI, but somehow I didn't think about replacing the 20 amp outlet with one... now I'm thinking that maybe I will go with a 1500 watt heatstick.
 
I'm glad that I read your posting. I purchased the parts, including a 2000W element, weeks ago, and they've been sitting on my workbench. I have a 20 amp outlet in my kitchen, dedicated for the over-the-stove microwave, but the whole part about replacing it with a GFCI didn't occur to me until I read your post. I knew I needed a GFCI, but somehow I didn't think about replacing the 20 amp outlet with one... now I'm thinking that maybe I will go with a 1500 watt heatstick.

Yeah I took the covers off several of the outlets in my kitchen to see how big of a PITA it was going to be to change them, and whoever built this condo did a crappy job, so there wasn't anything for me to screw the new GFCI covers in to. The adapter that I bought is great, now I can use this wherever.

Also, I wasn't real thrilled with sealing from the outside, so after a few tries (i.e. having to toss a couple heating elements b/c I screwed them up) I finally came up with at least IMO a good way to seal them. Basically, after I wired the heating element, I took a piece of heavy paper packing tape (I buy it at Uhaul store) and wrapped it around the base of the black box that the wires attach to... I then took and filled this about halfway with JB weld, so I was able to completely encapsulate the electrical connection without the JB weld dripping down all over the place. I let it cure for about a week (I went away to visit family for Christmas) and when I came back I was able to peal the tape off and it worked perfectly. From there, I just gooped some JB weld up into the stick, gooped some more around the cured JB weld on the heating element, and also spread some on the threads of the nut before I screwed it all together. I let it cure sitting straight up, and when I looked down into it from the top the next morning, the JB weld had spread out and perfectly sealed around the based of the tube.
 
I like the sound of what you did here.... does the coupling you used look something like this:
Do you recall what diameter you used for this? Looks to me like it would be a 1" ID or 1 1/4" ID

Yeah that is basically what i used...i can't recall the diameter, i just went around the pluming section and test fit a bunch till i found something close that would work. Even then i had sand the outside of the coupling down some so it would shove into the end of the pipe.
 
FYI, if anyone is looking for a cheap and easy way to mount your heatstick to your brew kettle so you don't have to worry about it sloshing around during the boil, here is what I put together.... A simple bar clamp and 3 spring clamps will hold it very securely, cost me a little over $10 at HD
heatstick.jpg
 
I'm glad that I read your posting. I purchased the parts, including a 2000W element, weeks ago, and they've been sitting on my workbench. I have a 20 amp outlet in my kitchen, dedicated for the over-the-stove microwave, but the whole part about replacing it with a GFCI didn't occur to me until I read your post. I knew I needed a GFCI, but somehow I didn't think about replacing the 20 amp outlet with one... now I'm thinking that maybe I will go with a 1500 watt heatstick.

Why not replace the 20A outlet with a 20A GFCI outlet?

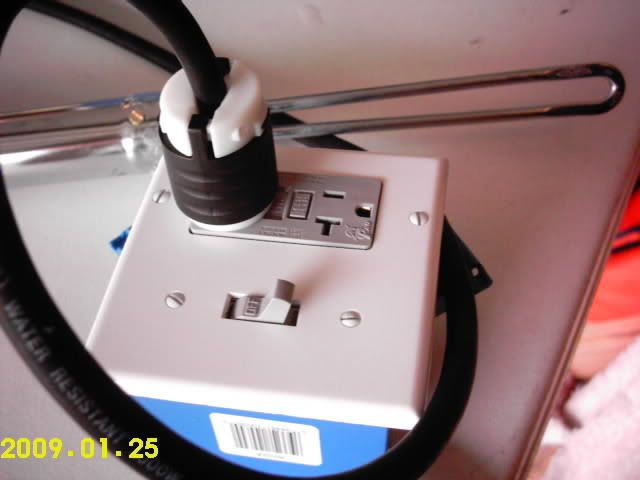
I use a 20A GFCI outlet in a home made extension cord. It has a 20A switch, too.

IMAG0078-2.jpg

IMAG0077-1.jpg
 
Why not replace the 20A outlet with a 20A GFCI outlet?

I use a 20A GFCI outlet in a home made extension cord. It has a 20A switch, too.

IMAG0078-2.jpg

IMAG0077-1.jpg

I just bought a 20 amp GFCI yesterday at Home Depot. I like your switch/outlet setup. Although if I do that, I will need to buy a second 20 amp plug...
 
I just bought a 20 amp GFCI yesterday at Home Depot. I like your switch/outlet setup. Although if I do that, I will need to buy a second 20 amp plug...

Just use a 12/3 extension cord and cut off the female end. Replace it with the outlet box w/GFCI and switch.
 
I realized that the cord I had on hand that I was going to use was not 12 gauge. I went to Lowes today and found a 9 foot, 12 gauge air conditioner extension cord (with 20 amp plug) for $11.xx. Considering that the 20 amp plug alone costs around $10, this seems to be an economical way to go.
 
I realized that the cord I had on hand that I was going to use was not 12 gauge. I went to Lowes today and found a 9 foot, 12 gauge air conditioner extension cord (with 20 amp plug) for $11.xx. Considering that the 20 amp plug alone costs around $10, this seems to be an economical way to go.

That's good to know. I'm slowly accruing the parts for this build and found that the plug and wire is indeed expensive. For the length of 12/3 wire and the plug I believe its around $23. So $11 is quite a bit cheaper.
 
That's good to know. I'm slowly accruing the parts for this build and found that the plug and wire is indeed expensive. For the length of 12/3 wire and the plug I believe its around $23. So $11 is quite a bit cheaper.

Yeah. The cord is a bit on the stiff side, but I don't think that will pose a problem for this use. Besides, neither my local Lowes nor Home Depot had 12/3 wire by the foot, only in the form of premade 50' extension cords for ~$25.
 
Yeah. The cord is a bit on the stiff side, but I don't think that will pose a problem for this use. Besides, neither my local Lowes nor Home Depot had 12/3 wire by the foot, only in the form of premade 50' extension cords for ~$25.

I am using a 25 foot extension cord with the female end cut off. It was cheaper than buying the 12/3 wire by the foot, and it come with a plug already attached.
 
HD has a rubberized cord by the foot that is very flexible and fits snugly into strain reliefs, but an extension cord is much cheaper than buying cord by the foot and a plug end.
 
HD has a rubberized cord by the foot that is very flexible and fits snugly into strain reliefs, but an extension cord is much cheaper than buying cord by the foot and a plug end.

Technically, the 12/3 extension cord is rated at 15A. However, I have never detected any warming of the plug on the extension cord or the plug on my heatstick when using it, even in the hottest part of summer. And that is running a 2000 watt stick, which pulls about 16.7A.
 
so i stumbled upon this thread and it got me thinking. My 5 gal batches on propane aren't an issue, but when i try to do a 10gal batch and try to bring 13-14gal to a boil, my burner isn't very happy, takes forever and the boil is sluggish. Would a 2000W as a supplement to my burner cut this time down and make the boil more vigorous? I have a 20A GFCI outlet in the same location as I brew with nothing on it, so that would work out perfectly.
 
so i stumbled upon this thread and it got me thinking. My 5 gal batches on propane aren't an issue, but when i try to do a 10gal batch and try to bring 13-14gal to a boil, my burner isn't very happy, takes forever and the boil is sluggish. Would a 2000W as a supplement to my burner cut this time down and make the boil more vigorous? I have a 20A GFCI outlet in the same location as I brew with nothing on it, so that would work out perfectly.

Yes. A 2000W heatstick is approximately the equivalent effective heat output (the amount of heat that actually makes it into your pot) of a 30,000 btu/hr burner.
 
Yes. A 2000W heatstick is approximately the equivalent effective heat output (the amount of heat that actually makes it into your pot) of a 30,000 btu/hr burner.

thanks, that will save me time and a good chunk of my propane. Will definitely be a huge benefit on 10gal batches, its just takes much longer to bring it to a full boil and even then its pretty "meh" of a boil. Will be perfect to speed it up a bit.
 
I was wondering if anyone used one of these in the bottom of a cooler or bucket and if the plastic melted. I'm looking to use it to heat up sparge water but the element will come in contact with the cooler.
 
I was wondering if anyone used one of these in the bottom of a cooler or bucket and if the plastic melted. I'm looking to use it to heat up sparge water but the element will come in contact with the cooler.


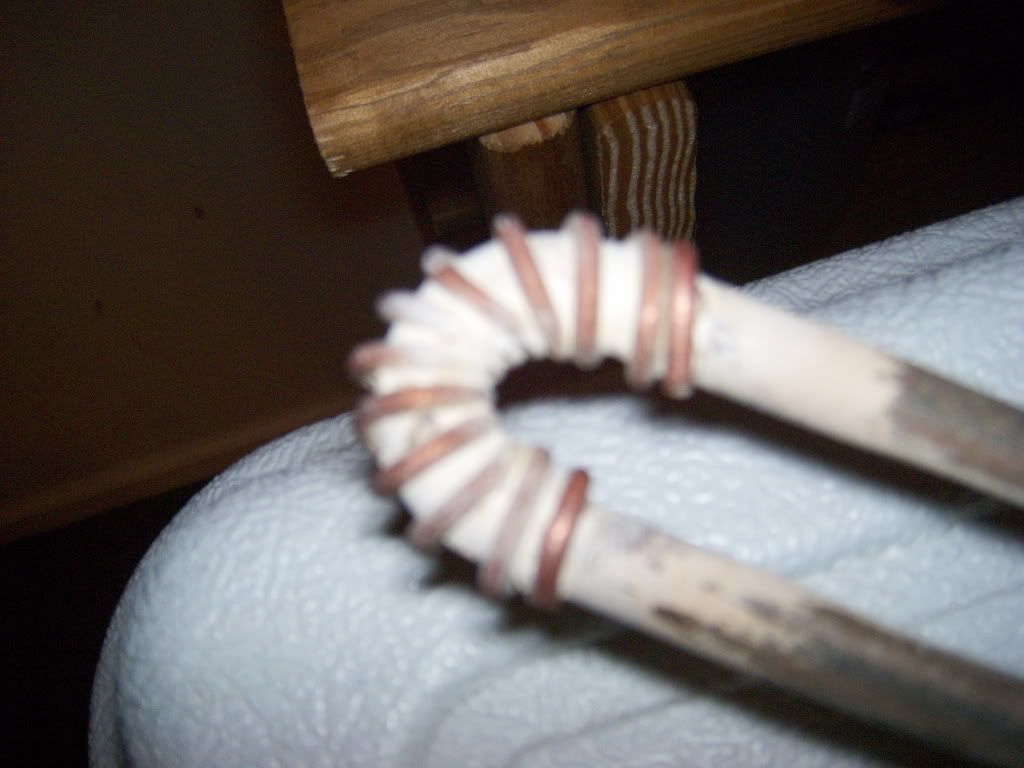
I use a heatstick in coolers for the strike and sparge. I wrap a piece of 12 ga copper around the stick so it does not contact the cooler.


HPIM0594.jpg
 
Is this a necessary thing? Dosen't the copper heat up just the same as the element?


For me, yes it is necessary. The copper wire keeps a bit of seperation b/w the cooler wall and the element. I don't believe the copper wire gets much hooter than the liquid, of course YMMV.

I did this after noticing a tiny mark or indent the stick made in the side of the cooler. Others have reported the stick melting a hole in a cooler wall. The small amount of seperation propvided by the coiled copper keeps liquid circulating b/w the stick and the cooler wall, at least for me it works well after many uses.

Sounds like a good idea then. Is this simply copper wire removed from 12g electrical wire.
 
A question to those of you who have built one of these. I have all the parts and the pvc coupler is completely loose in the pvc compression extension piece. Everything is the right size that's called out in the instructions. I'm thinking it could possibly be that the 1" cap and 3/4" coupler are schedule 40 while the extension is the cheap thin PVC type. How thight should those pvc pieces fit because this won't work how it is?
 
A question to those of you who have built one of these. I have all the parts and the pvc coupler is completely loose in the pvc compression extension piece. Everything is the right size that's called out in the instructions. I'm thinking it could possibly be that the 1" cap and 3/4" coupler are schedule 40 while the extension is the cheap thin PVC type. How thight should those pvc pieces fit because this won't work how it is?

I had to use a little bit of force to push the metal drain piece up into the PVC extension.. It is tight and far from completely loose like you mentioned.
 
I had to use a little bit of force to push the metal drain piece up into the PVC extension.. It is tight and far from completely loose like you mentioned.

That connection is rather tight with the pieces I have. It's the plastic pieces that aren't fitting together well. The pvc cap and coupler fit great but they are extremely loose in the plastic extension piece. Not even close.
 
That connection is rather tight with the pieces I have. It's the plastic pieces that aren't fitting together well. The pvc cap and coupler fit great but they are extremely loose in the plastic extension piece. Not even close.


Ahh.. I understand now... I had the same problem

I literally was playing in the PVC department at home depot for about 30 minutes going nuts, because the parts in the list did not fit at the end (the "top") of the extension tube.. the cap.. I ended up trying just about every piece in there til I found something that fit snug -- if you like I can take a pic of it for you.

If you could take a picture I'm sure it would benefit more than just me as I know a lot of people have built these or will be building one. Thanks!
 
Back
Top