Dongles are 18" long. (more than long enough for the girls I brew with)
Having the panic button on the top makes it an easy target but mounting on the front would work too (probably better, as I have accidentally bumped it on more than one occasion).
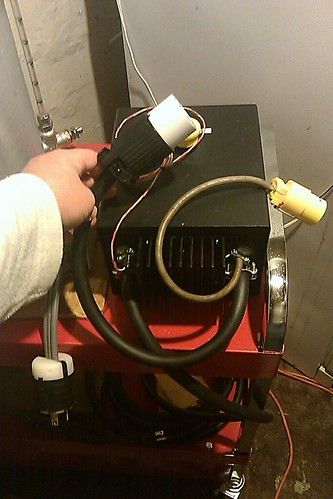
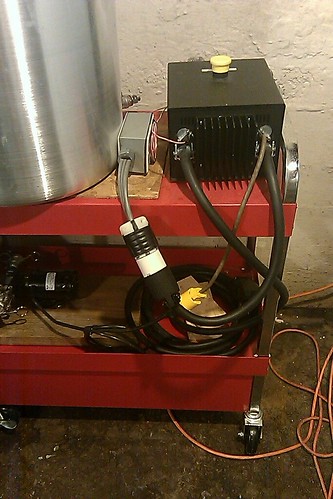
Push buttons are easy to operate and rubber feet on the bottom of the control box keep it from sliding around.
Todd,
I will probably mount the EPO on front, the SSR/Sink on top, hardwire the power cord, and attach receptacles on the rear for the plug-in devices.
I really like the lighted knobs that I've seen on some boxes, but they cost more than the lighted push-buttons. I'll have to think about it.
BTW, quick question: how long is your main power cord? I remember there being some discussion on how long the cord can be and whether or not one can use an extension cord with 240VAC. IOW, how far away is your brew-station from your spa panel when you brew?
Isn't it about time you stopped researching and started building? :cross:
Right now I don't have time to get into the thick of building. Baby's home from college on Christmas break, too. Probably going to make an offer on a house.
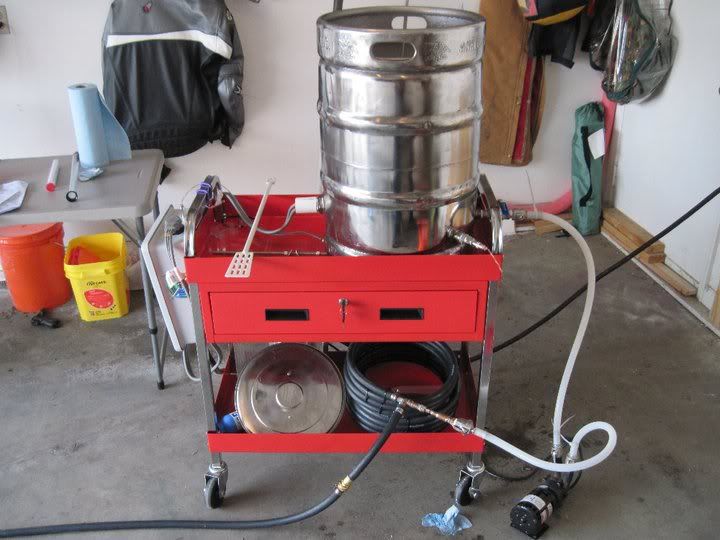
Of course. I wanted to settle on a design first - both for the control box and for the kettle. Then I can order parts. My son now works at a beer shop, and his boss gave him a old keg (the rim is dented). I just retrieved my angle grinder from my parents' house so I can try my luck at cutting the top off to make an electric brew kettle. We can try our luck at electrifying the keg before I spend money on a new kettle to drill/cut holes into.
I have a lot going on this month. After our Christmas program this evening at church, I went to practice the organ for a couple hours at another church where I will be playing for a wedding on 12/31.
It's possible that I could collect some parts and have it ready to start building in earnest right after the New Year.

I guess, if I don't post some photos of actual progress being made by the end of January, folks will decide that I'm all talk and start ignoring my questions.
Thanks,
Keith