NateLTB
Well-Known Member
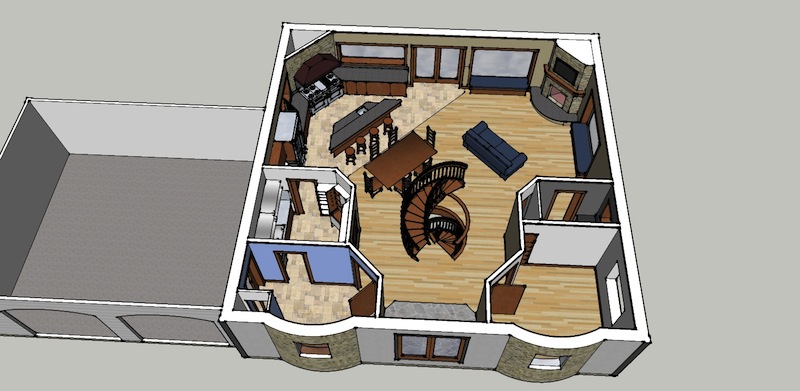
Great build Jester! That is an extremely nice place you've got there. Cheers!

pickles said:It looks like you poured concrete in the walls about every few feet of vertical height. I've only seen it poured once walls are at final height. Any reason why you did it this way? I'm really thinking about using ICFs, it looks really doable for me.
Gear101 said:Ok I have built a couple homes in the past, the floor trust is different to me. So I saw that and don’t want to come off the wrong way, but the floor trusts are only cantilevered on the top on to ledger. Do you remove the foam and then Tapcon the ledger to the concert? Then the webbing of the trust is engineered to support the load? It would make it easier to finish off the basement lid.
Cheers
Surprising how simple much of this stuff really is, isn't it Jester?
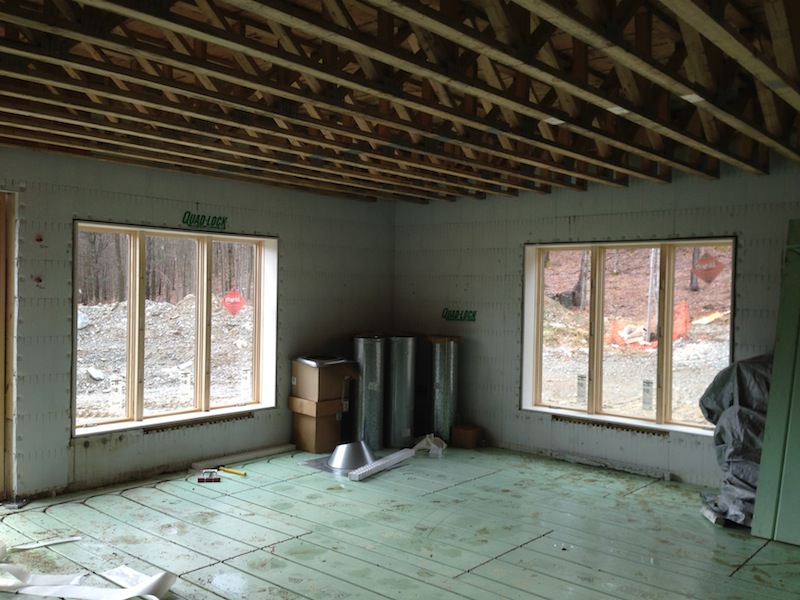
It's not so much that the work is all that technical, it's just that there is a LOT of work to do, some materials are quite awkward to maneuver or are just fecking heavy after about the third or fourth lift/laydown (only 1,238 pieces left to go!), and working conditions aren't necessarilly all that favorable until you are dried in and have some way to heat or dehumidify.
Still, nice job. Best part is the pride you can claim saying "Yeah, I did that." Even if you don't ever verbalize it.
They say you finally have the house you really want, after you've built the third one.
Chop, chop brother, you got 2.5 to go!
I used to build hotels. Specialized in wood frame. And was always a lead crew member getting my hands dirty, callused, or scarred up at every stage of the project.
So, just out of curiosity. Does your location not require licensed trades for the mechanical, electrical, and plumbing systems? Or, do you have licensed contractors in your pocket claiming your work at a reduced fee?
Looking good. I would have loved to have been there just to learn. Oh well.

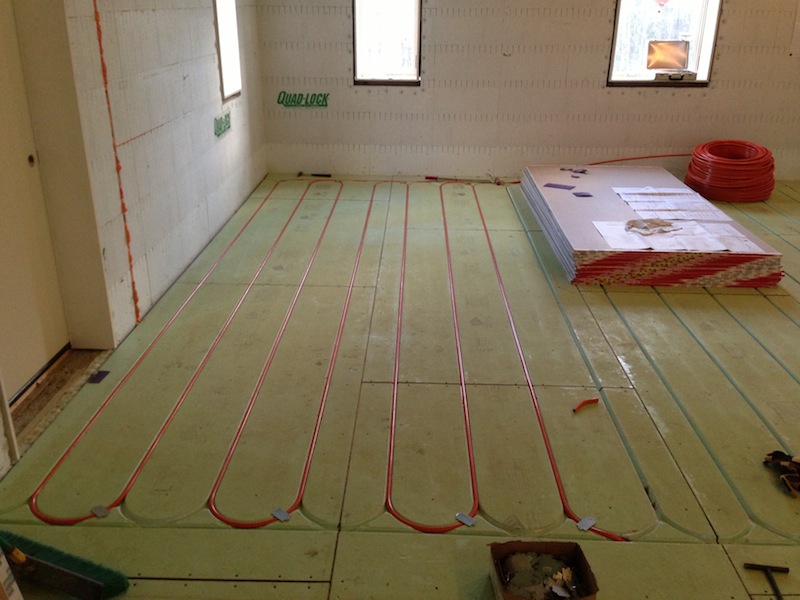
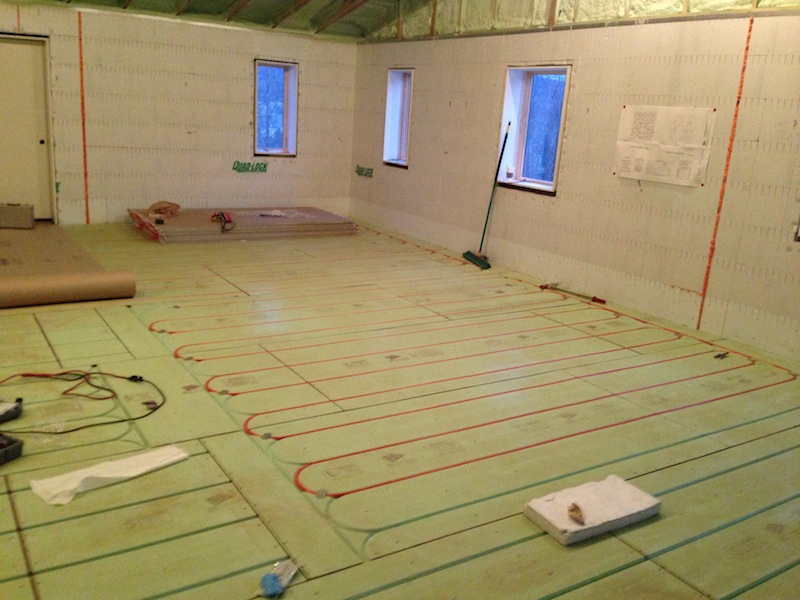
KIAKillerXJ said:What kind of wood flooring are you putting over the wormboard radiant? Living here in Tahoe, as a flooring guy, we work with that a lot in these huge homes up here. Some materials perform better than others...
And whatever you choose, be sure to pressure test it thoroughly before you lay one square foot of anything down.
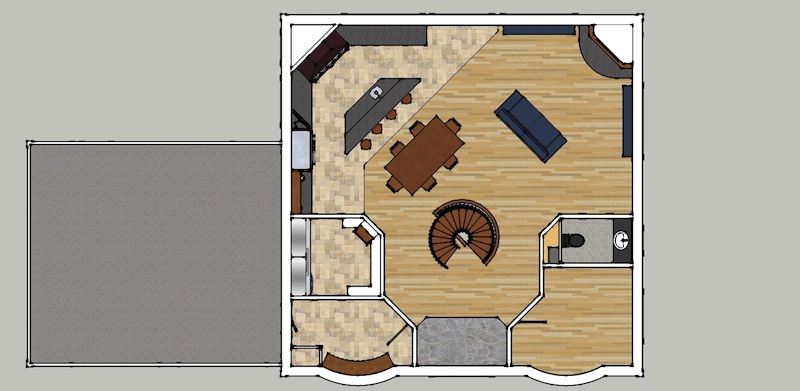
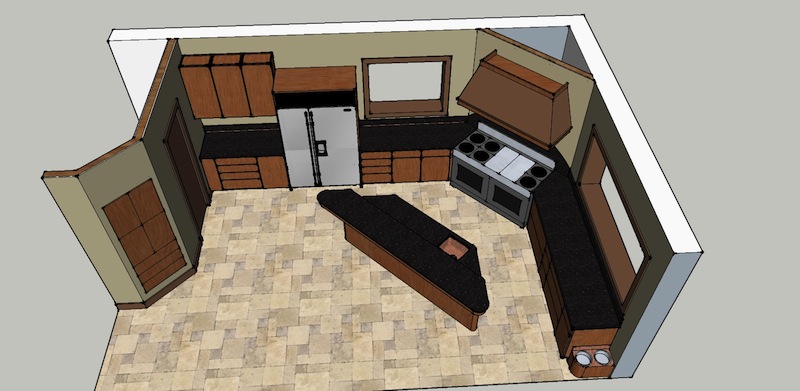
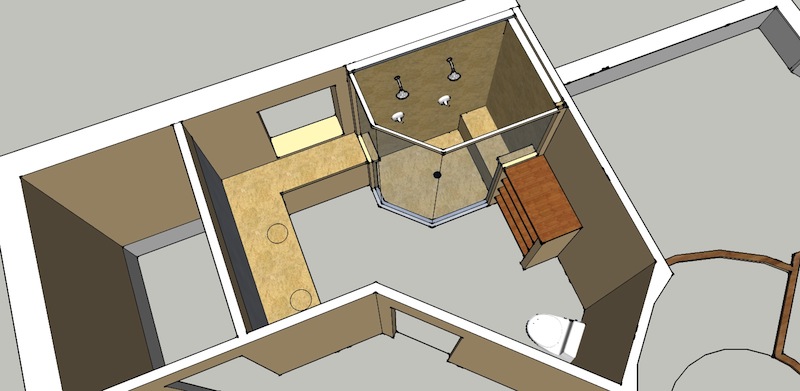
Huaco said:Did I see Built-In dog water/food bowls in the kitchen? Smart move!
Gear101 said:Guy is that a dog food/water bowl at the end of the base cabinets? And placement of a washer and dryer?
It's still under construction
Jester, you have inspired me. I would like to design and build my own ICF house. Could you point me in the right direction?
did you have someone design the house for you or did you buy a set of plans and make changes to them?
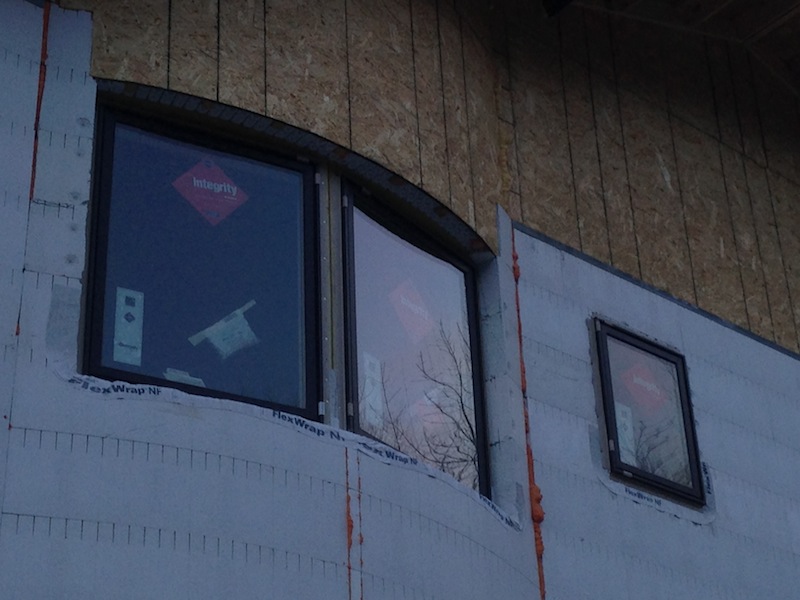
How hard was it to figure out what type of ICF to use and install? Would love to save the money and do the ICF myself like you did.
What resources did you use for cost estimating?
Thanks Craig
Jester, you have inspired me. I would like to design and build my own ICF house. Could you point me in the right direction?
did you have someone design the house for you or did you buy a set of plans and make changes to them?
How hard was it to figure out what type of ICF to use and install? Would love to save the money and do the ICF myself like you did.
What resources did you use for cost estimating?
Thanks Craig
NewBrewB said:If i was building a house from scratch, i would include some or all of the following features:
A charging shelf for cell phones, etc
A hidden spot for a built in safe for valuables
Prewired 7.1 surround
Access to the space behind my tv/electronics for easier wiring
Emergency generator for the house with autostart
Pull-down shelves from the MBR closets for non-seasonal clothes
A wet bar with at least 4 faucets, fed from a keezer in another location
A wood/metal workshop with serious thought to layout/outlets
An icemaker (love having mine)
Covered gutters that never require cleaning
Designated space/wiring for battery bank for eventual solar conversion
Hmmmm
A charging shelf for cell phones, etc
A hidden spot for a built in safe for valuables
Prewired 7.1 surround
Access to the space behind my tv/electronics for easier wiring
Emergency generator for the house with autostart
Pull-down shelves from the MBR closets for non-seasonal clothes
A wet bar with at least 4 faucets, fed from a keezer in another location
A wood/metal workshop with serious thought to layout/outlets
An icemaker (love having mine)
Covered gutters that never require cleaning
Designated space/wiring for battery bank for eventual solar conversion
")
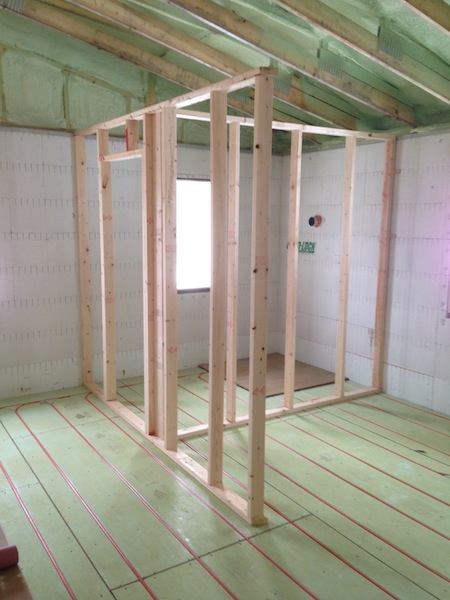
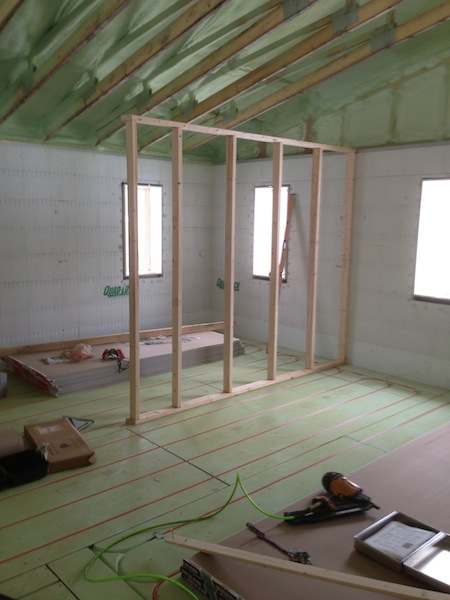
I guess it goes without saying that you MUST be careful not to nail into your radiant floor heating? Lol...
If i was building a house from scratch, i would include some or all of the following features:
A charging shelf for cell phones, etc
A hidden spot for a built in safe for valuables
Prewired 7.1 surround
Access to the space behind my tv/electronics for easier wiring
Emergency generator for the house with autostart
Pull-down shelves from the MBR closets for non-seasonal clothes
A wet bar with at least 4 faucets, fed from a keezer in another location
A wood/metal workshop with serious thought to layout/outlets
An icemaker (love having mine)
Covered gutters that never require cleaning
Designated space/wiring for battery bank for eventual solar conversion
Hmmmm
ToV said:One thing I would do with utilities is wire and plumb everything from the attic and basement and have all utilities running from the basement to the attic in one utility chase. I've had too many PITA moments getting at in wall routing.
Enter your email address to join: