Show us your sculpture or brew rig

Homebrew Talk - Beer, Wine, Mead, & Cider Brewing Discussion Forum

Help Support Homebrew Talk - Beer, Wine, Mead, & Cider Brewing Discussion Forum:

This site may earn a commission from merchant affiliate links, including eBay, Amazon, and others.
Bingo!... the CO detector has read 0ppm on two brew days so the hood seems to be doing it's job.
 
My cheap BIAB cart.

* Ikea Table for $7.99 x2. I needed a bottom shelf so I bought a second.
* Old towel as a heat barrier
* Casters to allow me to move it throughout the brew day $36.

I need to be able to carry this cart from the basement to my garage, so a requirement was lightweight. The Ikea table achieves this. I just bought the casters for this last brew day, and has made my life easier during chilling since my waste line of my wort chiller is too short to reach from the mash and boil location to the entrance of the garage. Now I just wheel everything over and begin chilling.

I bought the second table to mount my pump. I figured another $7.99 for only the top of the table was worth it.

The old towel as a thermal barrier is used since I have not found a good cheap wood or silicon mat to replace it.

In the end I wanted a cheap lightweight table for my semi-permanent location in my garage until I move to the basement in years to come.
View attachment 1499604485319.jpg
 
My cheap BIAB cart.

* Ikea Table for $7.99 x2. I needed a bottom shelf so I bought a second.
* Old towel as a heat barrier
* Casters to allow me to move it throughout the brew day $36.

I need to be able to carry this cart from the basement to my garage, so a requirement was lightweight. The Ikea table achieves this. I just bought the casters for this last brew day, and has made my life easier during chilling since my waste line of my wort chiller is too short to reach from the mash and boil location to the entrance of the garage. Now I just wheel everything over and begin chilling.

I bought the second table to mount my pump. I figured another $7.99 for only the top of the table was worth it.

The old towel as a thermal barrier is used since I have not found a good cheap wood or silicon mat to replace it.

In the end I wanted a cheap lightweight table for my semi-permanent location in my garage until I move to the basement in years to come.


Love the IKEA hack!
 
I posted a thread on my uncle's basement brewery years ago, the pics are all are dead links now, but he had an amazing setup, even beyond the brewery.

Anyway, they downsized and sold house, and for years he's said he'd love to keep it in the family. So now, after about 3 truck loads full, it's all in my garage now:) Lucky for me, I'm the only other homebrewer in the family!

Equipment;
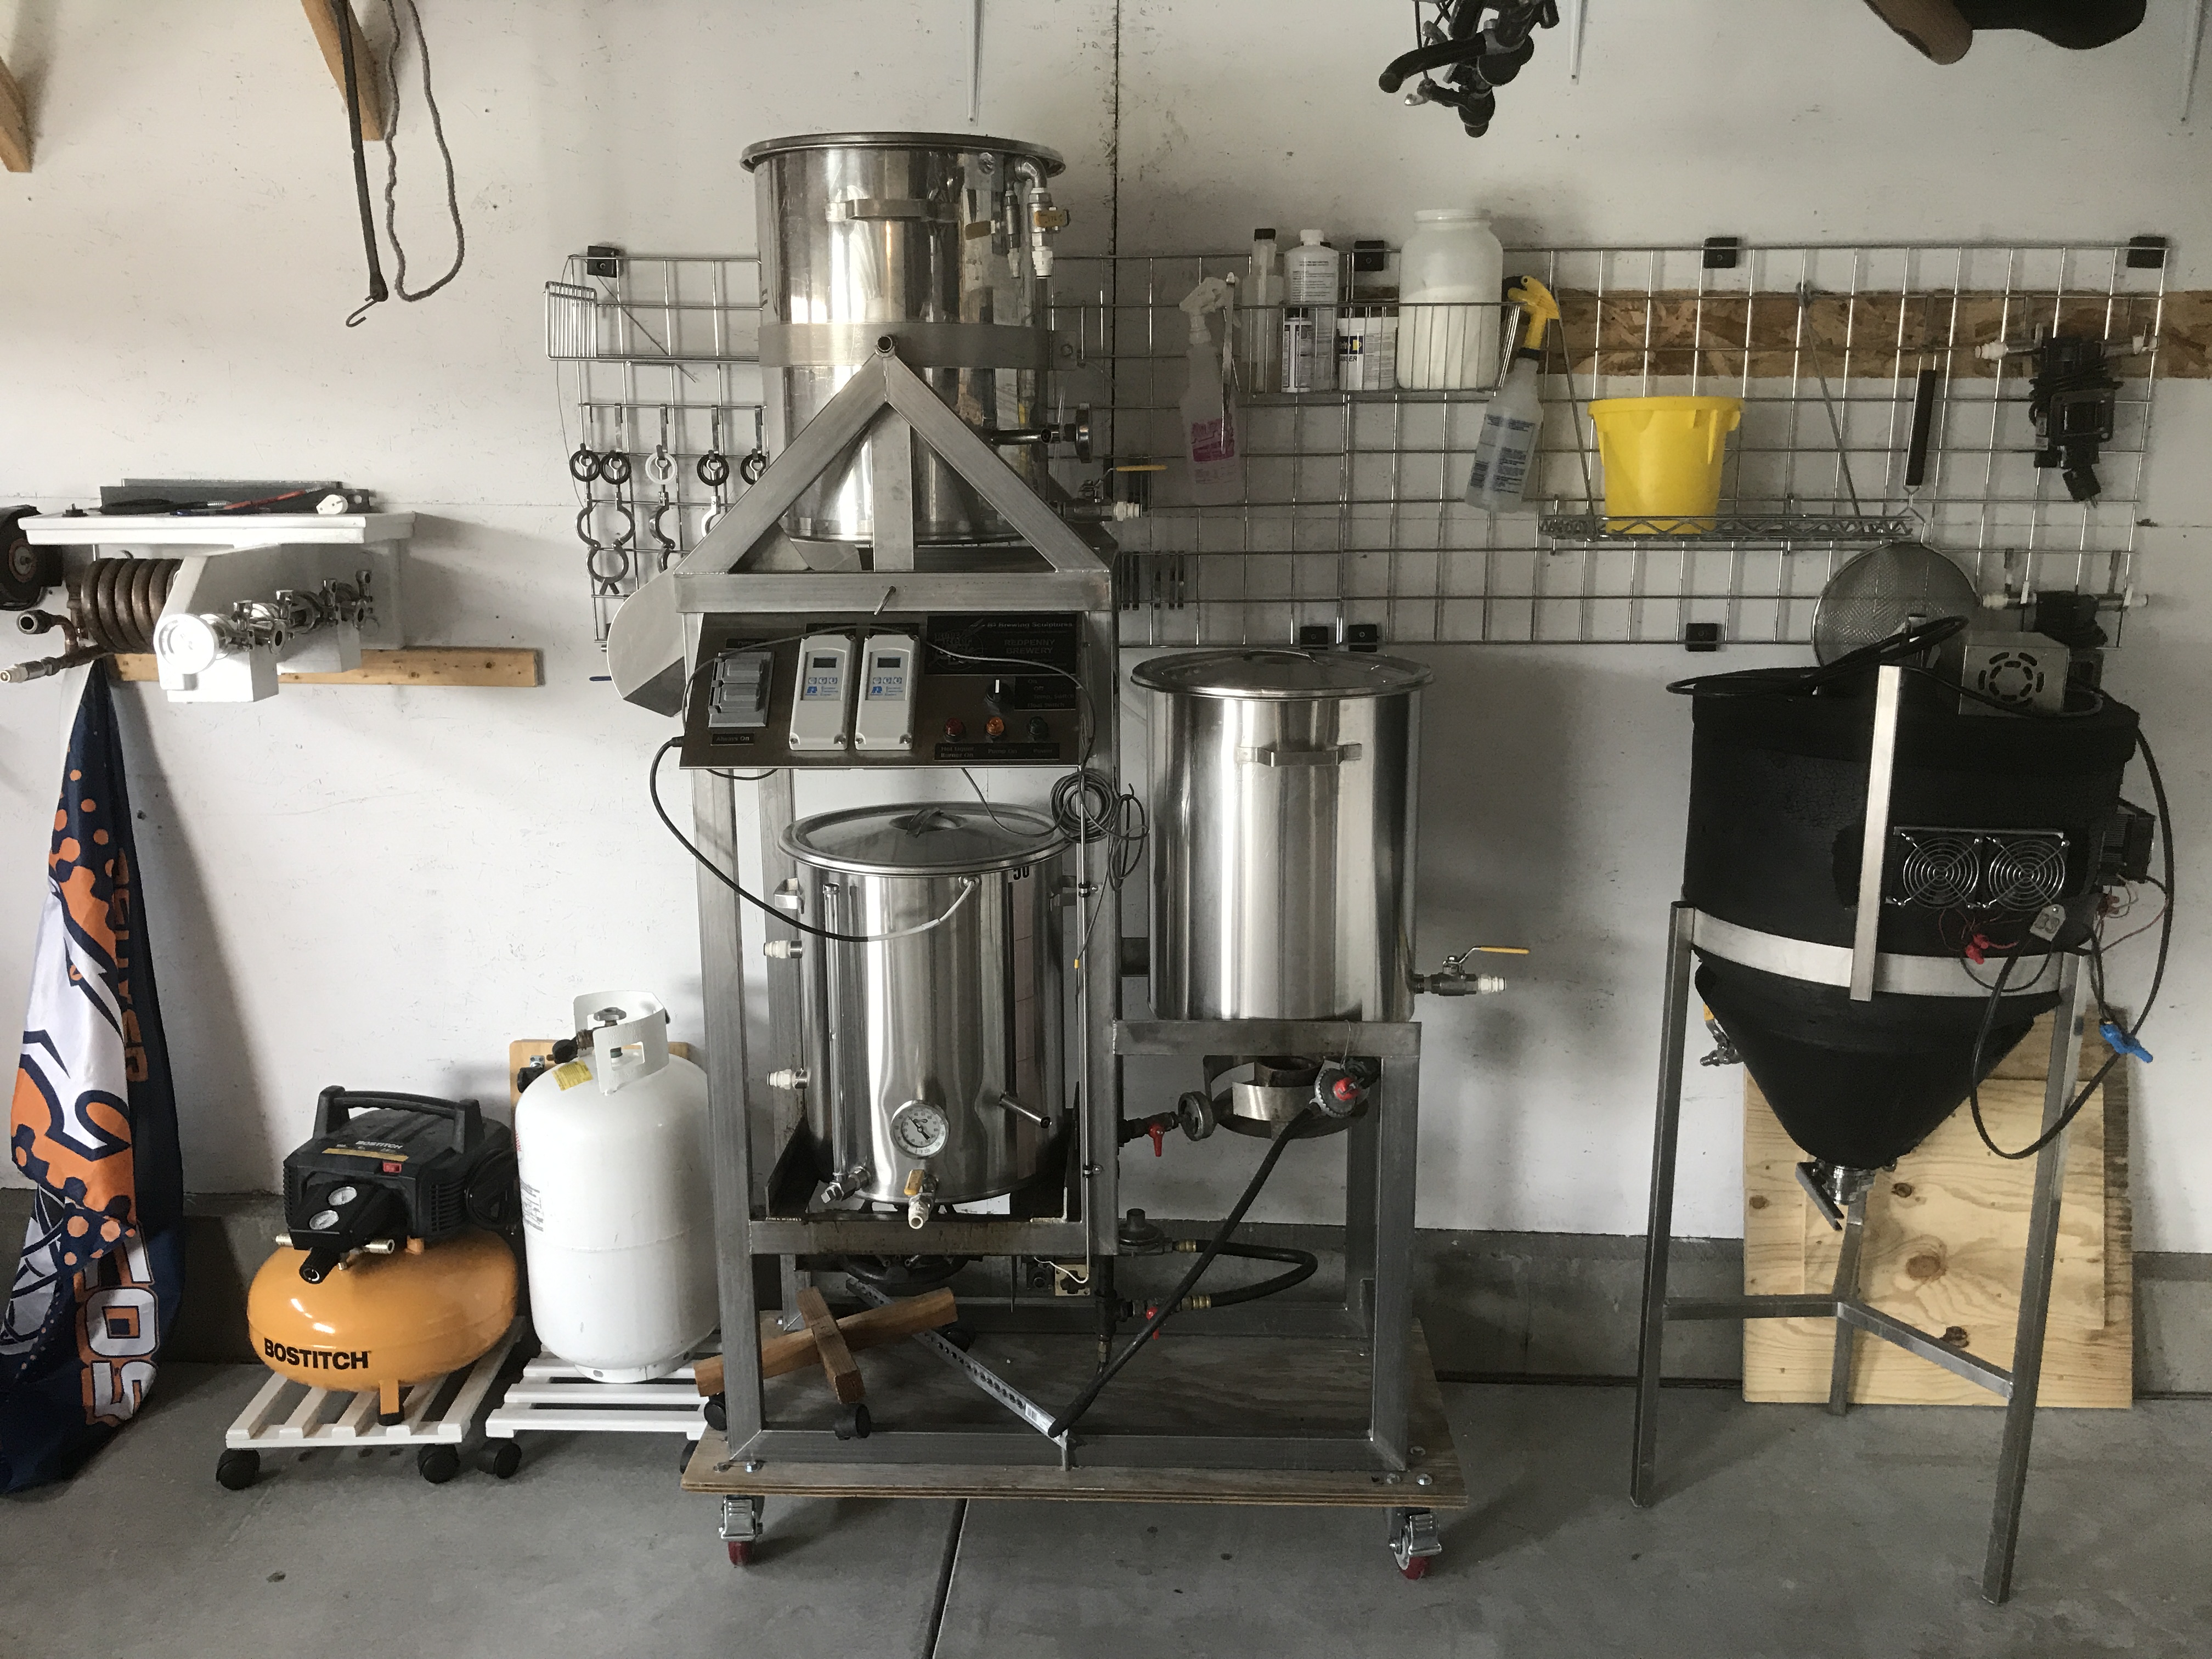
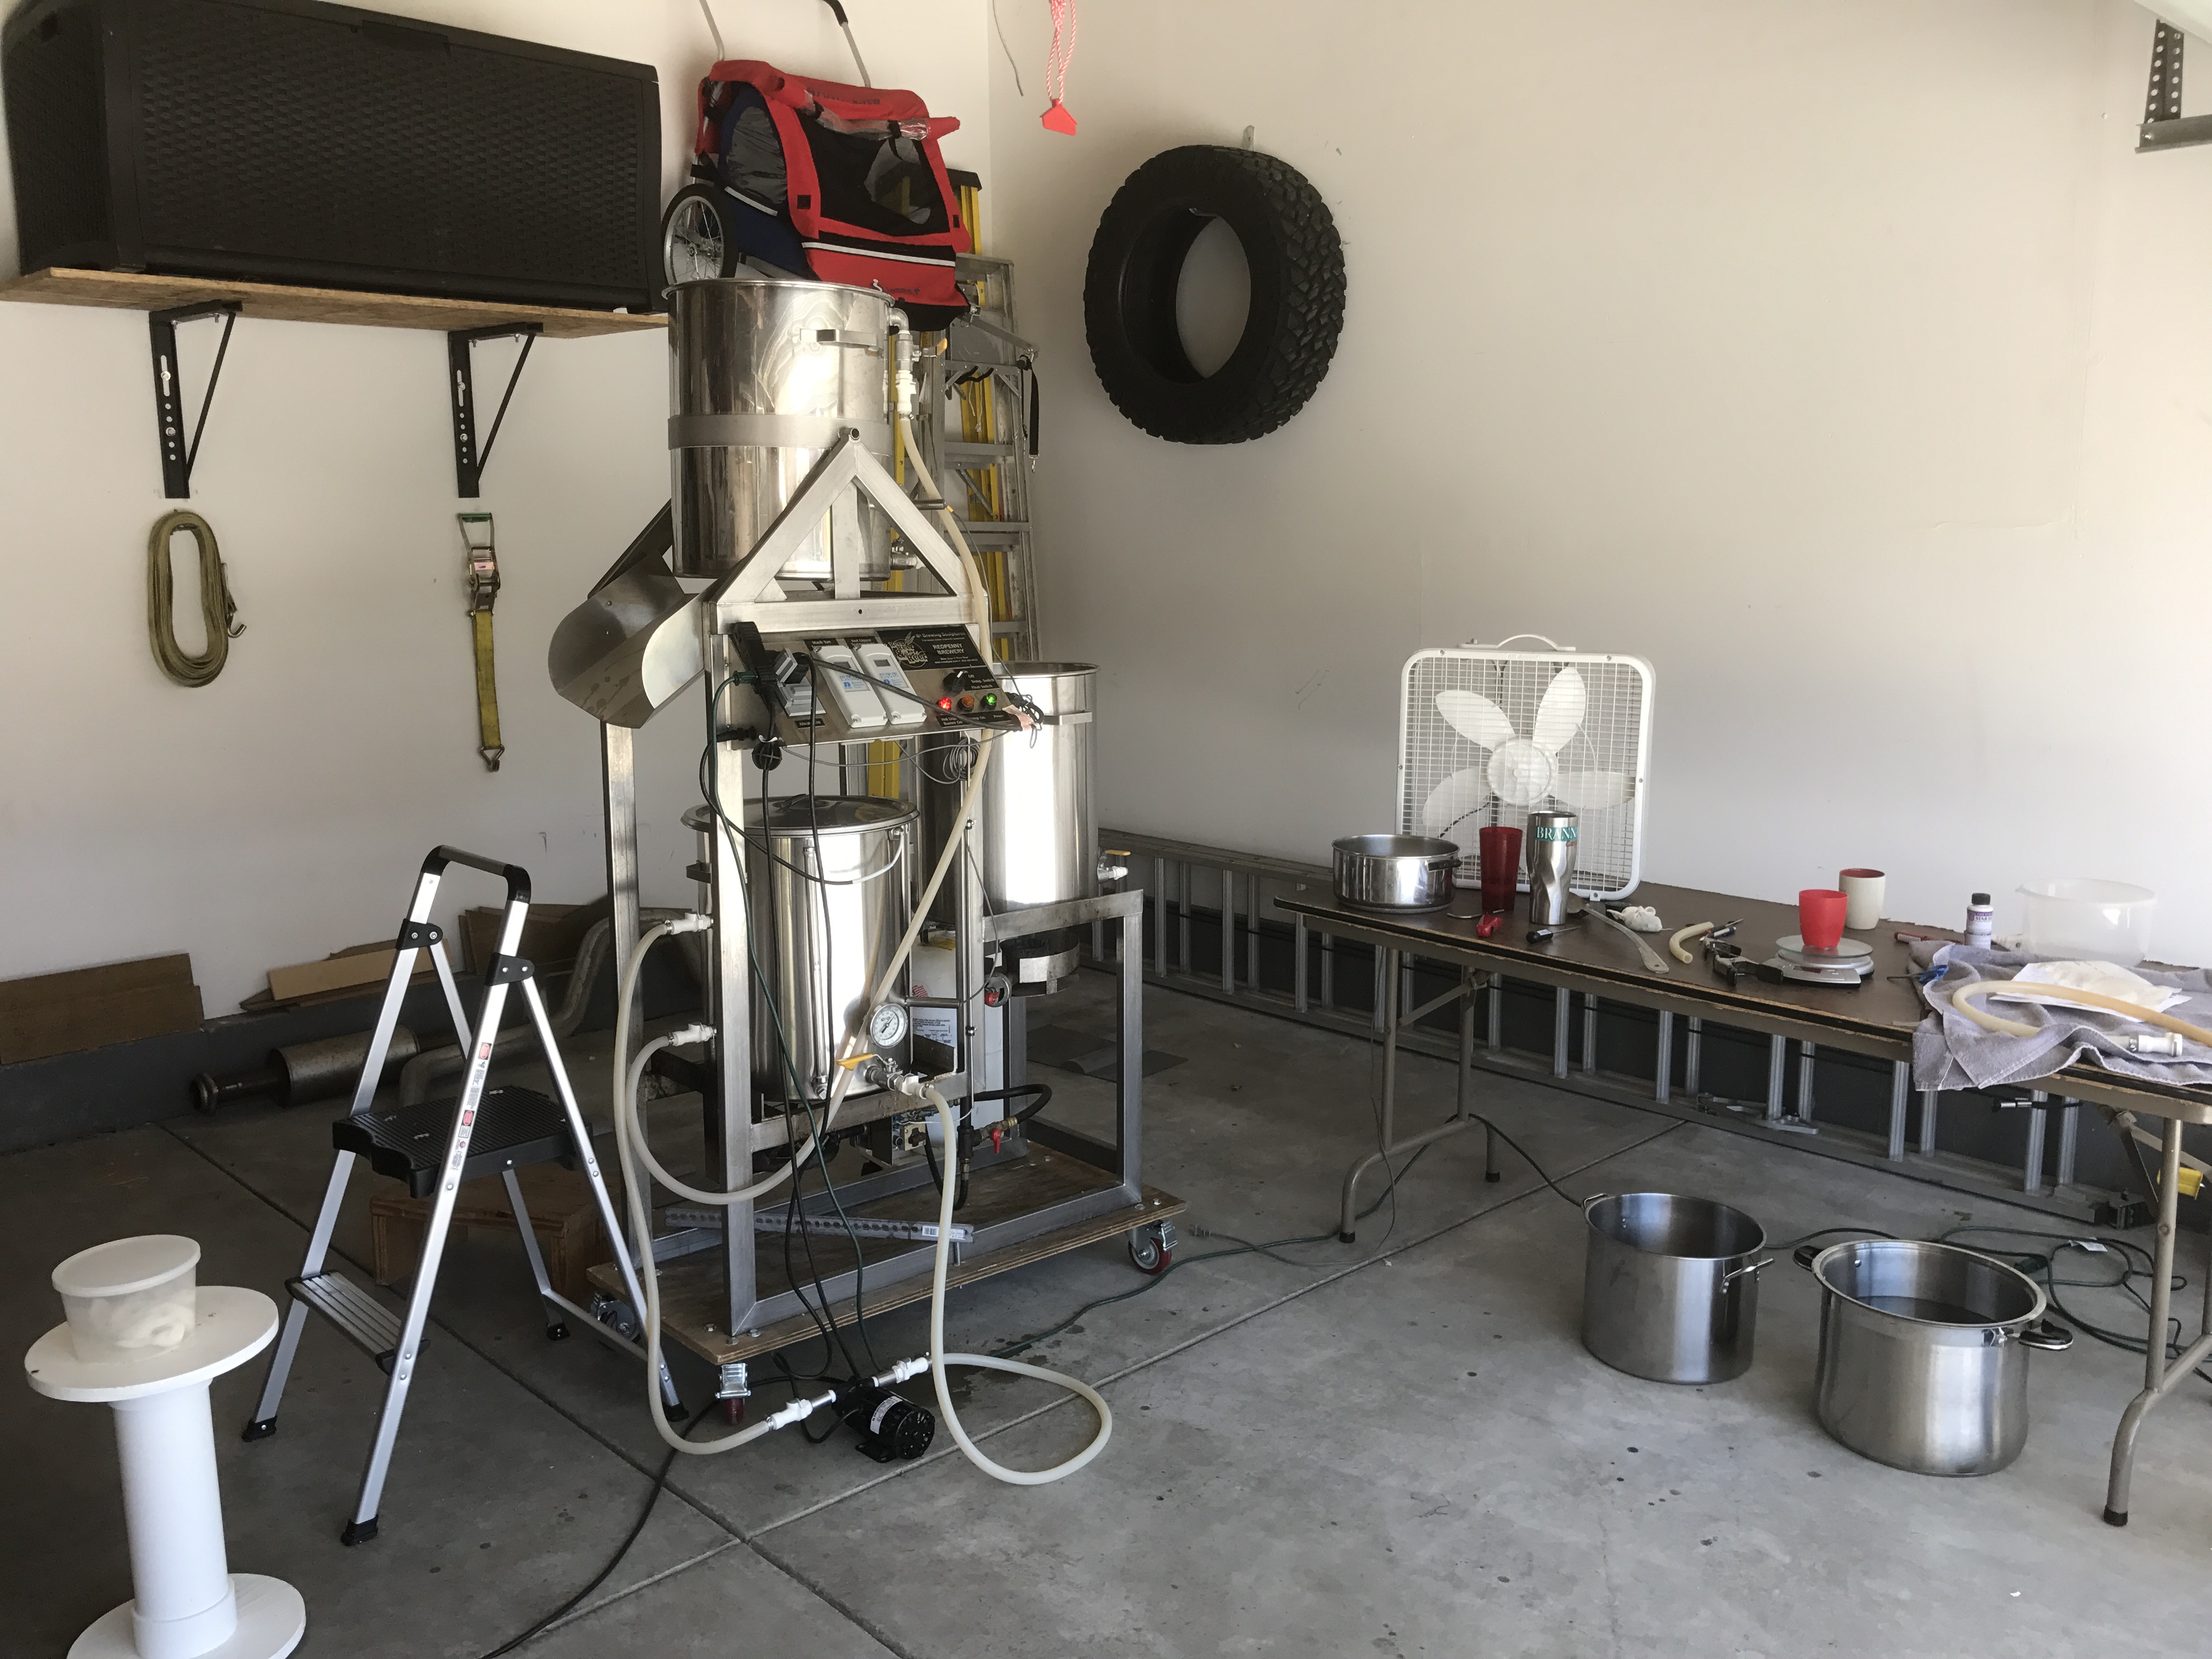
3 pot tippy HERMS brewstand with electronic temperature control. 50L mash tun, HLT and boil kettle.
2 marsh pumps
14 gallon TEC conical fermenter (25 below ambient)
Custom wall mounted Counter flow chiller with Oxygenator
Motor operated grain mill
Plate filter
Stir plate
Oxygen tank and 40lb propane tank.
4 kegs (6 total since I kept 2) with a custom stainless keg cart on casters. (not shown, he had two racks in his walk in fridge in basement)

2017-07-10%2017.00.29.jpg


Ingredients;
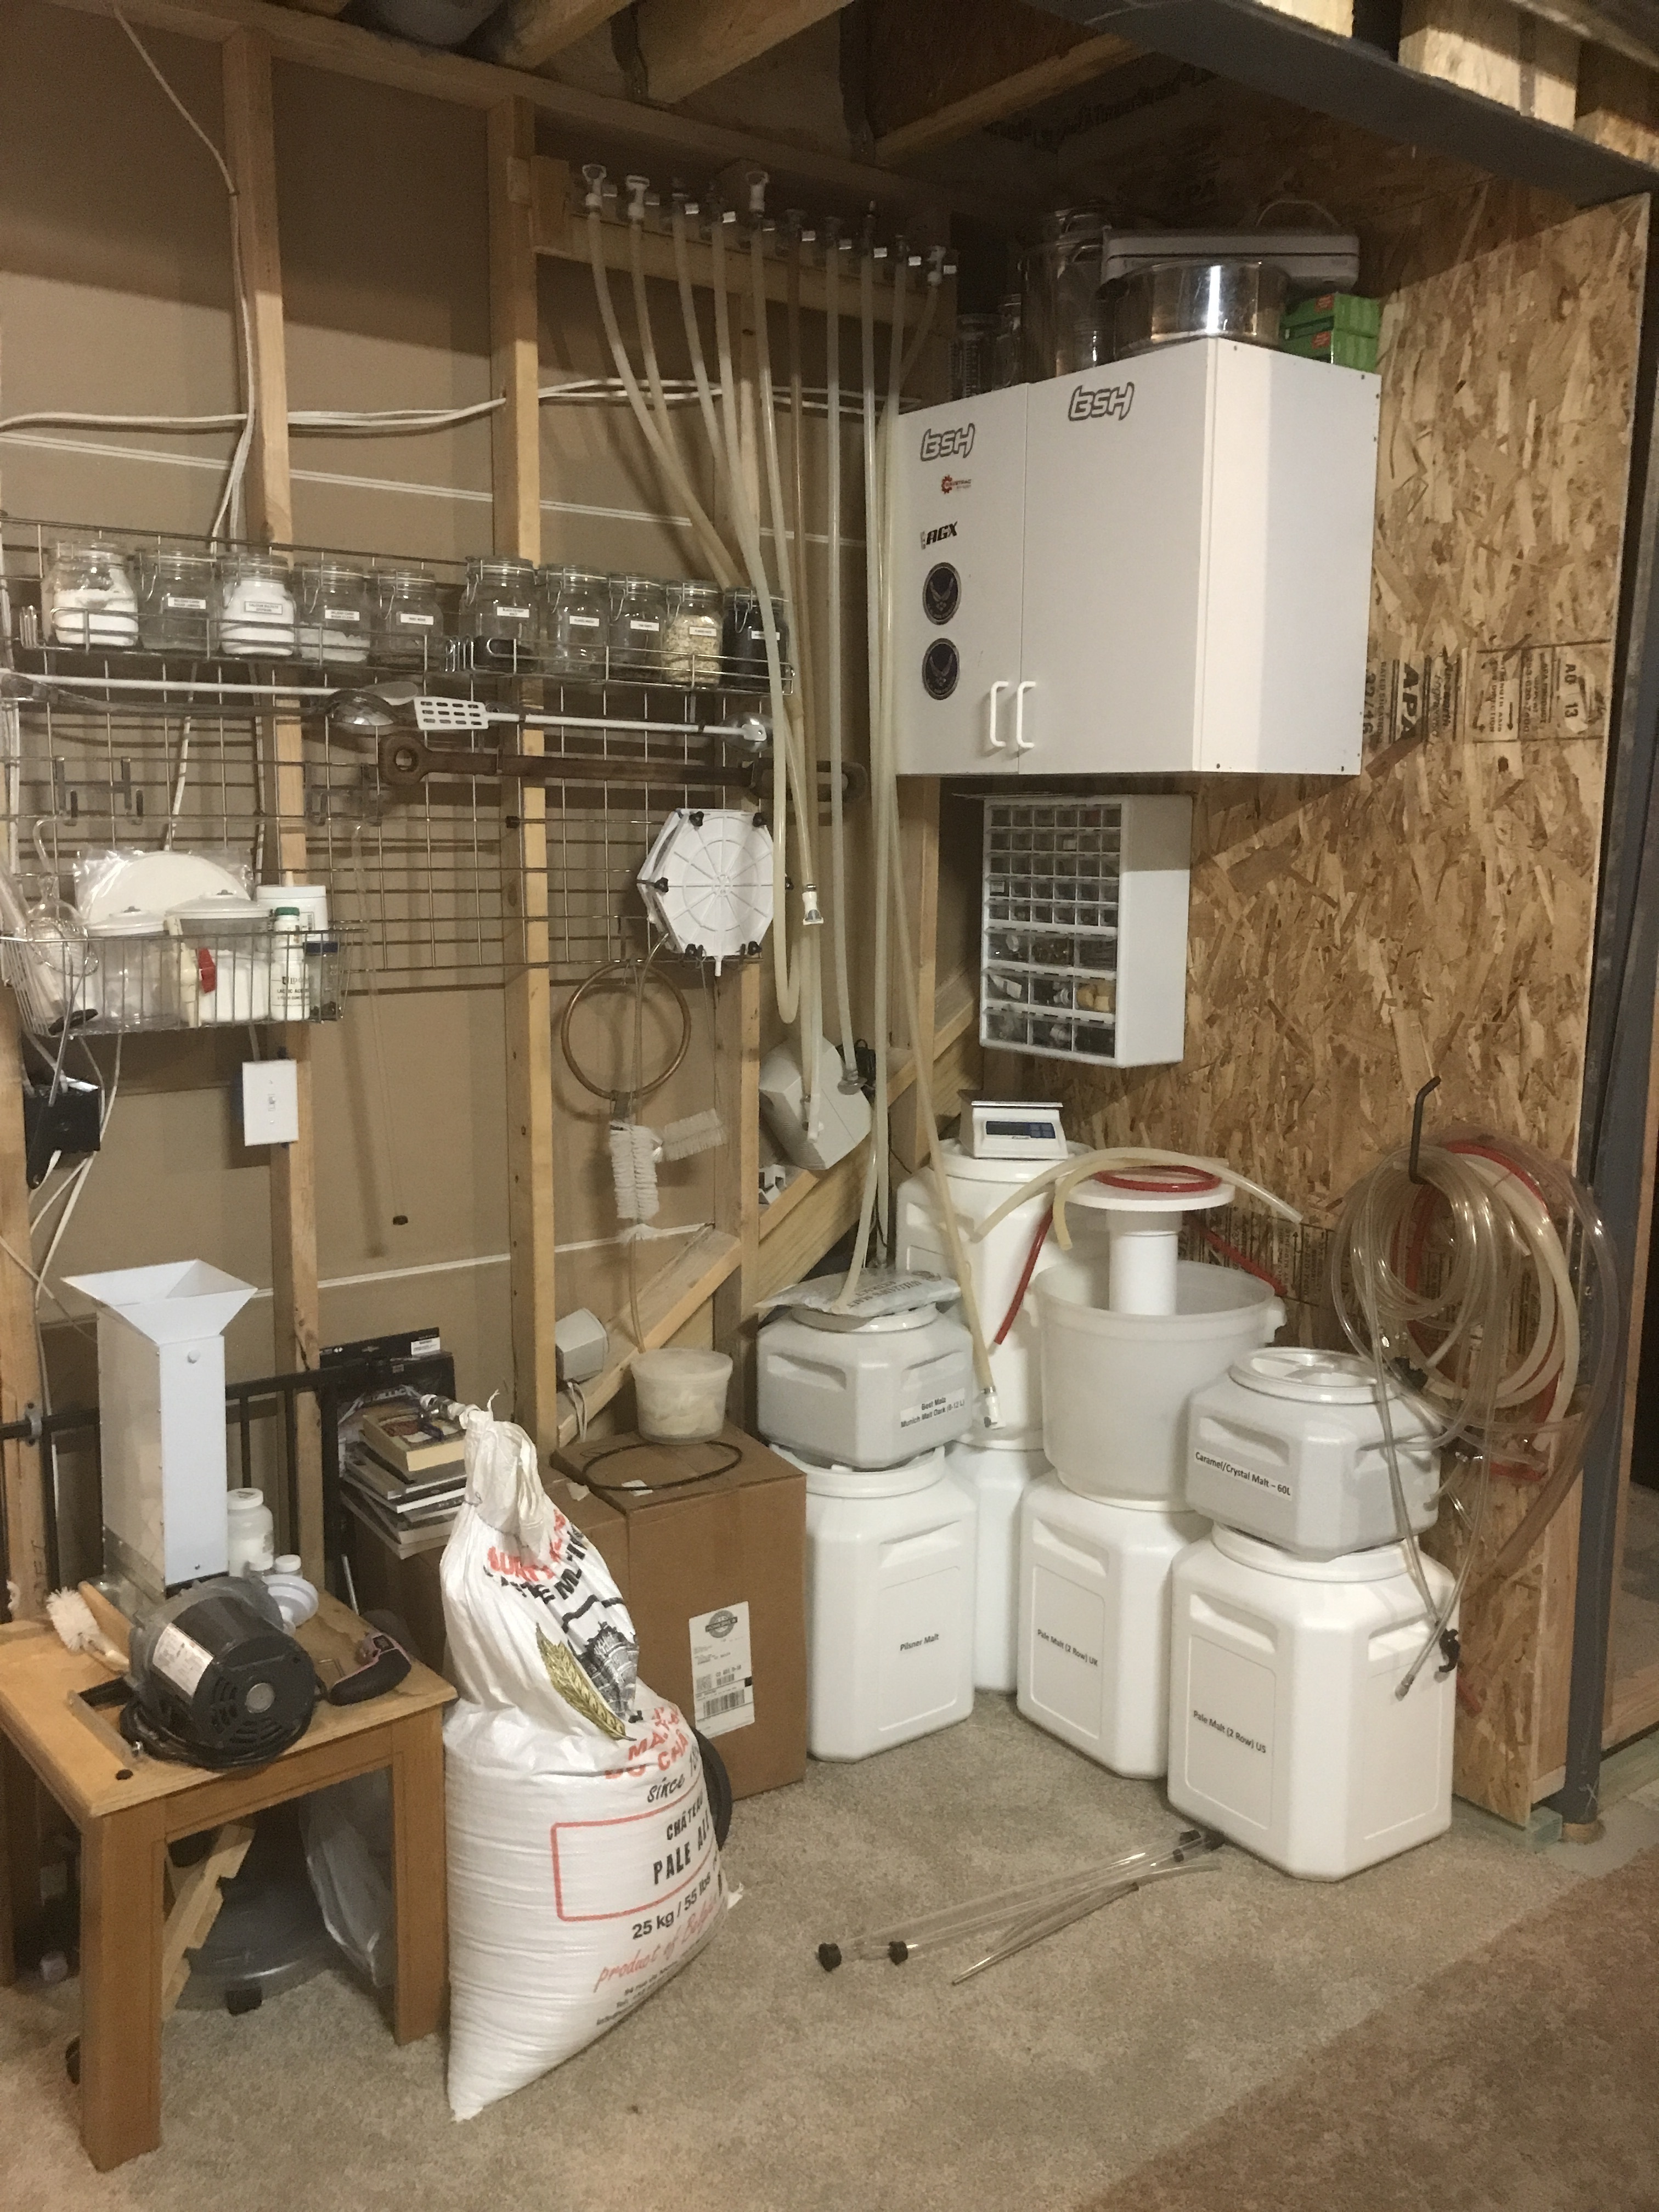
About 250 lbs of base grains (Munich, 2 row, pilsner, Maris otter, crystal 60.) Dog food containers to store it airtight in the basement.
Containers of black patent malt, chocolate malt, Irish moss, belgian candi, and tons of bags of other adjuncts and additives.
6lb bag of LME.

Plus
All the hoses to hook it up
Butterfly clamps
Plenty of pbw, star san and blc.
A hardware organizer full of extra QDs, parts, pieces, gaskets, stoppers etc.
A handful of faucets and regulators
All of the metal hooks, shelves and baskets from his wire grid shelving, so I just had to buy the 2x4 wire grids and brackets off amazon. The buyer of their home wanted to wire grids to stay, but not the hooks.. thankfully because the darn hooks and shelves are way more than wire grid.

2017-07-10%2017.20.50.jpg


Since I acquired it all, I mounted the brew stand on 4" casters to roll out to the driveway. I have the base built for fermenter as well, casters come in Wednesday. I have all the hoses mounted on a board I can move in one piece from basement long term storage to the garage on brew day.

Overall, it's just what I need to end my 5 year brewing hiatus after moving to CO and having kids.

First brew is a tripel and is in a few weeks. This is a major upgrade from my previous plastic buckets, folding tables, Coleman coolers and carboys.
 
I posted a thread on my uncle's basement brewery years ago, the pics are all are dead links now, but he had an amazing setup, even beyond the brewery.

Anyway, they downsized and sold house, and for years he's said he'd love to keep it in the family. So now, after about 3 truck loads full, it's all in my garage now:) Lucky for me, I'm the only other homebrewer in the family!

Equipment;
3 pot tippy HERMS brewstand with electronic temperature control. 50L mash tun, HLT and boil kettle.
2 marsh pumps
14 gallon TEC conical fermenter (25 below ambient)
Custom wall mounted Counter flow chiller with Oxygenator
Motor operated grain mill
Plate filter
Stir plate
Oxygen tank and 40lb propane tank.
4 kegs (6 total since I kept 2) with a custom stainless keg cart on casters. (not shown, he had two racks in his walk in fridge in basement)

2017-07-10%2017.00.29.jpg


Ingredients;
About 250 lbs of base grains (Munich, 2 row, pilsner, Maris otter, crystal 60.) Dog food containers to store it airtight in the basement.
Containers of black patent malt, chocolate malt, Irish moss, belgian candi, and tons of bags of other adjuncts and additives.
6lb bag of LME.

Plus
All the hoses to hook it up
Butterfly clamps
Plenty of pbw, star san and blc.
A hardware organizer full of extra QDs, parts, pieces, gaskets, stoppers etc.
A handful of faucets and regulators
All of the metal hooks, shelves and baskets from his wire grid shelving, so I just had to buy the 2x4 wire grids and brackets off amazon. The buyer of their home wanted to wire grids to stay, but not the hooks.. thankfully because the darn hooks and shelves are way more than wire grid.

2017-07-10%2017.20.50.jpg


Since I acquired it all, I mounted the brew stand on 4" casters to roll out to the driveway. I have the base built for fermenter as well, casters come in Wednesday. I have all the hoses mounted on a board I can move in one piece from basement long term storage to the garage on brew day.

Overall, it's just what I need to end my 5 year brewing hiatus after moving to CO and having kids.

First brew is a tripel and is in a few weeks. This is a major upgrade from my previous plastic buckets, folding tables, Coleman coolers and carboys.

Wow...just...wow...
 
I posted a thread on my uncle's basement brewery years ago, the pics are all are dead links now, but he had an amazing setup, even beyond the brewery.

Anyway, they downsized and sold house, and for years he's said he'd love to keep it in the family. So now, after about 3 truck loads full, it's all in my garage now:) Lucky for me, I'm the only other homebrewer in the family!

Hi, Its your long lost cousin! years ago I had a conversation with good ol' Uncle <insert Uncle's Name Here>! At the time I was the only other homebrewer in the family. He specifically told me that if he ever got out of the hobby, he wanted me to get all that sweet, sweet gear. So... I'll be over to pick it up tomorrow. Thanks so much for storing it in your garage 'til I could get it

Sincerely,
Long lost cousin Jimmy :D :mug:
 
Ingredients;
About 250 lbs of base grains (Munich, 2 row, pilsner, Maris otter, crystal 60.) Dog food containers to store it airtight in the basement.
Containers of black patent malt, chocolate malt, Irish moss, belgian candi, and tons of bags of other adjuncts and additives.
6lb bag of LME.

I'm trying to get an understanding for keeping grain fresh. How do the dog containers seal? Is there a way to vacuum the air out so that its 100% air tight? How long does grain stay fresh in the dog food containers?

:D
 
I'm trying to get an understanding for keeping grain fresh. How do the dog containers seal? Is there a way to vacuum the air out so that its 100% air tight? How long does grain stay fresh in the dog food containers?

:D

They are screw top lids. They are listed as airtight:
https://www.petco.com/shop/en/petco...supplies/dog-food-storage/gamma-vittles-vault

Not vacuum sealed though.. 55lb grain bags aren't vacuum sealed, so I'm not sure that is necessary. You can have 'air tight' without vacuum sealing.

My uncle stored his grains in these bins for almost 20 years, and likely had some base grains for over a year in the bin with no issues.
 
I patterned this compact three tier from a number of designs from other homebrewers. It is natural gas fired, PID controlled, has a Herms coil in the HLT, false bottom in the MT/LT, and a whirlpool arm in the BK. If I had it to do over I'd increase the head space above the BK and below the HLT. It's hot trying to dump hops into a sock with so little room. Hindsight, I guess.

IMG_20160520_225719715.jpg
 
I've been lurking on many of these threads for a while, picking and choosing the aspects of all the brew setups I liked and trying to come up with a mesh off all the things I wanted. I am finally at a point that my stand is usable in a manual configuration until future funds allow me to automate more. My goal was to have a 3 vessel system with two pumps on a single tier that I could control temperature and flow manually while still leaving the ability to run solenoids and a controller in the future. I belong to several homebrew clubs and occasionally brew at other places. I wanted to stay with propane and low voltage (110VAC) so that I could just jump on somebody's outdoor GFI receptacle and run and worst case, run off a generator. Worst, worst case I could sparge manually with 1 gallon pitchers (sucks but I've done it). So here is what I came up with.

First I bought 3 polished kegs with spears removed for a song. I can't remember if it was here or Craigslist, but I paid $90 for them all. Guy was using them as fermenters.
img_4291-68218.jpg


I then cut the spear ends on two of them and the domed bottom on the third that was to be my bottom drain MLT. They were cut specific to the IKEA 12" lids until all were snug.
img_4817-68221.jpg


Next I learned how to silver solder thanks to Bobby and many others posts on here. I bought silver solder kits from Brew Hardware and began laying out fittings in my HLT/HERMS tank. I installed the 5/8" high flow diptube, 3 piece ball valve, and 50' x 1/2" stainless HERMS coil with valves on each. I also installed a sight glass/dial thermometer on a "T" fitting.
img_52891-68156.jpg

img_49631-68225.jpg

img_49581-68224.jpg


Then I started on my boil kettle. Same scenario as the HLT with the drain valve but different orientation of the pickup tube and the installation of a whirlpool arm to avoid sucking up trub.
img_5103-68232.jpg


Mash tun incorporates the Blickman auto sparge with a twist. I didn't like the way my buddies used the silicone hose and floating ball, so I used locline and a shower head with mine to mimick my old setup in my cooler tun. I bottom drained this one for more efficiency and less trouble getting the wort to flow. I put a "T" on the end with a ball valve pointing downward and a dial thermometer inside the tube to check wort as it is entering the pump to go through the HERMS. I got the false bottom and locline/sparge parts from Brew Hardware as well.
img_5109-68233.jpg

img_5296-68235.jpg

img_5292-68236.jpg


Now for the stand. It had to fit into the bed of my F150 short bed, be able to load it by myself, be adjustable, be on wheels, and be weldless. I've been burned badly before with hot liquid so I wanted something sturdy that I didn't have to worry about tipping over on me. I decided to go with the 1 5/8" unistrut and premade fittings all connected with 1/2"x1" bolts, washers, and strut nuts. I liked the idea of a place to set my beer and recipe book and whatnots so I fgured for a shelf and a table to double as a pushcart handle and future location of a control panel. My biggest blessing in building this was the use of my company port-a-band saw. Worked great.
img_4982-68227.jpg


Test fit with a keg for spacing.
img_4987-68230.jpg


Wheels and burners added.
img_5017-1-68231.jpg


I added brackets to the end and mounted my plate chiller. I have since reversed the brackets so it sits nearly flush with the stand and is more protected.
img_5543-68254.jpg


Added plywood with 4 coats of polyurethane and mounted both chuggers underneath for protection of the motors. Oriented pump heads to have inlets down for purging and put a "T" and ball valve on each to help purge air as well as divert flow if needed. Bought a 50' 14/3 extension cord and wired the pool switches together to a weatherproof receptacle under the table routing all through the frame. Cut the bridge in the receptacle hot side and have the outlets switched independently. Used the remaining cordage with male end as a pigtail to connect to a wall outlet.
img_5632-68253.jpg


I brewed 9.5gal of German Pilsner on it last weekend and hit my SG, but had low volume as I was looking for 10.5 into the fermenters. Hadn't brewed in 6 months and got behind the 8 ball at the end and forgot to take a final reading. Still learning my volumes and temps on this one too. Stand got hot and melted my pump switch boxes. Will change them out for metal and build wind deflector/heat shields for the burners. Temps and flow were easy to control and it seems to work well. Looking forward to using this more.
 
I agree. Nice build @arcorey. How long did the build take from start to finish?
 
arcorey, I love the setup. I've been back and for about building a stand and I think I might go a similar route here pretty soon. I'm getting tired of lugging everything upstairs piece by piece. It'll be nice to be able to roll it around the house to the back yard all in one.
 
arcorey, I love the setup. I've been back and for about building a stand and I think I might go a similar route here pretty soon. I'm getting tired of lugging everything upstairs piece by piece. It'll be nice to be able to roll it around the house to the back yard all in one.

Things I learned from mine that may help. Buy way more bolts, washers, and strut nuts than you think you'll need. I had to buy several times. Keep everything the same size. I used 1/2" for all my hardware and some things had to be drilled out to accommodate. I should have gone 3/8" instead. Loose fit your parts then square them and tighten in sections. Example, I squared the top then wrenched everything once it was all true. Go with sturdy casters with brakes. I wish my casters were more forgiving for uneven ground. A larger, wider set with more load rating would have been nice. The stand gets very hot. Don't mount anything plastic to the stand. I melted both PVC switch boxes. A portable band saw or metal chop saw are the way to go for nice cuts. I tried a cutoff wheel on a grinder and caught myself on fire and had rough looking cuts to boot :smack:
 
I used these casters for my brew stand and fermentor, I'm pretty happy with them. Very solid. The brake really works well, and feels very substantial.

https://www.amazon.com/gp/product/B01MDJAY7S/?tag=skimlinks_replacement-20

My stand has three 50 liter pots which is roughly 350lb, plus the stand and pots itself, the 3/40 plywood base and anything else I may throw on it I figured 200 lbs., so 550lb which is very conservative. (I don't think I'd ever have all 3 pots full... but I know that I can if I need to)

These casters are 300lb capacity a piece so I've got over double the capacity than I need.
They have 3" and 5" as well.

I only roll mine across my garage floor and driveway, so very smooth terrain. Can't speak for how they'd work on rough ground, grass or dirt.

2017-07-22%2012.00.19.jpg
 
Last edited by a moderator:
I just finished my single tier rig. I purchased most of the 80/20 extruded from eBay. Much cheaper than buying direct, but this 80/20 stuff is awesome. Single chugger pump, 2 Blichmann burners, 10 gal. cooler mash tun, Duda plate chiller.

2j3od49.jpg


Nice work! I don't recall seeing a frame made of 80/20. I used to sell the stuff, and had planned to make my rig of it, but it priced out so dang expensive, even with my "former employee" discount. Looks good!!
 
@arcorey can you provide the dimensions of your stand? I like the layout of it.

I did a rough sketch during build and then fit everything as I went. I'll try and get dimensions from the finished product and get it uploaded this week.
 
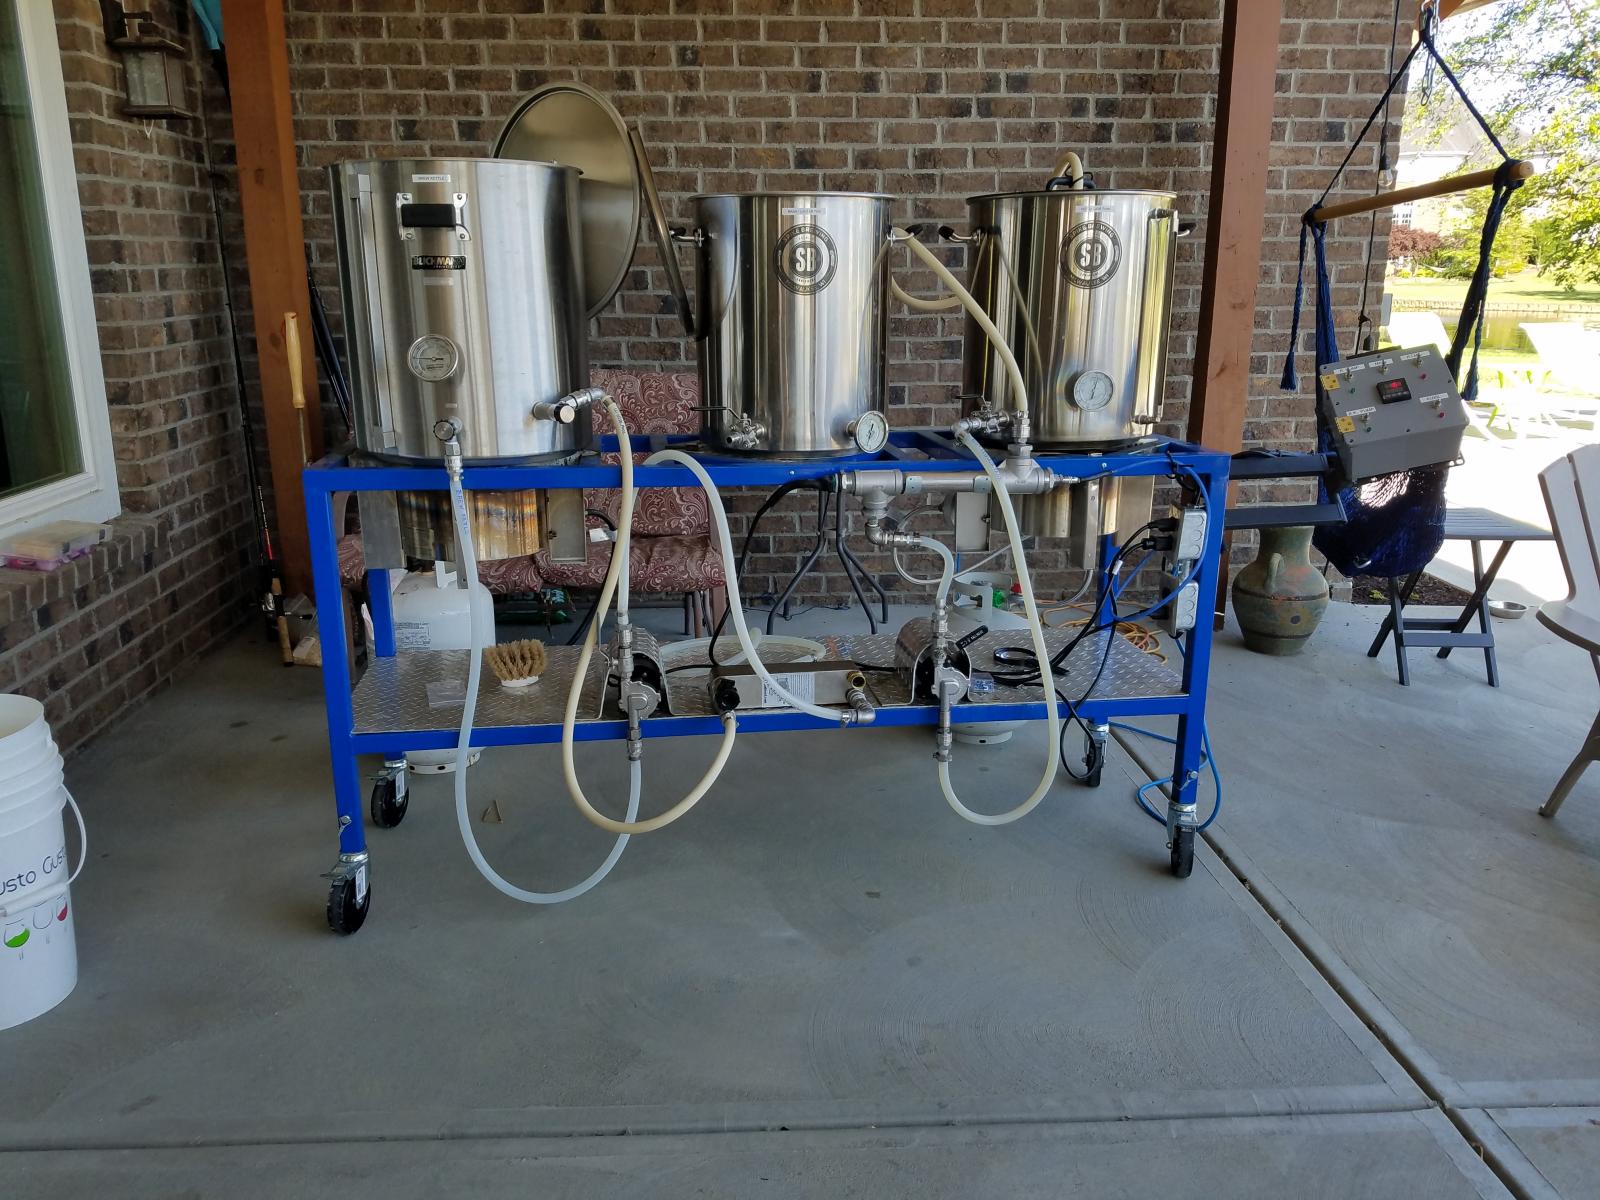
Timely Indy, appreciate seeing your RIMS as I was just last night laying out my plumbing for same.. assume you are pumping though chiller during whirlpool and then is that a valve or disconnect on the side of the BK you switch to fermenter? looks slick!
 
I'm considering building a stand with the strut material and currently use the 10 gallon coolers for mash and HLT. Just wondering what experiences people have had with a burner mounted to the stand and the heat impact to the plastic coolers.
 
I usually run three 20g kettles, but for the last lawn-mower pilsner of last year I used my 10g Rubbermaid for the MLT.
Bracketed by a pair of BG14s it didn't get much warmer than room temperature, but spacing is obviously key...

ab_26nov2016_02.jpg

Cheers!
 
Timely Indy, appreciate seeing your RIMS as I was just last night laying out my plumbing for same.. assume you are pumping though chiller during whirlpool and then is that a valve or disconnect on the side of the BK you switch to fermenter? looks slick!

That's correct. I whirlpool while chilling through my plate chiller (Duda Diesel 40 plate chiller). Both valves on my brew kettle are Blichmann G2 Linear Flow Valves, with 1/2" Quick Disconnects. After whirlpooling I come out of my brew kettle, through pump into fermenters. What it doesn't show is I now have a Blichmann ThruMometer inline between my chiller and my whirlpool inlet.
 
Back
Top