KCBrewer's Garage Brewery

Homebrew Talk - Beer, Wine, Mead, & Cider Brewing Discussion Forum

Help Support Homebrew Talk - Beer, Wine, Mead, & Cider Brewing Discussion Forum:

This site may earn a commission from merchant affiliate links, including eBay, Amazon, and others.
Joined
Feb 17, 2010
Messages
14,612
Reaction score
3,600
I'm putting an end to disorganized brew days. I had been looking for a free countertop for the garage to get the brewery more organized, and finally came across a good sized countertop being pulled from a coffee shop turned yoga, so the wheels were set in motion.

I also had $20 worth of Lowe's gift cards, so I picked up about a dozen 2x4's to get me started. The plan is to have a ferm chamber, carb/condition chamber, grain milling station, easy grain access, and plenty of workspace to keep things from getting cluttered.

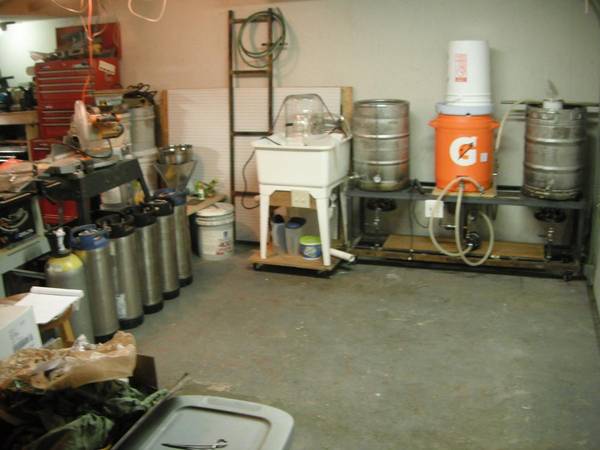
Here's the area that will become my brewery.
DSCF7023.JPG


The specimen.

DSCF7021.JPG


Framing started.

DSCF7027.JPG


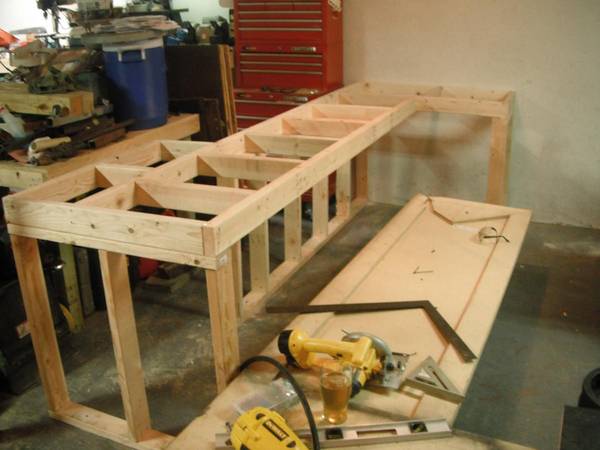
Rough framing nearly complete.

DSCF7032.JPG


Countertop cut to size and set in place.
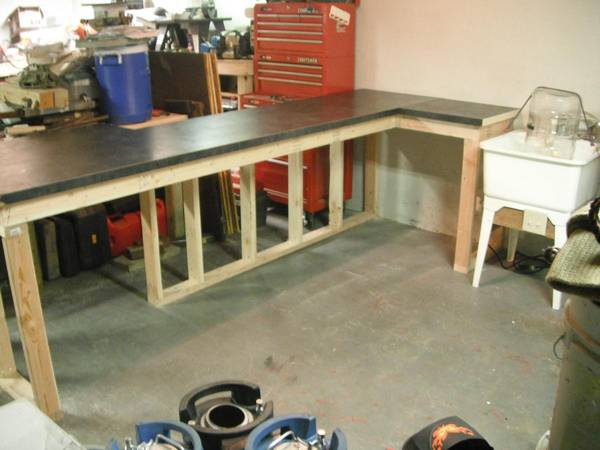
DSCF7038.JPG


Now it was time for something cold. A tasty glass of BM's Centennial Blonde hit the spot.
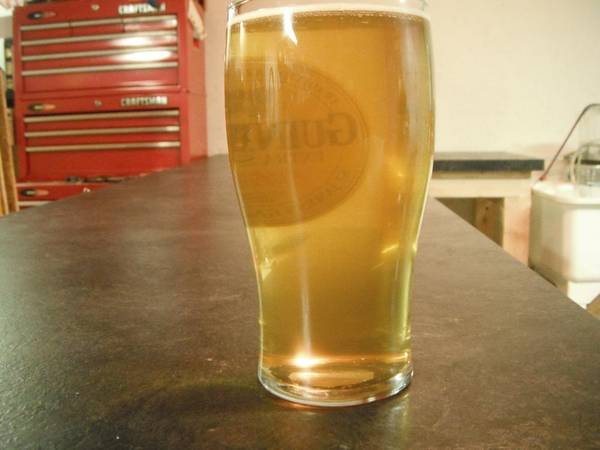
DSCF7041.JPG


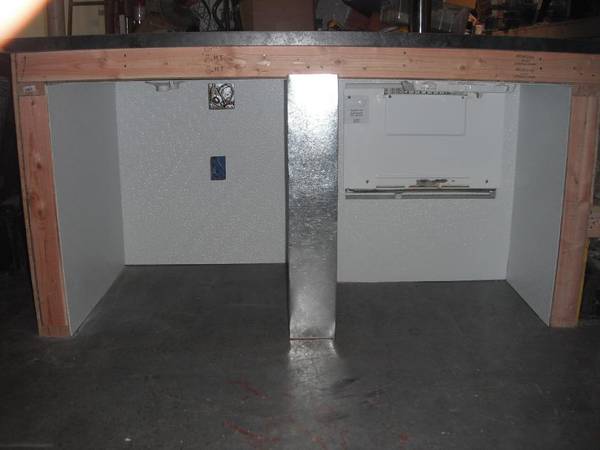
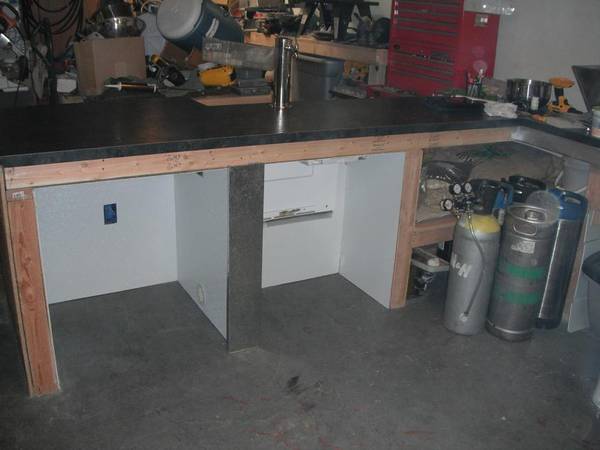
Back to work. A little more framing and some test fitting. You can see here there will be a fermentation chamber on the left (should hold 5 carboys easily) and a carb/condition chamber in the middle which will house 5 cornies and a 20lb co2 tank. There will be a single tap tower above this area for "sampling" before moving kegs to the bar. To the right will be the grain milling area.

DSCF7047.JPG


Grain mill mounted and some more test fitting of supplies. The mill will be motorized eventually. I have a motor, just need the pulleys. I bought the bins on the right for grain storage, but they're not airtight and I ended up returning them. Those stackable vittles vaults are just so fv&*ing expensive, especially when you need 10 of them.

DSCF7053.JPG


And this was the result of a couple days of playing in the garage.
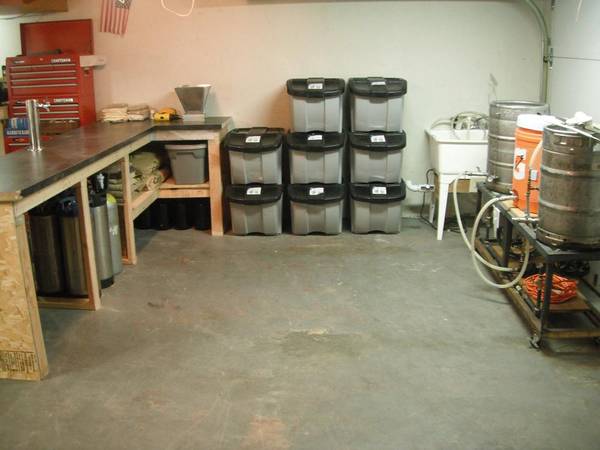
DSCF7052.JPG


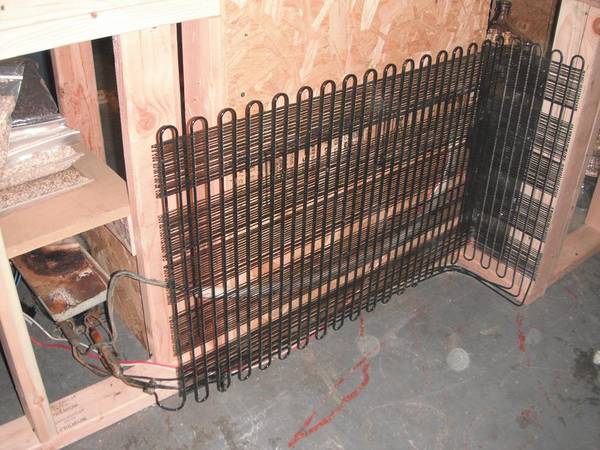
Next up is adding the cooling side of things. I used the refrigeration system from a basic 14 cu ft refrigerator. For those who don't know, you can remove the entire cooling system from a fridge without cutting any refrigerant lines, as you can see below. You then have a frost free cooling system that can be made to work with whatever chamber you build, and don't need to worry about brazing lines or recharging the system properly.
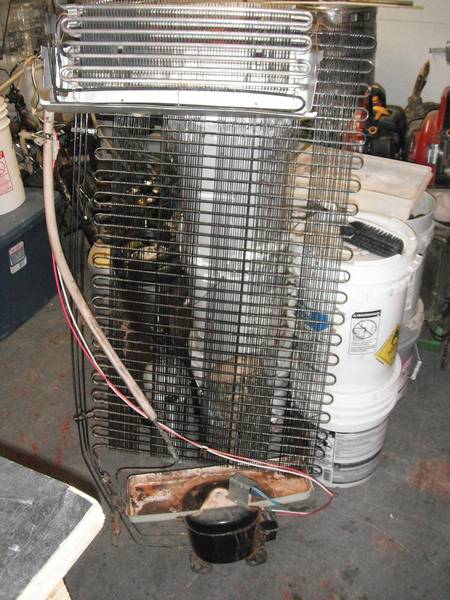
DSCF7073.JPG
 
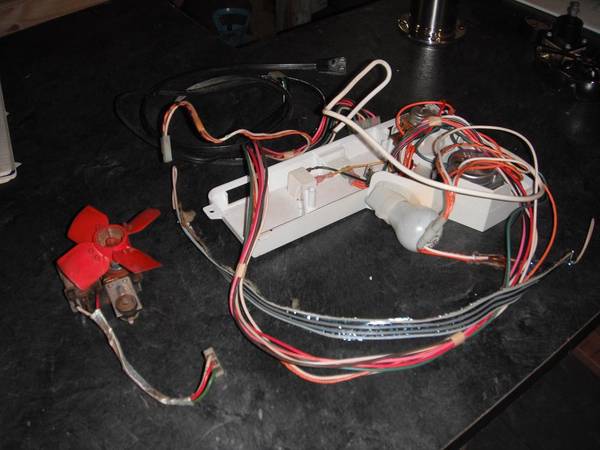
Here is the electrical side of things from the fridge. I also kept the fan shroud and inside freezer panel that covers the coil

DSCF7075.JPG


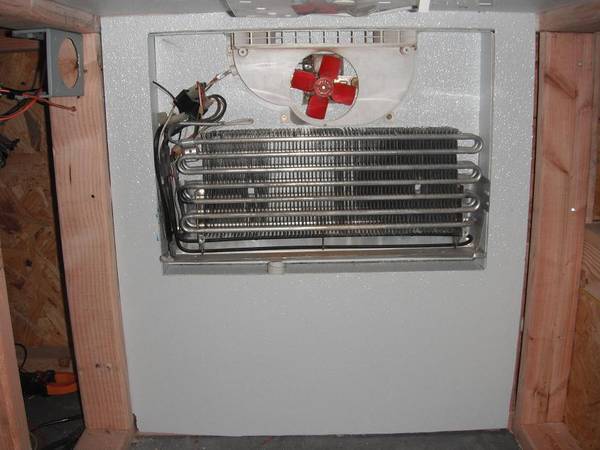
Here is the coil mocked up.

DSCF7081.JPG


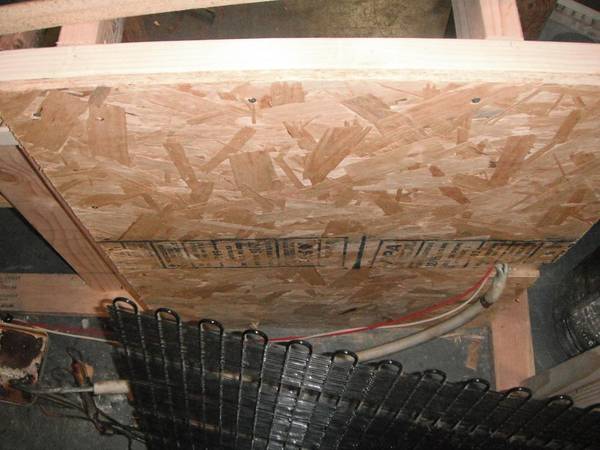
From the back side. The condensation drain pan is rusted out, but it isn't going to be used anyway. Any plastic pan to catch the water will work.

DSCF7082.JPG


Some OSB to close up the back side. The final product will be lined with this:
http://www.homedepot.com/webapp/wcs...talogId=10053&productId=100389836&R=100389836
so no wood will be exposed, including behind the coil. It's available at home depot/lowe's for $26.97.

DSCF7086.JPG


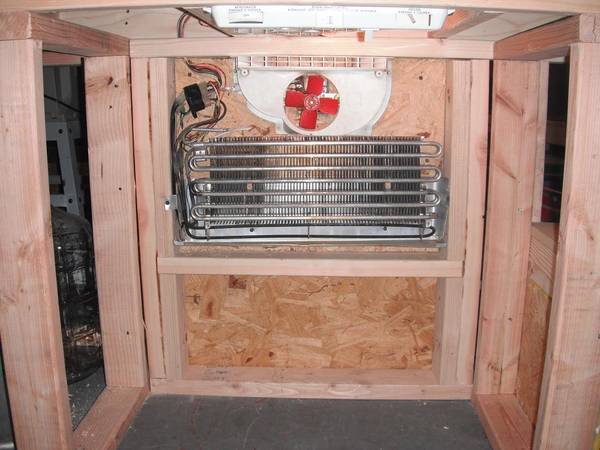
And a shot from the inside. The thermostat, light & switch are mounted up top so it will have light that comes on when the door opens. This is still just a mock up. I have the drain line mocked up as well using 1" pvc which isn't shown in this pic.

DSCF7108.JPG


Here is a shot from the back where the coil is mounted.

DSCF7099.JPG


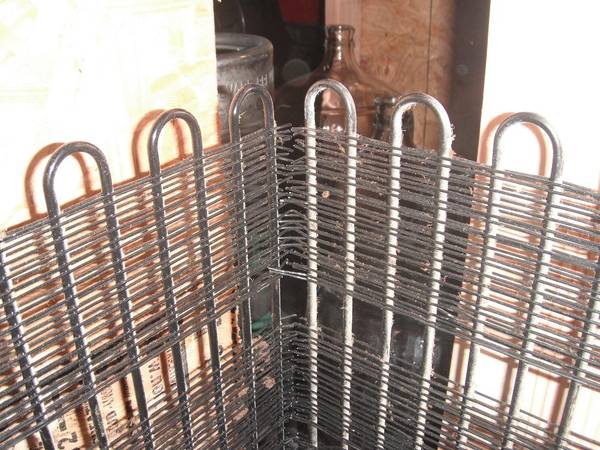
I folded the coil by cutting just the steel wires.

DSCF7107.JPG


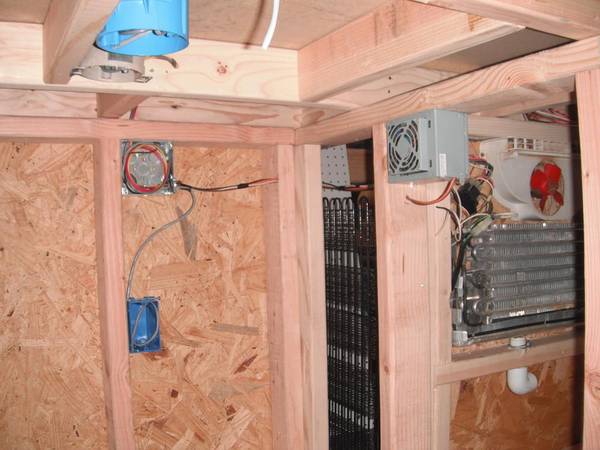
Next was onto the fermentation chamber. I am using a standard 24v thermostat with heat/cool. This controls an 80mm fan from a computer power supply to pull air from the refrigerated chamber for cooling, and for heat in the winter I used a porcelain light fixture that will hold a ceramic reptile heat lamp. There will also be a regular light bulb installed with a refrigerator door switch. Everything is controlled with just a standard 24v home thermostat and a fan control center from an old furnace. I'll add some more detail on the wiring for all of it when I'm not so tired.

What you see here is the mount for the fan control center in the top rear, the thermostat mounts below that, one fixture up top is for a light and one is for the heater. On the right is the computer PSU which has been gutted and contains just the fan to pull air from the refrigerated chamber.

DSCF7191.JPG


And that's where it's at currently. I've plugged everything in to test it before I start insulating and sealing it up and all seems to work well. I may do a final test with things closed up with plywood, just to make sure it's going to work as planned before sealing things off.
 
I'm just getting started, but I've got a space like this in my garage (with under-counter space) that I thought would be perfect for fermenting. I knew temp regulation would be an issue, but I think this will help me solve it. Subscribed and thanks.
 
Jealous. I need a build a brewshed in the backyard. Probably going to have to do some other things that have been on the to-do-list for a while to get permission......
 
Thanks for all the compliments everyone. :mug:

Jealous. I need a build a brewshed in the backyard. Probably going to have to do some other things that have been on the to-do-list for a while to get permission......

I went back and forth for a while before deciding to do it in the garage rather than the backyard. We have a hot tub that sits on a 12x12 concrete slab which already has a 50A GFCI circuit ran to it. We really don't use it often because it sucks to go out in the freezing cold/snow to get to it, so I thought about moving it up near the house and using the area to build a brew shed. I plan to switch over to electric soon (brewing with NG in the winter sucks!), so this would have been perfect.

The reasons I decided to go with the garage instead were because it was cheaper than building a new shed, it will be easier to plumb water to it, the garage is right off the basement where my bar is located so no moving kegs from the back yard down to the bar, and no going in and out of the cold/heat or having to heat/cool another building.

I really liked the idea of the backyard building though just for the cool factor. We have a pool also, so it would be freakin sweet to have a brewery/bar right by the pool. Maybe I'll move ahead with it someday, but for now this will work just great and save me some money.

I'll get some more updates soon. I did most all of the above in 2 good days of work last weekend, but have been too busy to get back to it. This week is looking better though, so I should be able to at least get everything insulated, sealed up, and actually up and running. I plan to brew at least 2 batches this weekend, so I'd like to have it ready to roll.

Anybody know a good source for cheap airtight grain storage bins that hold full sacks? I'd really like something like the stackable vittles vaults that you can get into with them stacked, but it would run me over $400!
 
Anybody know a good source for cheap airtight grain storage bins that hold full sacks? I'd really like something like the stackable vittles vaults that you can get into with them stacked, but it would run me over $400!

2 Home Depot buckets will hold a full grain bag and at around $3 ea are a bargain.
 
That looks damn good but not near as good as those slabs of ribs in your avatar. I see you also appreciate homebrew and smoked goodness. Cheers!
 
I'm really interested in relocating the internals of a fridge and making that working in a new enclosure.... I havent really seen that before and it is an awesome idea. I want to tear apart a few full sized refrigerators and make a walk-in now. Hahahaa
 
Looks good! The step-by-step instructions on setting up the cooling system are really helpful! I hope to be doing something like this in the near future.
 
2 Home Depot buckets will hold a full grain bag and at around $3 ea are a bargain.

Yeah, I've seen people using those. My issue is that I currently have over 500lbs of grain, so that would take around 20 buckets, which would be cheap enough, just very bulky. The other issue is I really want something that can be stacked, but still accessed without having to move around buckets to get into the one on the bottom.

AZScoob put up a post yesterday about costco having the vittles vaults stackables for $25 yesterday, so I need to get there and see if it's the same locally.

That looks damn good but not near as good as those slabs of ribs in your avatar. I see you also appreciate homebrew and smoked goodness. Cheers!

Thanks, smoking meats is one of my other favorite things to do.

*subscribed*

I guess no parts of the 'guts' from the fridge will set the wood on fire? Neat. :)

No worry of fire. The only thing that gets hot is the defrost burner, which is surrounded by an aluminum pan. All of the wood will be covered with the composite paneling from HD in the link I posted above.

I'm really interested in relocating the internals of a fridge and making that working in a new enclosure.... I havent really seen that before and it is an awesome idea. I want to tear apart a few full sized refrigerators and make a walk-in now. Hahahaa

Looks good! The step-by-step instructions on setting up the cooling system are really helpful! I hope to be doing something like this in the near future.

I'm glad it helps. I've got another junk fridge at work that I've yet to do anything with yet, so I'll try to take some pics for you so you can see how easy it is to remove. It takes about 30 minutes to get everything out. Basically they assemble the refrigeration system, then it is all mounted from the back side of the fridge. There is a rectangle opening on the back that the coil slides into and is then folded forward.

Thanks again for the compliments everyone. I should have more to post soon. I did a little more last night, but got distracted (kids homework) so I'm hoping to make some real progress tonight.
 
Subscribing to this thread SO hard right now.


Also, 500lbs of grain!?:rockin:


I would be very intrested in a fridge gutting pictorial. If you do it please link it from this thread as well!:mug:
 
Awesome start! Definitely something a lot of people on here aspire to.
 
I made some progress last night. I'm not sure if I'll be completely ready for Saturday's brew, but I'm trying hard. How I end up doing the doors will probably make or break the time frame.

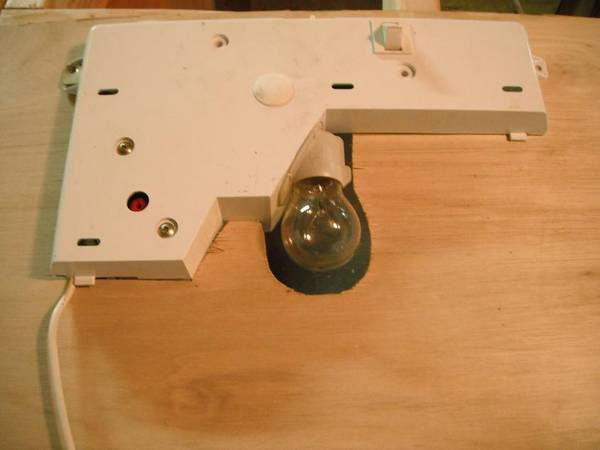
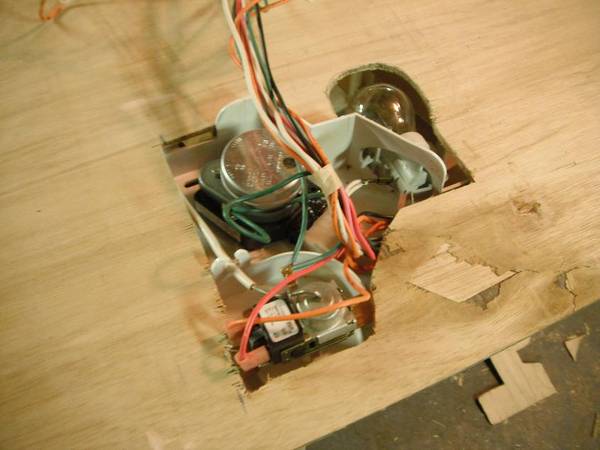
I overlooked how the mounting for the thermostat housing had to be done, which ended up taking more time than I expected since it had to be recessed. I didn't realize the light bulb and defrost timer had to be recessed as well, but I got it in. I still need to box in around it, but that's no problem.

This it fit into the underlayment I used for a backing behind the paneling.

therm-housing-1.JPG


From the back

therm-housing2.JPG


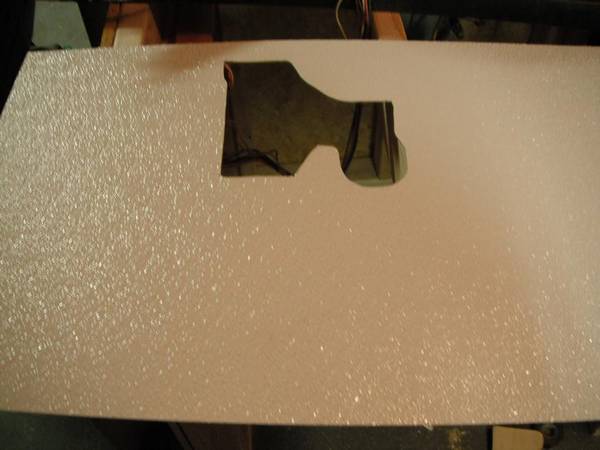
Paneling cut and ready. This stuff is great. Very tough with a hard, slick surface and it's cut easily wth a skil saw and jig saw. Wear a mask and goggles though. It has fiberglass in it and makes a really fine dust that irritated my lungs badly the first time I worked with it and didn't wear a mask.

top-panel.JPG


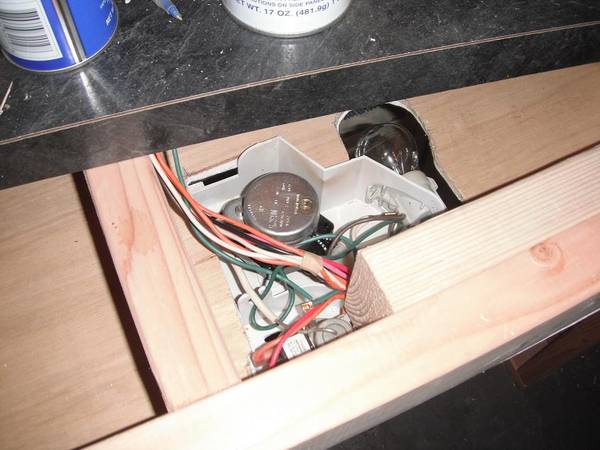
And a shot from the top with it all mounted up.

therm-mounted.JPG


Next was to finish running the drain line and lining the inside of the evaporator coil housing.

panel-start.JPG


Added some insulation.

insulation.JPG


With the back paneling installed.

rear-paneling.JPG


The sides and top got 1/4" luan (underlayment) installed which gave the paneling some strength and a nice smoot surface to glue to. All of the paneling was installed using spray glue that comes in an aerosol can. This is the side ready for the paneling to be glued on.

underlayment-side.JPG


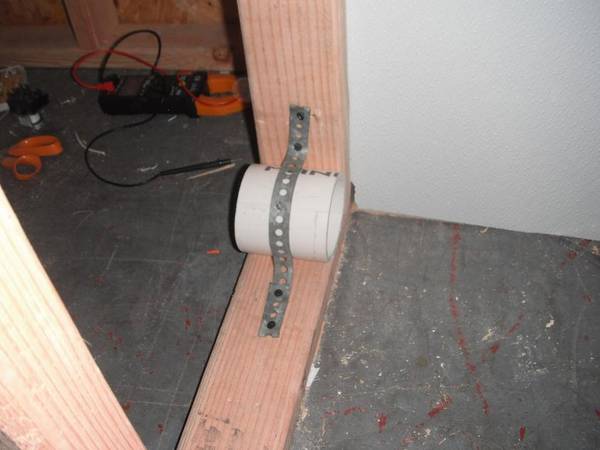
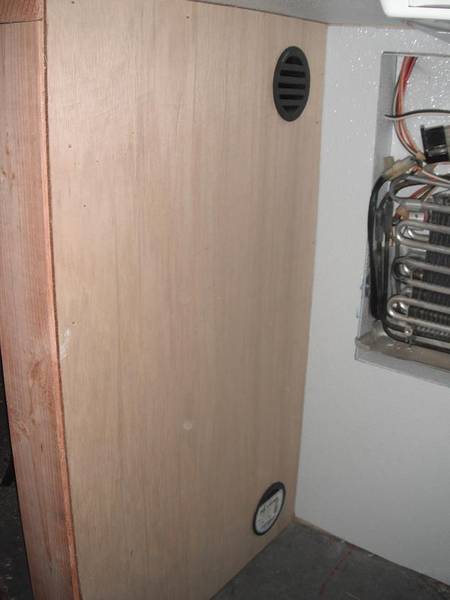
Now for the side that circulates air into the fermentation chamber. I used a piece of 3" PVC for the return air.

pvc-return.JPG


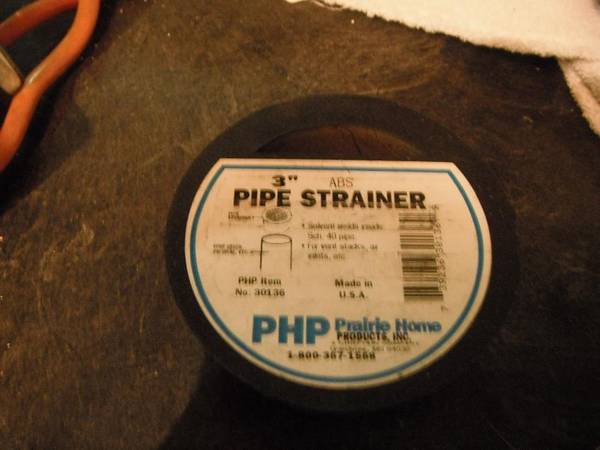
I am using these 3" pvc strainers to give it a nice finished look. They fit inside 3" pipe.

abs-strainer.JPG
 
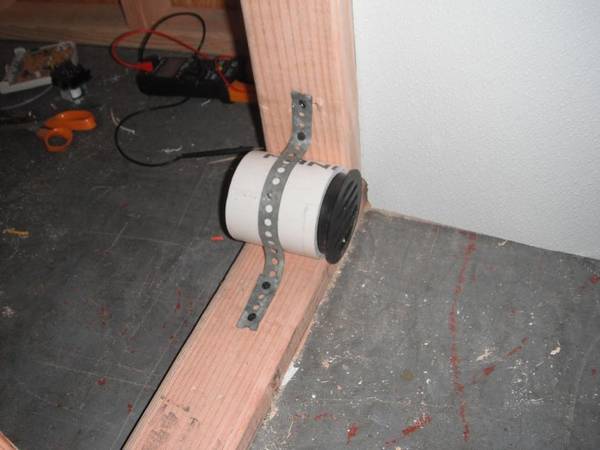
Here they are test fitted.

pvc-return2.JPG


I used a 3" hole saw to cut the psu that houses the fan. I also ordered a 24v 80mm fan to replace the original 12v. I used a rectifier to convert the 24vac from the thermostat to dc, but the 12v fan isn't going to last long at twice the voltage. The 24v fan also has a much higher CFM, and I was starting to question whether the 12v fan would be enough flow come summer time.

supply.JPG


A test fit with the underlayment backing.

test-fit.JPG


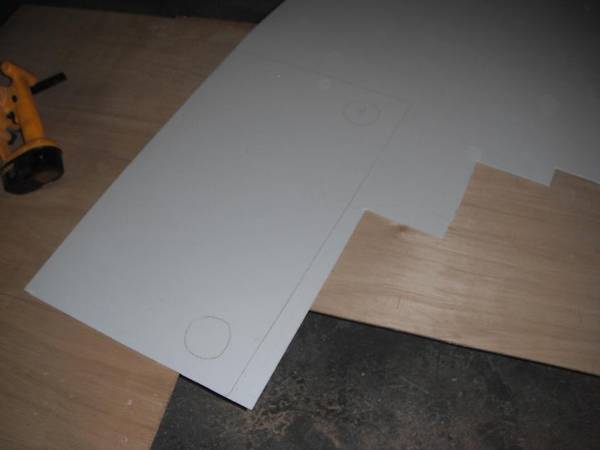
Traced out on the back side of the paneling. Cutting from the back will keep it from splintering on the good side.

panel-marked-up.JPG


And with it all installed.

left-side-panel.JPG


And a shot from the other side.

left-panel-back.JPG


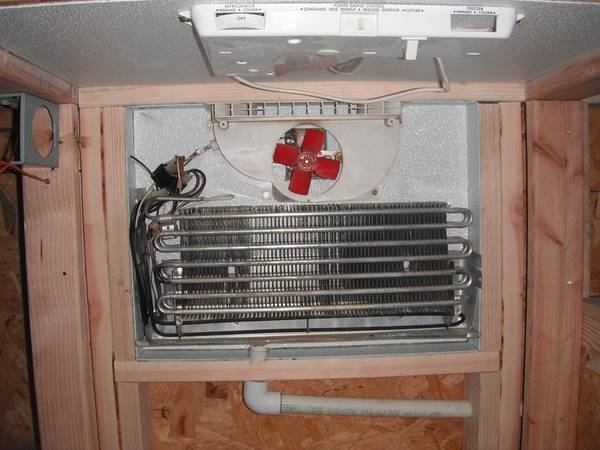
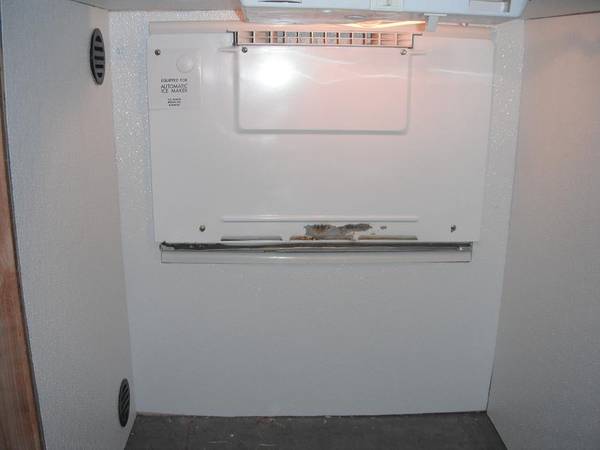
And the inside basically complete. I still need to go back through and silicone all the cracks, but I wanted to give it a little test run. The cover for the coil has a little paint chipped off, so I may give it a touch up with some appliance spray paint while I have it all back apart to silicone.

inside-panel-installed.JPG


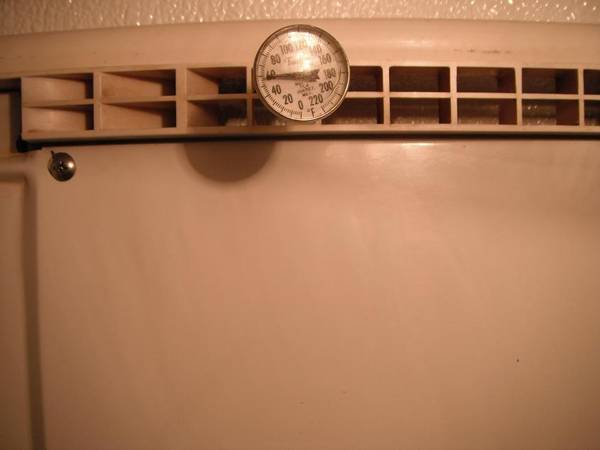
I just used a board to cover the front so I could test it out.

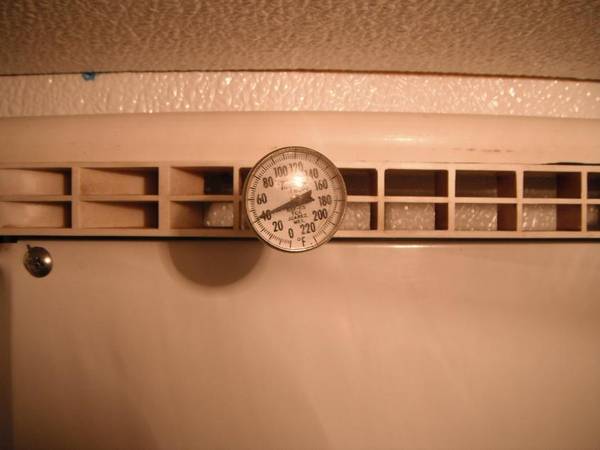
Started at 60 degrees.

temp11.JPG


Time for a break while I let it run. A stout hit the spot after working in a chilly garage all night.

stout-break.JPG


And after 18 minutes it had dropped it 18 degrees. This is with no insulation in the top, no cracks siliconed, and an uninsulated door with no seal.

temp21.JPG


Hopefully tonight goes as planned and I'll have more to post tomorrow.
 
I'm doing something similar (although on a much smaller scale). I'll be disassembling a mini fridge this weekend and placing the guts inside of an armoire I have.

Ive got a question or two about the job you've done. You have utilized a drainage system and fan inside of your fermentation space. My mini fridge didn't come with any sort of drainage area and no fan. I was planning on relying on the freezer cooling panel to cool the inside of my chamber (after unfolding from it's box formation).

Using my pieces, would you assume I need a fan or drainage system as the original application didn't have these? I have no ability or aptitude for rewiring appliances so I wouldn't know how to install a fan even if I wanted to. Thanks!

In your situation I would suggest simply using a small 12v fan from an old computer case or power supply and wire it up to an old cell phone charger or other power adapter. This will give you some circulation.

You probably don't have much option for drainage. A mini fridge isn't frost free, so your coil is going to freeze up and should only thaw when you do so manually. In my situation, there is a defrost burner that automatically thaws the coil every 8 or 12 hours, so the water needs to be drained.

Hope this helps.
 
This is just too freakin nice!! I'll be tackling the same sort of cooling chamber for my bar. Hopefully sooner than later. Just waiting for funds to free up. I'm just going to be sitting a mini fridge on one side and the framing around the fridge opening. Hope mine looks half as presentable as yours :)
 
Well I didn't make my Saturday deadline I was hoping for, but I'd rather take a little more time to make it right. It's not stopping me from brewing, so not a big deal. I've got 10 gallons of Hefe in the MLT right now and will be doing 10 gallons of Blonde after it's done.

I did make a little more progress. Got the ferm chamber lined and came up with a plan for the doors.

Here's the ferm chamber. I still need to hook up the electronics.

ferm-chamber.JPG


Here's a shot of both chambers. Still need to go back through with silicone, but I'm waiting until I've got all the trim work done so I can do everything at once.

inside-both.JPG


Here's the entire setup at this point.

lining-complete.JPG


I've decided to line the outside of the entire unit with galvanized sheet metal. In the two pics above you can see one piece that I've done. It's just a piece of 1x6 pine that I wrapped with some sheet metal I had already. I don't have enough to do the whole thing, so that's the main thing holding me up right now. I'll have to wait until Monday to pick up some 36" wide sheet metal.

For the doors I plan to use a 30" hollow core interior door slab. I will cut it in half to make 2 doors. The inside of these doors just have some carboard that gives them support, so I will pull it all out, then stuff the door with insulation. The inside will get lined with the white paneling, the outside will be done with galvanized sheet metal.

I'm using the seals from some old refrigerator doors, which is what lead me to using the sheet metal for the outside. The fridge seals have magnets in them so I needed something metal for them to stick to. I'm happy with the look of the galvanized metal. It goes well with the black counter top and keeps a garage look.

More to come this week!
 
As of now I don't plan to do anything to the floor. I did take that into consideration, but being such small areas I didn't think it would effect it much. I could be wrong, but that's how we learn! If it does turn out to be an issue, it won't be difficult to toss in a layer of 1" foam and some more paneling on top of it.
 
What kind of panels are those that you line your chamber with? Where did you get them at? I'm going to be building a chamber real soon and I'm looking for panel like that.
 
Yep, just like 40Below said. I put a link to it earlier in the thread. $26.97 for 4'x8' sheet at HD. Lowes was around $35 for the same thing.

Since I don't have the material to finish I wired everything up and made little video of it all. Here's a link:

 
Last edited by a moderator:
Dude, I'm gonna go ahead and suggest that you DO go ahead and put some sort of insulation between the floor and your ferm chamber. A large concrete slab (your garage floor) will hold its temperature much better than your puny ferm chamber. Therefore, whatever temp your floor is it will be the temp your chamber trends towards, i.e. it'll be on all the time unless the floor is the same temp that you want to ferment at (which I doubt). Trust me, you're going to want that layer of insulation.
 
*subscribed*. Amazing job, giving me tons of ideas. I see my free time and money saved going away in the near future.
 
Not bad for a guy from the wrong side of the state.

Haha! Wrong side of the state, eh?

Us Missourians have got to stick together! We've got plenty of states bordering us to rag on. Like KS, because except for KCK, KS is filled with inferior human beings (at least compared to Missourians).
 
Not bad for a guy from the wrong side of the state.

Thanks, I think. I do venture out your way from time to time. I picked up the 550lbs of grain I have (or had, it's going quick) from MO Malt Supply in your area.

Dude, I'm gonna go ahead and suggest that you DO go ahead and put some sort of insulation between the floor and your ferm chamber. A large concrete slab (your garage floor) will hold its temperature much better than your puny ferm chamber. Therefore, whatever temp your floor is it will be the temp your chamber trends towards, i.e. it'll be on all the time unless the floor is the same temp that you want to ferment at (which I doubt). Trust me, you're going to want that layer of insulation.

Now that 2 people have shown concern about it I may go ahead and do it. It won't take more than 15 minutes to do.

I just am not so sure that it will present that much of a problem. I didn't think conrete transferred heat/cold all that much. Like right now, it's 27° outside, but the garage is about 55-60° with no heat. I don't know what the floor is, but it isn't 27°. Also, the garage is about 6' underground, except where the doors are, and stays pretty cool all year round.

I've been in a few walk in coolers also that are built right on the concrete and they don't have any issues.

Like I said, I may be wrong, and if I am the floor is not a big deal to insulate. I'll have to run some tests once it's done to see how much more it runs without the floor insulated.

I appreciate any advice though. :mug:

*subscribed*. Amazing job, giving me tons of ideas. I see my free time and money saved going away in the near future.

Thanks :mug:

Haha! Wrong side of the state, eh?

Us Missourians have got to stick together! We've got plenty of states bordering us to rag on. Like KS, because except for KCK, KS is filled with inferior human beings (at least compared to Missourians).

Thanks for getting my back minsco. He's probably just still bitter about the last Governor's Cup. ;)
 
I just am not so sure that it will present that much of a problem. I didn't think concrete transferred heat/cold all that much. Like right now, it's 27° outside, but the garage is about 55-60° with no heat. I don't know what the floor is, but it isn't 27°. Also, the garage is about 6' underground, except where the doors are, and stays pretty cool all year round.

I've been in a few walk in coolers also that are built right on the concrete and they don't have any issues.

Like I said, I may be wrong, and if I am the floor is not a big deal to insulate. I'll have to run some tests once it's done to see how much more it runs without the floor insulated.

I appreciate any advice though.


I think the issue you may have is the concrete being a large mass that stays the same 50 ish degrees all the time. You probably won't have an issue unless you are trying to get a beer up to 65 or so degrees. I think the concrete will "wick" BTUs out of the bottom quickly. That said, it may actually help for a lager, or other lower temp ferment.

All that said.... screw it and see what happens. If you decide to insulate later let us know if you actually noticed a difference.

AND I FRIGGIN LOVE THE DESTROYED FRIDGE IDEA
 
Back
Top