Element cord options

Homebrew Talk - Beer, Wine, Mead, & Cider Brewing Discussion Forum

Help Support Homebrew Talk - Beer, Wine, Mead, & Cider Brewing Discussion Forum:

This site may earn a commission from merchant affiliate links, including eBay, Amazon, and others.

Joe_in_GA

Active Member
Joined
Oct 15, 2009
Messages
35
Reaction score
0
Location
the house of the Mouse
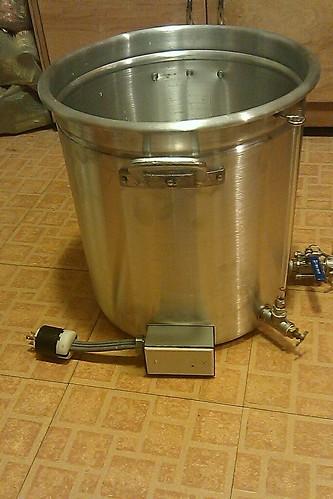
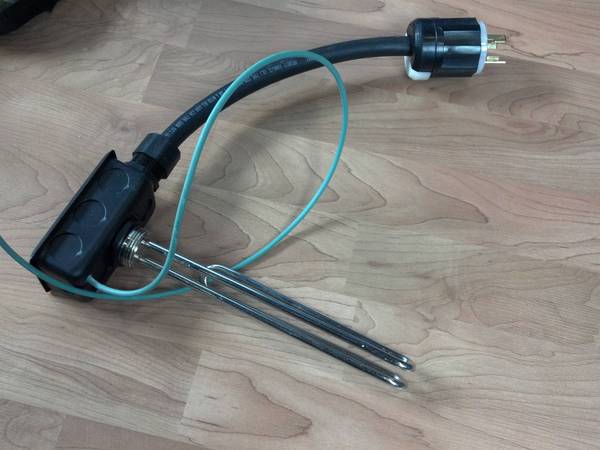
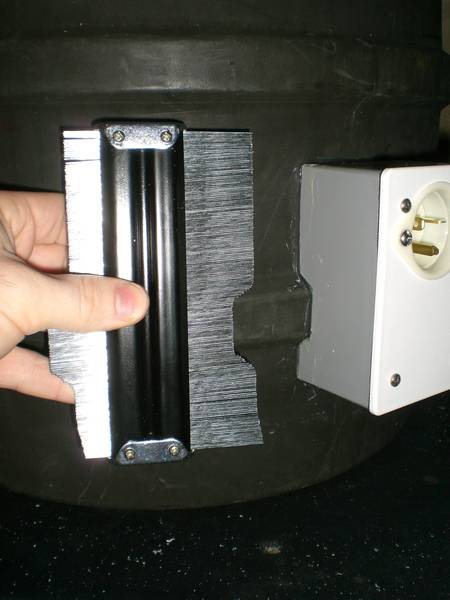
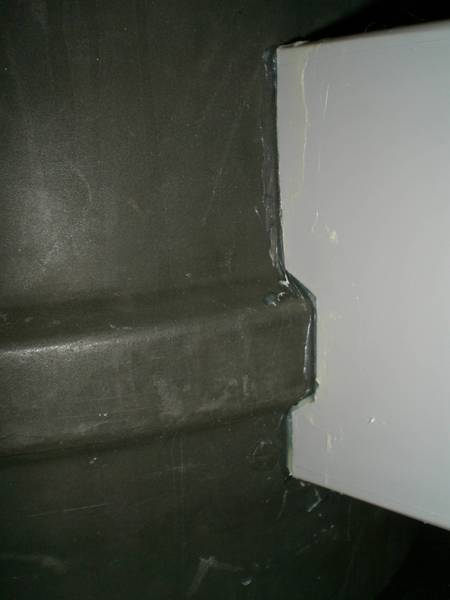
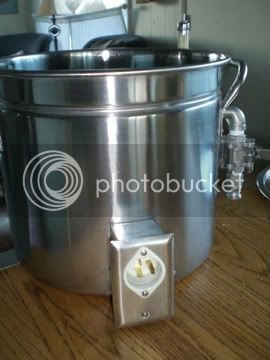
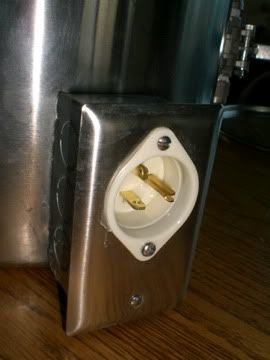
Hey guys, I'm working out the final details on my 2 vessel electric system and have a question for you. I was thinking of putting a plug on the kettle end of my element cord so I wouldn't have to drag a 6 foot cable around every time I moved my kettle. Has anyone done this? Do you like your setup? Are there any concerns other than the obvious don't get it wet? Thanks for your advice.
 
I put a short dongle on the kettle end:

6232266973_6c13af6e4a.jpg
 
IMO, A long cord would be a hassle. Here is how I did mine. It's about a 1-ft cord - short enough to not really be an issue and cheaper than a reverse service receptacle on the kettle.

2011-10-31_09-31-03_652.jpg
 
I considered the flanged inlet also. It does take a bigger box. Mine only uses a handy box and doesn't stick out very far. If you go this route, I'd use a L6-30 rated 240V unless you are running your elements at 120V.
 
Someone needs to start making a molded plastic assembly that attaches to the back of an element and also has the male twist lock on the other end.

Good idea, when can I order one? :mug:

Might try hacking something together w/ a PVC endcap + reducer...
 
Boerderij - do you just have the ground pin attached to the J-box?

What do you do on a boil over?
 
The grounds are attached to silver soldered grounding lugs attached to the kettle. I do not have boilovers (use FermCap) but the boxes are both sealed with silicone just for belt and suspenders protection.
 
FermCap?? first I heard of it, man I don't know (expletive) about brewing yet. I just searched the forums and found some information on FermCap. Maybe if I knew about the stuff my last three boils wouldn't have boiled over, plus it may have saved me from spending $150 on a Bayou Classic 62qt pot.

I have to keep reading the forums. :p
 
Thanks guys. Now the problem is which way to go? Knowing my preference for overdoing things, I'm sure I'll end up with something that will work just fine and cost twice as much as it needs to.
 
I considered the flanged inlet also. It does take a bigger box. Mine only uses a handy box and doesn't stick out very far. If you go this route, I'd use a L6-30 rated 240V unless you are running your elements at 120V.
I've been mulling this one over and then remembered fabricating parts and designing a system for a friend. With his setup I used a special plug and outlet very similar to the ones used for home computers but with a much higher current rating.

First thing, an element connector nut was soldered in place along with a gem box and ground wire. (Harris StayBrite-8 Silver solder is just awesome.)

DSC02376.jpg


Next thing after placing the element, a male connector was installed in the gem box cover.

PX0596.jpg
or this
PX0598.jpg


And its matching outlet was installed on the cable end.

PX0599.jpg


The setup looks like this.

DSC02403.jpg


And then with the power cord in place on the HLT.

DSC02394.jpg


And another view of it.

DSC02392.jpg


Anyway, the connector set worked out very well for him and has been using it for a number of years now.

Oh well, just a thought.

P-J
 
I never would have thought that soldering the box in place like that would be strong enough to hold up. Is it just soldered around the edges like one would weld it or is there more to it?
 
I never would have thought that soldering the box in place like that would be strong enough to hold up. Is it just soldered around the edges like one would weld it or is there more to it?
Harris StayBrite-8 Silver solder. Almost as strong as a braised connection but done with a propane torch at standard soldering temperatures. It requires a special flux for SS though - Harris StayBrite Liquid flux.
 
That is a female outlet. It would require a male plug on the cord which would expose 240V open on the plug probes. That's a killer waiting to happen.

Do not go there as you are playing "you bet your life" in real time...

I guess you are right if you accidentally have the controller turned on or if the plug comes disconnected mid-session.
 
Harris StayBrite-8 Silver solder. Almost as strong as a braised connection but done with a propane torch at standard soldering temperatures. It requires a special flux for SS though - Harris StayBrite Liquid flux.

I have this to solder the fittings onto my kettle. I just never would have thought a joint between the edge of the box and the kettle would be strong enough to be durable. Now that I see it, I think I'll give it a try.

I never stop learning things around here. :mug:
 
GregKelley said:
How about something like this with the appropriate cover?

Please don't use that, you'll have an extension cord with live ends; like a cattle prod! It's not a matter of "if an accident happens", it's simply a matter of when. You can find the correct panel mount male receptacle on Ebay pretty cheap. If you can't find one I'll be glad to find one for you.
 
Please don't use that, you'll have an extension cord with live ends; like a cattle prod! It's not a matter of "if an accident happens", it's simply a matter of when. You can find the correct panel mount male receptacle on Ebay pretty cheap. If you can't find one I'll be glad to find one for you.

Don't worry, I won't. Although I do like the sound of "Cattle Prod Stout"
 
Pretty good prices too. I see by the spec sheet they are rated 20A 240VAC by UL. Good for a 4500W element for sure. Probably close enough for a 5500W too... If I do another element, I will pick some up.
Yea, it'll be ok with 5500W but with a Sanke keg setup 4500W elements are enough. One thing about the connectors. All connections should be soldered i.e. no crimp on lug connections, IMHO.
 
This SOOOO tagged.

I really need to upgrade my "pvc caps crammed full of silicone" setup on my HLT. I mean, it works fine, but it worries me.

Plus, sooner or later I'm going to add elements to my BK, and the heatsticks will just be backups.

:rockin:
 
I've been mulling this one over and then remembered fabricating parts and designing a system for a friend. With his setup I used a special plug and outlet very similar to the ones used for home computers but with a much higher current rating.

First thing, an element connector nut was soldered in place along with a gem box and ground wire.

P-J

I trust your advice implicitly, but I'm curious about sealing within the box... those handy/gem boxes are not "weather tight"… Were there provisions to seal it off or are we not worried about water at the element contacts? Good enough with a solid ground and GFCI? Just thinking about boilover and other such accidents within the wet zone..
Thanks
I had no concerns with it. I purposely left the bottom seam open enough to provide a drain area "in case". This also eliminated a risk concern I had 'if' the element gasket leaked. Overall, all is A-Ok as the whole thing is GFCI protected.

I had no concerns about boil overs. That is one of the major reasons I choose to use Auber Instruments PIDs. They have a manual mode that allows you to control the percent power delivered during a boil.

I hope this makes sense.
 
Here is what I ended up with. It's the usual 1" coupling with a cap on the end. I plan on painting it eventually. I still have a long way to go until my system is done, so I'm not in a rush.

IMG00284-20120322-1505.jpg
 
Back
Top