You are using an out of date browser. It may not display this or other websites correctly.
You should upgrade or use an alternative browser.
You should upgrade or use an alternative browser.
Show us your sculpture or brew rig
- Thread starter Onescalerguy
- Start date

Help Support Homebrew Talk - Beer, Wine, Mead, & Cider Brewing Discussion Forum:
This site may earn a commission from merchant affiliate
links, including eBay, Amazon, and others.

Ok, what does it do and how does it work?Here is what I just finished...View attachment 576078
Ok, what does it do and how does it work?
That is a parallel counterflow chiller... I wanted counterflow for the speed of cooling... But want an easier way to clean it... I found the idea on YouTube...
Blazinlow86
Well-Known Member
- Joined
- Oct 19, 2016
- Messages
- 1,687
- Reaction score
- 743
Sorry to high Jack but I've been considering building the same chiller. How's it been working out for you?That is a parallel counterflow chiller... I wanted counterflow for the speed of cooling... But want an easier way to clean it... I found the idea on YouTube...
Sorry to high Jack but I've been considering building the same chiller. How's it been working out for you?
The initial run I drop from 175 to 83, which was ground water temperature, in under 5 minutes... I had the wort moving pretty quick so next run I’ll slow it down...
awoitte
Well-Known Member
- Joined
- May 9, 2017
- Messages
- 184
- Reaction score
- 21
Are those filters in your last attachment for bringing water in or filtering your beer post boil...?
In either case can you mention what models they are?
In either case can you mention what models they are?
I may as well hop on the bandwagon here. I used some of the ideas posted here for my Grainfather brew stand which some of you will recognize. I implemented something that I haven't seen before and that is a swing-out table for the chiller. Thanks goes to Fred Flintstone for the pipe design. Special thanks goes out to the "Our Gang" kids school of carpentry.View attachment 574504 View attachment 574506 View attachment 574507
Debuting yesterday, I have a double wide brew stand on wheels. With a work bench, storage space and my water iron filters mounted to the side. The extra elevation given from the wheels makes it easier on my back when stooping over the Grainfather.
BudgetBrewer
Well-Known Member
- Joined
- Sep 20, 2015
- Messages
- 156
- Reaction score
- 42
Love the OBK buckets. Theyre good people.Its Simple, but it serves me well!!!
- Joined
- Jun 12, 2014
- Messages
- 574
- Reaction score
- 191
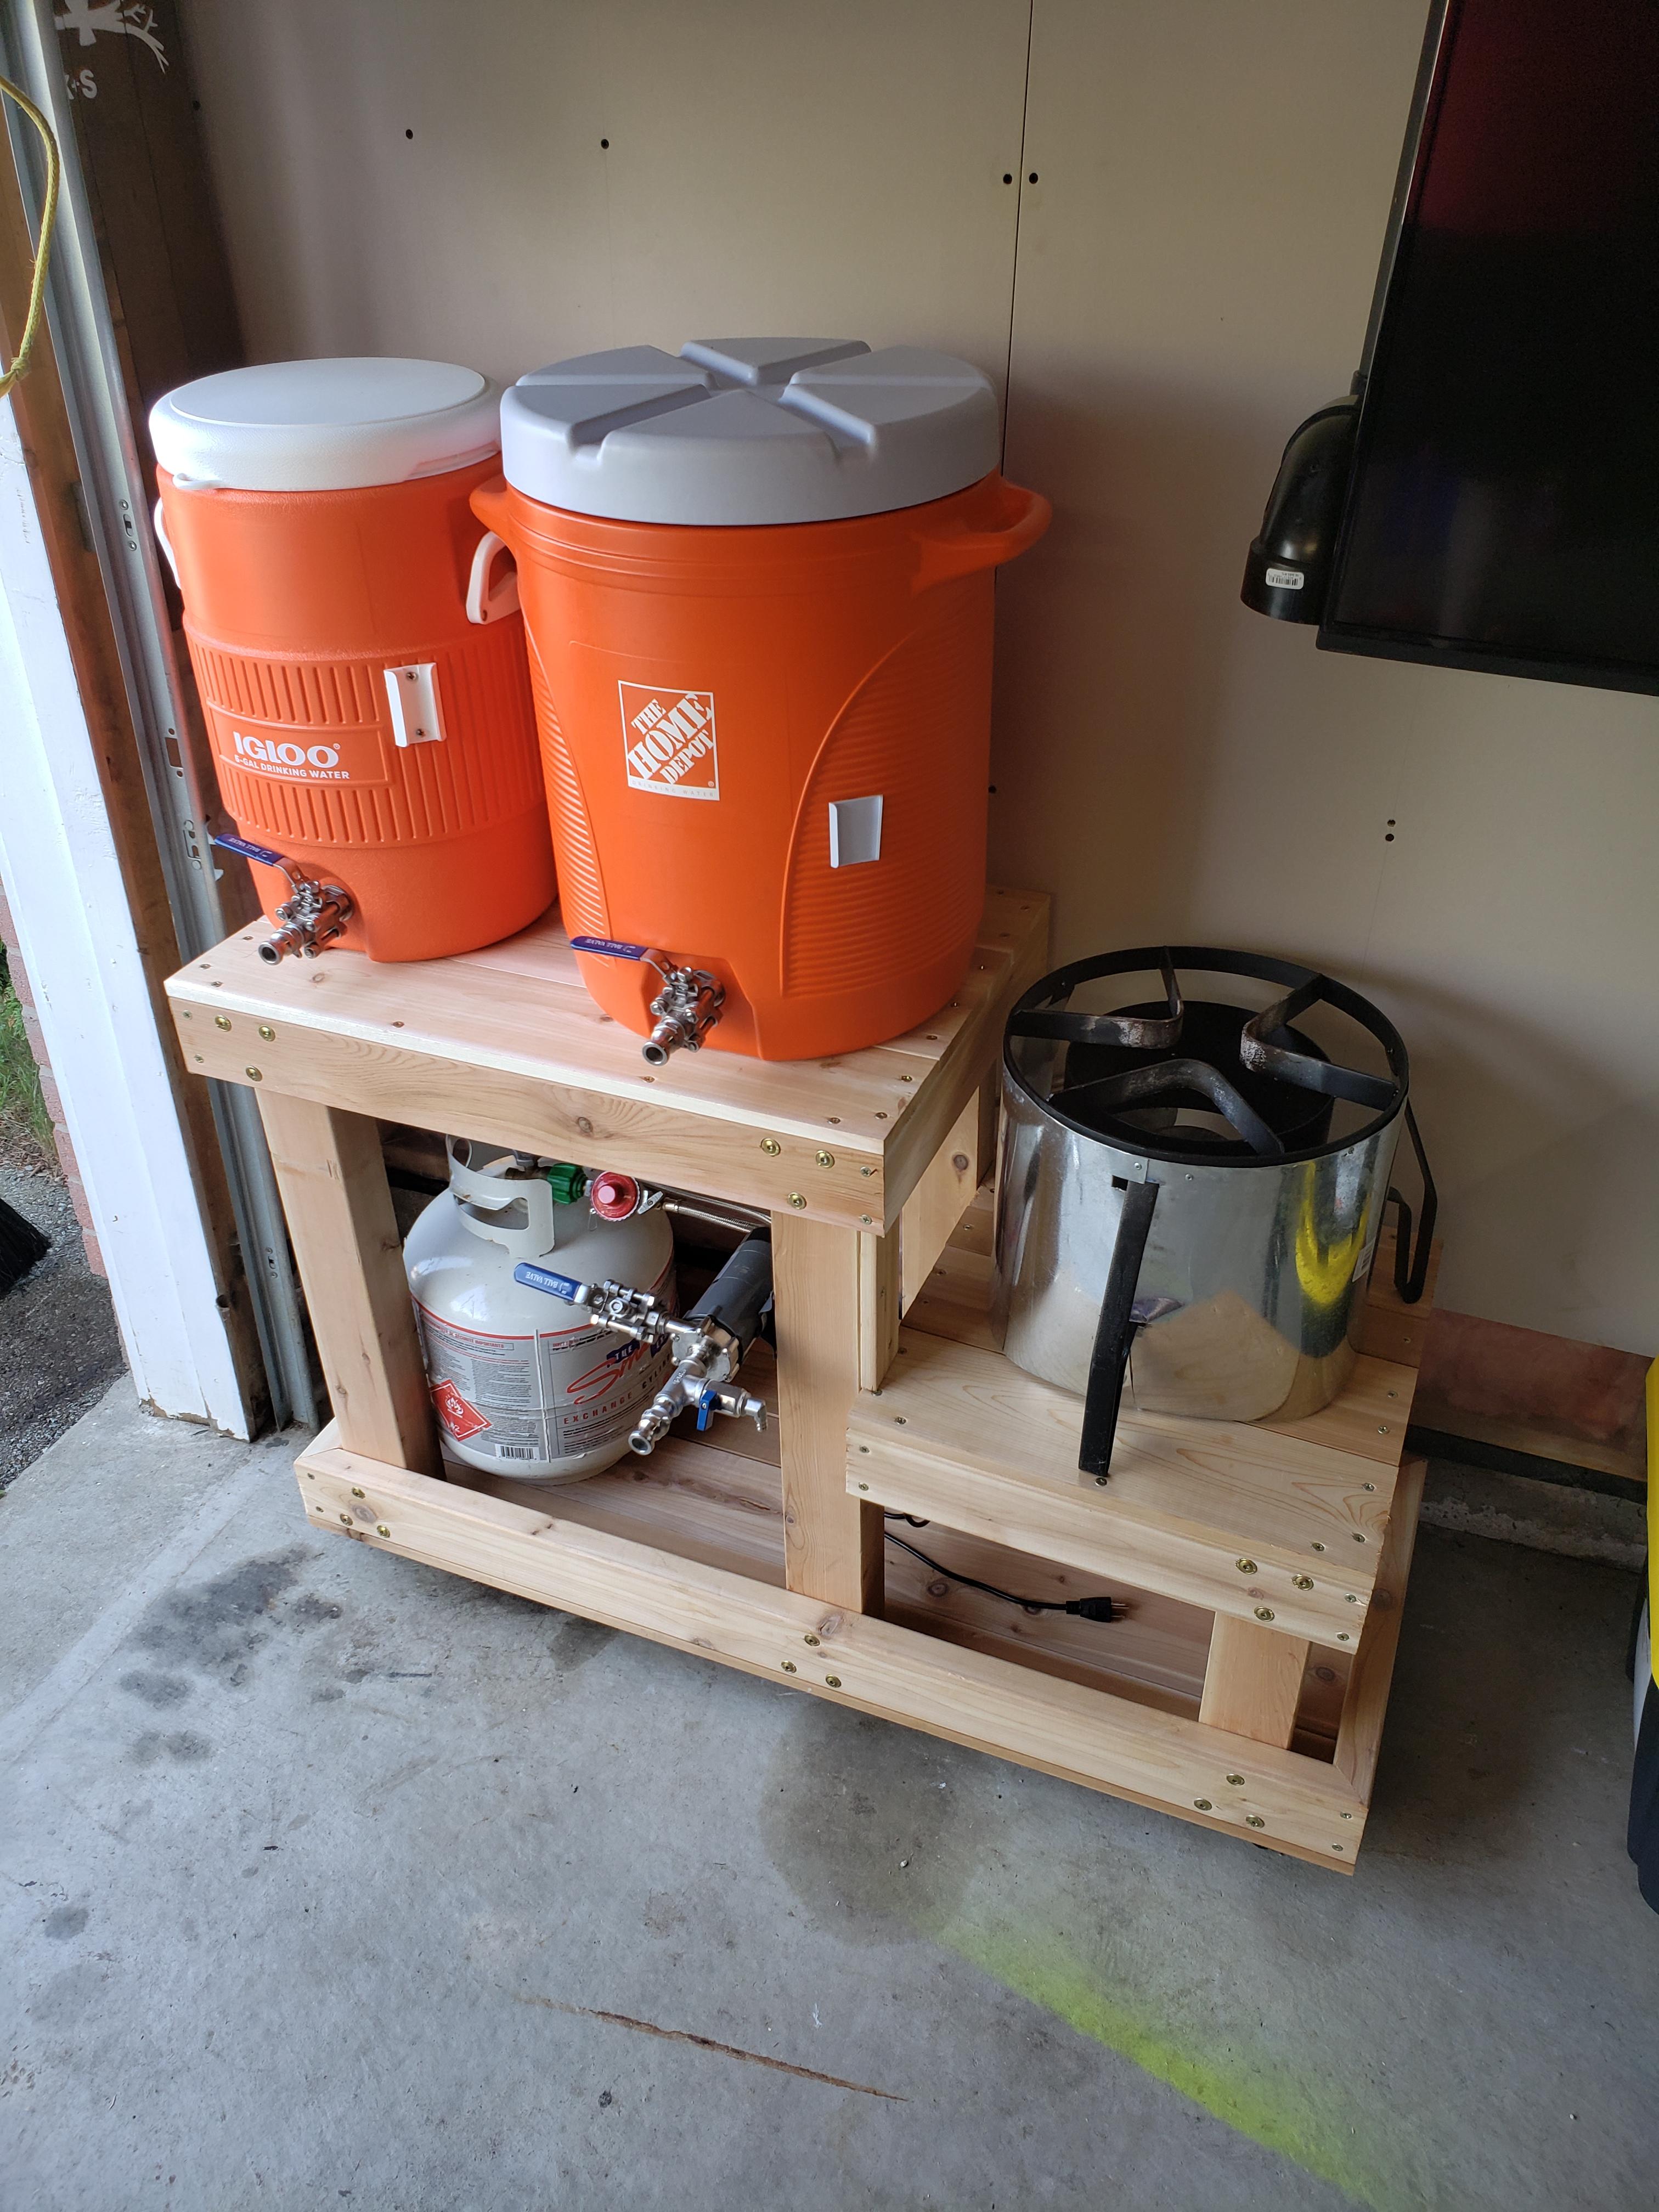
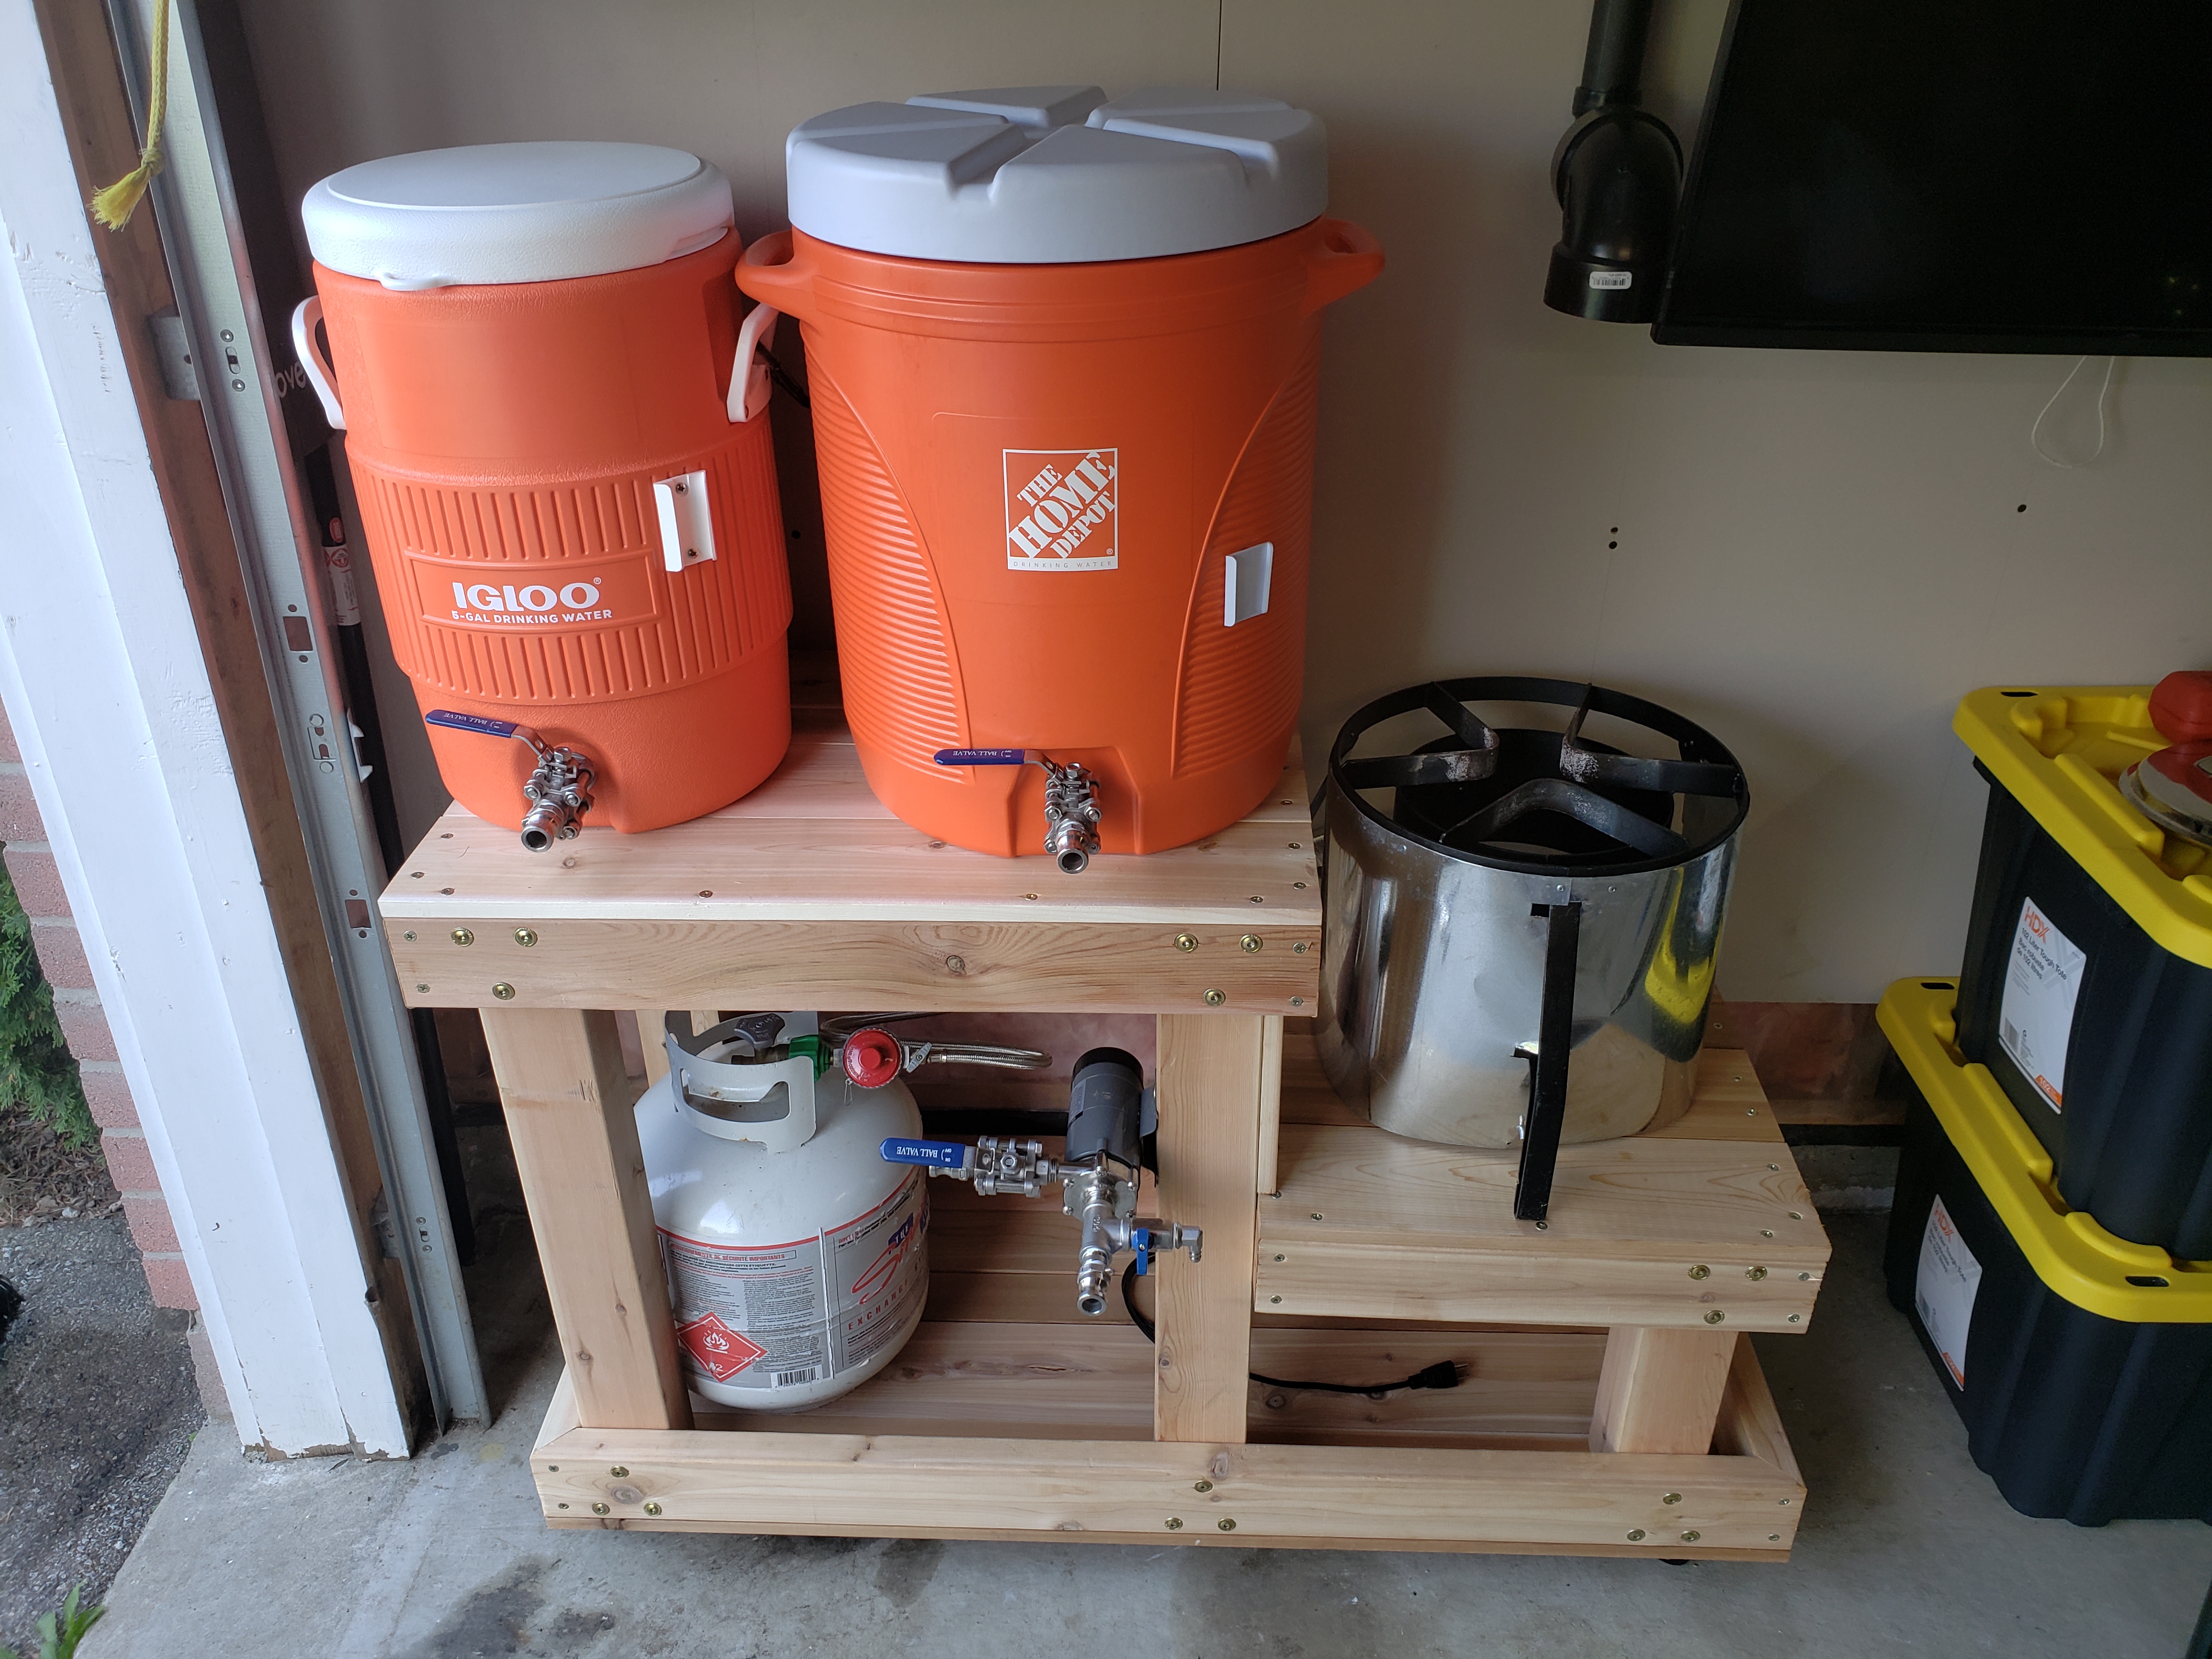
I think more pictures are called for on this one! looks interesting.. I like the burned wood finish.. I probably would have burned the house down trying to do that..Here is what I just finished...View attachment 576078

Here is what I just finished...View attachment 576078
Looks great! Took me a 2nd look to view the chiller, I was so focused on the stand. Did you use 2x3's?
AsylumBrewWorks
Member
- Joined
- Aug 11, 2015
- Messages
- 17
- Reaction score
- 2
Here is my HERMS system, built it about 5 years ago, have enjoyed brew g on it but may soon move to a brewmagic

How far is it advised to keep a control panel away from a flame/heat?
Building a modified Brutus with BG14s and am wanting to mount the control panel on the side, about 11-13" away from the flame, but still on the frame.
Building a modified Brutus with BG14s and am wanting to mount the control panel on the side, about 11-13" away from the flame, but still on the frame.

A modified King Kooker.
miggysmalls
MiggySmall

bgrungeman
New Member
- Joined
- Sep 19, 2014
- Messages
- 2
- Reaction score
- 0
That's a SoloflexaGood thread! I looked for consolidated info like this thread when I was looking for ideas to build mine.
BrewFlex
Info on how to build in 8000 easy steps HERE

Last edited by a moderator:
TheMerkle
Well-Known Member

I see you use the EZBoil too.It's a work in progress but this is what we've got so far...
TheMerkle
Well-Known Member
Hell yeah man. That thing kicks ass.
awoitte
Well-Known Member
- Joined
- May 9, 2017
- Messages
- 184
- Reaction score
- 21
Here is my HERMS system, built it about 5 years ago, have enjoyed brew g on it but may soon move to a brewmagicView attachment 577558
What would Brew Magic provide that this doesn't?
The only benefits I can see are footprint and electric control. Other than that I'd stick with what he has. Nice rig.What would Brew Magic provide that this doesn't?
Chihuahuita brewing
New Member
- Joined
- Jul 21, 2018
- Messages
- 4
- Reaction score
- 3
Started two years ago with a 7 gallon Anvil kettle, and a 5 gallon cooler mash tun. Eventually realized the equipment was too small for my needs. Purchased a King Kooker stand on Amazon. The JET burner drained my propane tank very quickly, so i stuck my anvil burner on top, it fit. Here's a pic of my setup so far...
Attachments

NavinRJohnson48
Member

Nice! Did you build the control panel?
thanks yes I design build everything
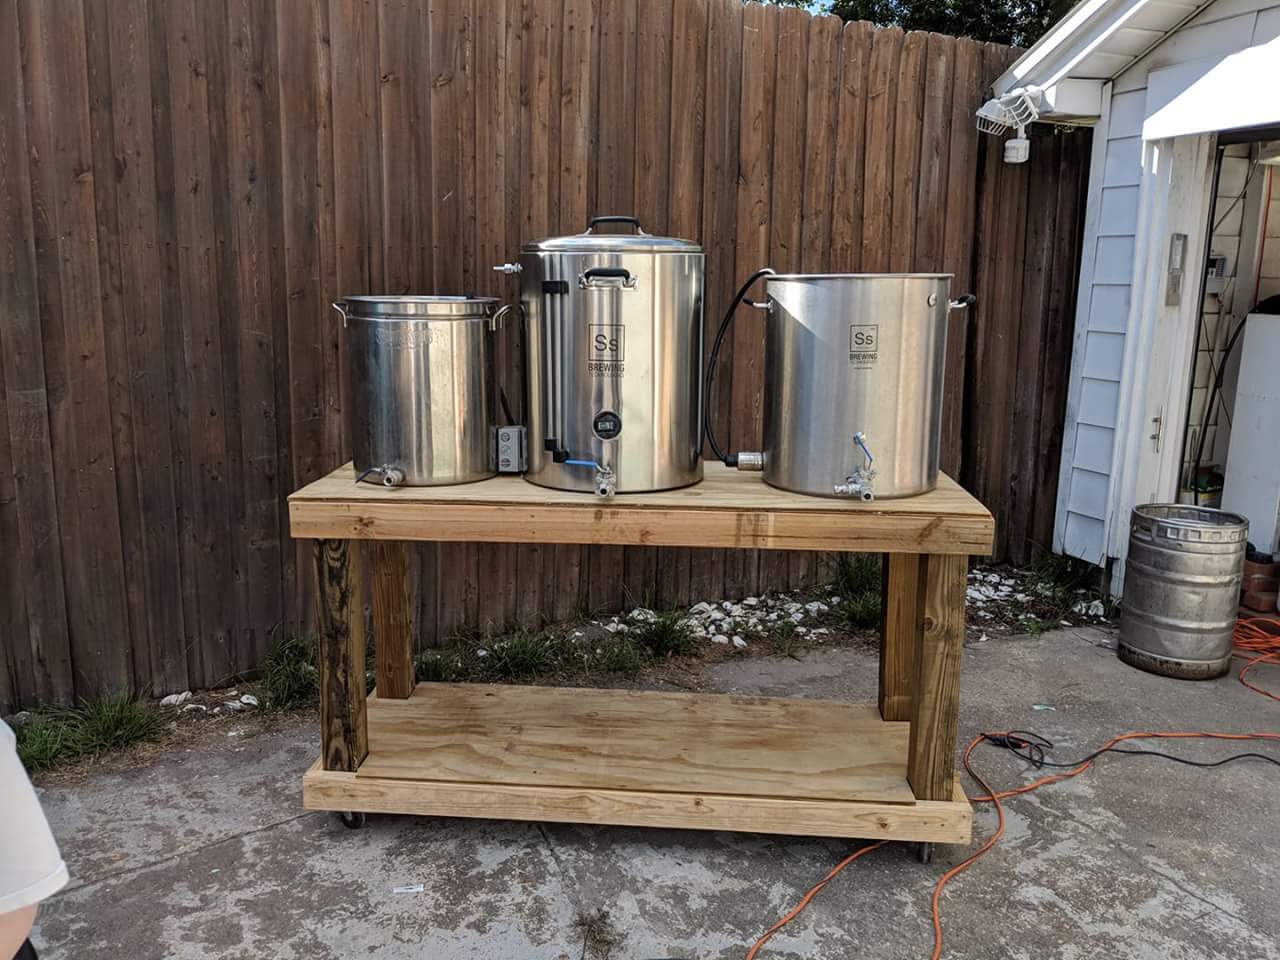
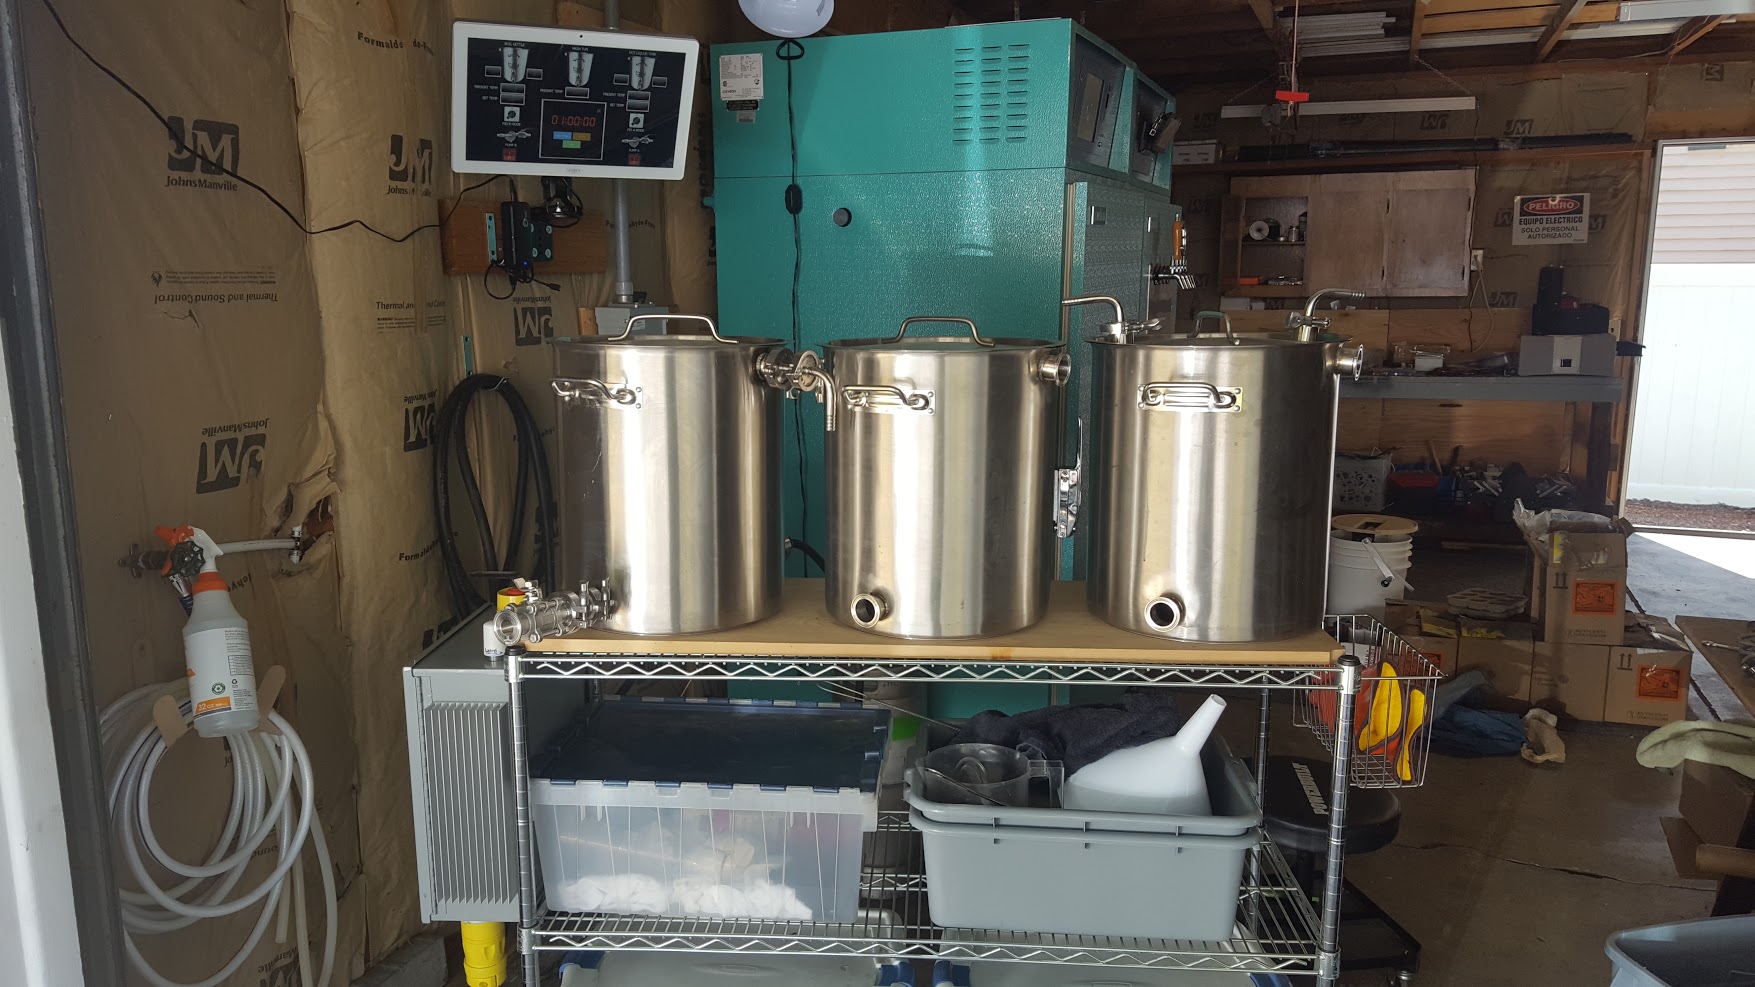
Sharing my Brew stand. Currently 15gal boil and hlt and 10gal ssbrewtech mashtun.
electric setup. have run 6 batchs so far, mostly 5 gal. last was a 10gal to try two different yeasts. was tight on the mt, 22 lbs of grain is prob the most i can safely run through it.
View media item 69311
electric setup. have run 6 batchs so far, mostly 5 gal. last was a 10gal to try two different yeasts. was tight on the mt, 22 lbs of grain is prob the most i can safely run through it.
View media item 69311
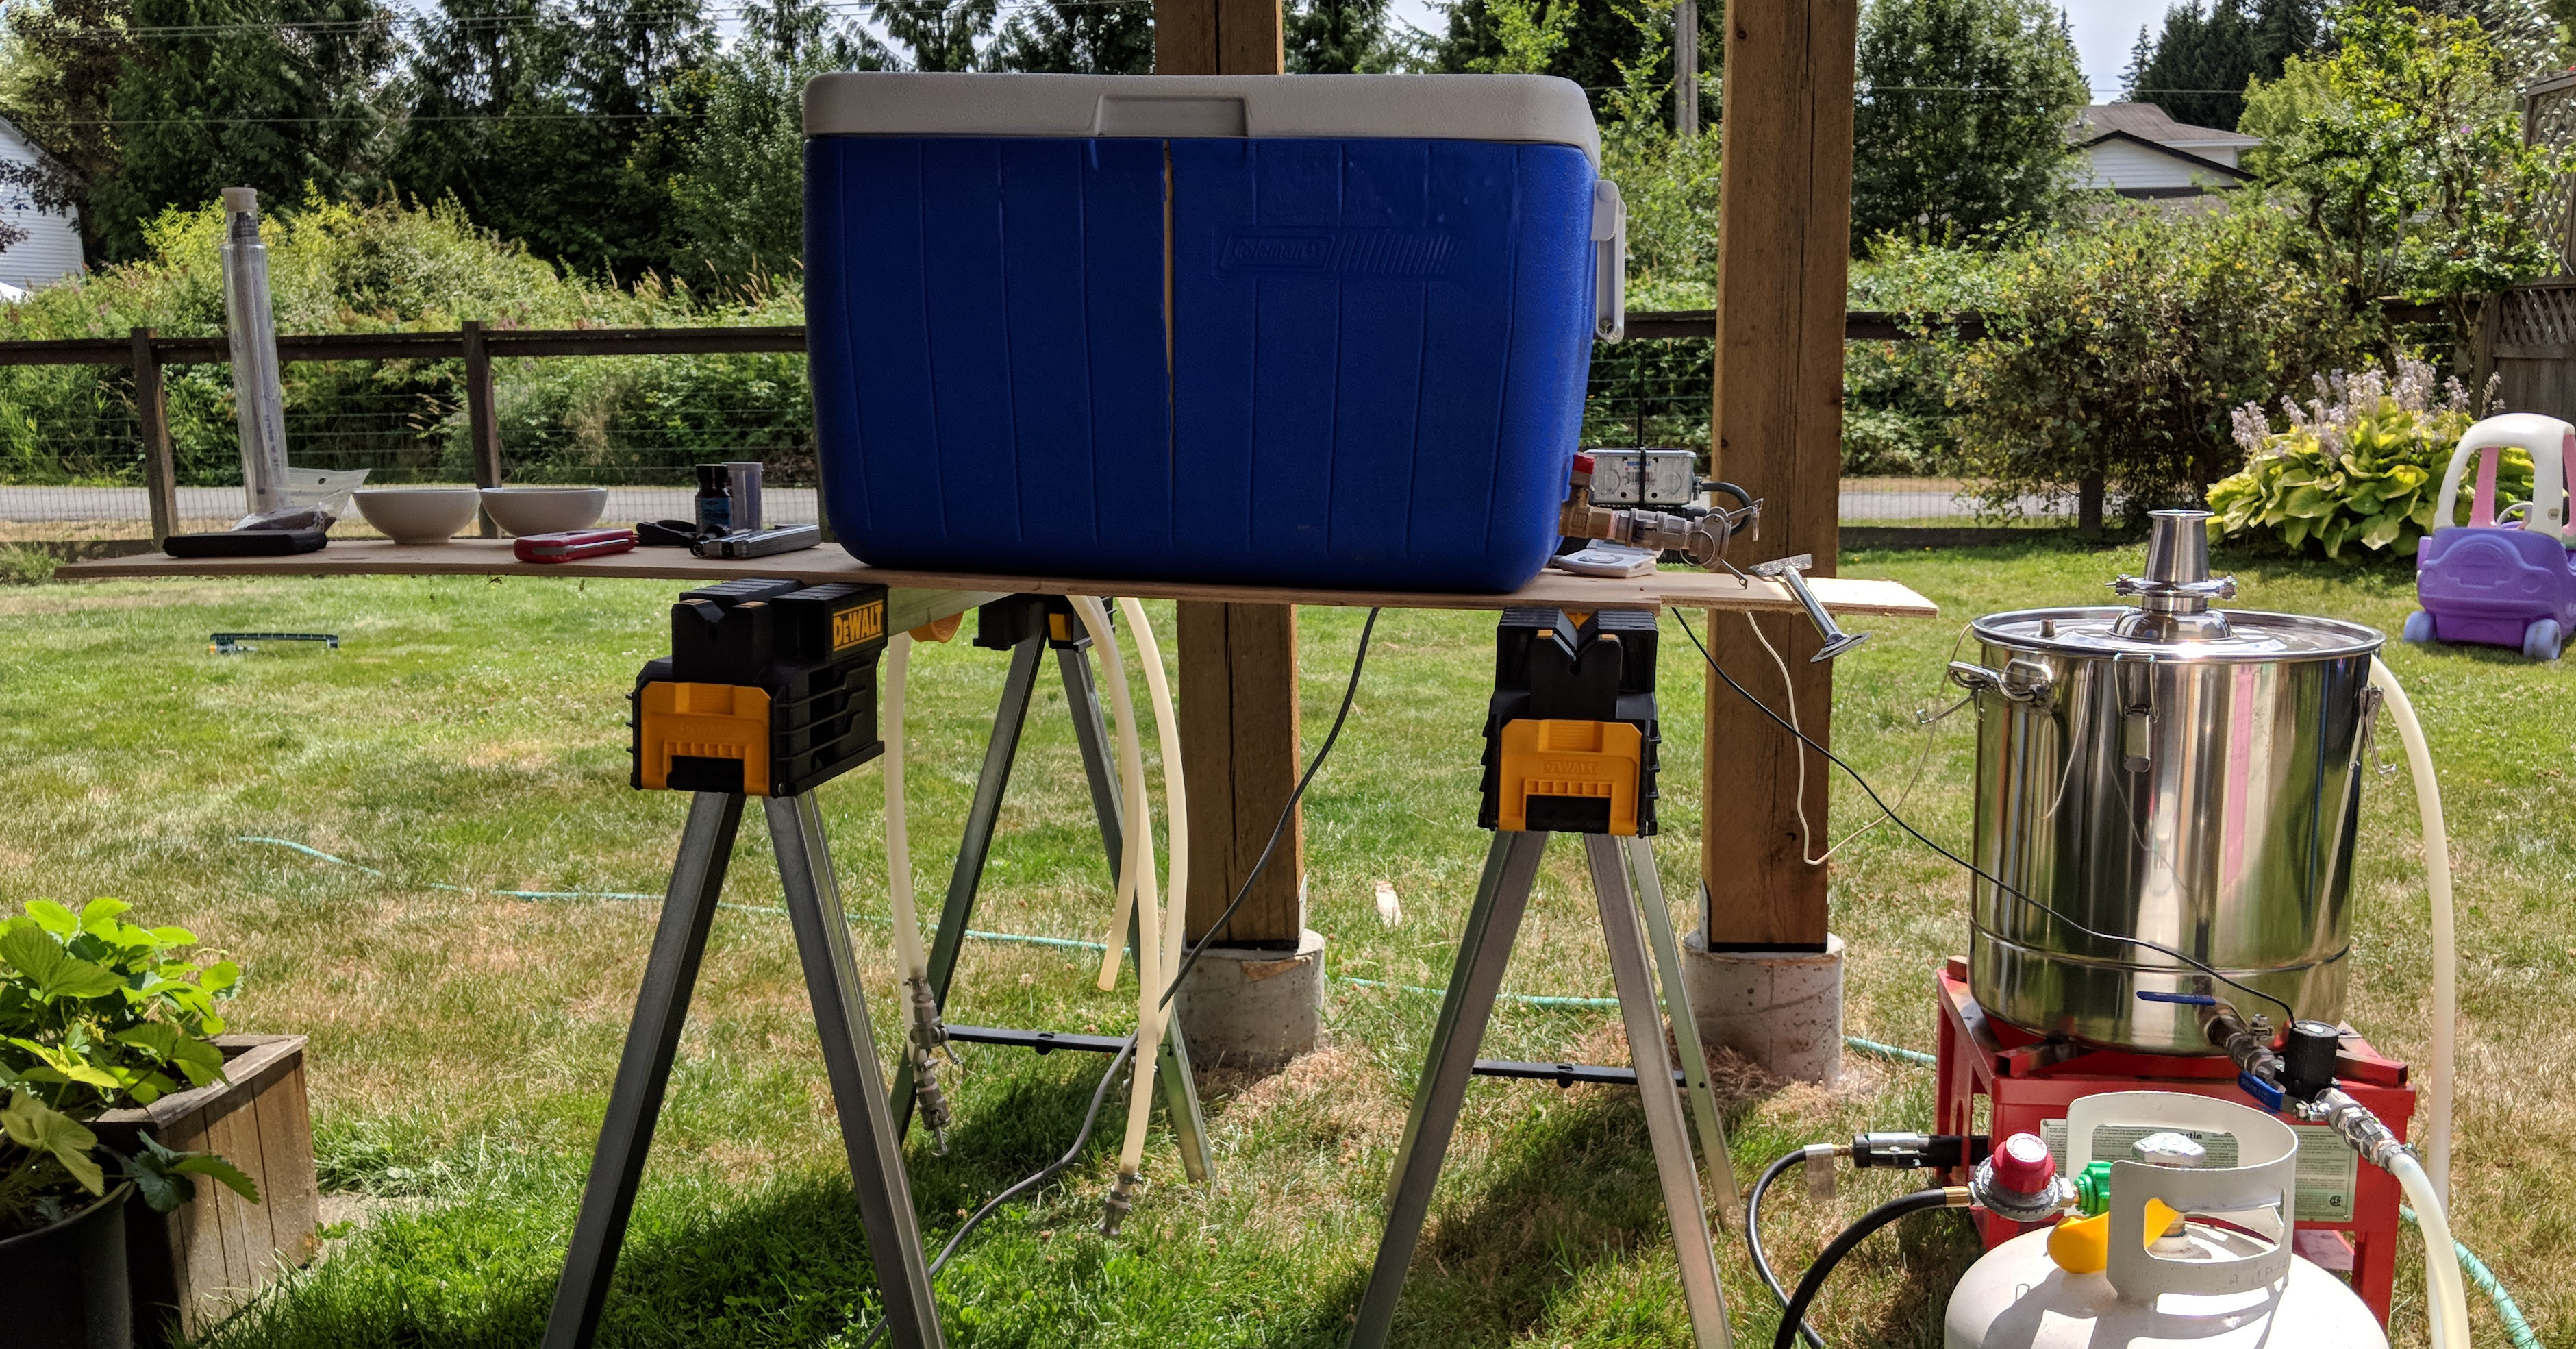
Got inspired this past week and built a stand for my gravity all-grain setup. I use an induction burner to heat my HLT, and then near the end of the sparge move it down to heat my kettle. Previously was sitting my mash tun on a cooler. One day I'll get a second induction burner, but seems to work for now.
Before:

After:

Before:

After:

user 40839
Well-Known Member
- Joined
- Jul 13, 2009
- Messages
- 1,176
- Reaction score
- 86
Recently gave Emily a good cleaning, replaced her keggles with some shiny new Spikes.
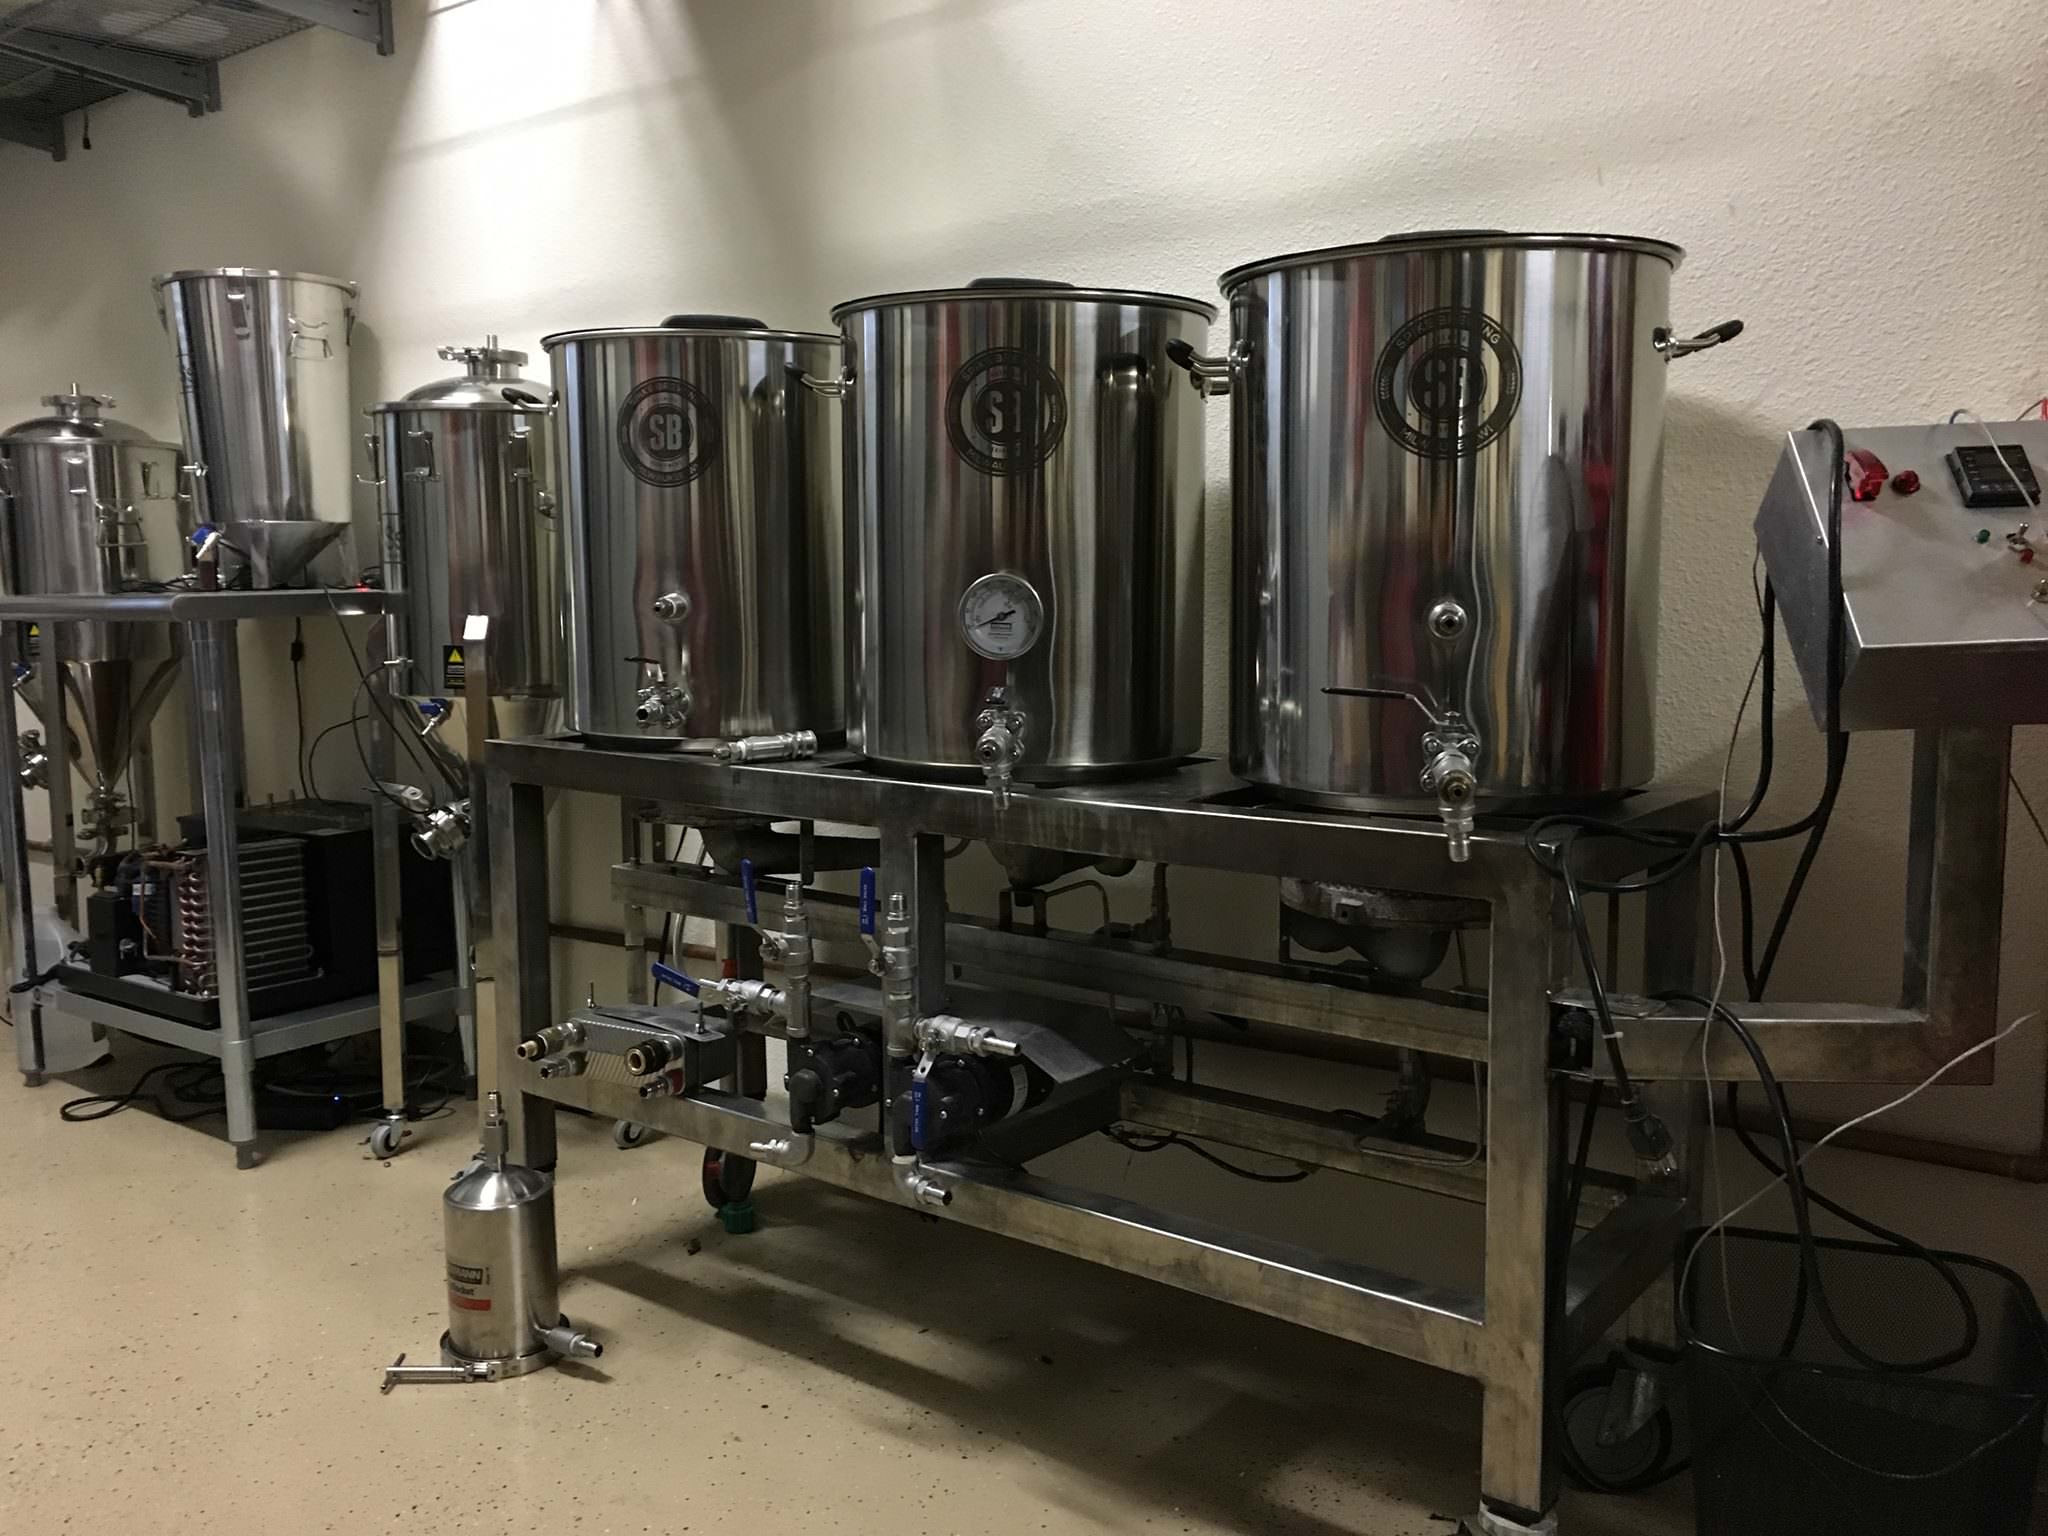
Since this was taken, replaced the March pumps with Riptides for good measure. She sure doesn't look that shiny now!
Since this was taken, replaced the March pumps with Riptides for good measure. She sure doesn't look that shiny now!
jack13
Well-Known Member
Does this count?:

Boalmjpd
Member

Nice setup. Can you tell me more about the brew control system you used? It that a touchscreen for control or is it just for monitoring?More recent picture:
Paul
Desert_Sky
Since 1998
Getting closer to being completed. This was a used Brutus frame and there is a lot that can be improved on. Maybe next year I'll spring for a nice stainless frame with better burners
https://imgur.com/a/XEVXwTj

https://imgur.com/a/XEVXwTj
Blazinlow86
Well-Known Member
- Joined
- Oct 19, 2016
- Messages
- 1,687
- Reaction score
- 743
Still a work in progress. The actual stand is temporary until we move into a new house. I'll upgrade to nicer built-in at that point. Cheers

akroessler
Well-Known Member


petemoss
Well-Known Member
- Joined
- May 28, 2015
- Messages
- 170
- Reaction score
- 58
Does this count?:
View attachment 582252
Of course it counts. I'm loving the aluminum pan with what I assume are holes in it to sprinkle the sparge water. I'm going to have to try that.
InspectorJon
Well-Known Member

hafmpty
Well-Known Member
My wife and I just moved into a new house. The basement is where my new brewery is set up. I run two 7.5gal Blichmann G2 Boilermakers with natural gas on two Blichmann burners. I have a Blichmann Tower of Power & RipTide pump that I use for temperature control and recirculation. I do 2.5gal BIAB batches with a stainless mesh basket from ArborFab. With the two pots & two burners, I double batch every brew day. I off-set the batches by about an hour. This means that while mashing batch 1, I'm heating mash water for batch 2. While boiling batch 1, I'm mashing batch 2. It has worked out well.
This is my first "leave in place" brewery. My last house was a pretty good setup in the garage off the basement. The basement was such that you didn't mind when you spilled a litte (or a lot). Garage brewing was fine. Did it for 8 years, but I had to bring everything out and put it all away for each brew day. Not awful, but it'll be nice to have it all set up.
As you can hopefully see in the pictures I have plumbing (copper pipe), drainage for the chiller (PVC pipe), electric, and ventilation for gas & steam. The idea for vent hood came from HBT users & the idea for mounting the hood on a TV arm did too. The shelving & work area are more than adequate for all the items I use. And the fermentation fridge and keezer are off on the side too. And if you look close you'll see I've got my speakers set up too so I can have my tunes playing. Currently, I'm listening to a lot of Ghost.
I put the finishing touches on it on Monday by putting up my brewery banner and putting my RO system on a cart to make it mobile. It's ready for brewing on 10/15 when I'll brewing a BIPA/CDA and an Amber Ale.") Looking forward to the inaugural brew day!
Looking forward to the inaugural brew day!
If you want to see a panorama you can check it out here.


This is my first "leave in place" brewery. My last house was a pretty good setup in the garage off the basement. The basement was such that you didn't mind when you spilled a litte (or a lot). Garage brewing was fine. Did it for 8 years, but I had to bring everything out and put it all away for each brew day. Not awful, but it'll be nice to have it all set up.
As you can hopefully see in the pictures I have plumbing (copper pipe), drainage for the chiller (PVC pipe), electric, and ventilation for gas & steam. The idea for vent hood came from HBT users & the idea for mounting the hood on a TV arm did too. The shelving & work area are more than adequate for all the items I use. And the fermentation fridge and keezer are off on the side too. And if you look close you'll see I've got my speakers set up too so I can have my tunes playing. Currently, I'm listening to a lot of Ghost.
I put the finishing touches on it on Monday by putting up my brewery banner and putting my RO system on a cart to make it mobile. It's ready for brewing on 10/15 when I'll brewing a BIPA/CDA and an Amber Ale.
Looking forward to the inaugural brew day!If you want to see a panorama you can check it out here.
Similar threads
- Replies
- 4
- Views
- 692
- Replies
- 2
- Views
- 1K