highland_brewer
Short Circuited Brewers
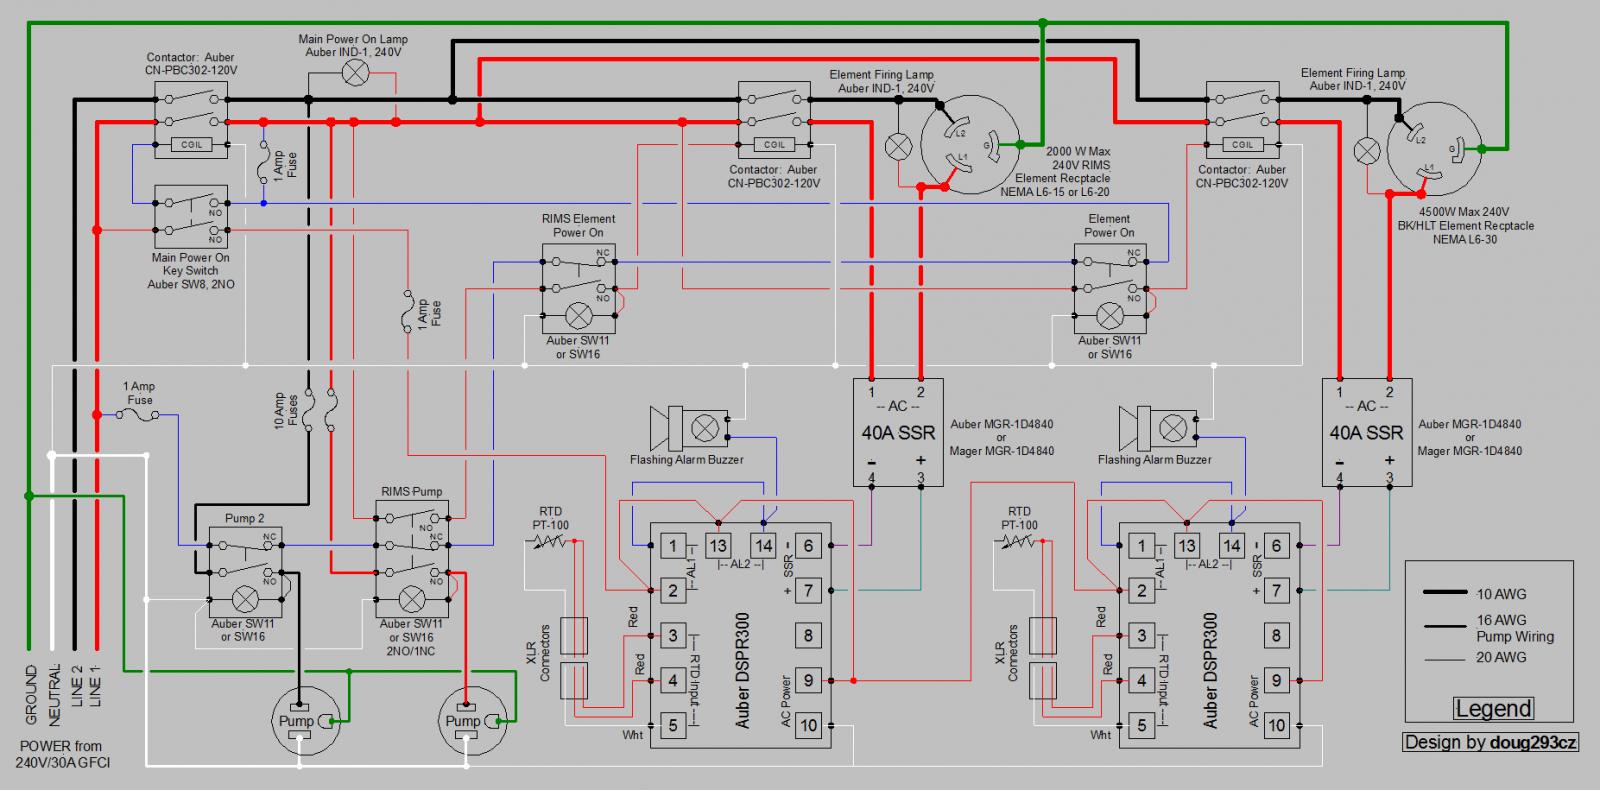
Part 4 in the series is up! Big thanks to @doug293cz for doing the diagram.
Here is the link:E-Brewing Series Part 4


Here is the link:E-Brewing Series Part 4


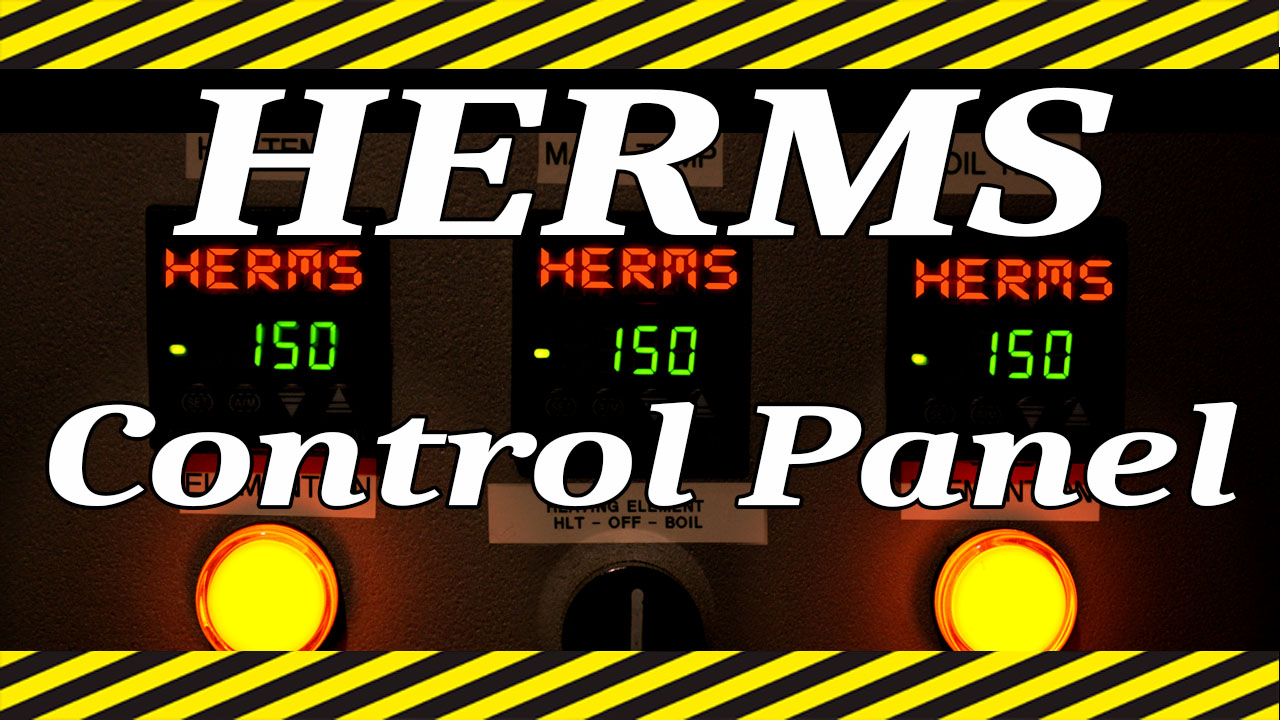
I am looking for input on where to go next with the series. HERMS System? PID calibration and programing? I am up for any ideas. Let me know what you guys think.
I would do a HERMS system and then PID calibration, maybe entering your system into a brewing software and then brew day video?
Seems like a logical sequence to me! Great job on the series! Very informative!
I am looking for input on where to go next with the series. HERMS System? PID calibration and programing? I am up for any ideas. Let me know what you guys think.

Herms! have you ever looked into a panel controlled by Raspberry Pi?
Very good content, keep up the great work!
I have not looked into it.. i do have one though (Raspberry Pi) Might be a good part in the series to do.
Thanks
Cheers!
Can someone explain to me when a contactor is needed and when it's not? I noticed that one is not used in the simple BIAB diagram but one is used in the RIMS diagram. Maybe I don't fully understand the purpose of them. Sorry, I'm new to all of this.

Apparently you can build a all wifi panel for half the cost, since Raspberry and CraftBeerPi do everything else for you!

Makes complete sense. Thanks for the reply! I just want to make sure I understand everything I will (and won't) be using in my panel.In many cases, it's just a matter of aesthetics. The Leviton 3032 (and similar) look like wall light switches. Some folks don't want that look on their panels. The nice looking lighted switches that are frequently used can only handle 10A, so are not suitable for directly switching the element power.
Other times, you need a relay (a contactor is nothing more than a high current relay.) If you want to interlock a switch, for example to prevent a RIMS element from being powered up if the pump is not running, then you must use a relay rather than a simple mechanical switch. Also, if you want to do any computer control (BCS, RPi, Arduino, PLC, etc.), then you must use contactors.
If the above doesn't answer your question, then ask in more detail.
p.s. I'm the originator of the designs discussed in the videos.
Brew on
There's no way you can do it for half the cost just by using an RPi. You can save the cost of multiple temp controllers (PID's, EZBoils, etc.) IF the design uses more than one, but those controllers usually make up less than 25% of the cost of a control panel. You still need all the contactors, relays instead of switches to control the contactors, enclosure, SSR's, heatsinks, wire, receptacles/plugs, etc.
Brew on

This might not be the right place for this... BUT we hit 1000 subs on the channel today. I have to credit a lot of the recent success to the HBT community. THANK YOU everyone that encouraged me to do the e-brewing series. It really ignited my passion to put out more good content. We are going to be doing a giveaway to our subs soon. I got a little excited today here is a video..
1000 subs announcement
Thanks again everyone.
Special thanks to @doug293cz For assisting with the great diagrams!
Congratulations on the milestone! Keep putting out great content and the more brewers will watch!
Cheers!
I know you mentioned it in one of the videos already, but I would love to see a video of actually putting together a panel from parts to finish!
By the way, I have enjoyed the videos so far! I have not gotten into electric brewing, but I am looking into doing RIMS with a pump and a basic control panel!


Fantastic series so far, thank you so much!
Looking forward to more, researching building up a custom electric system so these are fantastic right now.
 (shortcircuitedbrewers.com) Of course ;-)
Great! I don't think i would brew any other way now.
I do want to do a "complete" build. This does take money though, rest assured i am working on it behind the scenes. The more support we recieve the more likely it is to happen.
Thanks for the feedback!
Cheers!
Brian you could always diassemble your panel and put it back together.


Looking forward to this as well. I've got the nuts and bolts of how to put it together, just seeing someone wire one from start to finish would be a great comfort and resource as I put my long delayed panel together.


The animation on the diagram is stoopid cool!
I thought so too, really nice job!
John
Watched the first video of the new series...very well done!
Question: during the series will you be showing how your HERMS systems works...what I mean is discussing how much water you put in the HLT for mash in and recirculating...how much you get out of the mash tun into the BK...essentially process of the brew day and maybe how people new to the HERMS system can figure out their numbers?
Cheers!

To do the calculations rigorously, you need the MLT weight and specific heat. If you're starting with a cool MLT, then the MLT represents part of the thermal mass that is heating up when you add strike water. If you heat your strike water in your MLT (like BIAB) then the MLT represents part of the thermal mass that is cooling down when you add the grain. Either way the MLT thermal mass has an effect. However, in the first case the effect is much larger because the delta temp is larger. Ignoring it for the second case may be ok since it has a smaller effect with the lower delta temp. I have no idea if BS handles the two cases differently.Another nice video, Brian!
Question: You demonstrated measuring the weight of your MT and entering that, along with its material into BS. My understanding (belief) is these numbers are only used for infusion mash profiles (e.g. coolers), not for temperature mash profiles where the tun is heated (e.g. HERMS or RIMS). Is this not correct, and the MT weight/material used for something else? I have the values entered in my profile too, but I thought they weren't used.
Keep up the great videos - these are a fun way to learn new things, even for experienced brewers!

To do the calculations rigorously, you need the MLT weight and specific heat. If you're starting with a cool MLT, then the MLT represents part of the thermal mass that is heating up when you add strike water. If you heat your strike water in your MLT (like BIAB) then the MLT represents part of the thermal mass that is cooling down when you add the grain. Either way the MLT thermal mass has an effect. However, in the first case the effect is much larger because the delta temp is larger. Ignoring it for the second case may be ok since it has a smaller effect with the lower delta temp. I have no idea if BS handles the two cases differently.
Brew on
Well I am definitely confoosed... First, in a recipe, under the Mash Tab there is an option for "Adjust Temp for Equipment". Changing this changes the strike water temp. Second, the 1st step in a Temperature Mash is an infusion step, not a temperature step. Independently if I select a temperature mash or an Infusion mash, I get the same strike water temp. In my mind, and infusion has to account for the mash tun because it will get heated by the hot water being added. A temperature does not because the mash tun is heated along with the strike water.
In my case I recirc the water through the RIMS to heat it up. I suppose those with HERMS just pump over the water from the HLT and don't recirc prior to dough-in.
Bottom line I guess is to uncheck the "Adjust" checkbox for those who recirc before dough-in, and to check it for those who do not. Clear as mud?