How does a cooler mash tun work?

Homebrew Talk - Beer, Wine, Mead, & Cider Brewing Discussion Forum

Help Support Homebrew Talk - Beer, Wine, Mead, & Cider Brewing Discussion Forum:

This site may earn a commission from merchant affiliate links, including eBay, Amazon, and others.

EricR

Supporting Member
HBT Supporter
Joined
Feb 16, 2010
Messages
128
Reaction score
25
Location
Montreal
Perhaps I am just confused by information overload, but I can't seem to figure out how exactly a coleman cooler mash tun works?

I am confused by what the copper tubing at the bottom does? Is it for filtering out the wort? or for adding water in to the mash? I searched and googled and can't seem to figure it out. I have done all grain batches before, but always used a grain-bag and food grade container. I am looking at building my first mash tun and wort chiller this weekend, so any help in understanding how the tun works would be greatly appreciated!
 
The additional hardware inside the cooler (after the ball valve) is to filter the wort out of the grain. Some people use copper pipe, others PVC, some others pull apart braided stainless lines, and some use pre-fabricated screen assemblies... In round coolers, you might be able to fit a false bottom too.

I use a bazooka screen in my Coleman Xtreme cooler MT... It's basically a long tubular mesh screen that holds back the grain so that I can drain the wort out of the MT...

What you use on the inside of the cooler is as much personal preference as anything else. People will rave about what they are currently using all over the place. IMO, as long as it does a decent job of holding back the grain, and doesn't get plugged up, it's all good.

Here's a picture of what the inside of my MT looks like... I've adjusted it a little since the picture was taken, so that the screen is going straight down the middle of the cooler...
2705-shot-inside-my-cooler-mlt-fitted-screen-mashing-sparging-had-join-nipple-screen-1-2-silicon-tubing-high-heat-first-test-run-planned-2-26-11.jpg


A close up of inside the cooler, where the fittings come inside. What you can't see is the white gasket that was on the original fitting, which is on the other side of the washer.
3069-mash-tun-inside-final-configuration.jpg


This is outside the cooler, a 1/2" ball valve... Makes it very easy to drain the MT at a good rate. I have the 1/2" ball valves on my two kettles too. Makes quick work of draining the cooled wort into the primary too.
2709-mlt-ball-valve-outside.jpg


Older shot of the kettles... Front one is 32qt, back is 60qt... I've since removed the reflective insulation from the 32qt kettle (it was getting burned on the propane burner last week)...
2706-my-two-aluminum-brew-kettles-ball-valves-installed-back-one-60-quarts-front-one-32-quarts.jpg


Inside of the 32qt aluminum kettle... Nicely conditioned after a few batches (conditioned it before using it for the first time, and just maintain the conditioning on it now)... Cleanup is a snap...
3070-nicely-conditioned-al-kettle.jpg
 
Thank you both for the replies, that pretty much clears it up for me!

Gold - your pictures did not show up in your post?
 
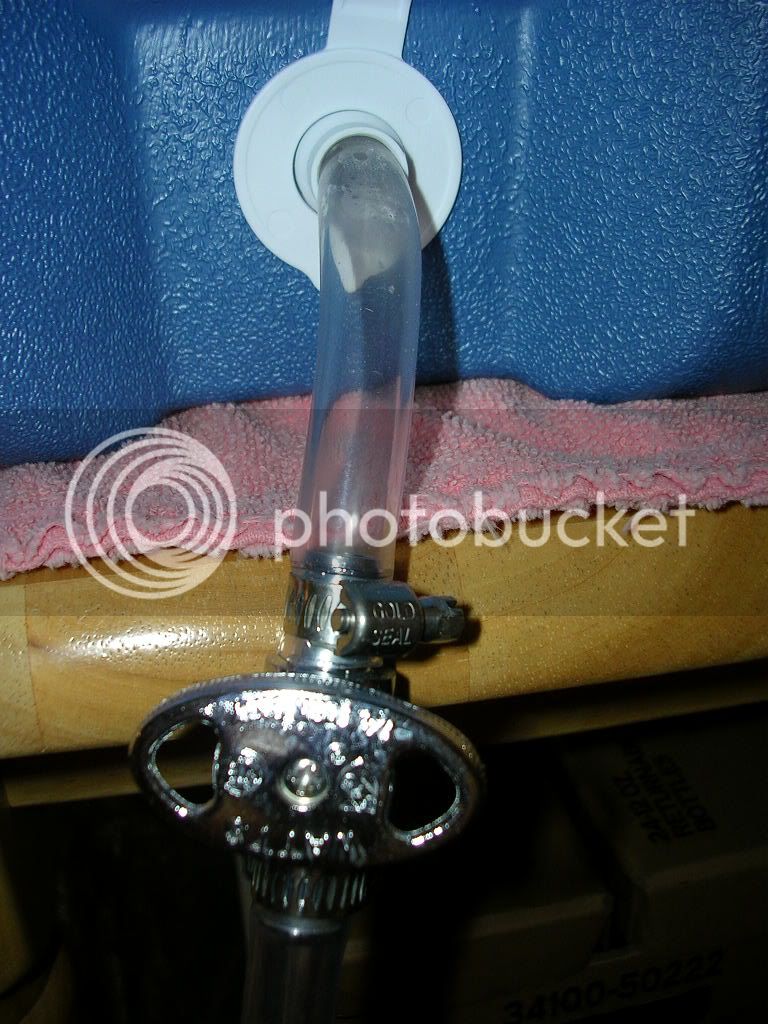
You can save some cost by using this technique for the valve.
MashTunDrain.jpg

Sure, if you want to go on the cheap... Personally, I'd rather do it right the first time and not need to worry about it, at all...

My cooler will never be anything BUT a mash tun for the rest of it's life... So doing the full conversion is fine with me. Plus, there's something very satisfying, and reassuring, about turning a ball valve handle. You KNOW it's either open, or closed. Not sure if I would trust the cheap-o method for too many batches...

Besides, regular tubing isn't rated for sparge water temps. Not sure if it's rated for above 150F even...

BTW, I would tend to think there's a valid reason why people use either SS or brass ball valves in their rigs, not the cheap method...

Well, I've brewed about 400 gallons on this rig so far. Not one problem, especially the leaking problem I read about with the folks that are trying to use a ball valve. I wouldn't call it cheap, just practical. I like to spend my money where it makes a difference. As far as the tubing goes, if you have scientific data that supports your statement that it requires a stainless or brass ball valve then I'm all eyes. Cheers!!!
 
Well, I've brewed about 400 gallons on this rig so far. Not one problem, especially the leaking problem I read about with the folks that are trying to use a ball valve. I wouldn't call it cheap, just practical. I like to spend my money where it makes a difference. As far as the tubing goes, if you have scientific data that supports your statement that it requires a stainless or brass ball valve then I'm all eyes. Cheers!!!

Leak resolution just takes using the old gray matter... Simply using the gasket from the original drain spout, on the inside of the cooler, resolves it in a heartbeat...

For the tubing, I was talking about the heat tolerance levels of the typical vinyl tubing shown in your image. The person from the LHBS did mentioned to me that it wasn't rated for the temperatures you'll see sparge water hit. While it could be ok, I'd rather not risk it... I use 1/2ID silicon tubing on the nipples for all the ball valves. Since it's rated to over 400F (450F-500F I believe) there's zero chance of issues from heat. It could be that the vinly tubing will just deform at those temps, which would have me concerned about how tight a seal you'll have...

It's really all personal preference here. I just prefer to use methods tested by a great many people already as being rock solid than to go a route used by maybe a few... Not to say that your assembly doesn't work, I just can't risk any leaks where I am.

Besides, ball valves are kick-ass... :D
To each their own man.... Cheers!!!
 
Ah well I'll probably be a supporter before I reach 100 posts anyways haha, just need to get cash to my paypal, but I'm lazy and forgetful.
 
Gold...I've been a fan of your posts so far but this seems a little harsh. Ham didn't say "do it this way" he said "I do it this way." I think appoligies are in order.
 
Back
Top