Kenmore 4.6cu ft. Kegerator Build

Homebrew Talk - Beer, Wine, Mead, & Cider Brewing Discussion Forum

Help Support Homebrew Talk - Beer, Wine, Mead, & Cider Brewing Discussion Forum:

This site may earn a commission from merchant affiliate links, including eBay, Amazon, and others.

Mike_M

Well-Known Member
Joined
Jul 2, 2011
Messages
48
Reaction score
2
Location
Chico
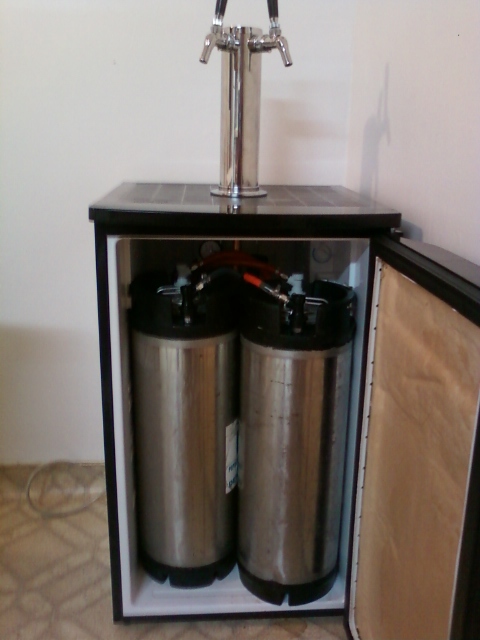
Nothing new or groundbreaking here, but I figured I'd share my first mini-fridge kegerator build. The refrigerator is a Kenmore 94689 4.6 cu ft model. Mine is the model with the black door. It is the same as the stainless steel door Kenmore 94683. It has a slide-out tray for the freezer compartment and a removable freezer door. This makes it easy enough to convert without needing to worry about bending coolant lines as is needed on some other mini-fridges with freezer compartments.

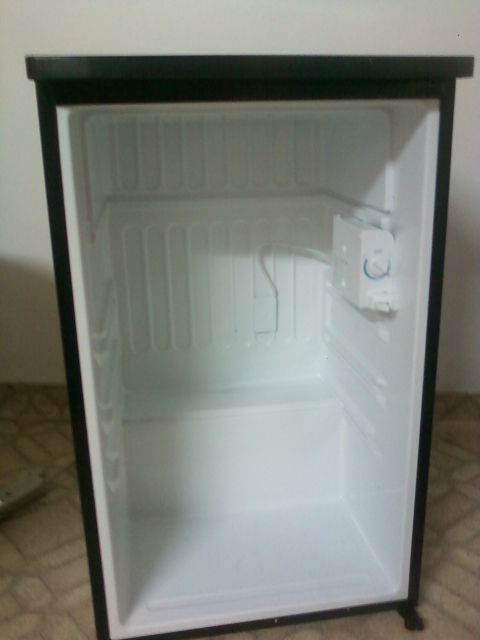
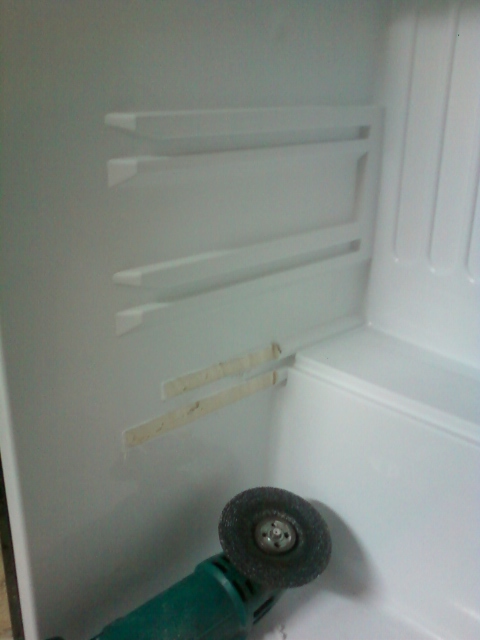
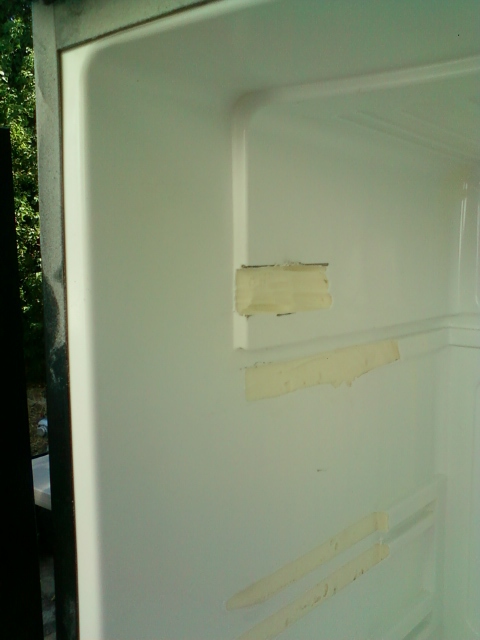
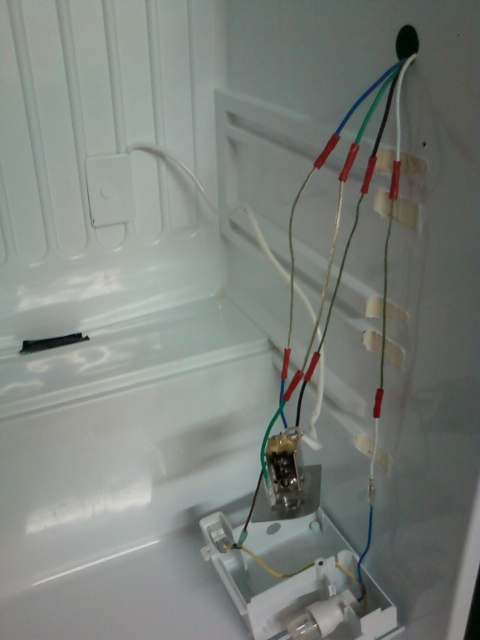
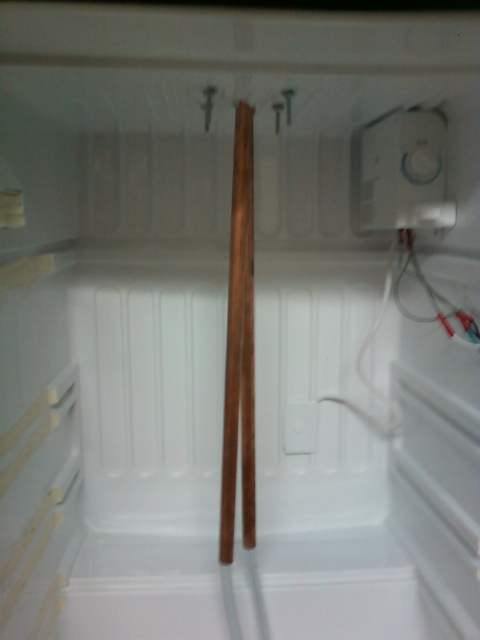
Below is a shot of of the interior after I removed the front door and the freeze compartment. Apparently I forgot to take a picture of it with all the shelves and the freezer compartment still intact. The main problem with this conversion was that the refrigerator is too narrow to fit two ball-lock kegs (it will NOT fit a ball-lock and a pin-lock, let alone two pin-locks). As can be seen in the picture below, there are rails on the side walls that are used to hold the shelves. These will need to be ground down. Also, the temperature control on the right hand side will need to be relocated.

01inside.jpg


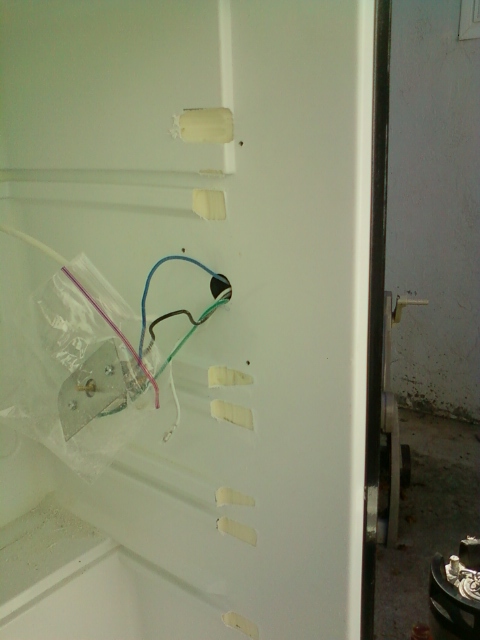
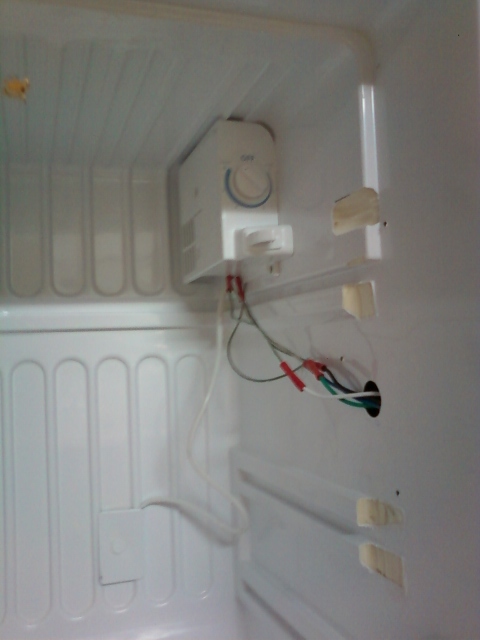
A closer shot of the temp. controller.

02inside.jpg


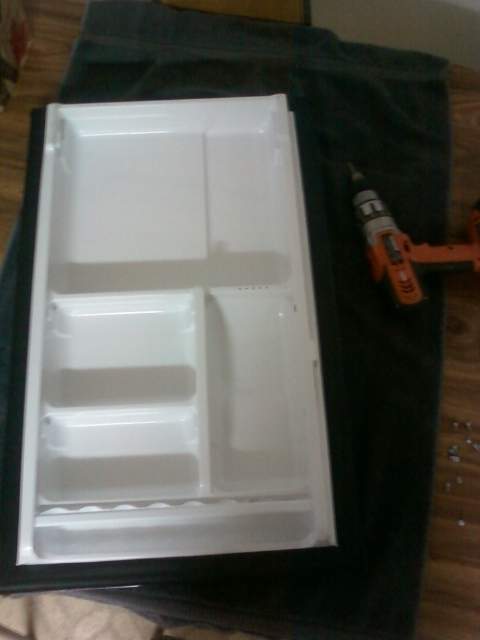
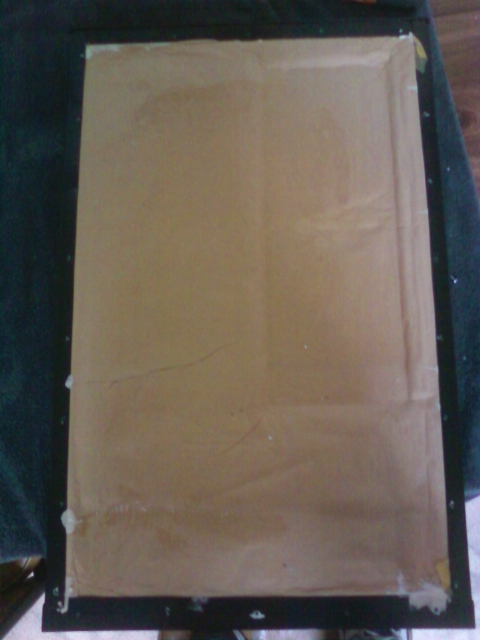
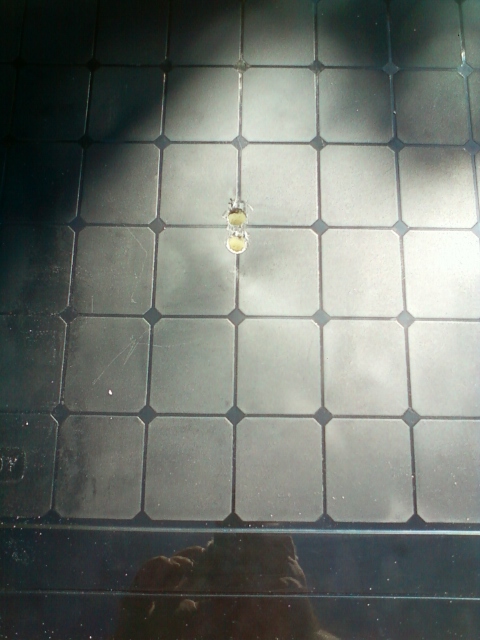
Let's get the conversion started. First up is removing the door and cutting out the door shelves. The picture below shows the intact door after it has been removed.

03door.jpg


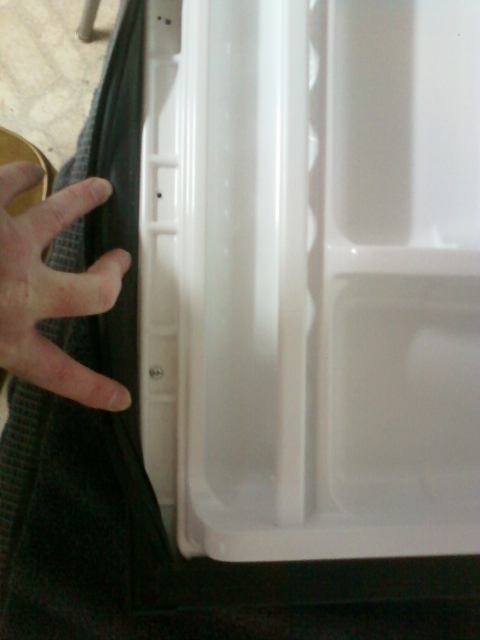
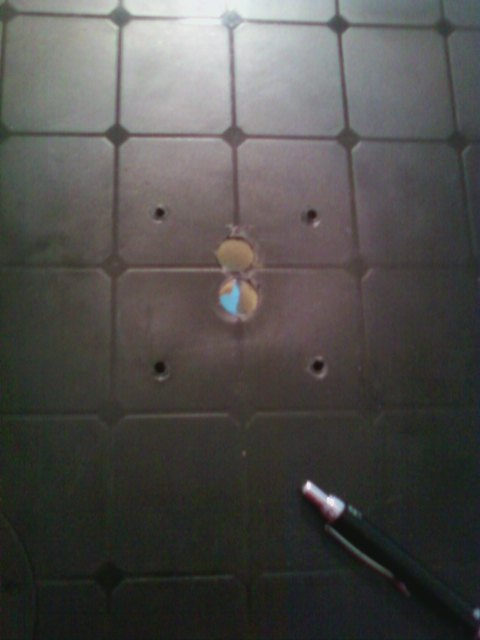
Peeling back the door seal/magnet strip reveals the screws that hold the seal and door shelves in to place.

04door_screws.jpg


Here is a picture of the door after the seal and door shelves have been removed.

05door_no_seal.jpg


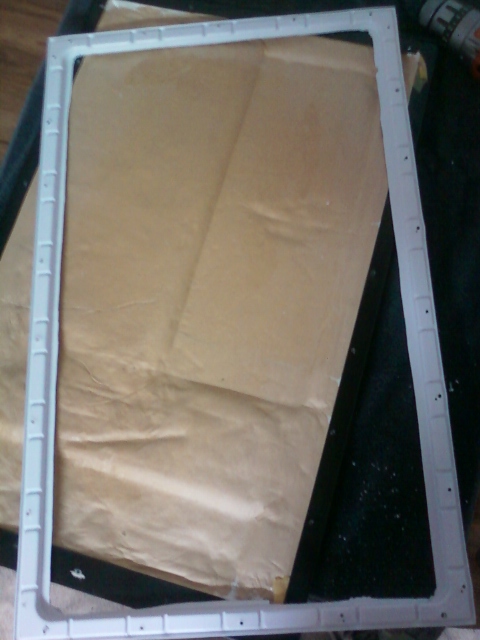
Two kegs will not fit in the refrigerator with the shelving on the door in place. However, something rigid is required to hold the door seal on the door. I chose to cut out the perimiter of the plastic from the door and use it to mount the seal in place. My first attempt at cutting it out was using a cheap Harbor Freight Dremel knock-off. I don't own a Dremel, and didn't want to spend the money to buy one. For the $8 the HF cut-off tool cost I figured it was worth the gamble. That was a gable I lost. It had very little torque and stalled out quite often while trying to cut through the plastic. My angle grinder and Rotozip would have been too imprecise. I settled on using a jig saw, which made quick work of the cutting. Here is a picture of the frame that was left over after cutting.

06door_shelves_removed.jpg


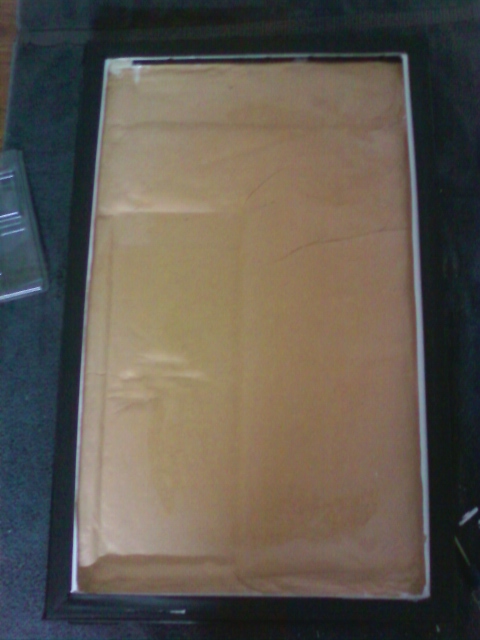
This is what the door looks like after reassembling with the plastic frame and the door seal. I suppose I could have used something to increase insulation, but the fit of the kegs was going to be tight enough without sacrificing that small amount of space.

07door_reassembled.jpg
 
I wanted to remove the housing for the temp controller and light bulb before I started grinding on the interior, so I took a picture of it to show me the wiring layout.

08temp_controller_wiring.jpg


Now it is time to start grinding off the interior shelf rails. The angle grinder made quick work of these, and with a small amount of patience made for clean and accurate removal. This picture is before I removed them all and smoothed them out.

09grind_left.jpg


Rather than remove a large section of insulation along the top left and right walls, I made grooves for the keg handles to slide in to. This allowed the kegs to fit while retaining as much of the inuslation as possible. This is a shot of the left side.

10grind_left_handle_groove.jpg


Two ball-lock kegs will not fit side-by-side, even after grinding down the shelf rails. They have to be offset. So rather than completely remove them on both sides, I only removed as much as was needed on the right side. This shows how little needed to be taken off and also shows the groove cut for the handle of the right-side keg (as well as my super high-tech protector for the temp. control).

11grind_right.jpg


To get the kegs to fit, about 1.5 inches needed to be ground off from the right side shelf rails.

12grind_right_meas.jpg


It appears that some refrigerant lines run along the top of this unit. Rather than cut a large hole for the faucet tower, I drilled two holes near the center to run the beer lines through. I believe I used a 5/8" bit so that I could run 1/2" copper tubing.

12top_holes.jpg


Looking at the pattern on the inside of what I believed to be the refrigerant lines, I carefully checked if I'd be able to drill mounting holes for the tower. Fortunately the mounting holes lined up along areas that had no lines. These next shots show where to drill the mounting holes with measurements using the grid pattern along the fridge top for guidance.

13top_tower_holes.jpg


13top_tower_holes_meas.jpg
 
The wires are too short to locate the temperature control. Using 18 gauge speaker wire and some butt connectors, I lengthened the four wires.

14rewire.jpg


The box now fits neatly in the top back corner of the right wall, out of the way of everything.

15relocate_temp_controller.jpg


A picture with two kegs inside and the CO2 tank hidden in the back. The 5# tank sits nicely on the back shelf with no real need for modification or extra support. Unfortunately I do not believe a 10# tank will fit. That is a real shame as it only costs about $2 more to exchange a 10 pounder than a 5 pounder.

16inside_kegs.jpg


For extra cooling of the beer lines and tower, I used copper tubing. This is a single 5' section of 1/2" tubing cut in half. It worked perfectly for the tower and 5' beer lines I have.

17inside_copper.jpg


A shot of the tower mounted on top.

18tower.jpg


Two final pictures of the finished product.

19finished.jpg


20finished.jpg


I just plugged the kegerator in today and it is cooling down nicely. I have two batches of beer crash cooling in my garage fridge before I transfer them to kegs and hook it all up.

It is hard to say how much time was put in to this conversion as I worked on it over a few weeks as time permitted. I doubt it would have taken any longer than three hours if I could have done it in one sitting. Overall I am quite pleased with the results. I can't wait to pour my first beers out of those taps!
 
Will a 6.5 gal carboy fit in there?

I'm not sure. I only have 5 gallon glass carboys and 6 gallon Better Bottles, in addition to some other oddly shaped fermenter buckets. My 6.5 gallon buckets (short and wide, unlike ale pail style buckets) and 5 gallon glass carboys fit in there without problem. I was using as a fermentation chamber until I did the conversion. The short, wide buckets fit in there with the bottom shelf installed in the fridge, and the 5 gallon carboys fit in there without the bottom shelf.

Well that obviously took some courage to pull off :)
Good job on your build! Looks great!

Cheers!

Thank you! I'm looking forward to finally kegging my beers after many years of bottling. I can't believe it has taken me this long to switch.
 
One more picture, this one with everything hooked up and chilling. The beer was at 38℉ this morning, so it has no problem keeping things cold (or even too cold, in this case). I'll see if the stock temperature control works well enough, or if I'll need to build my own.

21finished_full_kegs.jpg
 
Thanks for the write-up! And good timing too, I just found one of these on craigslist and was wondering if anyone had tried converting. Glad to hear it goes pretty well :)
 
Could you please explain or show photos on how you attached the copper to the top, near the faucets? I like this idea, and am going to entertain the idea sooner than later. :)
 
The main problem with this conversion was that the refrigerator is too narrow to fit two ball-lock kegs (it will NOT fit a ball-lock and a pin-lock, let alone two pin-locks).

I was a bit confused by this. What type of kegs were you able to finally fit in there. The opening measures 17" without the rails. What is the diameter of the kegs that you used?
 
So I just purchased the same fridge and am in midst of the conversion. I have a few findings and alternative methods to add to the mix.

The Door - I removed the door, then the plastic inside and rubber weather stripping via the screws. The plastic is thin enough that a new Razor in a sturdy utility knife will cut it like butter. I cut to the inside of the screw holes right when the plastic makes the 90 degree turn towards the inside of the fridge. Be careful with you free hand. I'm pretty good with a razor knife, but snagged my finger pretty good.

The Top - I wasn't sure of where the lines where located (and I wanted to reinforce the lid for the tower. I carefully removed the plastic lid. Go slow. It help to use a putty knife around the edged. I also used a block of wood and hammer to tap the side up. Then I SLOWLY peeled the top off. **Start in one of the front corners. A wedge piece of wood (like a door stop) helped a lot. I carved out small area from a 1/2 piece of wood to reinforce the lid for the tower.

Big observation I found. With the lid removed, on the underside there is a circle in the plastic and three preset "screw holes". It is dead center from side to side and about 3/4 back from the front of the fridge.

After digging out some of the foam insulation I found that the center of the circle is directly between two condenser lines. Translate this to the inside- You can see the Big bumps in the fridge and a few on the roof have a small bump in between them. The big bumps have the Lines the little one are in between them. So you can drill from the inside out using he small bump as a guide. The condenser lines are about 1/2" from the center of the small bump.

***So in short the big bumps on the inside of the fridge are the lines***Stay away from them****

Cutting the shelf rails - again you can use a good sharp utility knife.

Now I have pin locks and they do not reach as high as the cornies the OP has So I dd not have to cut the freezer section, only the bottom rail/shelf support for the freezer section.

Thanks to the OP - his worked greatly helped mine, and I hope my 2-cents can help someone else.
 
I was a bit confused by this. What type of kegs were you able to finally fit in there. The opening measures 17" without the rails. What is the diameter of the kegs that you used?

What I meant was that the fridge could not fit two ball-lock kegs without modification. I had to remove the shelf rails on the sides of the fridge in order to fit two ball-lock kegs. I've swapped out many kegs since I did this conversion, without problems. All of my kegs are standard ball-locks, with a diameter of just under 8.5".
 
Thanks for the additions, WCrane. Are you able to fit two pin-locks in the fridge, or just one? I seem to recall I was unable to get one ball-lock and one pin-lock in at the same time.

Nice tip on the utility knife. Just last week I used a utility knife to make a cut-out for my Love temp controller I use on my side-by-side fridge fermentation chamber. I wish I had known how well they cut through that plastic when I was doing the kegerator. Using the angle grinder made a huge mess. :)
 
I have to finish the cuts tomorrow but I think I should be able the squeeze them in. If I I have to ill cut into the compressor hump and touch things up with spray foam. I'll report back on my findings, headaches, screw ups and injuries.
 
I was AWOL from this site for a few months towards the end of last year, so I missed some of the responses in this thread.

Could you please explain or show photos on how you attached the copper to the top, near the faucets? I like this idea, and am going to entertain the idea sooner than later. :)

I took a single 5' piece of 1/2" OD copper tubing and cut it in half. I fed the two tubes through the holes I cut in the top of the fridge (shown in the last three pictures of the second post of this thread). I removed the quick disconnects from the beer lines and fed the lines through the tubes. Next I mounted the tower and re-connected the quick disconnects. The copper tubes themselves are not permanently mounted to anything. There is enough tension between the cramped space of the tower and the holes in the top of the fridge to hold them in to place. They can slide down in to the fridge if I'm switching out kegs or messing around with things. However, I just have to slide them back up in to the tower and all is well.

To be honest, I'm not sure the copper tubing helps much at all. I still get lots of foam on the first pour of most beers, until the lines cool off.

Let me know if any more clarification is needed. I'd just assume not take things apart at this point to take pictures, but I will if it would be helpful.

Do you think a 6 gallon better bottle would fit in the fridge before modification?

I believe hpergolic PM'd me about this. Unfortunately I don't have my responses saved, and I don't recall if the better bottle actually fit. If you're reading this hypergolic, do you remember what my response was? I don't feel like taking my kegs out right now and testing it.
 
Ok... didn't get much time to fit the pin-locks today...

I did manage to make a set of cardboard templates of the kegs to see how they would fit. It looks like I will need about 2.5-3" of space from the mouth of the fridge. The door, unaltered gives me about 7/8" and I may create a small indent in the door foam from an extra 1/2-3/4". I don't want to take too much out of the door.

I plan I will cut a divot in the left side of the fridge and another on the left end of the compressor hump. The insulation is thicker there and there is some room behind the ball in the rear to add some extra insulation while still allowing air circulation. I'll line each divot with silver tape and fill any gaps with foam to help hold the cold.

This way, I figure the left keg will sit in the indents and the right will be more forward.

I did manage to get my hole drilled to run two 12" section of 1/2" copper. Plan is that about 3" will hang into the fridge and the rest out the top, into the tower. I also drop a 3/4"x6"x6" piece of board into the top foam to help support the tower. I will secure it
with some adhesive, spray the cracks and gaps and add some silver tape.

I'm also thinking of making a cut to slid the thermo/light wires back. I think there is enough play that a simple cut to the back and down will allow me to slide them back to a new spot. I'll fill the old with foam and cover with tape.

Getting there....I'll report back after some progress is made.
 
I have an update.. took awhile to get free time to work on it.

The Lid - After removing the lid and adding a wood block I reattached the lid using some liquid nails for foam board. It didn't works so well. So I used for small screws, one in each corner on the side of the fridge. Thru the lid lip and into the metal side. beware there isn't much room to work with.

Pipes - I did run two 12" pieces of 1/2" copper thru the lid. About 2-3" sit in the fridge the remainder is out of the lid ( about 6-7"). I used spray foam to build a column around the pipes, then trimmed it down, wrapped it in foil and silver tape. With the fridge running the pipes are cold and so is the foam.

For the Door- I had to shave a small amount of foam out of the left side of the door (hinge side) there was a slight indent already, I just made it a tad bit deeper. I covered the inside of the door with the silver duct tape.
the one issue I did find is that the fridge slopes towards the door. I place a small section of 1/4 pipe to level out the forward keg and help clear the weatherstripping on
the door. I also attached a small latch on the side of the door to hold the door shut.

Shelf Rails - Cut and Taped

Theremostat relocation - managed to make a cut from the hole where the wire are down to the next shelf rail (not exposed) the wires travel down then towards the back. I managed to free up enough of the wire to relocate the Thermo without cutting and splicing any wires.

Fitting the Kegs- I cut out a 6-7"wide section of the compressor hump and removed the foam all the way to the plastic board in the back. I did this on the left side (as if you where looking into the fridge). There is a much better void in the back of the fridge where the compressor is. I used some spray foam to build back up what I took out. I covered all exposed areas with the silver tape. This along with the small amount from the door gave me enough to fit in two Pinlocks.

Still have to find a home for the regulators and figure out a nice top.
 
To be honest, I'm not sure the copper tubing helps much at all. I still get lots of foam on the first pour of most beers, until the lines cool off.

Just a little tip, just copper isnt going to insulate the lines, copper is actually a really good conductor, thats why its used for heat transfer applications (ICs, radiators, etc). Essentially if your lines are in contact with the copper you are creating a heat sink to suck away what cold you have from the fridge when its in the tower. So I would assume its not going to help much. To insulate the lines you want something less dense, in a perfect world you would put a vacuum between the lines and the outside air, but obviously thats not practical. So if you get some spray insulation, or some foam, something that has a lot of dead air space (heat cant travel through air very well) that would be a better solution. Another option and what Im considering doing when I set mine up is hook up a small computer fan to blow cold air into the tower, would need a bigger hole for the lines but might help. Hope this helps some
 
I'm aware of the conductive properties of copper. The idea of the copper tubing is to chill the tower. This approach is supposed to make use of the conductive properties of copper to remove heat from the top (the tower) so that the first pour is cooler than it would be normally.
 
Yeah I thought about that and that might work but im more inclined to think the direct contact of the air surrounding the pipe will have more of an effect than cooling the pipe inside the fridge and transfering that cold up the pipe to the tower, and didnt mean it in a negative way just was offering advice. Either way, very nice build, hope mine turns out that nice
 
I am in the middle of converting this unit and will plan on placing the tower within the next week (after I get the stones to drill through the top). How sturdy is the draft tower? Is it necessary to add a wood panel to help with mounting?
 
My tower is very sturdy without the addition of any wood. I drilled through the top and used the four bolts included with my tower to mount it. I have had no problems at all so far.
 
Fitting the Kegs- I cut out a 6-7"wide section of the compressor hump and removed the foam all the way to the plastic board in the back. I did this on the left side (as if you where looking into the fridge). There is a much better void in the back of the fridge where the compressor is. I used some spray foam to build back up what I took out. I covered all exposed areas with the silver tape. This along with the small amount from the door gave me enough to fit in two Pinlocks.

Would it be possible to post any pics of the mod you had to do to the compressor hump? Are you able to fit a 5# CO2 tank and everything else in there still?

Thanks!
 
So I completed my build and thought I'd share what I did. I did decide to mount a cheap plastic cutting board to the underside of the top (plastic so it won't rot with any humidity/condensation). After taking the top off, I removed some insulation to locate the refrigerator lines and can confirm that the ridges lining the top of the freezer are where they are located. There is about 1 1/4" in between them, so drilling blindly is cutting it pretty close but should be feasible if you stay between the ridges. I lined the insulation where I drilled with aluminum tape to seal off any condensation as well. I added rails, which were just stainless drawer handles from home depot.

photo-2.jpg


photo-3.jpg


photo-5.jpg


photo-6.jpg


photo-7.jpg
 
Here is the finished product. I used a 1" inch hole saw and made three holes with it, 2 for the lines, and 1 to pass a conductive piece of copper tubing up into the draft tower which lies between the two beer lines.

photo-8.jpg
 
I added rails, which were just stainless drawer handles from home depot.


Very nice build!!! Can you elaborate on how you connected the drawer handles/rail?

Also - what drip-tray is that and how did you connect it? It looks awesome!
 
Thanks Mike, pleased with it so far after figuring out a leak in my CO2 line. All good now though.
mfive - The drawer handles were available at home depot. I've heard of some people locating some on-line. I did a google search and found this site, but just a reference as to what I used as I have no idea about this actual site.

http://www.coolknobsandpulls.com/mo...brand-premium-series-stainless-steel-bar-pull

The side rails are 15.5" and the back is 19.5". You have to pre-drill through the top after removing it, and I used some spacer washers on the underside to make it more stable and create the necessary space (the top is too thin and the hardware will bottom out otherwise).
The drip tray was from northern brewer.

http://www.northernbrewer.com/shop/brewing/kegging/drip-trays/countertop-drip-tray-w-cut-out.html

You can find some very similar ones online. It sets on the top and can be easily removed and cleaned without any necessary installation.
 
phredrixxx said:
Would it be possible to post any pics of the mod you had to do to the compressor hump? Are you able to fit a 5# CO2 tank and everything else in there still?

Thanks!

Sorry it took so long to get back to the thread having a 4-mo old really changes free time I can't post pics. Two kegs fit. And the tank will based on measurements and mock ups.

image-664474361.jpg


image-3771639483.jpg
 
Finished product
Chalkboard paint on the door, and I mod-podged the six pack side (then sanded and smoothed) the sides
The top is a 2" by 2" by 3/4" birch ply and some 1.5"x 1/2" pine. Angled the cuts with a mitre saw, sand the hell out of it, Stained with an English chestnut then topped off with three coats of polyurethane.

image-2786441920.jpg


image-4266086891.jpg
 
I just bought the Emerson 4.5 cf and was able to convert it to a keggerator. I remove the selves and had to cut the door off as it is.glued to the foam in the door. I will be smoothing out the foam and getting that white board stuff to place over it so that I can write what is in there and how long its been in there. Right now I have a custom Wee Heavy in there and will be adding a cream ale for swmbo!
 
does anyone know if there are lines in the side of this fridge? I have a 20# CO2 tank that needs to be on the outside of the fridge so I need to run 2 lines through the side. I did some searches but can't seem to find any info on it and don't want to just go drilling. thanks!!
 
does anyone know if there are lines in the side of this fridge? I have a 20# CO2 tank that needs to be on the outside of the fridge so I need to run 2 lines through the side. I did some searches but can't seem to find any info on it and don't want to just go drilling. thanks!!

I answered my own question today - yes there are lines in the side. I didn't hit one but I did find itafter drilling a hole and getting rid of some insulation. If you do need to drill in the side, do what I did. Move the thermostat up and pull away some of the plastic behind the thermostat. You'll see a black plastic circle where the wires come in for the thermostat. You are safe to drill through the black plastic circle.
 
So I just purchased the same fridge and am in midst of the conversion. I have a few findings and alternative methods to add to the mix.

The Door - I removed the door, then the plastic inside and rubber weather stripping via the screws. The plastic is thin enough that a new Razor in a sturdy utility knife will cut it like butter. I cut to the inside of the screw holes right when the plastic makes the 90 degree turn towards the inside of the fridge. Be careful with you free hand. I'm pretty good with a razor knife, but snagged my finger pretty good.

The Top - I wasn't sure of where the lines where located (and I wanted to reinforce the lid for the tower. I carefully removed the plastic lid. Go slow. It help to use a putty knife around the edged. I also used a block of wood and hammer to tap the side up. Then I SLOWLY peeled the top off. **Start in one of the front corners. A wedge piece of wood (like a door stop) helped a lot. I carved out small area from a 1/2 piece of wood to reinforce the lid for the tower.

Big observation I found. With the lid removed, on the underside there is a circle in the plastic and three preset "screw holes". It is dead center from side to side and about 3/4 back from the front of the fridge.

After digging out some of the foam insulation I found that the center of the circle is directly between two condenser lines. Translate this to the inside- You can see the Big bumps in the fridge and a few on the roof have a small bump in between them. The big bumps have the Lines the little one are in between them. So you can drill from the inside out using he small bump as a guide. The condenser lines are about 1/2" from the center of the small bump.

***So in short the big bumps on the inside of the fridge are the lines***Stay away from them****

Cutting the shelf rails - again you can use a good sharp utility knife.

Now I have pin locks and they do not reach as high as the cornies the OP has So I dd not have to cut the freezer section, only the bottom rail/shelf support for the freezer section.

Thanks to the OP - his worked greatly helped mine, and I hope my 2-cents can help someone else.

Could you post pics of this done with both pin locks in?
 
I think I've answered my own question, but the beer lines go up into the tower inside the copper tubing? Correct? Also I have a chance to buy a GE 4.3 cu. ft mini fridge for $75.00. Would I be able to do the same conversion with it? The pictures are identical to yours.

Thanks
 
Back
Top