Show us your sculpture or brew rig

Homebrew Talk - Beer, Wine, Mead, & Cider Brewing Discussion Forum

Help Support Homebrew Talk - Beer, Wine, Mead, & Cider Brewing Discussion Forum:

This site may earn a commission from merchant affiliate links, including eBay, Amazon, and others.
Sneezye
I have three of the thirty+ tip NG burners I got for free. You think if I plug a bunch of the ports I can use them or ?

I don't know how the 30 tip is set up but if you only leave tips open that face other tips, it should work just fine. I only plugged the outside ring of tips and have no issues keeping the rest lit.
 
This is my brewery. There are many like it, but this one is mine.
My brewery is my best friend. It is my life. I must master it as I must master my life.
My brewry, without me, is useless. Without my brewery, I am useless.

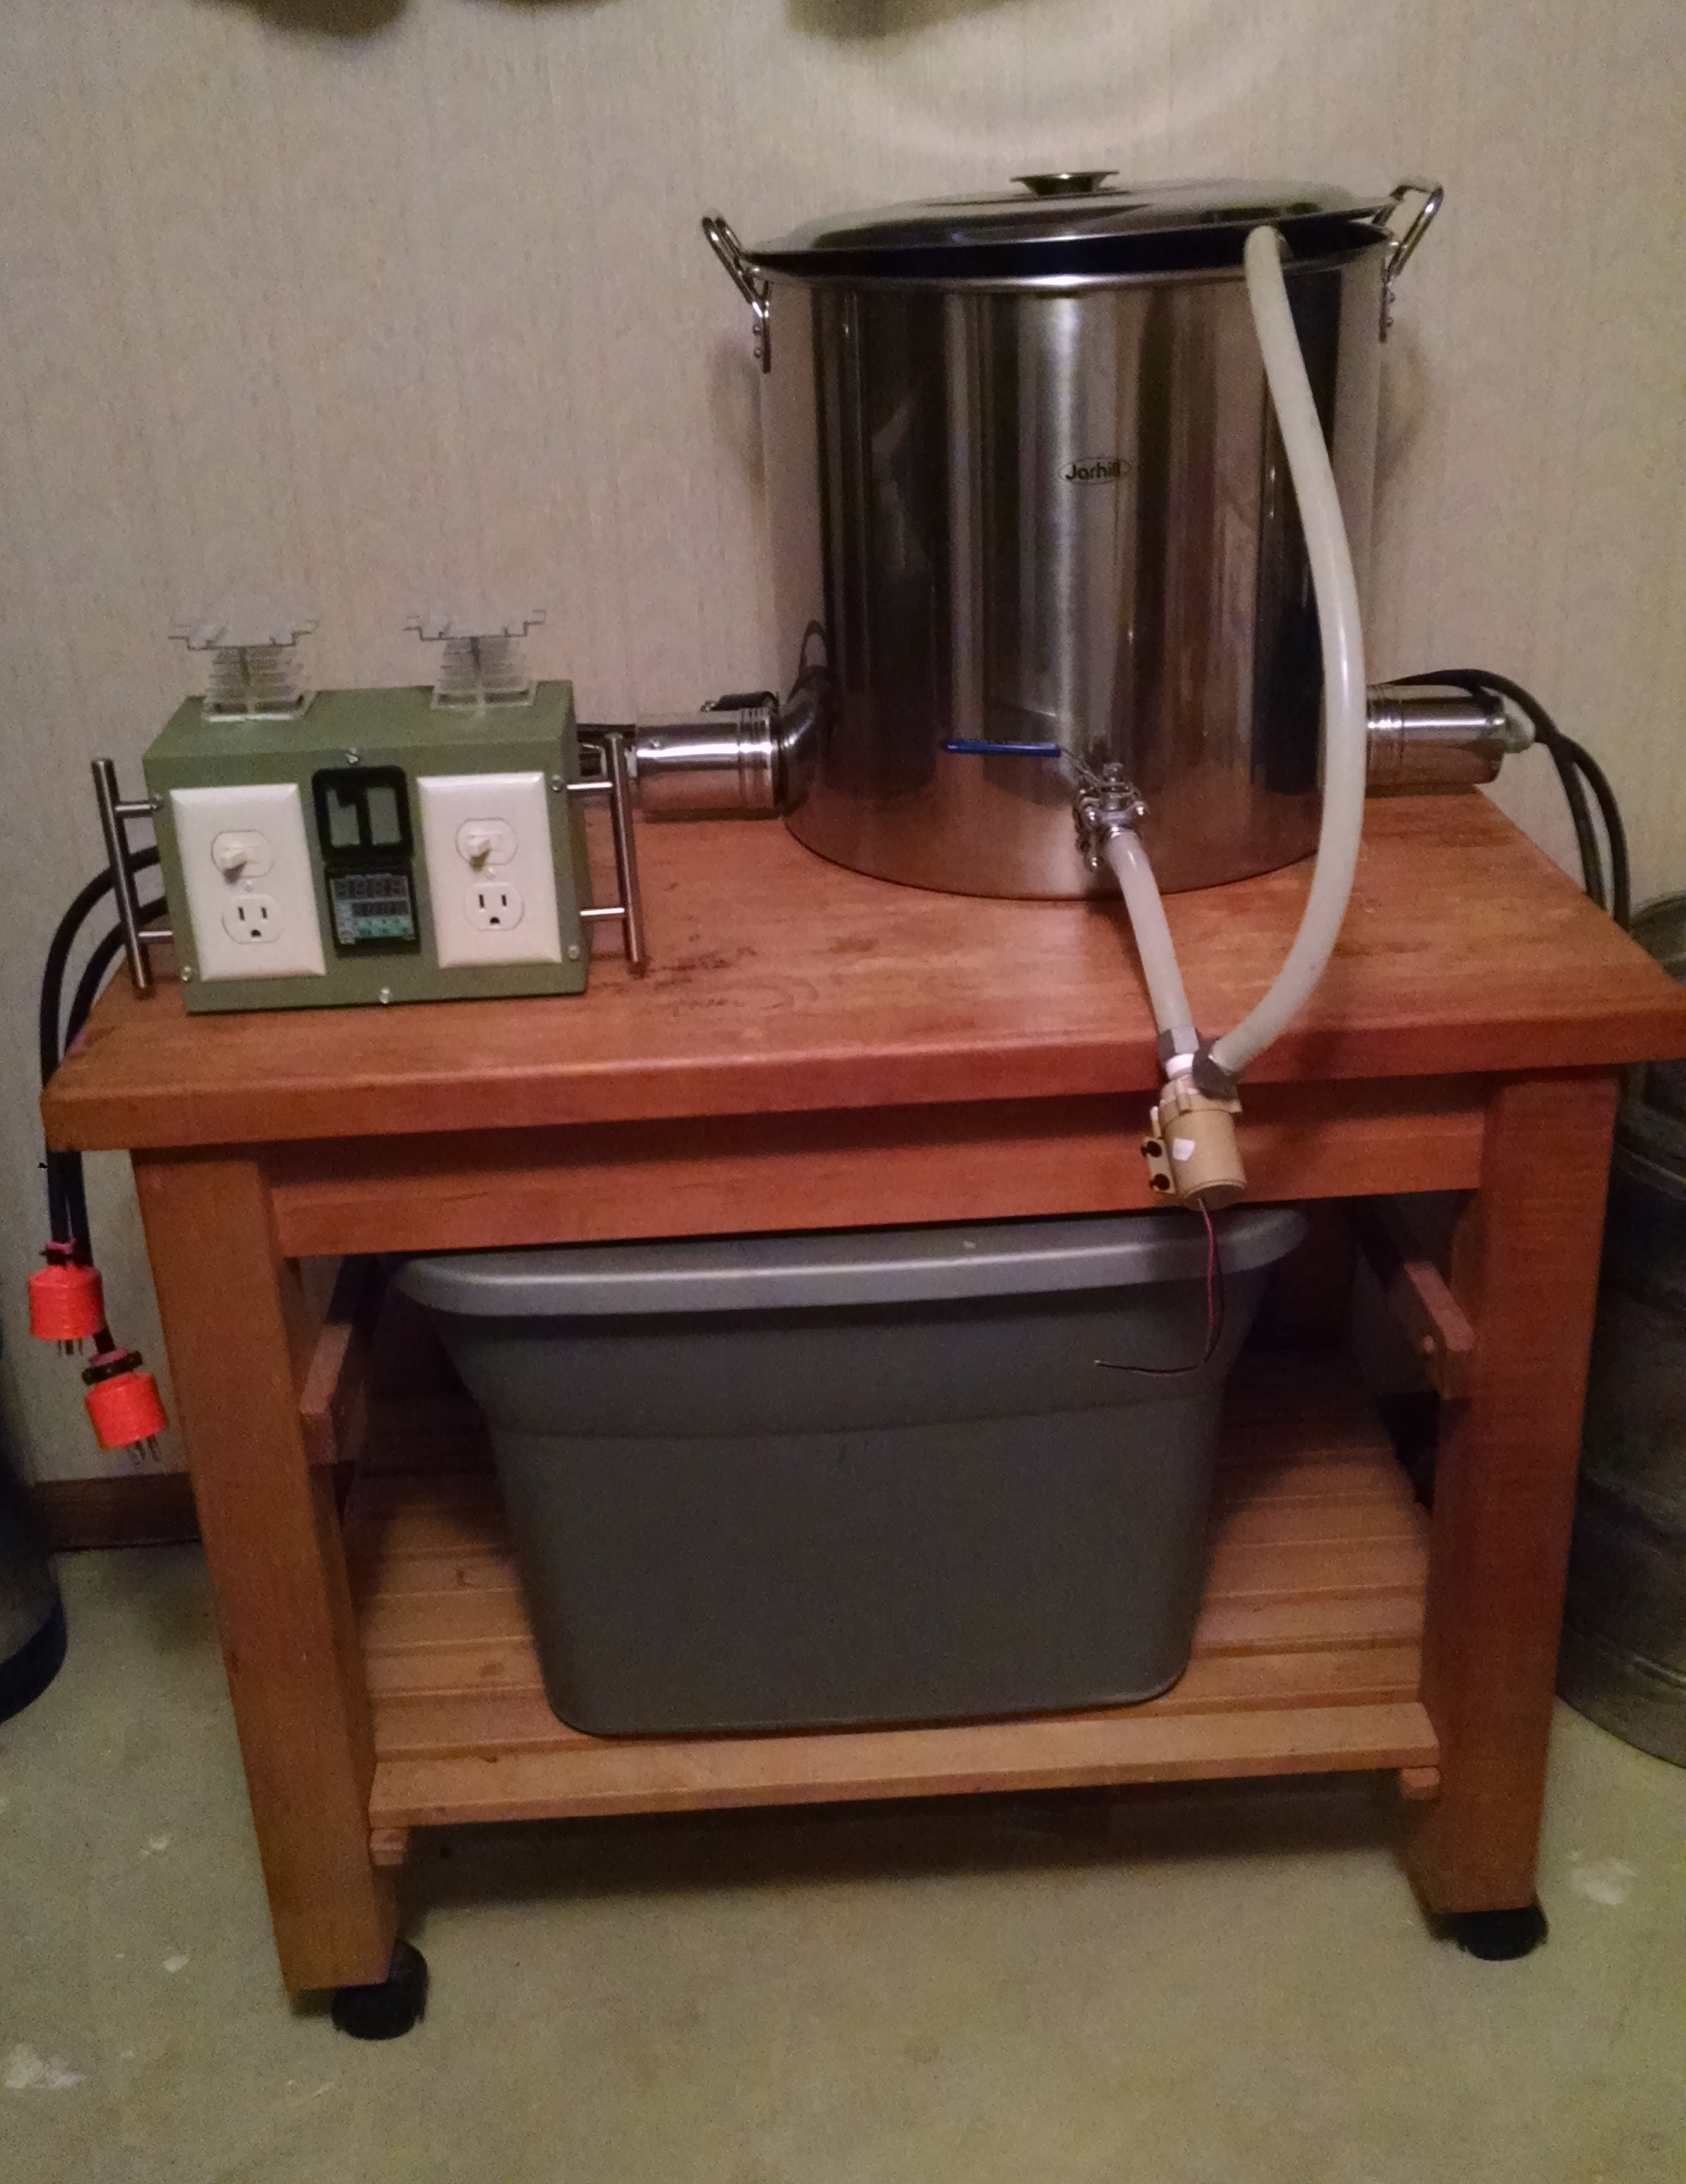
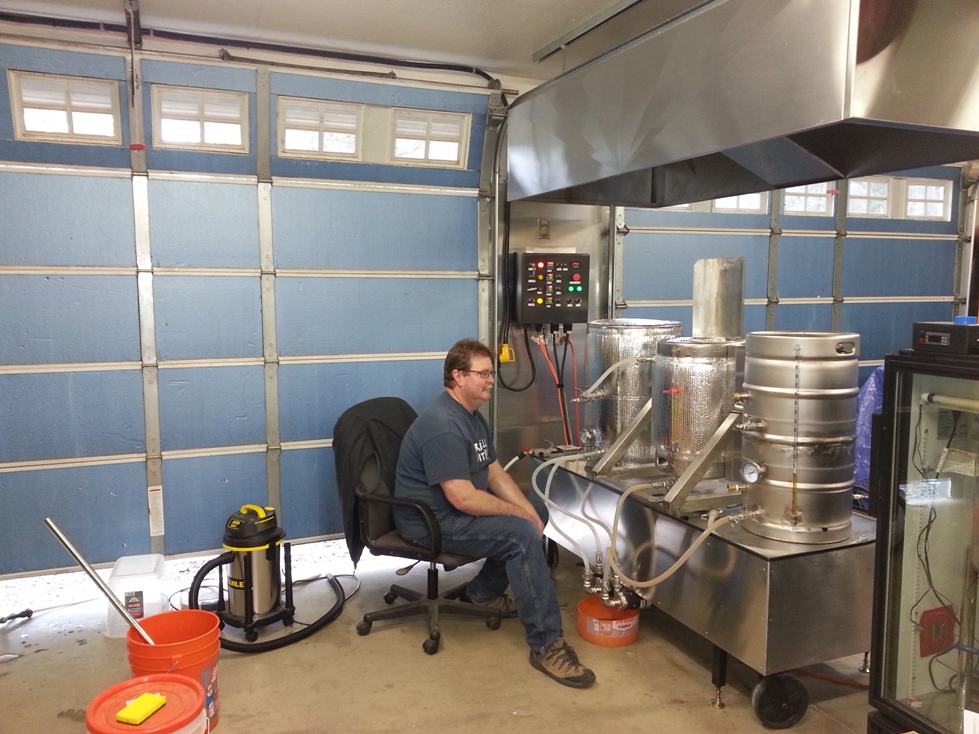
Square1 - Dual Element 110v 6 gallon E-BIAB
img_20141207_125148536-64329.jpg

Your control box made my jaw drop! That contraption is art.
 
On the 23 tip burners there are 3 tips that aren't paired. I plugged those up and the burners seen to burn well using NG. Others even plug all except 10 tips.
 
Your control box made my jaw drop! That contraption is art.

It was an old bastardized box that had holes already cut in it. I literally just brewed with it yesterday for the first time. I've already decided I am going to scrap it and build a new blingyer panel. There was no point to control that second element. I'm just going to plug t in the wall and set my alarm on my panel.. When the temps up I'll unplugged and element 1 will maintain the mash.. When mash is done I'll put element 1 on manual 100%, and just plug element 2 back into the wall.

I'm designing the new panel in cad right now and hope to start a build thread in the next couple weeks.
 
Drill a pilot hole through the shelf corner loop and the leg and put a tek screw into it. It won't slip anywhere.

I already thought about doing that but since I am not using those shelves for that purpose anymore, I just didn't bother. I built my entire brew stand out of wood (I have an all electric setup).
 
Couldn't be happier with the final results of the brew stand, an early Christmas gift! Just a few more fittings on my boil kettle and I'm content.


update
 
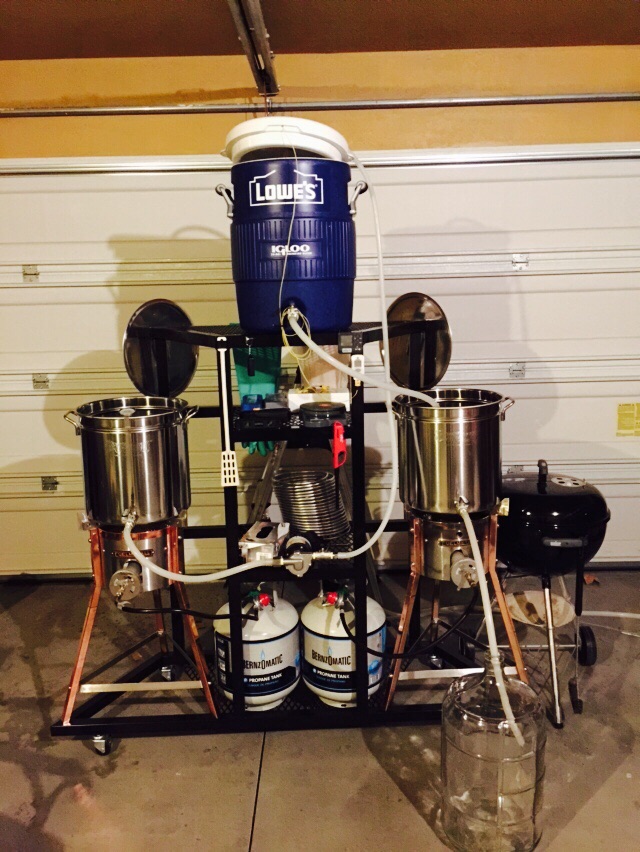
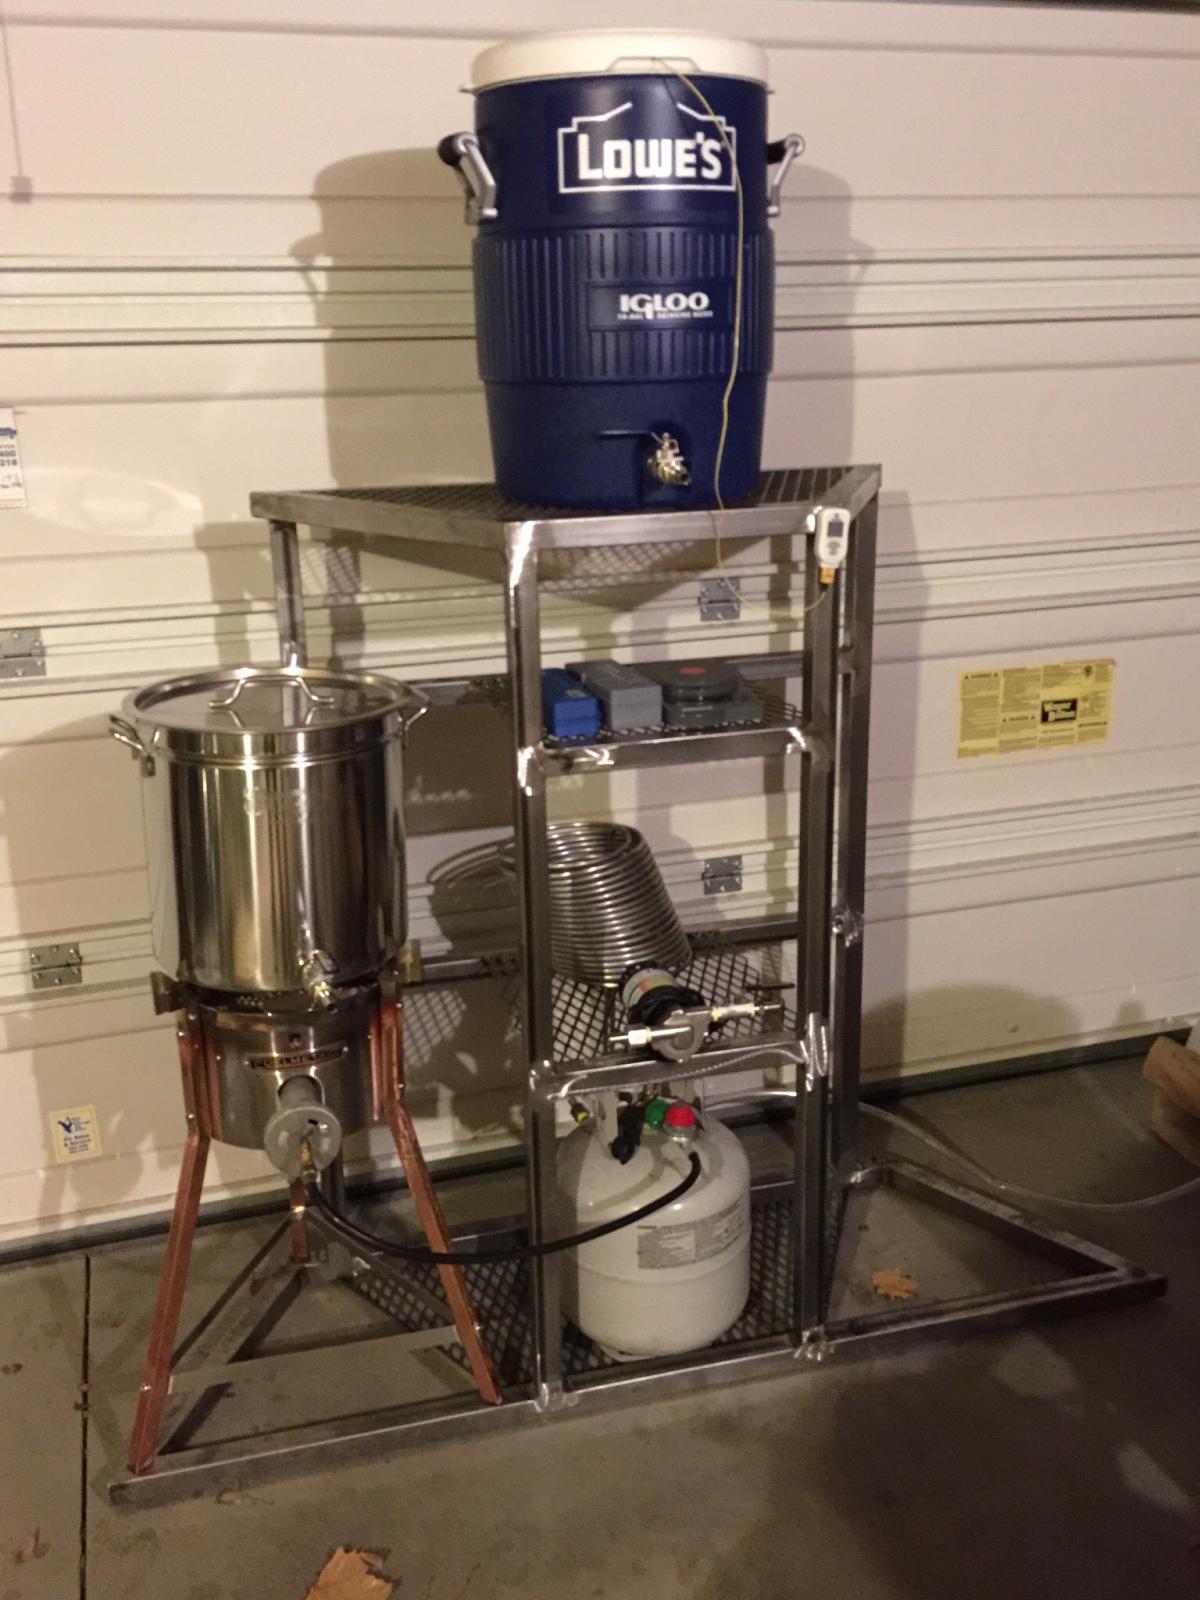
This is my two teir single pump Herms system I designed and built with a good friends help. - decided to have it powder coated gloss black to showcase the copper clad burners. Designed to be universal, compact, and Mobil.

Has to many features to list - clean in place - big burners - flush mounted expanded metal shelfs - triangle in side another triangle to create an nice Illinois that make it seem smaller in size. Can fit kettles and mash tuns big enough to do 20 gallon high gravity beers. Shown with my 5 gallon set up. Due to tripod design allows my weber kettle to fit nicely.

Mashtuns up top gravity feeds
Pump is used to pump strike water / HeRMS/ then Finishes with sparge to clean Herms system in place.

I would put more pictures showing detail but can only do one per post I guess.

image.jpg
 
This is my two teir single pump Herms system I designed and built with a good friends help. - decided to have it powder coated gloss black to showcase the copper clad burners. Designed to be universal, compact, and Mobil.

Has to many features to list - clean in place - big burners - flush mounted expanded metal shelfs - triangle in side another triangle to create an nice Illinois that make it seem smaller in size. Can fit kettles and mash tuns big enough to do 20 gallon high gravity beers. Shown with my 5 gallon set up. Due to tripod design allows my weber kettle to fit nicely.

Mashtuns up top gravity feeds
Pump is used to pump strike water / HeRMS/ then Finishes with sparge to clean Herms system in place.

I would put more pictures showing detail but can only do one per post I guess.

That is a work of art! Looks like you put a lot of work into it. You can always start a build thread on it if you haven't already. Have you brewed on it yet?
 
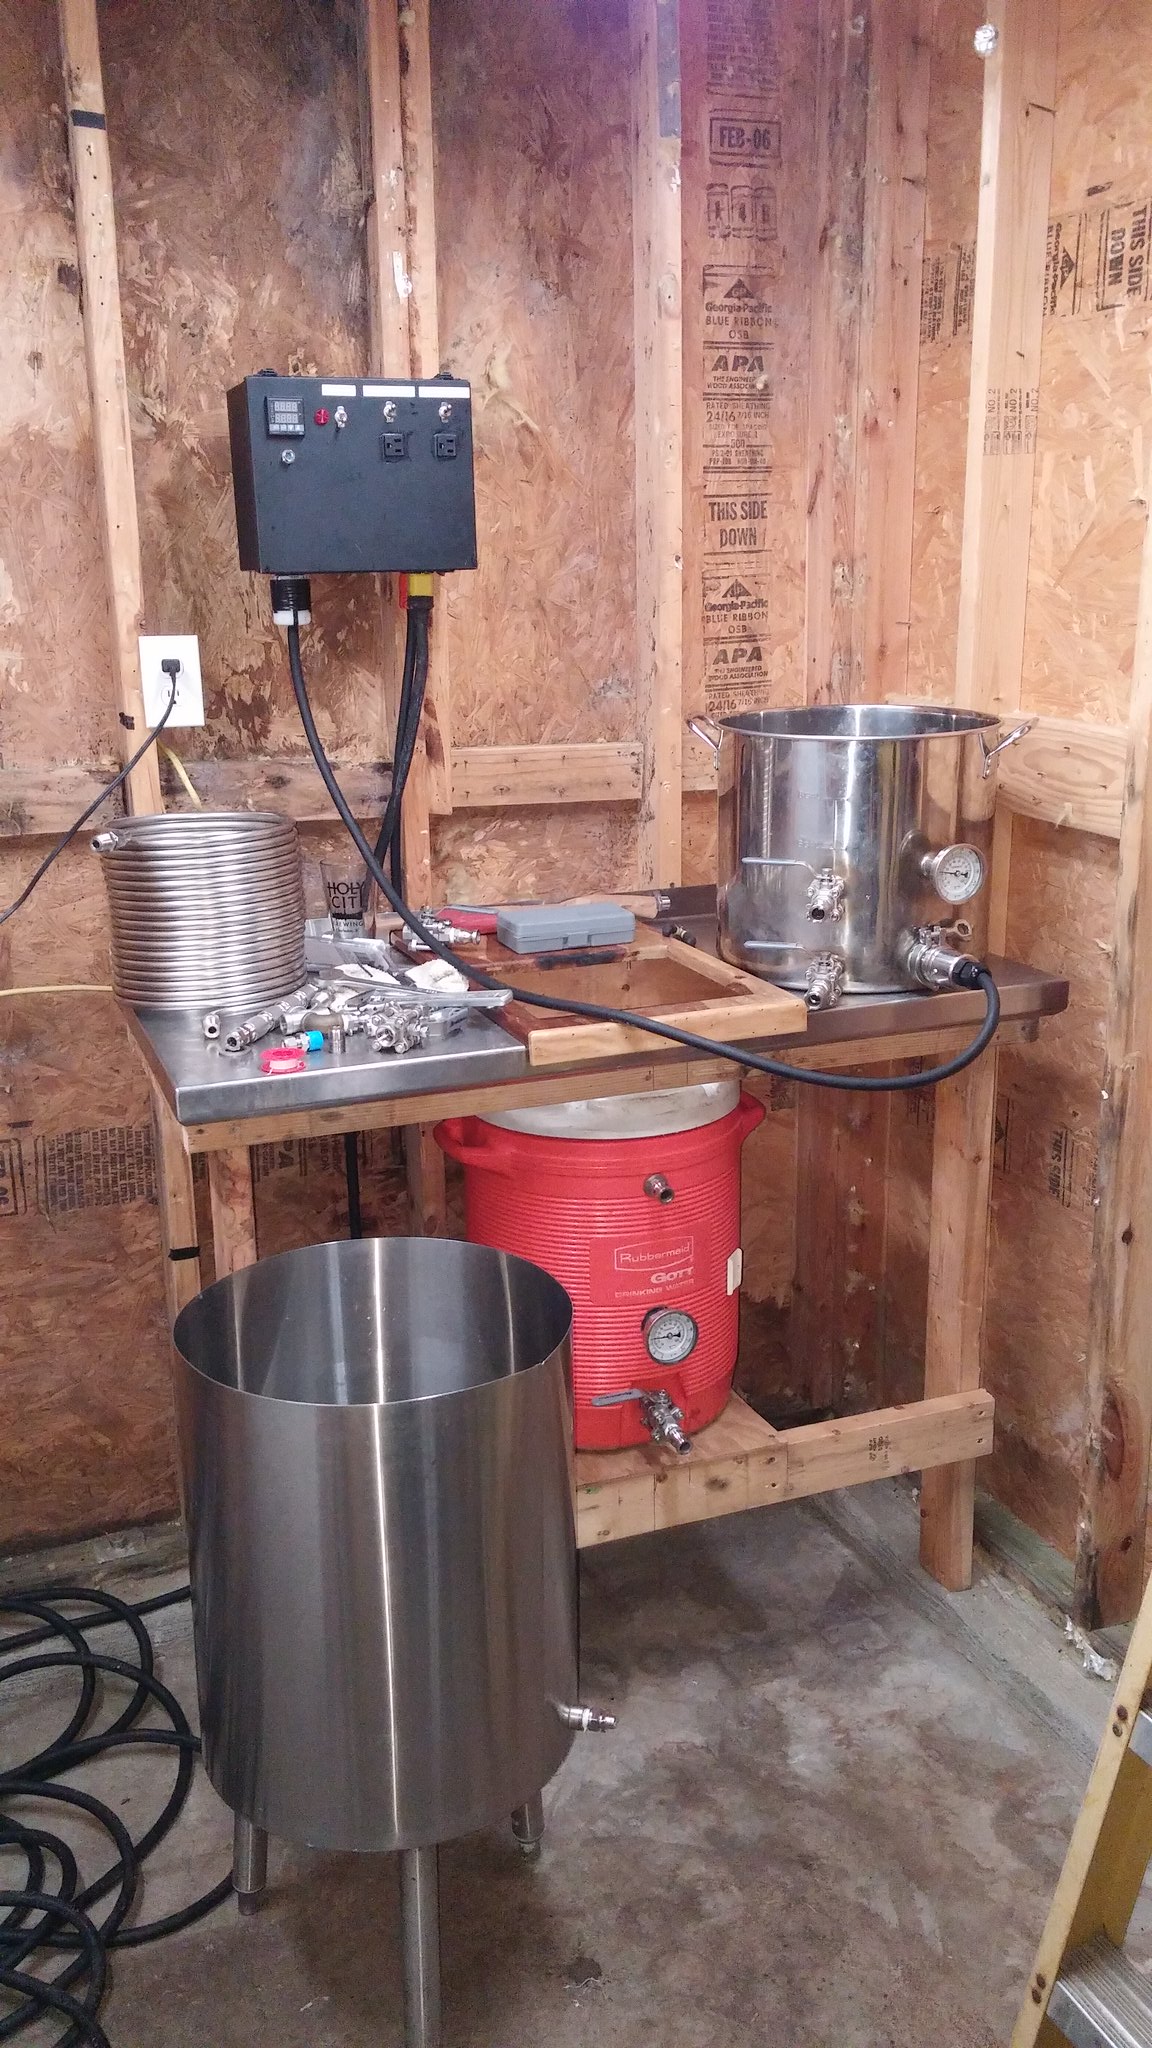
I guess I can post a pic of mine finally. I started building in March, pretty much complete now and managed to brew on it for the first time yesterday. All went pretty good, but a little bit of a learning curve from my old gravity system. All-in-all, I was extremely happy with it. You can find all the particulars in my EHERMS build thread if interested (link in signature).

First_Sparge.jpg
 
Thanks Huaco, Love your system too. Did you ever use your inline O2 setup?

No. I was scared to have all those threads on the cold side of the boil... I have a stainless steel wand with a stone on the end. I had a buddy give me a HUGE medical Oxygen tank that he filled off his welding OXY bottle. I still run a HEPA filter inline on the oxygen line and I set my brewery timer for 90-120 seconds and stir the heck out of the wort while injecting 1 Liter/minute regulated oxygen. Works like a champ!
 
Thanks - I did put a lot into it - yes I have brewed multiple times - have not done a build thread - did not think of that.

Funny u should mention I am brewing on it right now.

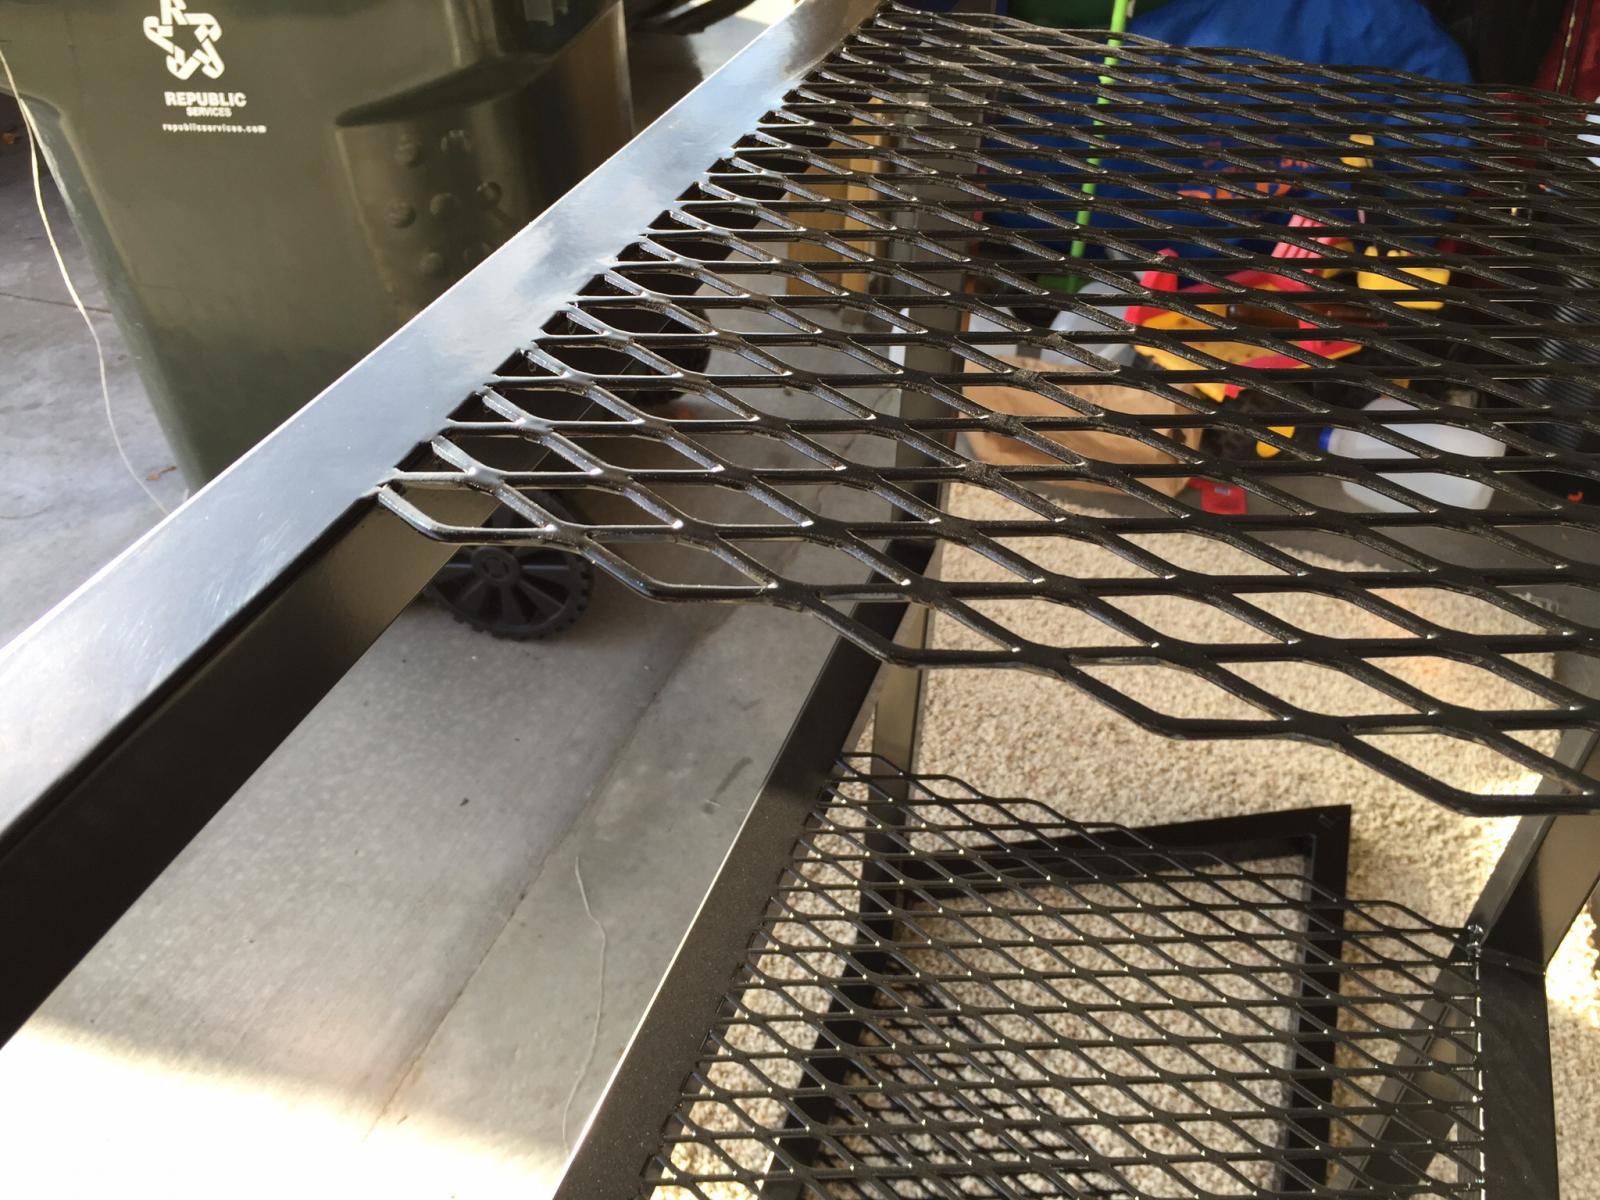
Attached a close up of the welding detail on the shelves.

image.jpg
 
I guess I can post a pic of mine finally. I started building in March, pretty much complete now and managed to brew on it for the first time yesterday. All went pretty good, but a little bit of a learning curve from my old gravity system. All-in-all, I was extremely happy with it. You can find all the particulars in my EHERMS build thread if interested (link in signature).

Very impressive - :)
 
Thanks - I did put a lot into it - yes I have brewed multiple times - have not done a build thread - did not think of that.

Funny u should mention I am brewing on it right now.

Attached a close up of the welding detail on the shelves.

It looks like some very nice work. Did you do the welding/fabrication? You should definitely do a build thread. I know I enjoy seeing what others have done and how they did it. That's what helped me formulate the design of my system and gave me a lot of great ideas.
 
Y'all check out my lil brew rig. Not a real good picture and it needs cleaned up a bit, but what do y'all think about it?

That's pretty cool, I like the single pump manifold system. Are those 3-way valves or just T's? Are your burners controlled by the panel via solenoid valves?What are you using for the liquid plumbing? Sorry, If you post it, the questions will usually follow.
 
I'm using 316 stainless compression fittings inside and out. 316 ballvalves at the top and bottem of keggles. Yes there are sellanoid valves for each 10 inch banjo burner each controlled by their own pid.
There is no 3 way valves
The manafold works with 3 inputs and 3 outputs.
 
This is my two teir single pump Herms system I designed and built with a good friends help. - decided to have it powder coated gloss black to showcase the copper clad burners. Designed to be universal, compact, and Mobil.


That's a pretty looking rig; the visual appeal is striking for a BIAC system. Nice work. Did you fab the steel?
 
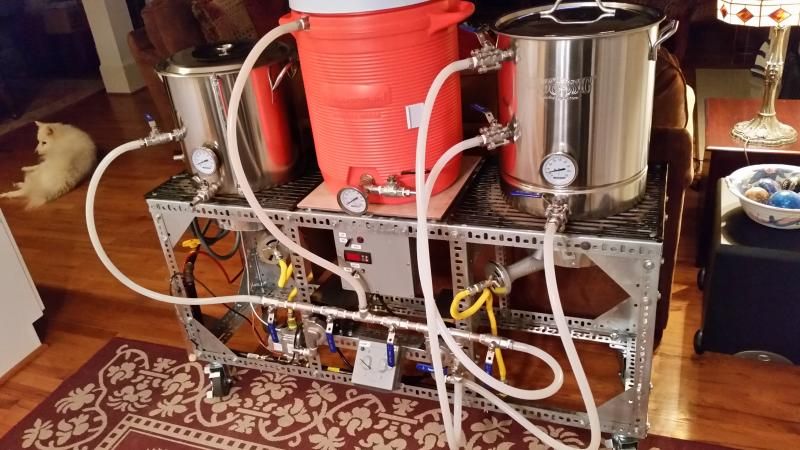
Here is my rig ... many thanks to Derrin over at Brewer's Hardware for all the help!!

I am on a natural gas hookup, with 2 burners and 2 chugger pumps. I'm about to switch over to a 2 T-valve manifold to eliminate hose switching from pump to kettles. Doing 11-gal batches and loving it! :)
--LexusChris

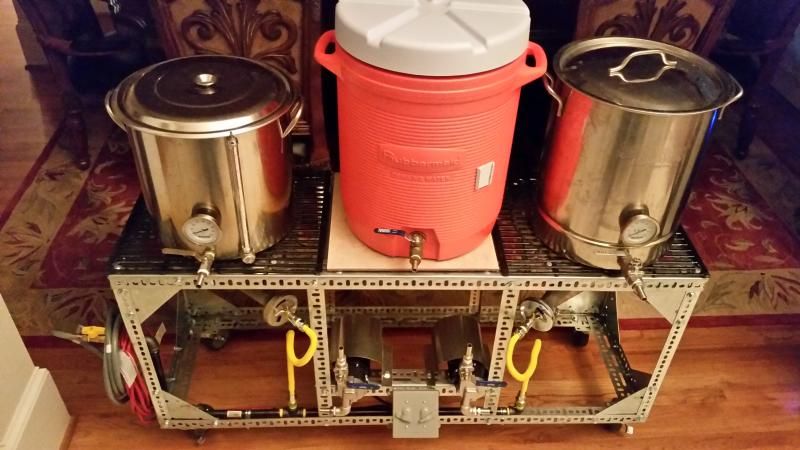
brewstand_ready.jpg
 
Here is my rig ... many thanks to Derrin over at Brewer's Hardware for all the help!!

I am on a natural gas hookup, with 2 burners and 2 chugger pumps. I'm about to switch over to a 2 T-valve manifold to eliminate hose switching from pump to kettles. Doing 11-gal batches and loving it! :)
--LexusChris

Nice looking rig! I can never get my (little) head around t-valves. Your stand as an example, where are they going and what are they eliminating? I'm almost done with my stand. Loooong project finalizing all the little details (it's automated, well - will be).

Todd
 
Hey Todd,

Yeah, the 3-way 'T-valve' gives my head a spin too... until you start to play with one .. then it makes more sense. This description at Brewershardwared.com helps clarify the options.

The photo I uploaded shows the hoses without the manifold, and in a straight through setup. Good for pushing cleaner solution from HLT (right), into the MT (middle), then into the BK (left). However, on a brew day, I will recirculate my runnings on the MT before going into the BK, so that is a hose change. Same for the whirlpool on the BK at the end of the boil,

The PDF attached is a diagram of the manifold. When assembled, it fits on the ball valve port out on the bottom of the 3 kettles. The 2 3-way valves are in between each kettle, with a port going down to the pumps. Clamp on the manifold to the kettles, then the down ports to the pump inlets. The pump outlets go into the MT & BK as normal.

With this setup, I can change the flow to handle recirc on either MT or BK, or even move wort from the BK back into the empty HLT if I am doing a split batch. My only hose change at the moment should be when I finish whirlpol and want to go into the fermenter, and that is an easy one. :)
:mug:
--LexusChris

View attachment manifold.pdf
 
I would recommend putting valves on the output of the pumps. Those silicone hoses don't hold much pressure, especially when hot. The pressure made by a chugger pump can possibly explode a silicone hose.
 
A valve won't reduce pressure, it will only throttle flow. The pump will still produce full dead head pressure through a partially opened valve if there is a downstream obstruction.
 
Back
Top