Fermentation Chamber w/ Refrigeration

Homebrew Talk - Beer, Wine, Mead, & Cider Brewing Discussion Forum

Help Support Homebrew Talk - Beer, Wine, Mead, & Cider Brewing Discussion Forum:

This site may earn a commission from merchant affiliate links, including eBay, Amazon, and others.
8/3/07 update:

...

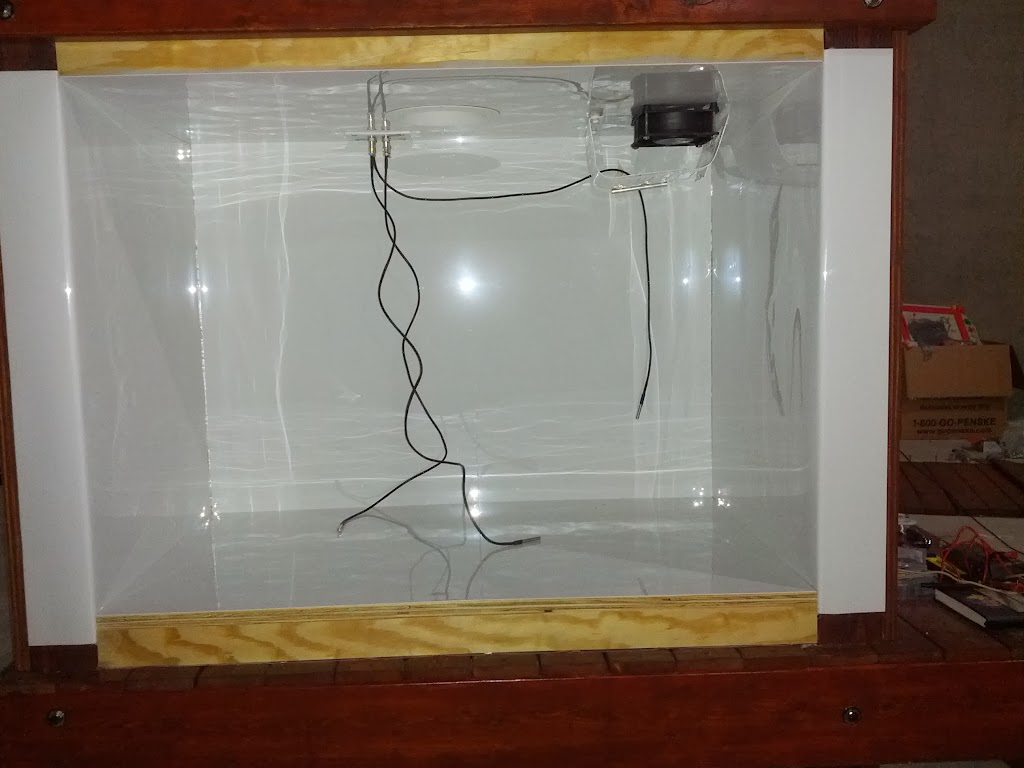
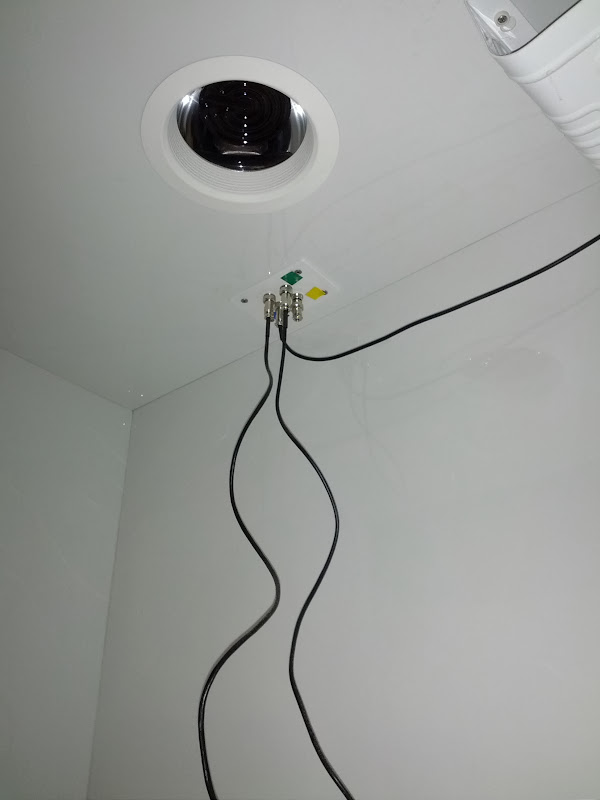
With the insulation in place, I lined the inside with a water-resistant board that Lowe's sells for laundry rooms, etc.

...

Oh, and the duct tape you see around the outside is to keep the styrofoam board from breaking apart and hold it just a bit more snugly. Not the prettiest bit of work, but I'll probably cover it eventually. I'm still working on the door design.


Very nice, I am in the process of doing my chamber.

Some of questions for you:

1. did you use 2" foam ? I bought 1" think with both side covered by aluminium foil. Reading your post I am not sure is good enough.

2. On the bottom, did you put the laundry sheet on top of the foam. How is that working when you put 2-3 full carboys on it. doesn't sink ?

3. How thick is that sheet ?

4. How did you handle the door insulation ? Don't you look cool air ?

It looks pretty good, it's an inspiration to me and others!
Q
 
8/6/07 - So I worked the night shift last night, but I am off tomorrow, so I struggled through the day and drank a couple beers while I wired up the compressor.

I used a project box to enclose everything, and fed the thermocouple up under the back pannel to the opening for the evaporator coil. It worked out a bit neater than I expected. :)

Wiring In-Progress:
10254-Wiring1.JPG


Install complete:
10254-Wiring2.JPG


Controller Up-Close:
10254-Wiring3.JPG


On to the caulking and door construction...

Did you placed the thermostat in the black box ? My thermostat had a wire that I assume was the ground, tied to the evaporator, or whatever inside white coil is named.
 
1. did you use 2" foam ? I bought 1" think with both side covered by aluminium foil. Reading your post I am not sure is good enough. Pretty sure I used 2" foam.

2. On the bottom, did you put the laundry sheet on top of the foam. How is that working when you put 2-3 full carboys on it. doesn't sink ? Yep, put the laundry sheet directly on the foam. It's worked fine, but then I'm only really holding one carboy at a time. If you want a bigger chamber, there is a lot to be said for getting a cheap chest freezer and slapping a new controller on it... just one other option.

3. How thick is that sheet ? Not sure, but it's pretty thin. Go with the slightly more expensive plastic type sheet if you can. My interior uses a coated fiberboard product. It's okay, but if it gets and stays wet, it eventually starts to soak up water and deform.

4. How did you handle the door insulation ? Don't you look cool air ? The door has a 2" piece of foam in it as well. And I used some weather stripping on both the door and chamber to create a nice seal. So really no leakage at all around the door to speak of.

5. Did you placed the thermostat in the black box ? My thermostat had a wire that I assume was the ground, tied to the evaporator, or whatever inside white coil is named. I cut out the thermostat and just wired the controller directly to the compressor. If you're adding in a digital controller, that will provide the same (albeit much improved) functionality as the old thermostat.

Hope that helps... Cheers!
 
Thanks a lot, it does help big time.

I picked up a discounted aqua glass ( white plastic of a shower).

I will get a picture of the wire that goes thru a aluminium tube connected to the evaporator. I am not sure what's that for and if I could take it out. It's a loose insulated wire (10ga) that comes out of the thermostat and goes loosely thru a 3-4 inch aluminium tube that's connected to the evaporator. I will take a pic and post it here.

Thanks a lot for reply Thomcat.
 
Here's an update on my chamber. I run mine with brewpi. The unit it's not fully done. it's working but I need to insulate the top and the door. Tomcat, what kind of seal is that one you used and where from you got it ?

IMG_20131028_072121.jpg


IMG_20131028_072036.jpg


IMG_20131029_202021.jpg


IMG_20131029_075537.jpg
 
I have a old GE frig from the 30's. I was hoping to use the box and take the guts from a mini frig and apply it just like you did. My frig is a larger old one with 9.5 cu ft inside. The sidewalls are a full 3 inches of insulation sandwiched by steel.

Do you think the mini frig cooling system would keep this sized antique frig cold enough to keep kegs in for a kegerator? Granted there are various sizes of mini frigs, I have two mini's at home now, one is almost twice as large as the "typical" mini frig.
 
I think one mini fridge should do the trick. I used two on my kegerator build and I'm pretty sure I measures the fridge out at over 20 cu. ft. I have had it holding at 34 deg without any problem in my 60 deg garage. We will see how well it works this summer!
 
This is great! I have a mini fridge I'm planning on doing the same thing!
:mug:
 
Great build. Couple of questions:

1. It looks like the frame is made out of 2x2's and 2x4's. Did you have to "compress" the 2" foam insulation since the wood was less than 2" thick?

2. Is the door made out of 2x4's as well?
 
Reviving an old thread here....but this is a nice build! Most likely going to attempt something like this myself. Does anyone know if I can use the STC-1000 to do something like this?
 
Reviving an old thread here....but this is a nice build! Most likely going to attempt something like this myself. Does anyone know if I can use the STC-1000 to do something like this?

If the fridge that is to be used has a mechanical thermostat you could connect the STC-1000 relay (no power just to complete the circuit) there to tell the system to start cooling leaving the main power to the fridge plugged in.
 
iamjonsharp, that's also a nice looking setup. This may be a silly question, but does the compressor need to stay upright or could it be mounted on it's side or upside down?
I discover the topic very late. A compressor is similar to the engine of a bike with oil in the carter, hence the need to keep it in upright position!
 
Back
Top