Gonna build a fermentation chamber

Homebrew Talk - Beer, Wine, Mead, & Cider Brewing Discussion Forum

Help Support Homebrew Talk - Beer, Wine, Mead, & Cider Brewing Discussion Forum:

This site may earn a commission from merchant affiliate links, including eBay, Amazon, and others.

ClutchDude

Well-Known Member
Joined
Jan 11, 2008
Messages
417
Reaction score
5
Location
Austin, TX
I just scored two fridges today that are in working condition for $35. One is your average mini-fridge size while the other is a bit smaller.

My question is should I use both to create a single massive cabinet that can handle a few 6.5gal carboys/5gal kegs or should one suffice?

Here's a picture:
01011201020001030420071210f94709d3bd373acf7d008593.jpg


EDIT: I should quantify a "few." At least one, no more than 2-3.
 
Small fridges frequently have tubing in the top & sides. If a carboy will fit in the larger one and kegs in the small ...
 
Finally was able to give the fridges a good look over.

All of the freon tubing is in the back, already exposed outward. There is an insulated tube that enters the back of the fridge. Better yet, the metal casing can be removed from all around. I'm hoping to pull them around and pull them apart tomorrow.
 
Got the unit apart intact. Here's some pictures.

2236571257_a3cd92cf92.jpg

One wire temp gauge
2236571209_eaeeb10f4a.jpg

The cut wires are from the temp. control unit.
2236571151_24bb6a9b65.jpg


2237362518_6225bfa017.jpg


Obviously reverse order.

I plan on attaching a set of fans to the cooler to help keep the air circulating in the fermenting area and help keep the entire thing cool.

My question is how thick should I make the foam for the new structure?

(obviously going to be bigger than the fridge I just removed the refrigerant from)
 
Anyone know the R-value of 2" extruded poly-styrene? That stuff sure is easy to work with.
 
Wow, seems like a lot of work. I took the easy way out, bought a used chest freezer and plugged it into a Ranco. Instant fermentation chamber!

Please understand, I don't mean to discourage you...quite the contrary, have at it! It's more a reflection of my own laziness I suppose. ;)
 
i was thinking of making it 30"x18"x54" on interior dimensions. that would give it a capacity for 4 cornies or 2 carboys/2cornies

OD would be 34"x22"x58"
That allows a door to be mounted.

Two hoods will also be made (no dimensions yet) to fit over the freon flow area. one fans wil be fitted to each hood, one intake and one exahust. Two might be needed if the bottom is not getting enough circulation.

Should I just get a bunch of sheet metal for the exterior/interior of the fridge to sandwich the foam board?

Also, I plan on keeping the fridge at 50F at the lowest. Does this sound realistic for the setup? If needed, I can cannibalize the other fridges refrigerant system (similar to the one above but smaller).
 
Your ability to hold lower and lower temps is directly related to your insulation and the sealing of the doors. Also the cost to run the thing is directly related to the insulation. If you have all the necessary tools to work with sheet metal, than why not. Otherwise 1/4 inch plywood works well. Spend a little more on high r value insulation today, and less on electricity for the life of the unit. In the end, you'll end up ahead. Especially if fuel/electricity prices keep going up.
 
Keep in mind this is all took place in my cramped garage, hence the clutter.
2290755302_6658a58e56.jpg

2289962703_57fc467ca1.jpg

2289963203_cf1627705c.jpg

2289962485_7de14f0cb6.jpg


Here's a couple of updated photos of the project. I used 2" foam board.

All that's left:
  1. Install shelf/plywood for shelf
  2. Mount door.
  3. Mount fans and inline transformer for it.
  4. Install Controller
  5. Get wiring for all of that and testing it.
  6. Caulking it up.
  7. Install Casters.
 
2308673453_6367802a4c.jpg


2308673863_5cace7fa88.jpg


2309480076_9ddf642c45.jpg


2308676425_511c0645e7.jpg


I've used some electrical tape to keep the probe attached to the carboy. I'll probably put some more holes in the plywood shelf to help circulation in the bottom parts.

In thirty minutes, it's dropped the interior temperature from 74 to 67 with one carboy, so I think I'll be good as far insulation and cooling goes. The real test will be when it has 3 carboys or some corny kegs aging in it.

Regardless, Hats off to this forum for giving me some inspiration to actually do this project. Thanks again guys!
 
Are you going to put a full carboy on that 3/8 inch plywood? I would maybe rethink that shelf, and put a stool type shelf with legs, as the current setup is a little less than what I would call "rigid".
 
There is actually a 2x4 brace underneath the plywood, providing support the entire width. No way that plywood alone could hold it. I tested it with two full cornies to make sure it isn't going to wuss out on me.

Just the thought of a 6 gallon glass carboy full of wort.....cracking through and falling below.....gah.
 
ClutchDude said:
There is actually a 2x4 brace underneath the plywood, providing support the entire width. No way that plywood alone could hold it. I tested it with two full cornies to make sure it isn't going to wuss out on me.

Just the thought of a 6 gallon glass carboy full of wort.....cracking through and falling below.....gah.


How is the air flow around the shelf to the bottom of the chamber? Just curious how air might circulate in there to avoid warm spots.
 
The plywood is 1/4" thin, so it can leak through.

There are also 4 1/2" holes in the shelf to allow air to fall through. The probe fits through one hole. I'll probably put another 4 or so to help. The three fans help circulate air inside.

There is a brew day this sunday, so I'll be able to see how efficient the entire system is.
 
How is it doing as of now?

Also, sorry if I missed it, but do you have an approximate cost and time spent? I may be doing something similar real soon.
 
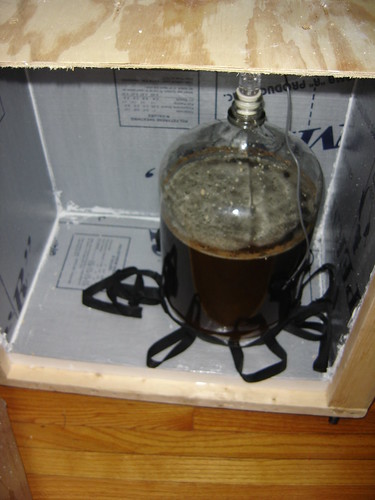
It is doing very well actually. It only has one carboy currently. Since Jackson is in the middle of a cold snap, it's insulating rather than cooling.

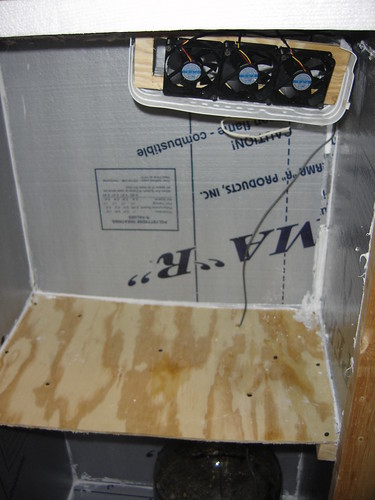
If I lived up north, I would have gotten a two stage controller and possible heating element, which would have worked great with the fans.

The cabinet itself is warm, but both the probe and the fermometer show the carboy at a nice 64F degrees.

The real test will come in the spring with a fuller load.

Total Cost was $236, though a half of that is the ranco and foam board. I'm working of what I remember on the project, so I may be a bit off without receipts in front of me.

Materials
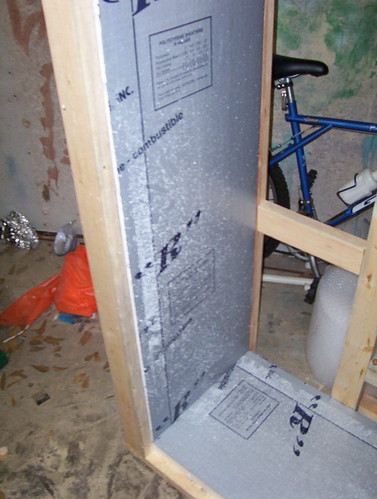
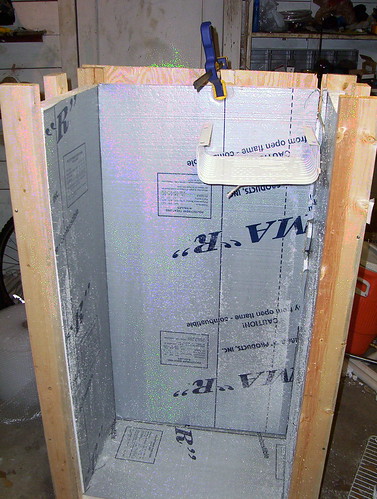
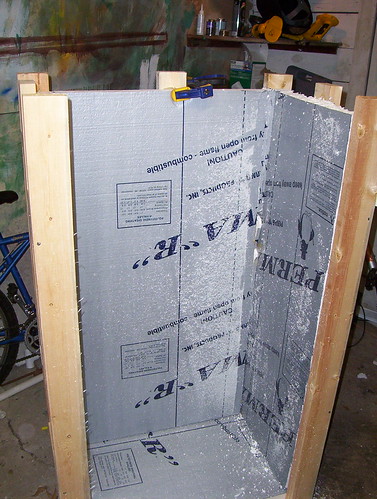
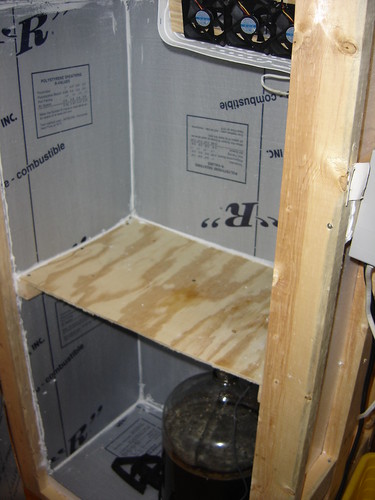
(2x)4x8 2" Foam board R7.8 $60ish
(6-7?) 12'x2"x4" boards $18ish?
(2x) Caulk $12
(1x) Liquid Nails $5
(1.3x) Box of 4" screws $10
(1x) Box of 2" drywall screws $5ish
(1x) 1/4" C/D plywood $14
(5x) 1/4"x2.5" bolts, nuts, Washers (I used stainless, though I had them laying around) no more than $4-5
(2x) 3" hinges $8
(1x) Package of 4 1.5" corner braces
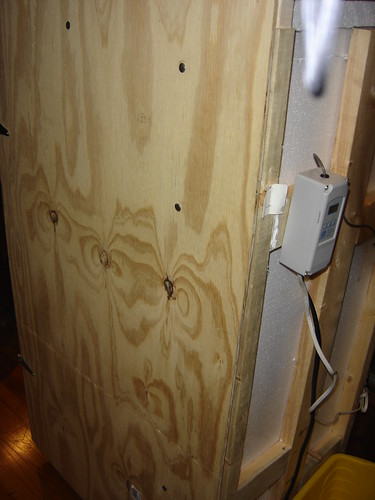
(1x) Ranco Controller $57 Ebay ($90 if you need a two-stage)
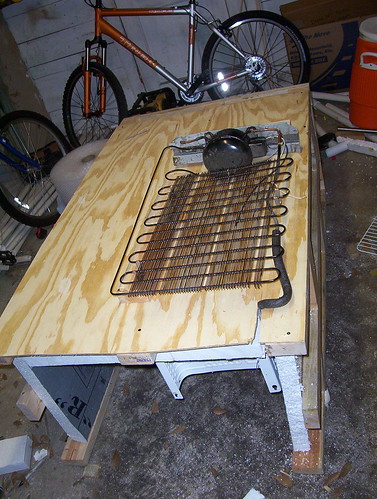
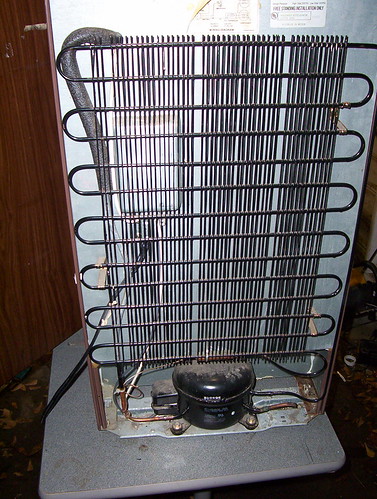
(1x) Refrigerant Unit Umm....I guess $17

Things I used that probably aren't needed are:
Wheel-Casters @ $3.99 a piece
Three fans 12v fans @ 4.99 a piece(newegg would have been cheaper)
Transformer for said fans @ $4.59 (radio shack)

I had all the wiring and other electrical around.

It took about 2 weekends to finish, though I could have done it MUCH faster with a bigger work space and/or a table saw.

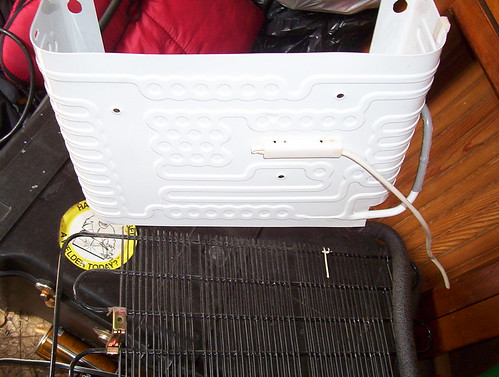
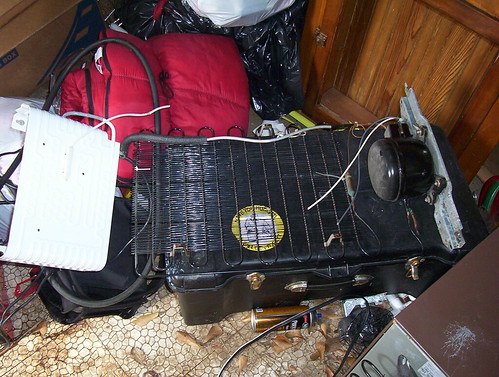
As for getting the heart of the project, the refrigerant unit, I just lucked out on Craigslist. Getting it apart was quite easy, though EXTREME CAUTION was needed when removing the top to get the unit out and making sure the refrigerant line didn't get kinked when moving.

I can write up a how-to from memory and taking some measurements, though it is pretty self-explanatory.
 
Just an update on this project:

It is currently doing great with keeping two carboys and corny keg no more than 67 F. I think it will have no problems keeping the cabinet cool as the summer heat beats down on us.

I'm going to be adding another fan to the shelf, pulling air from above to below.
 
Just an update on this project:

It is currently doing great with keeping two carboys and corny keg no more than 67 F. I think it will have no problems keeping the cabinet cool as the summer heat beats down on us.

I'm going to be adding another fan to the shelf, pulling air from above to below.

was wondering if this is still working out for you in the summer temps. im in oklahoma and thinking of buying a fridge from craigslist or building something like this.
 
one of my stand up freezers is dead, and I'm considerring something like this but would love to hear how it's working out? Is it out in an uninsulated garage?
 
It is currently working great. The temps in the fermentation cabinet stay around 67 the entire day.

It is currently in a non-insulated sun room. A few things I would have done differently are using the kitchen board, not plywood for the shelf. Much easier to clean. I also would have made it slightly bigger and put a yeastie culturing shelf in. May do that next to the chiller shelf. Also, a drip tray is needed for the chiller shelf. Other than that, it's working great!

Now, for my next idea, I'm thinking of taking the spare fridge I got and using that to prechill the IC water.......
 
glad to hear! My garage gets up to 105 on our hottest days. I'd love to build a big cabinet I could fit four carboys in, maybe also my stir plate. It would hold more than just replacing the stand-up freezer, which could hold 3 carboys if I smooshed them in carefully (2 on upper shelf, one on lower).

I guess if it had trouble with just the single minifridge compressor, if I housed that stuff on top of the unit on one side, I could add another identical setup and with a dual stage ranco put them on a single power source. With 3 universities nearby, we can get dorm fridges for cheap!
 
im waiting to hear back from someone on CL about one now. wooohooo thx.

http://tulsa.craigslist.org/hsh/728005583.html just got a call from her and im going to pick it up on thursday. wont have it ready for cooling until probably sunday but by that time all should be good to go. now to goto home depot tonight and spec out a cabnet
 
just remember to go ahead and spend some extra cash on insulation. It'll always pay off in electric savings in the long run. And it will reduce icing problems as well.
 
Back
Top