You are using an out of date browser. It may not display this or other websites correctly.
You should upgrade or use an alternative browser.
You should upgrade or use an alternative browser.
How To Make A Beer Crate For 12oz Beer Bottles
- Thread starter UncleDavid
- Start date

Help Support Homebrew Talk - Beer, Wine, Mead, & Cider Brewing Discussion Forum:
This site may earn a commission from merchant affiliate
links, including eBay, Amazon, and others.
joshstokes122
Well-Known Member
- Joined
- Apr 3, 2011
- Messages
- 75
- Reaction score
- 7
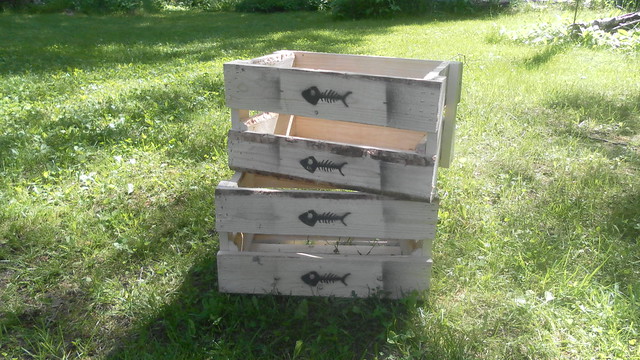
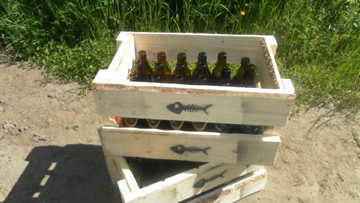
Made 4 this weekend. I did the mod to replace one 1x2 with a 1x3 so I can get 2 crates out of 5 boards.
Also, instead of dropping the 1x2 down 3/4", I dropped the 1x3 side rails (the 18.5" pieces) down to make them stackable.


Also, instead of dropping the 1x2 down 3/4", I dropped the 1x3 side rails (the 18.5" pieces) down to make them stackable.


stamandster
Well-Known Member
Made 4 this weekend. I did the mod to replace one 1x2 with a 1x3 so I can get 2 crates out of 5 boards.
Also, instead of dropping the 1x2 down 3/4", I dropped the 1x3 side rails (the 18.5" pieces) down to make them stackable.
I like the stackablility (is that even a word?)!
rwagner23
Well-Known Member
Tagging this.
This will actually let you make 2 full crates with 5 total piece since the 1x2 strip can be used across 2 differen crates by only using it for the vertical pieces.
Summary of the breakdown for one crate:
1x3: 18.5 | 18.5 | 18.5 | 18.5 | 10.5 | 10.5
1x3: 10.5 | 10.5 | 17 | 17 | 17 | 17
1x2: 10 | 10 | 10 | 10
I made four crates using this plan, but modified the 10 in 1x2's to 10.5 in to accommodate a few really tall bottles in my collection. I then bumped them down 0.5 in to make the crates stackable. I printed on them using an inkjet printer to wax paper method describe on this blog. It actually worked really well! Not counting price of ink, I have a cool $3.50 invested in each crate (and 96 fewer bottles lying around loose).

Another option for wood is pallets. You can usually find them for free on craigslist or local stores.
I would not recommend using pallets. They often contain trace metals among other nasty things and places that recycle them end up as superfund sites like this place.
http://www.epa.gov/R5Super/redevelop/pdfs/CrossBrothersPailRecycling.pdf
Also, food is often carried on them and e-coli finds a nice home in the wood. :cross:
nds34d
New Member
I would not recommend using pallets. They often contain trace metals among other nasty things and places that recycle them end up as superfund sites like this place.
http://www.epa.gov/R5Super/redevelop/pdfs/CrossBrothersPailRecycling.pdf
Also, food is often carried on them and e-coli finds a nice home in the wood. :cross:
What does a site that was contaminated by a company that recycled steel drums have to do with using pallets to make a beer crate? It can't be any worse than using fence pickets that are pressure treated as has been suggested by the source of the OPs design. I don't know about you, but I tend not to lick my beer crates.
Colleenali
Member
I made my own spin on this based on sierra nevada dimensions. I threw it all together in sketch-up so maybe I will throw a post up later with all the dimensions if anyone is interested. It fits like it was meant to be they bottles slide right in with less than a 1/16 of an inch play.
crappy cellphone pics...
I designed it so I can use this one as the bottom crate and build the next ones with 1x4 on the side-base to stack directly onto the top of this one and on up... I will make a post later with all dimensions as I know sierra nevada bottles are popular around here..
Neil
Hey Neil,
Would you mind sharing the poster? Id be really interested in using your mockup because most of our bottles are Sierra Nevada or similar bottles.
Thanks!!!
Has anyone made these for the 16oz/500ml Grolsch bottles? I'm going to see if I can't make some in the copious (not) spare time I have.
I also need to do this, but it sounds like we have comparable amounts of spare time.
Hey Neil,
Would you mind sharing the poster? Id be really interested in using your mockup because most of our bottles are Sierra Nevada or similar bottles.
Thanks!!!
Sure thing!!
https://www.homebrewtalk.com/f51/diy-beer-crate-24-sierra-nevada-bottles-sketchup-plans-325148/
Neil
aubiecat
Well-Known Member
Neilyboy, did you use Sketchup pro or the regular Sketchup to draw that up?
The numbers I got off my cardboard boxes which hold 12 500ml bottles each:
First number is from a box with no dividers, and the second is from a box with cardboard dividers.
L - 12" 12 1/2"
W - 9" 9 1/2"
The bottles are 9" tall from what I measured.
Can someone else come up with the cuts for those numbers? I'd prefer to keep the 500ml bottles in 12 pack to make them easier to carry.
Ralphadopolis
Well-Known Member
The in-laws had a pallet of tile just delivered to their house and they also took out some old cabinets in the garage so I swooped on all the wood.

And this is the first of many


And this is the first of many

What does a site that was contaminated by a company that recycled steel drums have to do with using pallets to make a beer crate? It can't be any worse than using fence pickets that are pressure treated as has been suggested by the source of the OPs design. I don't know about you, but I tend not to lick my beer crates.
Maybe I listed the wrong article but this will clear it up for you. Read it all the way to the bottom. I would not use them for something surrounding my beer. But it's a personal choice.
http://www.cheaplikemeblog.com/environment/dont-reuse-wood-pallets/
I followed the original design and think they came out really nice. I have absolutely no woodworking skills and had no trouble making these. They fit a case of bottles with the 6 pack holders without any problems. I decided to do the torching method on one of them and I think it added some nice effect to the crate. I love how cheap they are to make and the rustic look of them. I plan on making many more of these. Thanks for posting these plans.

Thanks for the great plans. Super cheap, super easy. They fit 4 6-pack holders nicely, but I liked the idea of using old election signs for dividers instead. Now I can drop freshly bottles beers into the crate without worrying that the box will get wet and all that work go crashing to the floor.
I used the original design with 2 modifications. Plastic signs for dividers, and I dropped the vertical end pieces by 1 additional width, so there are now 4 legs that interlock when stacking. I had to sand them down a bit with an orbital sander to get them to actually fit into each other, but now they work great, and look great.
Any new advise on getting my logo on to these?
Built and stained 5 crates this week. Going to use similar plans to make a few to hold 22oz bottles.

BayerischBier
Well-Known Member
OK granted the stained wood looks great!
why not using milk/dairy grates? They fit 25 sixpack bottles just perfectly.
and then add stained wood with your "branded" brandname on the outside.
why not using milk/dairy grates? They fit 25 sixpack bottles just perfectly.
and then add stained wood with your "branded" brandname on the outside.
BayerischBier said:OK granted the stained wood looks great!
why not using milk/dairy grates? They fit 25 sixpack bottles just perfectly.
and then add stained wood with your "branded" brandname on the outside.
Do you know where to get crates for under 5$ each? I could use some
BayerischBier
Well-Known Member
Do you know where to get crates for under 5$ each? I could use some
Thrift-Store!!
I found all of mine at local thrift stores. Paid between 0.50 and 1 dollar for each. Do not expect to walk in and get five of them but one or two are a good find.
dr_finklestein
Well-Known Member
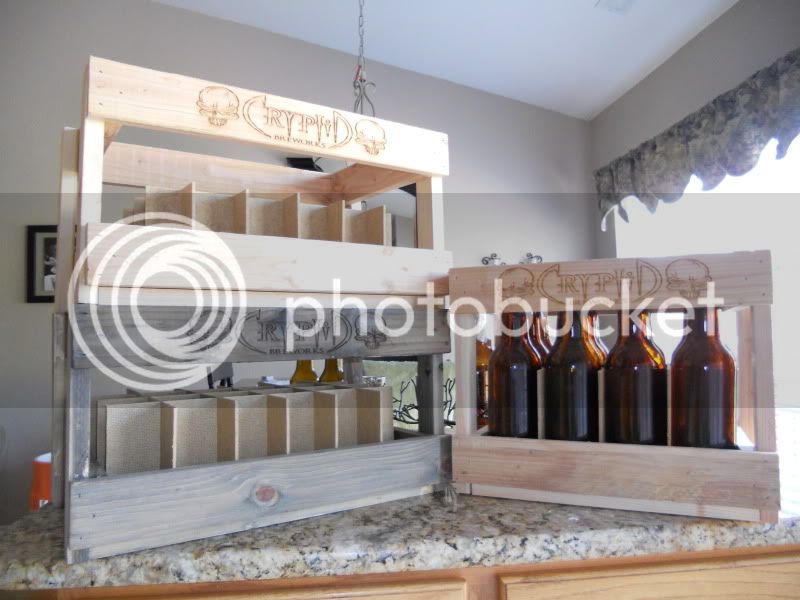
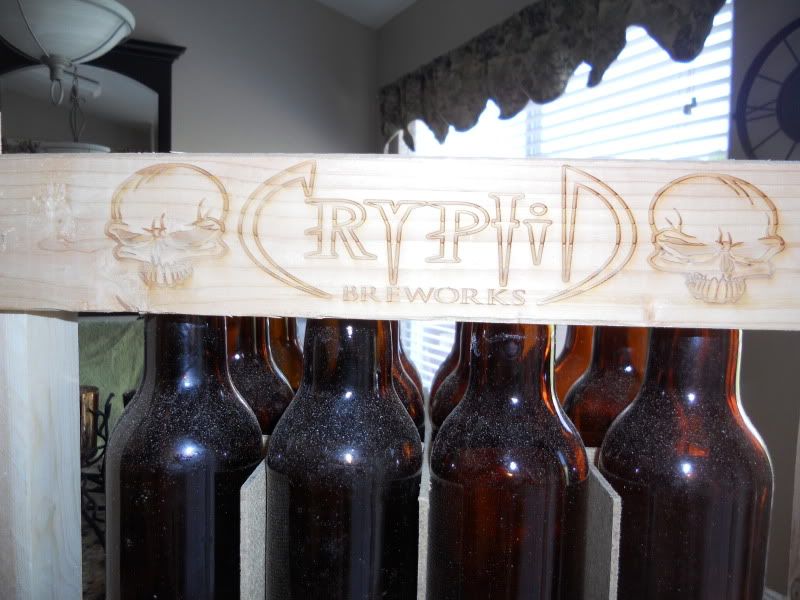
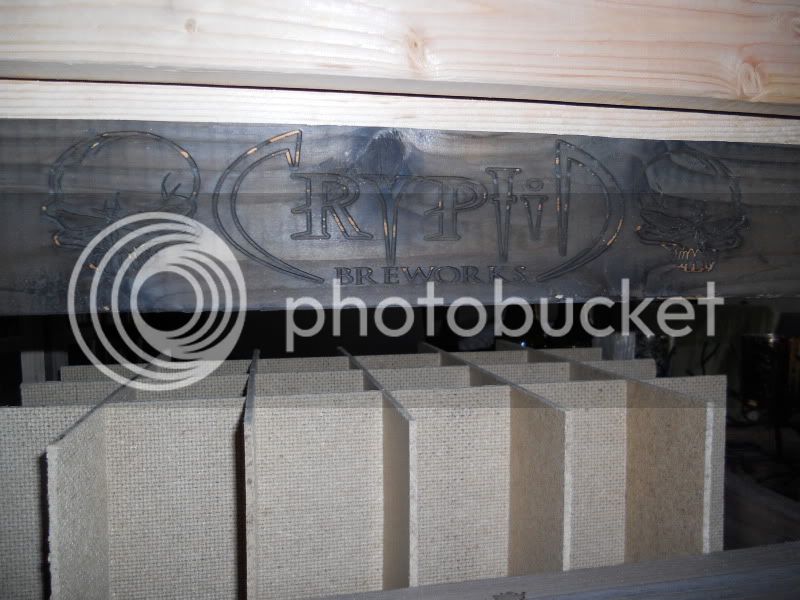
Finished mine yesterday. I also made two 12 pack bombers. I had my logo laser engraved!
BayerischBier
Well-Known Member
Pretty cool!
Again, I keep the dairy/milk crates for 25x 12oz BUT this looks cool for larger beer bottles!
Again, I keep the dairy/milk crates for 25x 12oz BUT this looks cool for larger beer bottles!
Finished mine yesterday. I also made two 12 pack bombers. I had my logo laser engraved!
The numbers I got off my cardboard boxes which hold 12 500ml bottles each:
First number is from a box with no dividers, and the second is from a box with cardboard dividers.
L - 12 - 12 1/2"
W - 9 - 9 1/2"
The bottles are 9" tall from what I measured.
Can someone else come up with the cuts for those numbers? I'd prefer to keep the 500ml bottles in 12 pack to make them easier to carry.
These are the numbers I come up with to make a carrier for 12 16oz bottles:
Bottom Slats = 14"
Vertical Ends = 10 1/4"
Shorts Sides = 9 1/2"
Long Sides = 15 1/2"
That is with the bottle dividers. and 1/2" head room for the bottles on top.
I calculated the inside of the original 24ct 12oz box as L - 15 1/2", W - 10 1/2", H - 9 1/4"
Thoughts?
dr_finklestein
Well-Known Member
My first attempt was:
Bottom Slats = 13 1/2"
Vertical Ends = 11 1/4"
Shorts Sides = 9 1/4"
Long Sides = 15 1/4"
It was a little long and too short so I adjusted the second one to this and it is great.
Bottom Slats = 13 5/8"
Vertical Ends = 12"
Shorts Sides = 9 1/4"
Long Sides = 15"
For the dividers I made them 6" wide and then measured the inside diameter of the crate and made the cuts with 3" squares.
dr_finklestein
Well-Known Member
I just realized that I was telling you my measurements for my 22oz bombers. Sorry guys!
lactardjosh
Well-Known Member
- Joined
- Aug 22, 2012
- Messages
- 80
- Reaction score
- 5
jybingbrew said:I made one slight modification that allows you to cut the # of pieces of lumber (assuming 8') from 4 pieces (2 of each) to 3 pieces by replacing the 5 17" slats made with the 1x2 with 4 17" pieces made with the 1x3.
This will actually let you make 2 full crates with 5 total piece since the 1x2 strip can be used across 2 differen crates by only using it for the vertical pieces.
Summary of the breakdown for one crate:
1x3: 18.5 | 18.5 | 18.5 | 18.5 | 10.5 | 10.5
1x3: 10.5 | 10.5 | 17 | 17 | 17 | 17
1x2: 10 | 10 | 10 | 10
Thanks for sharing this idea, and thanks to the original fence picket too! Awesome being able to make 2 crates for less than $5 (I didn't do the dividers).
I used these adjusted measurements and made four crates. I really like the design of these, however if I were to start over our major additional crates, I'll use better lumber instead of furring strips. They're just too warped and twisted.
I'm very happy with the design and I'll likely add rope handles to finish the look.
Thanks for sharing the original plans UncleDavid!
I made four of these last weekend out of some old scrap 1x3s and 1x4s my dad had in the barn. I'm very pleased with the way they turned out, I'm sick of cardboard boxes. I haven't stained or decorated them in any way yet, not sure I will.


I am not sure if this happens often but I had my crates, with beer, in the root cellar for a couple of weeks. When I took one out I noticed it had a nice bit of mold on it, the crate. I am wondering if it is because I used untreated pine or because I didn't paint or stain them?
I am not sure if this happens often but I had my crates, with beer, in the root cellar for a couple of weeks. When I took one out I noticed it had a nice bit of mold on it, the crate. I am wondering if it is because I used untreated pine or because I didn't paint or stain them?
If it was just in a couple of spots, you may have dripped some beer on them. Nothing to worry about.
If it's large patches I'd be concerned your basement is too damp. Might want to look into getting a dehumidifier in that case.
Homercidal said:If it was just in a couple of spots, you may have dripped some beer on them. Nothing to worry about.
If it's large patches I'd be concerned your basement is too damp. Might want to look into getting a dehumidifier in that case.
Well it is an old school root cellar, by that I mean it's dug in the side of a hill lined with bricks. No power in there. I will just have to use my plastic crates if I want to store in there.
Well it is an old school root cellar, by that I mean it's dug in the side of a hill lined with bricks. No power in there. I will just have to use my plastic crates if I want to store in there.
Yeah. That sounds about right. My basement is so wet in the summer I shut off the sump pump for a few hours and create an indoor swimming pool!

Iceman6409
Well-Known Member
For those of us that are not knowledgeable in the fine art of pneumatic nail guns what other way is there to "nail" or screw this together?
wegz15
Well-Known Member
Using a hammer and nails or screws and a screwdriver
AeroEngUA07
Member
Iceman6409 said:For those of us that are not knowledgeable in the fine art of pneumatic nail guns what other way is there to "nail" or screw this together?
I had good success using 3d coated sinkers and a 16 oz. hammer
Iceman6409
Well-Known Member
What size nails or screws?
What size nails or screws?
I just used 1-1/4" Drywall screws since I had a big box of them already.
http://www.homedepot.com/h_d1/N-5yc1v/R-203111631/h_d2/ProductDisplay?catalogId=10053&langId=-1&keyword=drywall+screw+1-1%2F4&storeId=10051#.UE-5NN1lT4Y
Similar threads
- Replies
- 0
- Views
- 12K
