New to brewing, whats the best cheap way to cool wort after ur boil?

Homebrew Talk - Beer, Wine, Mead, & Cider Brewing Discussion Forum

Help Support Homebrew Talk - Beer, Wine, Mead, & Cider Brewing Discussion Forum:

This site may earn a commission from merchant affiliate links, including eBay, Amazon, and others.

mattsmitty

Well-Known Member
Joined
Jul 2, 2013
Messages
54
Reaction score
2
Hey guys, im new to the brew world. Im gonna be doing my first extract brew this weekend. Right now all i have is my boil kettle, burner, fermantor, air lock and all my ingredients. I feel like i have everything i need except a chiller. Are there any fairly cheap ways to make a chiller? Ive heard of doing an ice bath but is that quick enough?? i went to lowes yesterday and 50ft of flexible copper is 60 bucks so thats a lil out of budget right now. Anyways to make something for around 30 bucks or so??
 
I used the 25ft length of copper cool from lowes, some hose clamps, vinyl hose and a female hose end and you are all set. Probably be into if for $40 by the time you are done but it all depends on what you have laying around the house for the supplies. This wort chiller does my eleven gallon batches just fine, works great for anything smaller too of course.
 
ok, thanks. i think they had some 3/8 copper 25ft for around 30 bucks, wasn't sure if that would be enough. but sounds like it should work just fine. Ill give it a shot.
 
I did the exact thing that Drawdy did. When I got into brewing, finding a commercially made chiller was darned near impossible. So, I made my own. I used a washing machine hose for the female end (attached to hose spigot or sink faucet) and for the water out, I just used a few feet of vinyl tubing. Be sure to hose clamp all hoses that will attach to the copper. Also, take your time working the copper. Too much bend may weaken the copper. Cheers!
 
When you're getting started, if you've got a sink that's big enough to do the job, an ice bath is perfectly acceptable. You just have to be willing to stir your cooling wort and careful not to let any outside fluids drip or splash into your wort.

I used to cool my full 7 gallon kettle this way, in the utility sink in my basement. I'd put the pot in the sink, then fill the sink with cold water up to the level of the wort. Stir for a while, until the wort hits around 150F. Drain the now warm water, refill with cold water and repeat, this time until the wort hits around 100F. Then you add ice and cold water and chill down to pitching temps. This usually got me to pitching temps in 20-30 minutes. Sure, it was a little work, but it saved me the cost of a half-way chiller until I could afford to go with a full-blown chiller the way I wanted to.
 
ok guys, just got home from lowes! now my question is what to use as a guide as i wrap my piping. Is a paint can good or should it be something wider?
 
ok guys, just got home from lowes! now my question is what to use as a guide as i wrap my piping. Is a paint can good or should it be something wider?

Something anything...a couple few inches smaller than your kettle. Paint can will likely work well, perhaps something a little larger??? Think ahead and bend it once, the copper work hardens and doesn't like repeated abuse...just alter the coil you already have, DO NOT try and straighen it out prior to trying to coil it...just tighten or adjust the coil you have gently.
 
When I made my immersion chiller, I just rolled the coil tighter by hand. Follow the size of the first loop you make, and it'll look just fine.
 
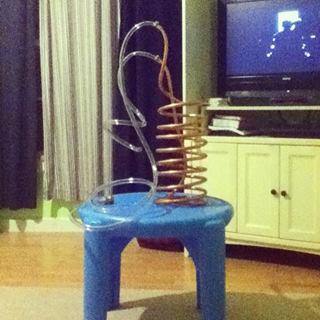
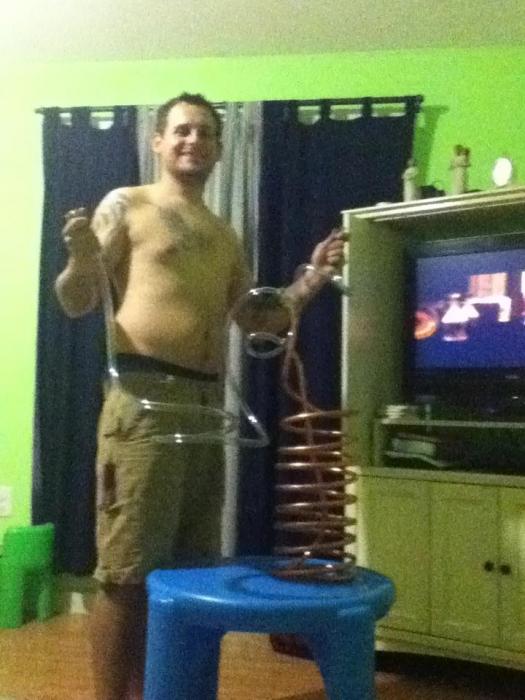
Well finished up my wort chiller! ran some water through it and it worked great!!! now im ready to do my first brew with it!

wort chiller.jpg


wort chiller 2.jpg
 
Nice job!!! I still stir my wort while the chiller is running. Stir in the opposite direction of water flow and it will cool much quicker.

I used to turn the water on and walk away but was just wasting time and water. Agitating and stirring the wort while the chiller is running will cool it down much quicker.
 
Add when you get some time and spare change, make a pre chiller that works in line with the wort chiller.

Same build as he wort chiller, but the pre chiller goes in a ice slurry (or at least that is what I have used for my first two batches)

I cooled my first batch from boil to 70 deg in 32 min, and that was with 1/2 my chiller tubing up and out of the wort, no stirring of wort, pre chiller in a old Aluminum pot of ice and water.

Second batch after re bending the worth chiller so the entire coil better fit the 7 gal pot I'm using, putting the pre chiller in a cooler fully of ice slurry and stirring the wort, boil to 68 deg in under 20 min.
Pre chiller melts though less then a 16# bag of ice in the new cooler, vs 1.5 bags in the old pot.

Next version,
Then later add a pump and run the first two min or so of "return" water to a drain , then after wort temps have dropped a bit, run the return water to the ice water. Saves water, if that is an issue for you.
 
I never had good luck with my immersion chiller. I was always afraid I was going to introduce something bad if I was stirring it too much, so it took me forever to cool my wort down. I just built a counter flow chiller with a rubber garden hose and a 3/8 copper coil. It will cool from boiling down to 75 with 65 degree water with all valves wide open.
 
Back
Top