Show us your panel

Homebrew Talk - Beer, Wine, Mead, & Cider Brewing Discussion Forum

Help Support Homebrew Talk - Beer, Wine, Mead, & Cider Brewing Discussion Forum:

This site may earn a commission from merchant affiliate links, including eBay, Amazon, and others.
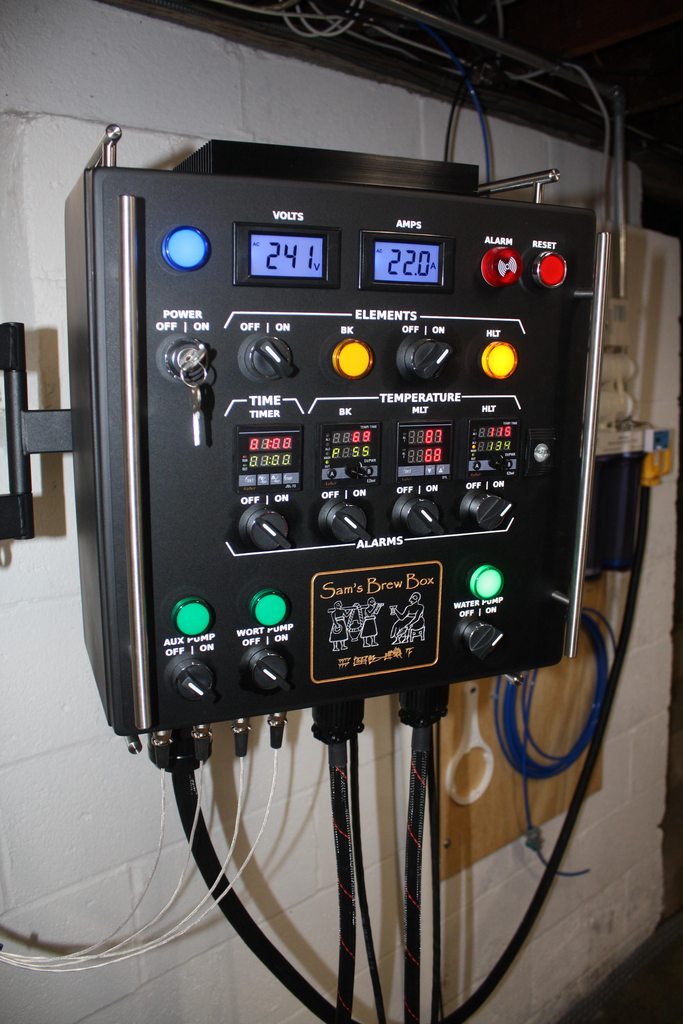
Here is my newly wired panel. It took a very long time to get here with kids, moving, new house, new job. It is a 50amp Kal kit with a minor change.

Started out with a combine. This model was used for many years on the family farm. Every summer I would help my Dad get it ready for harvest. Lots of good memories associated with the IH 1482.
View attachment ImageUploadedByHome Brew1477159442.771127.jpg

Then I got a metal worker friend to turn it into a box. And started cutting holes.
View attachment ImageUploadedByHome Brew1477159487.077557.jpgView attachment ImageUploadedByHome Brew1477159499.425736.jpgView attachment ImageUploadedByHome Brew1477159511.063729.jpg

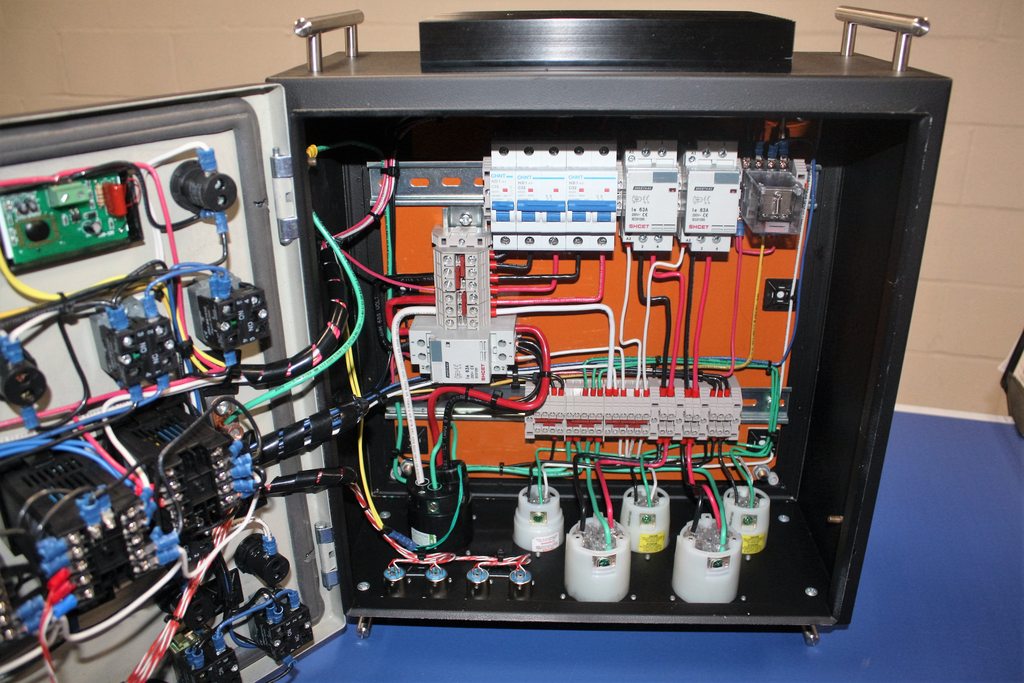
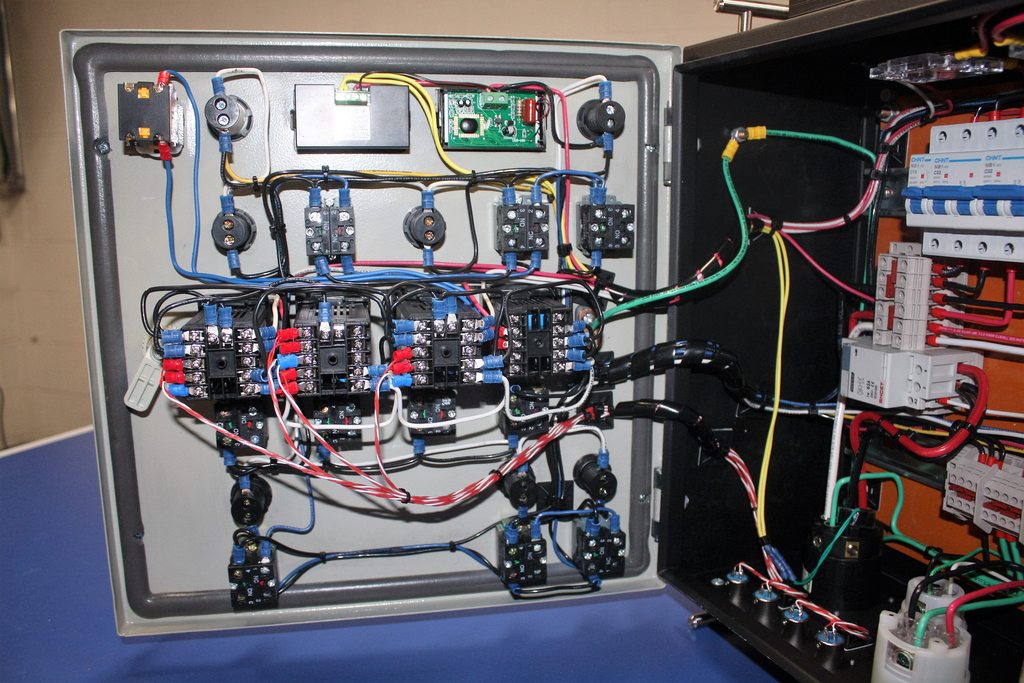
I ended up with kind of a reverse of most panels, with the door on the back. This does make it a bit of a pain to wire, and you need more heavy gauge wire. Need to clean it up yet, but here are the guts. View attachment ImageUploadedByHome Brew1477159383.368051.jpg

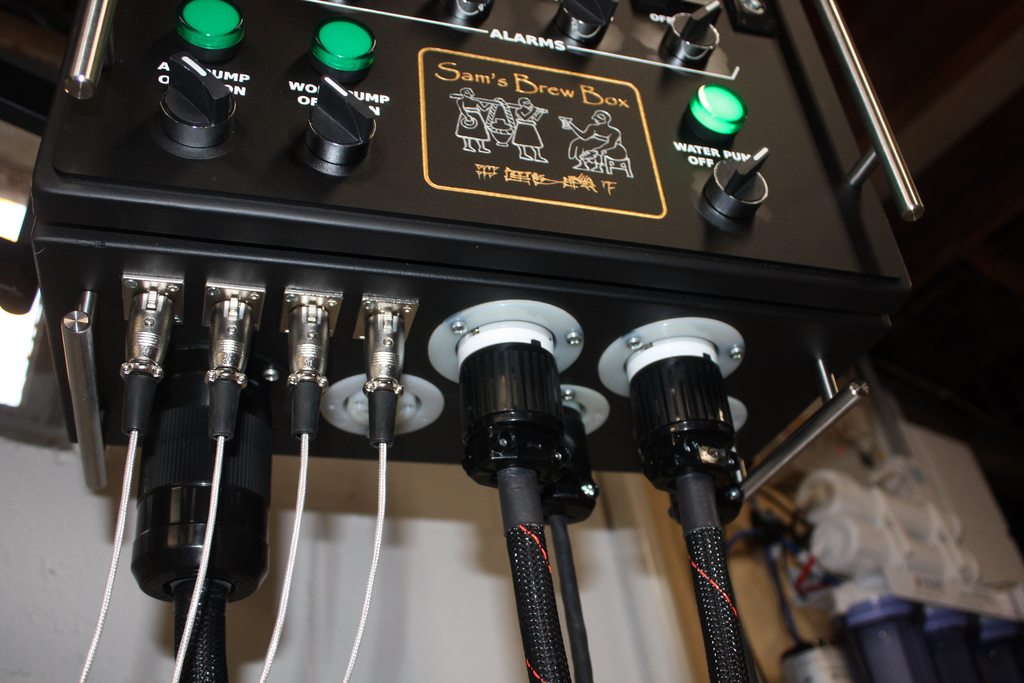
And the final product. View attachment ImageUploadedByHome Brew1477159415.552133.jpg
 
View attachment 374712 MyPin TD4 controlling a 2.4kW element and pump. Although the TD4 has a manual mode, I wired up a boil bypass switch - it's easier to flick a switch than dive through the PID menu
so with the switch its just 100% on? Why not just set the pid to something like 220 degrees from the beginning? it would accomplish the same thing without ever needing manual pwm mode. just curious.. I guess with the switch you could just leave the pid set at your mash temps and never have to adjust it?
 
Exactly that, augiedoggy - the switch allows me to go from mash mode to 100% boil without having to change anything on the PID. With my 2.4kW element at 100%, I get a gentle rolling boil with no need to throttle back, so no need to use manual mode on the PID.
 
Just finished my 50A box and everything tested out great. Only "mistake" I made was following the manual for the Mypin and setting the + and - on the SSR output the way it was shown. Elements wouldn't fire. Tested with multi-meter and notice polarity was switched so reversed the connections and all works. (picture taken before changing from K to PT100 so read-out is 500+)
It has an interlock circuit on the 2 element contractors and it has an EPO on the side.
It has a dual alarm function. 3 way switch can select the alarm for the HLT or Boil or off. Separate speaker on top for louder alarm (installed before I got the flashing buzzer).
The top 2 readouts are my PWM's for my 24v pumps. They work great for me. (24v 8.5A supply inside)
Both SSR's are rated at 80A on a reclaimed heatsink.
Now that everything is working I just have to mount the box and auto tune my TD4 PID's.

Front.jpg


Inside.jpg


cover.jpg
 
Just finished my 50A box and everything tested out great. Only "mistake" I made was following the manual for the Mypin and setting the + and - on the SSR output the way it was shown. Elements wouldn't fire. Tested with multi-meter and notice polarity was switched so reversed the connections and all works. (picture taken before changing from K to PT100 so read-out is 500+)
It has an interlock circuit on the 2 element contractors and it has an EPO on the side.
It has a dual alarm function. 3 way switch can select the alarm for the HLT or Boil or off. Separate speaker on top for louder alarm (installed before I got the flashing buzzer).
The top 2 readouts are my PWM's for my 24v pumps. They work great for me. (24v 8.5A supply inside)
Both SSR's are rated at 80A on a reclaimed heatsink.
Now that everything is working I just have to mount the box and auto tune my TD4 PID's.

Love the clean installation.
I really wish I would have taken the time to better organize my wiring like yours... mine looks like a birdnest unfortunately so when making changes or adding things its a bit stressful. its funny because I had a different wiring inconsistency between the label and the directions for my mypin pids if I rememeber right..

I thought it was a little messy myself, lol. Only thing I don't like is I ran out of a certain color wire at one point and used a different color in a different part of the panel for the same thing. I tried to keep them all the same for the different circuits. But I can still figure it out tracing it. I had a lot of stuff or got it donated but here are my $308 costs:
Control Panel
2 - PT-100 Thermocouples $18.68
2 - 25A Element Breakers $37.95
3D Printed Breaker Clips $8.50
1 - 63A Mains Power Contactor $26.00
2 - 3 Pin Male XLS Connector $4.68
2 - Panel Mount XLS PT-100 connectors $5.44
2 - Element Switches $8.40
24v DC power Supply $13.59
2 - TD4 MyPin PID $54.39
20ft Element Power Cord $25.00
50A Power Connector Male $23.90
50A Power Connector Panel female $15.08
Misc Wire $5.00
2 - PWM Speed controller $21.53
Alarm Buzzer/Light $1.99
5 Pair Waterproof DC Pump Connectors $3.99
Red Cable Sleeving $2.49
Blue Cable Sleeving $2.49
2 - 2 Pin Panel & Male Plugs $2.30
2 - 110v Element Panel Lights $1.49
1 - 110v Mains Panel Light $5.95
2 - Element Contactors $19.20

Total $308.04

DONATED STUFF or stuff I already had
Control Box
80A SSR's
Misc Wire
Alarm Speaker
Key Switch
Reclaimed Heat Sink
DIN Rails and DIN Terminals
DIN Relay
6A & 16A Din breakers
50A Range cord and plug.
30A Outlets
EPO Switch
Male 30A Element connectors
Many Terminal connectors
Many Screws
Many Tie Wraps
Triple Terminal Block
50A GFI Spa Panel
3 Way Alarm Switch

Cost for Pot and element Ect (not including ball valve and tee)
2 - 2" Hot Pods and Solderable TC Flanges $121.44
2 - 2" TC Clamps $11.98
2 sets - Element Pigtail Connectors $17.00
20 Gallon Kettle $99.99
2 - 5500W heating Elements $59.98
Keg HLT $25.00
Total $335.39
 
Here is my setup, I dont have any up close shots of the panel on here right now but it's basically a Kal clone setup with keggles. It took about three brews to get the hang of losses and efficiencies but I will never go back to using gas. The fermentation fridge has the capability of controlling two different fermenters using STC 1000 controllers. The freezer side I use for overflow of kegs to condition and store.

brew setup copy.jpg
 
Converting from gas to electric? or just the redundancy of having both? looks like your set for up for dual elements too...

3rd rig build and it was my first dive into electric. I was insecure about completely giving up on gas :)

The other thoughts were... (1) Stay at 30A. Sometimes we will do multiple batches during a brew day. Boil one on gas while mashing the next batch on electric. (2) Until I saw it for myself, I was insecure about rise times on step mashing on electric only. (3) The option of powering it with 120V so if I bring the rig somewhere that doesn't have 240/30, Just use gas but still have temp displays and pumps. (4) Made the HLT element selectable for either the HLT sensor and PID, or the Mash/Wort sensor and pid. Tuned for both. Sure, I could just set the HLT PID about 2F above what I want to mash at, but conditions change. Let the Mash PID do it's job and be more than be a temp display. (5) Portable and self contained. Shove it all in a corner of the garage when not in use.

Funny thing is... I've never used the burners
 
About 80% complete. Mostly using the plans from Electric Brewery with some minor layout changes and PID selection changes. Planning to be completely up and running in about 4 months (funding restrictions!!!)
WCWMatt
MVIMG_20171113_190912 (2).jpg
IMG_20171113_190844 (2).jpg
IMG_20171113_190854 (2).jpg
MVIMG_20171113_190834 (2).jpg
 
Back
Top