Tiny Brew (TB) - "Research Brewing System"

Homebrew Talk - Beer, Wine, Mead, & Cider Brewing Discussion Forum

Help Support Homebrew Talk - Beer, Wine, Mead, & Cider Brewing Discussion Forum:

This site may earn a commission from merchant affiliate links, including eBay, Amazon, and others.

bodhi314

Well-Known Member
Joined
Aug 2, 2009
Messages
75
Reaction score
1
Location
Corvallis
I'm nearing the completion of the my small scale electric system - so thought I would share with those that have inspired this creation.

I have to re-build the electric enclosure (SSR too hot for smallest version) this weekend, perhaps get to brew sunday??!! Pictures forthcoming....:mug:

Ideas, comments?

I have a question:

1) Where do I get an inline fuse for this system??


TinyBrew (TB)

Concept:

All-grain small batch (pilot type - 2 gal, bottled) PID controlled electric water heater element, no sparge, no chill (all the aussies are doing it this way!) for under $200.... did I mention stainless was requirement?

Proposed brewing process:

Heat full boil volume in pot to mash temp (dough in) - pour off sparge water into cooler - heat to sparge with heatstick. Place milled grain in nylon paint bag - into stainless fryer bucket, and into pot - (held in suspension with "S" hooks for handles). Steep. Remove Basket - Place into 'Sparge'. Stir. Steep. Remove basket/Discard Grain. Combine volumes. Boil/add hops.

That's the mash and boil - the no chill is pretty cool -

get a $7 container (for food shipping: http://www.usplastic.com/catalog/item.aspx?itemid=35995&catid=459&clickid=searchresults - or search "2.5 gallon natural") - these are apparently what they call - hot fill I think (they can be heat sanitized)

allow wort to cool to 190F - stir like mad to aerate (or use oxygen infuser) drain off into container. Squeeze out air. Seal and cool to room temp. Starter - stir. Pitch. add airlock. Add vodka - russian of course. Ferment til OG.

Oh yeah then drink :drunk:


Actual build report:

I gathered alot of parts -

stainless pot ($59 - kitchenfantasy.com - 26QT tall, includes stainless basket, requires dremel modding to remove basket handle. It's fun. Bottom is too thin for gas fired/moving it around alot, but for stationary electric, perfect - if I did it again - apply "buy once" theory, get heftier pot.)
electric water heater ($9 - Home Depot - 2000W/120V - wish I had 240 available)
12GA Electrical extension cord ($20 - HD)
SSR ($10 - Ebay)
PID + Watertight Thermo ($65 - Auber)
Enclosure ($9 - Home Depot)
GFCI ($13 - Home Depot)
Weldless Fittings ($65 - bargainfittings.com )

No.

I did not make it within budget = $255.

It works :rockin:


I drilled the pot using step-bit for smaller holes and a holesaw for the element. I now owned a pot I intentionally poked four holes in:


1) 1.25" for heater element (holesaw)
2) 7/8" for ball valve
3) 1/4" NPT clearance for thermometer - I used the step bit until it fit, don't remember dimension.
4) Small 1/4" bit hole for ground connection.

Yes.

It leaked after assembly, most of the weldless fittings ( www.bargainfittings.com -- they are great )needed to be tighter than I thought they should. The ground hole was the major pain - could not figure out how to seal it and allow contact with wall material of pot. Never did figure this out. Turns out -- water is a great conductor, and its touching the whole pot :) Bonus.

I originally wanted to cram everything into the smallest enclosure I could manage physically (it fit and worked) - after the first water heating ramp - I shut it down and was working on cleaning up the wiring - dam SSR was hot! I guess the larger Amp draw you pull, the more heat the SSR takes on - empirical knowledge. Needs bigger enclosure to run for a couple hours straight - create heatsink, check..

This is where I currently am - hope to brew this weekend!

Pliny the Elder Clone anyone? (https://www.homebrewtalk.com/f36/pliny-elder-recipe-questions-125517/)

Scale to rig....
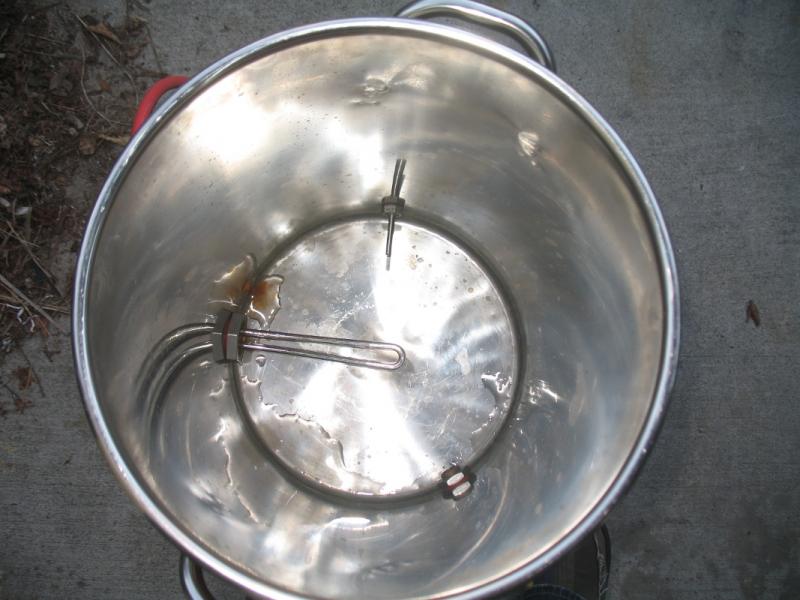
bk_inside.jpg


rust.jpg


basket.jpg


pre_weld.jpg
 
Why electric? For small batches you can easily brew on your stove. I got a 5 gallon SS pot at Boscov's for $16, add a $5 paint strainer from HD and I BIAB small batches for $21. Also, there is no need to do no-chill with small batches, they cool in your sink in about 10 minutes with ice water. If I was going to spend over $200, I would go full batch, but to each his own.

One other note, check your breakers with that 2000w element. I blew two of them on 20amp breakers, they draw a lot, but my house has old wiring so I scaled down to 1500w elements. Also, I would get a 40A SSR with a heatsink if you don't have one already.
 
I personally like the idea a lot. I am building a 2.5 gallon electric rig at the moment as well, and like the ability to do small test batches on a system that is PID controlled.

If you are able to, I would just go with an electric version of BIAB, and not deal with a second pot. Heat water to dough in, add grain to the paint bag/fryer bucket, place into kettle, when converted put the PID up to 170, when at 170 take the bag out, boil, etc. To me at least that would be easier and give you good results. You might lose some efficiency when you do a barley wine, but you are doing small batches, so it is less of a hit.

Also, with your cheap pot, it should not be a problem for direct fire that the bottom is thin. The real purpose of a thick bottom on a pit is to spread out heat for more viscous liquids. For wort, it really shouldnt matter.

I would love to see some photos.
 
The ground hole was the major pain - could not figure out how to seal it and allow contact with wall material of pot. Never did figure this out. Turns out -- water is a great conductor, and its touching the whole pot :) Bonus.
this statement scares me
please explain this further
 
Why electric? For small batches you can easily brew on your stove. I got a 5 gallon SS pot at Boscov's for $16, add a $5 paint strainer from HD and I BIAB small batches for $21. Also, there is no need to do no-chill with small batches, they cool in your sink in about 10 minutes with ice water. If I was going to spend over $200, I would go full batch, but to each his own.

There are certainly cheaper ways to do all-grain - cheapest route was not requirement. My budget was mainly set to keep me from buying a Blingman and finding out later that my keggle system is all I really wanted anyway.

Oh - and I got kicked out of the kitchen years ago... :D

One other note, check your breakers with that 2000w element. I blew two of them on 20amp breakers, they draw a lot, but my house has old wiring so I scaled down to 1500w elements. Also, I would get a 40A SSR with a heatsink if you don't have one already.

I'm in a little beach shack essentially - I think this concern is what has prompted the question about inline fuse - any ideas?
 
this statement scares me
please explain this further

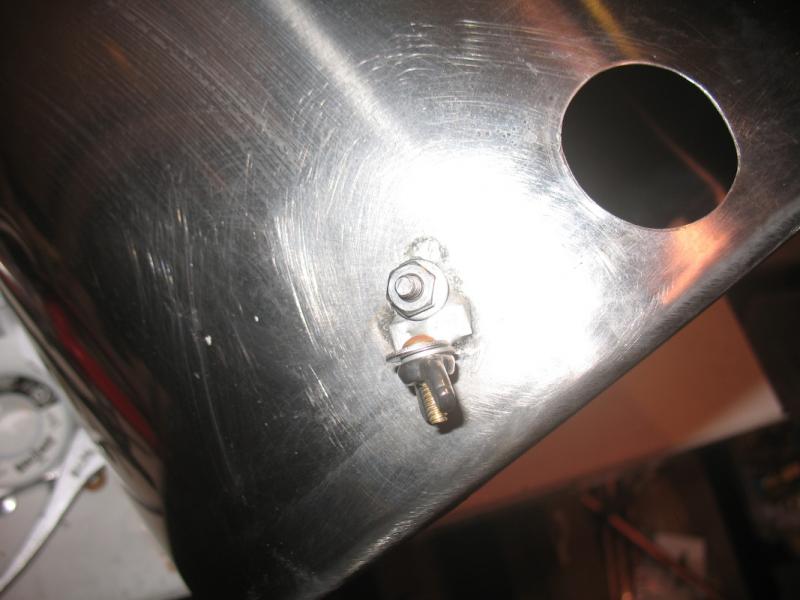
Originally I wanted to ground to wall of of the pot - I could not after four revisions (+trips to HD) get a water-tight seal - the way it is set up now has a brass 6-32 screw holding two washers and rubber washers. Like a small weldless fitting.

Connected to the outside of this is the ground for the element.

I tried metal to metal, large diameter silicone oring with copper wire underneath - and my original colossal failure was a HD stop to grab the fiber washers - learning curves :)

So my logic is now - this is a monitored system, only powered up containing water - which is a conductor and would touch both the pot and the ground connection.

Your fear now raises my general level of doubt - what are your thoughts here?

Am I walking a very thin line?
 
Firstly water is not a very good conductor. As a matter of fact pure water is not a conductor at all. If you experience a ground current you risk electrocution. I hope you used a GFCI.
 
Firstly water is not a very good conductor. As a matter of fact pure water is not a conductor at all. If you experience a ground current you risk electrocution. I hope you used a GFCI.

GFCI - definitely.
Understood - VERY thin line - thanks gentlemen - I will post some pictures tonight.

I will also do some more searching on the board for ideas to ground a pot - I've seen the keggle ones that are drilled into the bottom rim - but this doesn't help me in this situation.

If anyone has quick leads - would be helpful - I have a hole that needs to seal and ground.
 
Plug the hole. Then for your ground, solder a ring terminal to the pot, use another ring terminal on your ground lead and secure them together with a small screw, star washer and nut.
 
Radio Shack has all the inline fuse holders and fuses you will need... that is where I got all mine for my delicate electronics. You can get your heat grease for the heatsink installation there too.

As for heat, yes you really need to heatsink almost any SSR setup. I have 10 SSRs (and heatsinks) in a 12 x 12 x 6 box, but I also have a 105 CFM fan cooling that box too. That box is the ONLY electrical component box on the system, so it is small, and runs cool. If your heatsink is not mounted externally, and is internal (like mine) think about a fan too perhaps.
 
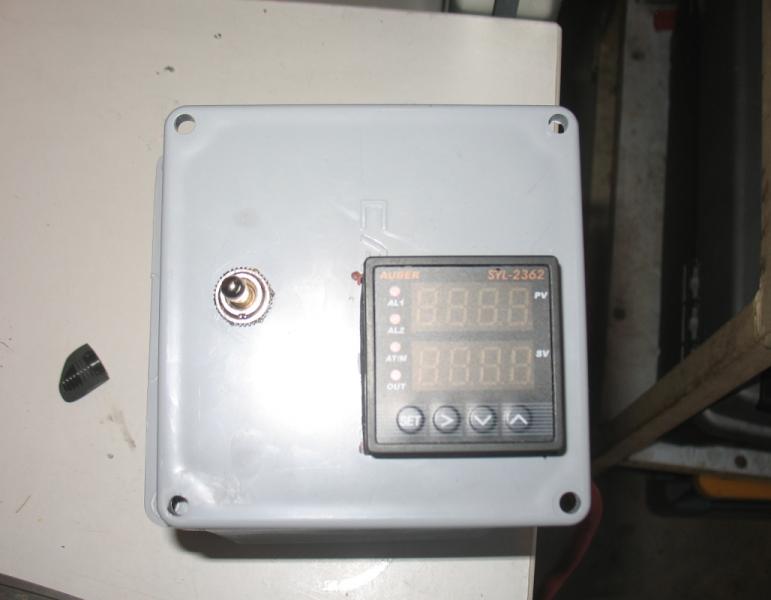
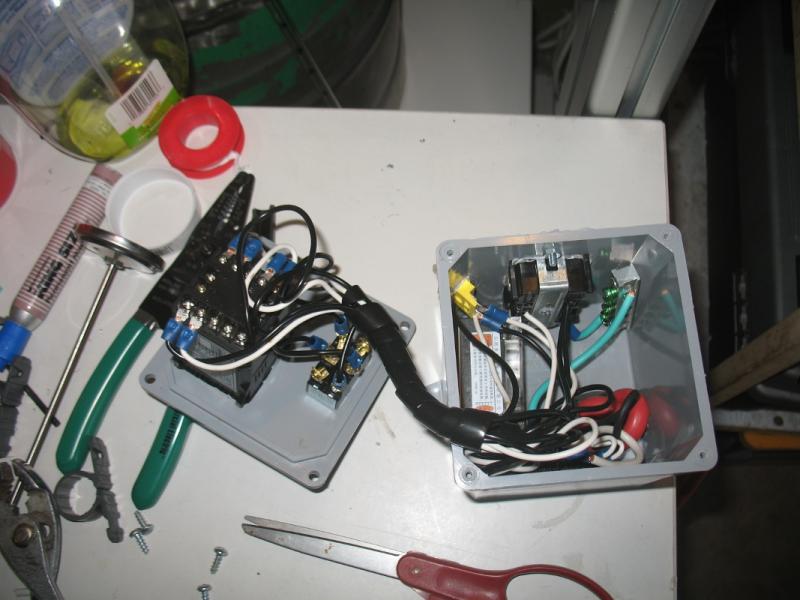
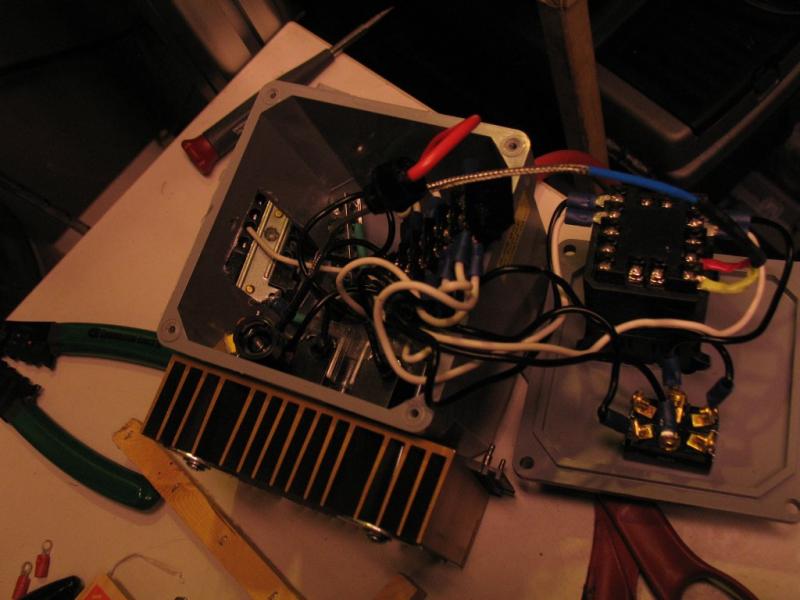
This is the first version of the control box - I was only calculating physical space, not the reality of the components/wire.

As it turns out-- it will actually fit, and work - but the amount of heat build up is not conducive to a system that lasts - which is a requirement :tank:

I fixed the ground this evening as suggested on the BK - so I don't fry myself making beer - and the next stage is to correct this enclosure - I got some suggestions including using a fan - I'll see how everything fits in the new box and post them here.

Off to radio shack to look for fuses - :)

box_closed.jpg


box_open.jpg
 
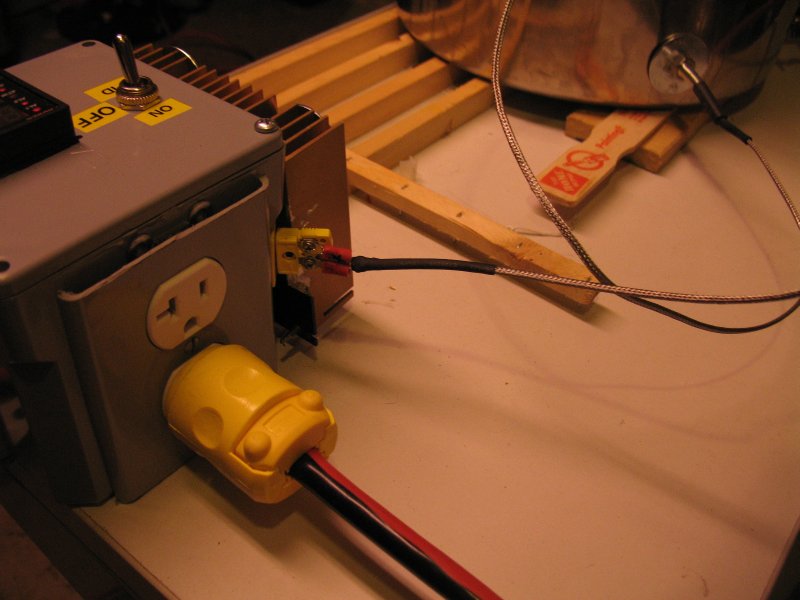
I used the same box for my PID and I cut a vertical strip down one side for the SSR and heatsink and the heatsink rests nicely on the vertical strip with most of the fins cooling outside the box. Just an idea for you.
 
Plug the hole. Then for your ground, solder a ring terminal to the pot, use another ring terminal on your ground lead and secure them together with a small screw, star washer and nut.

Thanks Pulse. Diesel & all for keeping me honest and alive :rockin:

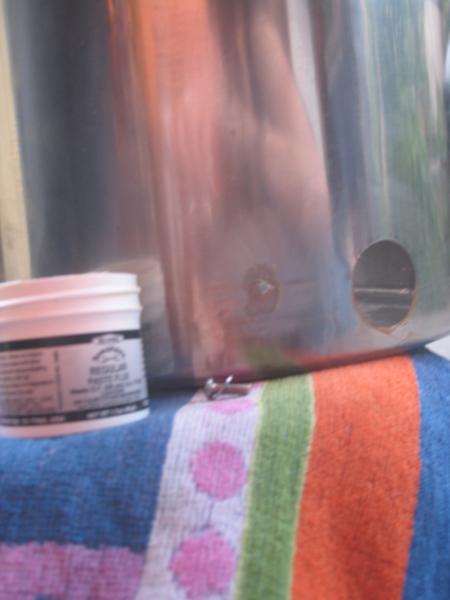
I used the solver solder method sticky'd to the DIY and connected a ring terminal to the pot, this is connected as suggested to the ground - pot is now physically and electrically grounded.

It wasn't as easy as I hoped to solder stainless - I was trying to solder in a stainless bolt, but could not get it to go, kept baking the flux - - I sanded and cleaned up spray cleaner - just as I had done with attached pic - but never sealed - is this common?

post_weld.jpg
 
I used the same box for my PID and I cut a vertical strip down one side for the SSR and heatsink and the heatsink rests nicely on the vertical strip with most of the fins cooling outside the box. Just an idea for you.

Where did you get heatsink?
 
When I had to ground my Gott cooler, I just put an alligator clip on the ground wire, then clipped it to the handle of the ball valve on a metal part. Not the best ground, but how do you ground a plastic vessel? I would think you could do an alligator clip to the edge of the pot. Pretty, no. Functional, yes.
 
Firstly water is not a very good conductor. As a matter of fact pure water is not a conductor at all.

Indeed.

In a home I had in the early 80s the main line into the building was not done correctly allowing water to run in to the main box.

I found out by opening the box one dark and stormy night and when I did gallons of water spilled out all over me and the power was on. I had like 600 volts available to me right there and not a tickle of electricity did I feel.

What water does do, is it increase contact area when a real contact is made.
 
I am new so forgive me for stating the obvious - but when wiring a TC/RTD make sure you use correct wires and polarities.

I made all the suggested changes:
1) Grounded pot as suggested (pix earlier)
2) Heat sink connected to SSR through side wall
3) Inline fuse added to protect equipment
4) GFCI used to protect the operator from being fried :)

I don't have a wiring diagram, but once everything is in front of you - just work one connection at a time and be patient :mug:

I had some issues i mentioned above getting the "K" type thermocouple to work = but all was solved with Auber email support (awesome.)

The SYL-2362 has manual mode and PID - I'm going to one-pot BIAB (brewed one earlier, with 1.048 OG - supposed to be 1.072!!) So efficiency needs work, but man it works like a dream (and I had to manually switch on each time) - so expecting even better with PID tune.

The pot will hold 6.5 gallons, so might even be possible to do full (small) batch on this one.

I'm done with AG batch in 3-4 hours, clean up included.

No-chill is awesome the "Bastid" clone of Pliny I brewed first is happily in secondary, getting massive doses of hops - see how this works with low OG??

Cheers - and so many thanks for helping make this happen!:tank:

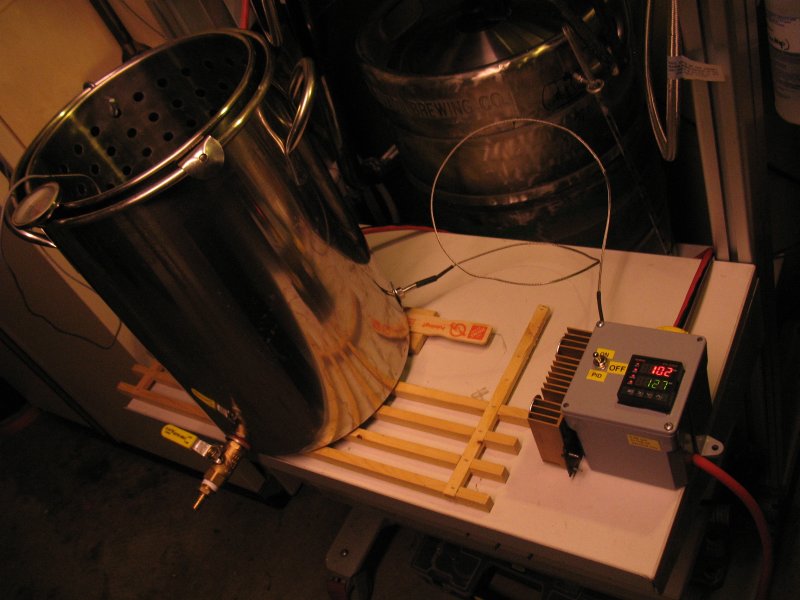
set_up_TB.jpg


control_box_TB.jpg


disconnect_TB.jpg


guts_TB.jpg


back_side_TB.jpg
 
Uh, I don't know if I'm missing something here, but why are you worrying about making a water-tight seal on your ground connection? If you're going to pop a hole in the kettle to ground it, make it at the very top, where it doesn't have to be watertight. This should be a pretty trivial task.
 
20:20 hindsight Reese.

There are simpler ways to do this - more involved systems as well, this is just my attempt at a "trivial task" so that others may learn like I did here.
 
A suggestion for the thermocouple wiring and plugs, while the crimp on lugs are nice they will cause problems as they will be additional measuring junctions in the system and make the readings drift as junction temps change. It would be better to use same thermocouple wire from element to plug then to PID input so the dissimilar junctions along the way would be eliminated.
 
Thanks Kladue - seriously first time around for all of this for me.

The Temp is 2-4 F off throughout my forseeable range with a "K" thermo couple - so if I can reign it in a little bit that would be great.

Otherwise - RTD is on the list ...

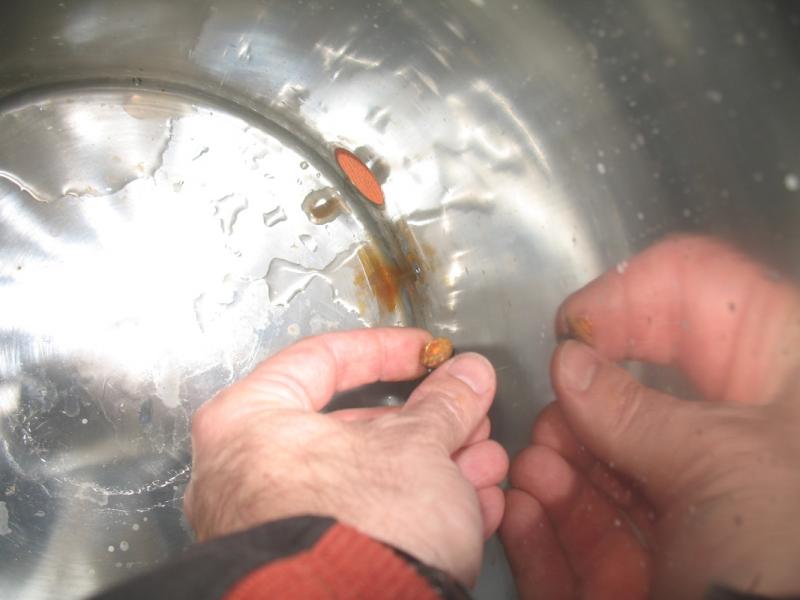
I have another question - I'm seeing rust in my pot - is the sacrificial anode required?
 
You should be able to correct temperature reading in the PID controller, as to the rust, get some ascorbic and citric acid, fill pot with water, add 1Oz each of ascorbic and citric acid and heat to 180. After you let it cool down to room it should have repassivated the stainless pot again, rinse and your good to go. you can find the ascorbic and citric acid on Amazon, or check with local craft store as they are used in some soap making activities.
 
Latest version pic attached.

Split the two plug ins and used one for PID, the other to control manually a pump.

Top switch is pump.

Left switch controls power to element.

I have had two batches now REALLY low OG (first one 1.045 - supposed to be 1.075) - BeerSmith says this is less than 50% efficiency....

So will add pump to full volume mash and see if this helps -

Anyone else run into this - ideas?

TB_w_pump.jpg
 
The efficiency does not sound that far off a no sparge batch, the gravity difference reflects the trapped sugars in the grain bed. Only advice is raise grain bed above first runnings in kettle and transfer sparge water to top for rinsing action as water flows through grain bed, or recirculate wort as you add sparge water while grains are in boil pot.
 

Latest posts

Back
Top