E-Herms Build

Homebrew Talk - Beer, Wine, Mead, & Cider Brewing Discussion Forum

Help Support Homebrew Talk - Beer, Wine, Mead, & Cider Brewing Discussion Forum:

This site may earn a commission from merchant affiliate links, including eBay, Amazon, and others.

Holter

Well-Known Member
Joined
Aug 6, 2007
Messages
120
Reaction score
9
Location
Culver City
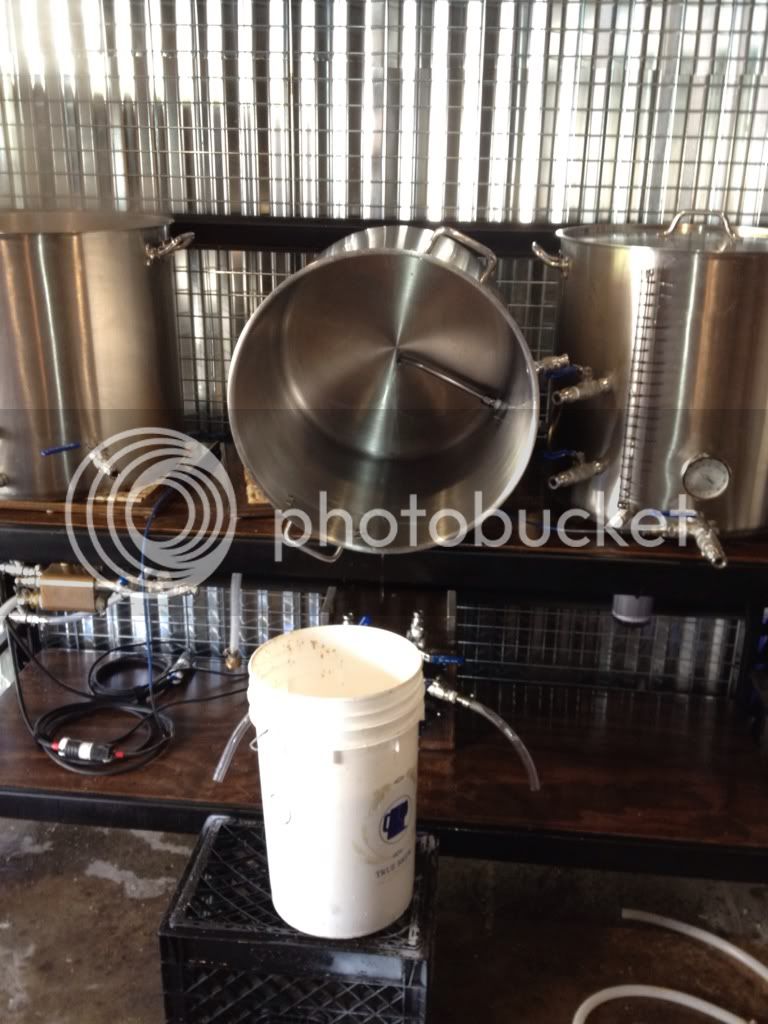
Ive been documenting my build over on the forums at Kal's electric brewery site but I figured that I should post it over here. Like so many others, I browse HBT because it is such a great resource. I figure I should post pics of my setup for others to look at as well.

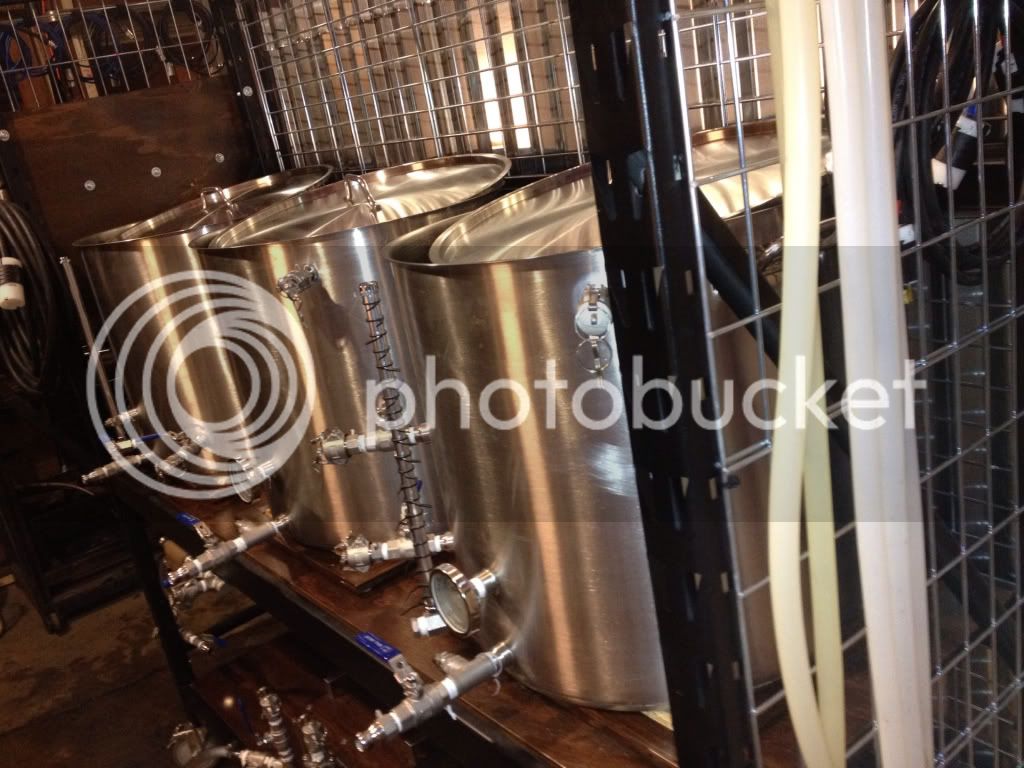
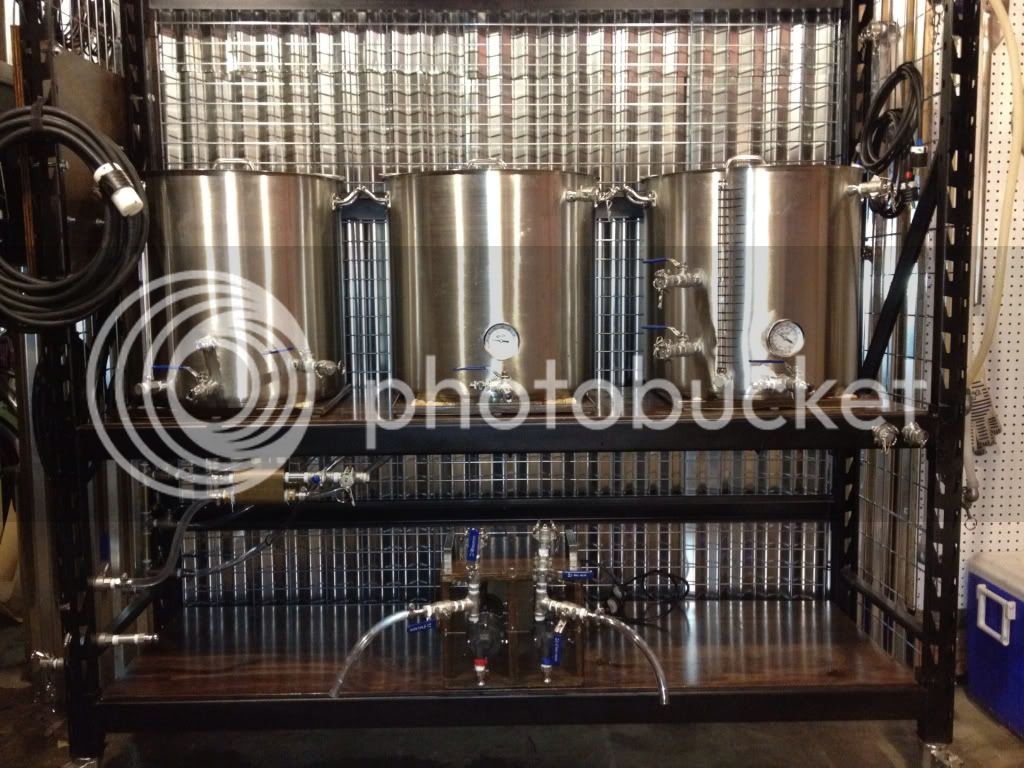
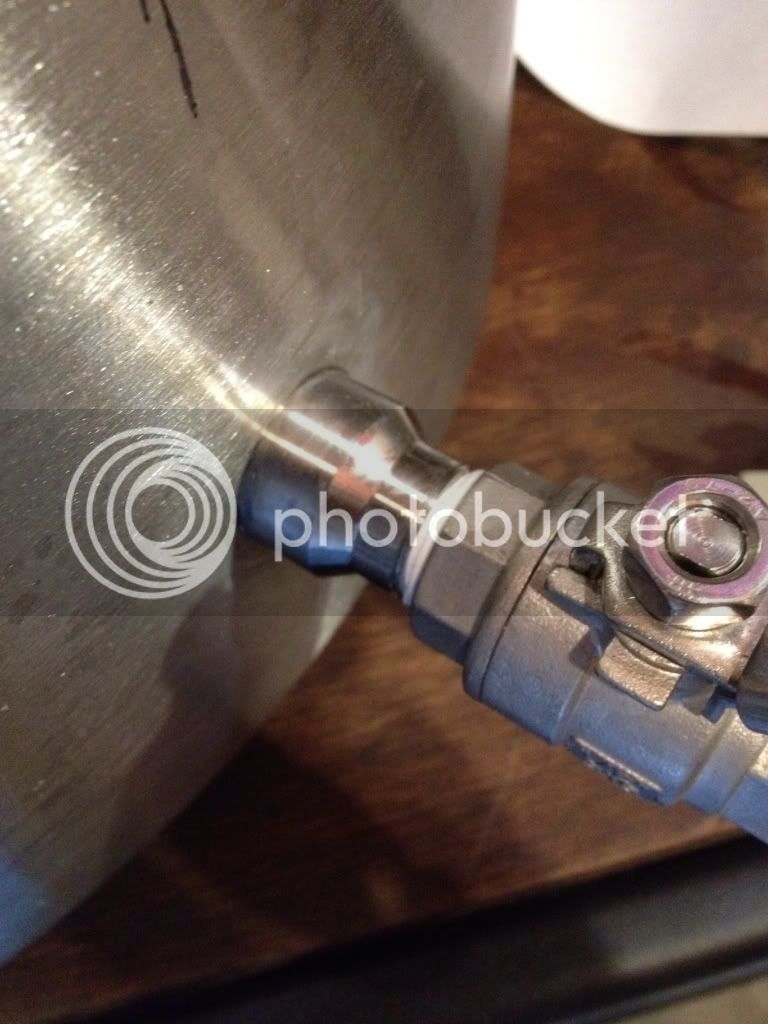
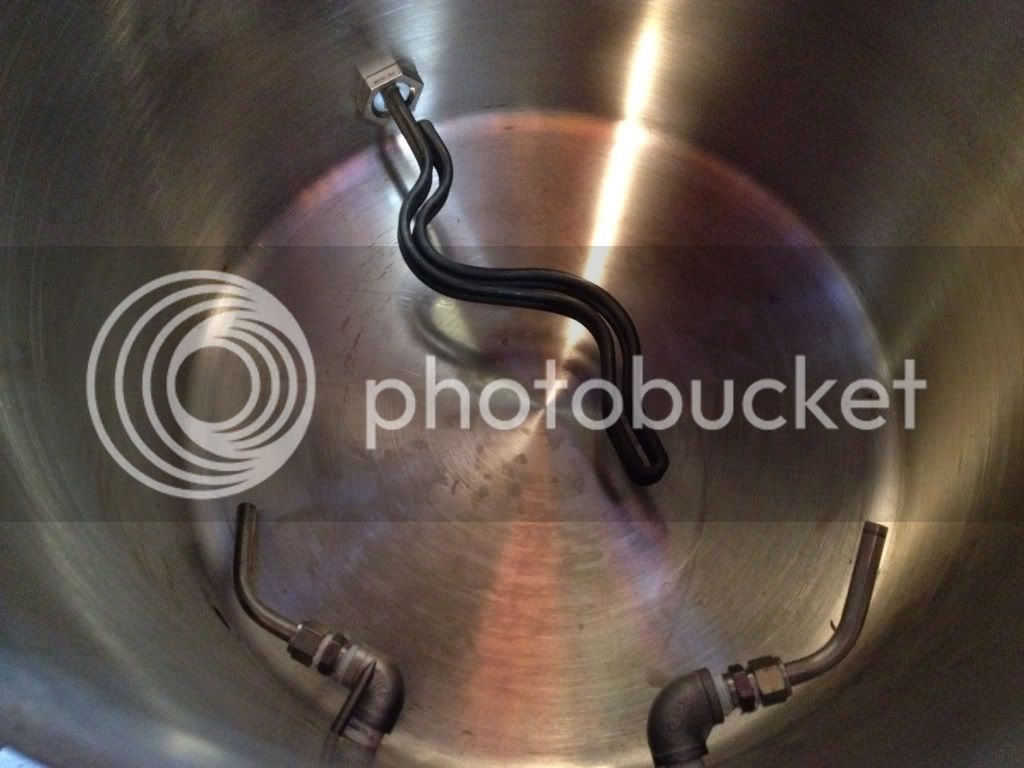
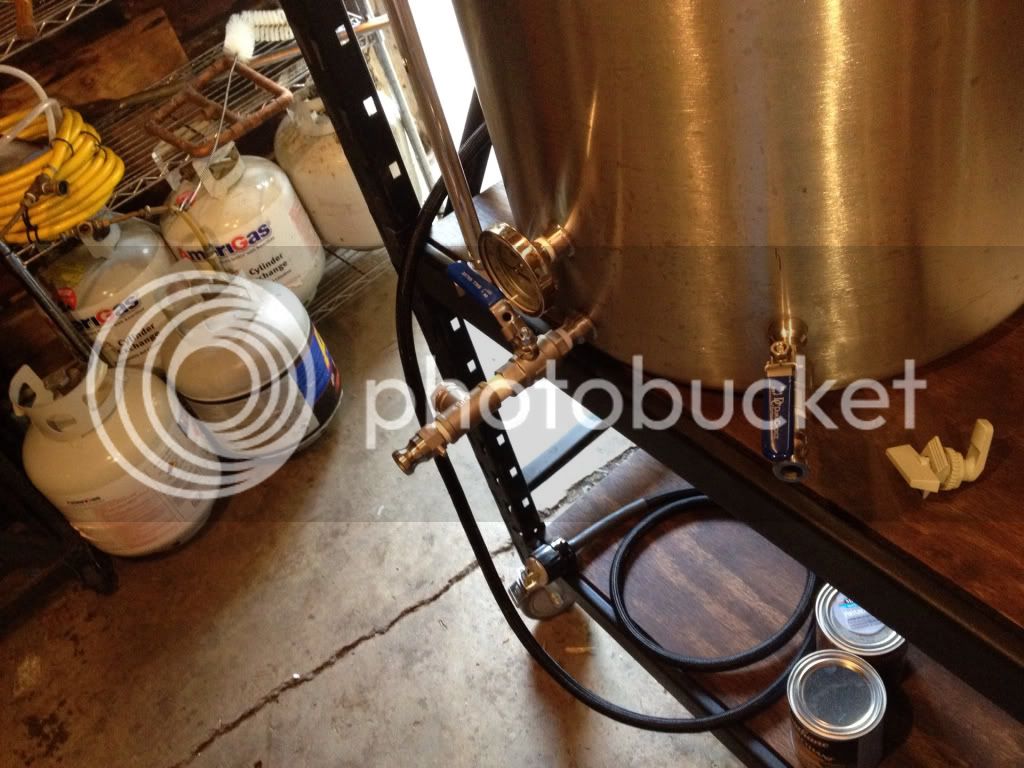
Going into this i knew very liittle about electricity, in fact i still dont. Because of that i really tried to focus on copying Kal's writeup as much as possible. Since there are so many people cloning Kal's panel I will skip that portion and just focus on the kettles, plumbing and brew stand.

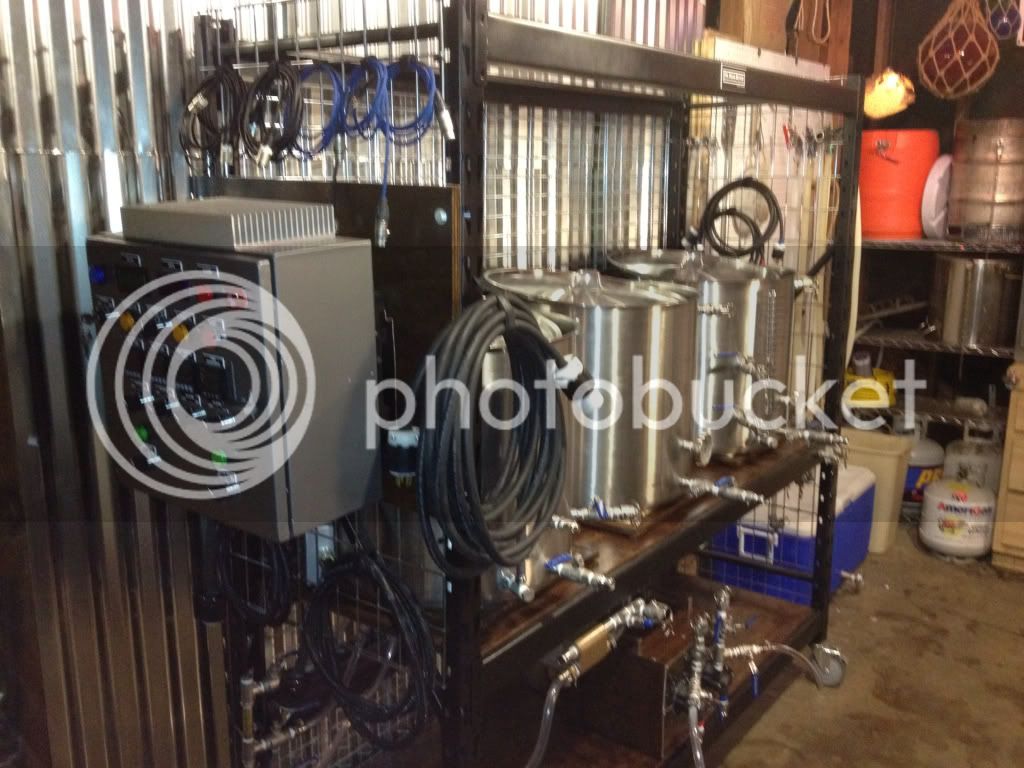
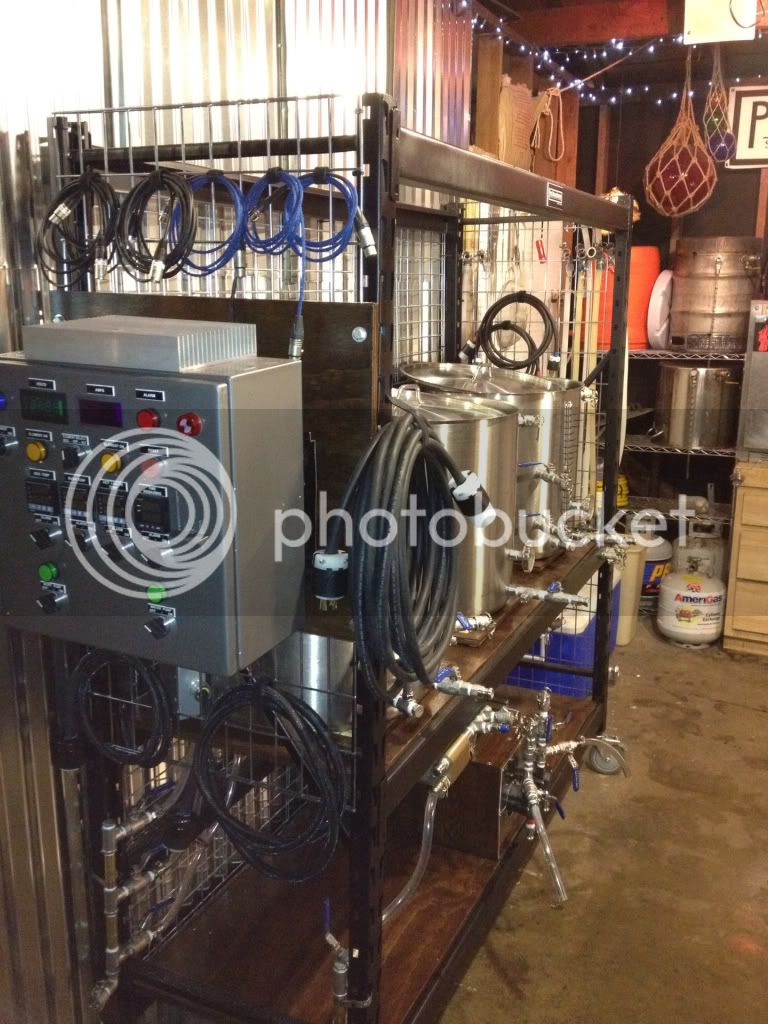
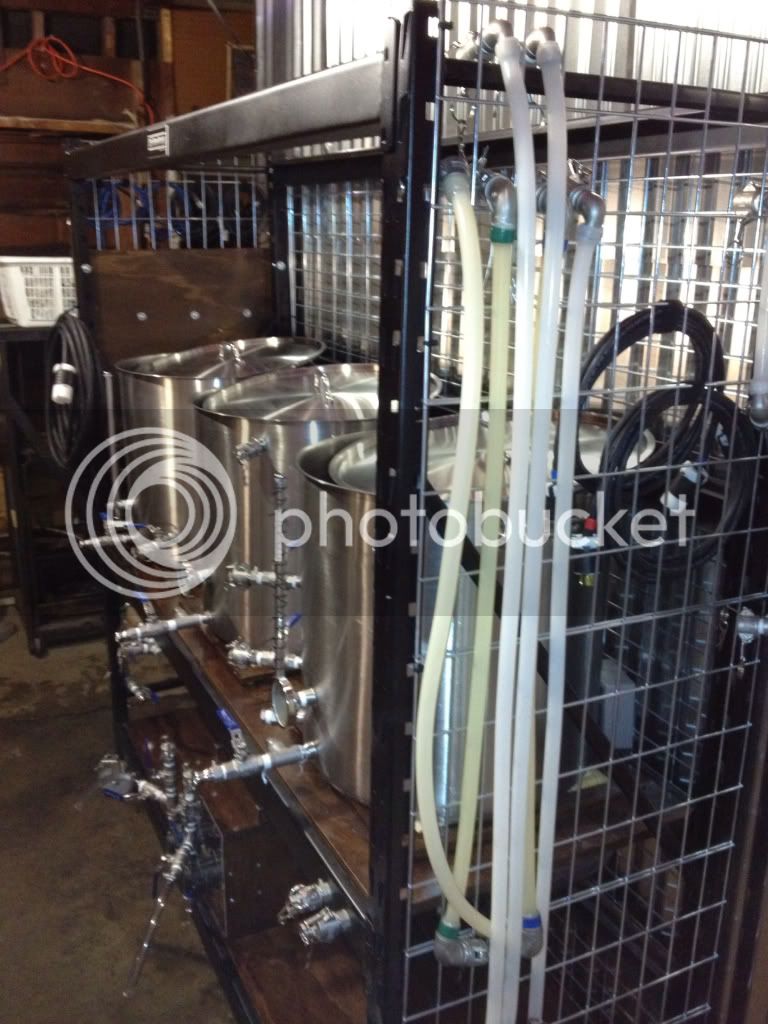
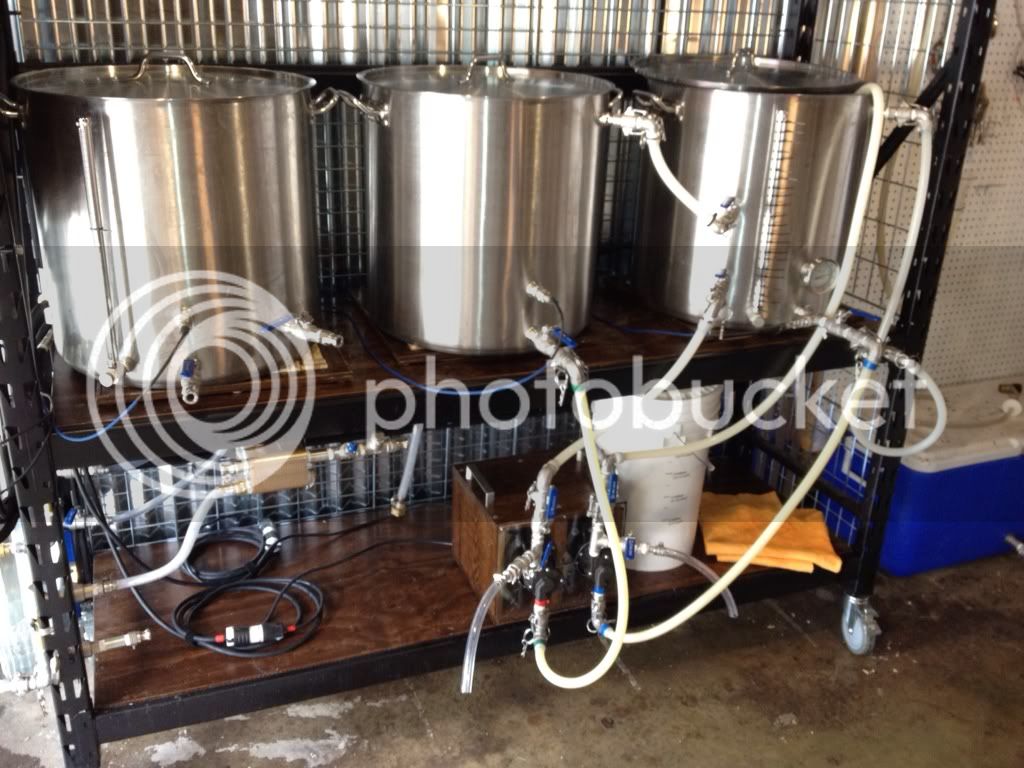
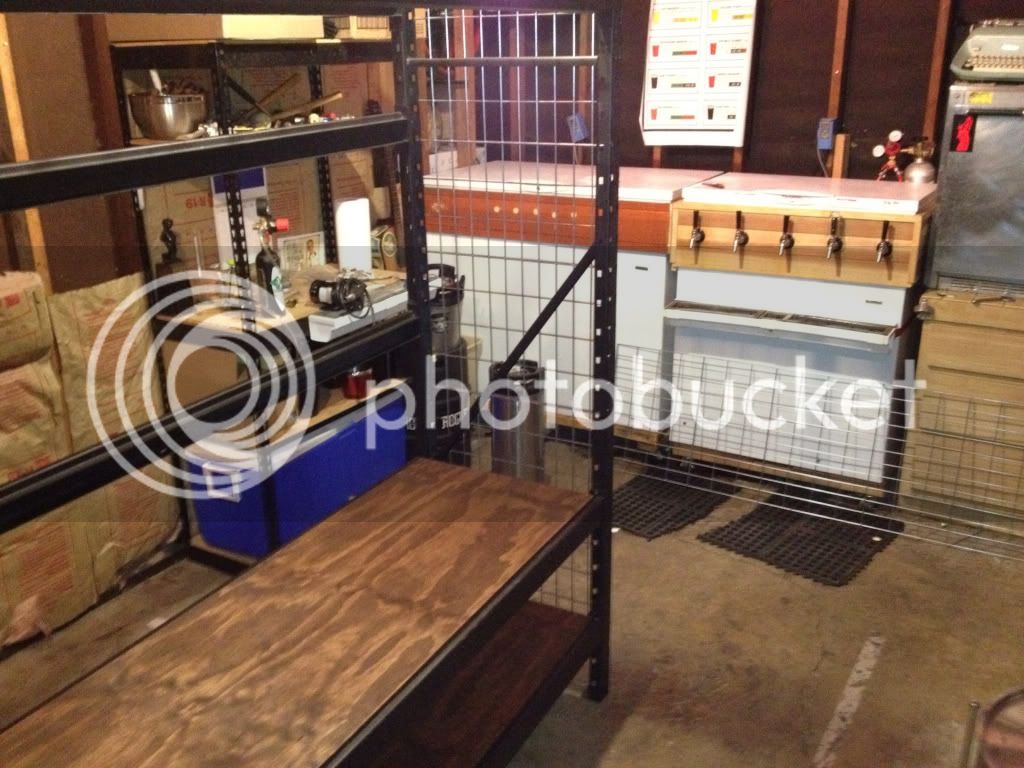
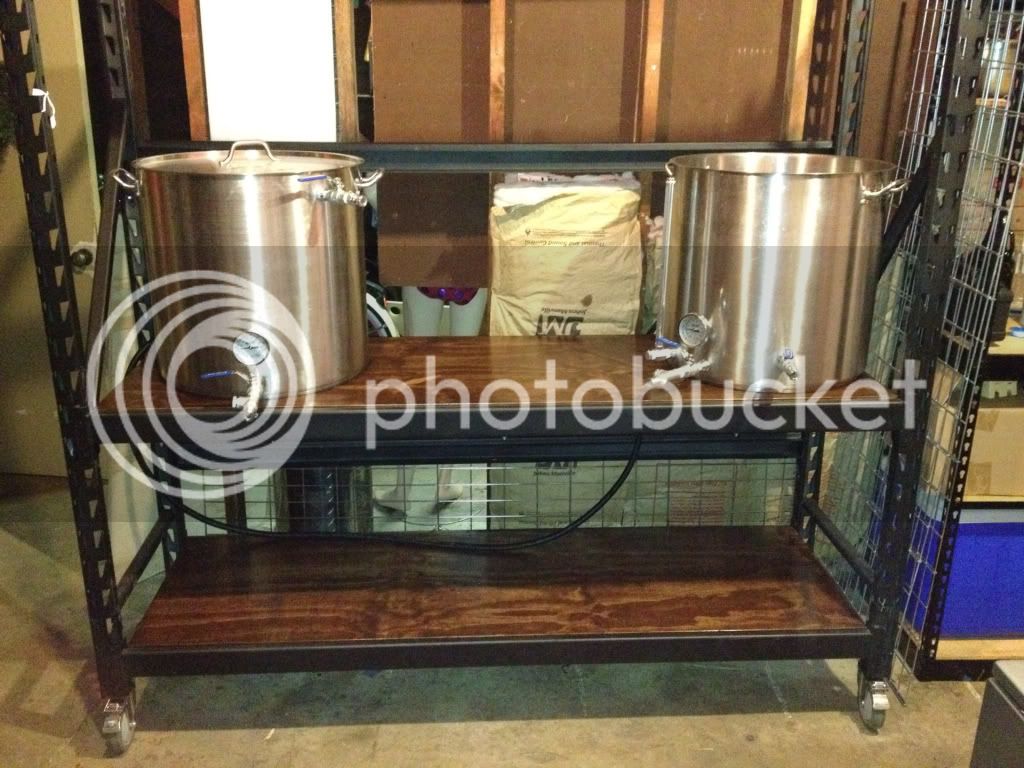
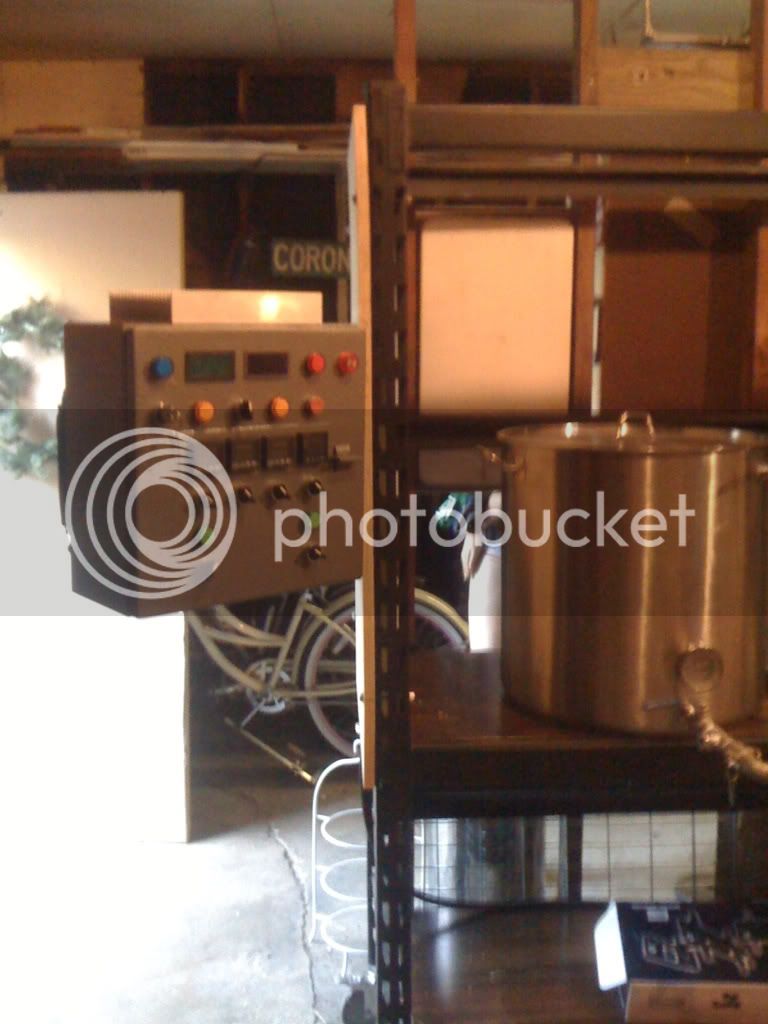
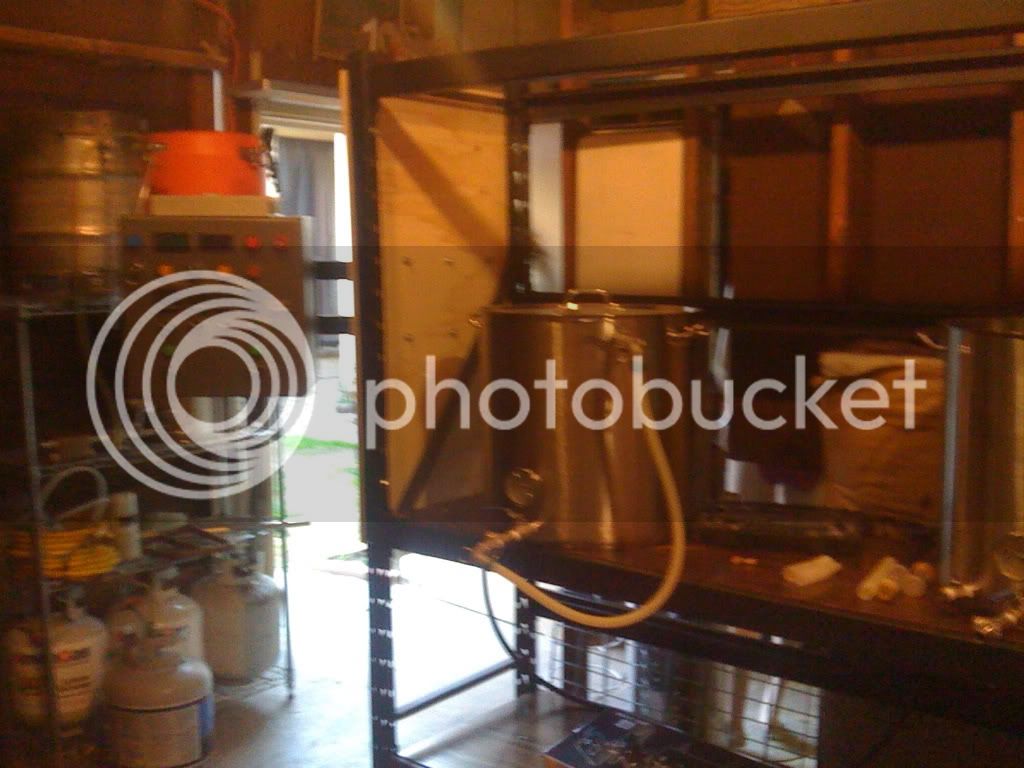
Instead of building the wood stand that Kal built I went with this stand from Home Depot - http://www.homedepot.com/buy/storag...idth-x-24-in-depth-x-78-in-height-145323.html. The main reason was just look. We wanted a metal stand with some wood, but not all wood.

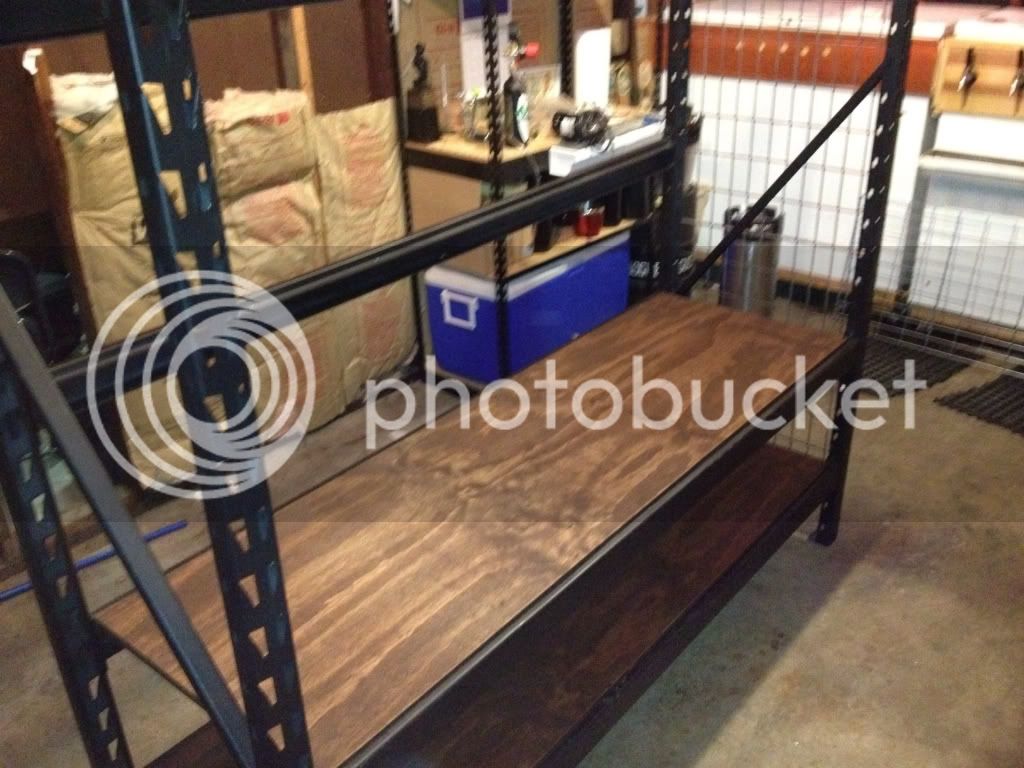
It's capacity seemed right for a single tier system, and the price was good. The downside to this stand out of the box was that it had metal shelves and we wanted wood.

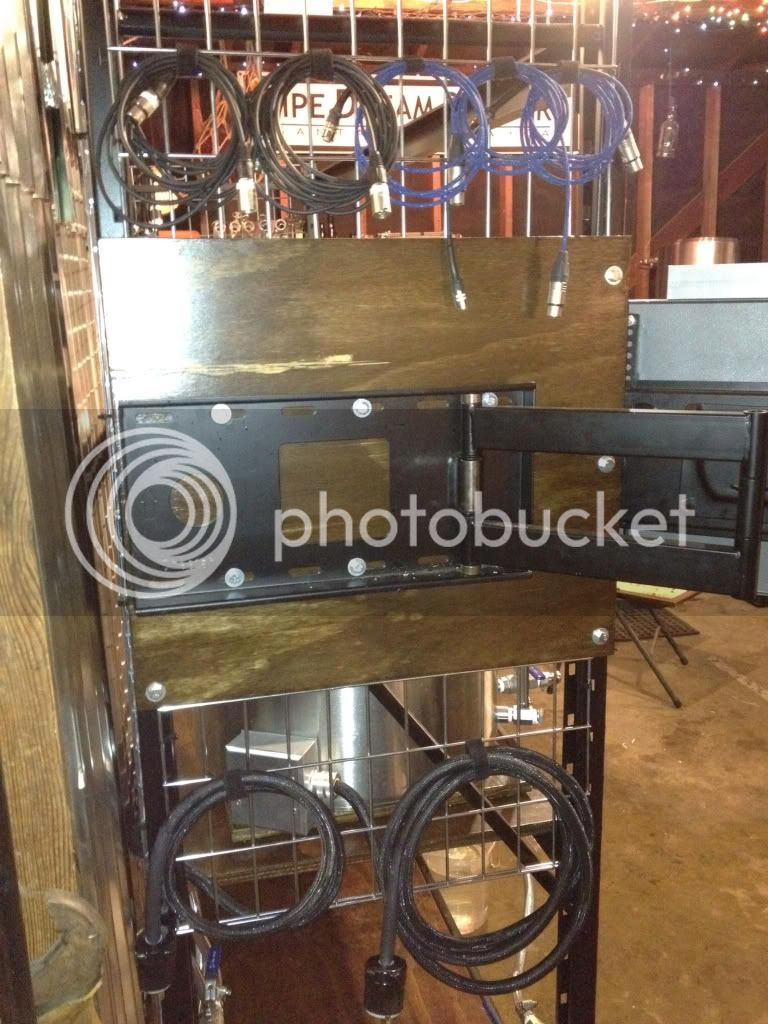
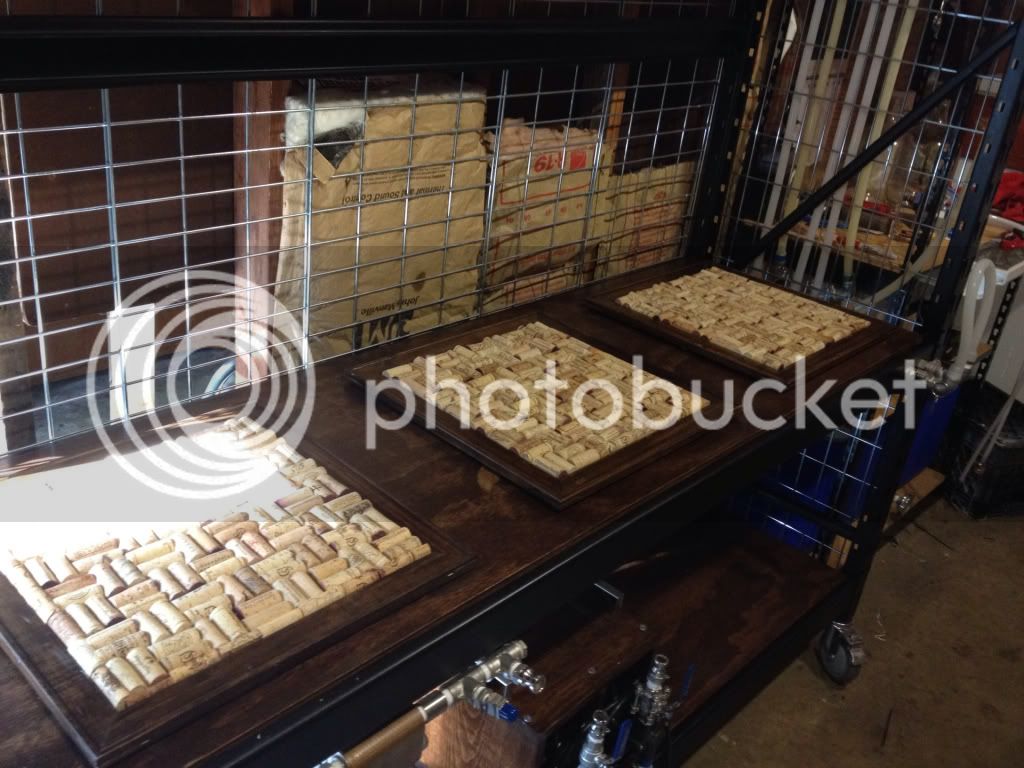
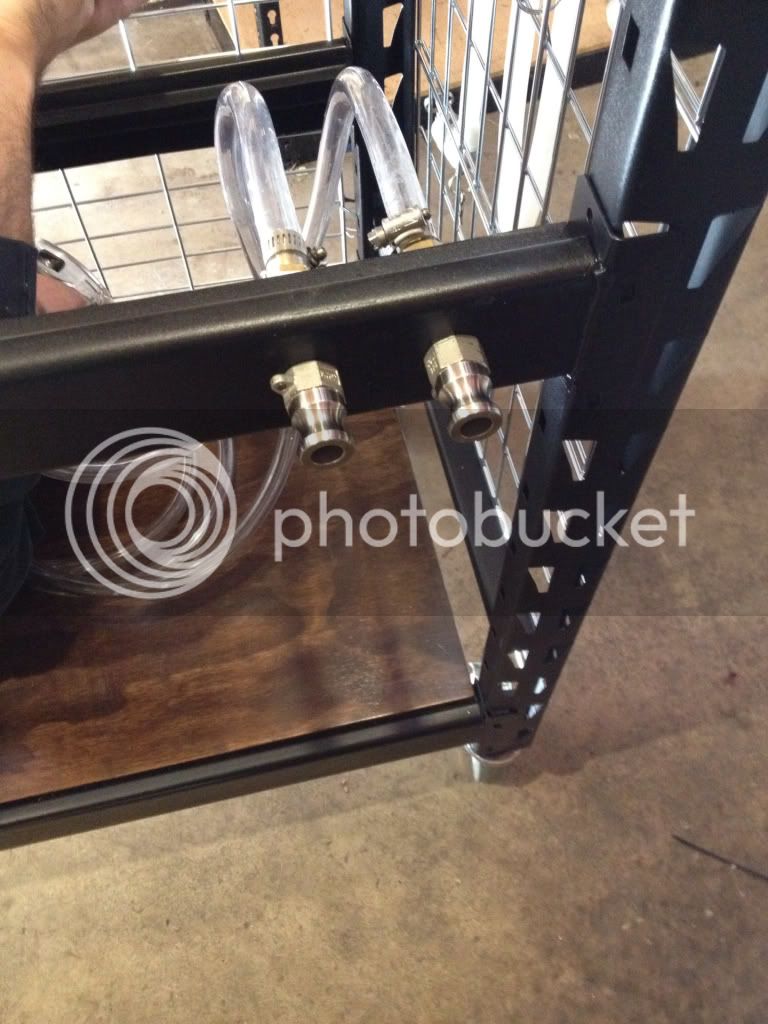
Here is a picture of the stand with a piece of plywood in place of the metal shelves that came with it (you can see the metal shelves in the background leaning up against the kegerator).

93d34474.jpg

cd87a4d2.jpg
 
For the brew kettles I went with the 26 gallon heavy duty kettles from More Beer. The Blichmanns seem awesome and they probably would have been just as good in the long run, but I really wanted to get welded connections for all of our fittings instead of the wellness kits. I figured if I was going to spend this much money on a brewing system, I should get what I want.

9eca8ba7.jpg


The connections that More Beer uses for their welded connections are fantastic. The male NPT on the outside of the kettle is great.

I also really wanted to be able to have a whirlpool with this kettle. I grabbed a couple of whirlpool connections from Bargain Fittings and set it up.

e3173782.jpg


The inlet for the whirlpool is just under the 5 gallon mark. I wasn't sure exactly where to put this, and since I was ordering over the phone with More Beer I had to guess. I filled the kettle up with 5 gallons of water and it whirlpools great. I then filled it up with 20 gallons and it whirlpools very well, thought not as fast as the 5 gallon did.

Here is a picture of the boil kettle's connections, along with the reason I switched to electric in the background.
670cd1e8.jpg


And here is the Boil Kettle (left) and Mash Tun sitting on the stand to show the size.
ffbef7d8.jpg
 
Another shot of the stand. This time it's a close up of the casters.
174de247.jpg


This is the original config. This ended up not working because the pre drilled hole in the base of the stand was off centered and ended up bending a bit. We drilled new holes and reinforced them, so it's pretty darn sturdy now. This gave us mobility. The stand is still relatively light because it is metal.

Since we wanted to have this system be a bit more mobile we needed to find a way to attach the panel to the stand. We decided on bolting a piece of wood to the side and attaching the panel via a tv mount with an articulating arm. Here is the front shot
fa8d7700.jpg


Another front shot
8c0d5ff9.jpg


And a shot from behind.
81deb260.jpg


We then undermounted the therminator that we already had, and we built a caddy like box for the pumps. This being a Herms single tier we needed two pumps.
ae6af96b.jpg


Close up of the pump caddy before we stained it.
c30013d4.jpg


And here is a close up of the chiller once I updated the plumbing. We added a RTD probe to the outlet so that when we are chilling we can just pull one of the probes from the Mash Tun and see the temperature of the wort on output. Obviously when we are whirlpooling we probably won't need this, but there are some beers that I plan on not utilizing the chiller during whirlpool, so I wanted to have the flexibility.
9ef24489.jpg
 
In Kal's design he uses cork mats to insulate his stand from heat. I looked around and couldn't find them within a price that I thought was reasonable, so I built ours out of corks. I called around t friends and family and have them save for a while.

Here is a 6 gallon bucket full of corks.
59bcaa99.jpg


I used a piece of wood underneath four canvas frame pieces to create the frame. We stained it to match the other stains on the stand and attached the corks with silicon.
d0d6515a.jpg

d58a0fb6.jpg

e4d34d8e.jpg

Stained.
1202d740.jpg


Here are the trivets on the stand
bc9ab733.jpg
 
Next up was plumbing. I am really tired of disconnecting the hose multiple times during the brew day. I decided to build a manifold for incoming water that would have three "ins" (water to the filter, water directly to the HLT for cleaning, and water to the plate chiller). The output manifold would have two outputs. The first is for water out of the chiller and the second is for dirty water out. Here is a shot of the input manifold after I put it together.
92827009.jpg


And attached to the stand.
73964e25.jpg


I put together hose adapter to 1/2npt and placed a cam lock on the end of it, so I can connect the hose directly to the manifold. It's mostly leak proof, I may end up changing this around to be a copper manifold that is soldered together. We will see how it goes.

Here is a shot of the water input manifold all plumbed up.
4e0819b0.jpg


And where the filter is mounted underneath.
8f34827b.jpg


An attempt at a wider shot to show the whole length.
4cb692ef.jpg


Here is where the water that goes through the filter or directly to the HLT come out from the stand.
07d1c659.jpg


We boiled up some water this past weekend after some issues, I'm out of town this weekend so the first brew on it should be on the 11th. After all of this work, all the time and money spent, I can't friggin wait to use this thing.
 
Two things:

1) Very cool idea using the flat panel mount for your control panel
2) Second the mannequin question--please explain the purple and pink polka dotted panties. If that is your woman, she has a HELL of a wax technician! Or was that your original design for holding the control panel?
 
Haha. I didn't realize that the mannequin was visible. No awesome stories behind it, it's my friend's wife's mannequin, we brew in their garage. She does dress it up occasionally in our "brewery" t-shirt though, which I think is pretty awesome.
 
Man. I spelled it manakin? 10:25 am too. Can't even blame it on not having coffee yet.

Very nice setup. I'd love to see some more control panel pictures, though. Your stand is great but you teased us with the best part. Not cool!
 
Nice trivets.. FYI, my brew vessels sit directly on a painted sheet of plywood. Before I sealed it with polyurethane the spills were kinda messing it up, but the heat has never shown to be a problem. Still the trivets do give you that nice classy touch that I'm clearly missing in my setup :)
 
Nice trivets.. FYI, my brew vessels sit directly on a painted sheet of plywood. Before I sealed it with polyurethane the spills were kinda messing it up, but the heat has never shown to be a problem. Still the trivets do give you that nice classy touch that I'm clearly missing in my setup :)

You know I figured it would be fine to just sit the kettles on the wood directly, but once I came up with the idea for the trivets I was pretty set in my ways. It's good to know though, in case I ever take them off of the stand.

The only part I am still debating about with the trivets is whether I want to permanently attach them to the stand. I want to do it, but I decided to leave them loose for the first few brew days and just out furniture movers underneath each one to keep it from scratching the wood. If I do permanently attach them I plan to put a bead of silicon around the outside to keep liquid out from underneath the pieces.
 
Wow, that's one hell of a setup! I'm jealous.

That is one killer set up thanks for sharing...making me want to get mine finished all the more so!!!

Thanks guys, it's been fun to work on this. Now I am just itching to brew on it. The first time we boiled water was a fantastic moment.

Two things:

1) Very cool idea using the flat panel mount for your control panel

Yeah that was my buddy's idea. We usually brew in the garage but hang out outside. With that mount we should still be able to see the panel if we are sitting outside or inside, so once he suggested using a tv mount it was really a no brainer. We just had to take a jig saw to the edge of the portion of the mount that sits behind the panel for aesthetic reasons, but other than that it was straight out of the box and onto the brew stand.

Thanks for the comments everyone.
 
Yeah, really like that idea also.. I didn't mount my panel, just set it on a table and run from there because I didnt want to take up extra space by hard mounting it on the side of my sculpture. I think I may borrow that idea for my rig, really cool to have an articulating mount like that.
 
I decided to head up to the bay area this weekend to visit some friends and get my hands on a pint of pliny the younger since I've never had it before. We hired a driver for the day and plan on hitting Russian River's pub, Lagunitas for the brewery tour and maybe bear republic. So unfortunately no progress on the brewery this weekend.

I heated up water on Weds but with the boil kettle PID set to manual and 100% we couldn't get above 207 degrees F. So I've got some troubleshooting to do next week before the first brew next weekend.
 
For now I have some more pictures. I'd say we are 90% complete. Tomorrow is the first brew on the new system, at which point I expect to find the other 10% during the first batch.

Here is a shot of the end of the brew stand with all of the cables organized. All of the cables at my office are organized with his cool double sided Velcro, so I picked up a roll for the brew system and it works great.

309416c2.jpg


Added some bleeder valves to the pumps. I was having trouble priming and clearing the pump lines without burning myself so I hooked these up. Eventually I will replace the pumps with the ones Kal recommends, I already had the pumps from before so I was trying to avoid extra costs. You can't really see it, but we added some plexiglas to the front of the pump stand to further protect from water.

506b3861.jpg


Added metal sheets to the wall behind the system. Here is a full shot of the system.

225cb0b5.jpg

5de9197a.jpg


Reverse angle

242049c1.jpg

cb1a9021.jpg


From the front.

b2a9a903.jpg


And finally, yeast on the stir plate for tomorrows brew...

def4b31b.jpg
 
Well i now have two batches in the fermenter on this thing. The first brew session was nothing short of hell. Temperatures didnt match, plumbing got stuck and i ended up with 15 gallons of beer after 15 hours of brewing and I have no idea what it will taste like nor do i have any idea how to repeat it if it works out well.

My second batch was far more successful, id say i am 80% satisfied with how the system functions. The main temperature issue from the first batch was inadequate plumbing or flow between kettles. The way Kal and many of you on this forum have designed your kettles is to have the temperature probe in the T fitting on the outlet of the kettles. For me, the issue i had was that i wasnt getting good flow through the T fitting so it wasnt completely submersing the probe in hot wort. Because of this i was getting incredibly low readings on the MLT probe. The culprit was loose compression fittings inside the MLT that was causing poor suction. That and the dip tube was far too close to the bottom of the kettle, restricting the flow even more.

Batch #2's main problem was with my whirlpool setup. What is ironic about all of the issues that i had in my first two batches is that the portion of the brewery i was the most worried about, electricity and panel wiring, are the only pieces that have worked flawlessly. Everything else that I thought was a piece of cake has been the issue. Go figure.
 
I've brewed 5 batches on this new setup and everything works great. I had some documented issues, but now that I understand the systems I need to follow to get good results I feel good about everything. My consistency is a bit wacky so far, hitting 70%, 82% and 93% efficiency ver the last three brews. Hopefully I'll be able to dial it in to around 80% soon. Kal's panel design is awesome.

Filling up the HLT with water. Tubing set for the mash.
4df87fa7.jpg


Heating up the Mash and HLT together to 160. My mash for this beer was 154. I've found that a water to grist ratio of 1.5 qts/lb is equal to around a 7-8 degree drop in the mash. I heat up the HLT and mash at the same time by recirculating the mash water through the coil as the HLT heats up. Wen it's time to dough in I set the HLT temp to my actual Mash temp and pour in the grains. I leave the mash recirculating while i dough in and for this batch I hit my mash temp in 3 minutes.
f08ac997.jpg


Close up of the HLT. This would be a downside of the kettles I chose. No preset markers for the gallon increments. I placed zip ties at each gallon marker and will eventually put more permanent markings on the glass tube. I've just been more focused on brewing ever since this thing was operational.
5edca96c.jpg


Setting the sparge temps
f7718c75.jpg


Sparge
adb3be08.jpg


Runoff into the BK.
6a8d80db.jpg


Tubing setup for sparge and runoff. I run the output of the HLT back through the coil to clear out the wort. I also fill the BK from bottom to top. I use the bleeder valve on the output of the pump to take gravity samples as the wort is filling up the kettle.
c30194ad.jpg


Freshly tapped keg of Pale Ale. This was a batch that hit 70% mash efficiency and as such came out darker than I would have liked. I entered it in NHC as both an Amber and APA.
93f7fdbb.jpg


Cleaning out the mash tun. We scoop out the spent grains first, remove the false bottom and hose it out. Works amazingly well.
c065c418.jpg

b5f4fdb1.jpg
 
Nice build. Enjoyed reading through it. I like the manifold you built for the water. I finished remodeling a portion of my basement for a brew room and then completed building an eHERMS system and got some good ideas from you. Thinking I'll switch out the quick disconnect water line and build a manifold like yours.
 
I have been wondering about the edsal shelving unit. I almost purchased it last week and then realized the holes for attaching the caster would not work since it was indeed off center and was meant for bolting down to the ground. When you redrilled the holes was it a pain in the *#!&. What kind of bit did you use. Also is those four bolt casters or a single center bolt.

If it is indeed to easy to drill through i will probably go purchase this shelving unit today and hopefully be able to finally brew with a more organized work flow
 
The casters are single center bolt and it was a breeze to drill through, no big deal. I cant recall now, but i am pretty sure we used some solid washers on there to support the joint that now has two holes in it.

Its been over a year without issue.
 
That is an awesome setup. After reading this post I bought that exact stand. I love it. But where did you get all the extra weld wire? couldn't locate any good sized pieces of it?
 
Holter,

I've been searching the forums looking for things to include on my own rig and stumbled across your build. You've got a few years on your system now. Anything you have/would change? I'm really like the idea of a manifold for water, something so simple but kind of a pain in the rear to be swapping hoses around on brew day.
 
Im not sure if I mentioned it in this thread or not, but the corkboard thing didnt work out like I had hoped. The unfortunate thing is that there is always going to be liquid making its way out of the kettle in one form or another, and with soft wood like I used its a bad setup. I switched over to using tiles now instead and they work great.

The water manifold works great as long as you have a good hose connection. Mine leaks a bit so we put a small pot underneath it during cooling to catch the extra water for cleanup water. I have thought about putting together an all copper manifold at some point just to have it be a bit cleaner looking, but the problem is it remains perfectly functional so i havent had a reason to change it.

So I guess other than the cork board thing I am really happy with my setup. Kal's instructions are great, and over the years as I discovered problems with my wiring (loose connections, etc) I have reached out to him and he has been very helpful - which for someone who doesnt know enough about electricity has been a huge help for me.

Good luck with your build!
Holter

I realize this is an old thread but saw your images on Google and its what im looking towards, my main concern right now is the length using flush welded couplers? After a coupler + close nipple + Stainless T + Nipple + ball valve + camlock it seems like you have this gigantic ass thing sticking out of your pot..have you found this to be a nuisance or anything or am i just being overly dramatic?
 
I realize this is an old thread but saw your images on Google and its what im looking towards, my main concern right now is the length using flush welded couplers? After a coupler + close nipple + Stainless T + Nipple + ball valve + camlock it seems like you have this gigantic ass thing sticking out of your pot..have you found this to be a nuisance or anything or am i just being overly dramatic?

Its not been an issue. I had the same concern but the whole system itself is big enough that you end up just being more comfortable with the overall size of the thing. Never having to worry about leaks has been a serious bonus.
 
Back
Top