Help With Polishing Keg

Homebrew Talk - Beer, Wine, Mead, & Cider Brewing Discussion Forum

Help Support Homebrew Talk - Beer, Wine, Mead, & Cider Brewing Discussion Forum:

This site may earn a commission from merchant affiliate links, including eBay, Amazon, and others.

LiquidFlame

Supporting Member
HBT Supporter
Joined
Apr 18, 2011
Messages
617
Reaction score
53
Location
Normal
I found on another site, one person's method was to use 3M products with the following grit levels. 100 --> 220 --> 320 wet --> 1000 wet. Then they used ryobi polishing compound D. Does this sound like it will get the job done? Only thing that I wasn't sure about, was what kind of pad they used with the polishing compound.
 
Whoa! 100 grit to start? It will be a LOT of polishing to get through the scratches left by that!! Given that my kegs are used and a bit dented, I hold out no hope of achieving perfection. There may be a few scratches in them, but I think starting off around 400 grit will give you 95% of the look with 25% of the work. Heck, just getting rid of the marks and glue and then doing one pass with a polishing compound ought to come out pretty nice.

I definitely think that 100 grit is overkill.
 
Personally I would start with polish, forget grinding and sanding, and wind up with really respectable looking kegs in 30 minutes a piece. But if you really want them to sparkle, yes, I think starting with 400 would be fine. 100 is MIGHTY coarse.

I have a grinding/polishing tool, dewalt variable speed. I would just get some sanding disks and mount them on the rubber backing plate, and go slowly as needed.

Mothers sells a silicone polish treatment for metal. They call it mag polish, but it is for all metals. I have used that on the outside of a corny and it came out very well with no real polishing and just a bit of elbow grease. Using any real gritty polish to start ought to do a nice job. It is just a question of how much time you are willing to invest and what your desired outcome is.

For polishing pads, get the foam and microfiber ones at the autoparts store.
 
I did the gator grit method on mine and followed the info on Bobby's site (suebob.com). Honestly, I don't think you need to start with the medium pad. I polished a pretty messed up keg to a mirror shine, but I spent a LONG time getting the swirls that the medium pad left out.
So going with a 3M method, I agree. 100 grit is ridiculous. I would probably start around 400.
However, the gator grits worked quite well for me. I don't think I'd want to deal with wet sanding it. Can you order the gator stuff online? I would probably try that before I went down the sandpaper road.

By the way, if you do go with the gator grit. Do yourself a huge favor and either do it outside or seal off a portion of your garage to do it in. AND wear a dust mask! It's been some time now and I'm still cleaning the layer of black off of everything in my garage.
 
Since you can't just run and grab, I'd get two packs of the light grit and two packs of the polishing pads. Don't forget the backing pad also. The gator grit one is more pricey but after having a cheap harbor freight one break on me, I ended up spending the extra money anyway. For polishing compound you don't have to get the stuff at Lowes either. Most hardware stores seemed to have some when I checked. I would ask your local store. They tend to keep it near the tools when they do have it.
 
Is that two packs for each keg? Do you guys have the model number or a link of those pads, because every time I google Gator Grit fine finishing pad nothing specific comes up. I just get a list of all their products.
 
I think I used two medium, two fine, and 3 polishing disks per keg. I probably would've used less though if I'd just started with the gator grit backing pad from the beginning. Each pack has two pads in it. I just recommended to get extra since it would suck to run out mid-polishing and have to wait another week to get more.

I don't have the part numbers handy, however as I'm at work. If I remember when I get home, I'll see if I still have the packages in my toolbox.

Actually, I googled real quick
Here's the backer pad.
http://www.lowes.com/pd_251023-1069-3873_0__?productId=1207989
Polishing discs
http://www.lowes.com/pd_251038-1069-3877_0__?productId=1207995&Ntt=gator+polishing&pl=1&currentURL=&facetInfo=
Fine discs
http://www.lowes.com/ProductDisplay?partNumber=251029-1069-3874&langId=-1&storeId=10151&productId=1207991&catalogId=10051&cmRelshp=req&rel=nofollow&cId=PDIO1
#5 Polishing compound
http://www.lowes.com/pd_329453-70-PCPC5_0__?productId=3364034&Ntt=porter+cable+polish&pl=1&currentURL=&facetInfo=

For whatever reason, I can't seem to find the #2 compound on their website though. But you'll want to start with something a little more rough than the 5 and hit it with the #5 last.

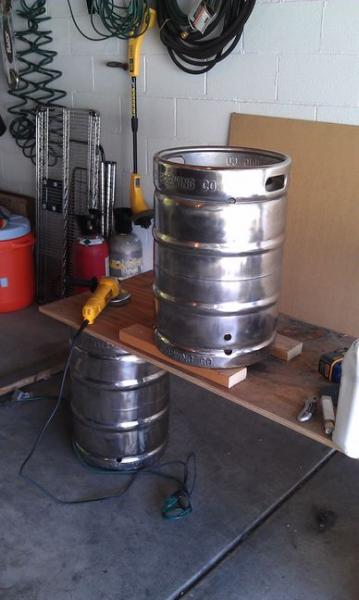
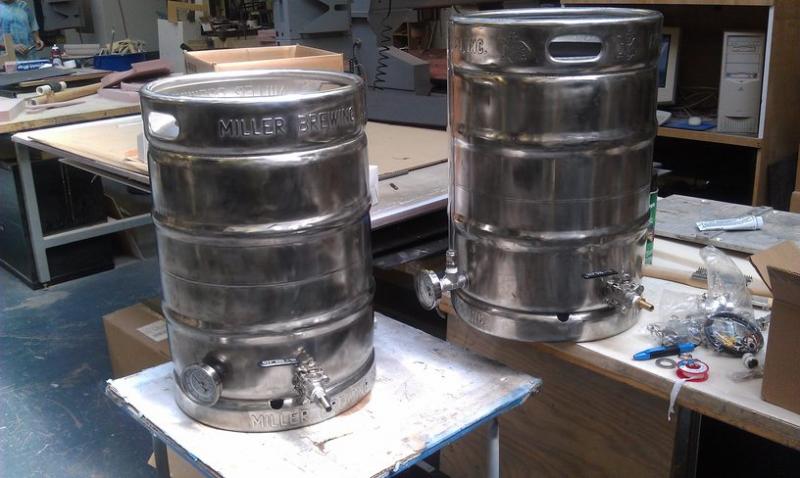
Here's what mine looked like going through the steps.

Before polishing
Keg3.jpg


I can't remember if this was after the fine or medium... I think it was the medium.
Keg2.jpg


Then after the compounds.
Keg1.jpg
 
Not a problem! There's a huge thread on here about polishing them, but it's like a days worth of reading to come up with the info I just gave you.

Remember though, wear a mask at the least. I didn't at first and I was blowing tar from my sinuses for days. And like I mentioned, if you don't want everything covered in a layer of black junk, do it outside or seal off the area where you're doing it with floor to ceiling tarps.

It took me about 4-5 hours total to get it to that shine, but like I mentioned, I wouldn't even use the medium disks to start unless your keg looks much worse than mine did. Even then I would probably only hit the huge gouges with the medium and do the rest with the light pad.

Take your time, and stick some headphones in and it'll go by quick.

Also, try to do it at a comfortable height where you're not bending over or you'll regret it later!
 
Sorry, I just noticed that my links take you straight to the Lowe's main page.

Here's the item numbers for them that you can search for instead.
Backer pad: 86517
Polishing discs: 251038
Fine discs: 251029
#5 polish: 329453
 
This could be really good news for me, I just did a random search on Menards website by the model numbers and found these:

Backer pad: http://menards.com/main/tools-hardware/power-tool-accessories/abrasives/4-1-2-backer-pad-1-pack/p-1704916-c-10154.htm
Polishing discs: http://menards.com/main/tools-hardware/power-tool-accessories/abrasives/4-1-2-polish-disc-2-pack/p-1704920-c-10154.htm
Fine discs:http://menards.com/main/tools-hardware/power-tool-accessories/abrasives/4-1-2-finishdisc-fine-2-pack/p-1704917-c-10154.htm

You think their the same? They look like it, which would be great, because they have them at my store and their cheaper.

Also sorry for not reading the older thread. I figured if the model numbers weren't on bobby's Site they weren't going to be in the thread.
 
I used these exact pads to polish mine, medium, fine, and polish. They will work. Mine did not end up as nice as the other guy's here but then again I spent about two hours on each keg.

Come to think of it, the rouge or polish compound I could not find at Menards, I think that did come from the home depot.

This could be really good news for me, I just did a random search on Menards website by the model numbers and found these:

Backer pad: http://menards.com/main/tools-hardware/power-tool-accessories/abrasives/4-1-2-backer-pad-1-pack/p-1704916-c-10154.htm
Polishing discs: http://menards.com/main/tools-hardware/power-tool-accessories/abrasives/4-1-2-polish-disc-2-pack/p-1704920-c-10154.htm
Fine discs:http://menards.com/main/tools-hardware/power-tool-accessories/abrasives/4-1-2-finishdisc-fine-2-pack/p-1704917-c-10154.htm

You think their the same? They look like it, which would be great, because they have them at my store and their cheeper.

IMAG0313_scaled.jpg


IMAG0372_scaled.jpg
 
The other thing I would say with the Menard's pad is to go easy on the medium unless you have some pretty good gouges. I spent some time working out the scratches I put in there with the medium. I would say one medium pad, two light, one to two polish pads per keg. Again, I just went for "pretty clean" instead of "mirror finish" so take it for what it is worth.
 
I would try those pads, I see no reason not to.
It's really the polishing compound that brings out the bling.
A lot of it depends on how much time you put into it also. And pressure that you apply.
I think Bobby probably mentioned it on his site, but you need to give it enough pressure until you start to hear the grinder motor slow down some. Light pressure doesn't work as well at all.

And also, work in small areas and move on. Don't try to do the whole length of the keg in one pass.
 
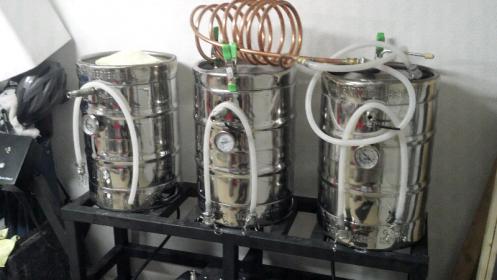
I just got done polishing my kegs last week. Took me about 12 hours for three kegs. I did use the gator pads at medium then fine. Follow with a buffing/ polishing pad that can fit on a 4 " angle grinder with a number 2 polishing stick. Sue bobs web site has great details, someone posted the link for ya. You will go through about 3-4 polishing pads per keg ( these we gator brand also) . 3M makes a great product, going all the way to 1000 wet seems like over kill. I achieved a mirror finish with the process listed at sue bobs. I didn't follow the #2 with the highgloss #5. ( to drunk and tired ) You can order these gator pads online. I bought 1 pack of medium and fine. Each pack comes with 2 pads. And it got me through 3 kegs. You will also need the rubber backing plate. I will post a pic as soon as I get home as my phone isn't cooperating with this app.

ForumRunner_20120726_150623.jpg


ForumRunner_20120726_150643.jpg
 
Another thing to add. If you polish the upper rim handle you will need to obviously need to clean out the inside of your kegs. This process took just as long as polishing them up. Still worried I didn't get them clean enough.
 
Are you talking about cleaning out the junk from sanding and polishing from the inside of the keg? If so I shouldn't have to really worry about that because I haven't cut my kegs yet.
 
Tape off the openings from inside the keggle with a plastic bag and some masking tape. Have enough slack in the bag so you can reach around and press the tape into place.
 

Latest posts

Back
Top