My new electric build....in progress

Homebrew Talk - Beer, Wine, Mead, & Cider Brewing Discussion Forum

Help Support Homebrew Talk - Beer, Wine, Mead, & Cider Brewing Discussion Forum:

This site may earn a commission from merchant affiliate links, including eBay, Amazon, and others.

HossTheGreat

Well-Known Member
Joined
Mar 28, 2009
Messages
523
Reaction score
5
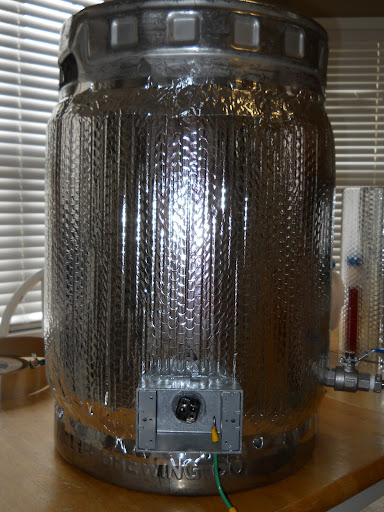
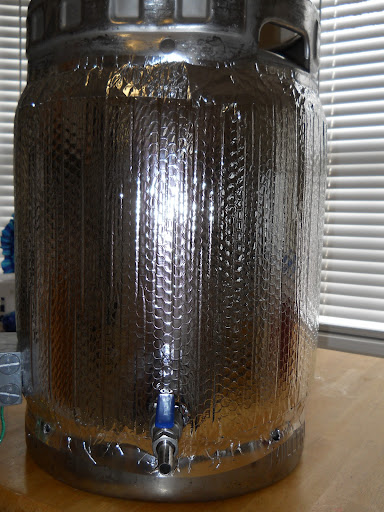
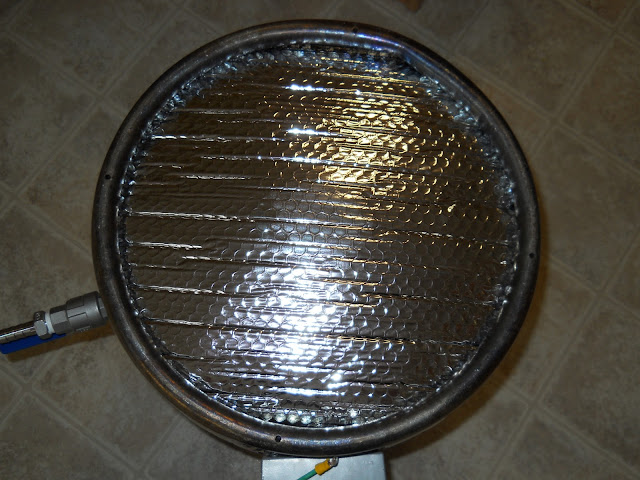
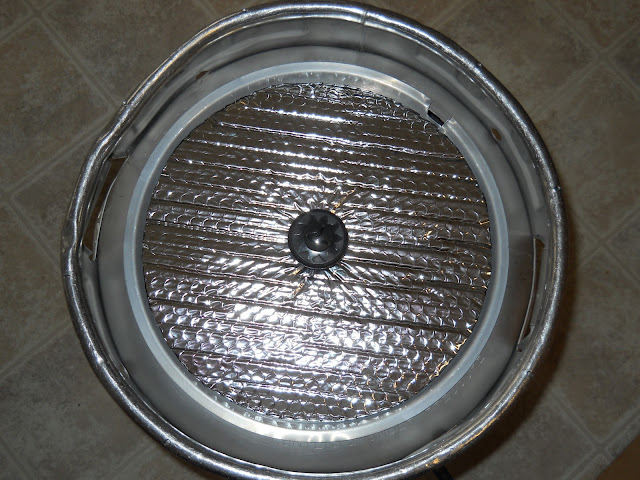
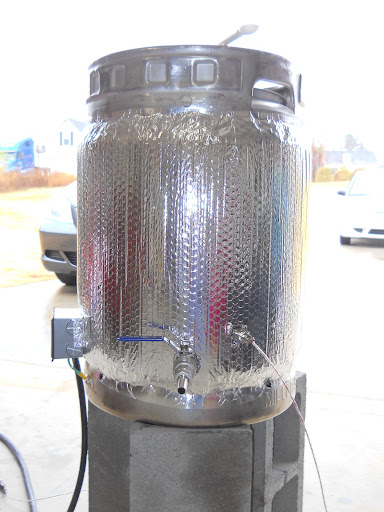
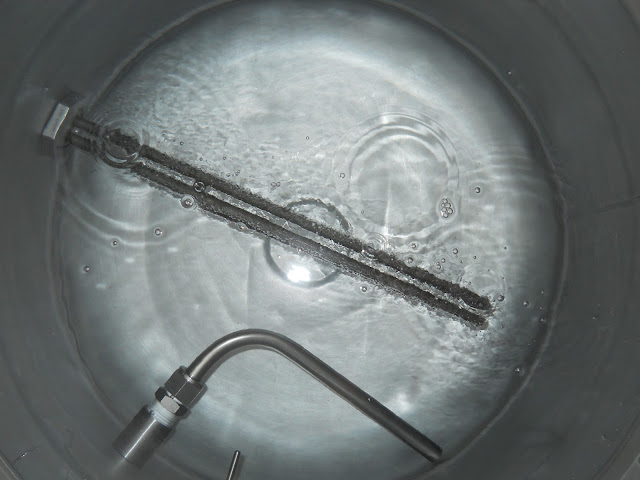
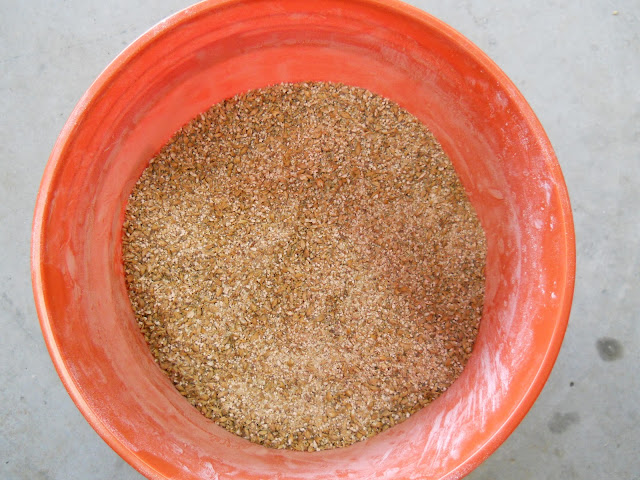
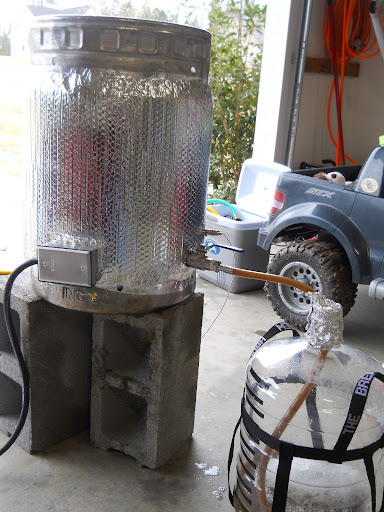
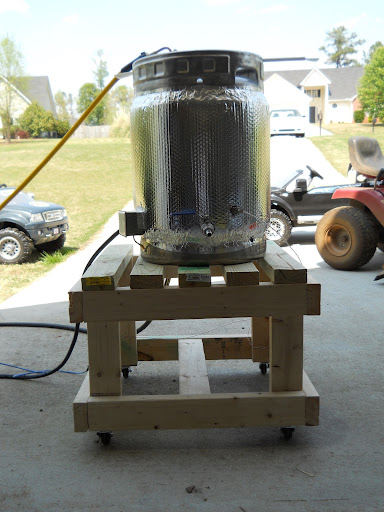
***3/6/2011 UPDATE*** The rig has been finished and the maiden voyage completed. Updated with lots of pics below.

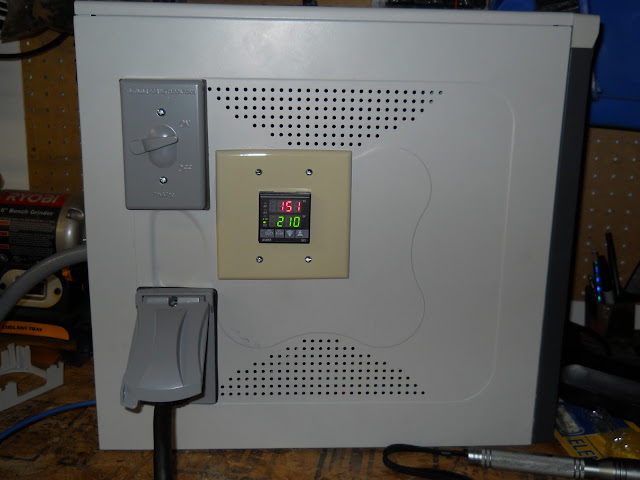
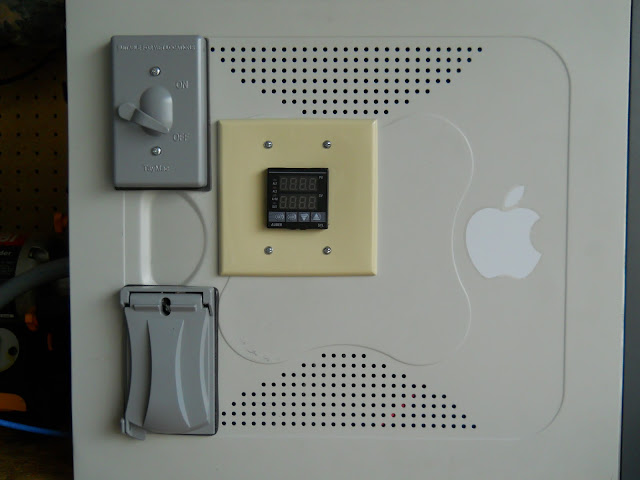
Here's a few pictures of the new control panel that I am almost finished wiring up. I put an old computer case that I had laying around to good use. It's a pretty simple setup, since I do a single vessel BIAB.

DSCN1024.JPG


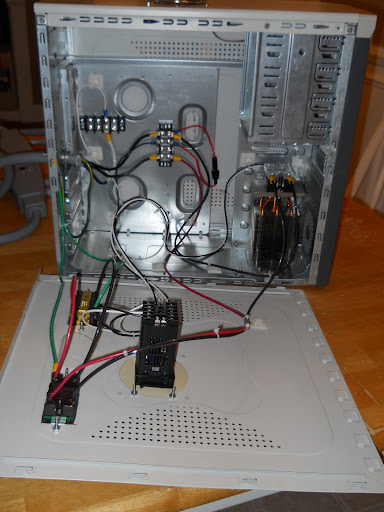
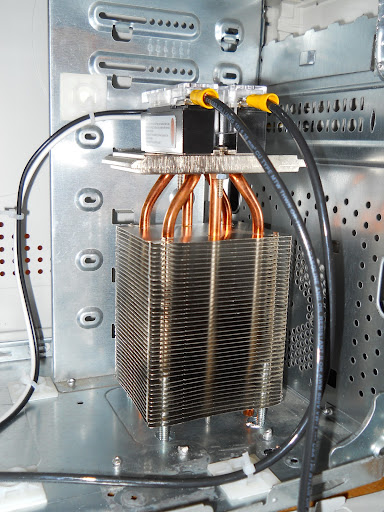
I do have one question about the SSR. You can see that the heatsink is enclosed in the case. I know that many people who use small water-tight enclosures opt to put their heatsink on the outside of the box. Do you think I'll run into any heat issues with the current setup? Obviously I do have the option of running a couple of case fans, but this would require me to purchase a transformer to step the voltage down, plus an ac to dc transformer to feed the fans. Just curious if this is necessary, or if I should be ok.

DSCN1026.JPG


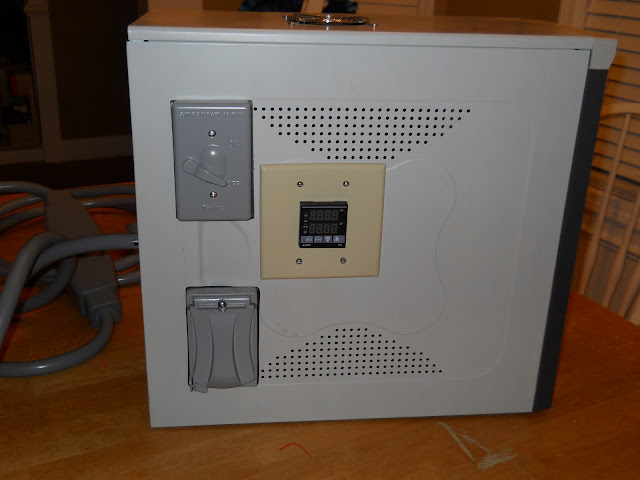
Next, here's a look at the outside. Before anyone says anything, I know there's no point in having waterproof covers, but I wanted a cover for the outlet just for a little added safety....and I just thought the switch cover was pretty cool.

DSCN1025.JPG
 
Looks good, can't wait to see more pics! As for that heatpipe cooler, it's made to cool a CPU that certainly gets hotter than that SSR ever will, I think you'll be just fine.
 
Cool idea with the case. I was viewing this on the iPhone app and it didn't show the pictures. I was completely expecting one of those neon/clear cases with a PID mounted in the middle!
 
Thanks guys. I also appreciate all the help you all have given me the past few weeks as I planned out this build. Here's some more pics.

5500w element, RTD probe, and Ball Valve/Dip Tube installed. Drilling that hole for the element using a step bit was a miserable experience, in which I hope I will never have to repeat.

DSCN1030.JPG


By bending the last couple of coils, I'm able to place my IC in without much trouble. We'll see how it works during an actual brew session though.

DSCN1033.JPG


I went back and forth between going with pol's method of using a PVC coupling and JB weld, but ultimately went with a waterproof box.

DSCN1031.JPG


I drilled out the back of the box and used JB stik to attach it to the element. Hopefully it'll hold up ok. I'll probably also run a bead of silicone caulk around where the box meets the element...just to ensure a watertight seal.

DSCN1032.JPG
 
Box is a far better solution than the jbweld IMO. Looks good.

I'm also building a new system to do 1 pot BIAB, so look forward to hearing how yours works.

As to a fan, buy a cheap 120v muffin fan and then you don't have to mess with transformers, etc. Something like this http://www.amazon.com/dp/B001TJWRS4/?tag=skimlinks_replacement-20
 
Last edited by a moderator:
Well, after triple checking my wiring, I plugged it in tonight and took her for a test drive. Must say, I'm pretty happy with it. The only thing was that my RTD sensor was reading about 6 or 7 degrees less than the actual temp. While boiling, it was reading 205-206. I need to read up on this a little and see if I need to do some calibration. Does anyone have any quick tips about this?

DSCN1034.JPG
 
I would guess that your PID controller has instructions for offsetting the temperature reading to have it read 212 when you are boiling. The old Love controller I got off eBay has that function. Not really calibration, but I don't care if the BK thermometer is off a few degrees on it's way to boiling, I want to know when the temp is close so I can get full enjoyment out of the inevitable boilover.
 
If that's an Auber PID, then you most certainly can enter a temperature offset. The user manual is available online, and will tell you what to do for that.

Neat build, BTW.

TB
 
If that's an Auber PID, then you most certainly can enter a temperature offset. The user manual is available online, and will tell you what to do for that.

Neat build, BTW.

TB

Thanks...I just tested it in a water bath and sure enough' it's reading right at 32 degrees. Perhaps it's just the placement of the probe that's giving me a reading that's lower? I'll test around some and see what I figure out.
 
Well after testing the rig out last night, I left the water in it to cool before emptying the keg. Today, there's quite a bit of rust on the element base. There's even some on the element itself, the RTD probe and some spots on the bottom of the kettle.

The obvious answer to prevent this would be to not allow water to sit in the kettle for such a long period of time...however, wouldn't water still sit under the stainless nut, causing rust on the element threads anyway? I've read where some people have tried using an aluminum nut instead of stainless, covering the base of the element in food grade silicone or food grade paint, using aluminum flashing or other means of sacrificial anodes, but have really yet to see any definitive answers on which method (if any) is the best.

In the meantime, I'll clean this up with some barkeepers friend and figure out what to do from here.

DSCN1037.JPG


DSCN1038.JPG


DSCN1041.JPG
 
Nice work. I use aluminum locknuts in my BK and that stopped the rusting. I got them from Wayne at bargain fittings, $12 if I recall for the 1" ones. Very happy.
 
Yes, that is it. I didn't know he had them on the site now, it was special order before. It is actually rounded on the back side (that you cannot see) and flat on the side he has shown on the site. I used the rounded side with an oring and it works fine.
 
Yes, that is it. I didn't know he had them on the site now, it was special order before. It is actually rounded on the back side (that you cannot see) and flat on the side he has shown on the site. I used the rounded side with an oring and it works fine.

Awesome...thanks for the info. Hell, another $13 is only a drop in the bucket anyhow.
 
The rusting really annoyed me so I was happy to try the aluminum nut. Clean all the rust off and the aluminum should do the trick. I think it acts as an anode, but regardless, it works.
 
Nice build! Just picked up my keg tonight to convert. Is a waterproof box an electrical part available at home centers?
 
So, my next plan was to insulate the keggle with some reflectix...but then it occurred to me, since I use an IC how much longer is it going to take me to cool the wort down to pitching temps with insulation keeping all of that heat in? I spose I could make a sleeve out of it of some sort and remove it when I'm done with the boil, but not sure if that would be ideal. Any thoughts?
 
Well, after triple checking my wiring, I plugged it in tonight and took her for a test drive. Must say, I'm pretty happy with it. The only thing was that my RTD sensor was reading about 6 or 7 degrees less than the actual temp. While boiling, it was reading 205-206. I need to read up on this a little and see if I need to do some calibration. Does anyone have any quick tips about this?

What's the altitude where you brew? Water boils at ~207 at 2500 feet.
 
What's the altitude where you brew? Water boils at ~207 at 2500 feet.

I'm located in GA, so I don't think that altitude is an issue here. I traded numerous emails back and forth with Auber (excellent customer service. I would highly recommend them). They suggested that the placement of the probe could be an issue. They asked me to email it back to them so that they could test it to ensure it's reading accurately. They also gave me several options to swap it out for probes of a different length/diameter if it does, in fact, test out ok. I will post once I hear the results from their test.
 
I'm located in GA, so I don't think that altitude is an issue here. I traded numerous emails back and forth with Auber (excellent customer service. I would highly recommend them). They suggested that the placement of the probe could be an issue. They asked me to email it back to them so that they could test it to ensure it's reading accurately. They also gave me several options to swap it out for probes of a different length/diameter if it does, in fact, test out ok. I will post once I hear the results from their test.

Okay, just keep in mind that 212 is the boiling point of water, at sea level.
 
Here's some new pics after working on insulation today.

I did 2 full wraps of reflectix.

DSCN1052.JPG


DSCN1053.JPG


I used a pizza stone to trace the circle for the bottom of the keg. Again, the insulation is doubled up here as well. It sits perfectly under the lip of the keg.

DSCN1054.JPG


Finally, I cut out a piece to put on the lid.

DSCN1055.JPG
 
Here's an update on my RTD probe. A few posts back, I was having a problem with the RTD sensor reading 206-207 when boiling. After several emails back and forth with Auber, they suggested that I send it in for some tests to ensure it's accurate. Here's what they came back with:

I received the probe and have it tested. Attached is the test report. Basically, the reading is about 1.1F lower when the probe is immersed to 50% of the thread. It is about 3F lower at 175Fif we don't immerse the thread section. In real application, half of the thread is inside the tank.
Then, we replaced the internal sensing element with a smaller and faster one. The difference become smaller. With 50% immersion, it is about 0.6F lower at 175F. Please note that the difference will be less if you working at 160 than at 200F. The larger the temperature gradient between the inside and outside, the larger the difference will be.
The option for you are.
1) change to a 4" probe. About 50% of the customer use the 4" probe.
2) Get the probe back with the fast element. If it still read lower, you can offset the controller for the difference.
3) We can make a thinner probe to further reduce the difference. It will be about 40 days lead time.


I opted to go with #2, since I really don't mind adjusting the offset. I didn't go with #1 because I didn't want it to interfere with my IC. I didn't consider option #3 either, not just because of the 40 day turnaround, but because they told me that a thinner probe would be more fragile. Because I'm lifting an IC in and out, I didn't want to run the risk of damaging it.
 
They are a pretty cool company to deal with. How many other suppliers would go to that effort.
 
They are a pretty cool company to deal with. How many other suppliers would go to that effort.

Yeah, they are awesome. You should see the detailed report they sent me...pretty impressive. I would most certainly recommend them to anyone.
 
Well, the new rig embarked on her maiden voyage yesterday. At first, I was going to do a simple extract batch with some of the DME I have laying around just to dial everything in, but then I thought "Stop being such a pansy". So I ended up brewing an AG Southern English Brown.

Here it is...single BIAB vessel ready to go

DSCN1060.JPG


Heating up approx 8.5 gallons of water. I didn't time how long it took to reach strike temp, but it was much faster than my propane setup.

DSCN1059.JPG


Also just sold off my old corona style mill and bought myself a Crankandstein 2A. This is the first time I'm putting that to use as well. So far, I'm pretty impressed.

DSCN1062.JPG


Stirring the Mash

DSCN1066.JPG


Nailed my mash temp

DSCN1065.JPG


At the end of the mash, I pulled the bag out and set it in a colander to drain while heating the wort to a boil.

DSCN1067.JPG


DSCN1068.JPG


Almost Boiling

DSCN1069.JPG


Again, I didn't time it but before I knew it I was at a boil.

DSCN1072.JPG
 
I was a little concerned how difficult it would be to put my wort chiller in when I couldn't see the element. I have to slip the bottom couple of coils under the element. It turned out to be a breeze. On the first try, that sucker slid right into place.

DSCN1073.JPG


Wort chilled

DSCN1074.JPG


DSCN1077.JPG


5.5 Gallons of a Southern English Brown

DSCN1080.JPG


And this is what I woke up to this morning :rockin:

DSCN1082.JPG
 
Nice work! I think I have the same issue with my auberin PID. It reads boiling around 206 or 207.
 
Thanks everyone. No way could I have ever done this without the help of everyone on here. I used to do the batch sparge/cooler method, but BIAB is so much easier. The addition of electric makes it even that much easier and quicker. I honestly don't see any reason for me to ever do it another way.
 
Another update....I hit up the Home Depot the other day. In the back of the store is their discount pile consisting of damaged, bowed, or scrap pieces of lumber. I built the following with about $3 worth of wood and put it in use today. Worked pretty well.

DSCN1245.JPG
 
Another update....I hit up the Home Depot the other day. In the back of the store is their discount pile consisting of damaged, bowed, or scrap pieces of lumber. I built the following with about $3 worth of wood and put it in use today. Worked pretty well.

DSCN1245.JPG

Wow, that is too weird! I am literally planning out a similar electric rig at the moment and am working on a similar wooden stand, one for each vessel. The room I'm putting everything into is a bit limited for space so it's the only way I can make a stand that is removable for cleaning, etc. later. I imagine mine may end up a little bit smaller (door I'm working with is 2ft), but it definitely gives me some ideas. What are the dimensions of that?
 
Wow, that is too weird! I am literally planning out a similar electric rig at the moment and am working on a similar wooden stand, one for each vessel. The room I'm putting everything into is a bit limited for space so it's the only way I can make a stand that is removable for cleaning, etc. later. I imagine mine may end up a little bit smaller (door I'm working with is 2ft), but it definitely gives me some ideas. What are the dimensions of that?

It's exactly 2'x2'. I too have pretty limited storage space, so it fits exactly in between a couple of work benches and underneith some shelves in my garage. The thing I like best is that I can just wheel it over to my utility sink, where my water filter is to fill it up then roll it out of the garage to brew.
 
Build looks really good, but I have a quick question. I noticed you ran a ground wire from your element box to the keg skirt. Maybe I missed something, but what was the specific reason for this? I don't recall seeing this before, specifically in Kal's build.
 
Back
Top