I love that scene!!
You are using an out of date browser. It may not display this or other websites correctly.
You should upgrade or use an alternative browser.
You should upgrade or use an alternative browser.
Bolts Electric Brewery Build
- Thread starter bolts
- Start date

Help Support Homebrew Talk - Beer, Wine, Mead, & Cider Brewing Discussion Forum:
This site may earn a commission from merchant affiliate
links, including eBay, Amazon, and others.
OP
OP
Just means I want oneVery well done sir :rockin:
Hah, I forgot about that scene. Excellent reference

lotbfan
Well-Known Member
I need to see this in person and am local, pm me if I can tempt you with a sixer of your favorite from belmont station.
AdamCanFly
Well-Known Member
Man, you make it look so easy! I've been trying to build something half this nice for about a year and a half now.
I could make quite a pile of sawdust in a year and a half....and still not come close to that craftsmanship
https://lh6.googleusercontent.com/-M96tJsr0k9E/UDRh8TWAXxI/AAAAAAAAD0s/AKnWcBxCCzU/s1600/20120819-DSC_2219.jpg[/IMG]
Bolts, could you describe in more detail how you built the heating element housings. Where did you get the tri clamp fittings? I am attempting to build a heatstick similar to Airbalancer's design
https://www.homebrewtalk.com/f51/ultimate-heatstick-240-volt-116049/
but what you have is perfect for what I want. Ive seen a lot of slap happy designs with JB weld and plastic PVC, but the stainless tri clamp is the most solid adaptation I have seen. Thanks. Great build BTW.
OP
OP
Bolts, could you describe in more detail how you built the heating element housings. Where did you get the tri clamp fittings? I am attempting to build a heatstick similar to Airbalancer's design
https://www.homebrewtalk.com/f51/ultimate-heatstick-240-volt-116049/
but what you have is perfect for what I want. Ive seen a lot of slap happy designs with JB weld and plastic PVC, but the stainless tri clamp is the most solid adaptation I have seen. Thanks. Great build BTW.
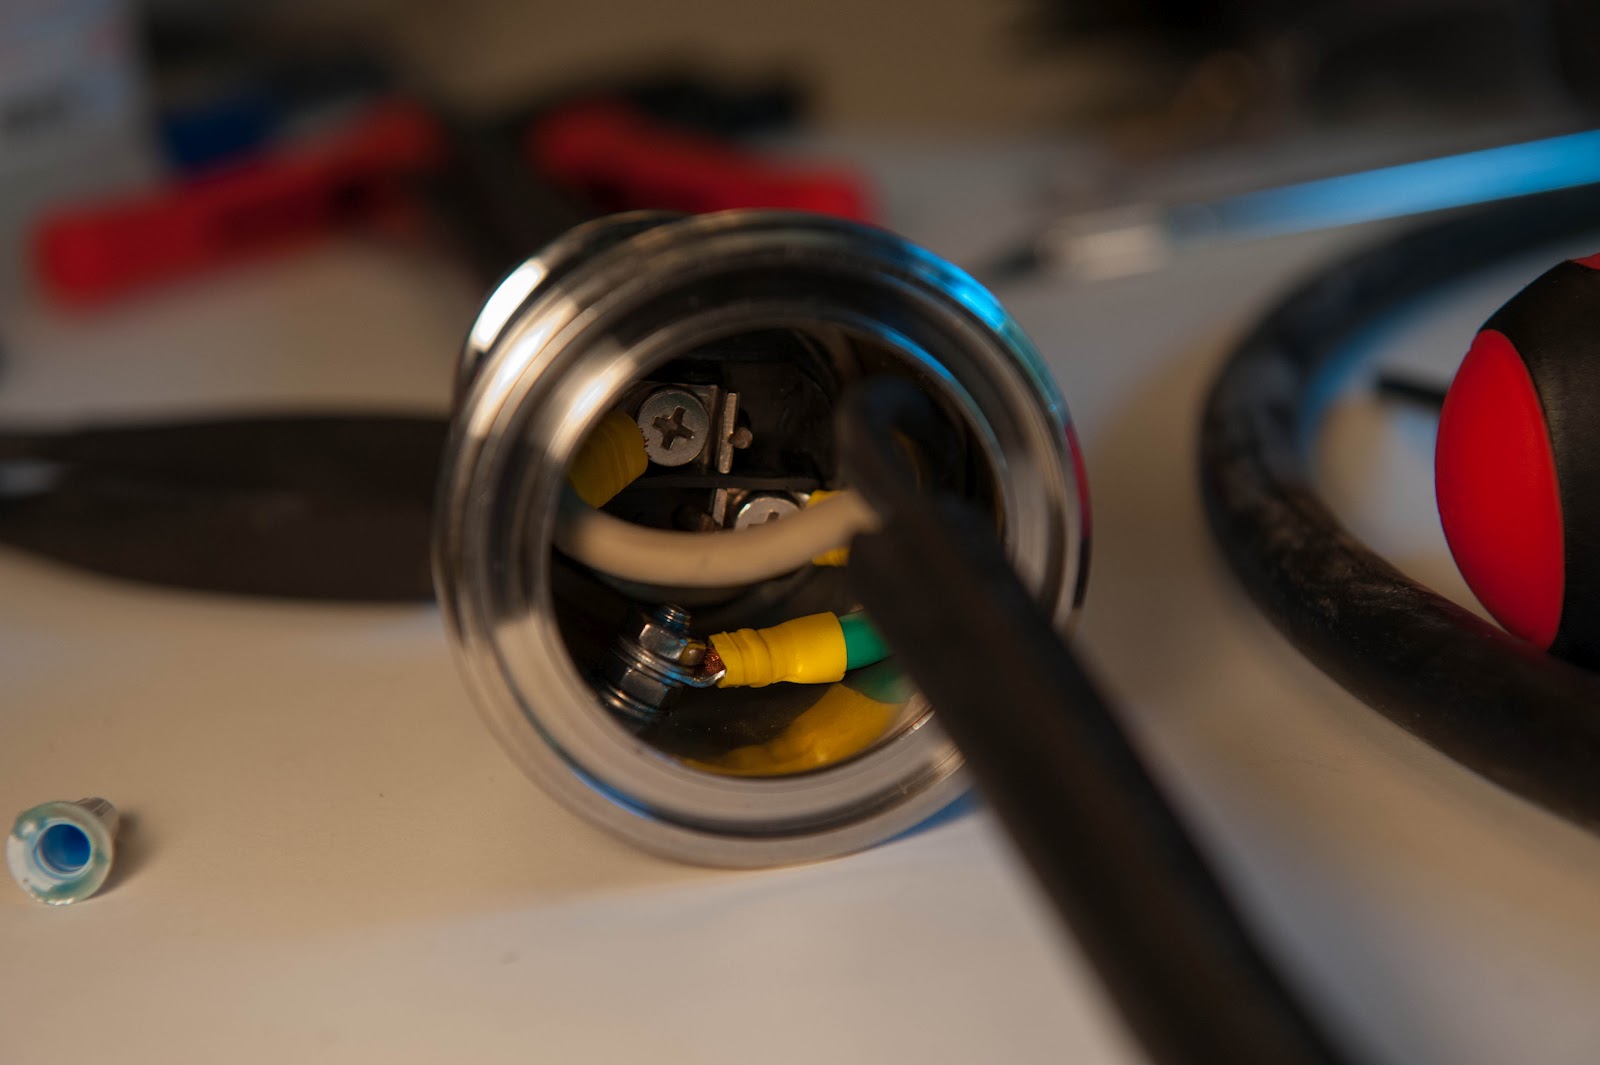
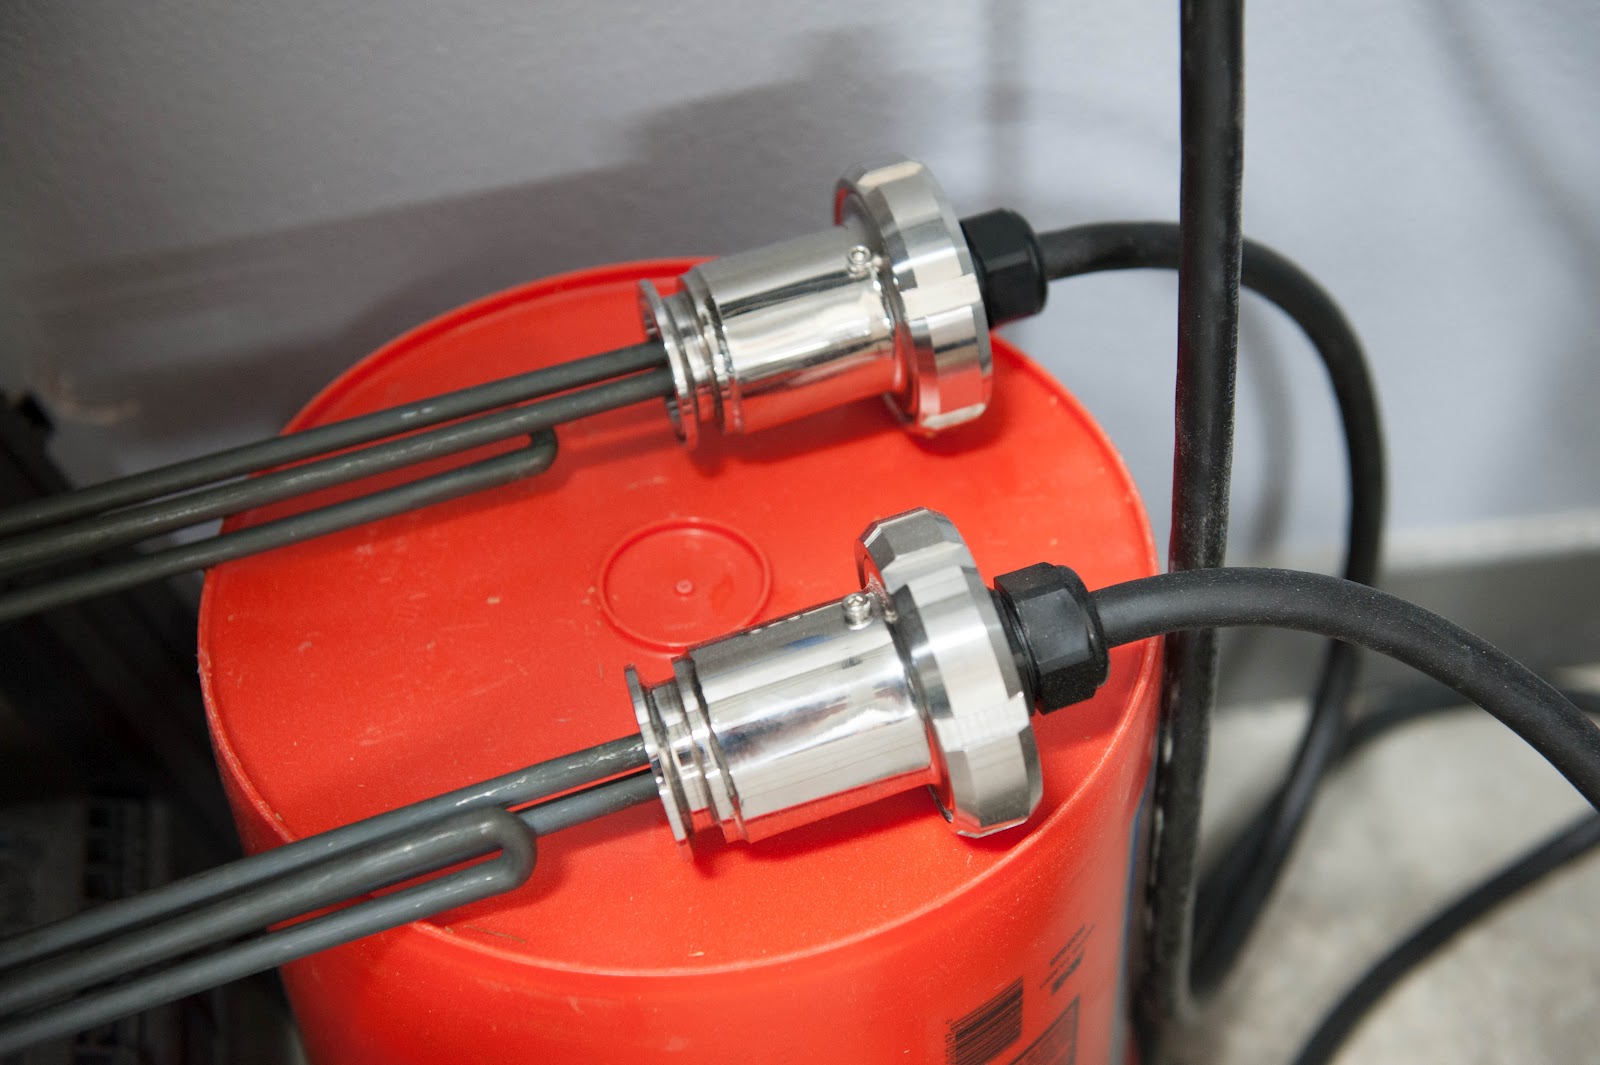
All the credit for these goes to Derrin at Brewers Hardware. The craftsmanship is fantastic. One note -- if you can get the larger 2" TC, I would. I was unable to fit the typical camco ripple element though the housing and went with the straight version.
https://www.brewershardware.com/TC15F10NPSCOV.html
That said, a few folks on this board have soldered/brazed their own not that different from this. This thread seems to have a bunch of ideas -- https://www.homebrewtalk.com/f170/triclamp-heater-element-design-217575/ I can work with wood -- but metal is a whole different beast...
OP
OP
I need to see this in person and am local, pm me if I can tempt you with a sixer of your favorite from belmont station.
PM sent -- saw your other post too, happy to oblige.
So you have the 1.5" and the ripple didn't fit? But the standard straight fold back did?
I'm in process of having a 2" ferrule welded to my HLT for this and want to make sure I get the right element. The 2" triclamp element fitting is in the mail.
I'm in process of having a 2" ferrule welded to my HLT for this and want to make sure I get the right element. The 2" triclamp element fitting is in the mail.
OP
OP
So you have the 1.5" and the ripple didn't fit? But the standard straight fold back did?
I'm in process of having a 2" ferrule welded to my HLT for this and want to make sure I get the right element. The 2" triclamp element fitting is in the mail.
Yup. Unfortunately, the ripple element wouldn't fit in the 1.5" TC fitting from brewers hardware. I ended up going with the Camco 02933 It's still a 5500W ULWD element.
Last edited by a moderator:
porcupine73
Well-Known Member
- Joined
- Aug 21, 2012
- Messages
- 814
- Reaction score
- 50
Looks very nice. The wiring is pretty neat and tidy. The lamicoid nameplates really add a professional touch. Is a ground bonding jumper required for the door?
OP
OP
Looks very nice. The wiring is pretty neat and tidy. The lamicoid nameplates really add a professional touch. Is a ground bonding jumper required for the door?
Thanks -- the tags are from Signs Banners & Tags place Kal recommends. George was nice to work with and had a quick turnaround.
It's hard to see, but there is a grounding post in the top right on the back of the door that's connected to the ground bus bar. Same with the inside right of the box. During testing I confirmed I had continuity between the door, panel, heatsink and backpanel. I used star lock washers in most places to give some bite to ground the various fasteners.
JordanThomas
Well-Known Member
IT'S SO FLUFFY!
HAHA yes. Monsters, Inc. quote. It's a good thing.
HAHA yes. Monsters, Inc. quote. It's a good thing.
No, no, no.... Despicable Me!
vinylicious
Well-Known Member
Bolt - did you ever wire in the alarm? I don't see it in your latest wiring diagram and none of your progress photos show the alarm wired up. T
Thanks by the way, I am basically planning on copying your design for my control panel.
Thanks by the way, I am basically planning on copying your design for my control panel.
OP
OP
Bolt - did you ever wire in the alarm? I don't see it in your latest wiring diagram and none of your progress photos show the alarm wired up.
Thanks by the way, I am basically planning on copying your design for my control panel.
I didn't wire up the alarm (at least not yet). It's really there as a placeholder for future use. I'll probably wire it up to my hlt pid so to monitor mash temp from afar. e.g. pump stops, stuck mash, etc would show up as dropping temp in the recirc probe.
I have some ambitious plans to create a timer/alarm module (embedded arduino or netduino). If you do decide to use the alarm without an additional embedded controller, then I would be inclined to follow Kal's lead here and use a switch + alarm (this one is a single unit for light + sound). I wasn't a fan of this given how many extra switches were required, but it works. http://www.theelectricbrewery.com/control-panel-part-2?page=12
I should have a bill-of-materials and my "what I would do differently" thoughts up this weekend.
I should have a bill-of-materials and my "what I would do differently" thoughts up this weekend.
Anxiously waiting for this
OP
OP
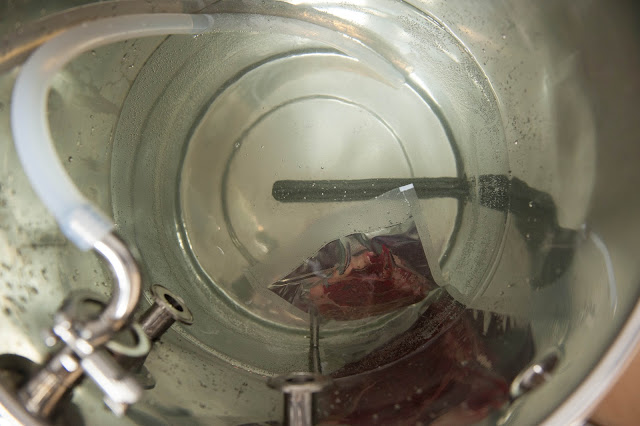
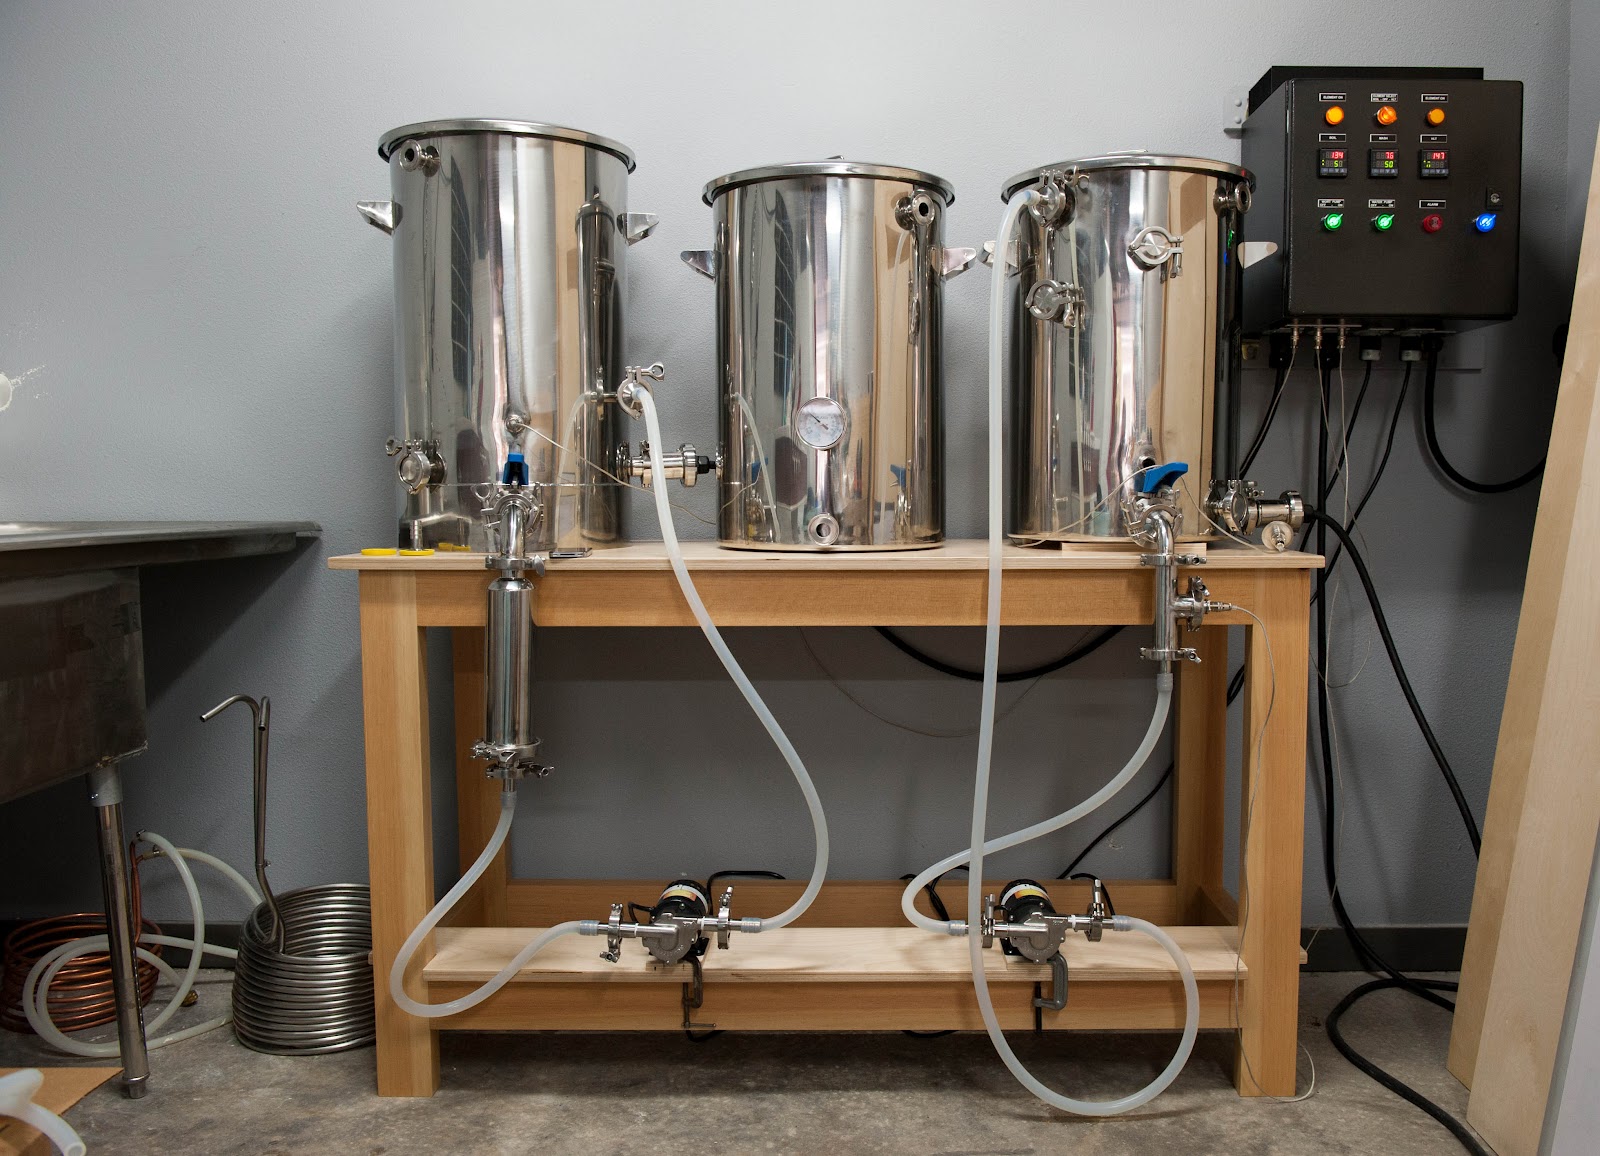
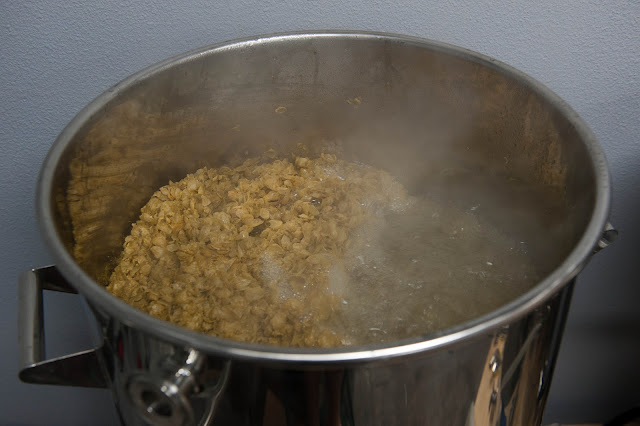
First a few more pics. The bench is finished, sink is plumbed and I did a few dry-runs -- including hops in the boil kettle. I had a pump apparently trip a thermal overload, but round #2 of testing didn't have any issues. Mike from chugger offered to send a replacement however. I did a full disassembly and reassembly of the pumps before testing the second time. I had some cavitation issues when pumping while at full boil -- but that seems to be expected. On to the pictures...
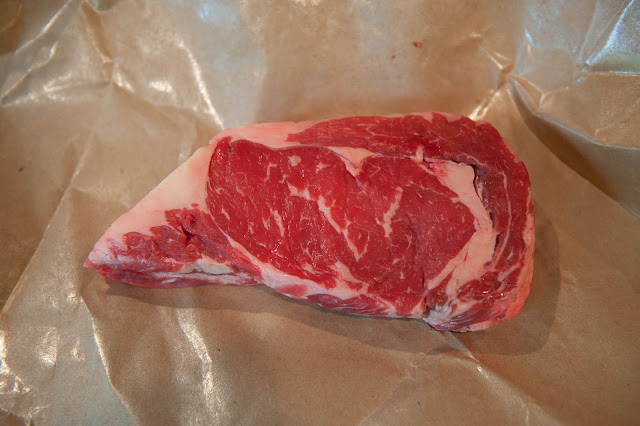
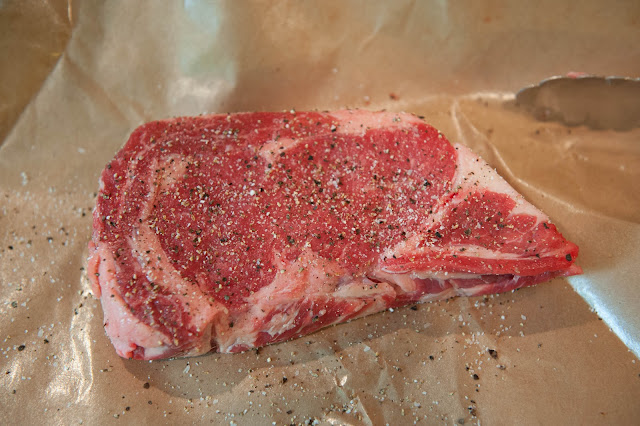
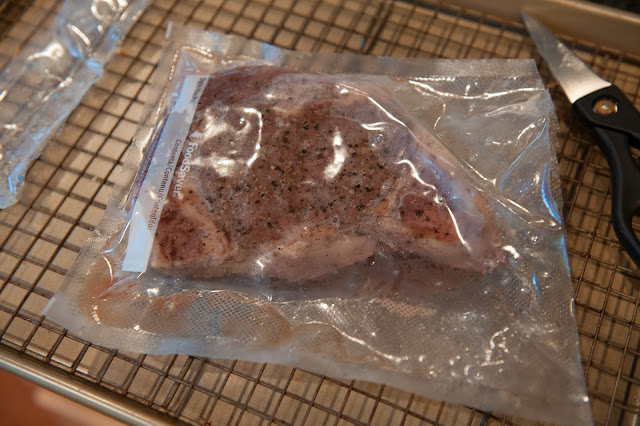
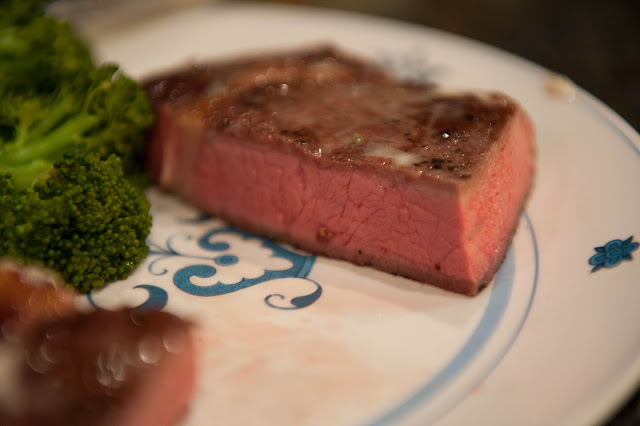
Test #1 was some sous vide rib eye steak I had some temp problems while the PID was seemingly tuning itself (it overshot by ~5 degrees) -- but it seems to be on target now. For reasons I don't understand, it was firing the element even though it was clearly already above the target temp. The steak was still tasty with a quick sear afterward.

Test #2 underway. I ran a recirc in the HLT at 154F and then up to 180F with the pump running the entire time (~2+ hours). Then I brought the boil kettle up to boiling, also with the pump running (a bit of a torture test). Cavitation became a problem around boiling, but stopped when I re-oriented the pump vertical. In both cases, I had no problem with priming -- just use gravity. I should probably test with some restriction (e.g. valves) before brewing.
Almost 10oz of old hops being boiled...
Since the plumber never called me back, I went on a mission to plumb the sink Saturday. The process involved way too much crawling around under the house. The sink is from a local restaurant supply store, I picked it up on a discount for $399 + the sprayer + the faucet. The sink has a huge 24" x 24" tub -- very easy to fit the kettles inside. Backsplash is next on the list. As an aside, you can probably get away without a sprayer by just sticking your thumb over the end of the filling hose
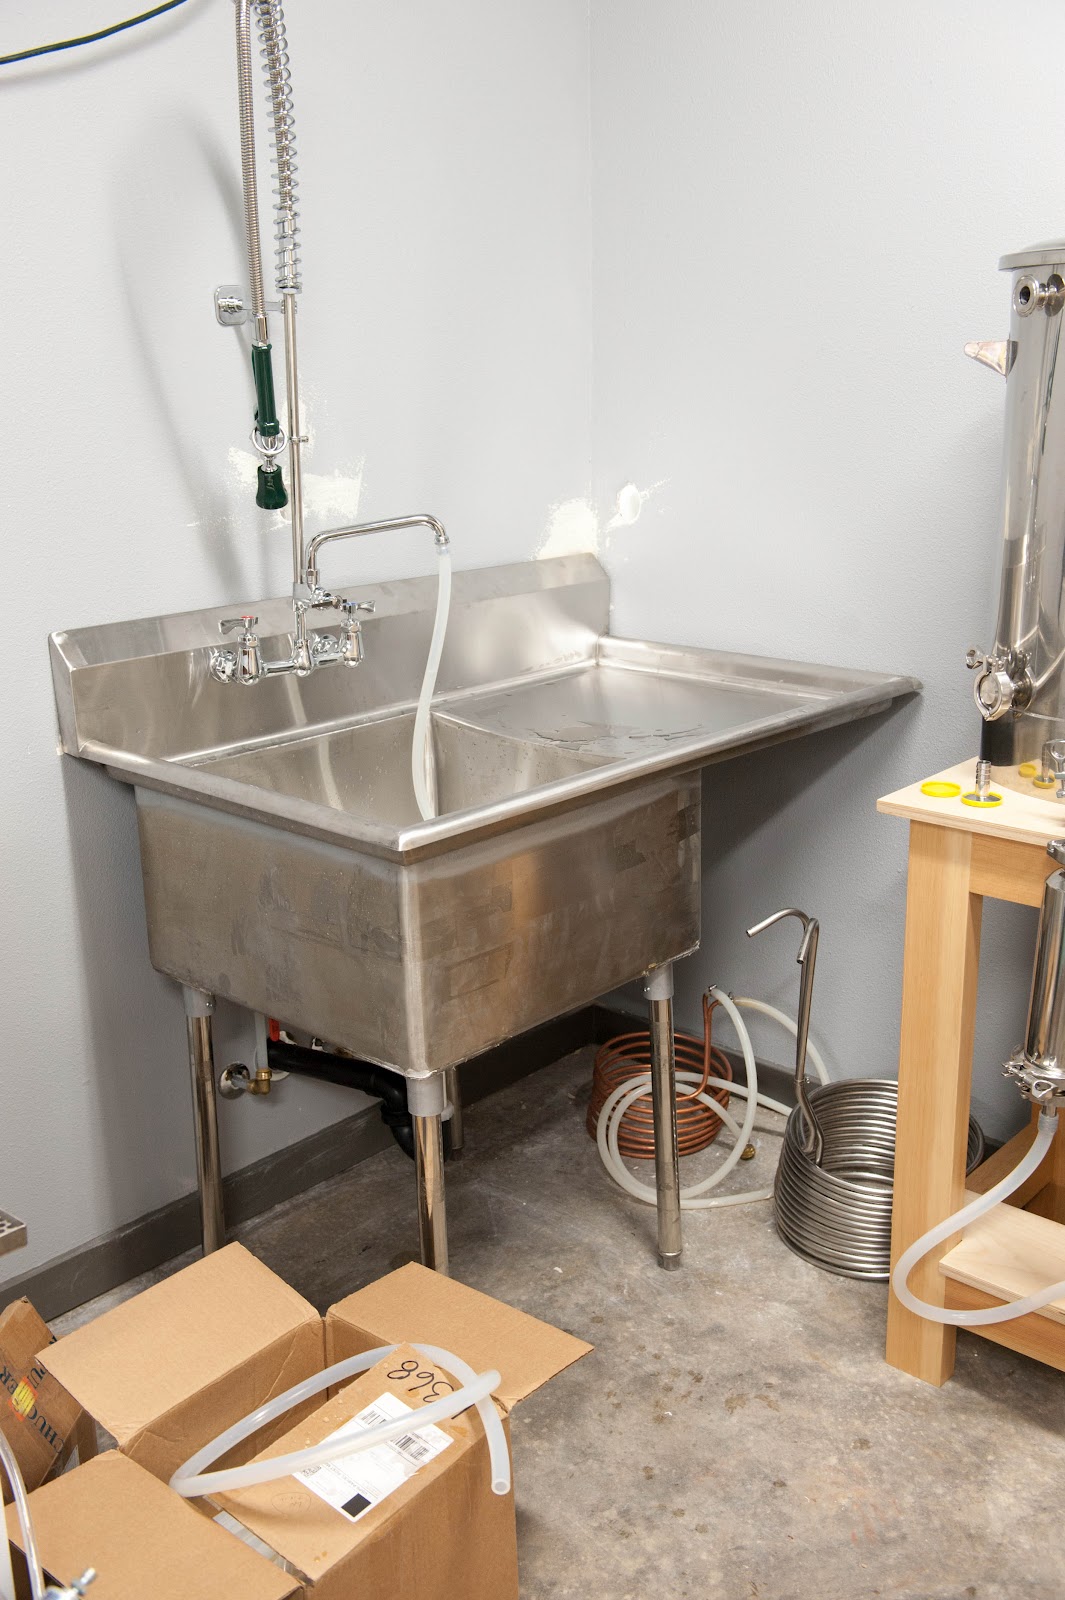
I found some 'dish washer disconnects' at the local ace hardware. Not shown in the picture is a hose -> barb adapter that will give me an easy way to connect/disconnect my filling hose. 1/2" silicon fits over the end as is, but the disconnect makes it easier to remove.

Test #1 was some sous vide rib eye steak
I had some temp problems while the PID was seemingly tuning itself (it overshot by ~5 degrees) -- but it seems to be on target now. For reasons I don't understand, it was firing the element even though it was clearly already above the target temp. The steak was still tasty with a quick sear afterward.
Test #2 underway. I ran a recirc in the HLT at 154F and then up to 180F with the pump running the entire time (~2+ hours). Then I brought the boil kettle up to boiling, also with the pump running (a bit of a torture test). Cavitation became a problem around boiling, but stopped when I re-oriented the pump vertical. In both cases, I had no problem with priming -- just use gravity. I should probably test with some restriction (e.g. valves) before brewing.
Almost 10oz of old hops being boiled...
Since the plumber never called me back, I went on a mission to plumb the sink Saturday. The process involved way too much crawling around under the house. The sink is from a local restaurant supply store, I picked it up on a discount for $399 + the sprayer + the faucet. The sink has a huge 24" x 24" tub -- very easy to fit the kettles inside. Backsplash is next on the list. As an aside, you can probably get away without a sprayer by just sticking your thumb over the end of the filling hose
I found some 'dish washer disconnects' at the local ace hardware. Not shown in the picture is a hose -> barb adapter that will give me an easy way to connect/disconnect my filling hose. 1/2" silicon fits over the end as is, but the disconnect makes it easier to remove.
OP
OP
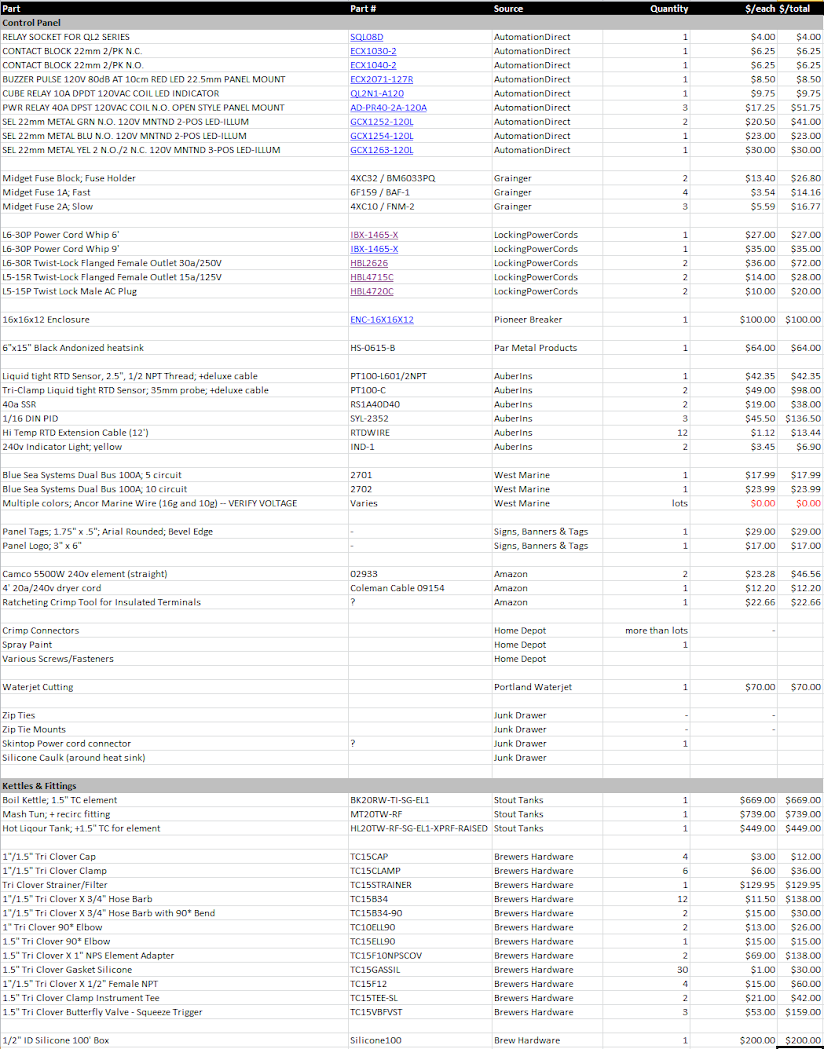
I had great customer service from everyone I ordered the control panel parts from. Auber was quick to email, Locking Power Cords promptly fixed a wrong part, Pioneer fixed a few mistakes and ultimately made it right. Even Amazon took some returns of parts I no longer needed. The one exception to this was Stout Tanks -- and even then, John is a great guy in person, just difficult to get a stream of communication going. I'll elaborate in a review of the kettles.
I didn't spend a huge amount of time hunting for the best prices -- but I did try to find reasonable places and concentrate my orders in only a few places to reduce the shipping costs (i.e. I usually can't stand ebay). I was also able to pick up the wire, connectors, fasteners and some other misc parts locally.
The only part on this whole list I really didn't like was the relay socket. It has a bit of a cheap feel to it and it seems like the screw terminals are going to pull out of the body. On the good side, the wire was really nice. This sounds silly, but nice flexible wire with no memory is great to work with.
During the assembly I used a lot of star washers to keep things in place (or blue thread locker in a couple places). The star washers have a side effect of cutting into the base plate and heatsink to ground the fastener too.
https://www.dropbox.com/s/w1e8w9kr0okyuwp/Parts.xlsx
OP
OP
There comes a point in a project where you stand back and review the work ... and then think of all the things you would tweak or change, and the good parts too. This is that list in no particular order.
Control Panel
The enclosure I used is a great size -- 16x16x12(D). The depth makes it trivial to make everything fit and the width/height make it pretty easy to stick your hands in the box and poke around. The depth has a second benefit also since it's mounted next to my kettles -- it stick out further making it easier to reach.
My layout was based on Kals' with a few tweaks. I'm planning on phasing some components over to Arduino control and that drove some of the layout decisions (the top right space for a keypad). The power switch clears the lock fine (I checked before cutting) -- but the tag doesn't fit .. oops. If I did it again, I'd probably move the power switch to the top right lined up with the yellow row -- seems to make more sense. I also may yet swap the water pump switch and alarm -- the lack of symmetry is bugging me
Label the wires and test connections as you go. Assembling it is easy if you're focused and following a diagram. However, once you get done it's just a big jumble of wires - I didn't label mine. I only made one trivial wiring mistake, but it could have been pretty painful to try and debug any errors (and unforgiving if things start frying). If you're probing inside with a multi-meter, make sure you have a steady hand --- or you really trust that GFCI. Lots of exposed ways to fry yourself.
I didn't add an emergency stop (The PJ style GFCI short is easy) -- eh. Maybe I should.
Get a good wire stripper and you must have a good crimper. I used a Klein stripper and the crimper I ordered worked great for all the red/blue/yellow crimps I used. This thing was night and day from other horrible methods I've tried I got my crimp terminals at home depot and matched them to the wire size and screw hole. As much as possible I used the ring version instead of spades so nothing can go flying if it gets loose. I think I used spades on all the switches/lights on the door -- everything else was rings.
I ran each wire and cut to length as needed keeping in mind the door and organizing it with zip ties. Don't be afraid to reroute, replace and recut wires. I did quite a few over as I built and again as I tidied it up. It came out better organized that way.
If you get the deluxe probe cables from Auber try asking for longer leads on the part in the panel that connects to the PID. I had to solder on new leads given the size of the box. Easy if you have the equipment, otherwise this would be difficult.
I realized after I had it together that replacing a broken component, like a relay, is going to be a nightmare. I'll have to pull most of the wiring and cut the zip ties to lift out the backplate. In hindsight (or if it ever comes apart) I should have either threaded holes in the back plate for mounting the parts or welded the nuts to the back. Neither of these an easy task. Which leads to...
I'll seriously consider a DIN rail mounted system if I build a version 2 someday. When I initially looked at the DIN route, I couldn't find any clear and concise information on what I needed and the parts seem to generally be quite a bit higher in cost. A DIN rail setup would make serviceability better and it would probably go together faster -- although honestly it wasn't that bad. It would also make it easier to tinker with the guts if desired.
I'm still debating the quality of the probe quick disconnects. They came from Auber, but the probes seem prone to poor connections. I've had more than a instances already where I had to jiggle the connector to get a reading (besides error) on PID. They seem decent, but something about them is giving me trouble.
I like the lighted switches a lot. More space for a logo
The Sink
I hate our crawl space. Hire a plumber. 'nuff said.
Tri-Clamp
Obviously, I took the tri-clamp route. I won't start a flame-war or start trolling, but I'm a convert and a fan. The cost and investment isn't trivial. However, who doesn't like 50 pounds of stainless bling.
The soft silicon seals better, but the harder materials are easier to connect. Hooking them up isn't hard, but it takes some coordination.
Now that I have a clue about TC hardware, I realize I could have used 1" everything (valves, elbows, tees, etc) instead of 1.5". It would save some cost, liquid deadspace, weight and bench space -- but it really doesn't matter in the grand scheme of things. The kettle outlets are 1" however -- so 1.5" is mostly pointless.
The bad -- how many clamps do you need? I mean really, I can barely carry the box of them and I'm still short.
The Bench
The bench came out nice. It's already apparent after a couple test runs that I need to add a lip in the back at least to contain spills. It's also going to get punished by the moisture and heat. The concrete top is still on my todo list once I decide if this is the right size and shape (20" x 60").
I'm going to need a whole lot more storage too. Hoses, clamps, gaskets, valves, etc etc.
Ventilation
If the ventilation guy would ever call me back I might get one....
Overall I'm looking forward to brewing on this system.
Control Panel
The enclosure I used is a great size -- 16x16x12(D). The depth makes it trivial to make everything fit and the width/height make it pretty easy to stick your hands in the box and poke around. The depth has a second benefit also since it's mounted next to my kettles -- it stick out further making it easier to reach.
My layout was based on Kals' with a few tweaks. I'm planning on phasing some components over to Arduino control and that drove some of the layout decisions (the top right space for a keypad). The power switch clears the lock fine (I checked before cutting) -- but the tag doesn't fit .. oops. If I did it again, I'd probably move the power switch to the top right lined up with the yellow row -- seems to make more sense. I also may yet swap the water pump switch and alarm -- the lack of symmetry is bugging me
Label the wires and test connections as you go. Assembling it is easy if you're focused and following a diagram. However, once you get done it's just a big jumble of wires - I didn't label mine. I only made one trivial wiring mistake, but it could have been pretty painful to try and debug any errors (and unforgiving if things start frying). If you're probing inside with a multi-meter, make sure you have a steady hand --- or you really trust that GFCI. Lots of exposed ways to fry yourself.
I didn't add an emergency stop (The PJ style GFCI short is easy) -- eh. Maybe I should.
Get a good wire stripper and you must have a good crimper. I used a Klein stripper and the crimper I ordered worked great for all the red/blue/yellow crimps I used. This thing was night and day from other horrible methods I've tried
I got my crimp terminals at home depot and matched them to the wire size and screw hole. As much as possible I used the ring version instead of spades so nothing can go flying if it gets loose. I think I used spades on all the switches/lights on the door -- everything else was rings.I ran each wire and cut to length as needed keeping in mind the door and organizing it with zip ties. Don't be afraid to reroute, replace and recut wires. I did quite a few over as I built and again as I tidied it up. It came out better organized that way.
If you get the deluxe probe cables from Auber try asking for longer leads on the part in the panel that connects to the PID. I had to solder on new leads given the size of the box. Easy if you have the equipment, otherwise this would be difficult.
I realized after I had it together that replacing a broken component, like a relay, is going to be a nightmare. I'll have to pull most of the wiring and cut the zip ties to lift out the backplate. In hindsight (or if it ever comes apart) I should have either threaded holes in the back plate for mounting the parts or welded the nuts to the back. Neither of these an easy task. Which leads to...
I'll seriously consider a DIN rail mounted system if I build a version 2 someday. When I initially looked at the DIN route, I couldn't find any clear and concise information on what I needed and the parts seem to generally be quite a bit higher in cost. A DIN rail setup would make serviceability better and it would probably go together faster -- although honestly it wasn't that bad. It would also make it easier to tinker with the guts if desired.
I'm still debating the quality of the probe quick disconnects. They came from Auber, but the probes seem prone to poor connections. I've had more than a instances already where I had to jiggle the connector to get a reading (besides error) on PID. They seem decent, but something about them is giving me trouble.
I like the lighted switches a lot. More space for a logo
The Sink
I hate our crawl space. Hire a plumber. 'nuff said.
Tri-Clamp
Obviously, I took the tri-clamp route. I won't start a flame-war or start trolling, but I'm a convert and a fan. The cost and investment isn't trivial. However, who doesn't like 50 pounds of stainless bling.
The soft silicon seals better, but the harder materials are easier to connect. Hooking them up isn't hard, but it takes some coordination.
Now that I have a clue about TC hardware, I realize I could have used 1" everything (valves, elbows, tees, etc) instead of 1.5". It would save some cost, liquid deadspace, weight and bench space -- but it really doesn't matter in the grand scheme of things. The kettle outlets are 1" however -- so 1.5" is mostly pointless.
The bad -- how many clamps do you need? I mean really, I can barely carry the box of them and I'm still short.
The Bench
The bench came out nice. It's already apparent after a couple test runs that I need to add a lip in the back at least to contain spills. It's also going to get punished by the moisture and heat. The concrete top is still on my todo list once I decide if this is the right size and shape (20" x 60").
I'm going to need a whole lot more storage too. Hoses, clamps, gaskets, valves, etc etc.
Ventilation
If the ventilation guy would ever call me back I might get one....
Overall I'm looking forward to brewing on this system.
OP
OP
Subscribed! Exactly the build I am shooting for! Whats a ballpark estimate on the control panel total if you don't mind me asking?
Now that I added it up...
If you only include what's in or permanently attached to the control panel I'm at around $950 (not including shipping on some of the parts and leaving room for misc bits). I had guesstimated I'd be around $1000 + another $500 with the probes, elements, cords and various bits to hook up to the kettles.
If you add in the stuff attached to the control panel (cords/plugs, elements, element-to-kettle adapter and RTD probes) then it's up to around $1300. This is assuming you have some Tri-Clamp kettles since the probes are different. A non-TC setup will save some on top of this. Given my original goal of coming in around or under Kal's kit price -- I did alright (and then spent it on the kettles and fittings).
If you then start outfitting tri-clamp kettles and all the fittings, it starts adding up fast.
newtstampede
Well-Known Member
Looks awesome!! The panel is similar to what I am designing. I am fine working with electricity but the thing I am hesitant about are the tool cost for cutting the enclosure. I live in the middle of nowhere KS so I am trying to figure out various option for waterjet cutting. Also not looking forward to drilling out my blichmanns :/
newtstampede said:I am fine working with electricity but the thing I am hesitant about are the tool cost for cutting the enclosure.
One thing you learn when you build-up any "handy" type skill is that there is no replacement for using "the right tool for the job."
I also agonized over buying $70 Greenlee tools of multiple sizes but found some consolation in the fact that they will re-sell in the classifieds section easily. I puled the trigger two nights ago and the Greenlees are on the way.
Now that I added it up...
If you only include what's in or permanently attached to the control panel I'm at around $950 (not including shipping on some of the parts and leaving room for misc bits). I had guesstimated I'd be around $1000 + another $500 with the probes, elements, cords and various bits to hook up to the kettles.
If you add in the stuff attached to the control panel (cords/plugs, elements, element-to-kettle adapter and RTD probes) then it's up to around $1300. This is assuming you have some Tri-Clamp kettles since the probes are different. A non-TC setup will save some on top of this. Given my original goal of coming in around or under Kal's kit price -- I did alright (and then spent it on the kettles and fittings).
If you then start outfitting tri-clamp kettles and all the fittings, it starts adding up fast.
First off, thanks for the ongoing pics, help, and motivation! Your build is brilliant!
Now,
After individually ordering all your parts from different sites, would you recommend doing the same, or would you recommend ordering the kit from Kal's site ($1420, which include: PIDs, timer, switches, meters, panel tags, handles, heat sink, relays, wire, JB Weld, heat sink grease, and every single screw and nut etc.) I would still have to buy/build the power chord, heating elements, and temp probes separately, in addition to punching and painting the control box...
Now that I actually type the disadvantages to buying from kal's site, I guess I seem better off buying individually :cross:
Thoughts?
OP
OP
First off, thanks for the ongoing pics, help, and motivation! Your build is brilliant!
Thanks! The actual build of the panel went pretty fast over a few days -- it was putting the electrical in, finding and ordering parts, getting the panel cut and trips to home depot that stretched it out.
After individually ordering all your parts from different sites, would you recommend doing the same, or would you recommend ordering the kit from Kal's site ($1420, which include: PIDs, timer, switches, meters, panel tags, handles, heat sink, relays, wire, JB Weld, heat sink grease, and every single screw and nut etc.) I would still have to buy/build the power chord, heating elements, and temp probes separately, in addition to punching and painting the control box...
Now that I actually type the disadvantages to buying from kal's site, I guess I seem better off buying individually :cross:
Thoughts?
I think Kal is doing a great thing for us and his prices seem quite reasonable. You also only pay shipping once and you know you'll get the right parts. That said, I think that you're buying a few more parts than you need -- the amp/volt meters are interesting, but not necessary and also add more parts inside the panel to mount. I also prefer the design I came up with that reduces the necessary # of holes by combining indicator lights and switches for the pumps/power. Kal does incorporate a timer (an expensive item) and has the alarm system wired up with individual switches -- something I left out (but plan to add with an Arduino).
So -- if you want to build a Kal clone; I'd buy the kit from him. If he can customize the kit you might give that a try (or we can convince him to make a smaller version).
That said, given the parts list I posted above, this method should be straightforward. Just remember that my version doesn't have timers or alarms wired up. The alarm should be easy to wire -- but a pita to shut off (have to use the PID menus).
drewmedic23
Well-Known Member
I love your thread and think your setup is amazing. If you wouldn't mind sharing, how much did this cost you from start to finish. PM me if you arent comfortable putting this out. I am looking to do something similar to you and would like a rough estimate on what it would cost. Thanks
bolts said:I'm also a fan of the heatsink I used. It was wide enough that I didn't need to do anything with the existing hole in the panel. I just put it on the top and left it as-is.
how did you attach the heat sink to the box?
OP
OP
how did you attach the heat sink to the box?
I drilled and tapped the holes from the bottom of the heatsink. I also matched the holes up the 4 of the existing holes in the existing hole in the enclosure. Note, that the hole in the enclosure is normally on the bottom, but it works fine on top and I didn't need to patch the hole this way.
I used standard 1/4-20 bolts and didn't worry about punching through the top of the heatsink. Caulk fixes all
OP
OP
I love your thread and think your setup is amazing. If you wouldn't mind sharing, how much did this cost you from start to finish. PM me if you arent comfortable putting this out. I am looking to do something similar to you and would like a rough estimate on what it would cost. Thanks
Missed this before -- no problem sharing. My best guess puts me into this about $5k. That includes the electrical permits, running lines, sink, kettles, panel, all the stainless bits, etc, etc, etc. I didn't keep great records on the random bits and pieces, just the panel, kettles and stainless.
newtonjason
Member
Great Job on the brewery, everything looks top notch
I am currently debating the purchase of the 20 gallon stout tank boil kettle. I also brew electric so I wanted to get your feedback on how this system has suited your needs over the last year (especially in regards to whirlpooling, element location and trub cone formation)
The stout tanks (from the cross section online) have a curved bottom for allowing the hop trub and cold / hot break material to whirlpool / settle. How effective is this settling with your electric element installed in the kettle?
Would you be able to attach a pic of your kettle inside?
How high from the bottom of the pot is you element installed?
I see an immersion chiller on the ground next to your kettle, I presume this is how you chill your wort. Have you ever thought of using a counterflow chiller inline with your recirculation pump?
Lastly, I see a triclover strainer / filter on your system. How does this handle pellet hops?
Similar threads
- Replies
- 14
- Views
- 1K
- Replies
- 3
- Views
- 700
- Replies
- 4
- Views
- 549
