My HERMS Brutus Clone

Homebrew Talk - Beer, Wine, Mead, & Cider Brewing Discussion Forum

Help Support Homebrew Talk - Beer, Wine, Mead, & Cider Brewing Discussion Forum:

This site may earn a commission from merchant affiliate links, including eBay, Amazon, and others.

beardedirishman

Active Member
Joined
Oct 26, 2010
Messages
44
Reaction score
9
Location
knoxville
I wasn't going to post this, but a friend convinced me that it's only fair. After all, most of my ideas and designs came from this forum. Feel free to ask questions. It's a pretty basic 1/2 barrel setup with a herms coil. Kettles are from Stout Tanks. Burners are Banjos on high pressure with manual pilots. It's not stainless, but wire brushed and clear coated with a ceramic high temp spray paint.

Pic is during mash-out.

IMG_20111116_124351.jpg


This was before mounting the control panel to the stand.


brewstandcontrolpanel.jpg
 
Nice! I just got my Stout Kettles, 20g with the HERMS and whirlpool. How'd they do on brewday?
 
Thanks for posting, that is beautiful! How smooth is your brewday? Tri-clovers everywhere, very niiice.
snake10
 
The stout Tanks work great on brew day. I was concerned the mash tun false bottom's holes were too large, and the gaps too big around the perimeter, but it worked wonderfully. Efficiency was good. I recirculated during the entire mash, and found I had to put a screen inline with the sparge arm stout provides or it clogs up at the start of the mash.

Brew day was pretty smooth. No big problems.

Hardest part was throttling back the pumps.

Came out of the mash with wort so clear it looked like a filtered beer already...
 
Is it possible to give more information about the swivel bar design for your control panel? If so, could you also take a close up picture of your work?
Does it lock in different positions?

Thanks in advance,

Daniel in Germany
 
Daniel, it doesn't lock in different positions, but it pivots and stays in different positions as long as the floor is level. It's merely a pin that goes through the end of the arm that it pivots on. I'll try to take a picture tonight if I remember.
 
I have been debating using keggles or the ones from stout tanks as well. After seeing your setup I'm going to go that route and sell the kegs I have sitting around. A very nice setup!
 
While your taking pics, any chance of showing me what your kettles are sitting on. Your kettle supports? Thanks
Snake10
 
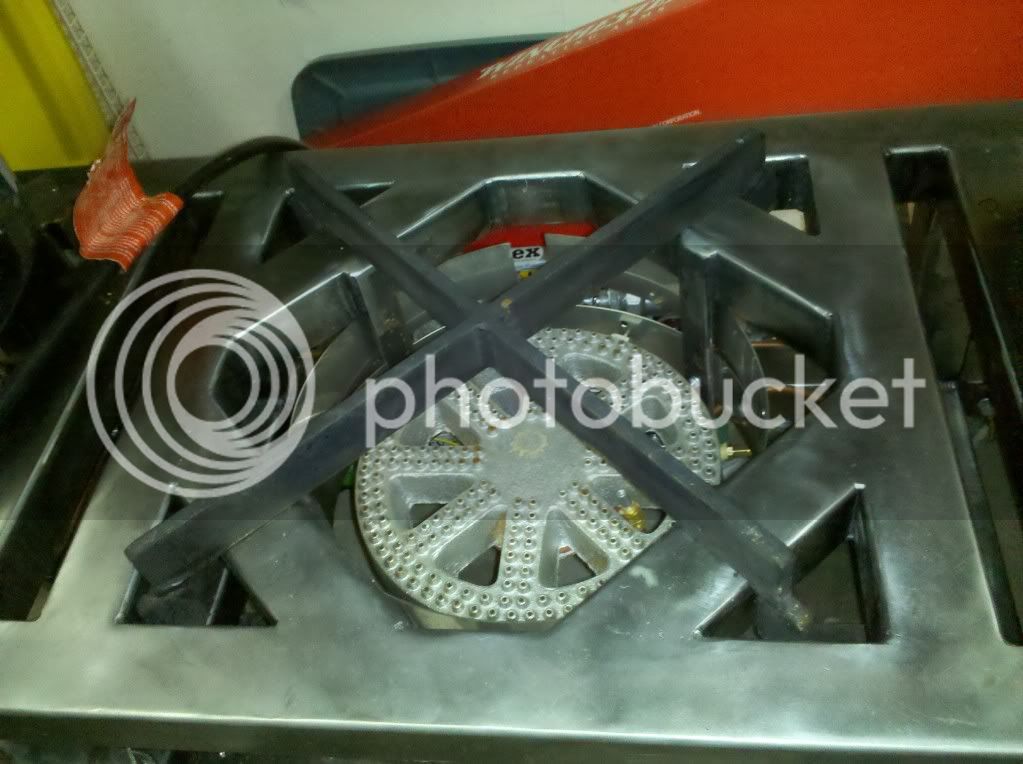
As requested, pictures are below. The first two are the spacers I used under my kettles. I tried it without them, and the 2inch tubing choked the flame too much even with no heat shields on the burners. These were more of an after-thought. They work really well though. Painted them with the high temp black barbecue spray paint at the big blue store. I like that they're removable and I can easily access the burners from the top for cleaning.

IMG_20111122_235838.jpg


IMG_20111122_235901.jpg


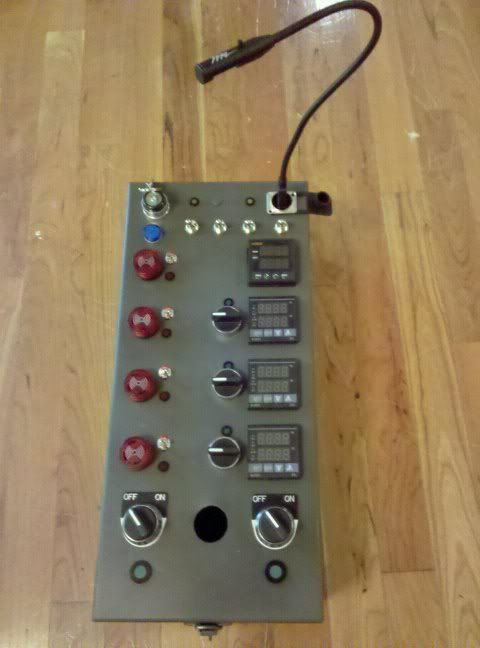
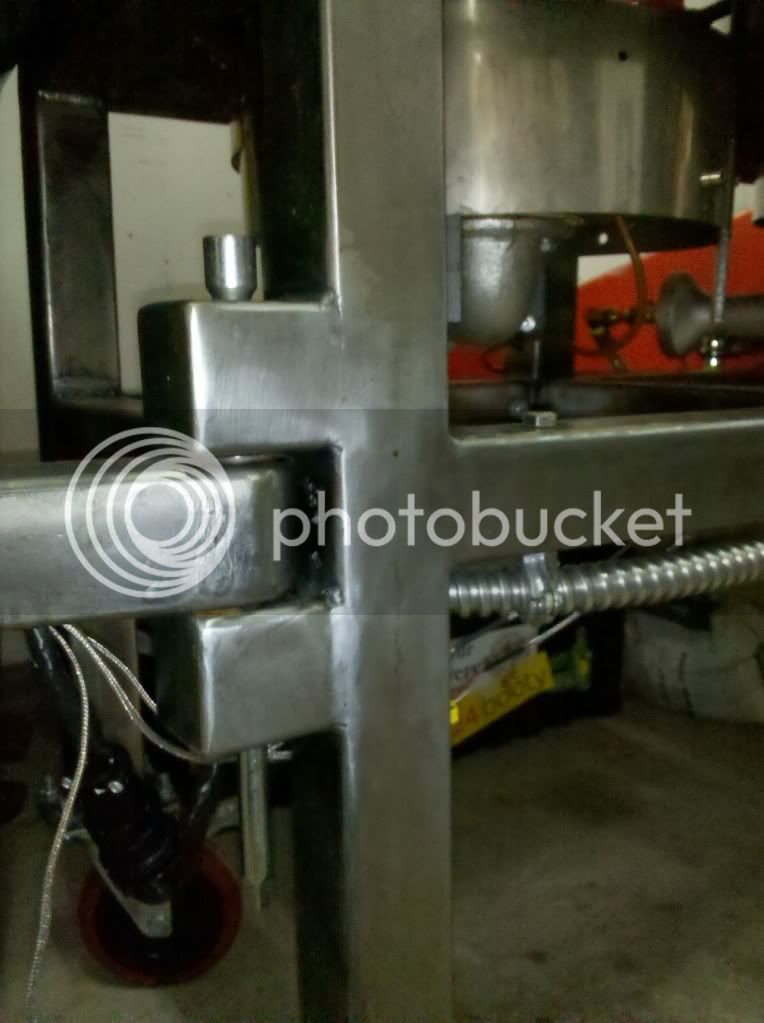
Next up is the pivot for the control panel. As you can see there's just a hole drilled through the top, and I happened to have a long socket extension I wasn't using, so I dropped that in place. Plans were to use a bolt...I may get around to that some day. All wiring is passed through quick disconnects at this junction and the entire control arm can be taken off in about 10 seconds. This makes it easy to travel with. I take my stand to a local brewery on occasion. Keeps the control panel dry in the rain.

As you can see the control arm is rounded so it can rotate 180 degrees.

IMG_20111122_235747.jpg


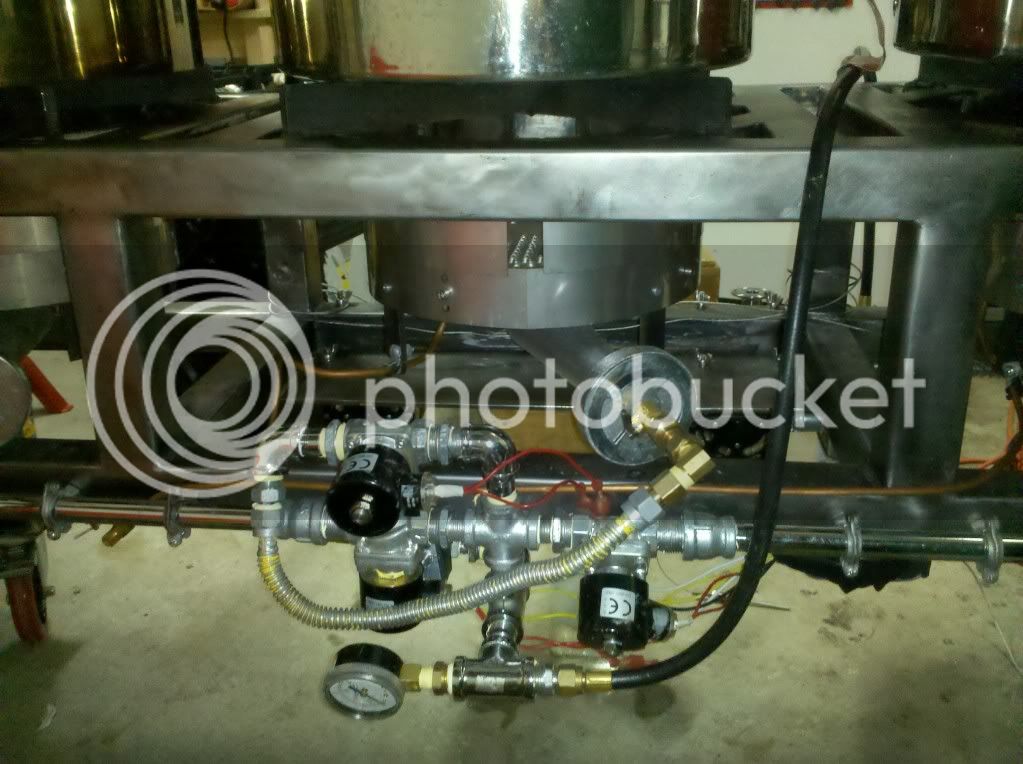
Just in case anyone wanted to see, this is what's in the back. The solenoids for the gas manifold. These are what the auber instruments controllers use to turn on and off the gas to the burners, and one for the pilots.

IMG_20111123_000001.jpg


I have been debating using keggles or the ones from stout tanks as well. After seeing your setup I'm going to go that route and sell the kegs I have sitting around. A very nice setup!

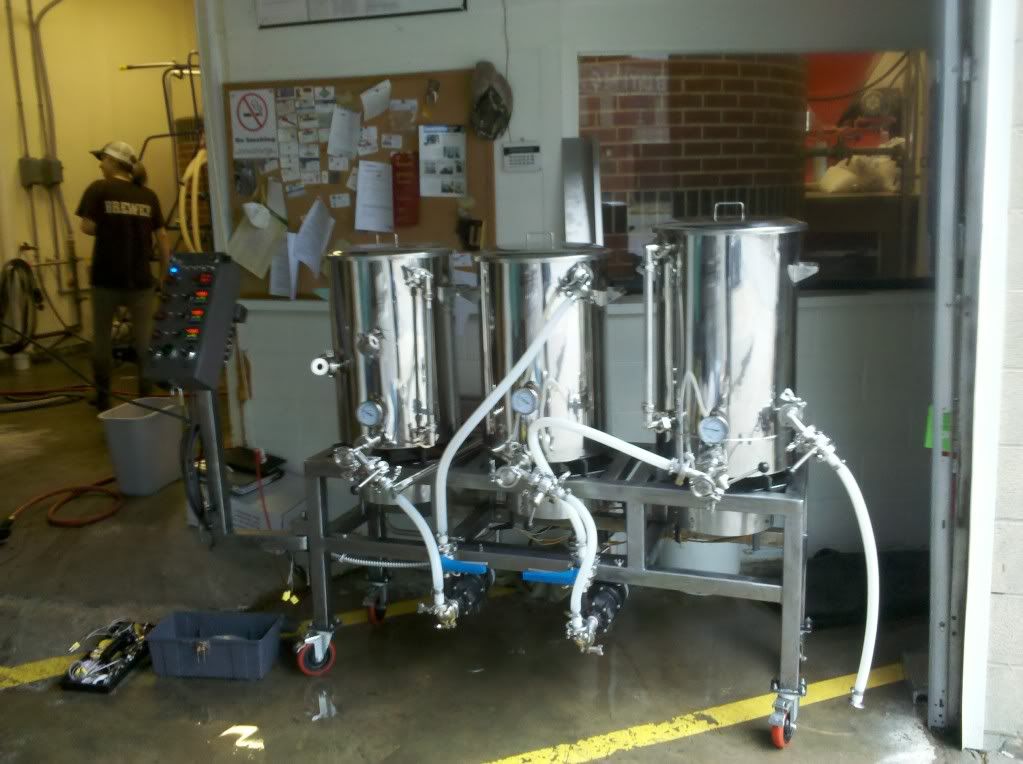
Yes, I liked the keggles I had, but when I priced the cost of having someone weld sanitary welds in all the places I wanted, and then acquiring the necessary parts to go to tri-clamp fittings it's actually about the same price as getting these...and you'd still only have a bunch of welded kegs with less capacity. Sure I could have done something simpler, but I wanted to be done with worrying about my system.

I still need to add a plate chiller to it. Looking at the Duda Diesel plate chillers, but if someone knows of a place to get tri-clamp fittings on their chiller without threads, let me know!
 
Thanks for the burner pics! Awesome awesome build. As far as a plate chiller, your on the right track. I have a 30 plate chiller but would love to have a 40 plate or more. The Blichmann is a 40 plate chiller. With that in mind, I have since built an immersion chiller (1/2 inch id) which I pair with an immersion pump and swapping 5 gallon buckets of cold water. Once down to 110 or so the buckets get ice and it ramps to 70 or less quickly. Overall 11 gallons in about 15 minutes. If I used straight ice it would be quicker I'm sure. The plate chiller was just difficult for me to clean. Go for it though, it would be a nice looking addition to your rig.
Snake10
 
I wasn't going to post this, but a friend convinced me that it's only fair. After all, most of my ideas and designs came from this forum. Feel free to ask questions. It's a pretty basic 1/2 barrel setup with a herms coil. Kettles are from Stout Tanks. Burners are Banjos on high pressure with manual pilots. It's not stainless, but wire brushed and clear coated with a ceramic high temp spray paint.

Pic is during mash-out.

IMG_20111116_124351.jpg


This was before mounting the control panel to the stand.


brewstandcontrolpanel.jpg


What Auber Pid are you using? Any chance I can get part numbers of your pilot light system? Thanks !
 
This is the PID controller I got from Auber:

1/16 DIN PID Temperature Controller (Relay Output) [SYL-2342] - $45.50 : auberins.com, Temperature control solutions for home and industry

As for the pilots, I just used a small solenoid valve for the supply on a hard wired switch (gets switched on when I'm turning everything on). The pilot light burner tips were an ebay special. You just need something with a super small pin hole in the end. I plumbed it all with 1/4 inch copper. Super easy if you are familiar with plumbing systems.

As for the plate chiller, I was very weary of using one for the sanitation issues, but I hooked up with a local brewery and borrow some of their caustic cleaner for CIP systems. Having seen it work in person, I feel pretty confident it'll clean it pretty well.

My immersion chiller got it down to 67 today in 18 minutes. That was with a constant whirlpool the whole time, but the time certainly isn't a factor now, I just want to be able to chill to lagering temps with my chiller, and I figured I'd try a plate chiller and use mine as a pre-chiller.
 
Beardedirishman,

That is a thing of beauty. I am working on something similar, but with 15-gallon Blichmanns. Could you post the dimensions of your frame for reference? I am concerned that with the smaller diameter kettles that I am using (12.8" for the 15-gallons) if I only make the frame 12-14 inches deep I may have stability issues.
 
My frame is about 22 inches deep. The kettles are 20 inches wide. The weight of the stand makes it incredibly sturdy. I think the stand is well over 300-400 lbs. its pretty hard to lift into the truck on my own. My only thought would be to size it for bigger kettles in case you ever wanted that option. I already wish i had bigger kettles.
 
Usually it's tacky to ask someone how much they spent on something, but I have plans for a build like this in the not too distant future, and I need to let my wife know how much she needs to come up with ;)
 
How did you get the triclover attachments to your pumps? Just Tri clamp to male npt fittings? I am assuming you are using the little giant hc-md3's? Also, what kind of wiring disconnects did you use, and how do they work. One of my biggest complaints with my current system is the difficulty in removing the panel. Thanks!
 
Back
Top