My Electric BK

Homebrew Talk - Beer, Wine, Mead, & Cider Brewing Discussion Forum

Help Support Homebrew Talk - Beer, Wine, Mead, & Cider Brewing Discussion Forum:

This site may earn a commission from merchant affiliate links, including eBay, Amazon, and others.

ThickHead

Well-Known Member
Joined
Oct 4, 2008
Messages
967
Reaction score
48
Apartment living can, and often does, present challenges to my homebrewing ambitions. My brewing process has, to this point, never really left my stove-top. I have been lucky enough in that the last two apartments, that I have called home, came with a decent stove installed. Full boils for my 5.5 gal batches were achievable, if only just. Even then, it takes a dreadful long time to get my wort to boil temps and to describe the boil as "rolling" could be considered, by some, an optimistic appraisal.

Since I have the ambition to step up my batch capacity to 11 gallon batches I was going to have to upgrade equipment in my process that addressed the boil capacity weakness. This meant a Boil Kettle upgrade and I wanted to go electric. I have no intention to change my mashing process at this time, which is done on the stove-top using 1 to 2 7.5 gallon pots (BIAB style). I can continue to mash my 5.5 gallon batches and even mash 11 gallon batches using this method.

My intention was to upgrade to a 13 to 20 gallon Boil Kettle and install a 5500w Camco ULWD burner which I could run from any 240v 30amp service with a simple control device. Here is what I came up with:

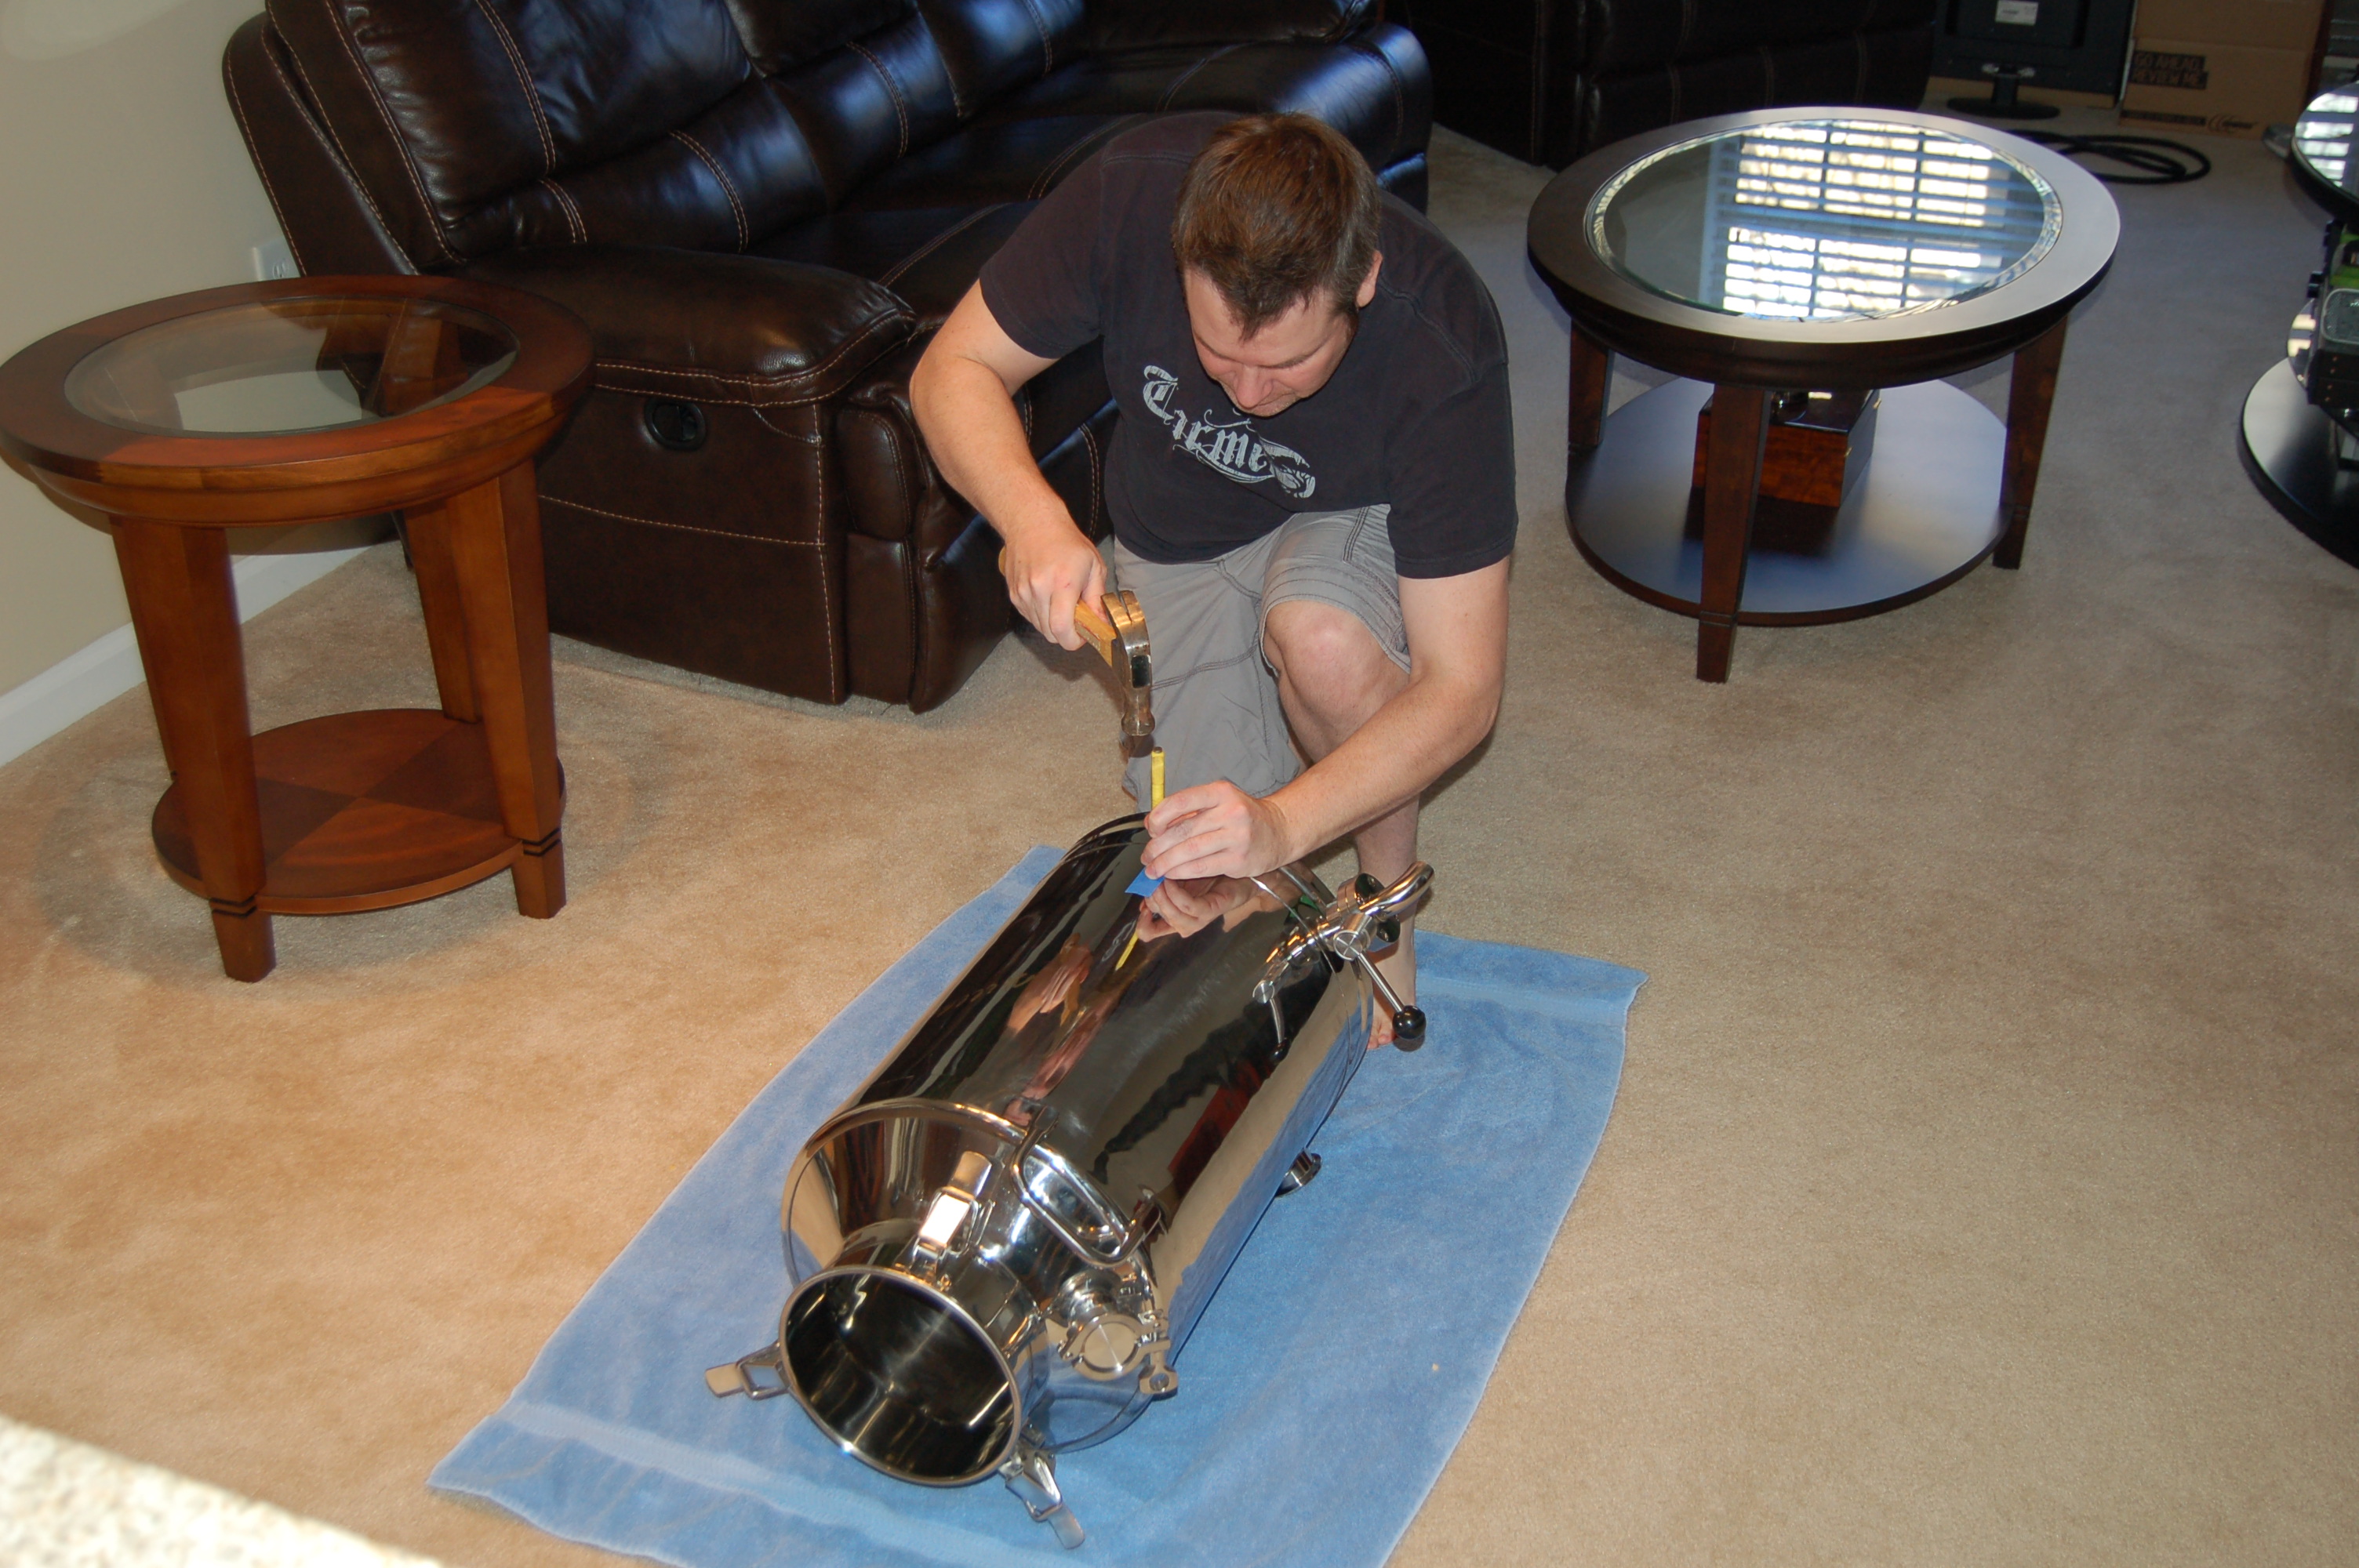
13 gallon "Milk Can" kettle with tri-clover sanitary fittings, Kal's Heating Element kit and a 240v 30amp variable output control panel:
dsc_0091-57965.jpg


Kal's Heating Element Kit installed with a tri-clover sanitary fitting:
dsc_0089-57966.jpg


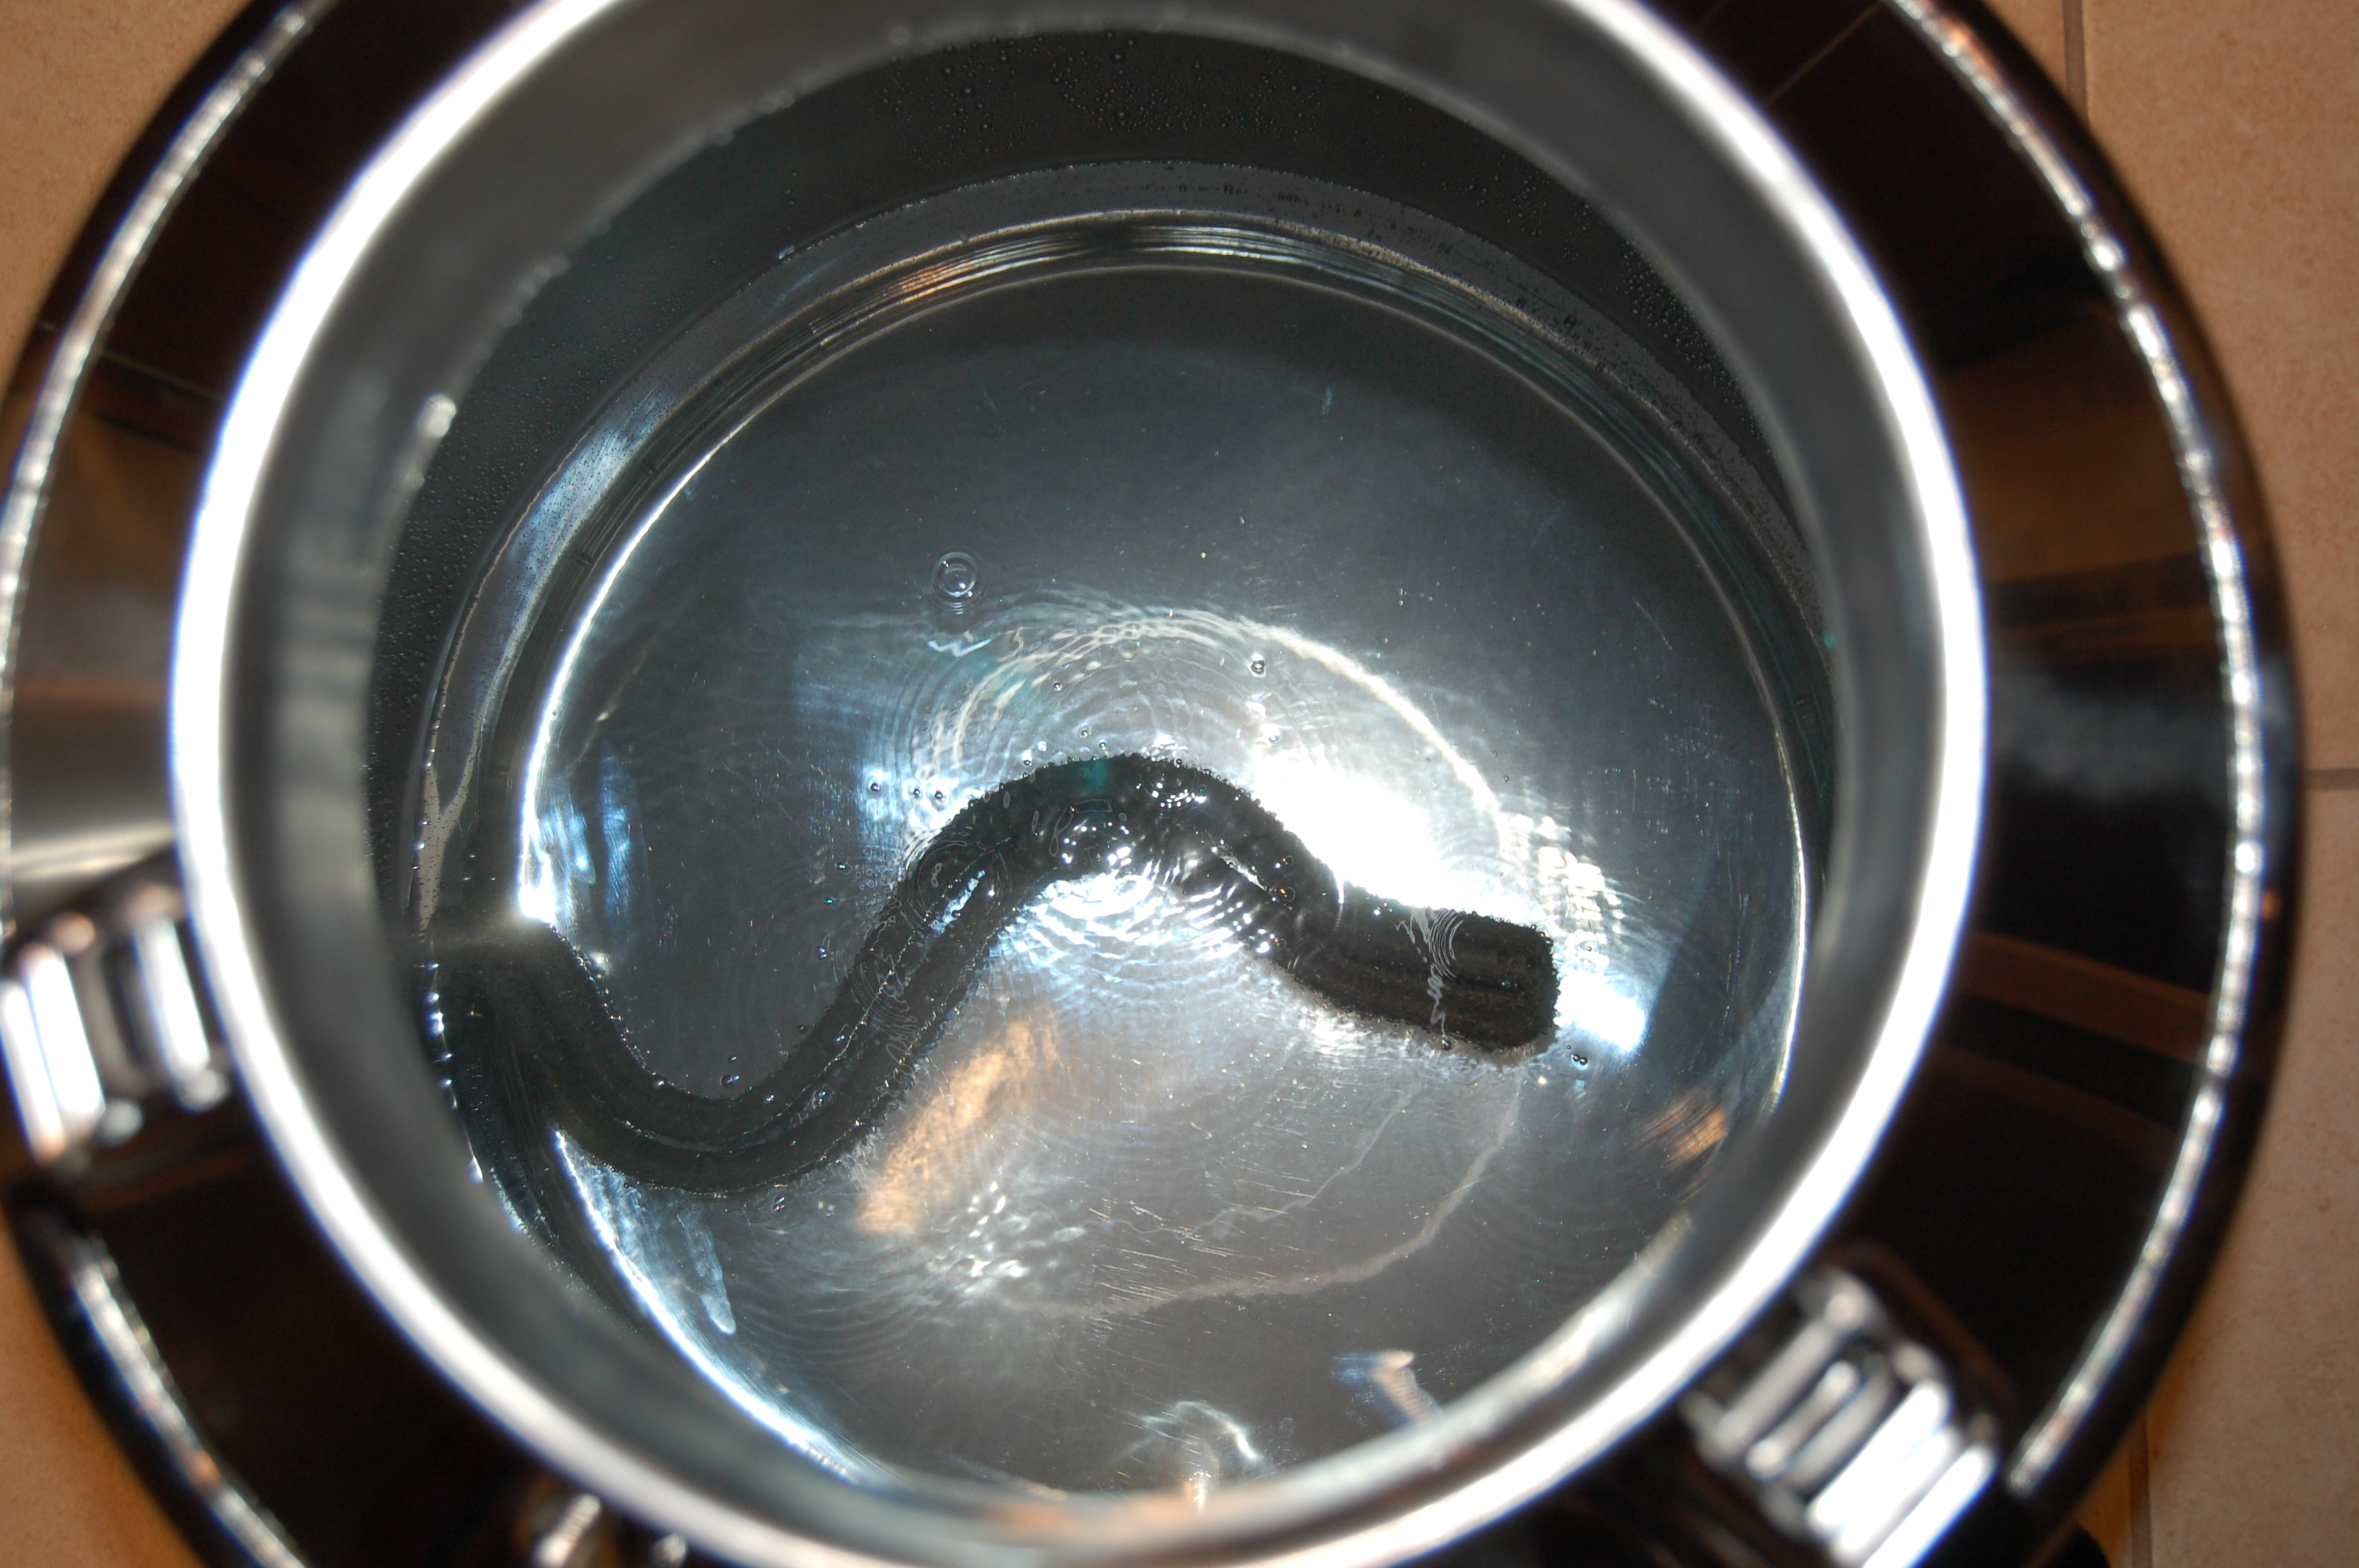
Inside Boil Kettle (element installed):
dsc_0093-57967.jpg


Control panel:
dsc_0096-57969.jpg


Test boil in progress:
dsc_0094-57968.jpg


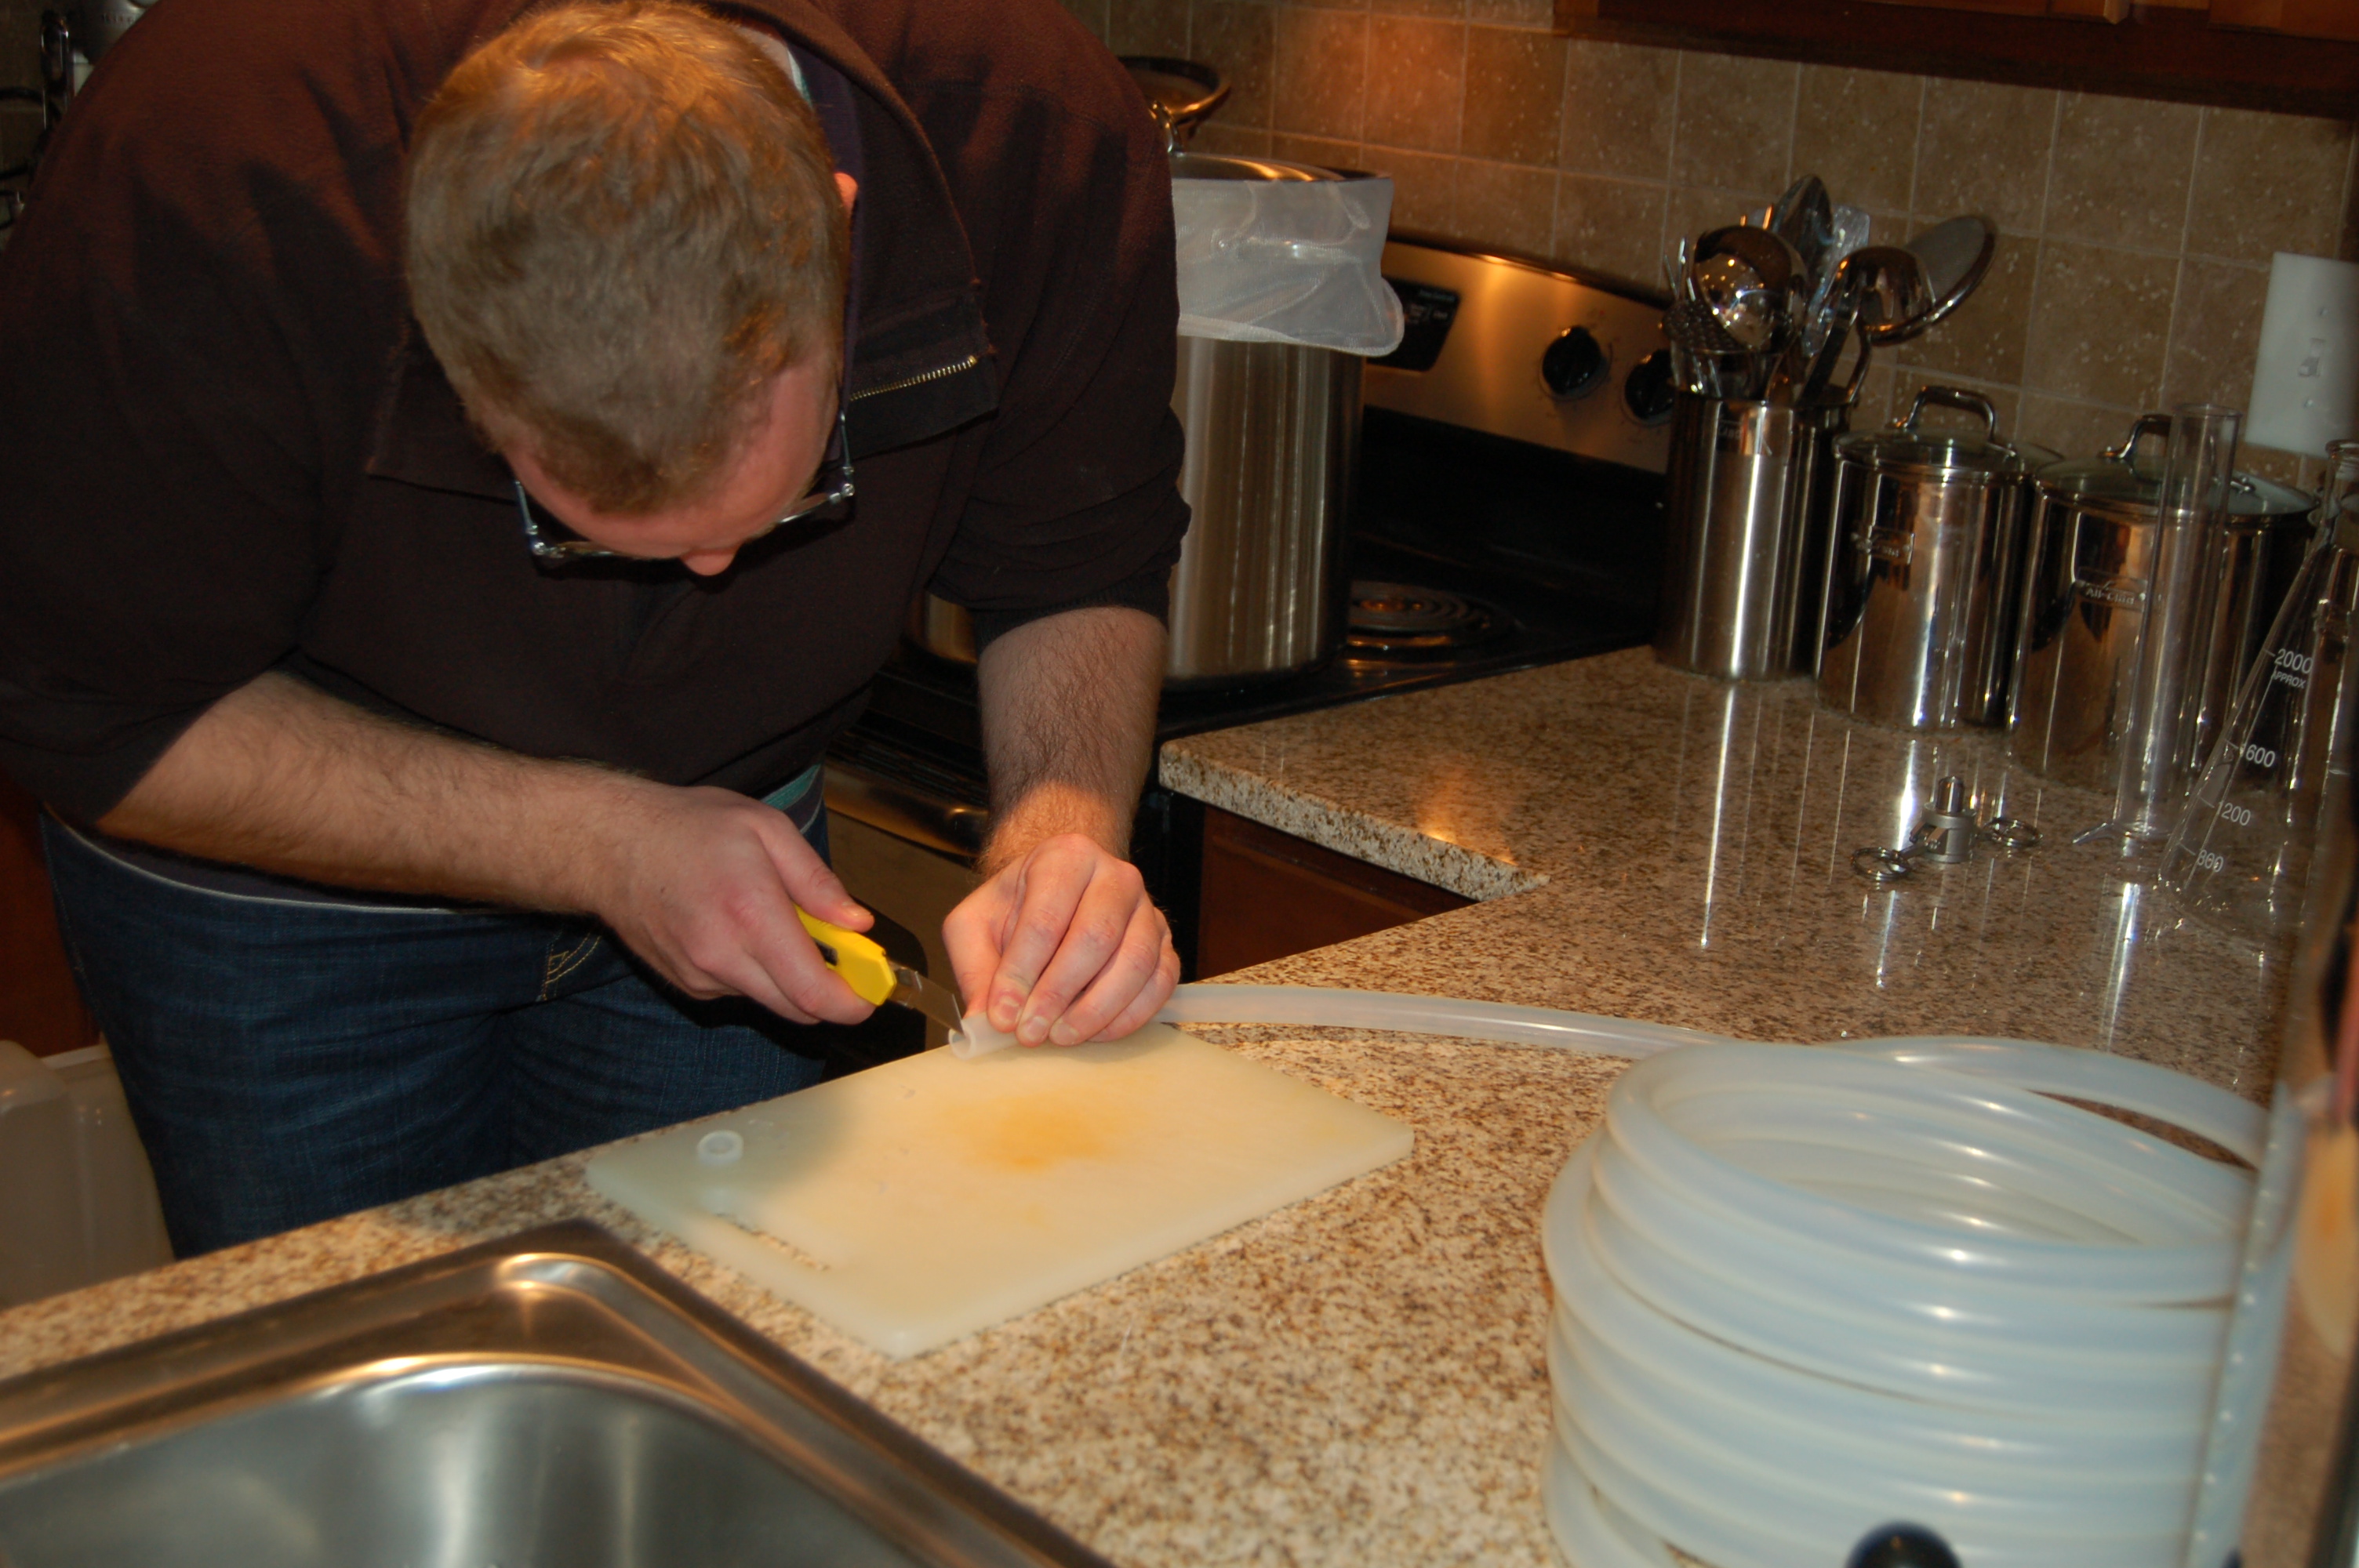
Works perfectly! I draw power from the 240v 30amp service that is installed for the dryer in my laundry closet. With some careful wiring (with the oversight of an expert) a bit of adjustment to Kal's Heating Element Kit installation process (to fit my sanitary fitting connections) and the use of a 240v 30amp GFCI cord, this thing is ready for its maiden brew!
 
Nice work! I, too, am limited to the stove in the winter and find myself in much the same place as you.

I'm almost thinking I should put something like this together with a 1500W element that I could plug right into the wall to supplement the stove top.
 
nice ! I like the milk kettle ! Are you still gonna be able to put that kettle under your kitchen hood when boiling ?
 
I like the milk kettle!

Thanks! I chose this for my kettle because it is configured for a secondary use for me as well. Works great for a Boil Kettle.

Are you still gonna be able to put that kettle under your kitchen hood when boiling ?

It sits on the floor in front of my stove during a boil, so the draw from my range hood provides sufficient ventilation. I just put it on the counter top for the photos.
 
I'm almost thinking I should put something like this together with a 1500W element that I could plug right into the wall to supplement the stove top.

I don't see why that would not work for you. I have yet to see anyone build something like that so it would be an interesting DYI project to watch develop.
 
Nice work! I, too, am limited to the stove in the winter and find myself in much the same place as you.

I'm almost thinking I should put something like this together with a 1500W element that I could plug right into the wall to supplement the stove top.
I made a 1500W heat stick to help my stove in the winter time, it works great. Note; I didn't want to mount an element in my kettle because I still like brewing outside with propane when the weather is nice.
 
I made a 1500W heat stick to help my stove in the winter time, it works great. Note; I didn't want to mount an element in my kettle because I still like brewing outside with propane when the weather is nice.

I've seen some pics of a few of those heat-sticks. I know that I would love brewing outside on occasion, but it would be problematic under my current living conditions. Can't even fire up my own grill here at this apartment complex. They have some kick-ass community grill pits though. I wonder if I rolled a big propane rig out to one of the grill pits they would be cool with it.....some how I doubt it. I would probably make some new friends based off curiosity alone. :tank:
 
Update:

Since this post, and the testing of my element install and control panel wiring modification, I have completed some new modifications and an initial brew-day on the new equipment. As I mentioned previously, SWMBO and I have been temporarily in a very small apartment over the past couple years. So if you're wondering why this is all done inside my apartment and in bare-feet...well that's just how I have to roll at the moment.

The following pictures document the process:

The first order of business, prior to brewing with my new electric Boil Kettle, was the installation of a valve, dip-tube, and sight-glass/thermometer assembly and some CamLock fittings to my transfer tubing. I received my order from Bobby M and my little brother (who is a giant compared to me) and I went to work.

Center punching for pilot hole drilling. Sight-glass assembly position marked on masking tape.
dsc_0001-58435.jpg


Drilling pilot hole for sigh-glass assembly
dsc_0002-58436.jpg


Pilot hole complete
dsc_0004-58437.jpg


Using step-bit (for the first time) to drill 7/8" penetration
dsc_0007-58438.jpg


Slow and steady with the step-bit
dsc_0008-58439.jpg


EVOO for lubrication
dsc_0009-58440.jpg


One final step needed from the inside
dsc_0010-58441.jpg


Final step drilled from the inside (for internal side seal)
dsc_0012-58442.jpg


Inside of Boil Kettle after final step was drilled
dsc_0014-58443.jpg


A quick dry-sanding with 220 grit sand paper
dsc_0016-58444.jpg
 
Measuring dip-tube for height
dsc_0017-58445.jpg


Marking for drain penetration
dsc_0018-58446.jpg


Center punching drain penetration
dsc_0020-58447.jpg


Drilling pilot hole for drain penetration
dsc_0021-58448.jpg


Slow and steady with the step-bit again
dsc_0024-58450.jpg


A look at both penetrations
dsc_0025-58451.jpg


Some final touch-up with the 220 grit sand paper
dsc_0026-58452.jpg
 
Installing for dry-fit test
dsc_0027-58453.jpg


Fit-up went perfectly as planned
dsc_0033-58454.jpg


Plumbing in the hardware
dsc_0036-58455.jpg


Sight-glass assembly going in
dsc_0038-58456.jpg


Lots of teflon tape where it matters
dsc_0042-58457.jpg


Installing the ball-valve on the dip-tube bulkhead
dsc_0043-58458.jpg


Ball-valve snugged up
dsc_0047-58459.jpg


CamLock fitting installed
dsc_0048-58460.jpg


Assembly complete
dsc_0051-58461.jpg


Leak-test passed
img_1220-58470.jpg
 
1 gallon at a time for sight-glass calibration
dsc_0055-58463.jpg


Calibrating the sight-glass
dsc_0052-58462.jpg


Sight-glass level markers going on
dsc_0063-58464.jpg


Meanwhile....strike water is coming up to temp
dsc_0066-58465.jpg


Preparing tubing for CamLock fitting installs
dsc_0067-58466.jpg


CamLock fitting install (My little bro was in charge of this part)
dsc_0070-58467.jpg


Test-fitting hop-back
dsc_0071-58468.jpg


Test-fit for gravity feed set-up
dsc_0072-58469.jpg
 
Doughing in
img_1219-58480.jpg


Wort transferred to Boil Kettle (7.75 gallons)
dsc_0078-58471.jpg


Boil Kettle fired up
dsc_0083-58473.jpg


Time to scrape the fop
dsc_0081-58472.jpg


Boiling like crazy in less than 15 minutes
dsc_0086-58474.jpg


A BIAB grain-bag was used as a hop-bag
dsc_0090-58475.jpg


Binder clips are handy...but watch out for that steam, it bites
dsc_0092-58476.jpg


Whole leaf hops for the hop-back
dsc_0100-58477.jpg


We only used 2oz in the hop-back for the first gravity feed run. Not even a hint of a problem.
dsc_0103-58478.jpg


Gravity feed set-up assembled and ready to go
dsc_0111-58479.jpg


Gravity feed set-up working perfectly with about 3 feet of drop
img_1225-58481.jpg


Sample for gravity check
dsc_0113-58482.jpg


"Dead-on-balls accurate, Vinnie"
dsc_0114-58483.jpg


Juiced it up with some O2
dsc_0115-58484.jpg


Everybody into the pool!
dsc_0116-58486.jpg


Happy yeast colony
dsc_1000-58487.jpg
 
That is one heck of setup, you should be very proud of that thing. I am a sucker for shiny stainless, bright copper, and high quality fittings. Outstanding Work!
 
That is one heck of setup, you should be very proud of that thing. I am a sucker for shiny stainless, bright copper, and high quality fittings. Outstanding Work!

Thanks! By the way....are you able to view all of the photos completely? What I mean by that is, are they all downloading or are you having partial picture loads due to the picture sizes? I am having a ton of trouble.....I may need to resize the photos and repost.
 
Yes, I can see everything fine. On a cable modem at home it was pretty much instant. On a slightly slower connection it took a few moments to load and resize everything but it was fine after it did. Both were Windows 7 machines. One on Chrome and one on Firefox.
 
Yes, I can see everything fine. On a cable modem at home it was pretty much instant. On a slightly slower connection it took a few moments to load and resize everything but it was fine after it did. Both were Windows 7 machines. One on Chrome and one on Firefox.

I still have issues with Firefox for some reason. I think I need to make a habit of making this pictures smaller anyway.
 
Just wondering why you installed a ball valve when you already had a nice butterfly valve on the BK?
 
Just wondering why you installed a ball valve when you already had a nice butterfly valve on the BK?

Because it would have taken more work to modify it to attach the fittings I wanted to use for wort transfer. Not only more work, but work I am neither equipped to, or skilled enough, to perform. I still use the butterfly valve as a primary dump valve and clean-out port in a different configuration.
 
Back
Top